Articles
How To Troubleshoot A HVAC System
Modified: August 26, 2024
Learn how to troubleshoot a HVAC system with our informative articles. Find expert tips and solutions to common HVAC issues.
(Many of the links in this article redirect to a specific reviewed product. Your purchase of these products through affiliate links helps to generate commission for Storables.com, at no extra cost. Learn more)
Introduction
When it comes to keeping our homes comfortable, a functional HVAC (Heating, Ventilation, and Air Conditioning) system is essential. However, like any mechanical system, HVAC systems can encounter issues over time. From inconsistent temperature control to strange noises, these issues can disrupt our comfort and increase energy bills.
Fortunately, many HVAC problems can be troubleshooted and resolved without the need for professional help. In this article, we will explore common HVAC issues and provide step-by-step instructions on how to troubleshoot your system like a pro. By following these guidelines, you can save time and money by avoiding unnecessary service calls and potentially even fix the problem on your own.
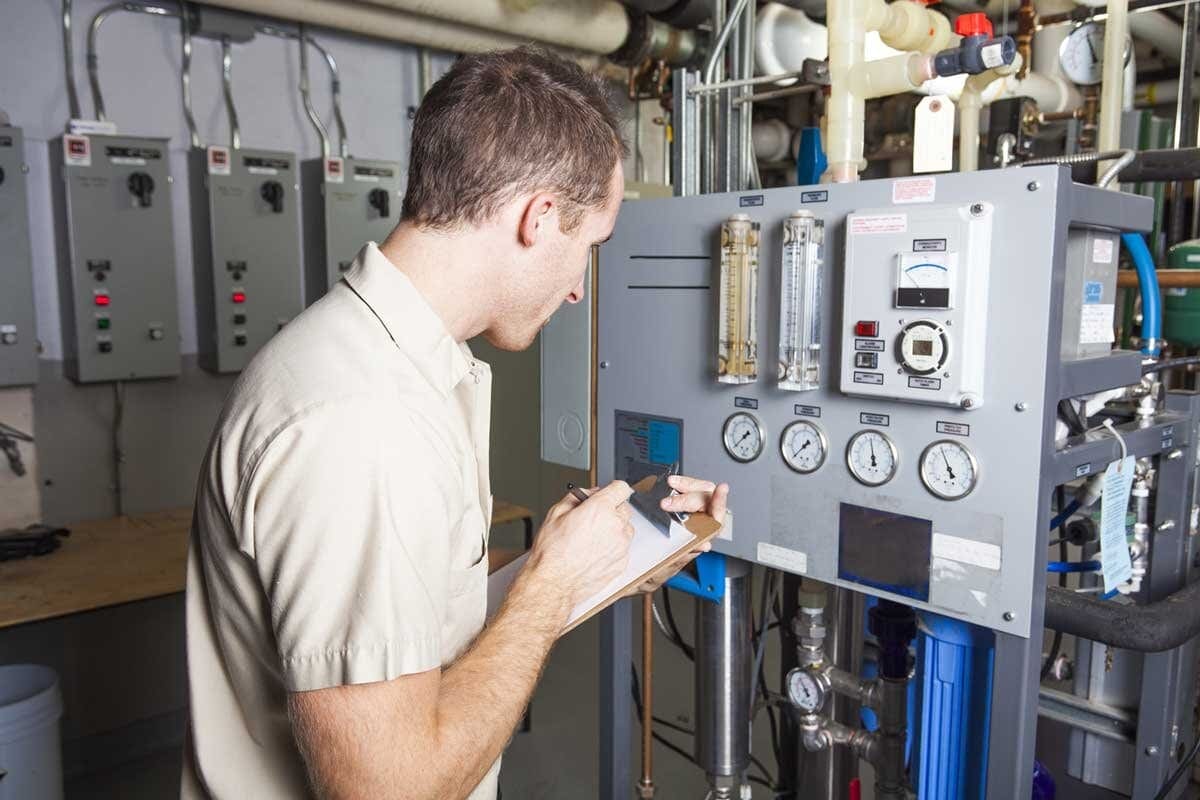
Before we dive into the troubleshooting process, it’s important to note that HVAC systems consist of both indoor and outdoor components. The indoor unit includes the air handler or furnace, while the outdoor unit contains the condenser and compressor. Understanding the different parts of your system will help you identify the source of the issue and effectively troubleshoot it.
With that said, let’s explore some of the most common HVAC problems and how you can troubleshoot them:
Key Takeaways:
- Troubleshoot HVAC issues like a pro by checking the thermostat, air filters, outdoor and indoor units, electrical connections, and essential components. Regular cleaning and professional maintenance ensure optimal system performance and indoor comfort.
- Understanding common HVAC issues and troubleshooting steps empowers homeowners to save time and money by addressing minor problems. Professional assistance is crucial for complex repairs and maintenance, contributing to long-term system efficiency and comfort.
Read more: How To Pull A Vacuum On HVAC
Common HVAC Issues
Before jumping into troubleshooting, it’s essential to familiarize yourself with the most common HVAC issues. Identifying the problem correctly will help you implement the appropriate solution. Here are some common HVAC issues:
- Inconsistent Temperature: If you notice temperature variations throughout your home, it could be due to clogged air filters, leaky ductwork, or problems with your thermostat.
- Strange Noises: Unusual sounds like rattling, grinding, or squeaking can indicate issues with the HVAC system, including loose parts, fan motor problems, or debris in the unit.
- Warm Air: If your system blows warm air instead of cool air, it could be caused by a refrigerant leak, a malfunctioning compressor, or improper thermostat settings.
- Frequent Cycling: Rapid on-off cycling of the system, also known as short cycling, indicates potential problems with the thermostat, air filters, or airflow restrictions.
- Poor Airflow: Insufficient airflow can be caused by dirty air filters, blocked vents or registers, or issues with the blower motor.
- High Energy Bills: If your energy bills have suddenly spiked, it could be a sign of HVAC inefficiency caused by clogged air filters, duct leaks, or inefficient equipment.
- System Not Turning On: If your HVAC system fails to turn on, it could be due to a tripped circuit breaker, faulty thermostat, or issues with electrical connections.
These are just a few examples of the common HVAC issues homeowners often face. By understanding these problems, you can now proceed to troubleshoot your system effectively. Let’s start by checking the thermostat.
Checking the Thermostat
The thermostat is like the brain of your HVAC system, controlling the temperature and settings. If there are issues with the thermostat, it can lead to temperature inconsistencies and other problems. Here’s how you can check the thermostat:
- Check the power: Ensure that the thermostat has power. If it’s a battery-powered thermostat, replace the batteries and see if that solves the issue. If it’s a wired thermostat, make sure it’s receiving power.
- Adjust the temperature settings: Set the thermostat to a temperature that should trigger the system to turn on. If nothing happens, it could indicate a problem with the thermostat or the power supply to the HVAC system.
- Clean the thermostat: Dust and debris can affect the thermostat’s functioning. Gently clean the thermostat using a soft cloth to remove any dirt or buildup that may be obstructing its sensors.
- Check the wiring: If you feel comfortable working with electrical connections, you can inspect the thermostat wiring. Ensure that all wires are securely connected and not damaged. If you notice any loose or damaged wires, consider calling a professional for assistance.
- Calibrate the thermostat: Over time, thermostats can lose calibration. Check the temperature readings on the thermostat against a separate thermometer to see if they match. If there’s a discrepancy, you may need to recalibrate the thermostat or replace it if it’s not functioning properly.
By checking the thermostat, you can rule out any issues related to temperature control. If the thermostat appears to be functioning correctly, you can move on to the next step in troubleshooting your HVAC system.
Checking the Air Filters
The air filters in your HVAC system play a crucial role in maintaining indoor air quality and preventing dust and debris from clogging the system. If the air filters are dirty or clogged, it obstructs airflow, reduces system efficiency, and can lead to various issues. Here’s how you can check and clean or replace the air filters:
- Locate the air filters: The air filters are typically located in the return air duct or in the air handler of your HVAC system. Refer to your system’s manual or check online resources to find their exact location.
- Inspect the filters: Take a close look at the air filters. If they appear dirty, dusty, or clogged with debris, it’s an indication that they need cleaning or replacement.
- Clean or replace the air filters: If the filters are reusable, you can clean them by gently vacuuming or rinsing with water, depending on the manufacturer’s instructions. Allow them to dry completely before reinstallation. If the filters are disposable, simply replace them with new ones.
- Ensure proper airflow: Once the filters are clean or replaced, make sure they are inserted properly and have a snug fit. Improperly installed filters can still cause airflow issues.
- Regular maintenance: It’s important to regularly clean or replace the air filters. Depending on factors like the type of filter and household conditions, it’s recommended to do this every 1-3 months. However, certain filters may need to be replaced more frequently, so refer to the manufacturer’s guidelines.
Checking and maintaining the air filters is a simple yet crucial step in HVAC troubleshooting. It ensures optimal airflow, improves system performance, and helps prevent further issues caused by clogged filters. Now that we’ve covered the air filters, let’s move on to inspecting the outdoor unit.
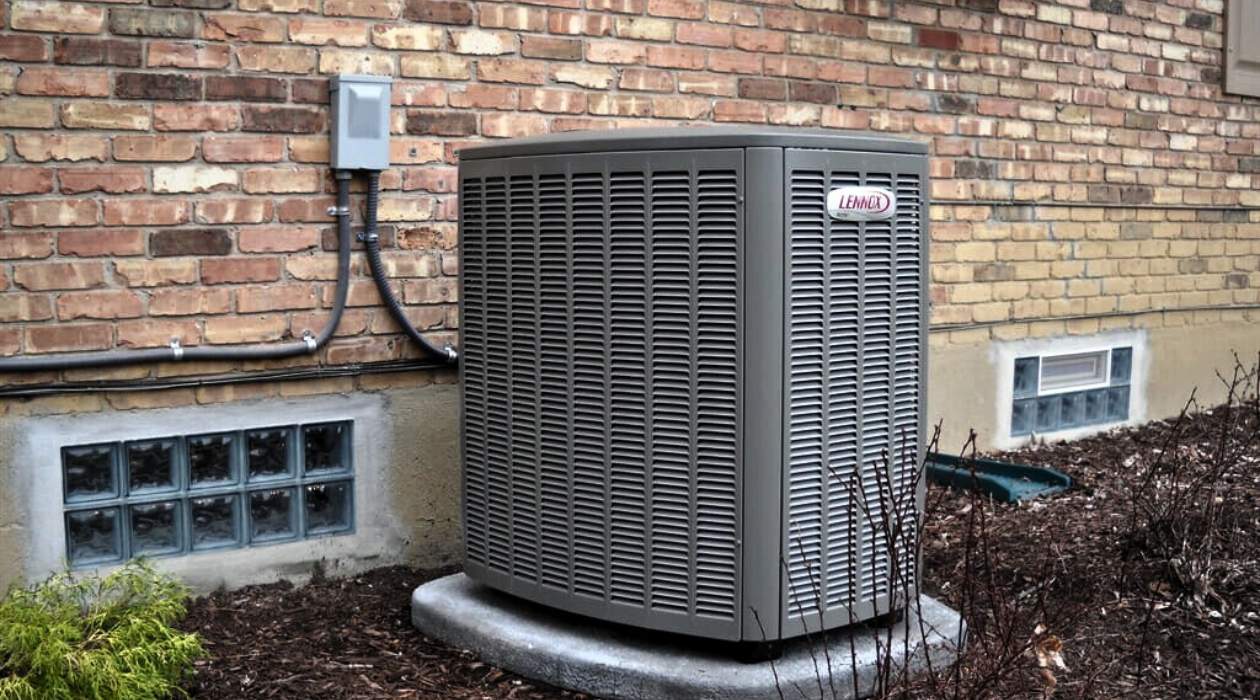
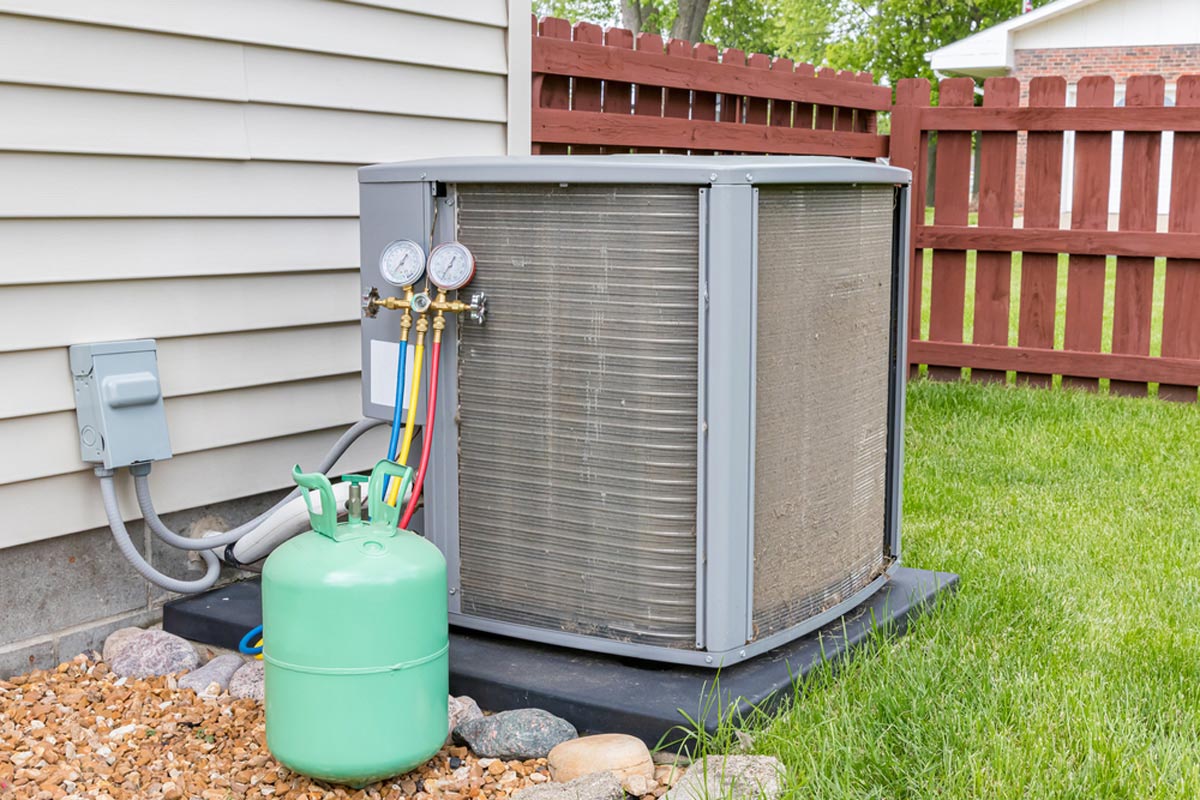
Inspecting the Outdoor Unit
The outdoor unit of your HVAC system, known as the condenser unit, plays a crucial role in transferring heat from your home to the outside. It’s important to inspect the outdoor unit regularly to ensure it is in good condition and free from any obstructions or damage. Here’s how you can inspect the outdoor unit:
- Turn off the power: Before inspecting the outdoor unit, make sure to turn off the power supply to the HVAC system. This can typically be done by switching off the circuit breaker dedicated to the unit.
- Clear any debris: Remove any debris, leaves, or vegetation that may have accumulated around the outdoor unit. Ensure that there is at least two feet of clear space around the unit to allow for proper airflow and easy access for maintenance.
- Check for damage: Inspect the outdoor unit for any visible damage or signs of wear and tear. Look for dented fins, bent coils, or oil leaks. If you notice any significant damage, it may require professional repair or replacement.
- Clean the condenser coils: Over time, dirt and debris can accumulate on the condenser coils, reducing their efficiency. Gently clean the coils using a soft brush or hose. Avoid using high-pressure water or harsh chemicals, as they can cause damage. If the coils are heavily soiled, consider calling a professional for a thorough cleaning.
- Inspect the fan: Check the fan blades for any damage or obstructions. Ensure that the fan spins freely and is not hitting anything. If you notice any issues with the fan motor or blades, it’s best to seek professional assistance.
By inspecting the outdoor unit, you can ensure proper airflow and prevent potential issues caused by obstructions or damage. Now that we’ve covered the outdoor unit, let’s move on to assessing the indoor unit of your HVAC system.
Read more: How A Chiller Works In HVAC
Assessing the Indoor Unit
The indoor unit of your HVAC system, which includes the air handler or furnace, is responsible for circulating conditioned air throughout your home. It’s important to assess the indoor unit to ensure its proper functioning and address any potential issues. Here’s how you can assess the indoor unit:
- Check the air vents and registers: Inspect the air vents and registers in each room to ensure they are open and not blocked by furniture or other objects. Blocked vents restrict airflow and can lead to temperature inconsistencies.
- Listen for unusual noises: While the HVAC system is running, listen for any unusual noises coming from the indoor unit. Rattling, squeaking, or grinding sounds could indicate issues with the blower motor, loose components, or debris in the system.
- Inspect the condensate drain: The condensate drain removes excess moisture produced during the cooling process. Check the condensate drain for any clogs or blockages. If you notice standing water or leaks around the indoor unit, it may indicate a problem with the drain that needs to be addressed.
- Check the blower motor: The blower motor is responsible for distributing conditioned air throughout your home. Listen for proper operation and check for any signs of damage or abnormal vibration. If there are issues with the blower motor, it’s recommended to seek professional help for repair or replacement.
- Inspect the ductwork: Examine the ductwork for any visible damage, such as leaks or loose connections. Damaged ductwork can impact system efficiency and airflow. If you notice significant issues with the ductwork, consult a professional to address the problem.
Assessing the indoor unit is crucial for maintaining proper airflow and indoor comfort. By checking the vents, listening for noises, inspecting the condensate drain, and evaluating the blower motor and ductwork, you can identify potential issues and take appropriate action. Now that we’ve covered the assessment of the indoor unit, let’s move on to troubleshooting the electrical connections.
Troubleshooting Electrical Connections
Electrical connections are an important aspect of your HVAC system, as they ensure proper functioning and safety. If there are issues with the electrical connections, it can lead to system malfunctions or even pose a risk of electrical hazards. Here’s how you can troubleshoot the electrical connections:
- Turn off the power: Before working on any electrical connections, it’s crucial to turn off the power supply to the HVAC system. This can be done by switching off the circuit breaker dedicated to the unit.
- Inspect the wiring: Carefully examine the wiring connections within the unit. Look for any loose, corroded, or damaged wires. If you notice any issues with the wiring, it’s best to consult a professional electrician to address the problem.
- Tighten loose connections: If you encounter any loose connections, use a screwdriver or appropriate tool to tighten them. Ensure that all connections are secure and snug, but be careful not to overtighten, as it can damage the wires or terminals.
- Check for burnt or melted wires: Look for any signs of burnt or melted wires, which can indicate electrical issues or overheating. If you notice any such signs, it’s imperative to call a professional electrician to investigate and resolve the problem.
- Inspect the circuit board and control panel: Examine the circuit board and control panel for any visible damage, such as burn marks or blown fuses. If you notice any abnormalities, it’s recommended to seek professional assistance to ensure proper repairs or replacements.
It’s important to note that working with electrical connections can be dangerous if you’re not experienced, so it’s always advisable to consult a qualified professional for electrical troubleshooting and repairs. They have the expertise and knowledge to handle electrical components safely and effectively.
By troubleshooting the electrical connections, you can ensure the proper functioning of your HVAC system and minimize the risk of electrical issues. Now, let’s move on to testing the capacitor as part of the troubleshooting process.
Check the air filters regularly and replace them if they are dirty. Clogged filters can restrict airflow and cause the HVAC system to work harder, leading to potential issues.
Testing the Capacitor
The capacitor in your HVAC system is responsible for storing and releasing electrical energy to help start the motors in the unit. If the capacitor is faulty or weak, it can result in motor malfunctions or the unit not starting at all. Here’s how you can test the capacitor:
- Turn off the power: Before testing the capacitor, make sure to turn off the power supply to the HVAC system. This can typically be done by switching off the circuit breaker dedicated to the unit.
- Locate the capacitor: Capacitors are typically located near the motors in the HVAC system. Consult your system’s manual or online resources to find the exact location of the capacitor.
- Discharge the capacitor: Capacitors store electrical charge even when the power is turned off. To ensure safety, use an insulated screwdriver with a plastic handle to discharge the capacitor. Touch the metal end of the screwdriver to the terminals of the capacitor to discharge any remaining charge.
- Testing with a multimeter: Set your multimeter to the capacitance mode (often denoted with the symbol “µF”). Touch the multimeter leads to the respective terminals of the capacitor. The multimeter should display a capacitance reading within the manufacturer’s recommended range. If the reading is significantly below or above the expected range, it may indicate a faulty capacitor that needs replacement.
- Consult a professional: Capacitor testing requires knowledge and experience to ensure accurate results. If you’re unsure about performing the test or if the capacitor needs replacement, it’s recommended to consult a qualified HVAC technician for assistance.
Testing the capacitor is an important step in troubleshooting HVAC system issues related to motor malfunctions or failure to start. By ensuring the proper functioning of the capacitor, you can potentially resolve electrical issues and improve system performance. Now that we’ve covered testing the capacitor, let’s move on to evaluating the fan motor.
Evaluating the Fan Motor
The fan motor in your HVAC system is responsible for circulating air through the system and ensuring proper airflow. If the fan motor is not functioning correctly, it can lead to inefficient cooling or heating and inadequate air circulation. Here’s how you can evaluate the fan motor:
- Turn off the power: Before evaluating the fan motor, make sure to turn off the power supply to the HVAC system. This can be done by switching off the circuit breaker dedicated to the unit.
- Locate the fan motor: The fan motor is typically located in the outdoor unit (condenser) or indoor unit (air handler) of the HVAC system. Refer to your system’s manual or online resources to find the exact location of the fan motor.
- Visual inspection: Inspect the fan motor for any visible signs of damage or wear. Look for loose or detached blades, bent motor shaft, or signs of overheating such as burnt wires or a strong burning smell.
- Test the motor: With the power turned off, manually spin the fan blades. They should rotate smoothly and freely. If the blades are stiff or difficult to move, it may indicate a problem with the motor or bearings.
- Listen for unusual noises: While spinning the fan blades, listen for any unusual noises such as grinding, scraping, or squeaking sounds. These noises can indicate mechanical issues with the fan motor, which may require further inspection or professional assistance.
- Consult a professional: If you suspect any issues with the fan motor or if you’re unfamiliar with motor evaluation, it’s best to consult a qualified HVAC technician for a comprehensive inspection and motor testing.
Evaluating the fan motor is essential for maintaining proper airflow and system efficiency. By checking for visible damage, testing the motor’s movement, and listening for abnormal noises, you can identify potential issues with the fan motor. Now, let’s move on to examining the compressor as part of the troubleshooting process.
Read more: How To Charge An HVAC System
Examining the Compressor
The compressor is a vital component of your HVAC system that pressurizes the refrigerant, enabling it to absorb and release heat. If the compressor is not functioning properly, it can lead to insufficient cooling or heating in your home. Here’s how you can examine the compressor:
- Turn off the power: Before examining the compressor, make sure to turn off the power supply to the HVAC system. This can be done by switching off the circuit breaker dedicated to the unit.
- Locate the compressor: The compressor is typically housed in the outdoor unit (condenser) of your HVAC system. Refer to your system’s manual or online resources to find the exact location of the compressor.
- Visual inspection: Inspect the compressor for any visible signs of damage or leaks. Look for oil stains, refrigerant leaks, or damaged parts. If you notice any significant damage, it’s best to consult a professional technician to address the problem.
- Listen for unusual noises: While the system is operating, listen for any unusual noises coming from the compressor. Grinding, hissing, or clanking sounds could indicate mechanical issues or refrigerant leaks, which require immediate attention.
- Check the compressor temperature: Carefully touch the exterior casing of the compressor to feel for excessive heat. While it’s normal for the compressor to generate some warmth, it should not be excessively hot to the touch. If the compressor feels too hot or is overheating, it may indicate a problem with its operation.
- Consult a professional: If you suspect any issues with the compressor or if you’re unsure about evaluating the compressor, it’s recommended to consult a qualified HVAC technician. They have the necessary expertise and tools to conduct a comprehensive examination and diagnose any compressor-related problems.
Examining the compressor is crucial for ensuring the proper functioning of your HVAC system and maintaining efficient cooling or heating. By inspecting for visible damage, listening for unusual noises, and checking for excessive heat, you can identify potential issues with the compressor. Now, let’s move on to checking for refrigerant leaks as part of the troubleshooting process.
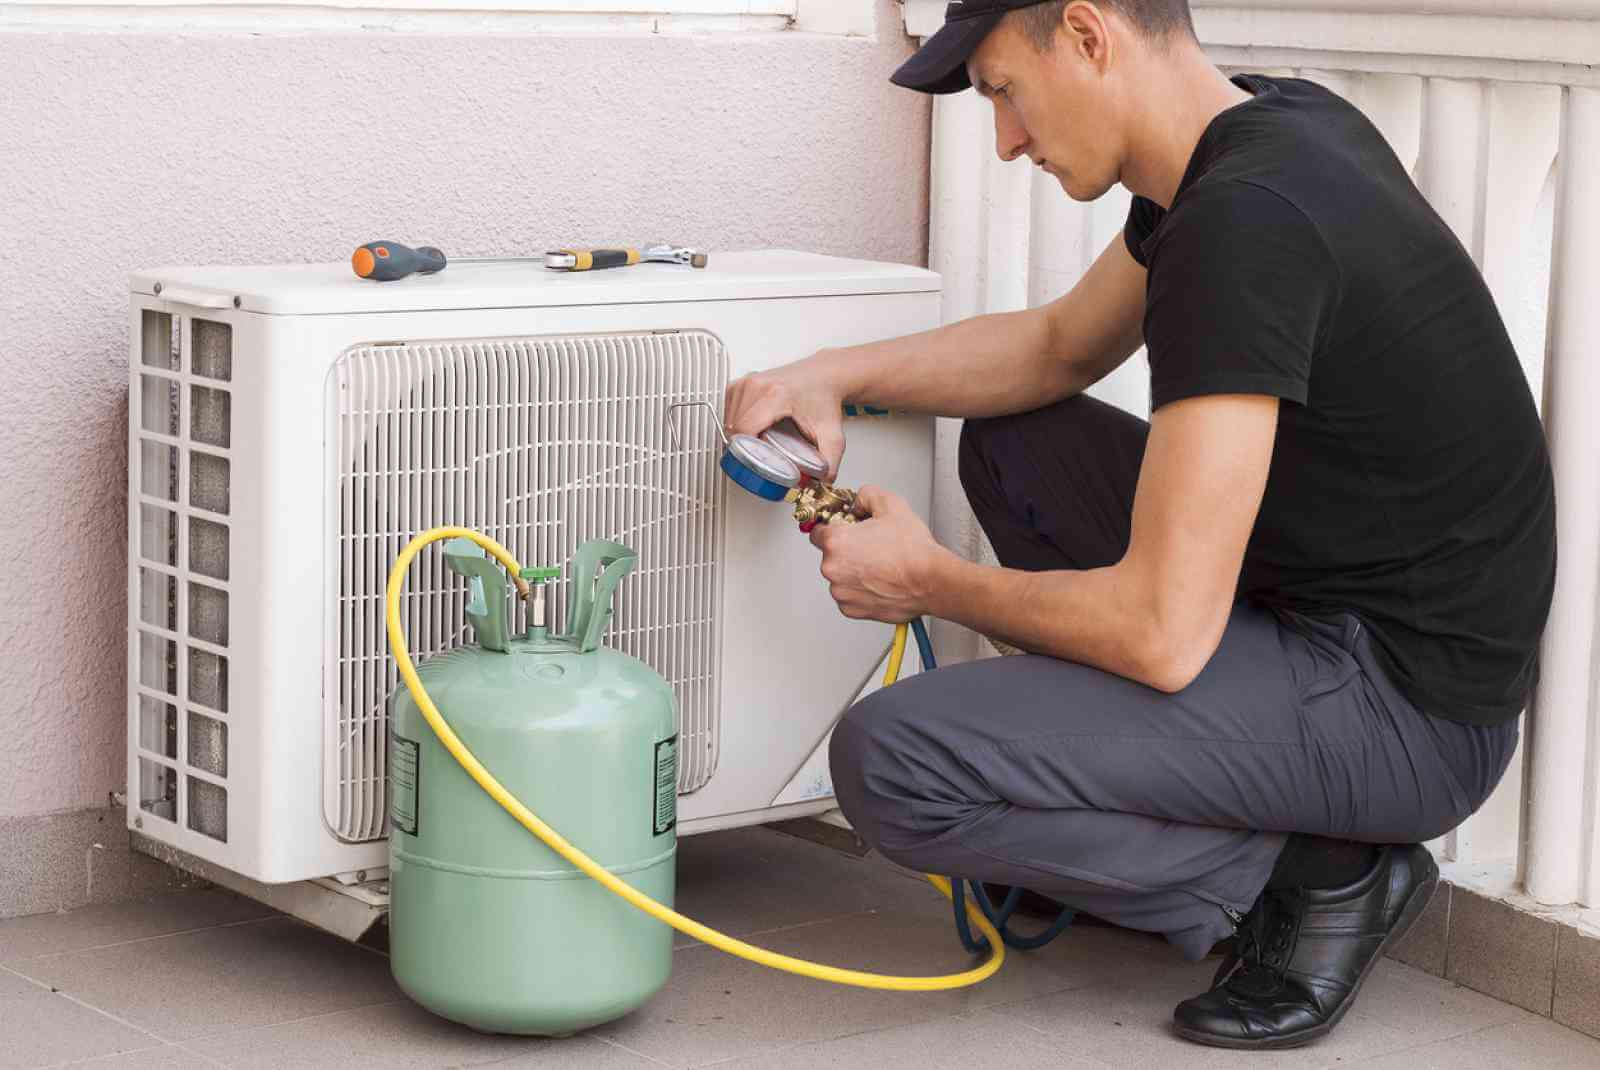
Checking for Refrigerant Leaks
Refrigerant is a vital component of your HVAC system that absorbs and releases heat to provide cooling or heating. If there are refrigerant leaks in your system, it can lead to reduced cooling or heating capacity and may even cause damage to the compressor. Here’s how you can check for refrigerant leaks:
- Turn off the power: Before checking for refrigerant leaks, make sure to turn off the power supply to the HVAC system. This can be done by switching off the circuit breaker dedicated to the unit.
- Locate the refrigerant lines: The refrigerant lines run between the indoor and outdoor units of your HVAC system. They are typically copper tubes with insulation covering them. Refer to your system’s manual or online resources to identify the location of the refrigerant lines.
- Visual inspection: Inspect the refrigerant lines for any signs of oil stains, coolant spots, or greasy residue. These can be indications of refrigerant leaks. You may also look for frost or ice formation on the refrigerant lines, which could signify a leak in the system.
- Inspect the fittings and connections: Examine the fittings and connections of the refrigerant lines for any signs of leaks or loose connections. Ensure that the fittings are tight and secure, and there are no visible hissing sounds, which could indicate a leak.
- Professional leak test: Refrigerant leaks can sometimes be challenging to detect visually. In such cases, it’s best to consult a professional HVAC technician who can perform a pressurized leak test using specialized equipment to identify and locate the leaks accurately.
- Addressing refrigerant leaks: If you suspect a refrigerant leak, it’s essential to address the issue promptly. Refrigerant leaks not only affect system performance but also have environmental implications. Consult a professional HVAC technician for proper repair, leak sealing, and refrigerant recharge.
Checking for refrigerant leaks is crucial for maintaining system efficiency and preventing further damage to your HVAC unit. By visually inspecting the refrigerant lines, examining fittings and connections, and seeking professional assistance if needed, you can address refrigerant leaks and restore proper functioning of your system. Now, let’s move on to the importance of cleaning the HVAC system as part of regular maintenance.
Cleaning the System
Cleaning your HVAC system is an important part of regular maintenance, as it helps improve system efficiency, indoor air quality, and overall performance. Over time, dirt, dust, and debris can accumulate in various components of the system, hindering its functionality. Here’s how you can clean your HVAC system:
- Turn off the power: Before cleaning the system, make sure to turn off the power supply to the HVAC system. This can be done by switching off the circuit breaker dedicated to the unit.
- Clean the air vents and registers: Remove the covers of the air vents and registers and clean them using a vacuum cleaner or a damp cloth. This will help remove dust and debris accumulation, ensuring proper airflow throughout your home.
- Clean the condenser coils: Using a soft brush or a fin comb, carefully clean the condenser coils in the outdoor unit. This will remove dirt, leaves, and other debris that can hinder the heat transfer process. Avoid using high-pressure water, as it can cause damage to the coils.
- Clean the evaporator coils: The evaporator coils are located inside the indoor unit. Gently clean them using a soft brush or a coil cleaner solution to remove dirt and debris that can affect heat exchange. Take caution not to bend or damage the delicate coils.
- Clean or replace the air filters: As mentioned earlier, clean or replace the air filters regularly to prevent dust and debris from clogging the system. This helps maintain optimal airflow and air quality.
- Clean the drainage system: Check and clean the condensate drain line to ensure it’s not clogged. Use a mixture of water and mild detergent to flush out any accumulated dirt or algae growth that can block the drain.
- Remove debris from around the outdoor unit: Regularly clean and remove any debris, leaves, or vegetation that may have accumulated around the outdoor unit. This aids in proper airflow and prevents obstructions.
- Professional maintenance: While you can perform basic cleaning tasks, it’s recommended to schedule professional HVAC maintenance at least once a year. A qualified technician can conduct a thorough cleaning, inspect the system, and address any underlying issues for optimal performance.
Cleaning your HVAC system regularly not only improves its efficiency but also prolongs its lifespan and helps maintain good indoor air quality. By following these cleaning steps and scheduling professional maintenance, you can ensure that your HVAC system functions optimally, providing comfort and clean air for your home. With the cleaning process complete, let’s conclude this article.
Conclusion
Maintaining a properly functioning HVAC system is crucial for ensuring comfort in your home. By understanding common HVAC issues and learning how to troubleshoot and resolve them, you can save time and money by avoiding unnecessary service calls. In this article, we discussed various steps to troubleshoot your HVAC system effectively.
We started by checking the thermostat to ensure proper temperature control. Then, we moved on to checking the air filters, which play a significant role in maintaining airflow and indoor air quality. Next, we inspected the outdoor unit, focusing on clearing debris and checking for damage. We then assessed the indoor unit, paying attention to air vents, fan motors, and the condensate drain. Troubleshooting electrical connections and testing the capacitor were important steps in identifying and addressing electrical issues.
Additionally, we evaluated the fan motor, examined the compressor, and checked for refrigerant leaks, all of which require careful attention to maintain system efficiency and effectiveness. Lastly, we emphasized the importance of regular cleaning, including air vents, coils, filters, and drainage systems.
While following these troubleshooting steps can help resolve minor issues, it’s important to know when to seek professional assistance. HVAC systems involve electrical components and specialized knowledge, making it essential to consult qualified technicians for complex repairs and maintenance.
By understanding how to troubleshoot common HVAC issues, you can keep your system running smoothly, minimize energy consumption, and ensure your home remains comfortable year-round. Regular maintenance and attention to these troubleshooting steps will help prolong the life of your HVAC system, improve indoor air quality, and provide you with peace of mind.
Remember, a well-maintained HVAC system not only keeps you comfortable but also contributes to energy efficiency and cost-saving benefits. So, take the time to troubleshoot and maintain your HVAC system regularly, and enjoy the benefits of a comfortable and efficiently running home.
Frequently Asked Questions about How To Troubleshoot A HVAC System
Was this page helpful?
At Storables.com, we guarantee accurate and reliable information. Our content, validated by Expert Board Contributors, is crafted following stringent Editorial Policies. We're committed to providing you with well-researched, expert-backed insights for all your informational needs.

0 thoughts on “How To Troubleshoot A HVAC System”