Articles
How To Test HVAC Low Pressure Switch
Modified: September 1, 2024
Discover how to properly test the HVAC low pressure switch in this informative article. Learn the steps and precautions for accurate readings.
(Many of the links in this article redirect to a specific reviewed product. Your purchase of these products through affiliate links helps to generate commission for Storables.com, at no extra cost. Learn more)
Introduction
Welcome to our comprehensive guide on how to test an HVAC low pressure switch. As an essential component of your heating, ventilation, and air conditioning (HVAC) system, the low pressure switch plays a crucial role in maintaining the proper functioning and safety of your equipment.
Understanding how to effectively test the low pressure switch can help you diagnose potential issues or malfunctions in your HVAC system before they escalate into major problems. By regularly checking the switch for proper operation, you can ensure optimal performance and prevent costly repairs in the long run.
In this article, we will walk you through the step-by-step process of testing the low pressure switch, highlighting the importance of this procedure and the tools you will need to successfully complete the task. So, let’s dive in and learn how to test your HVAC low pressure switch!
Key Takeaways:
- Regularly testing the HVAC low pressure switch is crucial for safety, energy efficiency, and preventive maintenance. It helps identify potential issues early, preventing costly repairs and ensuring optimal system performance.
- Prioritize safety and proper equipment when testing the low pressure switch. Consult a professional if issues are detected, and ensure correct replacement or repair procedures are followed to maintain the HVAC system’s functionality and safety.
Read more: How To Test A Dimmer Switch
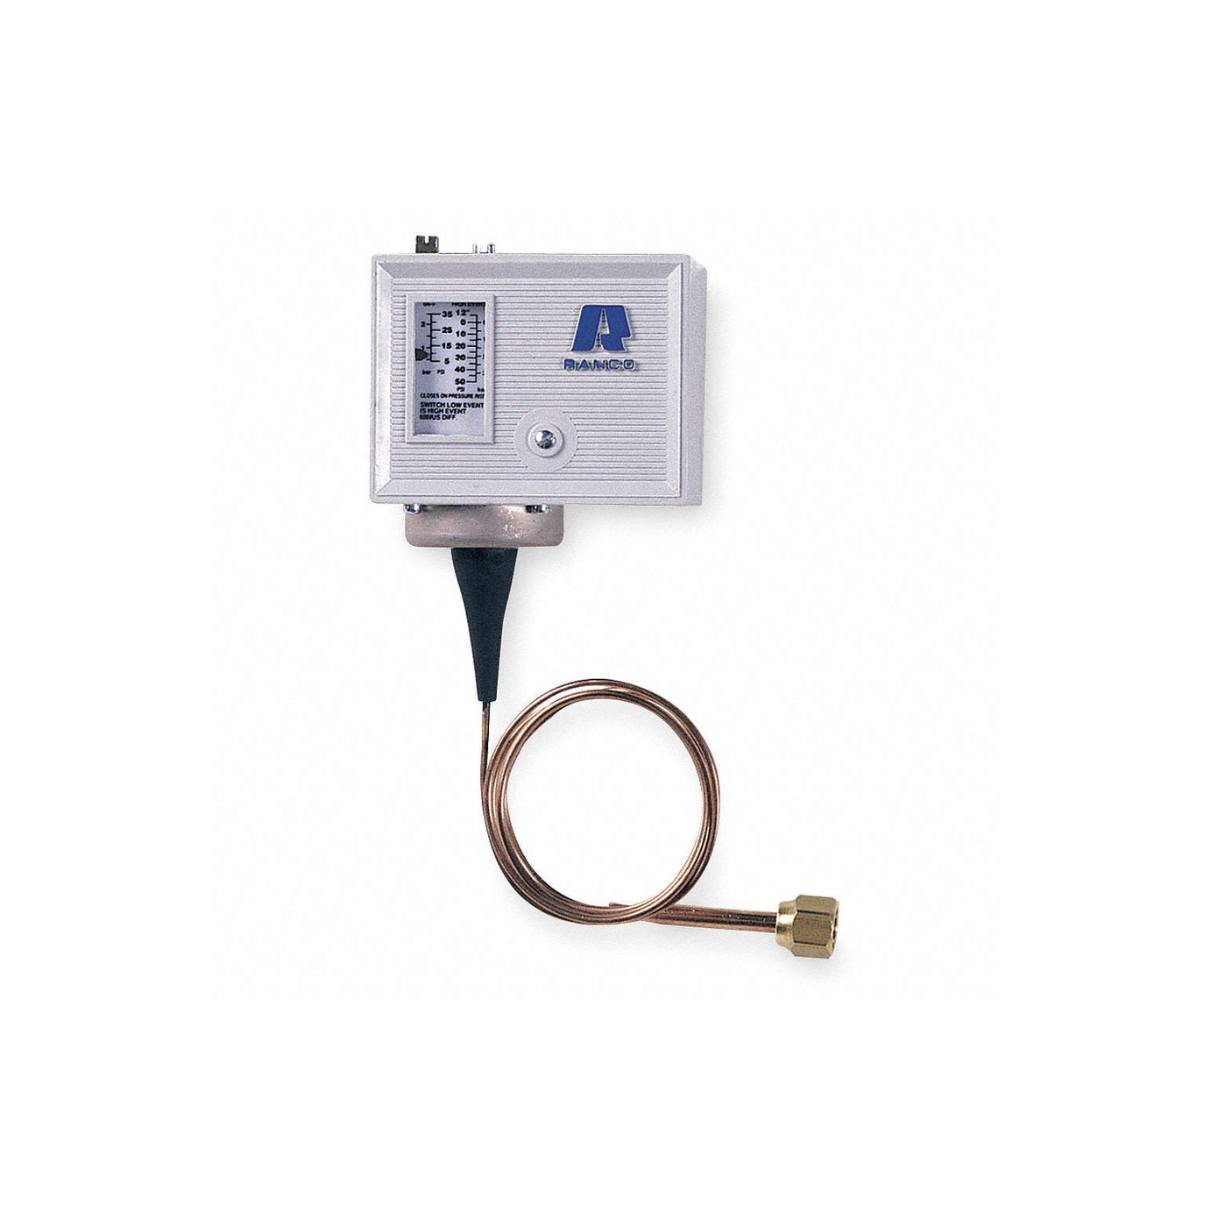
What is an HVAC Low Pressure Switch?
An HVAC low pressure switch, also known as a pressure sensor or a cutout switch, is a safety device installed in HVAC systems to protect against low refrigerant pressure. It is commonly found in air conditioning units, heat pumps, and refrigeration systems. The purpose of the low pressure switch is to monitor the refrigerant pressure and ensure that it remains within a safe operating range.
When the refrigerant pressure drops below the predetermined set point, the low pressure switch will activate and send a signal to the HVAC system’s control board. This signal triggers the system to shut down or activate specific safety measures to prevent further damage to the equipment.
The low pressure switch acts as a safeguard against potential issues such as refrigerant leaks, insufficient airflow, or other factors that can lead to low pressure levels. By detecting and responding to low pressure conditions, this switch helps protect the compressor from damage and ensures the system’s overall efficiency.
Typically, low pressure switches are adjustable, allowing the HVAC technician to set the desired pressure range according to the system’s specifications. Depending on the specific HVAC system, the low pressure switch may shut off the compressor, engage a safety shutdown, or activate an alarm to alert the user of the low pressure condition.
It’s important to note that different HVAC systems may have different pressure ranges and specifications for their low pressure switches. Therefore, it’s crucial to consult the manufacturer’s guidelines or enlist the services of a qualified HVAC professional to ensure accurate testing and adjustment of the low pressure switch.
Overall, the HVAC low pressure switch plays a critical role in maintaining the safe and efficient operation of your HVAC system. Regularly testing and monitoring the switch can help identify potential problems early on and ensure the longevity and performance of your system.
Why is Testing the Low Pressure Switch Important?
Testing the low pressure switch in your HVAC system is integral to ensuring the proper functioning and performance of the equipment. Here are several key reasons why testing the low pressure switch is important:
- Safety: The low pressure switch is a safety device designed to protect the HVAC system and prevent potential damage. By testing the switch, you can identify if it is functioning correctly and promptly take necessary actions in case the switch fails or malfunctions.
- Prevention of System Damage: A malfunctioning low pressure switch can cause serious damage to your HVAC system, particularly the compressor. Low refrigerant pressure can negatively impact the compressor’s lubrication, leading to increased wear and tear, overheating, and potential failure. Regular testing helps catch any issues with the switch before they escalate and cause significant damage.
- Energy Efficiency: Improperly functioning low pressure switches can result in decreased energy efficiency of the HVAC system. When the switch fails to detect low pressure accurately, it may lead to inefficient operation and excessive energy consumption. By testing and ensuring the switch’s proper operation, you can maintain optimal energy efficiency and reduce unnecessary energy costs.
- Preventive Maintenance: Regularly testing the low pressure switch is a part of preventive maintenance for your HVAC system. Through routine testing, you can detect potential problems early on, allowing for timely repairs or replacements. This can help prevent sudden system failures, costly repairs, and inconveniences associated with HVAC breakdowns.
- Compliance with Regulations: In some jurisdictions or industries, there are regulations and standards in place that require regular testing and maintenance of safety devices such as the low pressure switch. By ensuring proper testing and compliance, you can avoid potential legal and regulatory issues while prioritizing the safety and reliability of your HVAC system.
Overall, testing the low pressure switch is crucial for maintaining the safety, efficient operation, and longevity of your HVAC system. It allows you to identify and rectify any issues with the switch early on, preventing further damage and ensuring optimal performance. Regular testing should be a part of your HVAC maintenance routine to promote a safe and comfortable environment in your home or workplace.
Tools and Equipment Needed
Before you begin testing the low pressure switch in your HVAC system, it’s important to gather the necessary tools and equipment to ensure a successful and accurate process. Here are the common tools you will need:
- Multimeter: A multimeter is an essential tool for testing electrical circuits and components, including the low pressure switch. This device allows you to measure voltage, resistance, and continuity, providing valuable information about the switch’s functionality.
- Screwdriver: A screwdriver will be needed to remove any access panels or covers to access the low pressure switch. Choose the appropriate type and size based on the fasteners used in your HVAC system.
- Safety Gloves: Safety gloves are necessary to protect your hands during the testing process. They provide insulation and prevent accidental electric shock or injury from sharp edges or components.
- Safety Glasses: Safety glasses are important for eye protection, shielding your eyes from any debris or particles that may be released during the testing procedure.
- Flashlight: A flashlight will come in handy, especially if the low pressure switch is located in a dark or hard-to-reach area of your HVAC system. It helps improve visibility and makes it easier to inspect and test the switch.
- User Manual or Technical Documentation: Your HVAC system’s user manual or any technical documentation provided by the manufacturer will be invaluable during the testing process. It contains specific information about the location, specifications, and testing procedures for the low pressure switch in your system.
It’s essential to ensure that all tools and equipment are in proper working condition before starting the testing process. This will help you perform accurate measurements and safely handle the components of your HVAC system. Additionally, always follow proper safety protocols and guidelines when working with electrical equipment to prevent accidents or injuries.
Now that you have gathered the necessary tools and are ready to proceed, let’s move on to the step-by-step process of testing the low pressure switch in your HVAC system.
Step 1: Power Off the HVAC System
Before starting the testing process, it is crucial to ensure your safety by completely turning off the power to your HVAC system. Follow these steps to power off the system:
- Locate the Main Power Disconnect: Find the main power disconnect switch or circuit breaker for your HVAC system. It is typically located near the system’s outdoor unit or near the electrical service panel in your home.
- Switch Off the Power: Flip the main power disconnect switch to the “Off” position or switch off the corresponding circuit breaker in the electrical service panel. This will shut off the power supply to the HVAC system, preventing any electrical hazards during the testing process.
- Verify Power is Off: Once you have switched off the power, it is essential to ensure that it is truly off. Double-check the unit’s operation by trying to turn it on using the thermostat or any other controls. If the system does not turn on, you can proceed knowing that the power is indeed off.
It is crucial to power off the HVAC system to avoid electrical shocks or other hazards while working on the low pressure switch. Electricity poses serious risks, and taking this precautionary step is essential for your safety. Remember, if you are unsure about any part of the process or if you are uncomfortable working with electrical components, it’s best to consult a qualified HVAC technician.
With the power to the HVAC system safely turned off, we can now move on to the next step: locating the low pressure switch.
Read more: How To Test HVAC Capacitor
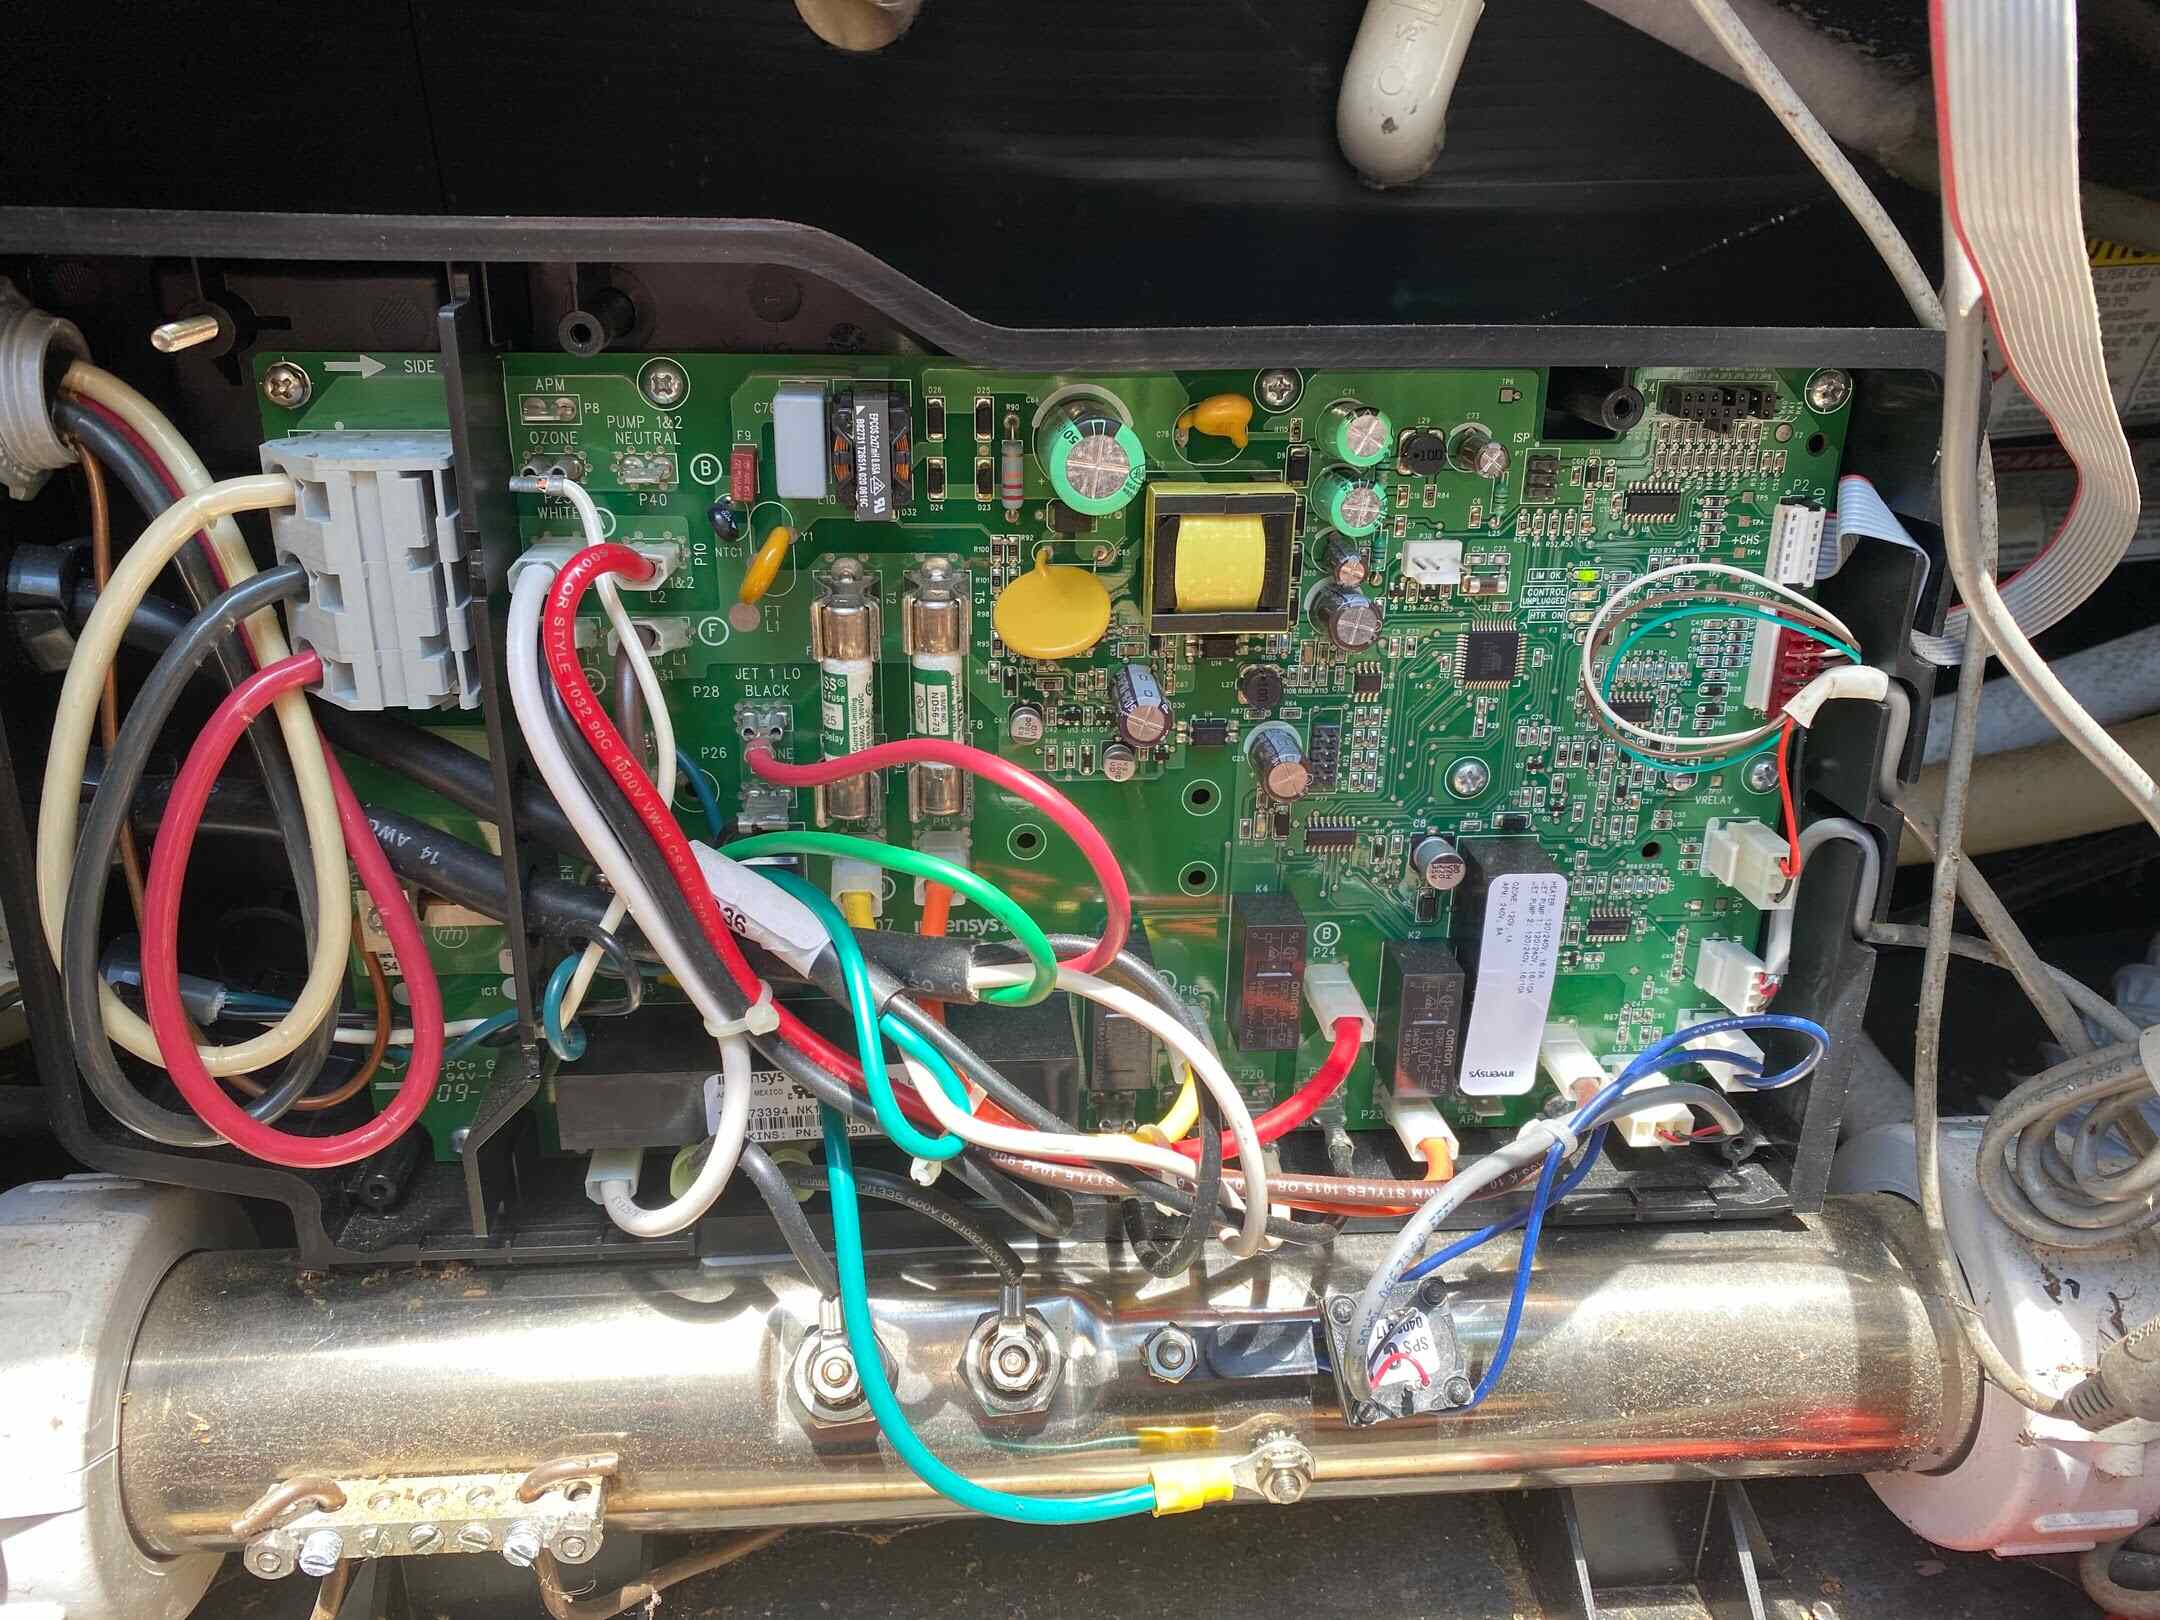
Step 2: Locate the Low Pressure Switch
After ensuring the power is turned off to your HVAC system, the next step is to locate the low pressure switch. The exact location of the switch may vary depending on the type of HVAC system you have, but here are a few general guidelines to help you find it:
- Consult the User Manual: The first resource you should refer to is the user manual or technical documentation provided by the manufacturer. It often includes detailed information about the location of various components, including the low pressure switch.
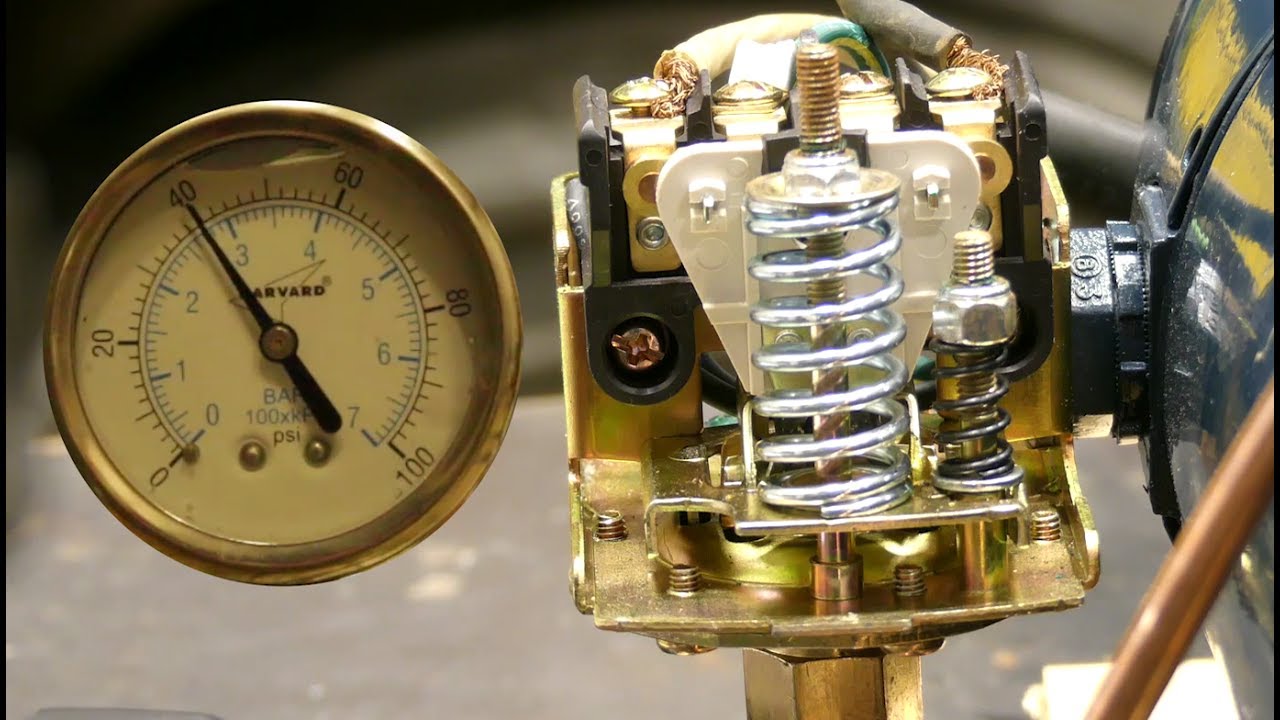
- Examine the Refrigerant Lines: The low pressure switch is typically installed on one of the refrigerant lines in your HVAC system. Start by examining the lines near the condenser unit (for air conditioning systems) or the heat pump (for heat pumps). Look for a small device with electrical connectors and pressure fittings attached to the lines.
- Check Near the Compressor: In some systems, the low pressure switch may be located near the compressor unit. The compressor is generally a larger component, often enclosed in a metal casing. Look for any nearby electrical connectors or pressure fittings that may indicate the presence of the low pressure switch.
- Follow the Wires: The low pressure switch will have electrical wires connected to it. Trace these wires from the refrigerant lines or compressor to identify the switch’s location. You may need to remove access panels or covers to gain better visibility.
Remember, the exact location of the low pressure switch can vary depending on the HVAC system model and manufacturer. The user manual or technical documentation specific to your system will be the most reliable source of information for locating the switch.
Once you have located the low pressure switch, you can proceed to the next step: inspecting the switch for any damage or corrosion.
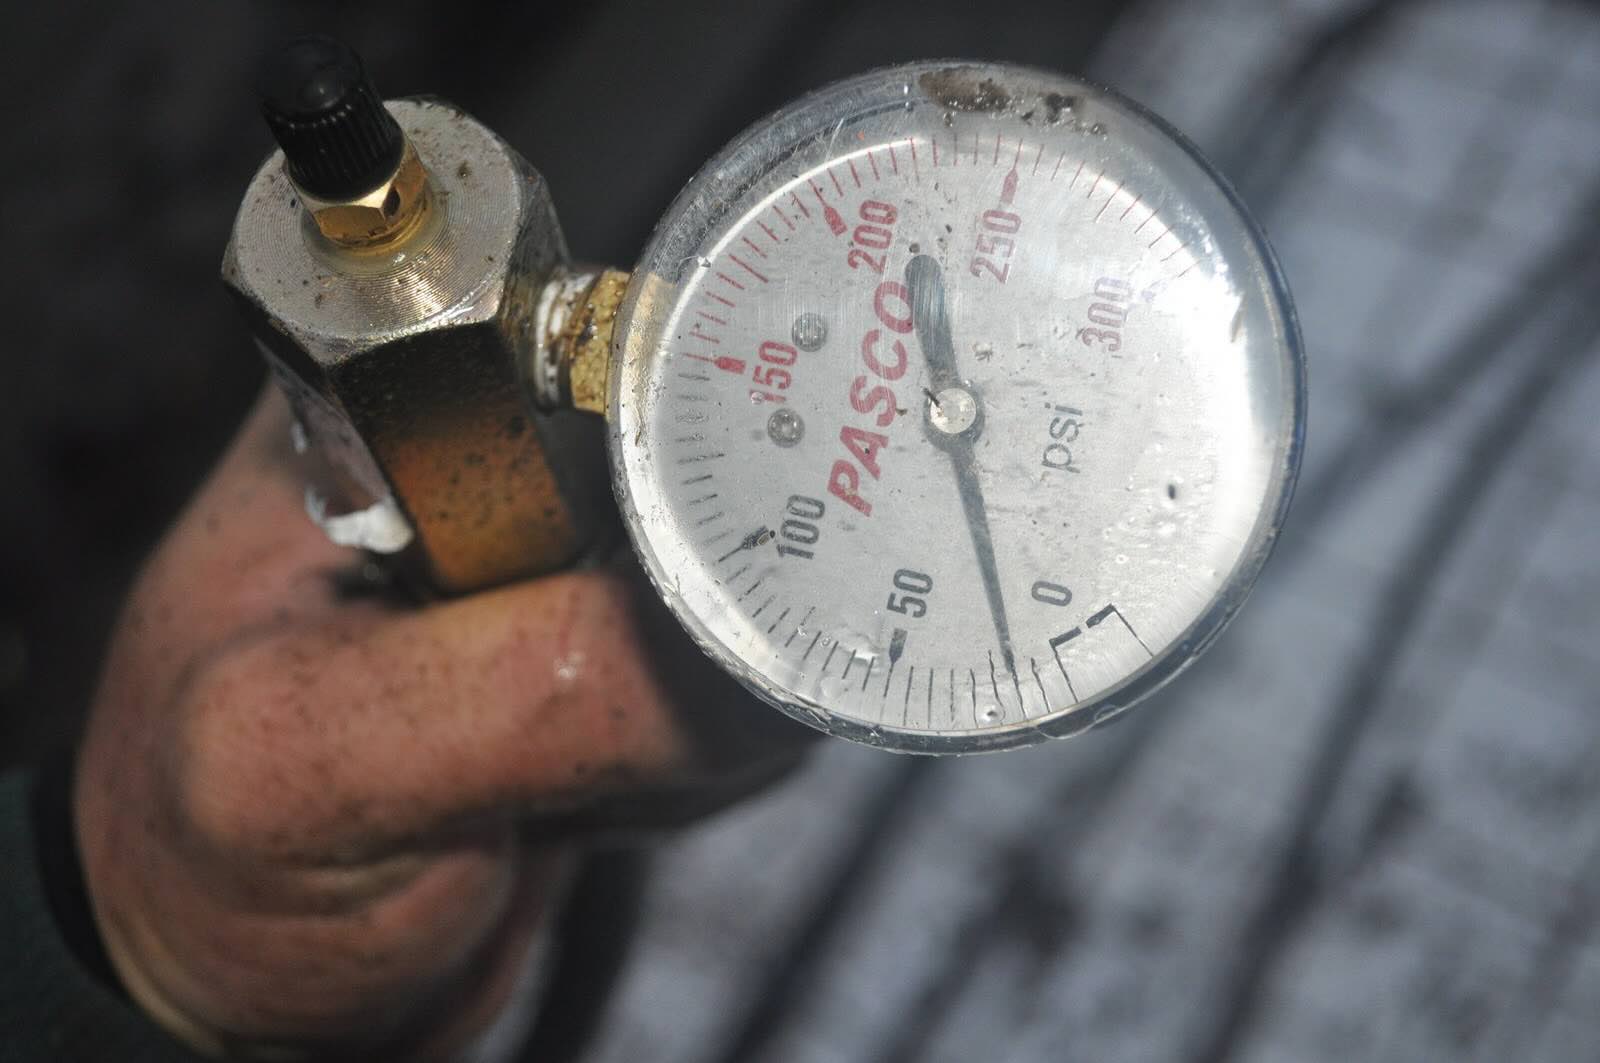
When testing an HVAC low pressure switch, use a multimeter to check for continuity across the switch terminals. If there is no continuity, the switch may be faulty and in need of replacement.
Step 3: Inspect the Switch for Damage or Corrosion
After successfully locating the low pressure switch in your HVAC system, it’s time to thoroughly inspect the switch for any signs of damage or corrosion. This step is essential to ensure that the switch is in good condition and capable of accurate performance. Follow these guidelines to inspect the switch:
- Visually Examine the Switch: Carefully observe the switch for any visible signs of damage such as cracks, dents, or loose connections. Inspect the electrical connectors, pressure fittings, and surrounding areas for any abnormalities.
- Check for Corrosion: Corrosion can hinder the performance of the low pressure switch. Look for any signs of rust or corrosion on the switch or its electrical connectors. Corrosion can affect the switch’s ability to detect pressure accurately and may require cleaning or replacement.
- Inspect Wiring Connections: Ensure that the wiring connections to the low pressure switch are secure and free from any loose or damaged wires. Loose connections can affect the switch’s functionality and lead to inaccurate pressure readings.
- Take Note of Any Issues: During the inspection, make a note of any damages, signs of corrosion, or loose connections you observe. This information will be helpful when deciding whether to repair or replace the low pressure switch.
It’s important to address any damages or corrosion found during the inspection. Depending on the severity of the issues, you may need to clean, repair, or replace the low pressure switch. If you are unsure about the best course of action, consult a qualified HVAC technician for guidance.
Once you have completed the inspection and addressed any necessary repairs or replacements, you can move on to the next step: testing the switch with a multimeter.
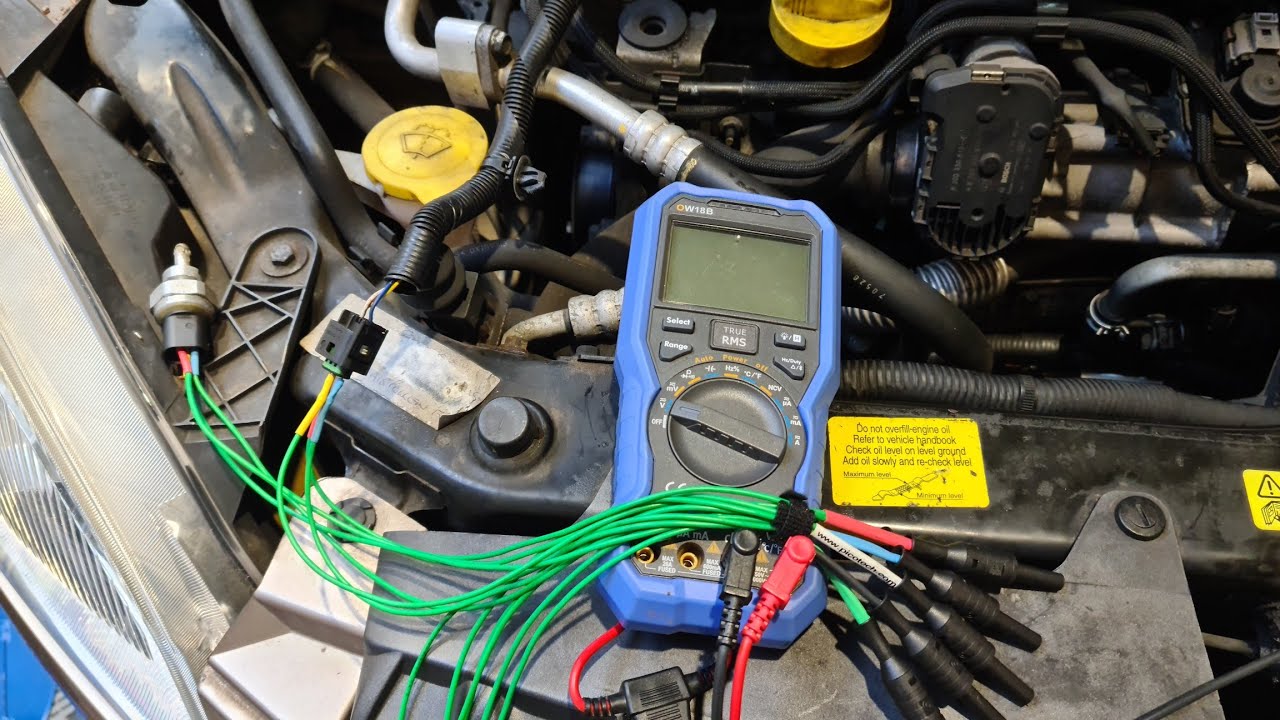
Step 4: Test the Switch with a Multimeter
Testing the low pressure switch with a multimeter is a fundamental step in determining its functionality and accuracy. The multimeter allows you to measure the electrical properties and continuity of the switch. Here’s how you can test the switch using a multimeter:
- Select the Proper Settings: Set your multimeter to the appropriate settings for measuring resistance or continuity. Refer to the multimeter’s user manual for guidance if needed. Make sure the multimeter is calibrated and functioning correctly before proceeding.
- Disconnect Wires if Necessary: If the low pressure switch is connected to any electrical wires, carefully disconnect them from the switch. This will allow you to measure the switch’s resistance or continuity accurately without interference from other components.
- Attach Multimeter Probes: Connect the multimeter probes to the appropriate terminals on the low pressure switch. The terminals are typically labeled “NO” (Normally Open) and “COM” (Common). Ensure a secure and stable connection between the multimeter probes and the switch terminals.
- Measure Resistance: With the multimeter probes attached to the switch terminals, measure the resistance across the switch. A properly functioning low pressure switch should display a specific resistance value within the manufacturer’s recommended range. Compare the measured resistance with the provided specifications to determine if the switch is within the acceptable range.
- Check for Continuity: Test for continuity by setting the multimeter to the appropriate continuity mode or buzzer mode. Touch the multimeter probes to the switch terminals. If you hear a continuous beep or see a reading on the multimeter, it indicates continuity, indicating the switch is functioning as intended. If there is no beeping sound or reading, it suggests a lack of continuity, indicating a fault or malfunction in the switch.
Always refer to the specific guidelines provided by the switch manufacturer or your HVAC system’s documentation for accurate testing procedures and acceptable measurement values. If the low pressure switch fails to meet the specifications or shows signs of malfunction, it may require further attention, such as cleaning, adjustment, or replacement.
Once you have completed the testing process with the multimeter, you can proceed to the next step: checking for continuity in the switch.
Step 5: Check for Continuity in the Switch
Continuity testing is an important step in assessing the functionality of the low pressure switch. It helps determine if the switch can maintain an electrical connection when it is closed or activated. Here’s how you can check for continuity in the switch:
- Ensure Power is Still Off: Before proceeding with continuity testing, double-check that the power to your HVAC system is still turned off. Safety should always be a top priority when working with electrical components.
- Set the Multimeter to Continuity Mode: If your multimeter has a continuity mode or a dedicated setting for testing connectivity, switch it to this mode. Refer to your multimeter’s manual if you are uncertain about the specific settings.
- Place the Multimeter Probes: With the multimeter set to continuity mode, touch the probes to the switch terminals. The “NO” (Normally Open) and “COM” (Common) terminals are where the probes should make contact.
- Check for a Continuity Signal: As you touch the multimeter probes to the switch terminals, you should hear a continuous beep or see a reading indicating continuity on the multimeter’s display. This means that the switch is maintaining an electrical connection when it is closed or activated.
- Observe the Multimeter Display: Take note of the readings or signals displayed on the multimeter. If you do not hear a continuous beep or see a continuity signal on the display, it suggests a lack of connectivity in the switch. This may indicate a faulty or malfunctioning switch that requires further attention.
Remember, the specific readings or signals indicating continuity may vary depending on the multimeter you are using. Consult the multimeter’s documentation for accurate interpretation of the continuity results.
If the low pressure switch shows a lack of continuity or exhibits inconsistent readings during the continuity test, it may require cleaning, adjustment, or replacement to ensure proper functioning. Consult with a qualified HVAC technician for further troubleshooting and potential solutions.
Once you have checked for continuity in the switch, move on to the next step: verifying the proper operation of the switch.
Read more: How To Test HVAC Blower Motor
Step 6: Verify Proper Switch Operation
After testing the low pressure switch for resistance and continuity, it’s essential to verify its proper operation to ensure that it functions as intended. Here’s how you can verify the proper operation of the switch:
- Reconnect Wires: If you disconnected any wires during the testing process, make sure to reconnect them securely to the low pressure switch. Ensure that all connections are tight and properly seated.
- Restore Power: Before proceeding, turn the power back on to your HVAC system. You can do this by flipping the main power disconnect switch to the “On” position or switching on the appropriate circuit breaker in the electrical service panel.
- Observe System Operation: Once the power is restored, observe the operation of your HVAC system. Pay close attention to any changes or abnormalities in its functioning. Listen for any unusual sounds, such as excessive noise from the compressor, or observe any indications of system malfunction.
- Monitor for Error Codes: If your HVAC system is equipped with error code displays or diagnostic features, monitor them for any error codes related to low pressure or switch malfunction. Any error codes that indicate a problem with the low pressure switch should be addressed promptly.
- Consult HVAC Documentation: Refer to your HVAC system’s user manual, technical documentation, or contact the manufacturer’s customer support if you encounter any issues or discrepancies during system operation. They can provide specific troubleshooting steps or guidance to rectify any problems.
Verifying the proper operation of the low pressure switch is crucial to ensure the overall functionality and safety of your HVAC system. If you notice any persistent issues or concerns, it’s best to consult a qualified HVAC technician for further diagnostics and assistance.
By verifying the proper operation of the low pressure switch, you can have confidence in its ability to accurately detect and respond to low pressure conditions, helping to maintain the optimal performance of your HVAC system.
Once you have completed the verification process, we can move on to the final step: replacing or repairing the switch if necessary.
Step 7: Replace or Repair the Switch if Necessary
If, during the testing and verification process, you discover that the low pressure switch is faulty, damaged, or not functioning properly, it may be necessary to replace or repair the switch. Here’s what you should consider:
- Evaluate the Severity of the Issue: Assess the severity of the problem with the low pressure switch. If the switch is severely damaged, corroded, or shows signs of irreversible malfunction, it is likely best to replace it with a new one. However, if the issue is minor, such as loose connections or minor corrosion, you may be able to repair the switch.
- Consult a Qualified HVAC Technician: If you are unsure about how to handle the replacement or repair process, or if you don’t have the necessary expertise and tools, it is recommended to consult a qualified HVAC technician. They can accurately diagnose the problem, provide professional advice, and perform the necessary repairs or replacements.
- Obtain the Right Replacement: If you decide to replace the low pressure switch, ensure that you obtain the correct replacement part specifically designed for your HVAC system. Refer to your system’s documentation or consult with the manufacturer or a reputable HVAC supplier to ensure compatibility and proper functioning.
- Follow Proper Replacement or Repair Procedures: Whether you are replacing or repairing the switch, it is important to follow the proper procedures outlined in your HVAC system’s documentation or provided by the manufacturer. This ensures that the switch is installed or repaired correctly and avoids any potential issues down the line.
- Retest and Verify the New Switch: After replacing or repairing the low pressure switch, it is crucial to retest and verify its operation. Follow the testing and verification steps outlined earlier to ensure that the new switch is functioning correctly and the issue has been resolved.
Remember, working with electrical components requires caution and expertise. If you are unsure or uncomfortable with any part of the replacement or repair process, it is always best to seek professional assistance from a qualified HVAC technician. They have the knowledge and experience to handle the task safely and efficiently.
By replacing or repairing the low pressure switch when necessary, you can ensure the continued proper functioning and reliability of your HVAC system.
With this final step, you have completed the process of testing the HVAC low pressure switch. Regularly testing and maintaining this important component of your HVAC system can help prevent issues, ensure safety, and promote optimal performance.
Remember to consult your HVAC system’s documentation or seek professional advice if you have any specific concerns or questions regarding your system’s low pressure switch or any other HVAC-related matters.
We hope this guide has been helpful to you in understanding how to test the HVAC low pressure switch effectively. Happy testing!
Conclusion
Testing the low pressure switch in your HVAC system is a crucial maintenance task that should not be overlooked. By following the step-by-step process outlined in this guide, you can effectively determine the functionality and accuracy of the low pressure switch, ensuring the safe and efficient operation of your HVAC system.
Regularly testing the low pressure switch helps identify any potential issues early on, allowing for prompt repairs or replacements. This proactive approach can save you from costly repairs, prevent system damage, and promote energy efficiency.
Throughout the testing process, it is essential to prioritize safety by powering off the HVAC system and using the necessary tools and equipment, such as a multimeter, safety gloves, safety glasses, and a flashlight. Taking proper precautions ensures your well-being and minimizes the risk of accidents.
By inspecting the switch for damage or corrosion and performing resistance and continuity tests, you can assess the switch’s condition accurately. If any issues are detected, consult a qualified HVAC technician for further assistance and guidance.
In the event that the low pressure switch requires replacement or repair, consult with professionals or refer to the manufacturer’s guidelines to ensure correct procedures are followed. After replacing or repairing the switch, retest and verify its proper operation to ensure the issue has been resolved.
Testing the low pressure switch and maintaining its functionality is vital for the overall performance, efficiency, and safety of your HVAC system. Incorporate this testing process into your regular HVAC maintenance routine to address any potential problems proactively and prolong the lifespan of your system.
Remember, if you ever encounter difficulties or uncertainties during the testing process, it is always advisable to seek the assistance of a qualified HVAC technician. They have the expertise and knowledge to ensure accurate testing and provide professional guidance.
We hope this comprehensive guide has provided you with the necessary knowledge and guidance to effectively test your HVAC low pressure switch. By prioritizing the health and maintenance of your HVAC system, you can ensure a comfortable and safe indoor environment for years to come.
Frequently Asked Questions about How To Test HVAC Low Pressure Switch
Was this page helpful?
At Storables.com, we guarantee accurate and reliable information. Our content, validated by Expert Board Contributors, is crafted following stringent Editorial Policies. We're committed to providing you with well-researched, expert-backed insights for all your informational needs.


0 thoughts on “How To Test HVAC Low Pressure Switch”