Articles
How To Use Jura Coffee Machine
Modified: August 27, 2024
Discover articles on how to use Jura coffee machine, featuring tips, tricks, and step-by-step guides for brewing the perfect cup of coffee at home.
(Many of the links in this article redirect to a specific reviewed product. Your purchase of these products through affiliate links helps to generate commission for Storables.com, at no extra cost. Learn more)
Introduction
Welcome to the wonderful world of Jura coffee machines! If you’re a coffee lover, then you’re in for a treat. Jura is known for producing high-quality, reliable, and user-friendly coffee machines that can elevate your coffee brewing experience to a whole new level. Whether you prefer espresso, cappuccino, latte, or a simple cup of black coffee, a Jura coffee machine is a perfect addition to your kitchen.
In this article, we will guide you through the process of using a Jura coffee machine step by step. From setting up the machine to troubleshooting common issues, by the end of this article, you’ll be a pro at using your Jura coffee machine like a barista!
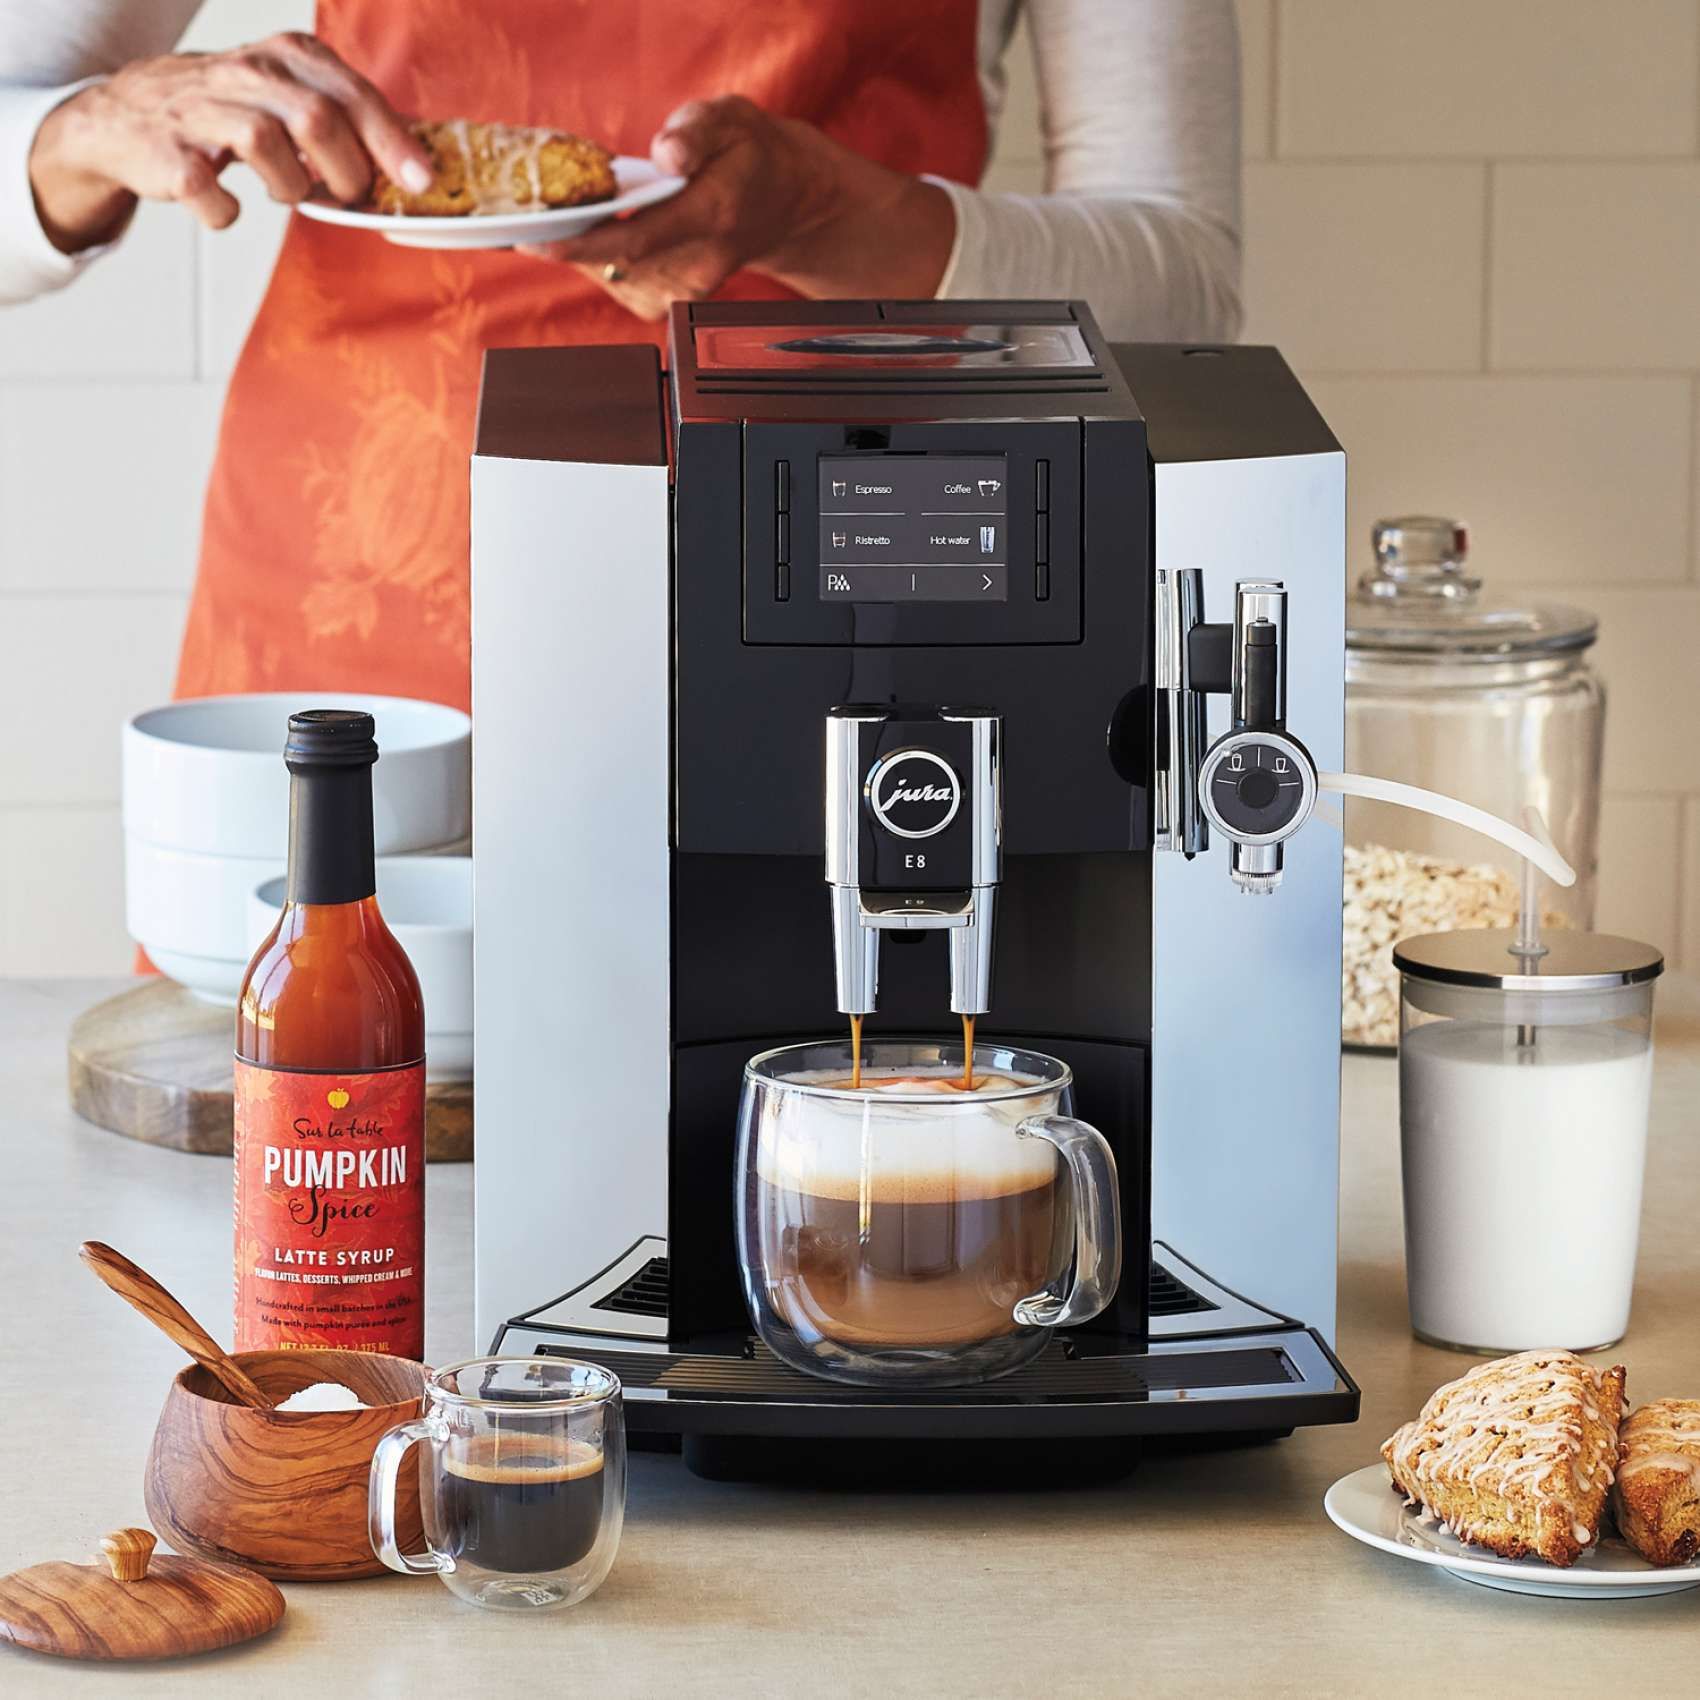
Before we dive into the details, let’s take a moment to appreciate the beauty of Jura coffee machines. Picture a sleek, modern design with a touch of elegance. Jura machines are designed to seamlessly blend in with any kitchen décor, while still grabbing attention with their stylish appearance.
Now that we’ve set the stage, let’s move on to the practical steps of using a Jura coffee machine. We’ll start with unboxing and setting up the machine, move on to familiarizing yourself with the control panel, and then dive into the details of preparing, grinding, and brewing the perfect cup of coffee.
But it doesn’t stop there! Proper maintenance and cleaning are vital for keeping your Jura coffee machine in top-notch condition. We’ll guide you through the process of cleaning your machine and provide essential maintenance tips to ensure its longevity.
And while Jura machines are known for their reliability, occasionally, you may encounter some common issues. But don’t worry – we’ll walk you through troubleshooting those problems so you can return to enjoying your delicious coffee without missing a beat.
Are you ready to unlock the full potential of your Jura coffee machine? Let’s get started on this exciting journey!
Key Takeaways:
- Elevate your coffee experience with Jura machines, from unboxing to troubleshooting. Embrace the art of brewing and maintenance for a seamless, flavorful cup every time.
- Master the art of brewing with Jura machines, from selecting beans to troubleshooting. Embrace the joy of crafting your perfect cup of coffee.
Read more: How To Fix Jura Coffee Machine
Step 1: Unboxing and Setting Up the Jura Coffee Machine
Before you can start brewing your favorite coffee, you’ll need to unbox and set up your Jura coffee machine. It’s an exciting moment, as you unwrap the packaging and unveil the beautiful machine that will soon bring you aromatic and flavorful cups of coffee.
Firstly, carefully remove all the components from the box, making sure not to damage any of the parts. Ensure that the machine is placed on a clean and stable surface, away from direct sunlight or sources of heat.
Next, give the machine a quick visual inspection. Check for any visible damage or loose parts. It’s always a good idea to refer to the user manual provided by Jura for more detailed instructions specific to your model.
After inspecting and ensuring the machine is intact, it’s time to prepare it for the setup process. Start by removing any protective film or stickers from the surface of the machine, including the display and buttons.
Now, it’s time to connect the machine to the power source. Locate the power cord and plug it into a grounded electrical outlet. Make sure the outlet is easily accessible and not obstructed.
Once the machine is plugged in, it’s time to fill the water tank. Most Jura coffee machines have a removable water tank located at the back or side of the machine. Take out the water tank, fill it with fresh, cold water, and then securely place it back into its position.
Now, it’s time to prime the machine, which is an important step that helps remove any air from the system. Refer to your specific model’s user manual for priming instructions, as the process may vary. In many cases, you’ll need to press the power button and allow the machine to go through a self-priming process.
During the priming process, the machine may dispense some water into the drip tray. It’s important to place the drip tray in its designated spot to catch any water or coffee spills.
Once the priming process is complete, your Jura coffee machine is almost ready for use. We recommend going through a quick cleaning cycle to ensure optimal performance. Some machines have automatic cleaning cycles, while others may require manual cleaning. Consult your user manual to determine the best method for your specific model.
With the initial setup complete, you’re now ready to move on to the next step: familiarizing yourself with the control panel and functions of your Jura coffee machine.
Step 2: Familiarizing Yourself with the Control Panel
Now that you have successfully set up your Jura coffee machine, it’s time to familiarize yourself with the control panel. The control panel is where you’ll access various functions and settings to customize your coffee brewing experience.
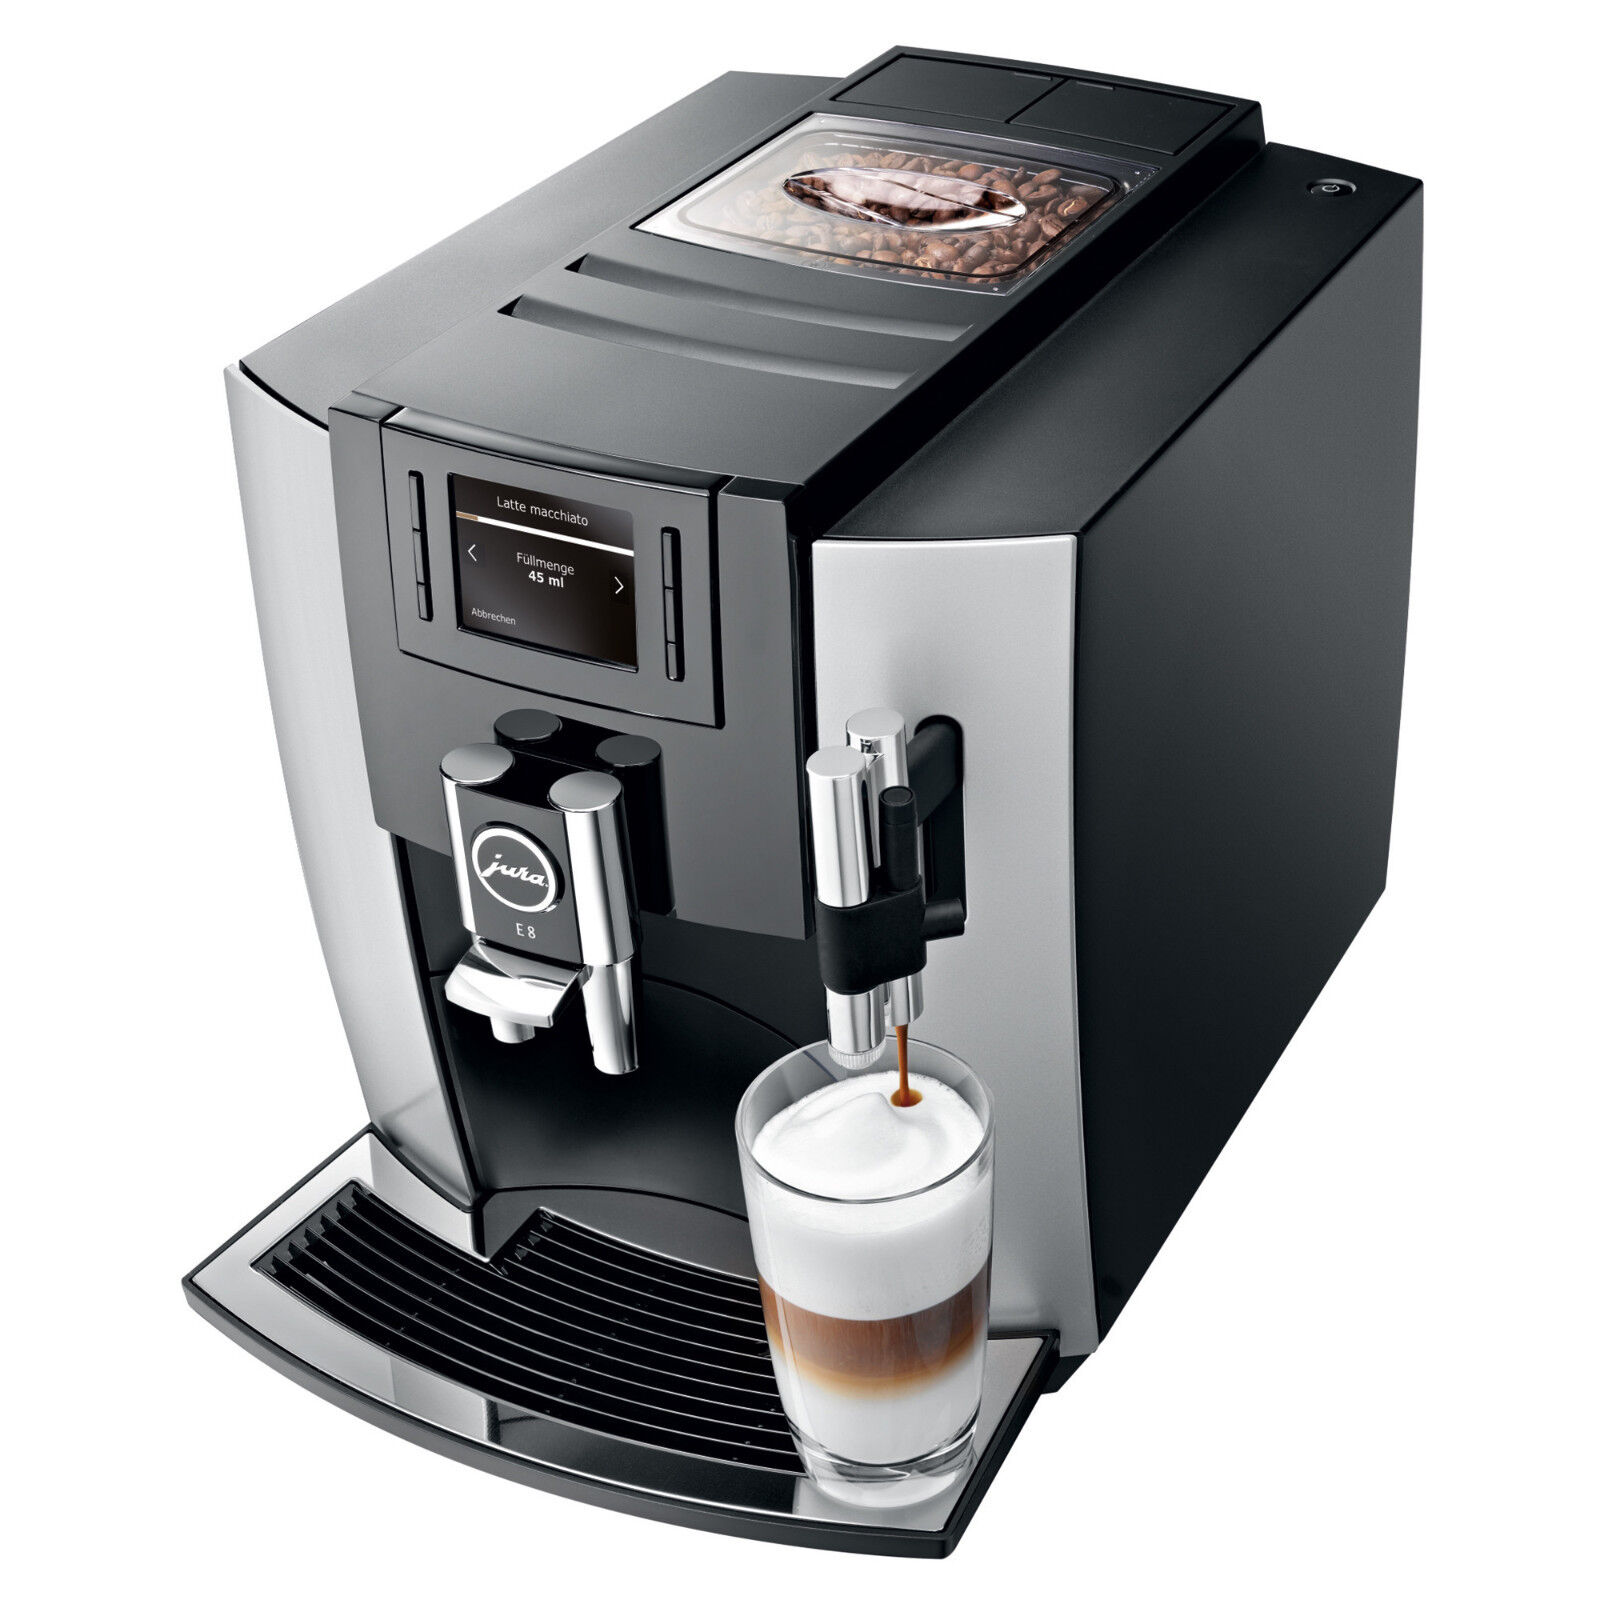
Take a moment to closely examine the control panel and familiarize yourself with the different buttons, icons, and displays. Each Jura coffee machine model may have a slightly different control panel layout, but they generally share some common features.
Start by locating the power button. This button is typically used to turn the machine on and off. It may also serve additional functions like entering standby mode or activating cleaning cycles.
Next, find the display panel. This is where you’ll see important information such as the coffee brewing settings, coffee strength, brewing progress, and any error messages. The display panel may be a simple LED screen or a more advanced LCD display, depending on your model.
Now, let’s move on to the buttons and icons. Look for buttons that allow you to select your desired brewing option, such as espresso, cappuccino, or latte. These buttons may be labeled with specific coffee icons or abbreviations.
Additionally, there may be buttons or icons for adjusting the coffee strength or cup size. These functions allow you to customize your coffee according to your preferences. Some Jura machines offer multiple strength levels, while others allow you to adjust the amount of coffee used per cup.
Other common buttons or icons you may find include steam and hot water buttons for frothing milk or dispensing hot water, aroma settings for adjusting the intensity of the coffee flavor, and a menu button for accessing advanced settings and programming options.
It’s important to spend some time experimenting with these buttons and exploring the different options available on your Jura coffee machine. This will help you understand the capabilities of your machine and allow you to brew coffee that suits your taste perfectly.
Remember to consult your user manual for more precise instructions on using the control panel of your specific Jura coffee machine model. The manual will provide detailed explanations of each button and its corresponding function.
With a good understanding of the control panel, you’re now ready to move on to the next step: preparing the machine for use.
Step 3: Preparing the Machine for Use
Now that you’re familiar with the control panel of your Jura coffee machine, it’s time to prepare the machine for brewing your favorite cup of coffee. Proper preparation ensures that your coffee machine is clean, warm, and ready to deliver a delicious and seamless coffee brewing experience.
Start by making sure the water tank is filled with fresh, cold water. Check the water level and refill if necessary. The water tank is typically located at the back or side of the machine and can be easily removed and reattached.
Next, ensure that the machine is switched on and in the ready state. Depending on your model, this may involve pressing the power button or waiting for the machine to reach the optimum temperature for brewing.
Some Jura coffee machines have an automatic rinsing feature. Before making your first cup of coffee, it’s a good idea to run a rinsing cycle to clean the internal components and remove any dust or residue. Consult your user manual for specific instructions on how to initiate the rinsing cycle.
Once the machine is ready, it’s time to prepare the brewing unit. Open the front panel of the machine to reveal the brewing unit. Depending on your model, this may involve lifting a lever or pressing a button.
Prior to inserting the coffee grounds, it’s important to check that the brewing unit is clean and free from any leftover grounds. Wipe away any residue with a clean, damp cloth if necessary.
Now, it’s time to select your coffee grounds and prepare them for brewing. Jura coffee machines are compatible with both pre-ground coffee and whole coffee beans. If using whole beans, ensure that you have a bean container attached to the machine and fill it with your desired coffee beans.
If you prefer using pre-ground coffee, you’ll need to add the coffee grounds into the designated compartment or bypass doser. Consult your user manual for specific instructions on how to insert pre-ground coffee.
With the coffee grounds ready, place a cup or mug under the coffee spout to catch the brewed coffee. Ensure that the cup is of an appropriate size to accommodate the amount of coffee you’re brewing.
Now, it’s time to initiate the brewing process. Refer to the control panel and select your desired brewing option, such as espresso, cappuccino, or latte. Adjust the settings for coffee strength and cup size, if applicable. Press the appropriate button to start the brewing process.
During the brewing process, the machine will grind the coffee beans (if using whole beans), extract the flavors, and dispense the brewed coffee into your cup. Enjoy the enticing aroma that fills the room as your Jura coffee machine works its magic!
Once the brewing process is complete, carefully remove the cup and savor your freshly brewed coffee. Don’t forget to properly dispose of the used coffee grounds and rinse out the cup.
Now that you’ve successfully prepared the machine, it’s time to move on to the next step: selecting and grinding the coffee beans.
Step 4: Selecting and Grinding the Coffee Beans
Choosing the right coffee beans and grinding them to the perfect consistency are crucial steps in achieving a flavorful and aromatic cup of coffee. Jura coffee machines provide the flexibility to use either whole coffee beans or pre-ground coffee, allowing you to customize your brewing experience.
When selecting coffee beans, it’s important to consider your personal taste preferences and desired coffee flavor profile. Whether you prefer a bold and intense espresso or a smooth and mellow brew, there are numerous coffee bean options available to cater to every palate.
Look for coffee beans that are freshly roasted and of high quality. Opt for beans that have a roast date within the past few weeks to ensure optimum flavor and aroma. Consider experimenting with different coffee bean origins and blends to discover your favorites.
If you choose to use whole coffee beans, ensure that your Jura coffee machine has a bean container attached. Open the bean container and pour in your selected coffee beans. Most Jura machines offer a bean hopper with a capacity that can accommodate a generous amount of beans.
Before grinding the coffee beans, it’s important to understand that different brewing methods require different grind sizes. For example, espresso typically requires a fine grind, while a coarser grind is suitable for pour-over or French press brewing.
Jura coffee machines usually have built-in grinders with adjustable settings to accommodate various grind sizes. Locate the grinder adjustment knob or access the grinder settings through the control panel.
Consult your user manual to understand how to adjust the grind size on your specific Jura coffee machine model. Start with a medium grind size and then make adjustments based on your personal preference and the desired coffee brewing method.
If you prefer using pre-ground coffee, your Jura coffee machine may feature a bypass doser. This doser allows you to add pre-ground coffee directly into the machine, bypassing the grinder. Refer to your user manual for instructions on how to use the bypass doser.
Once you have selected your coffee beans and determined the grind size, it’s time to start grinding. Select the appropriate brewing option on the control panel and press the start button. The machine will start grinding the beans and preparing them for brewing.
During the grinding process, you’ll be greeted with the captivating aroma of freshly ground coffee. The sound of the grinder working its magic is a beautiful symphony to any coffee lover’s ears.
With the coffee beans ground to perfection, you’re now ready to move on to the next step: brewing the perfect cup of coffee with your Jura coffee machine.
When using a Jura coffee machine, always ensure that the water reservoir is filled with fresh, cold water and that the coffee beans are of high quality and properly ground for the best results.
Read more: How To Clean Jura Coffee Machine
Step 5: Brewing the Perfect Cup of Coffee
With your Jura coffee machine set up, the coffee beans selected and ground to perfection, it’s time to dive into the art of brewing the perfect cup of coffee. Jura machines offer a range of brewing options, from single espresso shots to rich and creamy cappuccinos. Let’s explore the steps to achieve coffee nirvana:
1. Ensure that your cup or mug is placed under the coffee spout, ready to catch the brewed coffee. Make sure the cup is of an appropriate size for your desired coffee serving.
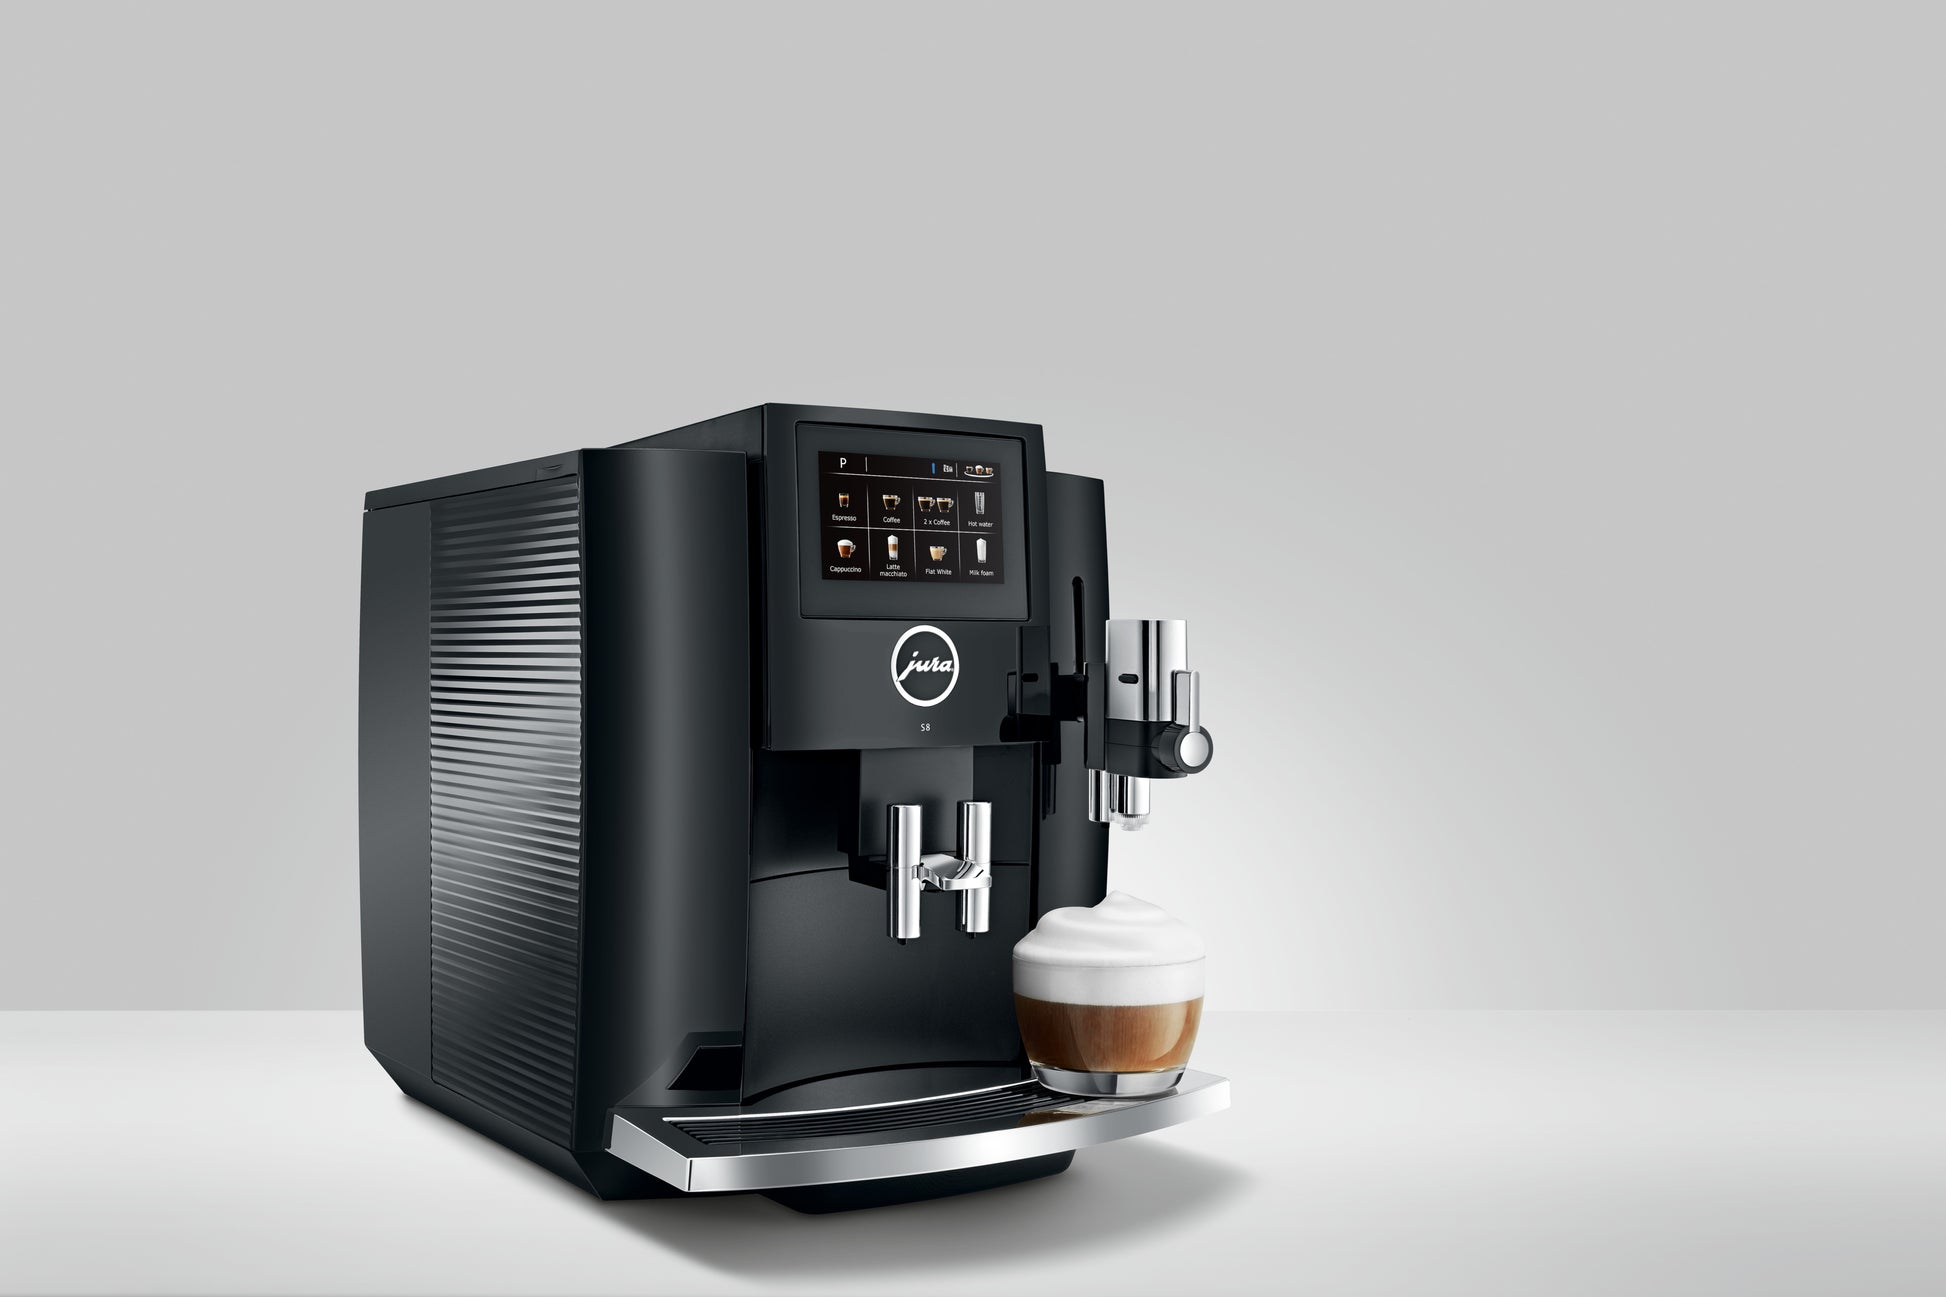
2. On the control panel, select your preferred brewing option. Jura machines usually offer a variety of choices, such as espresso, coffee, cappuccino, latte, and more. Some models even have pre-set coffee recipes for convenience.
3. Adjust the settings to customize your coffee profile. You can typically adjust factors like coffee strength, cup size, and temperature to suit your taste preferences. Experiment with different settings to find your ideal cup of coffee.
4. Once you’ve set your preferences, press the start button to begin the brewing process. Sit back and enjoy the mesmerizing sight as your Jura machine creates a masterpiece in your cup.
5. During the brewing process, you’ll witness a symphony of aroma, as the machine extracts the flavors from the coffee grounds and dispenses the aromatic liquid into your waiting cup. Take a moment to inhale the captivating scent that fills the air.
6. As your cup fills with the rich, flavorful brew, observe the beautiful layer of crema on top of your espresso shot. Crema is a sign of a well-extracted espresso and adds a velvety texture to the final cup. Take a mental note of the crema’s color and thickness, as these are indicators of a successful brew.
7. Once the brewing process is complete, carefully remove your cup from under the spout. Admire the beautiful essence of your creation, whether it’s a simple black coffee or an intricate latte art masterpiece.
8. Take a moment to appreciate the aroma, taste, and overall experience of sipping your freshly brewed coffee. Notice the nuances of flavor, the balance of acidity, sweetness, and bitterness, and the overall satisfaction of a well-crafted cup of joe.
9. After enjoying your coffee, remember to properly dispose of the used coffee grounds and clean your cup. Keeping your brewing area tidy and organized ensures a fresh start for your next brewing adventure.
Brewing the perfect cup of coffee is an art that takes practice and experimentation. With your Jura coffee machine, you have the tools to embark on a journey of coffee discovery. Pay attention to the details, experiment with different settings and coffee beans, and embrace the joy of brewing your own custom-made cup of coffee.
Now that you’ve mastered the art of brewing, it’s time to move on to the maintenance and cleaning of your Jura coffee machine, which we’ll explore in the next step.
Step 6: Cleaning and Maintenance of the Jura Coffee Machine
Maintaining a clean and well-maintained Jura coffee machine is essential for its longevity and optimal performance. Regular cleaning and maintenance ensure that your machine continues to deliver consistent and delicious cups of coffee. Let’s dive into the steps involved in cleaning and maintaining your Jura coffee machine:
1. Daily Cleaning: After each use, it’s important to clean the coffee spout and drip tray. Remove the drip tray and rinse it with warm, soapy water. Wipe the coffee spout with a damp cloth to remove any coffee residue or milk splatters. This quick daily cleaning routine prevents the build-up of dirt and keeps your machine looking fresh.
2. Milk System Cleaning: If your Jura coffee machine has a milk system, regular cleaning of the milk frother and milk tubes is necessary. Consult your user manual for instructions on how to clean the milk system. In most cases, you’ll need to run a cleaning cycle with a milk system cleaning solution to remove any milk residue and ensure proper hygiene.
3. Descaling: Over time, mineral deposits can build up in your Jura coffee machine’s internal components, affecting its performance and taste of the coffee. Descaling is an important maintenance task that involves removing these mineral deposits. Use a descaling agent specifically designed for Jura coffee machines and follow the instructions outlined in your user manual for the descaling process. This will help maintain the optimal functioning of your machine.
4. Cleaning the Water Tank: Regularly cleaning the water tank prevents the growth of bacteria and ensures optimal water quality for brewing. Empty the water tank and rinse it with warm, soapy water. For a more thorough cleaning, you can use a mixture of water and vinegar and allow it to sit in the tank for a short period before rinsing it out.
5. Cleaning the Grinder: The coffee grinder can become dirty over time due to the accumulation of coffee oils and residue. Refer to your user manual for instructions on how to clean the grinder. Some Jura machines have a built-in grinder cleaning cycle, while others may require manual cleaning using a brush or vacuum cleaner. Regular grinder cleaning ensures consistent grind quality and prevents any stale flavors from affecting your brewed coffee.
6. Check and Replace Filters: If your Jura coffee machine has filters, such as a water filter or a descaling filter, it’s important to regularly check their status and replace them as recommended by the manufacturer. Filters help maintain water quality and reduce the need for frequent descaling.
7. Regular Maintenance: In addition to routine cleaning, regular maintenance tasks can help keep your Jura coffee machine in excellent working condition. This includes lubricating moving parts, checking for any loose or worn-out components, and keeping the exterior of the machine clean and free from dust and debris. Refer to your user manual for specific maintenance instructions for your model.
By following these cleaning and maintenance practices, you can prolong the lifespan of your Jura coffee machine and ensure that it consistently delivers outstanding coffee. A well-maintained machine will reward you with a delightful coffee experience each time you brew.
Now let’s move on to the final step: troubleshooting common issues that may arise with your Jura coffee machine.
Step 7: Troubleshooting Common Issues
Even with regular maintenance and care, you may encounter some common issues with your Jura coffee machine. However, fear not! Many of these issues can be easily resolved with a few troubleshooting steps. Let’s take a look at some common problems and how to address them:
1. Machine Not Powering On: If your Jura coffee machine isn’t powering on, first check that it’s properly plugged into a working power outlet. If it’s plugged in but still not turning on, check if there’s a power switch on the machine that needs to be turned on. If the problem persists, consult your user manual for further troubleshooting steps or contact Jura customer support.
2. Coffee Not Brewing: If the machine is on and appears to be functioning, but no coffee is being brewed, check that the water tank is filled and properly inserted. Make sure the brewing unit is clean and free from any blockages. If using beans, check the bean container to ensure it’s not empty. Also, check the grind size settings and adjust as needed.
3. Weak or Watery Coffee: If your coffee is weak or watery, it may be due to insufficient coffee grounds or incorrect coffee strength settings. Ensure that you’re using an appropriate amount of coffee for your desired brew strength. Adjust the settings on the control panel to increase the coffee strength if necessary. Also, check that the grinder is properly calibrated for the desired consistency.
4. Machine Leaking or Dripping: If you notice water or coffee leaking from the machine, first check that the drip tray is properly inserted and not overflowing. Examine the coffee spout for any blockages or misalignments. If the issue persists, there may be a problem with the machine’s internal components, and it’s best to contact Jura customer support for assistance.
5. Grinder Malfunction: If the grinder is not working or producing inconsistent grind sizes, check that it’s not clogged with coffee residue. Clean the grinder following the manufacturer’s instructions. If the issue continues, consult your user manual for further troubleshooting steps or contact Jura customer support.
6. Error Messages: Your Jura coffee machine may display error messages on the control panel. These messages are designed to alert you to specific issues. Consult your user manual or the Jura website to understand the meaning of the error message and the appropriate steps to resolve it.
7. Unusual Noises: If your machine is making unusual noises during operation, it could indicate a problem with its internal mechanisms. Refer to your user manual for any specific troubleshooting steps or contact Jura customer support for guidance.
Remember, if you’re unable to resolve an issue on your own, don’t hesitate to reach out to Jura customer support for assistance. They are equipped with the knowledge and expertise to help you troubleshoot and resolve any problems you may encounter.
Congratulations! By following these troubleshooting steps, you’ll be able to overcome common issues and enjoy a smooth and seamless coffee experience with your Jura coffee machine.
Now that you’re armed with the knowledge of troubleshooting, it’s time to wrap up our guide to using the Jura coffee machine.
Conclusion
Using a Jura coffee machine can elevate your coffee brewing experience to new heights. With its user-friendly design, advanced features, and ability to produce delicious coffee, it’s no wonder that Jura is a trusted brand among coffee enthusiasts.
In this comprehensive guide, we’ve walked you through the steps of unboxing and setting up your Jura coffee machine, familiarizing yourself with the control panel, preparing the machine for use, selecting and grinding the coffee beans, brewing the perfect cup of coffee, cleaning and maintaining the machine, and troubleshooting common issues.
We’ve emphasized the importance of proper cleaning and maintenance to ensure the longevity and optimal performance of your Jura coffee machine. Regularly cleaning the coffee spout, drip tray, milk system (if applicable), and water tank will help ensure that your machine consistently delivers superb coffee.
By selecting the right coffee beans and grinding them to the appropriate consistency, you can achieve a personalized and flavorful cup of coffee. Experiment with different settings and become the master of brewing your perfect cup each time.
Lastly, we’ve provided troubleshooting steps to address common issues that may arise with your Jura coffee machine. With a little troubleshooting know-how, you’ll be able to overcome any obstacles and continue enjoying your coffee without missing a beat.
Remember, your Jura coffee machine is more than just a kitchen appliance—it’s a gateway to a world of delicious coffee. Embrace the opportunities it offers, experiment with flavors, and enjoy the experience of brewing your own professionally crafted cup of joe.
So go ahead, embrace your inner barista, and savor the delightful journey that awaits you with your Jura coffee machine. Happy brewing!
Now that you've mastered your Jura coffee machine, why stop there? Dive deeper into the art of coffee making with our guide on how to make espresso in a coffee machine. Perfect your espresso shots to impress friends and family. Next, consider the purity of your brew. Reading our latest roundup on best water filtration systems for 2024 might just be what you need for cleaner, tastier coffee every time. Both guides are packed with useful tips to help you get the most out of your coffee experience!
Frequently Asked Questions about How To Use Jura Coffee Machine
Was this page helpful?
At Storables.com, we guarantee accurate and reliable information. Our content, validated by Expert Board Contributors, is crafted following stringent Editorial Policies. We're committed to providing you with well-researched, expert-backed insights for all your informational needs.
0 thoughts on “How To Use Jura Coffee Machine”