Articles
How To Use Miele Microwave Oven
Modified: February 26, 2024
Discover articles on how to use the Miele microwave oven and unlock its full potential. Explore tips, tricks, and recipes for perfect microwave cooking.
(Many of the links in this article redirect to a specific reviewed product. Your purchase of these products through affiliate links helps to generate commission for Storables.com, at no extra cost. Learn more)
Introduction
Welcome to the world of Miele Microwave Ovens! Whether you’re a seasoned chef or just starting your culinary journey, this article will guide you on how to make the most of your Miele Microwave Oven. With its advanced features and intuitive controls, you’ll be able to effortlessly create delicious meals and explore a whole new world of cooking possibilities.
Miele is known for its exceptional quality and innovative design, and their microwave ovens are no exception. Packed with cutting-edge technology and thoughtful features, these appliances make cooking faster, easier, and more efficient than ever before. From defrosting and reheating to grilling and combination cooking, your Miele Microwave Oven has got you covered.
Before we dive into the various functions and features, let’s talk about some important safety precautions to ensure your cooking experience is enjoyable and accident-free. It’s always best to be well-informed and take necessary precautions when using any kitchen appliance, and your microwave oven is no exception.
Firstly, make sure to read the user manual provided with your Miele Microwave Oven. It contains essential information on safety guidelines, usage instructions, and maintenance tips. Familiarize yourself with the contents to ensure safe and proper use of your appliance.
Secondly, when unpacking and installing your microwave oven, carefully follow the manufacturer’s instructions. Ensure that there is adequate ventilation around the appliance to prevent overheating. Avoid placing any objects, especially flammable materials, on top of or near the microwave oven.
Keep children away from the appliance when it is in use, as the interior and exterior surfaces can become hot. It’s also important to never operate the microwave oven with an empty cavity or without the supplied turntable in place.
Always use microwave-safe cookware and containers when cooking or reheating food. Do not use metal utensils or foil inside the microwave oven, as they can cause sparks or fire. Additionally, be cautious when handling hot food or liquids to avoid burns.
By following these safety precautions, you can ensure a safe and enjoyable cooking experience with your Miele Microwave Oven. Now that you’re familiar with the safety guidelines, let’s explore the various functions and features of your appliance in the following sections.
Key Takeaways:
- Master the art of safe and efficient cooking with your Miele Microwave Oven by following essential safety precautions, understanding its components, and utilizing its versatile functions.
- Keep your Miele Microwave Oven in top shape by practicing regular cleaning and maintenance, and confidently troubleshoot common issues to ensure continued performance and functionality.
Read more: How To Use Microwave Oven
Safety Precautions
When it comes to cooking with your Miele Microwave Oven, prioritizing safety is paramount. By following these safety precautions, you can enjoy your culinary adventures without any glitches or mishaps.
- Read the User Manual: Start by carefully reading the user manual that comes with your Miele Microwave Oven. It contains vital information about safety guidelines, usage instructions, and maintenance tips. Familiarize yourself with the contents to ensure safe and proper use of your appliance.
- Installation and Ventilation: When unpacking and installing your microwave oven, make sure to follow the manufacturer’s instructions. Ensure that there is sufficient ventilation around the appliance to prevent overheating. Avoid blocking the vents and keep flammable materials away from the microwave oven to reduce the risk of fire.
- Child Safety: Keep children away from the microwave oven when it is in use. The interior and exterior surfaces can become extremely hot and pose a burn risk. If you have young children, consider installing a child lock feature to prevent unintended operation of the microwave oven.
- Proper Placement: Place your Miele Microwave Oven on a stable and level surface. Avoid placing it near heat sources or flammable materials. Ensure that there is enough space around the appliance for proper ventilation and to prevent any interference with other kitchen appliances.
- Microwave-Safe Cookware: Always use microwave-safe cookware and containers when cooking or reheating food. These are specially designed to withstand the heat generated by the microwave oven. Avoid using metal utensils or foil inside the microwave, as they can cause sparks and potentially damage the appliance.
- Empty Cavity: Never operate the microwave oven with an empty cavity or without the turntable in place. This can lead to damage to the oven and is not safe. Always ensure that there is food or a microwave-safe container inside when using the appliance.
- Hot Food and Liquids: Exercise caution when handling hot food or liquids from the microwave oven. Use oven mitts or heat-resistant gloves to avoid burns. Stir liquids and test the temperature before consuming or handling to prevent scalding.
- Cleaning and Maintenance: Regularly clean the interior and exterior of your Miele Microwave Oven to prevent the accumulation of dirt and grease. Follow the manufacturer’s recommendations for cleaning and maintenance procedures. Ensure that the appliance is unplugged before cleaning.
By adhering to these safety precautions, you can create a safe environment for cooking with your Miele Microwave Oven. Remember, safety should always be the top priority in the kitchen, and being aware of these guidelines will help you enjoy your appliance to the fullest while minimizing any potential risks.
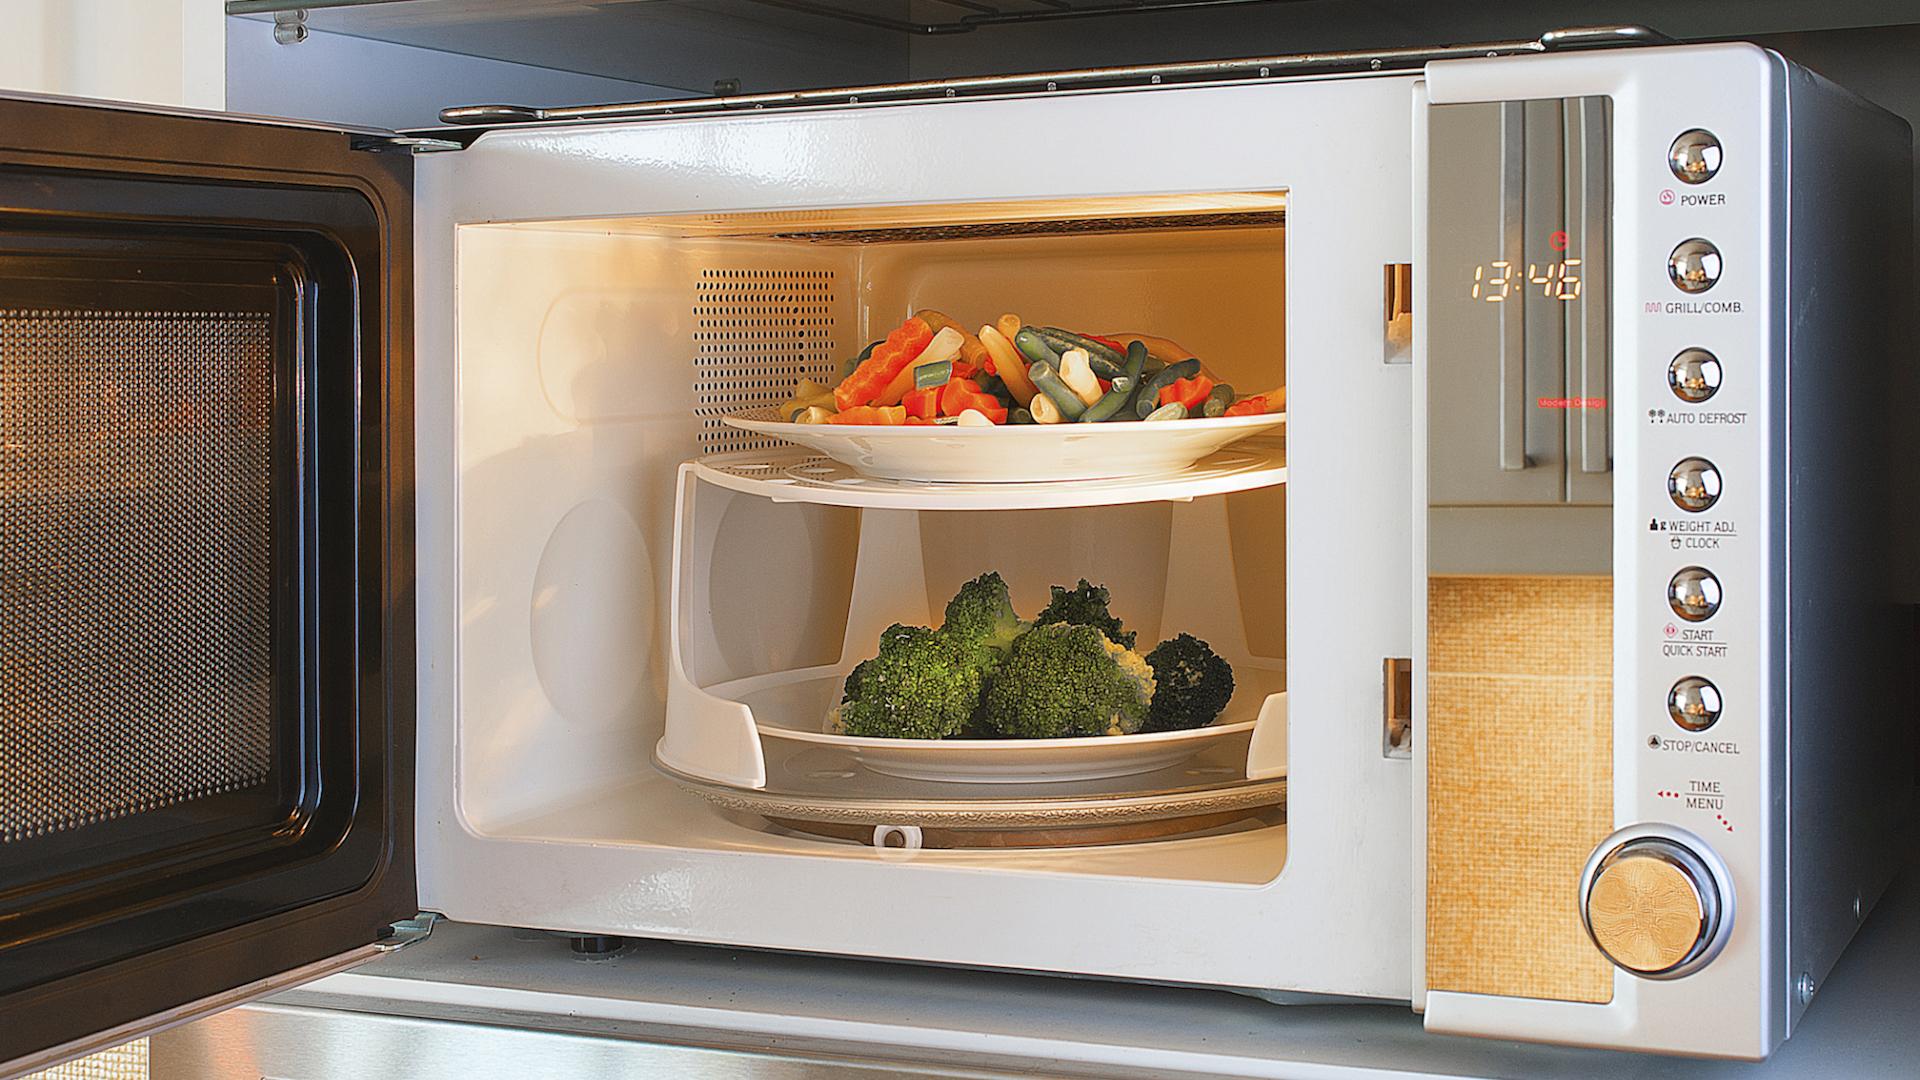
Getting to Know Your Miele Microwave Oven
Before you start cooking up a storm with your Miele Microwave Oven, it’s important to become familiar with its various components and features. Understanding how everything works will help you make the most out of your appliance and achieve delicious results.
Here are the key elements you should know:
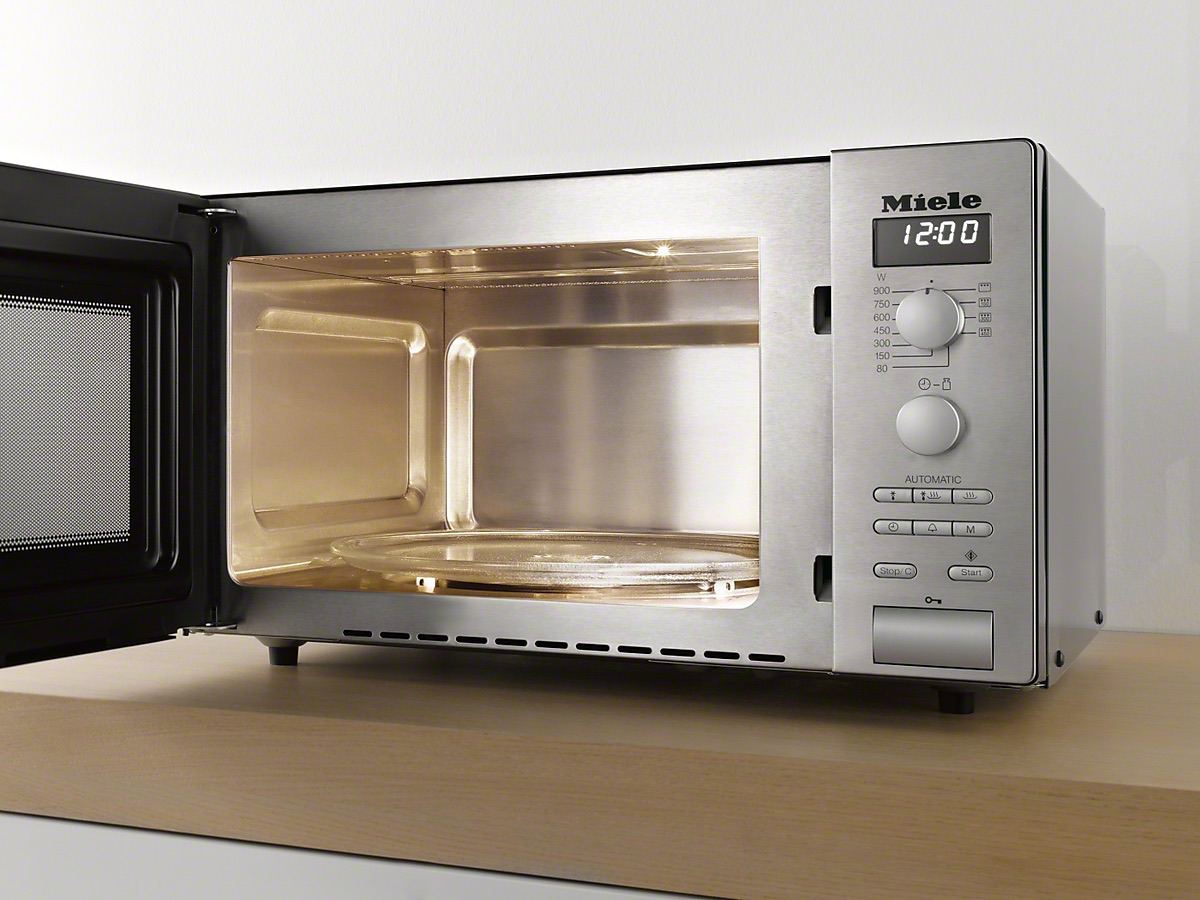
- Microwave Cavity: This is the interior compartment of the microwave oven where you place your food or containers for cooking or reheating. It is usually made of stainless steel, which is easy to clean and helps distribute heat evenly.
- Turntable: The turntable is a rotating glass plate located inside the microwave cavity. Its purpose is to ensure even cooking by allowing the food to rotate as the microwaves heat it. It is essential to always place the turntable back in its proper position before using the microwave oven.
- Control Panel: The control panel is where you interact with your Miele Microwave Oven. It contains various buttons, a display screen, and sometimes a rotary knob. This is where you will select functions, adjust cooking settings, and set the timer.
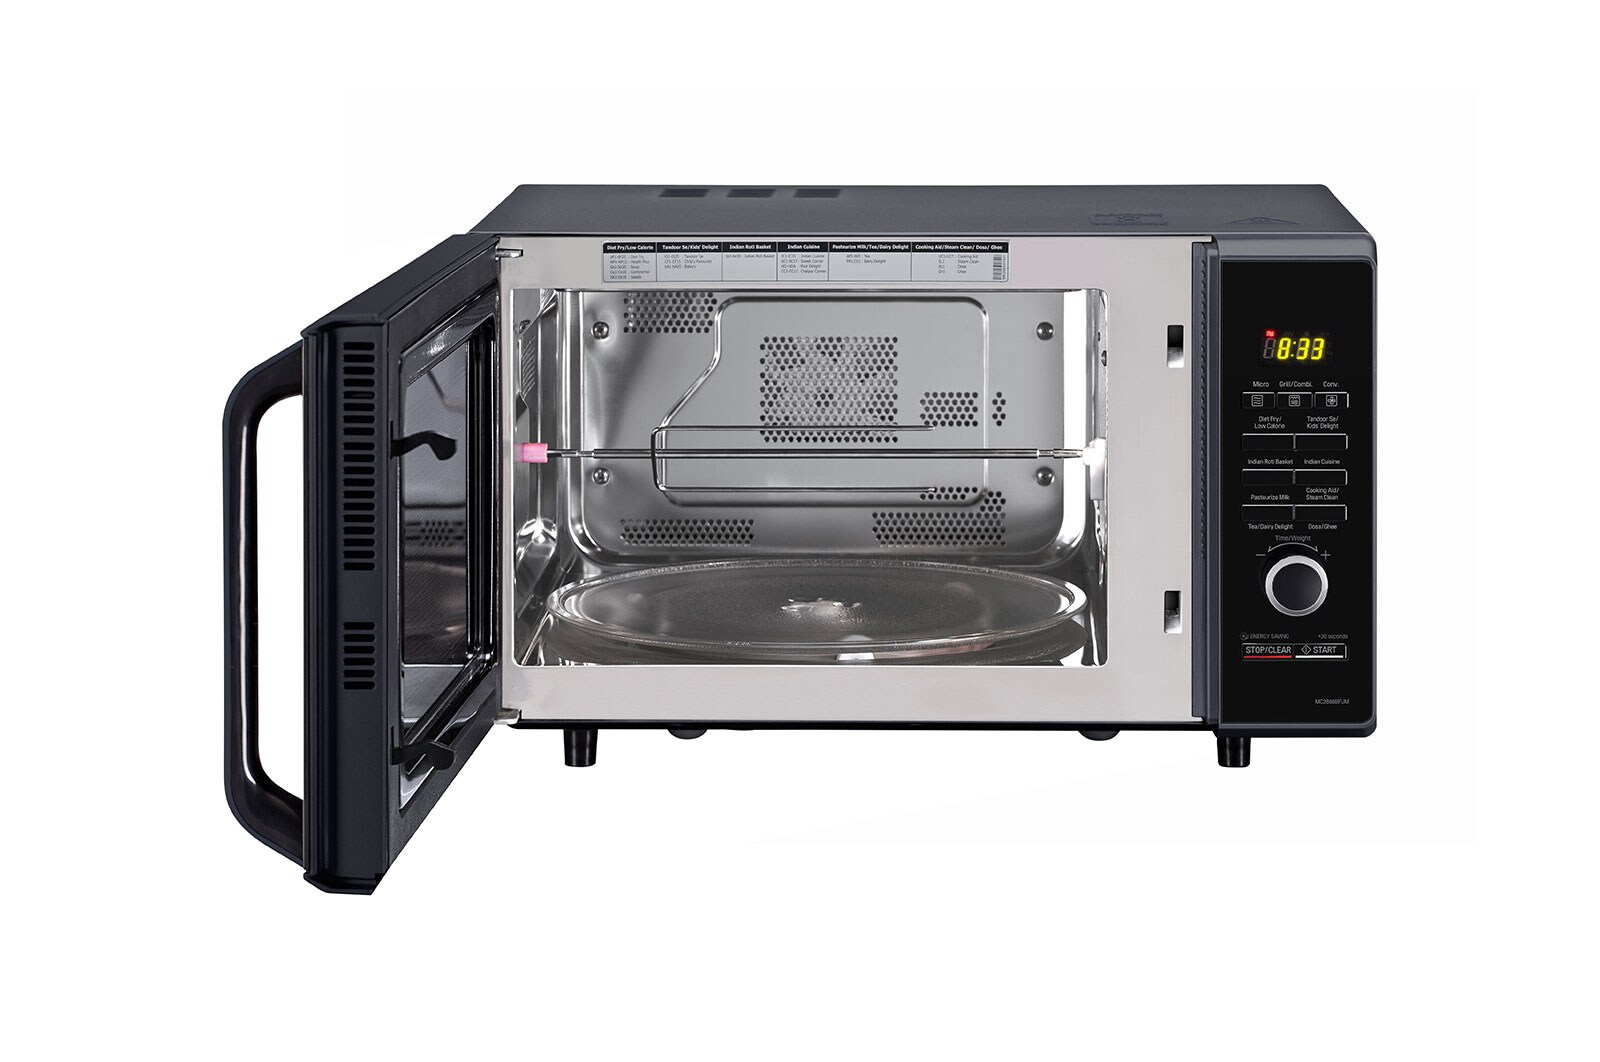
- Function Buttons: These buttons allow you to choose the desired cooking method or function. Common function buttons on a Miele Microwave Oven include “Microwave,” “Grill,” “Combination Cooking,” and “Defrost.”
- Power Level and Time Buttons: These buttons help you adjust the power level and cooking time as per your requirements. You can increase or decrease the power level, depending on the dish you are preparing. The time buttons allow you to set the desired cooking time.
- Display Screen: The display screen provides information about the settings, cooking time, and other important details. It allows you to monitor the progress of your cooking and make any necessary adjustments.
- Door and Safety Lock: The microwave oven door should be securely closed for proper operation. Some models may have a safety lock feature that prevents accidental opening during cooking. This feature ensures your safety and prevents any potential harm.
- Accessories and Attachments: Your Miele Microwave Oven may come with a range of accessories and attachments, such as a grill rack, baking tray, or steam container. These add versatility to your cooking options and allow you to explore different recipes and techniques.
Take the time to thoroughly read the user manual provided with your Miele Microwave Oven. It will provide detailed instructions on how to use each component, along with valuable tips and tricks for optimal performance.
Now that you have a good understanding of the key features and components of your Miele Microwave Oven, it’s time to move on to setting up and configuring your appliance. We’ll cover this in the next section, so you can start cooking up your favorite dishes with ease and confidence.
Setting Up Your Microwave Oven
Setting up your Miele Microwave Oven properly is essential to ensure optimal performance and safe operation. Here are the steps to follow when installing and configuring your appliance:
- Choose the Right Location: Select a suitable location for your microwave oven. Ensure that there is enough space around the appliance for proper ventilation and that it is away from heat sources and flammable materials. A stable and level countertop or surface is ideal.
- Check the Power Requirements: Make sure you have the appropriate power supply for your microwave oven. Check the voltage and wattage requirements specified in the user manual. Use a power outlet that is grounded and easily accessible.
- Unpack and Inspect: Carefully remove the microwave oven from its packaging and inspect it for any visible damage. Check for any loose parts or accessories, and ensure everything is in working order before proceeding further.
- Clean the Interior: Before using your microwave oven for the first time, clean the interior with a mild soap and water solution. Wipe it dry with a clean cloth. This will remove any dust or residue from the manufacturing and packaging process.
- Install the Turntable: Place the turntable securely on the rotating mechanism in the center of the microwave cavity. Ensure that it sits flat and does not wobble. This will ensure even cooking and prevent any accidents during operation.
- Plug in and Test: Connect the power cord of your Miele Microwave Oven to a grounded power outlet. Turn on the oven and test its basic functionality by running a short microwave cycle. Listen for any unusual noises or vibrations, and check if the turntable rotates properly.
- Set the Clock: Most microwave ovens require you to set the clock before you can use other functions. Follow the instructions in the user manual to set the correct time and date. This will enable you to use the timer and other time-related features.
- Explore the User Manual: Once the initial setup is complete, take the time to thoroughly read the user manual. It will provide detailed instructions on how to use the various functions and features of your Miele Microwave Oven. Familiarize yourself with the available options and settings.
By following these steps, you can ensure that your Miele Microwave Oven is set up correctly and ready to use. Remember to refer to the user manual for any specific instructions or precautions related to your model. Now that your microwave oven is set up, we can delve into the different functions and features in the next sections.
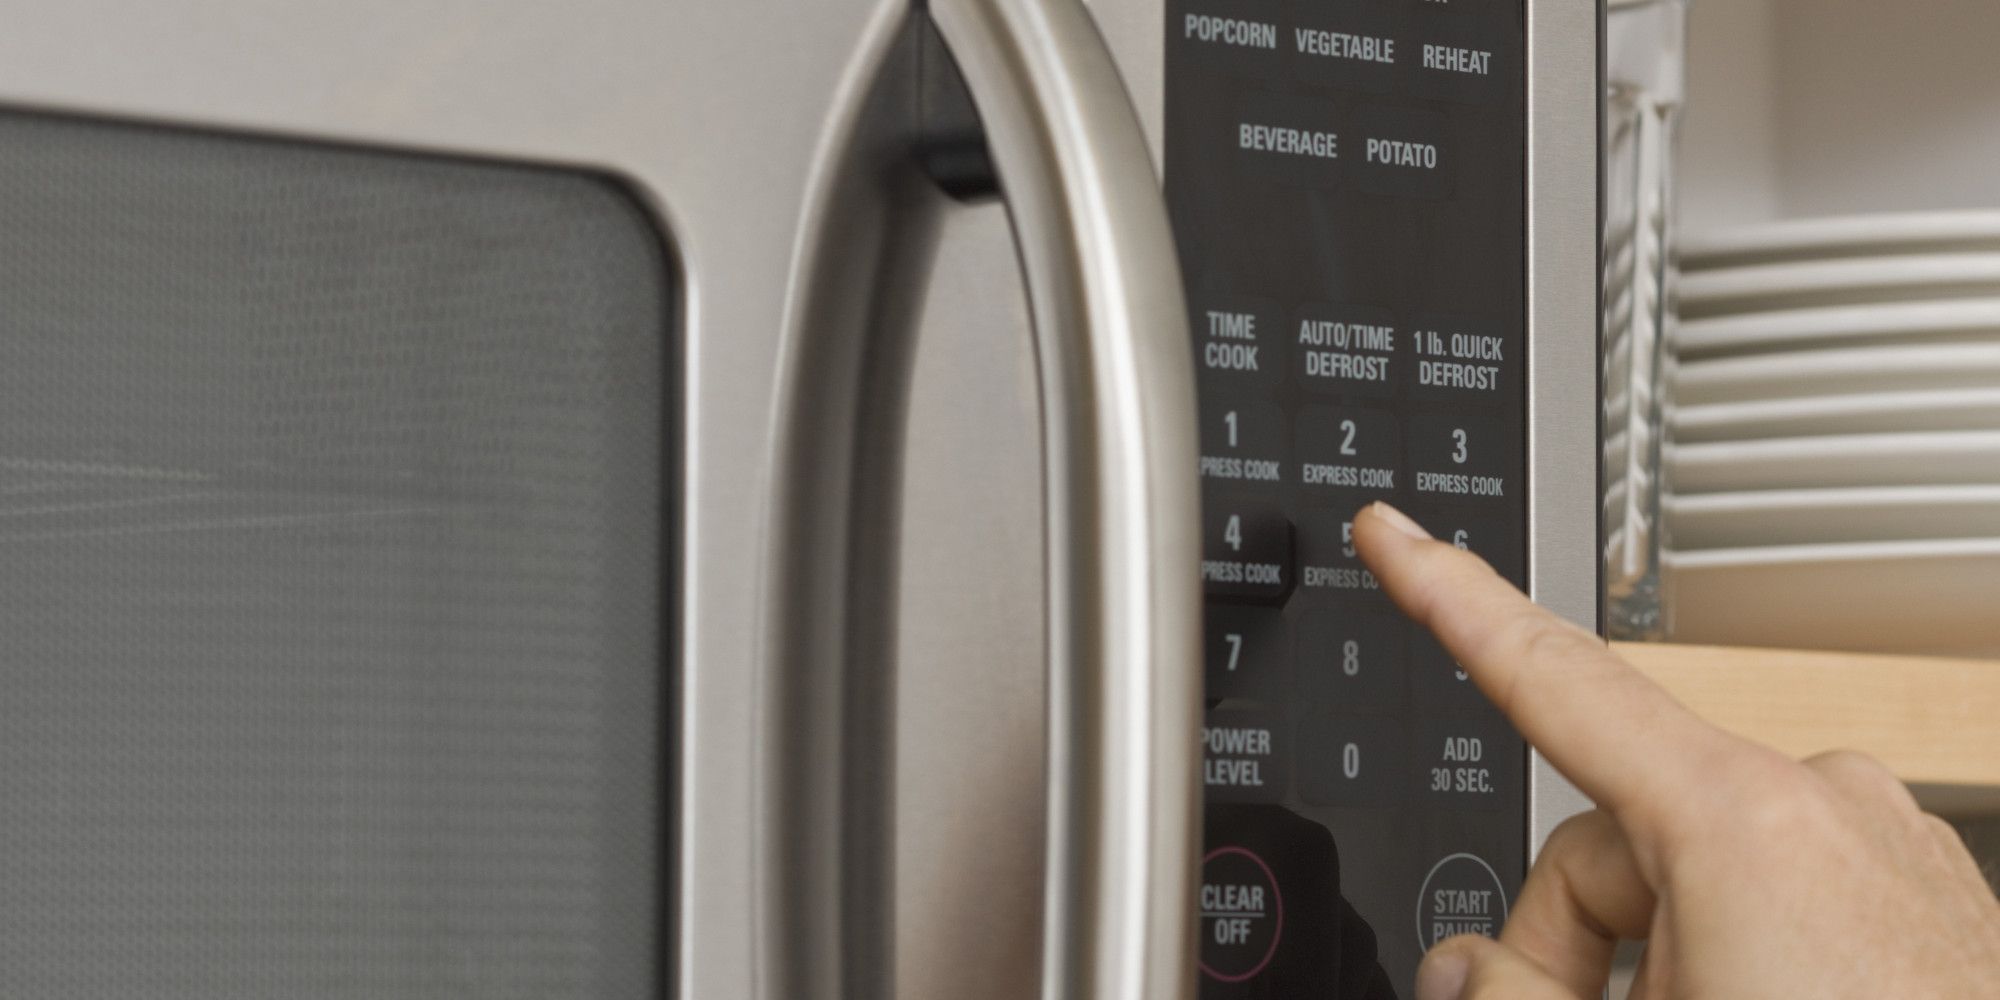
Using the Control Panel
The control panel of your Miele Microwave Oven is where you interact with the appliance and select various functions and settings. Understanding how to navigate the control panel will ensure that you can easily operate your microwave oven and make the most out of its features.
Here are the key components and functions of the control panel:
- Display Screen: The display screen provides visual feedback and displays important information, such as the selected function, cooking time, and power level. It allows you to monitor the progress of your cooking and make any necessary adjustments.
- Function Buttons: These buttons allow you to choose the desired cooking method or function. Common function buttons on a Miele Microwave Oven include “Microwave,” “Grill,” “Combination Cooking,” and “Defrost.” Press the respective function button to select the mode you want to use.
- Power Level Buttons: Use these buttons to adjust the power level at which your food will be cooked. Most microwave ovens offer multiple power levels, allowing you to customize the cooking process based on your preferences or the requirements of the dish you are preparing.
- Time Buttons: These buttons help you set the desired cooking time for your dish. Press the “+” or “-” buttons to increase or decrease the cooking time. Some models may also include a separate “Timer” button for setting a specific duration for other purposes, such as defrosting or timing an auxiliary process.
- Start/Stop Button: Once you have selected the desired function, power level, and cooking time, press the Start button to initiate the cooking process. Pressing the Stop button will immediately halt the cooking cycle.
- Additional Buttons: Depending on the specific model of your Miele Microwave Oven, you may find additional buttons for specific functions, such as pre-set cooking programs, sensor cooking, or multi-step cooking sequences. Consult the user manual to familiarize yourself with all the available options.
To use your microwave oven, simply follow these steps:
- Review the recipe or cooking instructions to determine the appropriate function, power level, and cooking time.
- Press the respective function button (e.g., Microwave, Grill, Combination Cooking) to select the desired cooking mode.
- Adjust the power level, if necessary, using the dedicated buttons. Select a lower power level for gentler cooking or defrosting and a higher power level for faster and more intense cooking.
- Set the cooking time by pressing the time buttons. Use the “+” and “-” buttons to increase or decrease the cooking duration.
- Press the Start button to begin the cooking process.
- Monitor the progress of your cooking on the display screen and make any adjustments as needed.
- Once the cooking time has elapsed, carefully remove the cooked food from the microwave oven using oven mitts or heat-resistant gloves.
- Press the Stop button to stop the cooking process and turn off the microwave oven.
Remember to consult the user manual provided with your Miele Microwave Oven for any additional instructions or specific settings related to your model. With a little practice, you’ll become proficient in navigating the control panel and using your microwave oven to prepare a wide variety of delicious meals.
Read more: How To Use Samsung Microwave Oven
Basic Functions
Your Miele Microwave Oven offers a range of basic cooking functions that allow you to easily heat, cook, and defrost a variety of foods. Let’s explore these functions in more detail:
- Microwave: The microwave function is a fundamental feature of your Miele Microwave Oven. It utilizes microwaves to heat food quickly and efficiently. This function is perfect for reheating leftovers, cooking simple meals, and defrosting frozen foods. You can adjust the power level and cooking time to suit your needs.
- Grill: The grill function allows you to achieve that perfect crispy and golden-brown finish on your dishes. It emits intense heat from the grill element, which is located at the top of the microwave cavity. This function is ideal for grilling meats, toasting bread, or browning the top of casseroles.
- Combination Cooking: The combination cooking function combines the power of both microwaves and grilling elements. It allows you to cook dishes quickly while still achieving that desired grilled texture and flavor. This function is great for cooking dishes that require a crispy exterior and tender interior, such as roasted meats or baked goods.
- Defrost: The defrost function is a handy feature for safely and efficiently defrosting frozen foods. It uses a lower power level and specific time settings to thaw your food without cooking it. This helps to preserve the food’s texture and taste while readying it for further cooking or immediate consumption.
To utilize these basic functions, follow these general steps:
- Select the desired function by pressing the respective button on the control panel.
- Adjust the power level if necessary. Lower power levels are suitable for gentle reheating or defrosting, while higher power levels are better for cooking or grilling.
- Set the appropriate cooking time using the time buttons. Refer to the recipe or cooking instructions for guidance on the recommended duration.
- Press the Start button to begin the cooking process.
- Monitor the progress on the display screen and make any adjustments if needed.
- Once the cooking or defrosting is complete, carefully remove the food from the microwave oven using oven mitts or heat-resistant gloves.
- Press the Stop button to stop the cooking process and turn off the microwave oven.
Experiment with different power levels, cooking times, and combinations of functions to discover the best settings for your favorite recipes. Keep in mind that cooking times may vary depending on the quantity and density of the food. It’s always a good idea to check the internal temperature of meat and the doneness of other dishes before serving.
By mastering these basic functions, you’ll have the foundation to explore more advanced techniques and recipes with your Miele Microwave Oven. And don’t forget to consult the user manual for your specific model to familiarize yourself with any additional features or settings unique to your appliance.
Using the Microwave Function
The microwave function of your Miele Microwave Oven is perfect for quickly heating, cooking, and reheating a wide range of foods. Whether you want to warm up leftovers, prepare a quick snack, or defrost frozen ingredients, the microwave function is a versatile option that saves time and energy.
Here’s how to utilize the microwave function effectively:
- Select the Microwave Function: Press the “Microwave” button on the control panel to activate the microwave function. The display screen will indicate that the microwave function is active.
- Adjust the Power Level: Determine the appropriate power level for your dish. Lower power levels are suitable for gentle reheating or defrosting delicate foods, while higher power levels are better for cooking or heating denser items. Use the power level buttons to adjust the intensity as needed.
- Set the Cooking Time: Use the time buttons to set the desired cooking duration. The cooking time will vary depending on the food and quantity. Refer to the recipe or cooking instructions for guidance on the recommended duration. Alternatively, use the pre-set time options if available.
- Place the Food in the Microwave: Arrange the food or container in the microwave cavity. Use microwave-safe cookware or dishes to ensure safe and effective heating. Properly cover or wrap food to prevent splatters and retain moisture.
- Start the Microwave: Press the Start button to initiate the cooking process. The microwave oven will begin to emit microwaves, which will penetrate the food and generate heat. The display screen will show the countdown timer, allowing you to monitor the progress.
- Pause and Stir (if necessary): For larger dishes or items with uneven heating, it may be necessary to pause the microwave mid-cycle and give the food a stir. This helps distribute the heat evenly and ensures thorough cooking. Use caution when removing the dish from the microwave, as it may be hot.
- Check for Doneness: When the cooking time is complete, carefully remove the dish from the microwave using oven mitts or heat-resistant gloves. It’s always a good idea to check the internal temperature of food, particularly meat, using a food thermometer to ensure it has reached the desired level of doneness.
- Let Stand: Allow the food to rest for a few minutes before serving. This allows for even distribution of heat and helps prevent burns from hot steam or liquids.
- Clean the Microwave: Once you’re finished using the microwave, clean the interior of the microwave oven. Wipe away any spills or residue with a damp cloth or sponge. Ensure the microwave oven is unplugged before cleaning.
It’s important to note that not all dishes are suitable for the microwave function. Avoid using metal utensils or containers, as they can cause sparks or damage the microwave oven. Additionally, be cautious when heating liquids, as they can become superheated and rapidly boil when disturbed.
By using the microwave function effectively, you can save time in the kitchen and efficiently prepare a variety of dishes. Experiment with different power levels and cooking times to find the ideal settings for your favorite recipes. Remember to consult the user manual for your specific model for any additional instructions or guidelines provided by Miele.
Using the Grill Function
The grill function of your Miele Microwave Oven is a fantastic feature that allows you to achieve a delectable grilled texture and flavor on a variety of foods. From perfectly seared meats to crispy toasted bread, the grill function adds a whole new dimension to your culinary creations.
Here’s how to use the grill function effectively:
- Select the Grill Function: Press the “Grill” button on the control panel to activate the grill function. The display screen will indicate that the grill function is active.
- Preheat the Grill: Preheat your Miele Microwave Oven with the grill function on the desired power level. This allows the grill element to reach the optimum temperature for efficient and even cooking. Refer to the user manual for specific instructions on preheating times.
- Prepare the Food: Season and prepare the food you wish to grill. Whether it’s marinated meat, vegetables, or bread, make sure the ingredients are ready and properly arranged on a grill rack or suitable cookware. For even cooking, ensure the food is evenly spread out and not overcrowded.
- Place the Food in the Microwave: Carefully place the prepared food on the grill rack or cookware inside the microwave cavity. Position it as close to the grill element as possible to achieve a desirable browning effect.
- Set the Cooking Time: Use the time buttons on the control panel to set the desired cooking duration. Keep in mind that cooking times may vary depending on the thickness and type of food. Consult recipes or cooking instructions for guidance.
- Start the Grill: Press the Start button to initiate the grilling process. The grill element will emit intense heat, creating a searing effect on the food. Monitor the cooking process and adjust the heat level or cooking time if necessary.
- Flip or Rotate the Food: Depending on the recipe or desired level of browning, you may need to flip or rotate the food halfway through the grilling process. This ensures even cooking and helps achieve a uniform crust or sear.
- Check for Doneness: When the cooking time is complete, carefully remove the grilled food from the microwave using oven mitts or heat-resistant gloves. Check for desired doneness using a food thermometer or visual cues. Let the food rest for a few minutes before serving.
- Clean the Grill: Once you’re finished using the grill function, clean the grill rack or cookware according to the manufacturer’s instructions. Remove any food debris or residue before storing or using again.
It’s essential to exercise caution when using the grill function. Always follow safety guidelines and avoid leaving the microwave unattended while the grill function is active. Be aware that the grill element and the microwave cavity can become extremely hot during grilling, so handle with care and use oven mitts or heat-resistant gloves.
The grill function of your Miele Microwave Oven opens up a world of possibilities for creating restaurant-quality grilled dishes at home. Experiment with different marinades, cooking times, and ingredients to discover new flavors and textures. As always, consult the user manual for specific instructions and recommendations provided by Miele.
Using the Combination Cooking Function
The combination cooking function of your Miele Microwave Oven combines the power of microwaves and grilling elements to provide you with a versatile cooking method. This function allows you to achieve the best of both worlds – fast microwaving and the desired texture and flavor of grill cooking.
Here’s how to use the combination cooking function effectively:
- Select the Combination Cooking Function: Press the “Combination Cooking” button on the control panel to activate the combination cooking function. The display screen will indicate that the combination cooking function is active.
- Preheat the Oven (if necessary): Some models require preheating for the combination cooking function. If this is the case for your Miele Microwave Oven, follow the instructions in the user manual for the recommended preheating time and power level. Preheating ensures that the grill element reaches the optimal temperature for efficient cooking.
- Prepare the Food: Season, marinate, and prepare your ingredients according to the recipe or your preferences. Arrange the food on a suitable grill rack or cookware, ensuring it is evenly spread out for uniform cooking.
- Place the Food in the Microwave: Carefully position the food on the grill rack or cookware inside the microwave cavity. Place it as close to the grill element as possible for a desired browning effect.
- Set the Cooking Time and Power Level: Use the time and power level buttons on the control panel to set the desired cooking duration and power level. Adjust the settings based on the recipe or your preferences. The combination cooking function allows you to customize the cooking process by utilizing different power levels and cooking times.
- Start the Combination Cooking: Press the Start button to initiate the combination cooking process. The microwave will emit microwaves while the grill element emits intense heat. Monitor the cooking progress and adjust the settings as needed.
- Flip or Rotate the Food: Depending on the recipe or desired level of browning, you may need to flip or rotate the food during the cooking process. This ensures even cooking and helps achieve a uniformly browned or seared result.
- Check for Doneness: When the cooking time is complete, use oven mitts or heat-resistant gloves to carefully remove the food from the microwave. Check for desired doneness using a food thermometer or visual cues. Allow the food to rest for a few minutes before serving.
- Follow Cleaning Instructions: After using the combination cooking function, clean the grill rack or cookware as specified by the manufacturer’s instructions. Remove any food debris or residue before storing or using again.
The combination cooking function provides you with the flexibility to achieve the desired texture and taste of grilled dishes while benefiting from the speed and convenience of microwaving. Experiment with different combinations of power levels, cooking times, and ingredients to create unique and flavorful meals.
Always consult the user manual for your specific model to familiarize yourself with any additional instructions or recommendations provided by Miele. With the combination cooking function, you can take your culinary skills to new heights and impress your family and friends with delicious and perfectly cooked creations.
Read more: How To Use Convection Microwave Oven
Defrosting Food
The defrost function of your Miele Microwave Oven is a convenient feature that allows you to quickly and safely thaw frozen foods. Whether you’re defrosting meat, vegetables, or baked goods, this function helps you save time and ensures that your ingredients thaw evenly without risk of overcooking.
Here’s how to defrost food effectively using your microwave oven:
- Select the Defrost Function: Press the “Defrost” button on the control panel to activate the defrost function. The display screen will indicate that the defrost function is active.
- Arrange the Frozen Food: Place the frozen food on a microwave-safe dish or in a suitable container. It’s important to ensure that the food is evenly spread out to allow for even defrosting. For larger items, it may be necessary to separate them into smaller portions to speed up the process.
- Enter the Weight of the Food: Some Miele microwave ovens require you to enter the weight of the food to ensure accurate defrosting. Consult your user manual for instructions on how to do this. If no weight entry is needed, proceed to the next step.
- Set the Defrost Time: Use the time buttons on the control panel to set the desired defrosting duration. The display screen may offer predefined options based on common food types and weights. Select the one most appropriate for your food item or manually set the defrosting time.
- Start the Defrost: Press the Start button to begin the defrosting process. The microwave oven will emit gentle microwaves and adjust the power level to defrost the food gradually. Monitor the defrosting progress and adjust the time if necessary.
- Pause and Check Progress: If needed, pause the defrosting process to check the progress of the food. Use this opportunity to separate any portions that have already thawed from the rest, as they may require shorter defrosting times.
- Continue Defrosting (if required): If the food is not fully thawed after the initial defrosting cycle, restart the defrost function using the appropriate time setting. Repeat this process until the desired level of thawing is achieved.
- Use or Store the Thawed Food: Once the food is fully thawed, use it immediately or store it as per your recipe or preferred storage guidelines. Properly cooked or reheated leftovers should not be refrozen.
- Clean the Microwave: After defrosting, clean the interior of the microwave oven to remove any potential food residue or drippings. Follow the manufacturer’s instructions for proper cleaning and maintenance.
Defrosting times may vary depending on the size, type, and weight of the frozen food. It’s always a good idea to check the progress periodically and flip or separate any portions that have already thawed to ensure even defrosting.
By using the defrost function appropriately, you can safely and efficiently thaw frozen foods, preserving their quality and reducing preparation time. Refer to the user manual for your specific model to become familiar with any additional instructions or recommendations provided by Miele.
Using the Timer Function
The timer function of your Miele Microwave Oven is a useful feature that allows you to set a specific duration for various cooking tasks or reminders. Whether you need to time a specific step in a recipe or simply want to keep track of the cooking progress, the timer function ensures precision and convenience in your culinary endeavors.
Here’s how to use the timer function effectively:
- Press the Timer Button: Locate the “Timer” button on the control panel of your Miele Microwave Oven. Press this button to activate the timer function. The display screen will indicate that the timer function is active.
- Set the Timer Duration: Use the time buttons on the control panel to set the desired duration for your timer. Press the “+” or “-” buttons to increase or decrease the time in minutes or seconds, depending on the specific model of your microwave oven. The display screen will show the set time.
- Start the Timer: Once you have set the desired duration, press the Start button to initiate the timer. The display screen will start counting down the remaining time. The timer will continue to run even if other cooking functions are in use.
- Monitor the Timer: Keep an eye on the display screen to monitor the progress of the timer. It will continue counting down until it reaches zero or until you manually stop the timer by pressing the Stop button.
- Use the Timer for Cooking Tasks: The timer function can be particularly helpful for timing specific steps in recipes or multi-step cooking processes. For example, if a recipe requires simmering a sauce for 10 minutes, set the timer for 10 minutes and let it count down while you attend to other tasks or prepare other components of the dish.
- Use the Timer as a Reminder: Aside from cooking tasks, the timer function can also serve as a useful reminder for various purposes in your kitchen. Set the timer to remind you when to check on a dish in the oven, when to flip or rotate food on the stove, or when to take baked goods out of the oven.
- Pause or Cancel the Timer: If needed, you can pause the timer function by pressing the Pause button. This allows you to temporarily stop the countdown without canceling the timer. To cancel the timer completely, press the Stop button.
- Utilize the Repeat or Auto-Repeat Function (if available): Some Miele microwave ovens may offer a repeat or auto-repeat function for the timer. This allows you to set the timer to automatically restart once it reaches zero, repeating the same duration. Consult your user manual for instructions on how to use this feature, if available.
The timer function provides you with the flexibility and convenience to precisely time cooking tasks and reminders in your kitchen. Mastering this function allows you to manage your cooking processes more efficiently and achieve consistent results.
Consult the user manual for your specific model to familiarize yourself with any additional features or instructions provided by Miele. By utilizing the timer function effectively, you’ll have better control over your cooking, resulting in delicious meals every time.
When using a Miele microwave oven, always refer to the user manual for specific instructions on cooking times and power levels for different types of food. This will ensure optimal results and prevent overcooking.
Cleaning and Maintenance
Maintaining proper cleanliness and performing regular maintenance on your Miele Microwave Oven is essential to keep it running smoothly and ensure optimal performance. By following these cleaning and maintenance practices, you can prolong the lifespan of your appliance and keep it looking and functioning at its best.
Cleaning the Interior:
Regularly clean the interior of your microwave oven to remove food splatters, stains, and any buildup that may occur during cooking. Here’s how:
- Ensure the microwave oven is unplugged and cooled down before cleaning.
- Remove the turntable and wash it using warm, soapy water. Rinse and dry thoroughly before placing it back in the microwave.
- Wipe the interior walls and ceiling of the microwave with a soft cloth or sponge dampened with a mild, non-abrasive cleaner. Avoid using harsh chemicals or abrasive materials that can damage the interior surface.
- Clean the door and door seal with a damp cloth or sponge. Make sure to remove any food particles or residue from these areas.
- Dry all surfaces thoroughly to prevent moisture buildup or odors.
Read more: How To Use Kitchenaid Microwave Oven Combo
Cleaning the Exterior:
Keeping the exterior of your microwave oven clean not only enhances its appearance but also helps maintain its longevity. Here’s how to clean the exterior:
- Wipe the exterior surfaces of the microwave oven with a soft, damp cloth or sponge. Use a mild detergent or non-abrasive cleaner to remove any stains or fingerprints.
- Avoid using abrasive cleaners, bleach, or ammonia-based solvents as they can damage the surface of your microwave oven.
- Dry the exterior thoroughly to prevent watermarks or streaks from forming.
Maintenance Tips:
In addition to regular cleaning, here are some maintenance tips to keep in mind:
- Refer to the user manual for specific maintenance instructions and guidelines provided by Miele for your particular model.
- Inspect the power cord regularly for any signs of damage. If you notice any frayed wires or loose connections, contact a qualified technician for repairs.
- Avoid placing any objects on top of or near the microwave oven, as they can obstruct airflow and lead to overheating.
- Ensure that the vents and air circulation openings are clear and not blocked by any debris or obstructions. This allows for proper ventilation and helps prevent overheating.
- Periodically check the door seal for any signs of wear or damage. A tight and secure door seal is essential for proper operation and energy efficiency. If you notice any issues, contact a technician for inspection and replacement if necessary.
By following these cleaning and maintenance practices, you can ensure that your Miele Microwave Oven remains in excellent condition. Regular cleaning not only promotes hygiene but also prevents any buildup that may affect the performance and safety of your appliance. Remember to consult the user manual for any specific care instructions and recommendations from Miele.
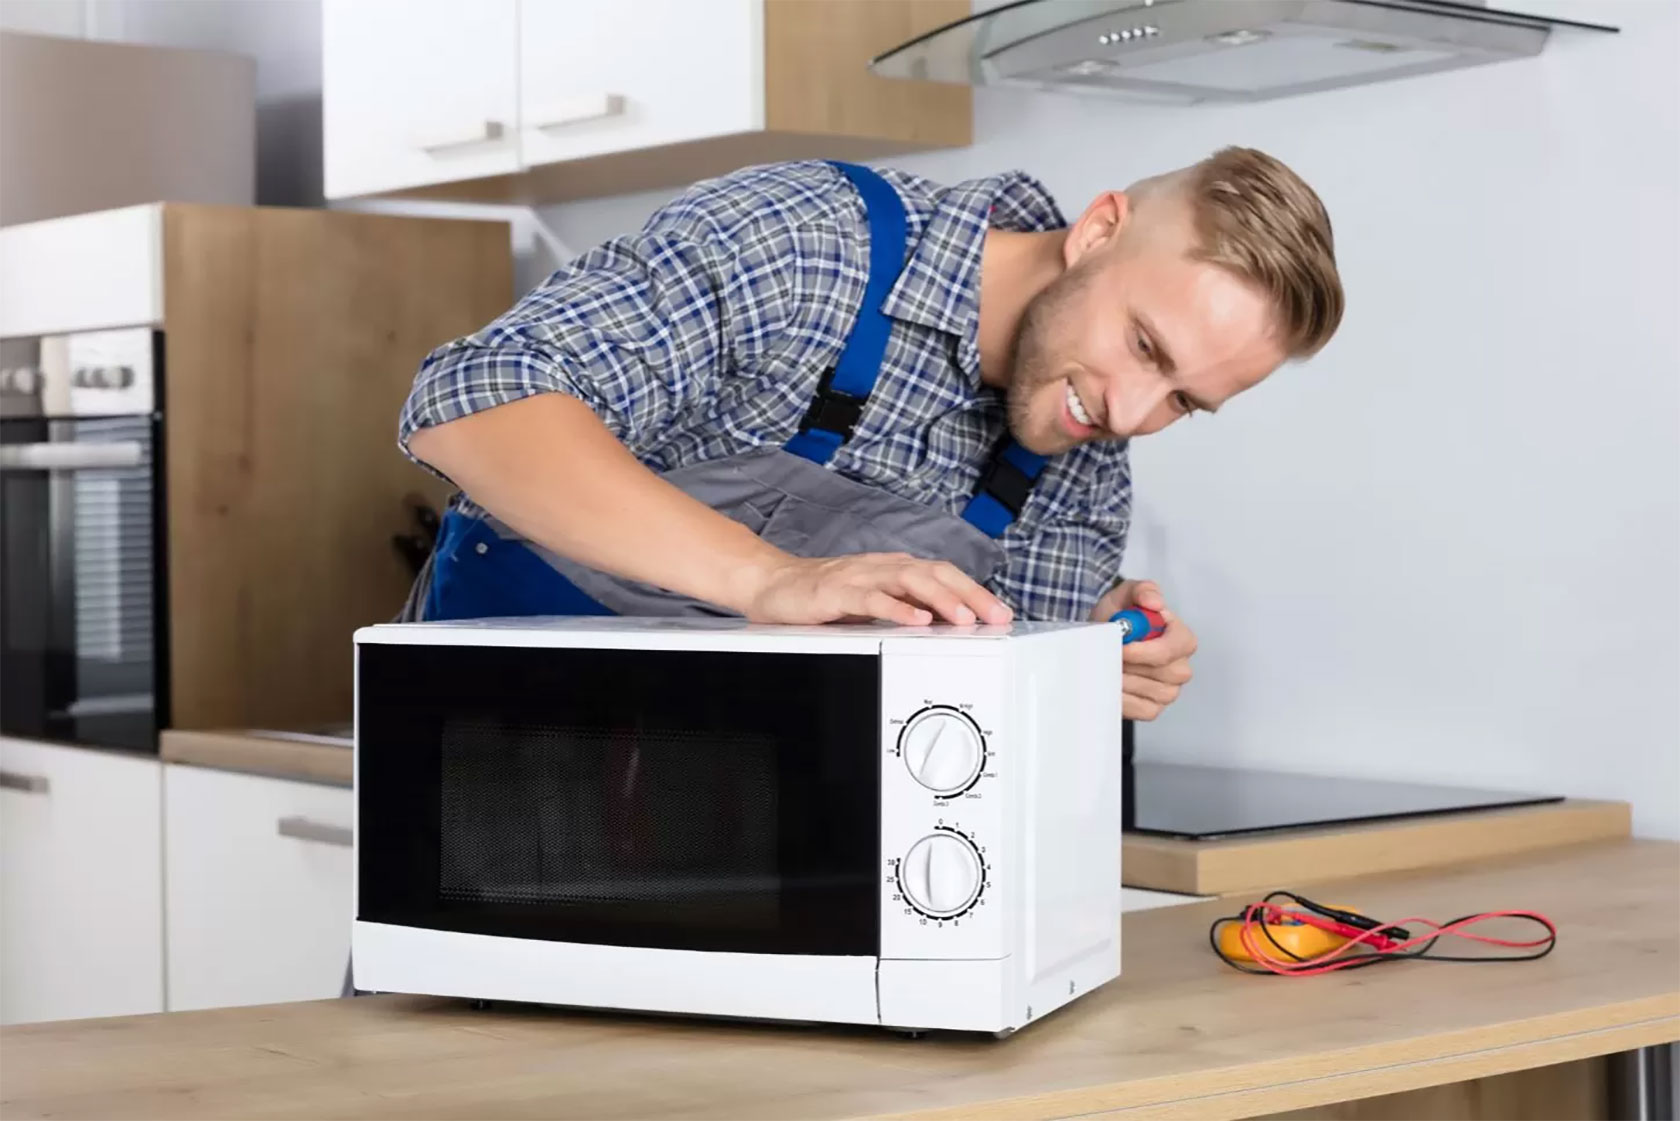
Troubleshooting
Even with proper maintenance and care, issues may occasionally arise with your Miele Microwave Oven. However, many common problems can be resolved with some simple troubleshooting steps. Below are a few troubleshooting tips to help you address issues that may arise:
No Power or Display:
- Check that the microwave oven is plugged into a functioning power outlet and that the circuit breaker or fuse has not tripped.
- Ensure that the power cord is securely connected to the microwave oven and the outlet.
- If the display is not working, check for any loose connections or damaged wiring. Consider contacting a qualified technician for repairs if necessary.
Read also: 15 Best Used Microwave Oven for 2024
Microwave Not Heating:
- Ensure that the microwave oven is set to the appropriate power level and cooking time for your food.
- Check that the door is securely closed. The microwave oven will not operate if the door is not properly sealed.
- Verify that the turntable is properly positioned and rotates freely. If it is not rotating, ensure that it is securely placed on the rotating mechanism.
- Clean the interior of the microwave oven and remove any food residue that may be interfering with the heating process.
Uneven Cooking or Browning:
- When using the grill or combination cooking function, ensure that the food is evenly spread out on the grill rack or cookware.
- If browning is uneven, try flipping or rotating the food halfway through the cooking process to promote even cooking.
- Adjust the cooking time and power level as needed, considering the thickness and type of food being cooked.
- Clean the grill rack or cookware regularly to remove any grease or residue that may interfere with the browning process.
Excessive Noise or Vibration:
- Ensure that the microwave oven is placed on a level and stable surface to prevent vibrations.
- Check for any loose or foreign objects inside the microwave oven that may be causing noise or vibration during operation.
- Inspect the turntable and ensure it is properly positioned on the rotating mechanism and free from any obstructions.
If none of these troubleshooting steps resolve the issue, refer to the user manual for your specific Miele Microwave Oven. It will provide additional troubleshooting tips and contact information for Miele’s customer support if further assistance is needed. Remember, it’s always best to consult with a qualified technician if you are unsure or uncomfortable performing any troubleshooting steps or repairs yourself.
By following these troubleshooting steps and reaching out to the appropriate support channels, you can quickly address any challenges you may encounter and ensure the continued performance and functionality of your Miele Microwave Oven.
Conclusion
Congratulations! You are now equipped with the knowledge and understanding of how to make the most of your Miele Microwave Oven. From safety precautions to cleaning and troubleshooting, you have gained the necessary information to ensure a seamless and enjoyable cooking experience.
The safety precautions provided will help create a secure cooking environment, allowing you to confidently use your Miele Microwave Oven. By following these guidelines, you can prevent accidents and protect yourself and your loved ones from harm.
Getting to know your microwave oven’s various components will enable you to navigate the control panel with ease. You can take advantage of the basic functions, such as microwaving, grilling, combination cooking, and defrosting, to create a wide variety of delicious dishes. Remember to adjust power levels, cooking times, and temperatures as needed for optimal results.
Cleaning and regular maintenance are essential to keep your Miele Microwave Oven in top shape. By following the recommended cleaning practices and performing simple maintenance tasks, you can extend the lifespan of your appliance and ensure its continued performance.
In the event of any issues, the troubleshooting tips provided can help you address common problems. By following these steps, you can potentially resolve minor issues on your own and seek professional assistance if needed.
Now, armed with this comprehensive guide, you can confidently embark on your culinary adventures with your Miele Microwave Oven. Experiment with recipes, try new techniques, and embrace the convenience and versatility that this appliance offers.
Remember to always refer to your specific model’s user manual provided by Miele for any additional instructions and guidelines. Miele is committed to providing exceptional quality and innovation in their appliances, and with your newfound knowledge, you can make the most of your Miele Microwave Oven for years to come.
Enjoy your cooking journey and savor every delicious moment with your Miele Microwave Oven!
Frequently Asked Questions about How To Use Miele Microwave Oven
Was this page helpful?
At Storables.com, we guarantee accurate and reliable information. Our content, validated by Expert Board Contributors, is crafted following stringent Editorial Policies. We're committed to providing you with well-researched, expert-backed insights for all your informational needs.

0 thoughts on “How To Use Miele Microwave Oven”