Home>Articles>The 10 Cleaning Questions Most Often Searched On Google, Answered
Articles
The 10 Cleaning Questions Most Often Searched On Google, Answered
Modified: October 21, 2024
Discover expert answers to the top 10 cleaning questions searched on Google. Our informative articles have all the information you need for effective cleaning.
(Many of the links in this article redirect to a specific reviewed product. Your purchase of these products through affiliate links helps to generate commission for Storables.com, at no extra cost. Learn more)
Introduction
Keeping our living spaces clean and tidy is a constant pursuit for many people. Whether it’s removing stubborn stains from carpets, cleaning grout in the bathroom, or dealing with odors in the refrigerator, we all want to find effective solutions to our cleaning challenges. With the rise of search engines like Google, we now have the ability to quickly find answers to our most pressing cleaning questions.
In this article, we will address the 10 cleaning questions that are most often searched on Google and provide you with the answers you need to tackle your cleaning tasks effectively. From removing pet stains from hardwood floors to eliminating soap scum from shower tiles, we will cover a wide range of cleaning topics to help you achieve a spotless and fresh living environment.
Whether you are a seasoned cleaning enthusiast or a novice with little experience, these questions and answers will serve as a handy guide to ensure that your cleaning efforts are fruitful and efficient. So, let’s dive in and address the most common cleaning conundrums that have people turning to the internet for advice.
Key Takeaways:
- Act quickly to remove stains from carpets and hardwood floors to prevent them from setting in. Use the right cleaning solutions and techniques for effective stain removal and restoration.
- Regular cleaning and maintenance are essential for keeping your living spaces fresh and hygienic. Follow specific methods for each cleaning task to achieve optimal results.
Read more: How To Answer A Call On Google Home Mini
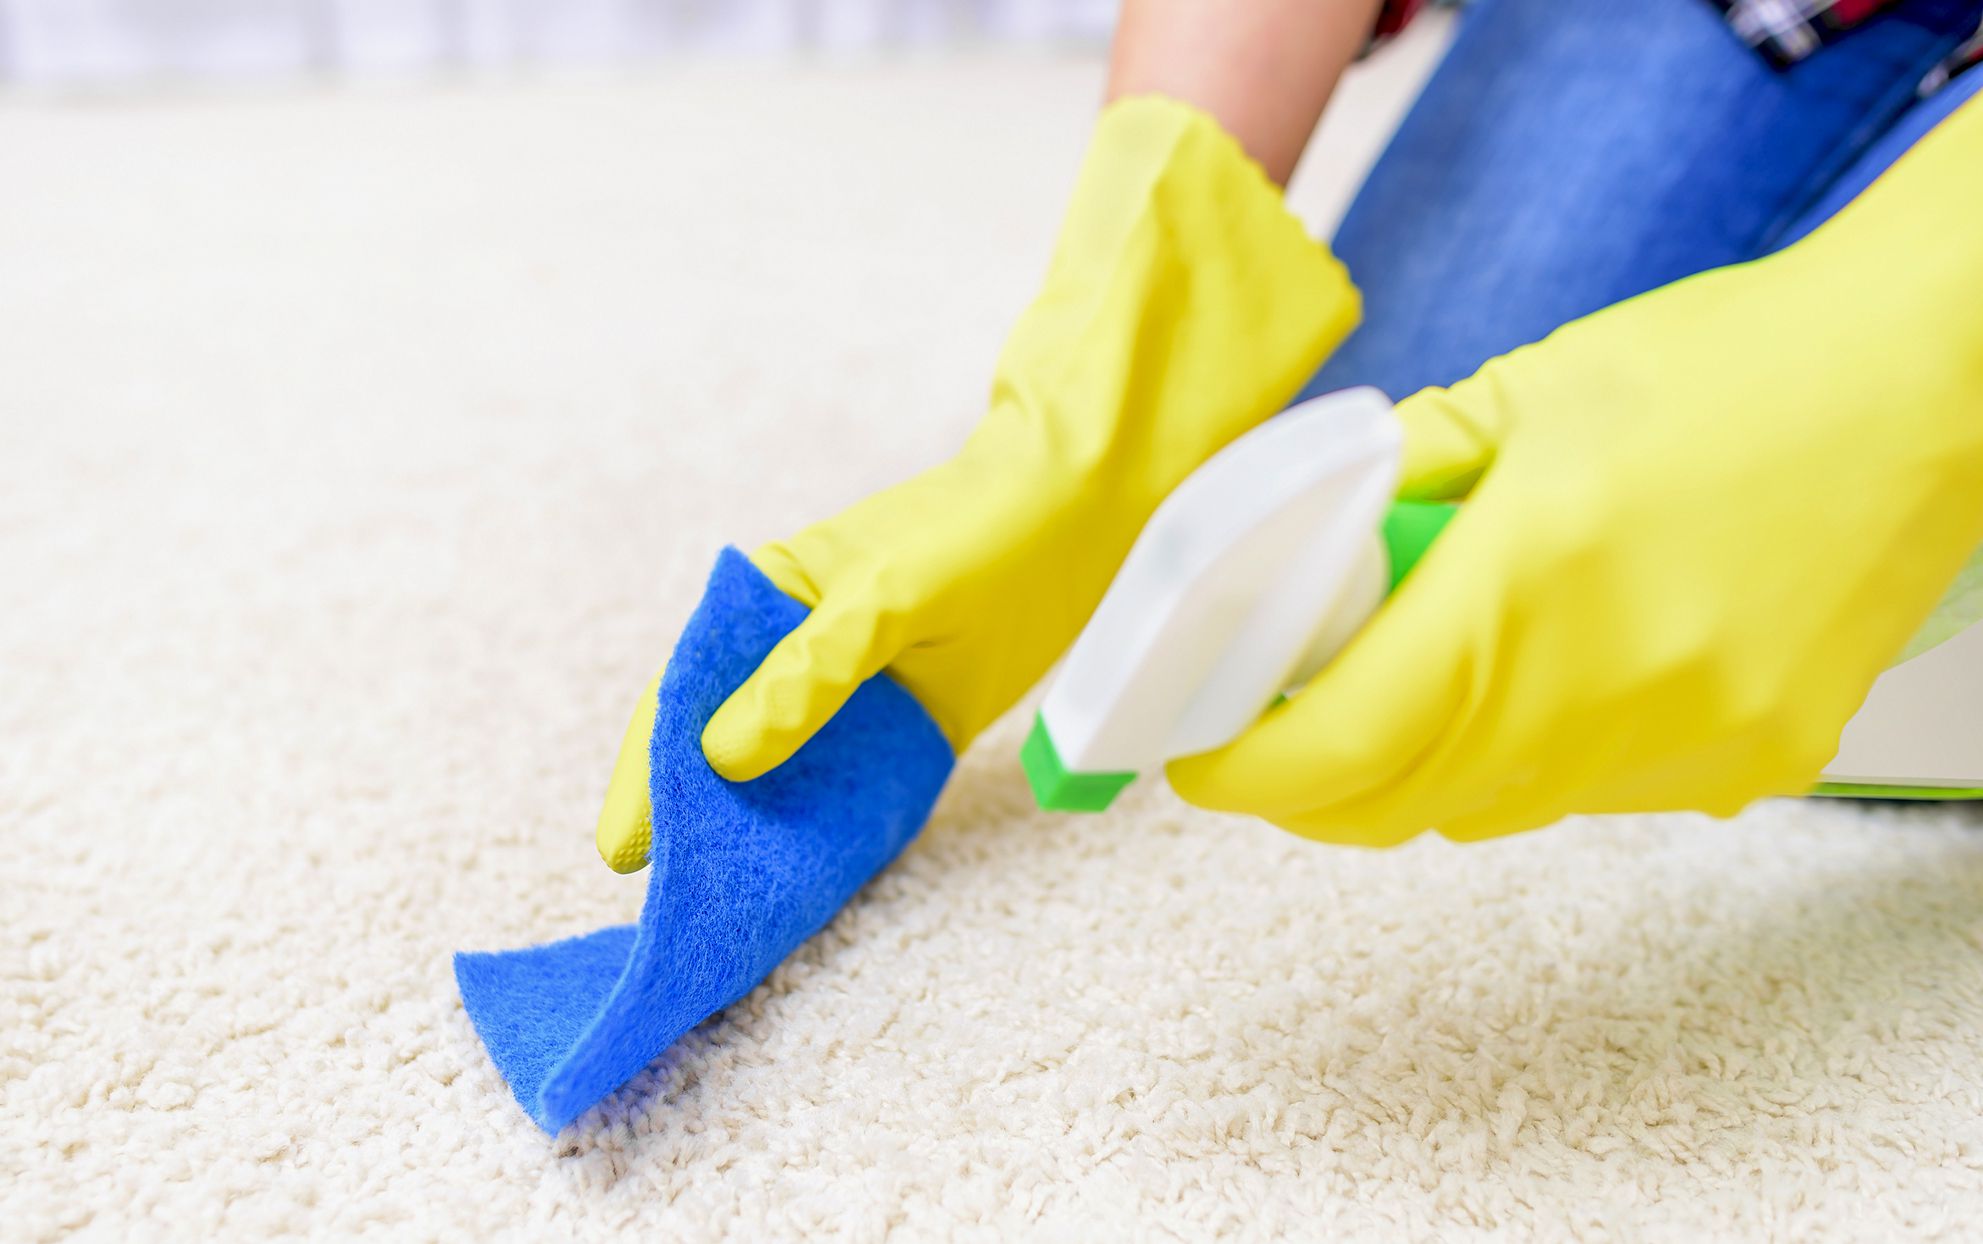
How to Clean a Stained Carpet
A stained carpet can be a real eyesore and can make any room look untidy. Fortunately, there are several methods you can use to effectively clean a stained carpet and restore its original beauty.
Step 1: Act quickly
When a spill or stain occurs on your carpet, it’s important to act quickly to prevent it from setting in. Blot the stain with a clean cloth or paper towel to absorb as much of the liquid as possible. Avoid rubbing the stain, as this can push it deeper into the carpet fibers.
Step 2: Choose the right cleaning solution
The next step is to determine the appropriate cleaning solution for the type of stain you’re dealing with. Different stains require different treatment methods. For example:
- If it’s a food or beverage stain, mix a solution of mild dish soap and warm water.
- For pet stains, use an enzymatic cleaner specifically designed for removing pet odors and stains.
- If it’s an oil-based stain, using a solvent-based carpet cleaner can be effective.
Step 3: Test the cleaner on a small, inconspicuous area
Before applying the cleaning solution to the entire stained area, it’s important to test it on a small, inconspicuous area of the carpet first. This will ensure that the cleaner doesn’t cause any discoloration or damage to the carpet fibers.
Step 4: Apply the cleaning solution
Once you’ve tested the cleaning solution, apply it to the stained area of the carpet. Use a clean cloth or sponge to gently blot the area, working from the outside of the stain towards the center. Avoid scrubbing the carpet vigorously, as this can damage the fibers.
Step 5: Rinse and dry
After treating the stain, rinse the area with clean water to remove any remaining cleaning solution. Blot the carpet with a clean, dry cloth to absorb the moisture. It’s important to ensure that the carpet is thoroughly dry to prevent the growth of mold and mildew.
If the stain persists after following these steps, it may be necessary to call professional carpet cleaners who have specialized equipment and expertise in effectively removing tough stains.
By following these steps and using the appropriate cleaning solution, you can effectively clean a stained carpet and restore its original beauty. Remember, acting quickly and using the right techniques are key to successfully removing stains from carpets.
What is the Best Way to Remove Pet Stains from Hardwood Floors?
Pets are beloved members of many households, but they can sometimes leave unsightly stains on our beautiful hardwood floors. Fortunately, there are effective methods for removing pet stains and restoring the pristine look of your hardwood floors.
Step 1: Act quickly
When accidents happen and your pet leaves a stain on your hardwood floors, it’s important to act quickly. The longer the stain sits, the more difficult it will be to remove. Grab some paper towels or a clean cloth and blot up as much of the liquid or mess as possible.
Step 2: Determine the type of stain
Pet stains can vary in composition, so it’s essential to determine the type of stain you are dealing with before proceeding with the cleaning process. Different types of stains, such as urine or vomit, may require varying approaches.
Step 3: Clean the affected area
For fresh pet urine stains, use a paper towel or cloth to blot up as much liquid as possible. Afterward, mix a solution of equal parts white vinegar and water. Apply the solution to the affected area and let it sit for a few minutes. Blot the area again to remove the solution and any remaining stain.
If dealing with dried pet stains, mix a small amount of gentle dish soap with warm water. Using a soft cloth or sponge, gently scrub the stained area. Make sure not to use excessive water, as this can damage the hardwood floors. After scrubbing, wipe away the soapy residue with a clean, damp cloth.
Step 4: Neutralize odors
Pet stains often come with unpleasant odors. To neutralize these odors, sprinkle baking soda over the cleaned area. Allow the baking soda to sit for a few hours or overnight to absorb the odors. Once it has done its job, vacuum the baking soda from the floor.
Step 5: Polish and protect
After successfully removing the pet stain, it’s important to restore the shine and protect your hardwood floors. Apply a hardwood floor cleaner or polish to enhance the appearance and provide a protective layer.
Remember, prevention is always the best approach when it comes to pet stains. Make sure to train your pet and provide them with appropriate areas to relieve themselves. Keep an eye on your furry friend and clean up any accidents promptly to minimize the chances of permanent staining on your hardwood floors.
By following these steps and utilizing the appropriate cleaning methods, you can effectively remove pet stains from your hardwood floors and maintain their natural beauty for years to come.
How to Remove Soap Scum from Shower Tiles
Soap scum can accumulate on shower tiles over time, leaving them looking dull and dirty. Fortunately, there are effective methods for removing soap scum and restoring the sparkle to your shower tiles.
Step 1: Gather your cleaning supplies
Before you begin cleaning, gather the necessary supplies. You will need a mild household cleaner, a scrub brush or sponge, a bucket of water, vinegar, and baking soda.
Step 2: Pre-treat the soap scum
To loosen the soap scum, start by pre-treating the area. Spray or apply a mild household cleaner directly onto the soap scum and let it sit for a few minutes. This will help break down the scum and make it easier to remove.
Step 3: Scrub the tiles
After the pre-treatment, use a scrub brush or sponge to scrub the tiles vigorously. Apply firm but gentle pressure and scrub in a circular motion to effectively remove the soap scum. Make sure to focus on the particularly stubborn areas.
Step 4: Rinse the tiles
Once you have thoroughly scrubbed the tiles, rinse them with clean water to remove any remaining cleaner and soap scum residue. Use a bucket of water or a detachable showerhead to ensure thorough rinsing.
Step 5: Remove stubborn stains with vinegar or baking soda
If there are still stubborn stains remaining, you can use natural remedies like vinegar or baking soda to tackle them. For vinegar, soak a cloth or sponge in vinegar and apply it to the stained areas. Let it sit for a few minutes and then scrub gently. Rinse with water afterward.
Alternatively, you can create a paste by mixing baking soda with water. Apply the paste to the stained areas and let it sit for a few minutes before scrubbing. Rinse with water once you’ve finished.
Step 6: Maintain regular cleaning
To prevent soap scum from building up again, it’s important to maintain regular cleaning. After each shower, wipe down the tiles with a squeegee or a microfiber cloth to remove any soap residue. This simple step will go a long way in preventing soap scum buildup.
By following these steps and utilizing the appropriate cleaning techniques, you can effectively remove soap scum from your shower tiles and keep them looking clean and pristine. Remember to take preventative measures to minimize the future accumulation of soap scum and maintain the cleanliness of your shower tiles.
What are the Most Effective Methods for Cleaning Grout?
Grout is notorious for accumulating dirt, stains, and mold in between tiles, which can make even the cleanest tiles look dull and dirty. Luckily, there are several effective methods for cleaning grout and restoring its original color and cleanliness.
Method 1: Cleaning with a Grout Cleaner
One of the most straightforward ways to clean grout is by using a specialized grout cleaner. These cleaners are available in liquid or spray forms and can be found at most home improvement or cleaning supply stores. Follow the instructions on the product label carefully, as application and dwell time may vary.
Generally, the process involves applying the grout cleaner directly onto the grout lines and letting it sit for the specified amount of time. Then, scrub the grout lines with a small scrub brush or an old toothbrush. Rinse the area thoroughly with water to remove any residue.
Method 2: DIY Natural Grout Cleaner
If you prefer a more natural and budget-friendly approach, you can make your own grout cleaner using household ingredients. Create a paste by mixing equal parts baking soda and water. Apply the paste onto the grout lines and let it sit for about 15 minutes.
Then, use a scrub brush or toothbrush to scrub the grout lines vigorously. For extra cleaning power, you can add a small amount of vinegar to the baking soda paste. After scrubbing, rinse the grout lines thoroughly with water.
Method 3: Steam Cleaning
Steam cleaning is another effective method for cleaning grout. Steam cleaners use high-temperature steam to dissolve and remove dirt and stains from grout lines. This method is particularly useful for deep cleaning and sanitizing grout.
When using a steam cleaner, follow the manufacturer’s instructions for proper usage and safety precautions. Make sure to move the steam cleaner over the grout lines slowly and consistently to allow the steam to penetrate and loosen the dirt. After steam cleaning, wipe away any excess moisture with a clean cloth.
Method 4: Preventative Maintenance
To keep your grout looking clean and avoid heavy buildup of dirt and stains, regular preventative maintenance is essential. Wipe down the grout lines regularly with a mixture of equal parts vinegar and water to prevent the growth of mold and mildew.
In addition, consider applying a grout sealer after cleaning to protect the grout from future staining and make it easier to clean. A grout sealer creates a barrier that repels dirt and liquids, keeping the grout looking cleaner for longer.
By utilizing these effective methods for cleaning grout, you can restore the appearance of your grout lines and keep them looking clean and fresh. Remember to choose the method that works best for your specific needs and always follow proper safety precautions when using cleaning products or equipment.
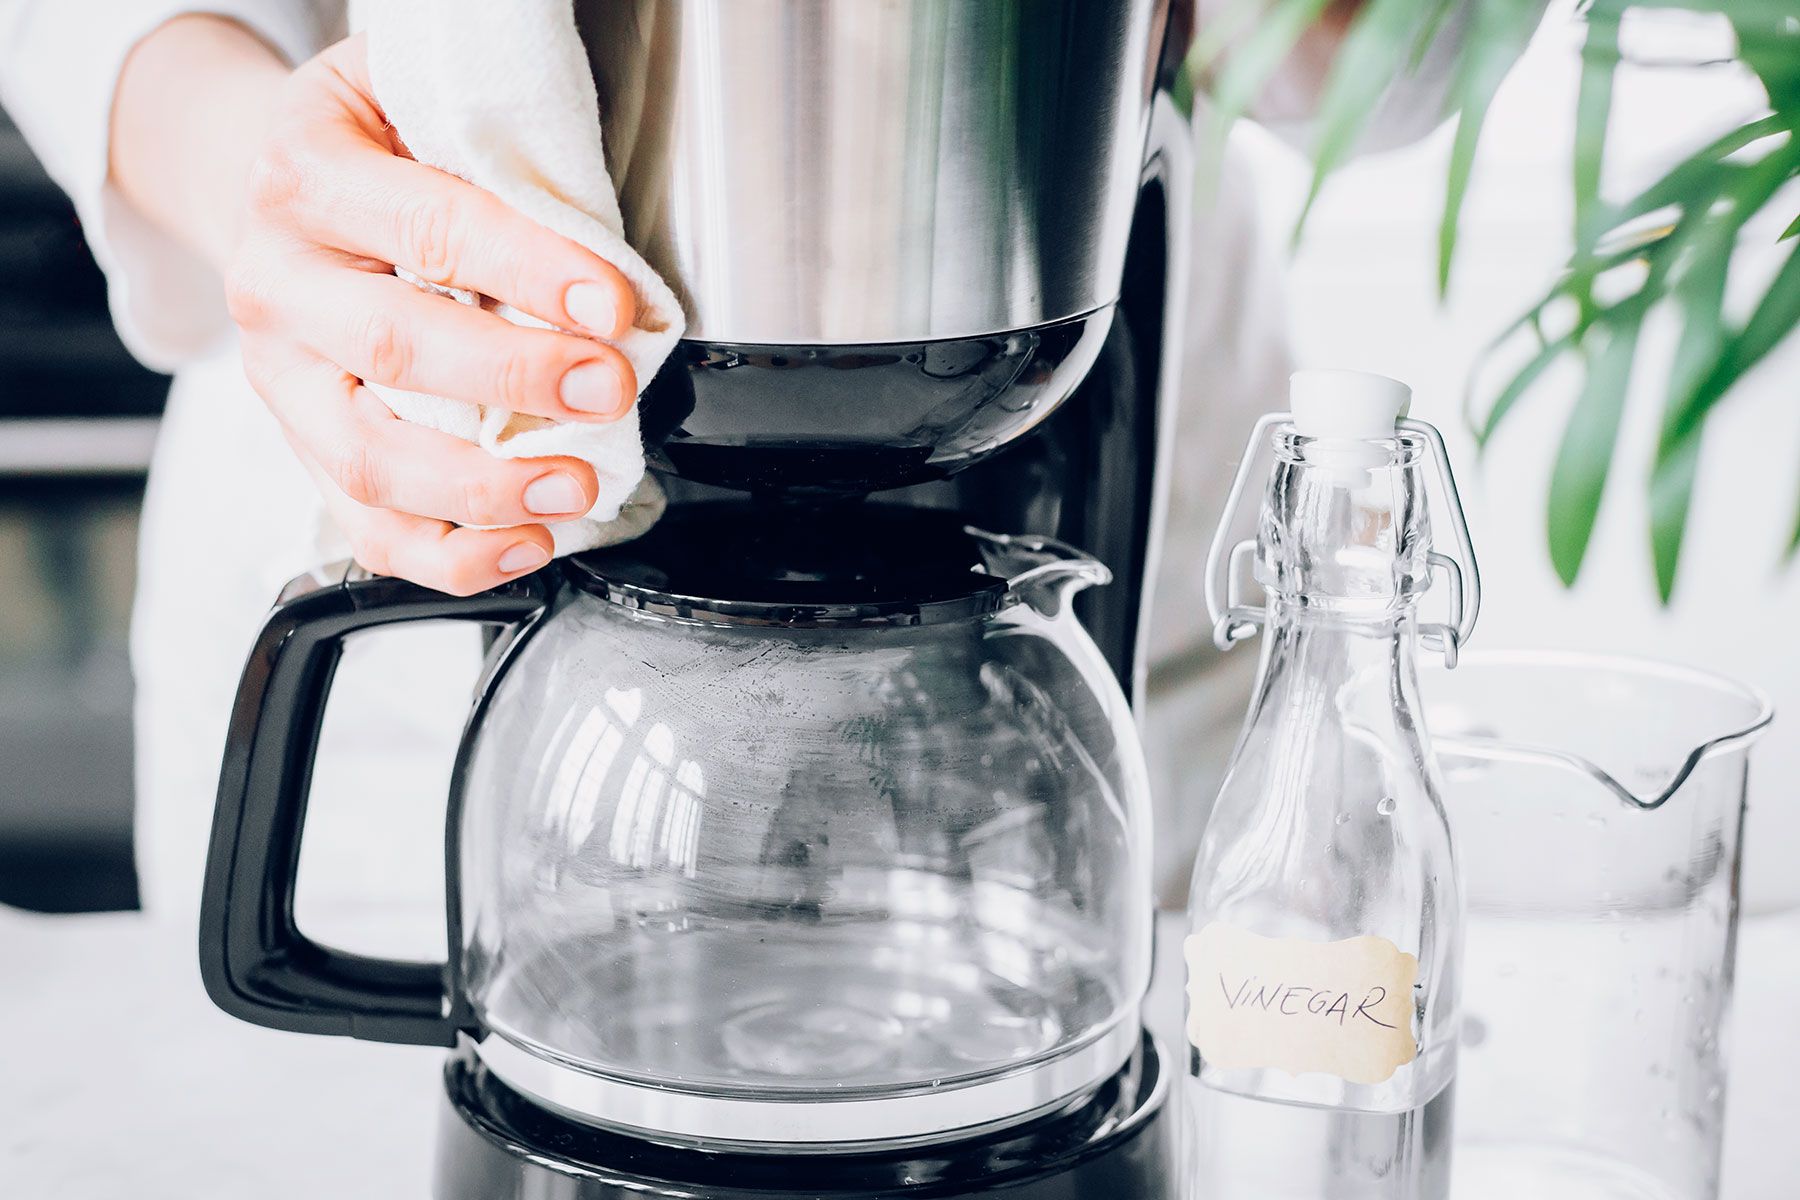
How to Get Rid of Odors from a Refrigerator
A foul odor coming from your refrigerator can be unpleasant and can even affect the taste of your food. Luckily, there are several effective methods for getting rid of odors and keeping your refrigerator smelling fresh and clean.
Step 1: Remove and discard spoiled food
The first step in eliminating refrigerator odors is to remove any spoiled or expired food. Check all items in your fridge, including produce, leftovers, and condiments. Discard anything that has gone bad or is past its expiration date.
Step 2: Clean the interior
After removing spoiled food, thoroughly clean the interior of your refrigerator. Start by unplugging the appliance and removing all shelves, drawers, and trays. Use a mixture of mild dish soap and warm water to clean the interior surfaces. Pay special attention to corners, seals, and crevices where odor-causing bacteria may accumulate.
Step 3: Use natural odor absorbers
To eliminate lingering odors, there are several natural odor absorbers you can use in your refrigerator:
- Baking soda: Place an open box of baking soda on one of the shelves. Baking soda will help absorb and neutralize odors over time. Remember to replace the baking soda every few months for continued effectiveness.
- Activated charcoal: Activated charcoal is known for its odor-absorbing properties. Place a few activated charcoal briquettes or sachets in your fridge to help eliminate odors.
- Coffee grounds: Unused coffee grounds can also help absorb refrigerator odors. Place a small bowl of coffee grounds in your fridge and let them work their magic.
Step 4: Keep it clean and organized
To maintain a fresh-smelling refrigerator, it’s important to keep it clean and organized on a regular basis:
- Wipe up any spills or leaks promptly.
- Regularly check and clean the drip tray located at the bottom of the refrigerator.
- Keep your food covered to prevent odors from spreading.
- Regularly rotate and consume food items before they spoil.
By following these steps and implementing these tips, you can effectively remove odors from your refrigerator and keep it smelling fresh. Remember, regular cleaning and maintenance are key to preventing odors from returning.
When cleaning windows, use a solution of vinegar and water for a streak-free shine. Mix equal parts of vinegar and water in a spray bottle and use a microfiber cloth to wipe the windows clean.
What is the Proper Way to Clean Stainless Steel Appliances?
Stainless steel appliances are known for their sleek and modern appearance, but they can quickly become smudged and tarnished if not cleaned properly. To ensure your stainless steel appliances maintain their shine, follow these steps for proper cleaning:
Step 1: Gather your cleaning supplies
Before you start cleaning, gather the necessary supplies. You’ll need mild dish soap, a microfiber cloth, warm water, white vinegar, and a soft-bristle brush or sponge.
Step 2: Prepare the cleaning solution
Mix a few drops of mild dish soap with warm water in a clean bucket or sink. Stir the solution gently until it’s well mixed.
Step 3: Wipe down the appliance
Dampen a microfiber cloth in the soapy water mixture, and then wring it out to remove excess moisture. Use the cloth to wipe down the surface of the stainless steel appliance, following the direction of the grain. This helps to lift and remove any dirt or smudges.
Step 4: Remove stubborn stains
If there are stubborn stains or fingerprints that won’t come off with just the soapy water solution, you can use white vinegar. Dampen a cloth or sponge with vinegar and gently rub the affected area. Repeat this process until the stain or fingerprint is removed.
Step 5: Rinse and dry
Once you’ve cleaned the appliance, rinse the cloth in clean water and wring out any excess moisture. Use the damp cloth to wipe away any remaining soap or vinegar residue. Finally, dry the surface thoroughly with a clean microfiber cloth to prevent water spots or streaks.
Step 6: Polish for extra shine (optional)
If you want to give your stainless steel appliance an extra shine, you can use a specialized stainless steel cleaner or polish. Apply a small amount of the product to a clean cloth and gently rub it onto the appliance. Always follow the manufacturer’s instructions when using a stainless steel cleaner or polish.
Additional Tips:
- Avoid using abrasive cleaners or scrub brushes as they can scratch the surface of the stainless steel.
- Always test any cleaning solution on a small, inconspicuous area of the appliance before applying it to the entire surface.
- Regularly dust your stainless steel appliances with a soft microfiber cloth to prevent the buildup of dust and debris.
By following these steps and tips, you’ll be able to keep your stainless steel appliances clean and maintain their sleek appearance for years to come. Regular cleaning and proper maintenance will ensure that they continue to shine and enhance the aesthetic appeal of your home.
How to Remove Stubborn Stains from Clothing
Stubborn stains on clothing can be frustrating, especially when they seem impossible to remove. However, with the right approach and a few effective techniques, you can successfully tackle those stubborn stains and restore your garments to their original condition.
Step 1: Act quickly
When a stain occurs, time is of the essence. The sooner you address the stain, the better chance you have of removing it completely. Blot the stain with a clean cloth or paper towel to absorb as much of the substance as possible. Avoid rubbing the stain, as this can push it deeper into the fabric.
Step 2: Check garment care instructions
Before applying any stain-removing method, check the care label on the garment to ensure you won’t cause any damage. Different fabrics require different treatment approaches, so it’s important to follow the manufacturer’s recommendations.
Step 3: Treat the stain with the appropriate method
There are several common types of stains, and each requires a specific approach for effective removal:
- Food and beverage stains: Rinse the stained area with cold water to dilute and remove as much of the stain as possible. Apply a stain remover or a small amount of liquid detergent directly onto the stain. Gently rub the fabric together to work the product into the stain, then launder the garment as usual.
- Grease and oil stains: Place an absorbent material, such as baking soda or cornstarch, onto the stain. Allow it to sit for a few minutes to absorb the grease. Carefully brush off the powder, then apply a pre-treatment stain remover or liquid detergent. Launder the garment using the warmest water allowed for the fabric.
- Ink stains: Blot the stain gently with a cloth soaked in rubbing alcohol or use an ink remover specifically designed for fabric. Rinse the area thoroughly, then launder the garment according to the fabric’s care instructions.
- Blood stains: Start by rinsing the stain with cold water to remove as much blood as possible. Apply a small amount of hydrogen peroxide directly to the stain and let it bubble. Blot the area with a clean cloth, then wash the garment in cold water.
Step 4: Check the stain before drying
After laundering, inspect the stained area before putting the garment in the dryer. If the stain is still visible, it’s important not to dry the garment, as the heat can set the stain and make it harder to remove. Instead, repeat the stain-removing process until the stain is gone, then proceed with drying.
Step 5: Seek professional help if needed
If you’ve tried multiple stain-removing methods and the stain is persistent, it may be time to seek professional dry cleaning or laundering services. Professional cleaners have access to specialized products and techniques that can effectively remove even the toughest stains.
Remember, it’s crucial to act quickly, follow the appropriate stain-removing methods for specific stains, and always check the care instructions on the garment. With patience and persistence, you can conquer those stubborn stains and extend the lifespan of your favorite clothing items.
What are the Best Practices for Cleaning Windows?
Windows play a crucial role in the aesthetic appeal of our homes, and keeping them clean and streak-free can make a significant difference. To achieve crystal-clear windows, follow these best practices for window cleaning:
Step 1: Choose the right time and tools
Start by selecting a cloudy or overcast day to clean your windows. Cleaning windows on a sunny day can cause the cleaning solution to dry quickly, leaving streaks behind. Gather the necessary tools, including a glass cleaner or a mixture of vinegar and water, a squeegee, a microfiber cloth or lint-free paper towels, and a bucket of warm water.
Step 2: Dust and prepare the windows
Before applying any cleaning solution, remove dust and debris from the window surfaces. Use a soft brush or a microfiber cloth to gently remove any loose dirt or cobwebs. This step helps prevent scratching the glass when you start cleaning.
Step 3: Clean the windows
There are different methods you can use to clean your windows:
- Glass cleaner method: Spray a glass cleaner directly onto the window surface or apply a mixture of vinegar and water using a spray bottle. Use a lint-free cloth or paper towel to wipe the solution in an up-and-down or side-to-side motion until the window is clean. Be sure to reach all corners and edges.
- Squeegee method: Start by wetting the window surface with the cleaning solution or the vinegar and water mixture. Use a squeegee to remove the solution from the glass, starting from the top and working your way down in a smooth, overlapping motion. Wipe the squeegee blade with a cloth or paper towel after each pass to avoid streaks.
Step 4: Dry and finish
Once you’ve cleaned the windows, use a dry microfiber cloth or lint-free paper towels to remove any remaining moisture and ensure a streak-free finish. Wipe the edges and corners of the windows carefully to ensure no water droplets are left behind.
Step 5: Clean window frames and tracks
Don’t forget to clean the window frames and tracks. Use a soft brush or a vacuum with a brush attachment to remove loose dirt and debris. Wipe the frames and tracks with a damp cloth or sponge and a mild detergent solution, then dry them thoroughly.
Additional Tips:
- Avoid cleaning windows in direct sunlight to prevent the cleaning solution from drying too quickly and causing streaks.
- Use a clean microfiber cloth or paper towel for each window to prevent transferring dirt or residue from one window to another.
- For hard-to-reach windows, consider using an extension pole or hiring a professional window cleaner.
By following these best practices for cleaning windows, you can achieve sparkling, streak-free results. Regular window cleaning not only enhances the appearance of your home but also allows more natural light to enter, brightening up your living space.
Read more: How Often To Clean A Kegerator
How to Clean and Sanitize a Bathroom
Keeping your bathroom clean and sanitized is essential for maintaining a hygienic and pleasant environment in your home. Follow these steps to effectively clean and sanitize your bathroom:
Step 1: Gather your cleaning supplies
Before you begin, gather the necessary cleaning supplies. You’ll need rubber gloves, a toilet bowl cleaner, a disinfecting cleaner, a glass cleaner, a mildew remover, a scrub brush, microfiber cloths or paper towels, a mop or a broom, and a bucket.
Step 2: Start with the toilet
Begin by applying a toilet bowl cleaner to the inside of the toilet bowl. Use a toilet brush to scrub the bowl thoroughly, paying attention to the rim and under the toilet seat. Flush the toilet to rinse away the cleaner.
Step 3: Clean the shower or bathtub
Spray a disinfecting cleaner on the walls, tiles, and surfaces of the shower or bathtub. Use a scrub brush or sponge to scrub away soap scum, grime, and mildew. Rinse thoroughly with water to remove the cleaner.
Step 4: Clean the sink and countertops
Apply a disinfecting cleaner to the sink and countertops. Use a cloth or sponge to wipe away dirt, toothpaste, and other residue. Pay attention to the faucet, handles, and edges. Rinse with water and dry with a clean cloth.
Step 5: Wipe down mirrors and glass surfaces
Spray a glass cleaner onto a microfiber cloth or paper towel. Wipe down mirrors, windows, and any other glass surfaces to remove smudges and fingerprints. Use a dry cloth to buff and achieve a streak-free finish.
Step 6: Clean the floors
Sweep or vacuum the bathroom floors to remove any loose dirt and debris. Mop the floors using a disinfecting cleaner or a mixture of warm water and a mild detergent. Pay attention to corners and areas around the toilet. Allow the floors to air dry or dry them with a clean mop or cloth.
Step 7: Disinfect high-touch areas
Don’t forget to disinfect high-touch areas, such as doorknobs, light switches, and toilet handles. Wipe these areas with a disinfecting wipe or a cloth soaked in a disinfecting cleaner to kill germs and bacteria.
Step 8: Handle mold and mildew
If you notice any mold or mildew in your bathroom, use a mildew remover or a mixture of vinegar and water. Apply the solution to the affected areas and allow it to sit for a few minutes. Scrub the mold or mildew with a brush or sponge, and then rinse with water.
Step 9: Maintain regular cleaning
To keep your bathroom clean and sanitized, establish a regular cleaning routine. Clean and disinfect your bathroom at least once a week or more often if needed. Regularly wipe down surfaces and promptly address any spills or messes.
By following these steps and maintaining a consistent cleaning routine, you can effectively clean and sanitize your bathroom, ensuring a fresh and hygienic space for you and your family.
What is the Best Method for Removing Grease Stains from Kitchen Surfaces?
Grease stains can be a common occurrence in the kitchen, especially on countertops, stovetops, and kitchen appliances. Fortunately, there are effective methods for removing grease stains and restoring the cleanliness of your kitchen surfaces.
Step 1: Act quickly
As with any stain, it’s important to act quickly to prevent the grease from setting into the surface. Use a paper towel or cloth to blot up as much of the fresh grease as possible. Avoid rubbing the stain, as this can spread the grease and make it more difficult to remove.
Step 2: Use dish soap and hot water
Dish soap can be a powerful grease-fighting agent. Mix a few drops of dish soap with hot water in a bowl or bucket. Dip a sponge or cloth into the soapy water and gently scrub the grease stain. Rinse the sponge or cloth frequently to remove the grease.
Step 3: Utilize vinegar or baking soda
If the grease stain persists, you can try using vinegar or baking soda:
- Vinegar: Dampen a cloth or sponge with white vinegar and gently scrub the grease stain. Vinegar has acidic properties that can help break down the grease. Rinse the area with water after cleaning.
- Baking soda paste: Create a paste by mixing baking soda with a small amount of water. Apply the paste to the grease stain and let it sit for a few minutes. Scrub the stain gently with a sponge or cloth, then rinse with water.
Step 4: Try a commercial degreaser
If the grease stain is particularly stubborn, you may want to consider using a commercial degreaser. There are various degreasing products available on the market specifically designed to tackle tough grease stains. Follow the instructions on the product label for the best results.
Step 5: Preventative measures for future stains
To minimize the occurrence of grease stains in the kitchen, consider implementing some preventative measures:
- Use splatter guards while cooking to prevent grease from splattering onto surfaces.
- Clean up spills and splatters immediately to prevent them from becoming stubborn stains.
- Regularly wipe down and clean kitchen surfaces to remove any grease or oil residue.
- Consider incorporating a protective barrier, such as a countertop sealant, to make surfaces more resistant to grease absorption.
By following these steps and utilizing the appropriate methods, you can effectively remove grease stains from your kitchen surfaces. Remember, quick action, the right cleaning agents, and preventative measures are key to maintaining a grease-free and clean kitchen environment.
Frequently Asked Questions about The 10 Cleaning Questions Most Often Searched On Google, Answered
Was this page helpful?
At Storables.com, we guarantee accurate and reliable information. Our content, validated by Expert Board Contributors, is crafted following stringent Editorial Policies. We're committed to providing you with well-researched, expert-backed insights for all your informational needs.


0 thoughts on “The 10 Cleaning Questions Most Often Searched On Google, Answered”