Articles
How Often To Clean A Kegerator
Modified: October 20, 2024
Discover how often you should clean your kegerator with our informative articles. Keep your beer tasting fresh and your kegerator in top condition.
(Many of the links in this article redirect to a specific reviewed product. Your purchase of these products through affiliate links helps to generate commission for Storables.com, at no extra cost. Learn more)
Introduction
Welcome to the wonderful world of kegerators! These amazing appliances not only provide you with the convenience of having a draft beer at home, but they also elevate your beer-drinking experience to the next level. However, like any other piece of equipment, kegerators require regular cleaning to maintain their functionality and ensure the beer you pour is of the highest quality.
Cleaning a kegerator may not be the most exciting task, but it is a crucial one. Neglecting to clean your kegerator can lead to a buildup of bacteria, yeast, and mold that can contaminate the beer and affect its taste. Additionally, an unclean kegerator can cause clogs in the lines, resulting in foamy pours or even a complete beer dispensing system failure.
In this article, we will delve into the importance of cleaning your kegerator, factors that determine how often it should be cleaned, the step-by-step cleaning process, signs that your kegerator needs cleaning, common mistakes to avoid, and tips for maintaining a clean and efficient kegerator.
Whether you are a seasoned homebrewer or just a beer enthusiast with a kegerator in your home, this article will provide valuable insights and guidelines to help you keep your kegerator in pristine condition and enjoy fresh, delicious beer every time.
Key Takeaways:
- Regular cleaning of your kegerator is crucial to maintain the quality and freshness of your beer, prevent clogs, and ensure a smooth dispensing system.
- Factors such as usage, beer type, and environment determine how often you should clean your kegerator, so tailor your cleaning schedule accordingly.
Read more: How To Clean A Haier Kegerator
Understanding the Importance of Cleaning a Kegerator
When it comes to enjoying a perfect pint of beer, cleanliness is paramount. Cleaning your kegerator on a regular basis is essential for several reasons.
Firstly, cleaning removes any buildup of bacteria, yeast, and mold that can contaminate the beer. These microorganisms can alter the flavor and aroma of the beer, compromising its quality. Cleaning also helps prevent the growth of harmful bacteria that can cause illness if consumed.
Secondly, a clean kegerator ensures that the beer lines remain clear and free from obstructions. Over time, residue from beer and other substances can accumulate in the lines, leading to clogs. This can result in foamy pours, irregular flow, and even a complete shutdown of the dispensing system. Regular cleaning helps to prevent these issues and ensures a smooth and efficient beer dispensing experience.
Furthermore, cleaning your kegerator helps to maintain the overall longevity and performance of the appliance. Residue and buildup can cause corrosion and damage to the various components of the kegerator, such as the tap, faucets, and couplers. By keeping your kegerator clean, you can prolong its lifespan and avoid costly repairs or replacements.
Lastly, a clean kegerator is visually appealing and creates a positive impression. Whether you have a kegerator in your home or use it for commercial purposes, a spotless and well-maintained unit enhances the aesthetic appeal of your space, giving a professional and polished appearance to your beer setup.
Cleaning your kegerator may require some time and effort, but the benefits far outweigh the inconvenience. By dedicating a small amount of time to regular cleaning, you can ensure that your kegerator is always ready to dispense fresh, delicious beer that is free from contaminants. So, let’s dive into the factors that determine how often you should clean your kegerator!
Factors That Determine How Often to Clean a Kegerator
The frequency of cleaning your kegerator can vary depending on several factors. It is important to consider these factors to determine the optimal cleaning schedule for your specific situation.
1. Usage: The usage of your kegerator plays a significant role in determining how often it should be cleaned. If you use your kegerator frequently and go through kegs quickly, it is recommended to clean it more frequently. The more beer that flows through the system, the greater the chance of buildup and contamination, making more frequent cleaning necessary.
2. Beer Type: The type of beer you dispense also impacts the cleaning frequency. Beers with higher alcohol content and hops, such as IPAs, tend to leave more residue and can cause faster buildup. Conversely, lighter beers or those with lower alcohol content may require less frequent cleaning. Consider the characteristics of the beers you typically dispense to determine the appropriate cleaning schedule.
3. Environment: The environment in which your kegerator is located can affect its cleanliness. If your kegerator is situated in a dusty or humid area, it may require more frequent cleaning. Dust can settle on the kegerator’s surfaces and find its way into the beer lines, while high humidity can promote the growth of mold and bacteria. Assess the environment and adjust your cleaning schedule accordingly.
4. Temperature Control: Proper temperature control is crucial for maintaining the integrity of your beer and preventing bacterial growth. If your kegerator is consistently kept at the recommended temperature range (usually between 38-42 degrees Fahrenheit), you may be able to extend the cleaning interval slightly. However, if the temperature fluctuates significantly or if the kegerator is often exposed to warmer temperatures, more frequent cleaning may be necessary.
5. Personal Preference: Lastly, personal preference plays a role in determining how often you clean your kegerator. Some individuals may have a higher tolerance for potential contaminants and can go longer between cleanings, while others may prioritize cleanliness and prefer to clean more frequently.
It is important to strike a balance between maintaining a clean kegerator and avoiding excessive cleaning, as too much cleaning can cause wear and tear on the components. Taking these factors into consideration, you can determine the optimal cleaning frequency for your kegerator. In the next section, we will walk you through the step-by-step process of how to clean your kegerator effectively.
How to Clean a Kegerator Step by Step
Cleaning your kegerator may seem like a daunting task, but with a step-by-step approach, it can be easily accomplished. Here’s a guide on how to clean your kegerator effectively:
Step 1: Disconnect and Empty the Keg
Begin by disconnecting the keg and removing it from the kegerator. Make sure to release any pressure in the system before removing the keg. Drain any remaining beer from the keg and dispose of it properly.
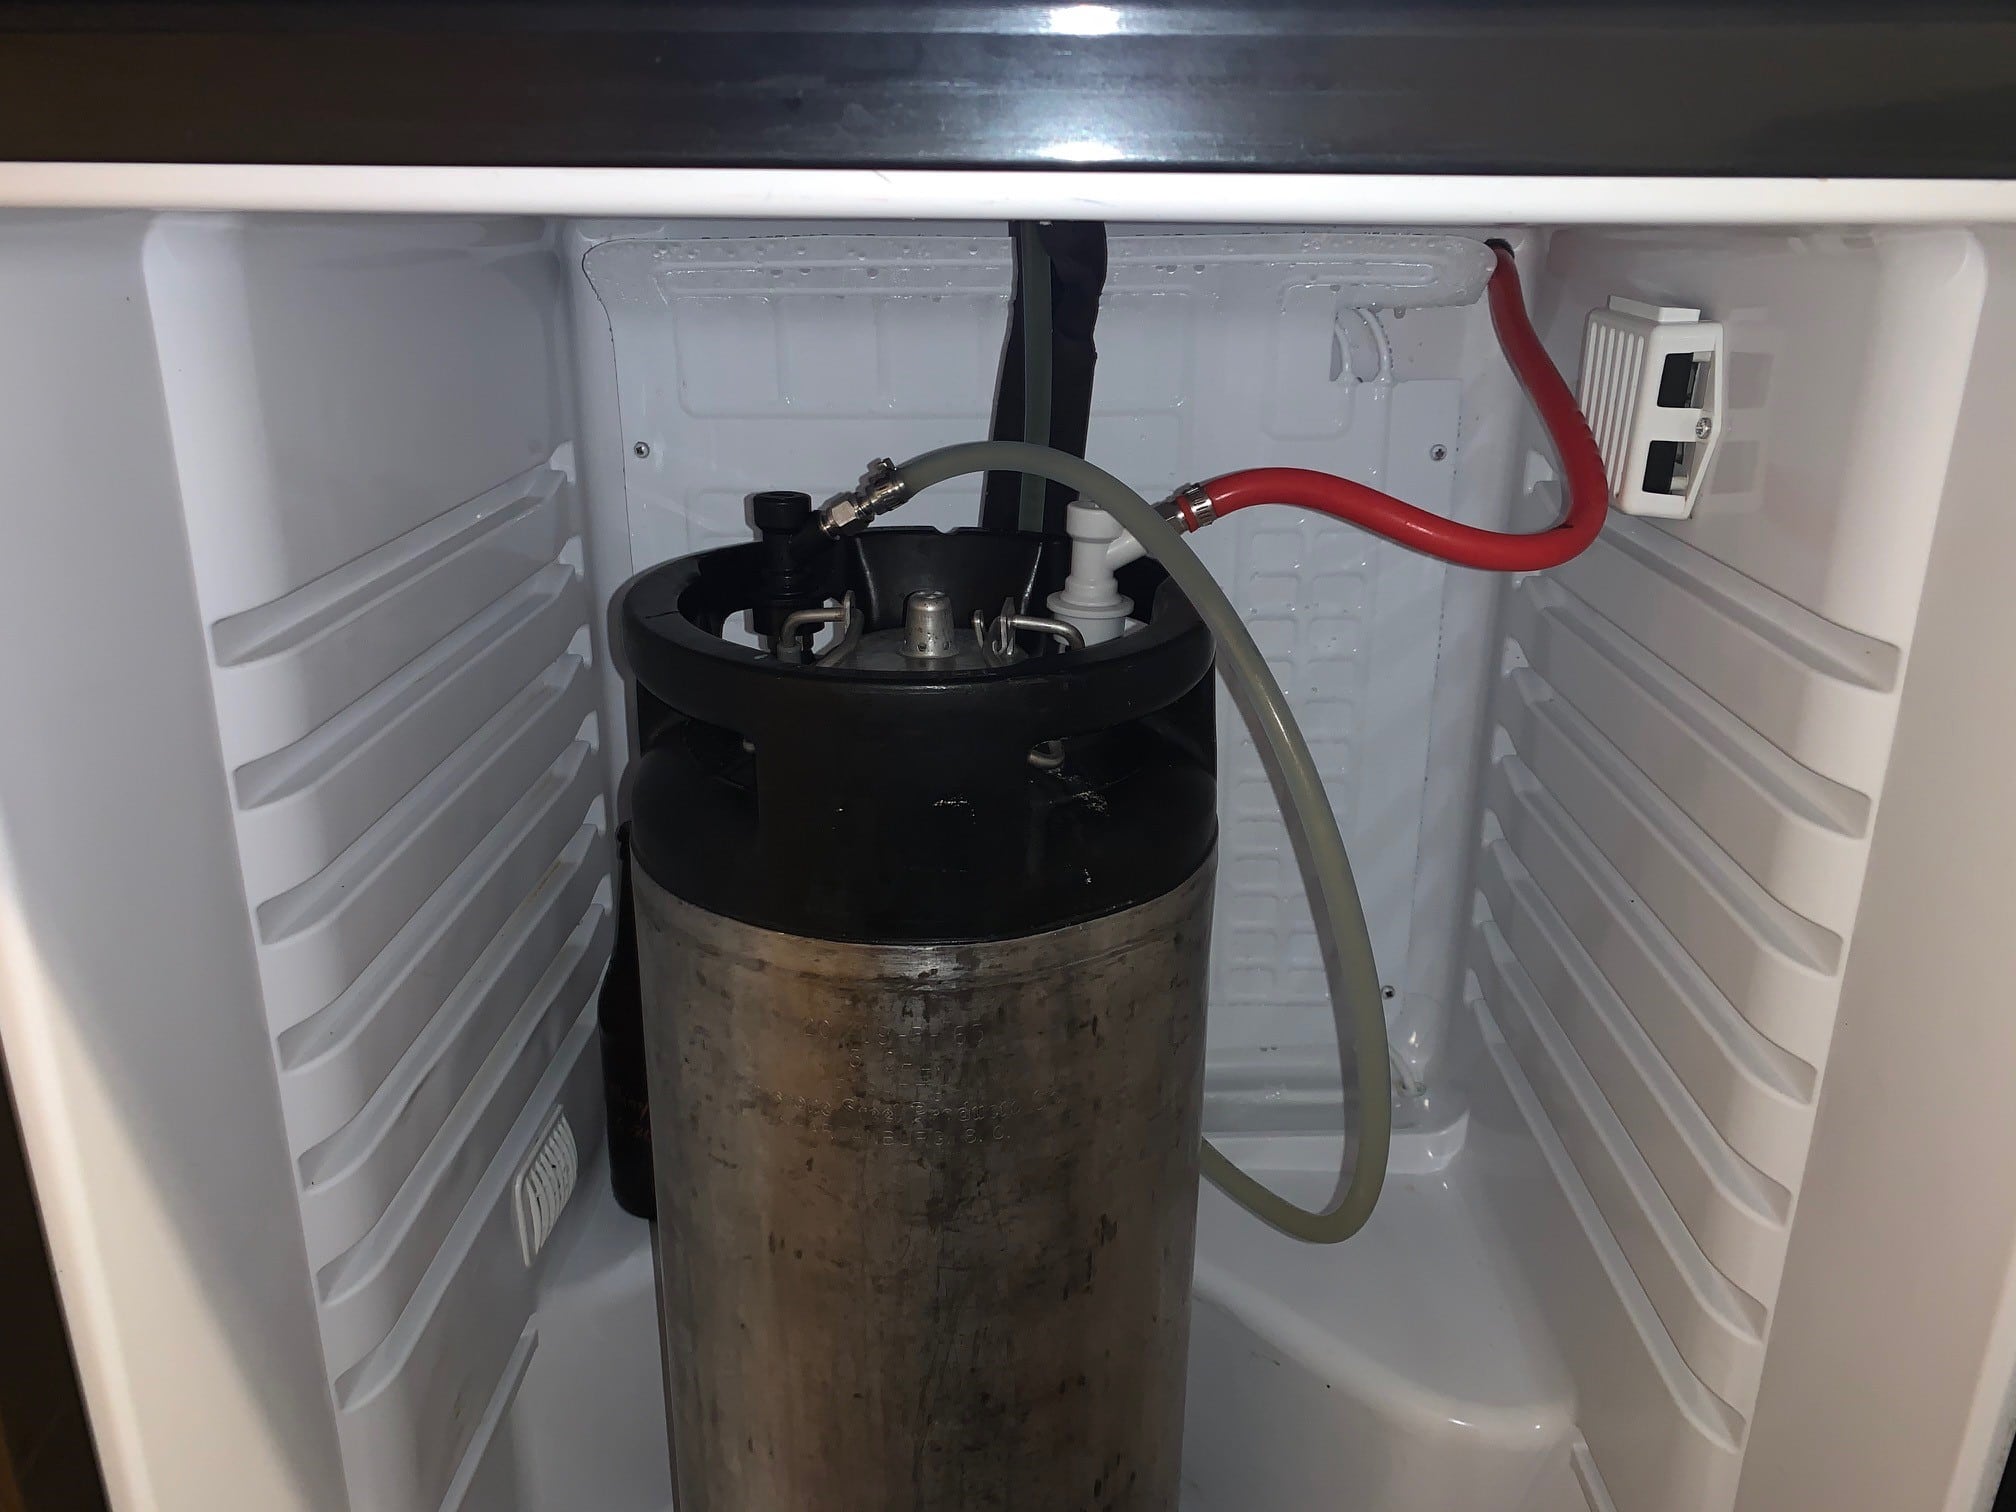
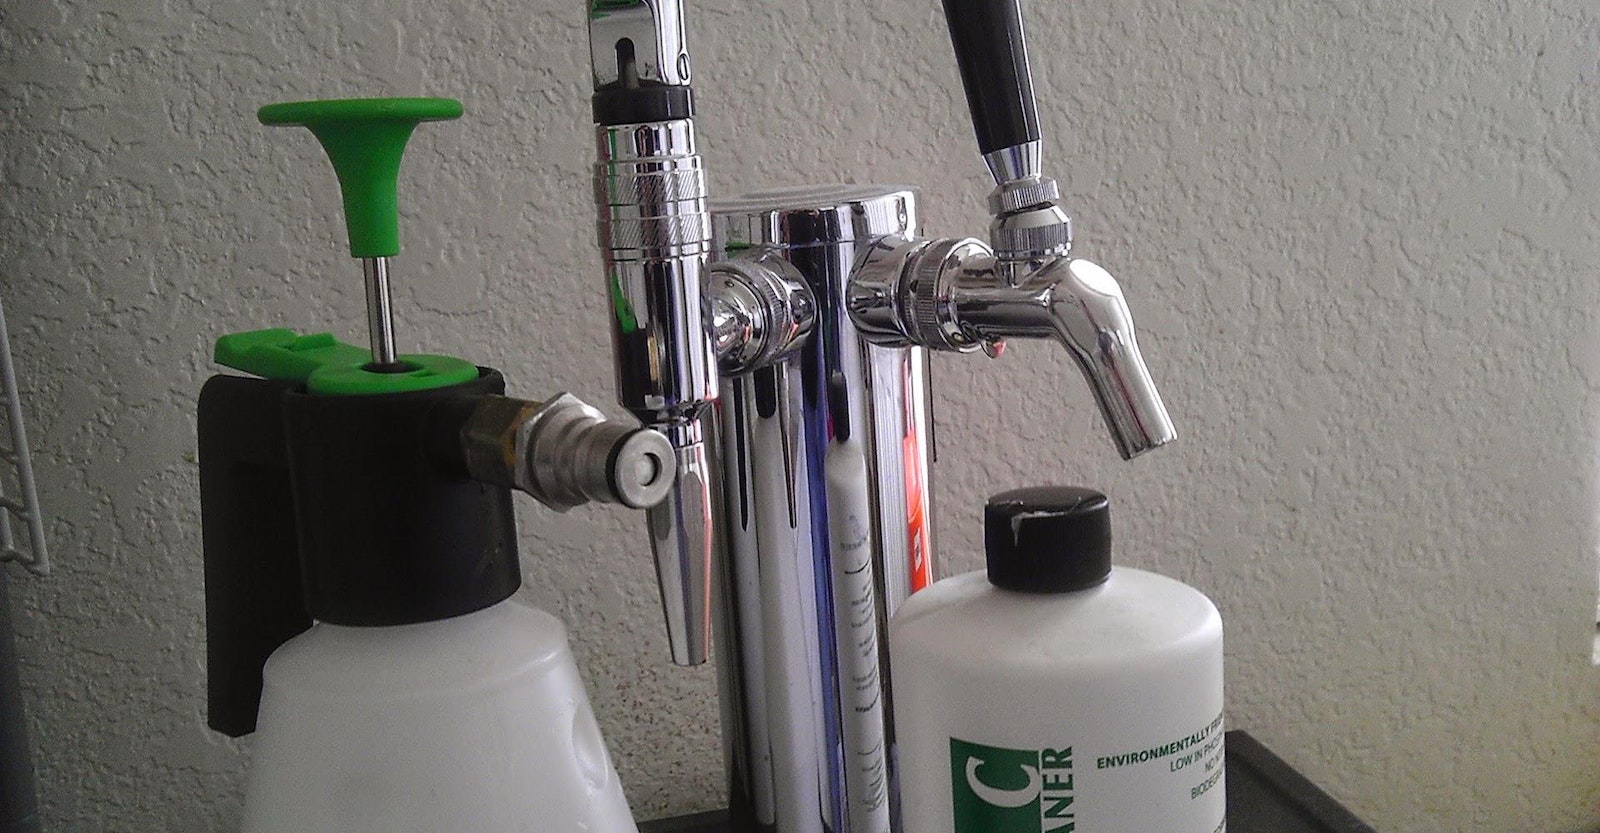
Step 2: Remove and Clean the Faucet and Beer Lines
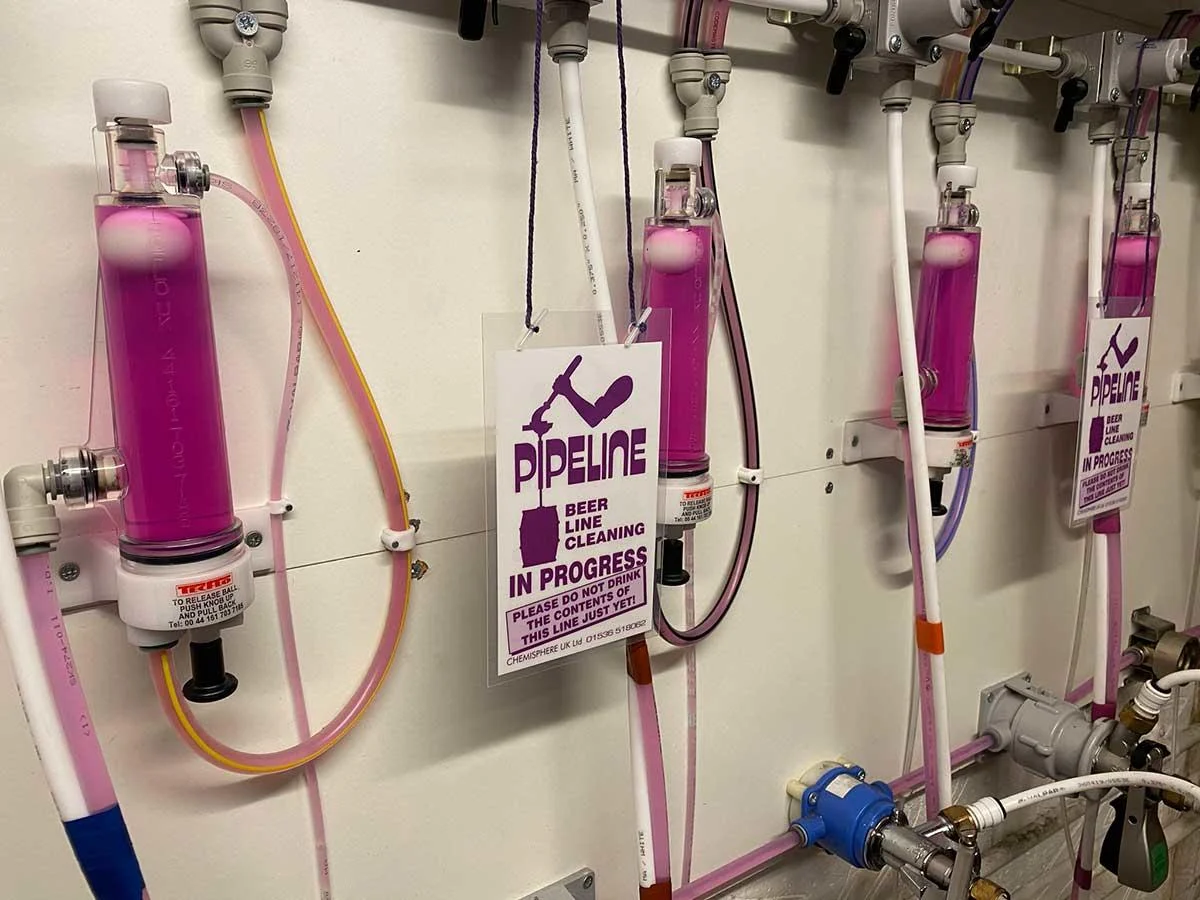
Next, remove the faucet from the kegerator. Soak it in warm water and a mild cleaning solution, such as a mixture of dish soap and water. Use a cleaning brush to scrub away any residue and rinse thoroughly. Repeat this process for the beer lines, using a cleaning brush or a specialized beer line cleaning kit to ensure a thorough clean.
Step 3: Clean the Couplers
Detach the couplers from the keg and clean them using warm water and a cleaning solution. Scrub away any buildup or residue and rinse thoroughly. Pay special attention to the connection points and O-rings, as these areas can harbor bacteria and mold.
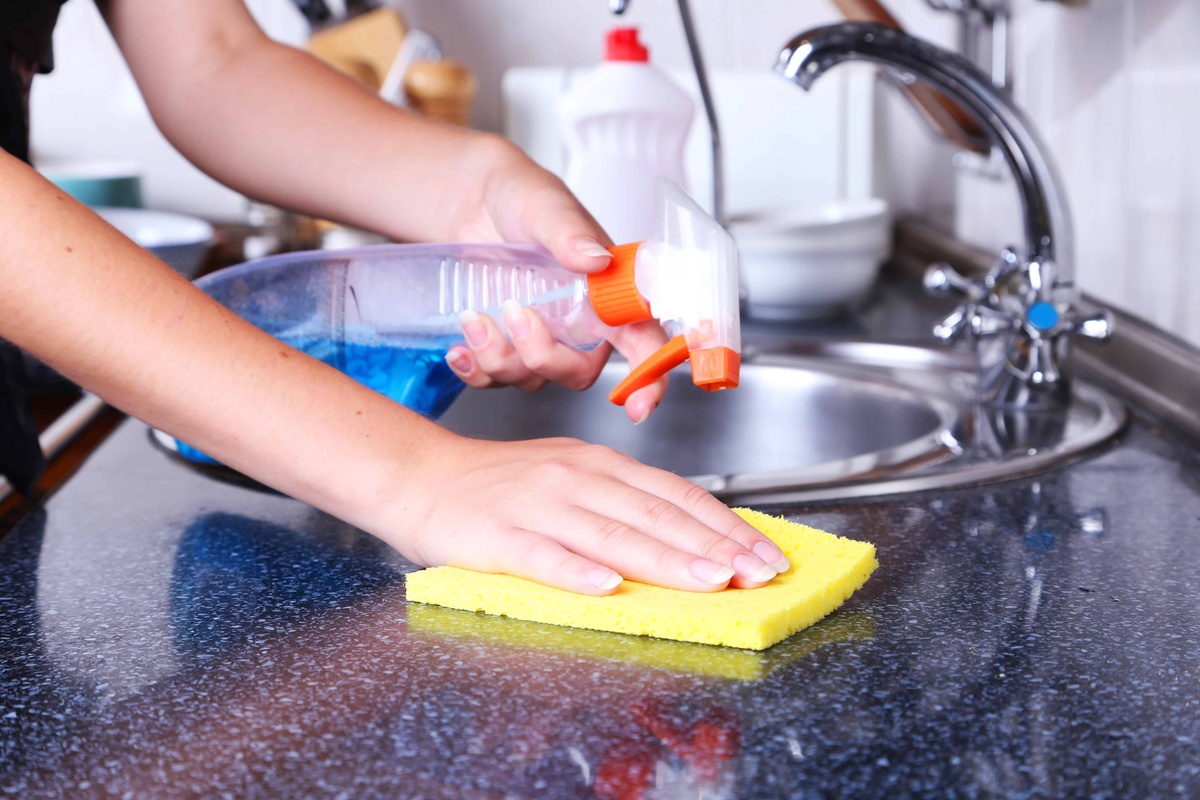
Step 4: Wipe Down the Interior
Using a soft cloth or sponge, wipe down the interior of the kegerator, including the walls, shelves, and any other surfaces. Use a mild cleaning solution or a mixture of water and vinegar to remove any dirt or residue. Be sure to rinse thoroughly and allow the kegerator to dry completely before proceeding.
Step 5: Sanitize the System
Once the kegerator is dry, it’s time to sanitize the entire system. Prepare a sanitizing solution by mixing a brewery-approved sanitizer with water according to the manufacturer’s instructions. Use this solution to sanitize the faucet, beer lines, couplers, and any other components that come into contact with the beer.
Step 6: Reassemble and Reconnect
After sanitizing, reassemble all the components and reconnect the couplers to the kegerator. Ensure that everything is securely tightened. If using new O-rings, lubricate them with a food-grade lubricant to prevent leaks.
Step 7: Run Clear Water Through the System
Before tapping a fresh keg, run clean water through the lines to flush out any residual sanitizer. This ensures that no traces of sanitizer remain in the system, preventing any potential off-flavors in the beer.
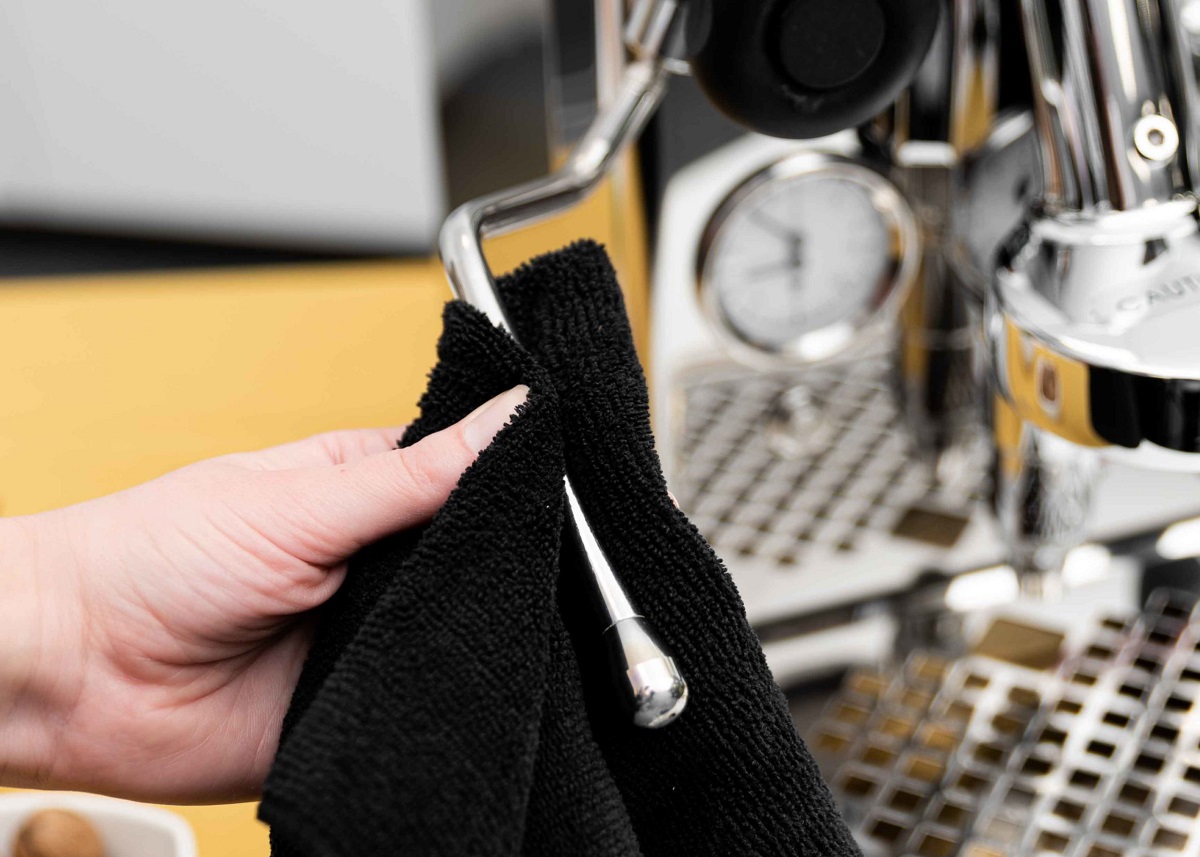
Step 8: Clean the Exterior
Lastly, clean the exterior of the kegerator using a mild cleaning solution and a soft cloth. Wipe down any fingerprints, stains, or dirt to keep your kegerator looking its best.
Following these step-by-step instructions will help you maintain a clean and hygienic kegerator, ensuring that your beer is always fresh and enjoyable. In the next section, we will discuss the signs that indicate when your kegerator needs cleaning.
It is recommended to clean your kegerator every 2-3 months to prevent buildup of mold, bacteria, and off-flavors in the beer lines and components. Regular cleaning will also ensure optimal performance and taste.
Signs That Your Kegerator Needs Cleaning
Regular cleaning is vital for maintaining the hygiene and functionality of your kegerator. However, it can be challenging to determine exactly when your kegerator needs cleaning. Here are some common signs that indicate it’s time to give your kegerator some much-needed attention:
1. Off-Flavors in the Beer:
If you notice any unusual or unpleasant flavors in the beer, such as sourness, bitterness, or a strange aftertaste, it could be a sign of contamination. A dirty kegerator can introduce unwanted bacteria, yeast, or mold into the beer, affecting its flavor profile. If the beer tastes off consistently, it’s a clear indication that it’s time for a thorough cleaning.
2. Excessive Foam or Slow Pouring:
When pouring a pint of beer, excessive foam or slow pouring may indicate a buildup in the beer lines. Residue and debris can cause clogs that disrupt the flow of beer. If you notice that your pours are consistently foamy or take longer than usual, it’s a sign that your kegerator needs cleaning to maintain a smooth and efficient dispensing system.
3. Mold or Mildew Growth:
Inspect the interior of your kegerator for any signs of mold or mildew growth. These fungi thrive in moist environments and can quickly spread if left untreated. Mold or mildew growth is an obvious sign that your kegerator requires cleaning to eliminate these potential health hazards and prevent them from contaminating your beer.
4. Unpleasant Odors:
If your kegerator emits unpleasant odors, it’s likely due to bacterial growth or the buildup of stale beer residue. Over time, these odors can affect the quality of your beer and diminish the overall experience. Regular cleaning helps eliminate these odors and ensures that your kegerator smells fresh and clean.
5. Visual Buildup or Residue:
Take a look inside your kegerator and inspect the surfaces, beer lines, faucets, and couplers for any visible buildup or residue. This can include film, sediment, or discoloration. Even if you can’t see any visible signs, it’s still recommended to follow a routine cleaning schedule to prevent any potential issues and maintain a pristine kegerator.
Regularly checking for these signs and addressing them promptly will help you keep your kegerator in optimal condition. By cleaning your kegerator at the first indication of these signs, you can ensure that your beer remains fresh, flavorful, and free from contaminants.
Now that you’re aware of the signs that signal when it’s time to clean your kegerator, let’s move on to discussing common mistakes to avoid during the cleaning process.
Read more: How To Clean Kegerator Freon
Common Mistakes to Avoid When Cleaning Your Kegerator
While cleaning your kegerator is essential for maintaining its performance and ensuring the quality of your beer, it’s important to be aware of common mistakes that can compromise the cleaning process. Avoiding these mistakes will help you achieve a thorough and effective cleaning. Here are some common mistakes to steer clear of when cleaning your kegerator:
1. Using Harsh Chemicals:
Avoid using harsh chemicals or abrasive cleaners when cleaning your kegerator. These can damage the components and leave behind residue that can affect the taste of the beer. Stick to gentle cleaning solutions, such as mild dish soap or brewery-approved sanitizers, that won’t harm the kegerator or the beer it dispenses.
2. Neglecting to Disconnect the Keg:
Before starting the cleaning process, always disconnect the keg from the kegerator and release any pressure in the system. Neglecting to do so can result in unnecessary spills, damage to the keg or the kegerator, and potential injury. Always prioritize safety and ensure that the keg is properly disconnected before proceeding with the cleaning.
3. Rushing the Cleaning Process:
Cleaning a kegerator requires time and attention to detail. Rushing through the cleaning process can lead to inadequate cleaning and potentially leave behind contaminants. Take your time, follow each step meticulously, and ensure that all components are thoroughly cleaned and sanitized before reassembling the kegerator.
4. Neglecting to Clean the Faucet and Beer Lines:
Don’t overlook the importance of cleaning the faucet and beer lines. They are key components that come into direct contact with the beer. Skipping their cleaning can lead to the buildup of residue, bacteria, and mold, which can affect the quality and taste of the beer. Make sure to dedicate time to clean these parts thoroughly.
5. Forgetting to Sanitize:
Sanitization is a vital step in the cleaning process. Neglecting to sanitize the kegerator after cleaning can reintroduce bacteria and other contaminants. Use a brewery-approved sanitizer and follow the manufacturer’s instructions to ensure proper sanitization. Give the sanitizing solution enough contact time to effectively kill any remaining bacteria before reassembling and using the kegerator.
6. Failing to Dry the Kegerator Thoroughly:
After cleaning and sanitizing your kegerator, it’s crucial to allow it to dry completely. Moisture can promote the growth of mold and bacteria, which can compromise the cleanliness of the kegerator. Ensure that all components are fully dry before reassembling and using the kegerator again.
By avoiding these common mistakes, you’ll be able to clean your kegerator effectively and maintain its optimal performance. Now, let’s move on to some valuable tips for maintaining a clean and efficient kegerator.
Tips for Maintaining a Clean and Efficient Kegerator
Keeping your kegerator clean and running smoothly requires regular maintenance and care. By following these tips, you can ensure that your kegerator remains clean, efficient, and delivers fresh, delicious beer every time:
1. Establish a Cleaning Schedule:
Create a regular cleaning schedule and stick to it. Determine how often your kegerator needs cleaning based on factors such as usage, beer type, and environment. Consistency is key to prevent the buildup of contaminants and ensure the longevity of your kegerator.
2. Clean the Beer Lines Regularly:
Pay special attention to the beer lines, as they are a common area for buildup and bacterial growth. Regularly clean the beer lines using a specialized cleaning kit or a brewery-approved cleaning solution. This will help maintain the quality and flavor of your beer and prevent clogs in the system.
3. Practice Proper Line Flushing:
After each keg is emptied, flush the lines with clean water to remove any residual beer and prevent the buildup of bacteria. This quick and easy step will help maintain the cleanliness of your kegerator and ensure that subsequent pours are fresh and flavorful.
4. Keep the Kegerator Environment Clean:
Maintain a clean and dust-free environment around your kegerator. Regularly dust the exterior surfaces of the kegerator and ensure that the area around it is free from debris. Dust and dirt can find their way into your kegerator, affecting its cleanliness and potentially contaminating the beer.
5. Monitor and Regulate Temperature:
Keep a close eye on the temperature of your kegerator and ensure it remains within the recommended range. Fluctuating temperatures can affect the quality of the beer and promote the growth of bacteria. Use a reliable thermometer to monitor the temperature and make adjustments as necessary.
6. Store Kegs Properly:
When not in use, store your kegs properly to prevent contamination. Ensure that kegs are sealed tightly and stored in a clean and cool area. Avoid exposing them to extreme temperatures or sunlight, as these can negatively impact the quality and flavor of the beer.
7. Routinely Inspect and Replace O-Rings:
Regularly inspect the O-rings on your kegerator for any signs of wear or damage. Damaged O-rings can lead to leaks and contamination. Replace them as needed to maintain a proper seal and prevent any issues with your kegerator.
8. Use Proper Cleaning Tools:
Invest in high-quality cleaning tools specifically designed for cleaning kegerators. These tools, such as cleaning brushes and specialized line cleaning kits, are designed to effectively remove residue and buildup without causing damage to your kegerator.
9. Educate Yourself:
Stay informed about best practices for kegerator maintenance and cleaning. Research reputable sources, attend brewing workshops, or consult with experts in the field. The more knowledge you gain, the better equipped you’ll be to maintain a clean and efficient kegerator.
By implementing these tips, you can ensure that your kegerator remains in optimal condition, delivering fresh and flavorful beer every time you pour. Taking the time to maintain and care for your kegerator will not only enhance your beer-drinking experience but also prolong the lifespan of your equipment.
Now that you have a comprehensive understanding of cleaning and maintaining a kegerator, it’s time to put these tips into practice and enjoy your favorite beer on tap, right in the comfort of your own home!
Conclusion
A clean and well-maintained kegerator is key to enjoying the ultimate beer-drinking experience at home. Regular cleaning and maintenance not only ensure the freshness and quality of your beer but also extend the lifespan of your kegerator. By following the steps outlined in this article and implementing the tips provided, you can keep your kegerator in pristine condition and have the confidence that every pour will be perfect.
Understanding the importance of cleaning your kegerator is the first step towards ensuring a clean and efficient system. Regular cleaning helps eliminate contaminants, such as bacteria, yeast, and mold, that can affect the taste of your beer and compromise your health. Factors such as usage, beer type, and environment play a role in determining how often you should clean your kegerator, so it’s important to consider these factors when creating a cleaning schedule.
Knowing how to clean your kegerator step by step is crucial for a thorough and effective cleaning process. From disconnecting and emptying the keg to sanitizing the entire system, following a systematic approach will ensure that every component of your kegerator is properly cleaned and maintained. Avoiding common mistakes, such as using harsh chemicals or neglecting to sanitize, will help you achieve the best results and prevent any issues down the line.
In addition to regular cleaning, implementing proper maintenance practices is essential for maintaining a clean and efficient kegerator. Regularly cleaning the beer lines, monitoring and regulating temperature, and storing kegs properly are just a few examples of the steps you can take to keep your kegerator in top shape.
By following these guidelines and incorporating the tips provided, you can enjoy the freshest and most flavorful beer from your kegerator. Remember, a clean kegerator not only enhances your beer-drinking experience but also showcases your commitment to quality and attention to detail. So, raise a glass and toast to a clean and well-maintained kegerator that brings joy to every beer enthusiast’s heart!
Frequently Asked Questions about How Often To Clean A Kegerator
Was this page helpful?
At Storables.com, we guarantee accurate and reliable information. Our content, validated by Expert Board Contributors, is crafted following stringent Editorial Policies. We're committed to providing you with well-researched, expert-backed insights for all your informational needs.


0 thoughts on “How Often To Clean A Kegerator”