Articles
Wagner Wallpaper Steamer How To Use
Modified: February 20, 2024
Learn how to use the Wagner Wallpaper Steamer with our informative articles. Discover tips, tricks, and step-by-step guides to make your wallpaper removal process a breeze.
(Many of the links in this article redirect to a specific reviewed product. Your purchase of these products through affiliate links helps to generate commission for Storables.com, at no extra cost. Learn more)
Introduction
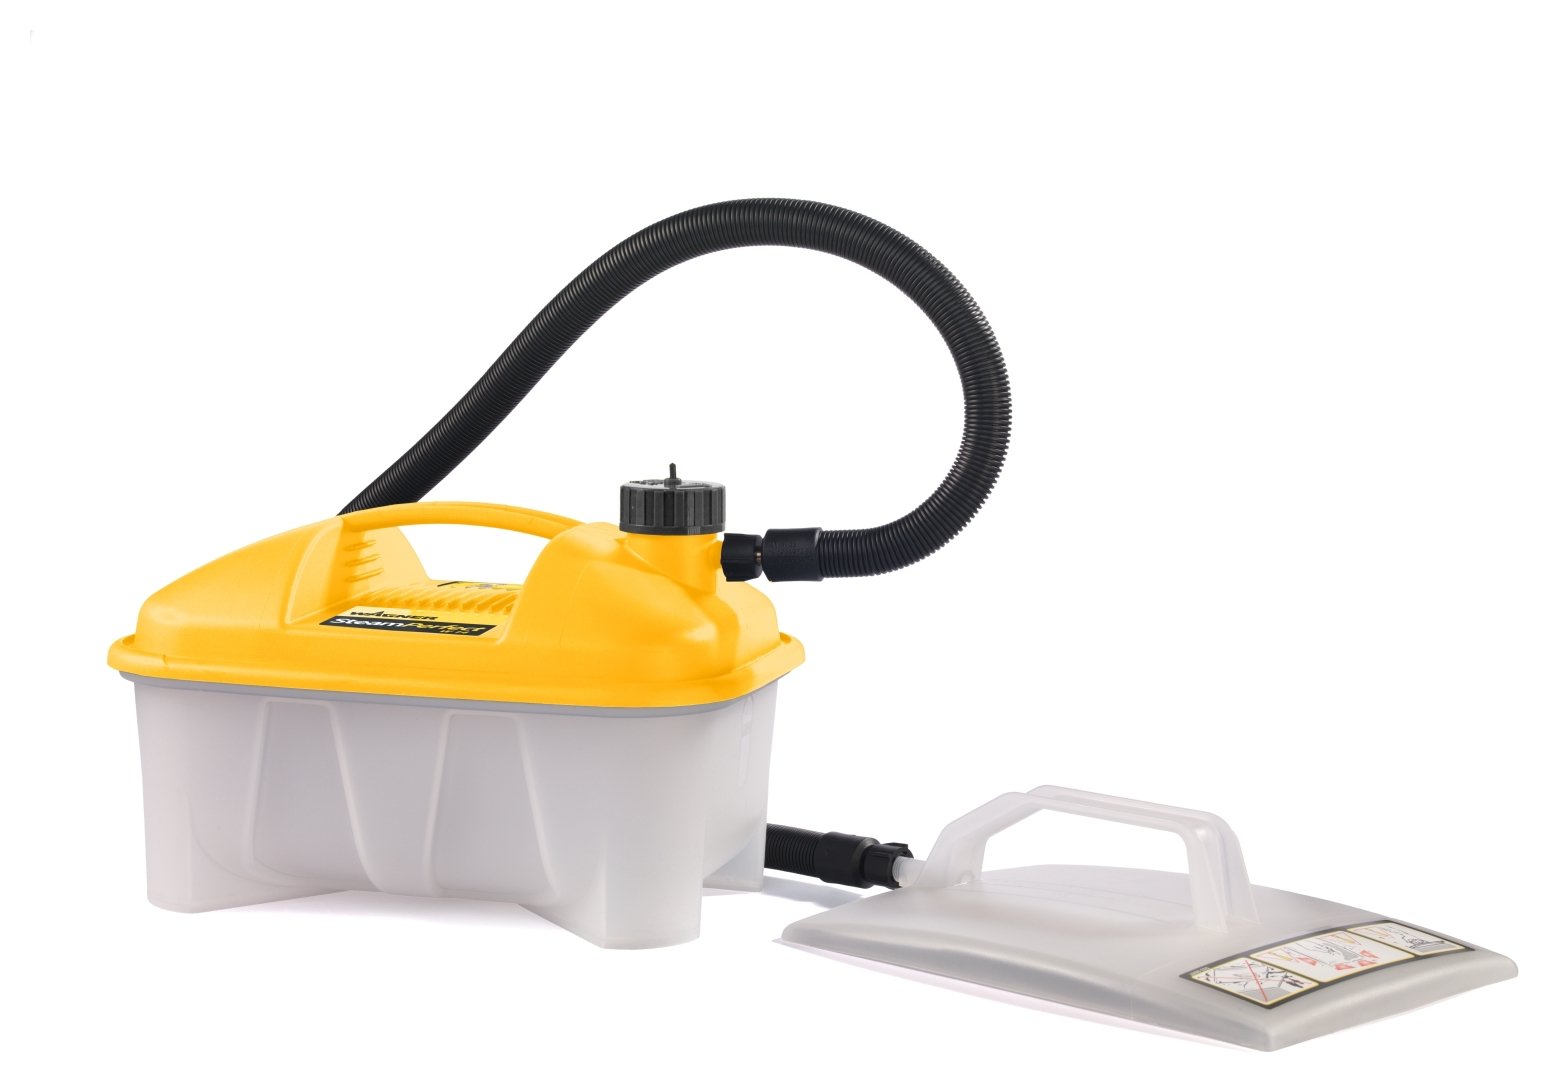
Removing wallpaper can be a daunting task, especially if you’ve never done it before. Traditional methods like scraping and using chemicals can be time-consuming, messy, and even damaging to your walls. That’s where the Wagner Wallpaper Steamer comes in. This handy tool is designed to make the wallpaper removal process easier and more efficient.
In this article, we’ll guide you through the steps of using the Wagner Wallpaper Steamer effectively and safely. Whether you’re a DIY enthusiast or a professional contractor, following these instructions will help you achieve professional results without the hassle.
Before we jump into the step-by-step guide, it’s important to note that safety should always be your top priority. Make sure to wear appropriate protective gear, such as gloves, goggles, and a mask, to protect yourself from steam and potential debris. Now, let’s get started with the Wagner Wallpaper Steamer!
Key Takeaways:
- Safety First
Prioritize safety when using the Wagner Wallpaper Steamer by wearing protective gear, handling the steamer with care, and following manufacturer’s instructions. Create a safe and well-prepared workspace for efficient and secure wallpaper removal. - Methodical Approach
Follow a methodical approach to using the Wagner Wallpaper Steamer, from proper assembly and workspace preparation to effective steaming and thorough cleanup. Patience and attention to detail lead to professional results without damaging walls.
Read also: 12 Amazing Wagner Wallpaper Steamer for 2024
Safety Precautions
When working with the Wagner Wallpaper Steamer, it’s important to prioritize safety to avoid any accidents or injuries. Here are some essential safety precautions to keep in mind:
- Protective Gear: Always wear protective gear, including gloves, goggles, and a mask, to shield yourself from steam and potential debris. This will minimize the risk of burns and inhalation of harmful substances.
- Turn off Power: Before you begin, ensure that the power source of the area you’ll be working in is turned off. This will prevent any electrical hazards and ensure your safety during the process.
- Inspect the Steamer: Before using the Wagner Wallpaper Steamer, thoroughly inspect it for any signs of damage. Check the power cord, steam plate, and water reservoir for any cracks or leaks. If you notice any issues, do not use the steamer and seek professional help for repairs.
- Proper Handling of the Steamer: When using the steamer, make sure to handle it with care. Avoid forcefully pulling or tugging the power cord, as this can damage the cord and cause electrical hazards. Also, be cautious while maneuvering the steamer to avoid tipping or causing any accidental spills or burns.
- Clear the Workspace: Before starting the wallpaper removal process, clear the workspace of any obstacles or hazards. This includes removing furniture, wall hangings, and other objects that may obstruct your movement or cause accidents.
- Ventilation: Ensure that the work area is well-ventilated to prevent the buildup of steam and moisture. Open windows or use fans to circulate the air and prevent condensation on surfaces.
- Follow Manufacturer’s Instructions: Read the instruction manual provided by Wagner carefully and follow the manufacturer’s guidelines for using the wallpaper steamer. This will ensure that you are using the tool correctly and efficiently, reducing the risk of accidents.
By adhering to these safety precautions, you can create a safe working environment and minimize the risk of accidents or injuries while using the Wagner Wallpaper Steamer. Now that we have covered the safety measures, let’s move on to the step-by-step guide on using the steamer effectively.
Step 1: Assemble the Wagner Wallpaper Steamer
Before you can start using the Wagner Wallpaper Steamer, you need to assemble it properly. Follow these steps to ensure a correct setup:
- Unpack the Steamer: Start by unpacking the Wagner Wallpaper Steamer from its packaging. Make sure to remove all the components and accessories included.
- Attach the Steam Plate: Take the steam plate provided with the steamer and attach it securely to the front of the steamer. Most models have a simple slot or fastening mechanism for easy attachment.
- Connect the Power Cord: Locate the power cord attached to the steamer. Plug the cord into a nearby electrical outlet. Ensure that the outlet is compatible with the electrical requirements of the steamer.
- Fill the Water Reservoir: The Wagner Wallpaper Steamer operates by generating steam from water. Locate the water reservoir, usually located at the back or side of the steamer. Remove the cap and fill it with water according to the manufacturer’s instructions. Be cautious not to overfill, as it may cause spills.
- Secure the Cap: Once you have filled the water reservoir, securely fasten the cap back onto the steamer. Ensure it is tightly sealed to prevent any leaks during operation.
- Check the Power Indicator: Some models of the Wagner Wallpaper Steamer have a power indicator light. Check if the light is illuminated, indicating that the steamer is powered on and ready to use.
Once you have successfully assembled the Wagner Wallpaper Steamer, you are ready to move on to the next step: preparing the workspace. Proper setup and assembly are crucial for the steamer to function efficiently and safely. Now, let’s move on to step 2.
Step 2: Prepare the Workspace
Preparing the workspace is essential before you begin using the Wagner Wallpaper Steamer. Taking the time to properly set up your work area will help you work efficiently and prevent any unnecessary damage. Follow these steps to prepare the workspace:
- Remove Furniture and Obstacles: Start by removing any furniture, decor, or other obstacles from the area where you’ll be removing the wallpaper. This will give you sufficient space to maneuver the steamer and prevent any accidental damage.
- Protect Floors and Surfaces: Place drop cloths or plastic sheets on the floor to protect your flooring from moisture and debris. Cover any nearby surfaces, such as countertops or cabinets, with plastic or old towels to prevent them from getting damaged during the process.
- Mask Off Electrical Outlets: Use painter’s tape to mask off any electrical outlets or switches near the wallpapered area. This will protect them from steam and moisture as you work.
- Ensure Adequate Lighting: Make sure the work area is well-lit. Proper lighting will help you see the details of the wallpaper as you steam and remove it.
- Ventilate the Room: Open windows or use fans to improve airflow and ventilation in the room. This will help dissipate the steam and prevent excessive moisture buildup.
By following these steps to prepare the workspace, you’ll create an optimal environment for using the Wagner Wallpaper Steamer. Taking these precautions will not only make your work easier but also help protect your surroundings from potential damage. Now that the workspace is ready, let’s move on to step 3: filling the steamer reservoir.
Step 3: Fill the Steamer Reservoir
Before you can start using the Wagner Wallpaper Steamer, you need to ensure that the steamer reservoir is properly filled with water. Follow these steps to fill the reservoir:
- Locate the Water Reservoir: The water reservoir is typically located at the back or side of the Wagner Wallpaper Steamer. Find the cap or opening for the reservoir.
- Remove the Cap: Unscrew or unlock the cap of the water reservoir to access the inside. Be cautious, as the cap may be hot if the steamer was recently used. Use a cloth or gloves if necessary.
- Add Water: Fill the reservoir with water according to the manufacturer’s instructions. The required amount of water may vary depending on the size and model of the steamer. Avoid overfilling, as it may cause spills or leaks during operation.
- Replace the Cap: Once the reservoir is filled, securely screw or fasten the cap back onto the steamer. Ensure that it is tightly sealed to prevent any water from escaping during operation.
It’s important to use clean water for the steamer reservoir. Avoid using any additives or chemicals that are not recommended by the manufacturer, as they can damage the steamer or affect its performance.
Now that the steamer reservoir is filled with water, you’re one step closer to removing the wallpaper with ease. The next step is to heat up the Wagner Wallpaper Steamer before you begin steaming the wallpaper.
When using a Wagner wallpaper steamer, make sure to fill the reservoir with water and allow the steamer to heat up before applying it to the wallpaper. Start from the top of the wall and work your way down, holding the steamer against the wallpaper for about 20-30 seconds to loosen the adhesive.
Read more: How To Use Wagner Steamer
Step 4: Heat up the Wagner Wallpaper Steamer
Before you can effectively remove the wallpaper using the Wagner Wallpaper Steamer, it’s important to heat up the steamer. Heating the water inside the steamer creates steam that will aid in softening the wallpaper adhesive. Follow these steps to heat up the steamer:
- Power on the Steamer: Ensure that the Wagner Wallpaper Steamer is connected to a power source and turned on. Most models have a power switch or button that needs to be pressed to start the heating process.
- Wait for the Indicator: Many Wagner Wallpaper Steamers have an indicator light that will illuminate once the steamer has reached the desired temperature. This light indicates that the steamer is ready for use.
- Preheat Time: The time required for the steamer to heat up may vary depending on the model. Refer to the manufacturer’s instructions for the recommended preheat time.
- Check and Maintain Water Level: While the steamer is heating up, periodically check the water level in the reservoir. If necessary, add more water to ensure a continuous supply of steam during the wallpaper removal process.
It’s important to note that the steamer’s steam plate will become hot during the heating process. Avoid touching the steam plate with your bare hands to prevent burns. Use gloves or wait until the steamer has cooled down before handling the steam plate.
Once the Wagner Wallpaper Steamer has been heated up, it’s time to move on to the next step: steaming the wallpaper. Heating the steamer adequately will ensure optimal steam production for efficient and effective wallpaper removal.
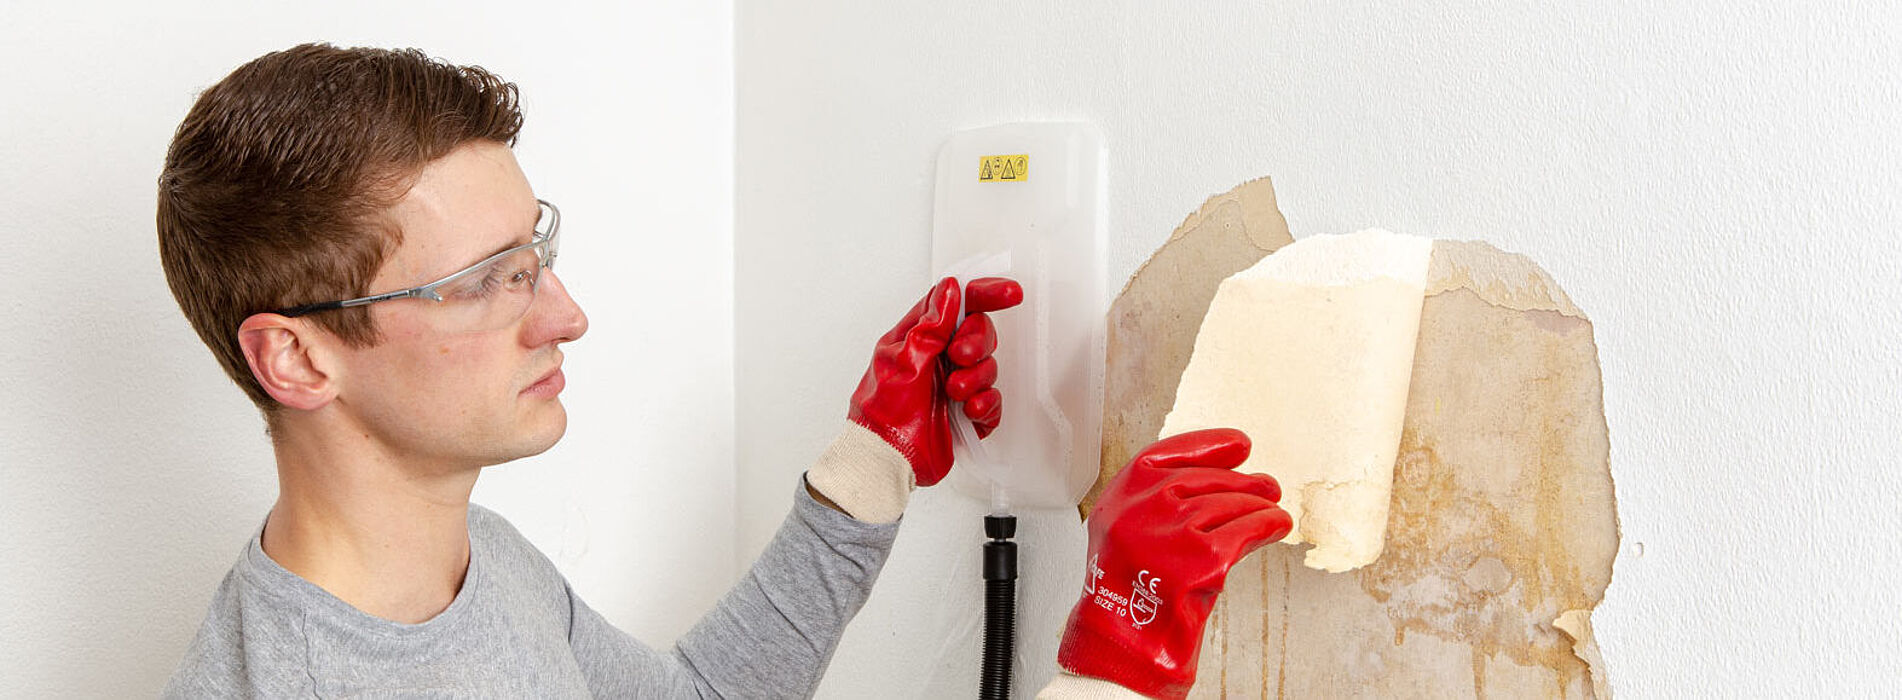
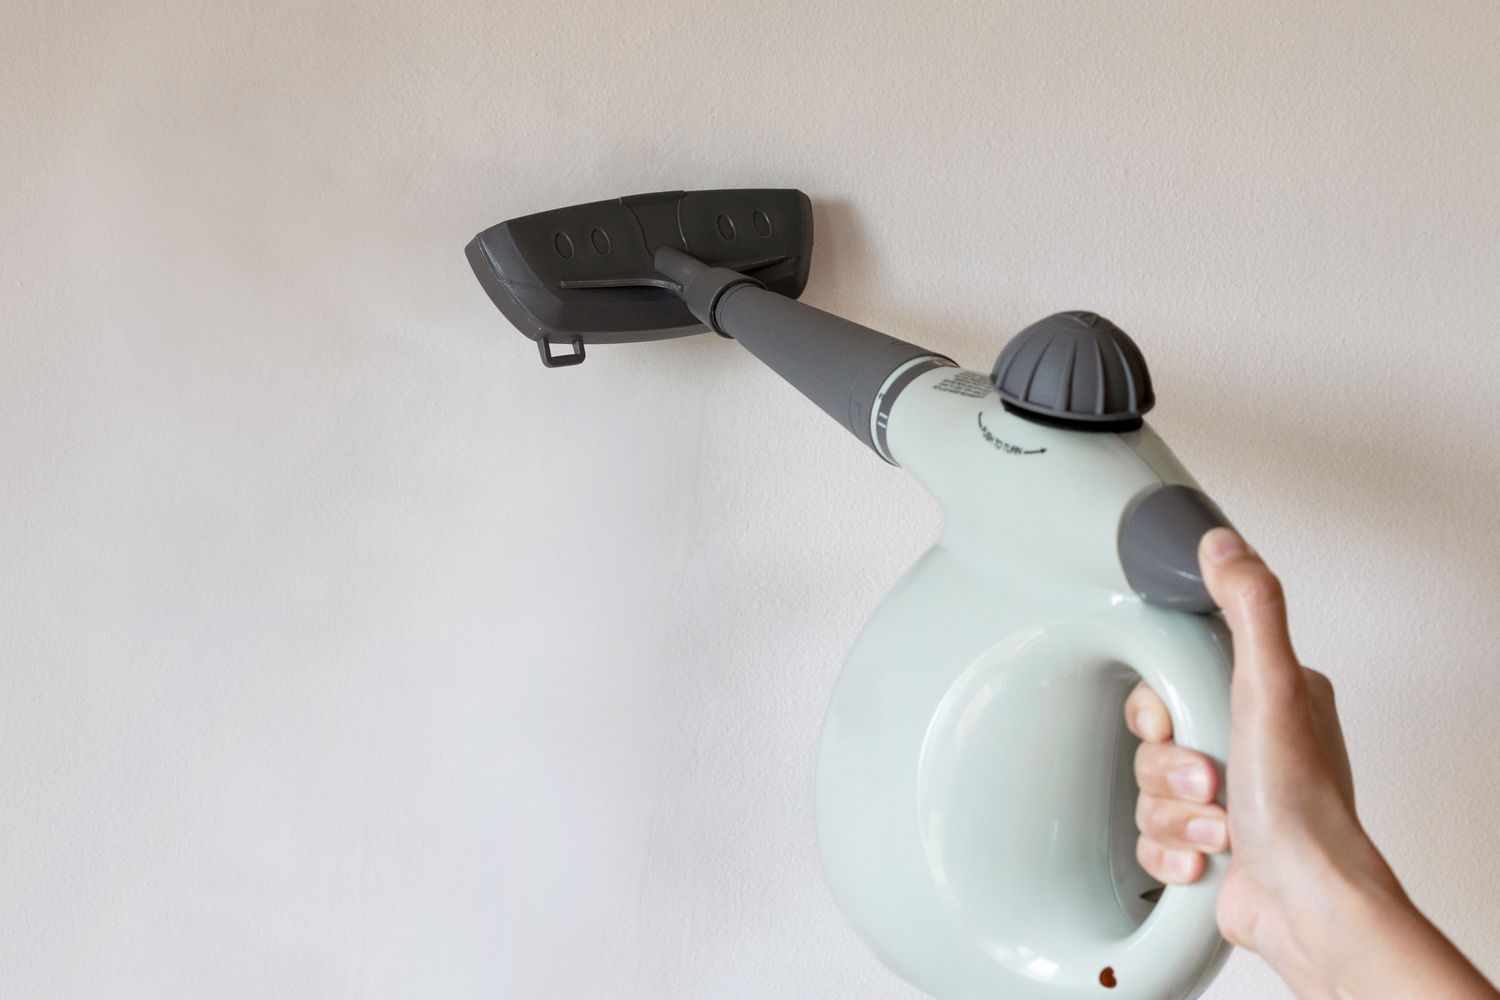
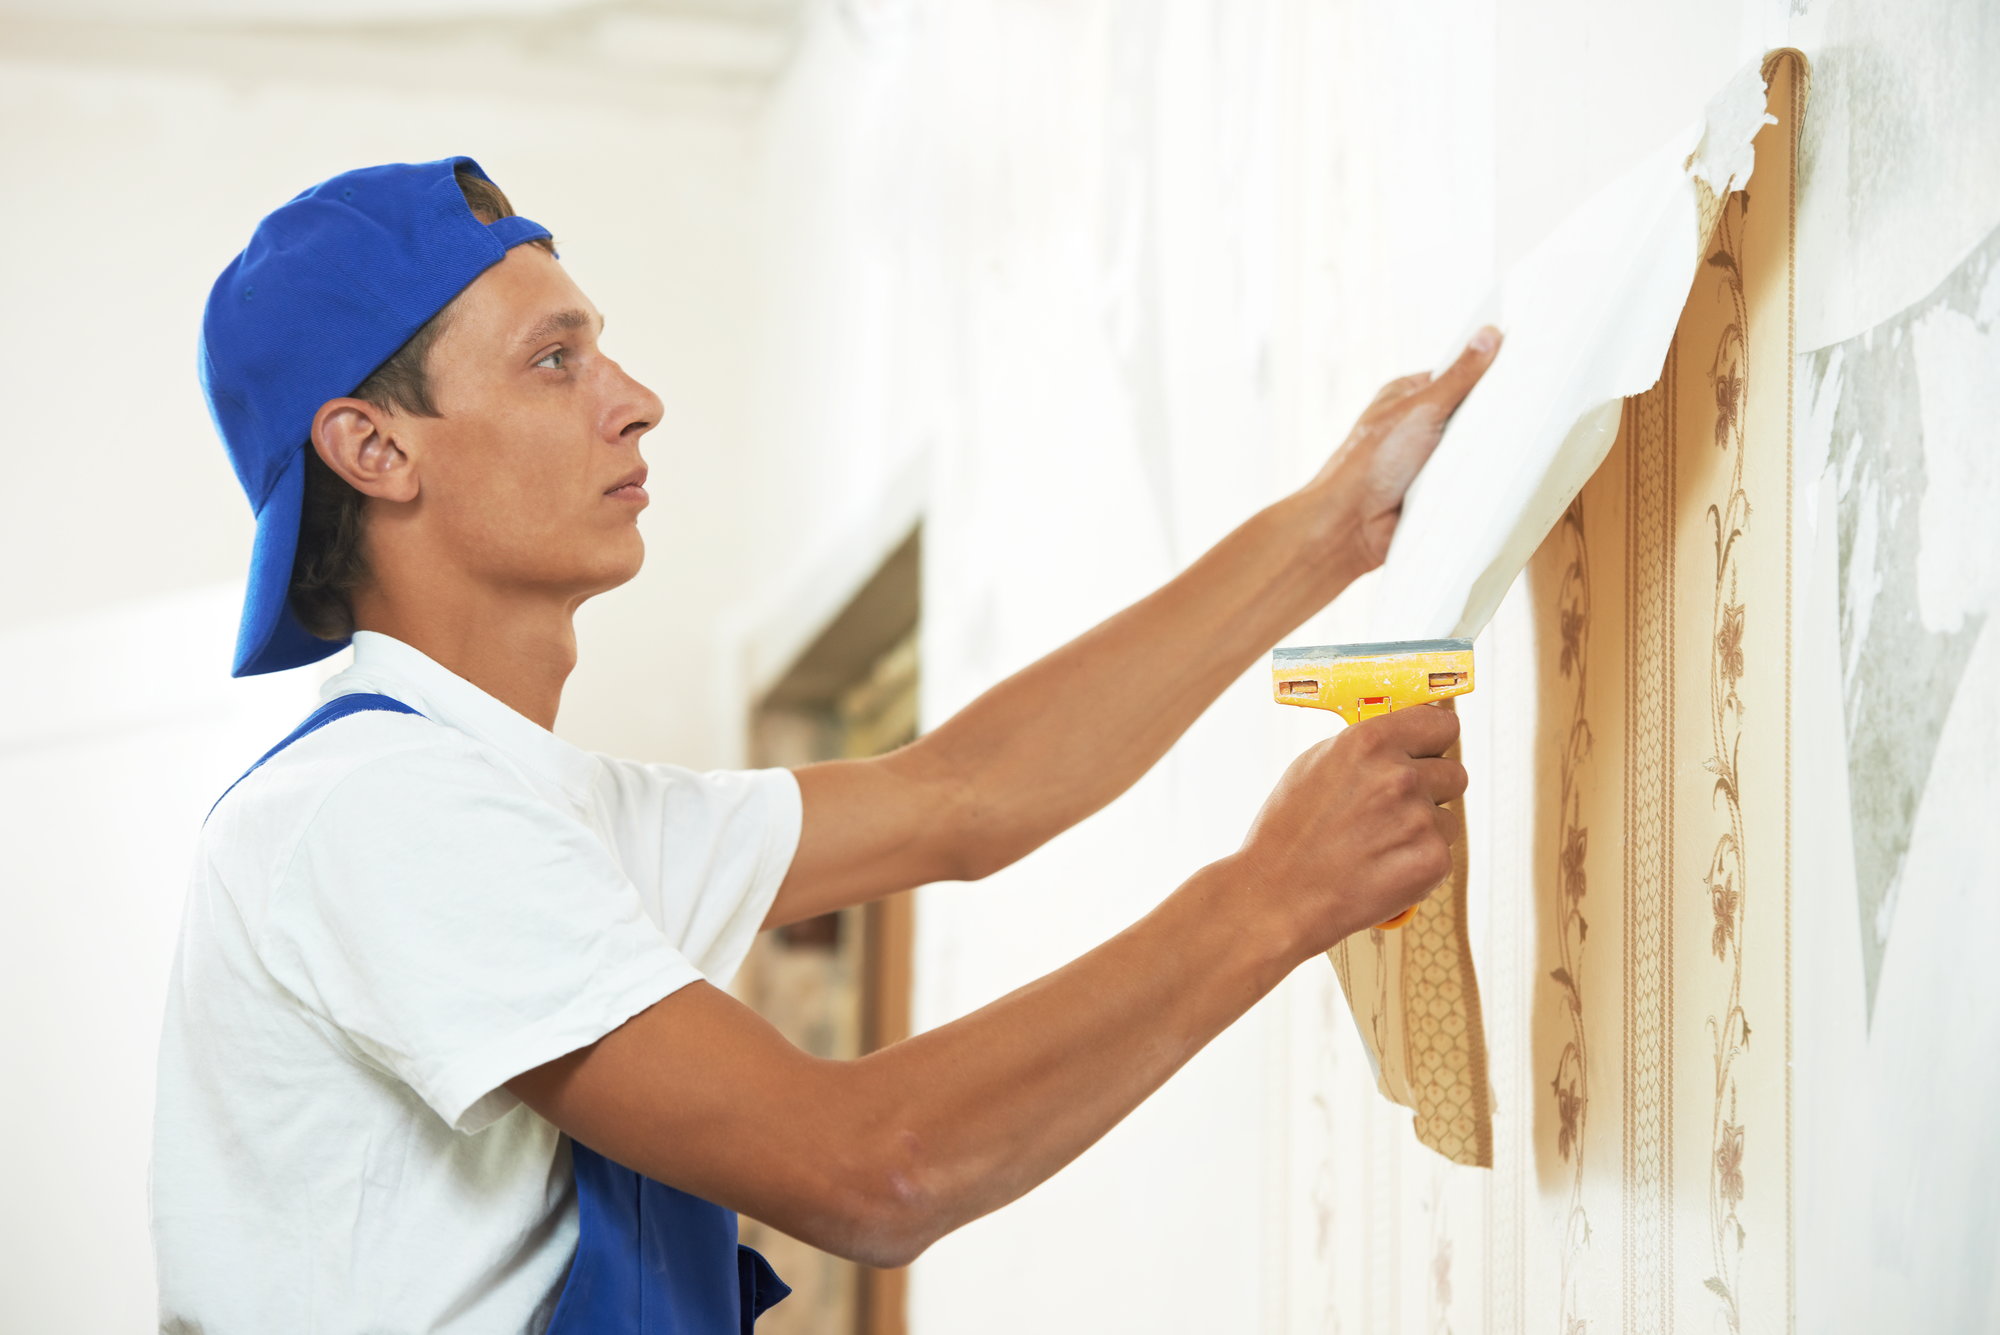
Step 5: Begin Steaming the Wallpaper
Now that the Wagner Wallpaper Steamer is heated up and ready for use, it’s time to start steaming the wallpaper. Follow these steps to effectively steam the wallpaper:
- Hold the Steamer Properly: Hold the Wagner Wallpaper Steamer with both hands, ensuring a firm grip on the handle. Keep a comfortable distance from the wallpaper to prevent steam from directly hitting your face or body.
- Position the Steam Plate: Place the steam plate against the wallpaper, starting from the top portion. Allow the steam to penetrate the wallpaper for a few seconds before moving on to the next section.
- Move the Steamer Slowly: Slowly move the steamer across the wallpaper surface in a horizontal or vertical motion. Ensure that you cover the entire section evenly with steam to effectively loosen the adhesive behind the wallpaper.
- Steam in Small Sections: Work in small sections, focusing on one area at a time. This will prevent the wallpaper from drying out before it can be adequately removed.
- Pay Attention to Stubborn Areas: Some areas of the wallpaper may be more stubborn than others. If you encounter a particularly resistant spot, spend extra time steaming that area to ensure the adhesive is sufficiently softened.
- Test the Wallpaper: After steaming a section, test the wallpaper by gently lifting a corner or edge using a scraper or putty knife. If the wallpaper easily peels away from the wall, it’s ready for removal. If not, continue steaming and testing until the adhesive is properly softened.
Remember to be patient and thorough while steaming the wallpaper. Properly steaming each section will make the removal process much easier. Be cautious not to excessively saturate the wallpaper with steam, as it may damage the underlying wall surface.
With the wallpaper sufficiently steamed, it’s time to move on to the next step: removing the wallpaper.
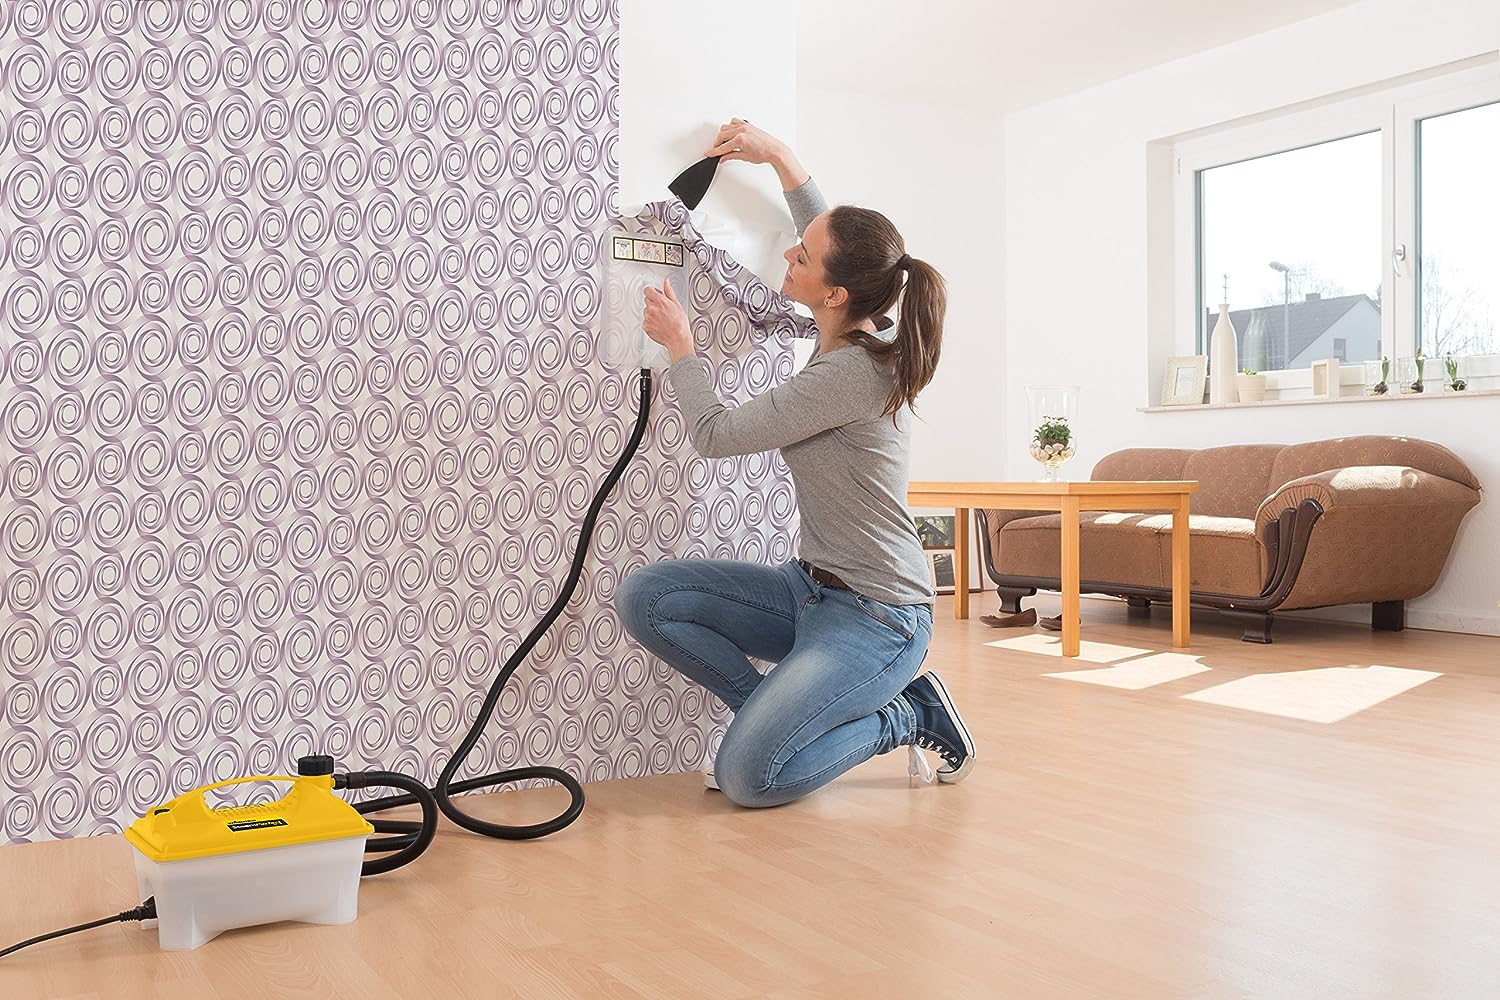
Step 6: Removing the Wallpaper
After steaming the wallpaper with the Wagner Wallpaper Steamer, it’s time to remove it. Follow these steps to effectively and efficiently remove the wallpaper:
- Start from a Corner or Edge: Begin by peeling off a corner or edge of the wallpaper that has been adequately softened by the steam. Use a scraper or putty knife to gently lift the paper from the wall.
- Work in Small Sections: Continue to peel and remove the wallpaper in small sections. Focus on one area at a time to avoid drying out the wallpaper before it can be removed.
- Use the Scraper or Putty Knife: As you peel off the wallpaper, use a scraper or putty knife to help loosen and remove stubborn sections. Gently scrape the wallpaper away from the wall, being careful not to damage the underlying surface.
- Dispose of the Wallpaper: Place the removed wallpaper sections in a trash bag or container for easy disposal. Work systematically to keep your workspace clean and organized.
- Continue Steaming as Needed: Throughout the wallpaper removal process, continue to steam the remaining sections of the wall that need to be stripped. Make sure to steam each area adequately to loosen the adhesive before attempting to remove the paper.
- Inspect and Clean the Wall Surface: After removing the wallpaper, inspect the wall surface for any remaining adhesive or residue. Use a sponge or cloth dampened with warm water or adhesive remover to clean the walls and remove any leftover residue.
- Allow the Wall to Dry: Before applying any new finishes or treatments to the wall, allow it to fully dry. This will ensure a smooth surface for the next steps of your wall improvement project.
By following these steps, you can effectively remove the wallpaper using the Wagner Wallpaper Steamer. Take your time and work systematically to achieve the best results without damaging the underlying wall surface.
Now that the wallpaper has been removed, it’s time to move on to the final step: cleaning up the work area.
Step 7: Clean up the Work Area
After successfully removing the wallpaper using the Wagner Wallpaper Steamer, it’s important to clean up the work area for a finished and tidy result. Follow these steps to effectively clean up the work area:
- Dispose of Waste: Properly dispose of the removed wallpaper sections and any other waste generated during the wallpaper removal process. Use a trash bag or container and dispose of it according to your local waste disposal guidelines.
- Remove Protective Coverings: Carefully remove any drop cloths, plastic sheets, or protective coverings that were placed on the floor or other surfaces. Dispose of them or clean them as needed.
- Clean Up Tools and Equipment: Clean the Wagner Wallpaper Steamer and any other tools or equipment used during the removal process. Follow the manufacturer’s instructions to ensure proper cleaning and maintenance.
- Clean the Wall Surface: Inspect the wall surface for any remaining adhesive or residue. Use a sponge or cloth dampened with warm water or adhesive remover to thoroughly clean the walls and remove any remaining residue. Wipe the walls dry with a clean cloth.
- Inspect the Surrounding Area: Take a few moments to inspect the surrounding area for any stray wallpaper remnants or debris. Remove them and ensure the area is clean and free of clutter.
- Restore the Room: Once the work area is clean and tidy, put back any furniture or decor items that were temporarily removed. Arrange the room to its original state or as desired now that the wallpaper has been successfully removed.
- Dispose of Water Safely: If there is any remaining water in the steamer reservoir, dispose of it according to local regulations. Be mindful of any chemicals or additives used in the water and dispose of them properly.
By following these steps to clean up the work area, you’ll ensure a finished and organized space after wallpaper removal. Take the time to clean and maintain your tools and equipment for their longevity and future use.
With the work area cleaned up, you have successfully completed the process of removing wallpaper using the Wagner Wallpaper Steamer. Congratulations on a job well done!
Remember, proper preparation, adherence to safety precautions, and careful techniques are key to achieving optimal results with the Wagner Wallpaper Steamer. Happy wallpaper removal!
Read more: How To Use A Wallpaper Steamer
Conclusion
Removing wallpaper can be a challenging task, but with the help of the Wagner Wallpaper Steamer, the process becomes much more manageable. By following the step-by-step guide provided in this article, you can effectively and efficiently remove wallpaper without the need for harsh chemicals or excessive scraping.
Throughout the process, it is crucial to prioritize safety by wearing protective gear and following the manufacturer’s instructions. The Wagner Wallpaper Steamer, when used correctly, can make the wallpaper removal process safer and less time-consuming.
Remember to assemble the steamer properly, prepare the workspace, fill the steamer reservoir with water, heat up the steamer, and begin the steaming process. Take your time when removing the wallpaper, working in small sections and testing to ensure the adhesive is adequately softened.
After the wallpaper has been successfully removed, clean up the work area, dispose of waste properly, and restore the room to its original state. Take care of your tools and equipment by cleaning and maintaining them for future use.
By following these guidelines and using the Wagner Wallpaper Steamer, you can achieve professional results in your wallpaper removal projects. Say goodbye to outdated wallpaper and hello to a fresh, new look for your walls.
Remember, practice makes perfect, so don’t be discouraged if you encounter any challenges along the way. With time and experience, you will become more proficient at using the Wagner Wallpaper Steamer and achieving flawless wallpaper removal results.
Happy steaming and enjoy your beautifully transformed walls!
Frequently Asked Questions about Wagner Wallpaper Steamer How To Use
Was this page helpful?
At Storables.com, we guarantee accurate and reliable information. Our content, validated by Expert Board Contributors, is crafted following stringent Editorial Policies. We're committed to providing you with well-researched, expert-backed insights for all your informational needs.


0 thoughts on “Wagner Wallpaper Steamer How To Use”