Home>Articles>What Can Be A Cause Of Non-Production To Low Production Of Ice In The Ice Maker?
Articles
What Can Be A Cause Of Non-Production To Low Production Of Ice In The Ice Maker?
Modified: August 24, 2024
Discover the common causes behind non-production or low production of ice in ice makers and find helpful articles to troubleshoot the issue.
(Many of the links in this article redirect to a specific reviewed product. Your purchase of these products through affiliate links helps to generate commission for Storables.com, at no extra cost. Learn more)
Introduction
Having an ice maker in your home or business can be a convenient and refreshing addition. However, sometimes you may encounter issues with your ice maker, such as it not producing ice or producing it at a significantly lower rate than usual. This can be frustrating, especially if you rely on a steady supply of ice for beverages or other purposes.
There are several common causes for non-production to low production of ice in an ice maker. Understanding these causes can help you troubleshoot the issue and potentially resolve it without having to call a professional repair service.
In this article, we will explore some of the most frequent causes of ice maker inefficiency, providing you with insights on how to identify and address the problem. By addressing these issues, you can get your ice maker back up and running at optimal production levels in no time.
Before we delve into the specific causes, it’s important to note that these troubleshooting steps apply to traditional ice makers found in most refrigerators. If you have a standalone ice maker or a different type of ice maker, the causes and solutions may differ.
Now, let’s take a closer look at the common causes of non-production to low production of ice and how to resolve them.
Key Takeaways:
- Ensure a steady water supply by checking for kinks, clogs, and filter status to troubleshoot non-production or low production of ice in your ice maker. Regular maintenance is key to optimal ice production.
- Address issues with the thermostat, motor, supply line, and ice bin to restore proper ice production in your ice maker. Regular cleaning and maintenance are crucial for efficient ice production.
Common Causes of Non-Production to Low Production of Ice
There are several potential reasons why your ice maker may not be producing ice or is producing it at a reduced rate. Understanding these causes will help you troubleshoot the issue effectively. Let’s explore some of the most common culprits:
1. Insufficient Water Supply: A lack of water supply is a common cause of ice maker issues. Check if the water valve supplying water to the ice maker is fully open. Additionally, ensure that the water supply line is not kinked or blocked, as this can restrict water flow to the ice maker.
2. Clogged Water Inlet Valve: Over time, mineral deposits or debris can accumulate in the water inlet valve, obstructing the water flow. To resolve this, turn off the water supply to the ice maker and clean the valve using a vinegar solution or a recommended cleaner. Be sure to consult your appliance’s manual for specific instructions.
3. Malfunctioning Water Filter: If your refrigerator has a water filter, a clogged or expired filter can reduce water flow to the ice maker. Replace the filter according to the manufacturer’s recommendations to ensure a steady water supply.
4. Faulty Water Supply Line: A damaged or leaky water supply line can disrupt the water flow to the ice maker. Inspect the water supply line for any cracks, kinks, or leaks. If necessary, replace the water supply line to restore proper water flow.
5. Defective Ice Maker Control Module: The control module is responsible for activating the ice maker when needed. If it’s faulty, the ice maker may not produce ice or may do so intermittently. Consider replacing the control module if necessary.
6. Low Freezer Temperature: The freezer temperature should be set between 0 and 5 degrees Fahrenheit (-18 to -15 degrees Celsius) for proper ice production. If the temperature is too high, adjust it accordingly and monitor if ice production improves.
7. Damaged or Dirty Condenser Coils: Dust and debris can accumulate on the condenser coils, inhibiting proper heat dissipation. This can lead to inefficient ice production. Clean the coils using a soft brush or vacuum cleaner to ensure optimal performance.
8. Faulty Ice Maker Thermostat: The thermostat regulates the temperature inside the ice maker, determining when it should cycle on to produce ice. If the thermostat is faulty, it may not signal the ice maker to produce ice. Consider replacing the thermostat if needed.
9. Malfunctioning Ice Maker Motor: The ice maker motor is responsible for powering the ice-making process. If the motor is damaged or malfunctioning, it may not cycle on to produce ice. Consult a professional technician to inspect and replace the motor if necessary.
10. Blocked or Frozen Ice Maker Supply Line: Ice can sometimes form inside the supply line, blocking the water flow. Check for any blockages or ice buildup and thaw the line if necessary.
11. Overfilled or Jammed Ice Bin: An overfilled ice bin can obstruct the ice maker’s ejector mechanism, preventing it from producing more ice. Empty the ice bin and ensure it is not jammed or obstructed in any way.
12. Faulty Shut-off Arm or Sensor: The shut-off arm or sensor detects when the ice bin is full and tells the ice maker to stop producing ice. If it’s faulty or misaligned, it may not provide the correct signal, resulting in non-production or low production of ice. Adjust or replace the shut-off arm or sensor if needed.
By identifying the specific cause of your ice maker issues, you can take the appropriate steps to resolve the problem. In the next section, we will provide some additional tips and steps to help troubleshoot and fix these issues.
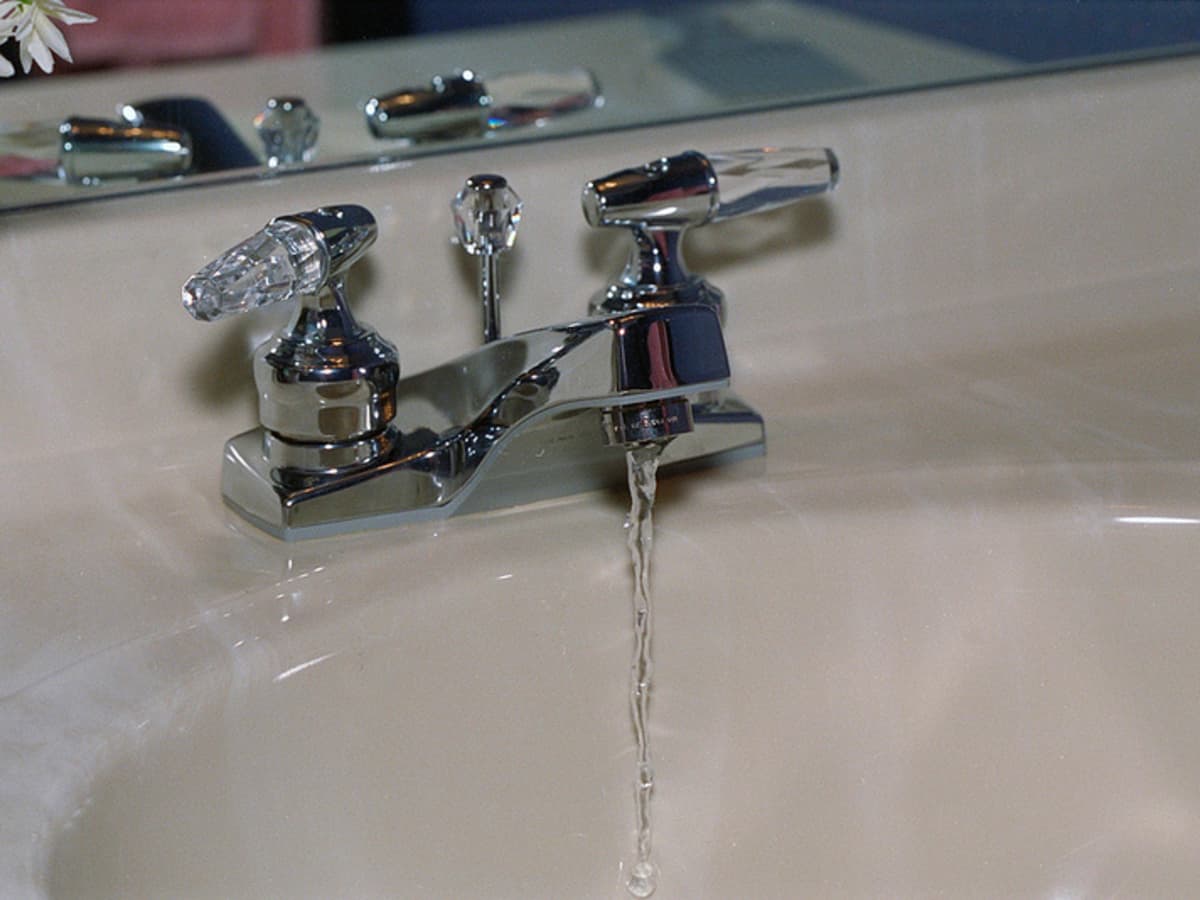
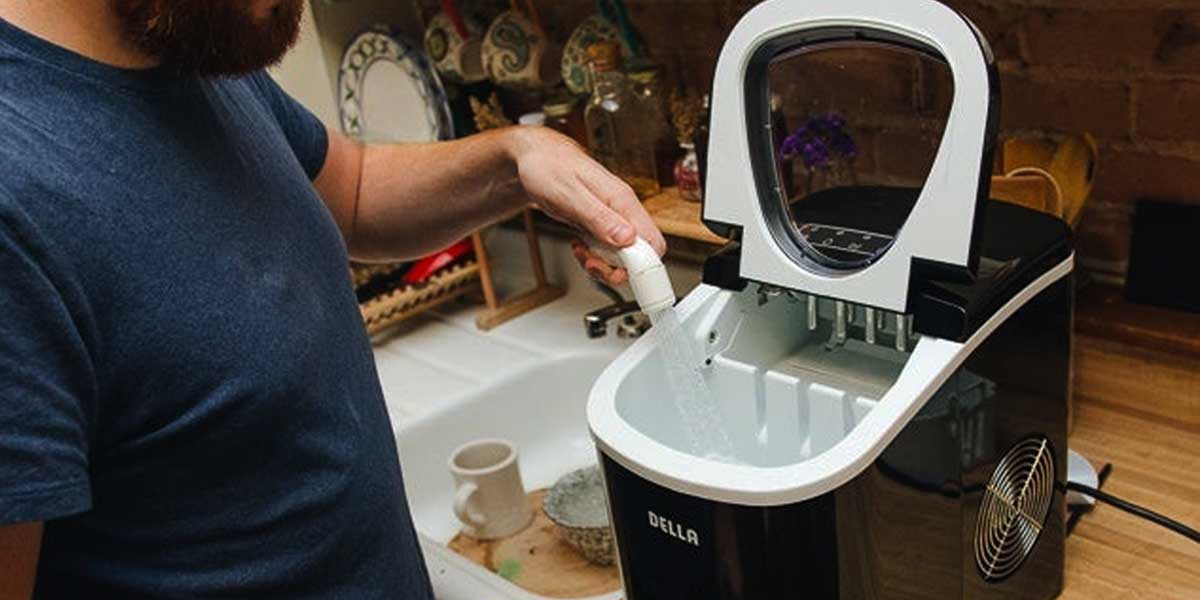
Insufficient Water Supply
One of the most common causes of non-production or low production of ice in an ice maker is an insufficient water supply. Without an adequate water flow, the ice maker cannot produce ice cubes as intended. Here are some steps to address this issue:
First, ensure that the water valve supplying water to the ice maker is fully open. This valve is usually located on the back of the refrigerator or under the sink. If it’s partially closed or completely shut, open it completely to allow sufficient water flow.
Next, check the water supply line for any kinks, blockages, or leaks. A kinked or restricted water line can significantly impede the water flow to the ice maker. Straighten out any kinks and ensure that the line is not being pinched against the wall or any other objects. If you notice any blockages, clear them to restore a smooth flow of water.
It’s also essential to inspect the water filter, if your refrigerator has one. A clogged or expired water filter can restrict water flow to the ice maker. Follow the manufacturer’s recommendations on how often to replace the filter, and do so if it’s overdue. Refer to your appliance’s manual for guidance on replacing the water filter.
If you notice that the water pressure in your home is low, it may affect the flow of water to the ice maker as well. Check the water pressure at the nearest faucet and consult a plumber if necessary to address any underlying plumbing issues.
In some cases, the water inlet valve itself may be the culprit. This valve controls the flow of water into the ice maker. Over time, mineral deposits and debris can accumulate inside the valve, obstructing the water flow. Turn off the water supply to the ice maker and clean the valve using a vinegar solution or a recommended cleaner. Consult your appliance’s manual for specific instructions on accessing and cleaning the water inlet valve.
If you’ve checked all the above steps and the water supply is still insufficient, it may be necessary to consult a professional technician or contact the manufacturer for further assistance. They can diagnose and resolve any underlying issues that may be causing the insufficient water supply.
Remember, ensuring a consistent and ample water supply is crucial for the proper functioning of the ice maker. By addressing the issue of insufficient water supply, you can restore optimal ice production in your ice maker.
Clogged Water Inlet Valve
Another common cause of non-production or low production of ice in an ice maker is a clogged water inlet valve. Over time, mineral deposits, sediment, or debris can accumulate inside the valve, obstructing the water flow and impeding the ice-making process. To address this issue, follow these steps:
First, locate the water inlet valve, which is usually located at the back of the refrigerator or under the sink. Before proceeding, make sure to turn off the water supply to the ice maker. This can usually be done by turning the valve clockwise until it is fully closed.
Once the water supply is turned off, remove the access panel or cover that provides access to the water inlet valve. Refer to your appliance’s manual for specific instructions on how to access the valve.
With the valve exposed, inspect it for any visible signs of clogging or buildup. You may notice debris, sediment, or mineral deposits inside the valve. Gently clean the valve using a soft brush or a cloth to remove any dirt or grime.
If the buildup is stubborn, you can use a vinegar solution to dissolve the mineral deposits. Mix equal parts of vinegar and water and apply it to the valve using a brush or cloth. Let it sit for a few minutes to allow the vinegar to dissolve the deposits, and then rinse it thoroughly with clean water.
In some cases, the clogging may be severe, and manual cleaning may not be sufficient. In such situations, it may be necessary to replace the water inlet valve altogether. Consult your appliance’s manual or contact the manufacturer for guidance on replacing the valve.
Once the valve is clean or replaced, carefully reconnect the water supply line, ensuring that it is properly secured and free from any kinks or bends. Turn on the water supply and check for any leaks or drips.
After restoring the water supply, give the ice maker some time to cycle and start producing ice. It may take a few hours for the ice maker to resume normal operations and produce a sufficient amount of ice.
Regularly inspecting and cleaning the water inlet valve can help prevent future clogs and ensure a consistent water flow to your ice maker. Consider incorporating this maintenance task into your routine to maintain optimal ice production and extend the lifespan of your ice maker.
If you have tried these troubleshooting steps and the issue persists, it may be necessary to consult a professional technician or reach out to the manufacturer for further assistance. They can provide specialized guidance and support to resolve the clogged water inlet valve issue effectively.
Malfunctioning Water Filter
A malfunctioning water filter is another common cause of non-production or low production of ice in an ice maker. The water filter plays a crucial role in purifying the water that flows into the ice maker, ensuring that it is clean and free from impurities. If the filter becomes clogged or expired, it can restrict the water flow and hinder the ice-making process. To address this issue, follow these steps:
First, determine if your refrigerator has a water filter. Many modern refrigerators come equipped with built-in water filters to improve the quality of the water dispensed through the ice maker and water dispenser.
Locate the water filter, which is typically located inside the refrigerator compartment or at the back of the appliance. Consult your appliance’s manual if you are unsure about the exact location of the water filter.
Check the status of the water filter. Most filters have a visual indicator that displays the status of the filter, indicating whether it is still usable, needs replacement, or is expired. Refer to the manufacturer’s guidelines to determine the recommended lifespan of the water filter.
If the water filter is expired or overdue for replacement, it is essential to replace it promptly. Follow the manufacturer’s instructions on how to remove the old filter and install a new one. Typically, this involves twisting or sliding the old filter out and inserting the new one in its place.
Before installing the new filter, make sure to flush it with water to remove any carbon fines or debris. This can be done by running water through the filter for a few minutes until the water runs clear.
Once the new filter is installed, properly secure it according to the manufacturer’s instructions. Ensure that it is tightly sealed to prevent any leaks.
After replacing the water filter, give the ice maker some time to initiate the production cycle. It may take a few hours for the ice maker to start producing ice again. Monitor the ice production to ensure that it returns to normal levels.
It is crucial to follow the manufacturer’s recommendations for replacing the water filter. Typically, filters need to be replaced every six months to ensure optimal performance. Ignoring the recommended replacement schedule can lead to reduced water flow and poor ice production.
If you have replaced the water filter and the issue persists, there may be other underlying problems with the ice maker or the water supply. In such cases, it is advisable to seek the assistance of a professional technician or to contact the manufacturer for further troubleshooting and support.
Regularly replacing the water filter and following the manufacturer’s maintenance guidelines will help ensure a clean and reliable water supply for your ice maker, allowing it to produce ice at optimal levels.
Read more: What Causes Ice Maker To Freeze Up
Faulty Water Supply Line
A faulty water supply line can contribute to non-production or low production of ice in an ice maker. The water supply line carries water from the main water source to the ice maker, and if it is damaged, leaking, or blocked, it can disrupt the water flow and hinder ice production. Here are some steps to address this issue:
Start by inspecting the water supply line for any visible signs of damage, such as cracks or leaks. Trace the line from the ice maker to the water source, checking for any potential issues along the way. If you notice any damage, it is likely a faulty water supply line contributing to the problem.
If the water supply line is damaged, it may need to be replaced. Consult your appliance’s manual or contact the manufacturer for guidance on obtaining a replacement water supply line. Follow the manufacturer’s instructions to disconnect the old line and install the new one properly.
Sometimes, the water supply line may be blocked by mineral deposits or debris, restricting the water flow to the ice maker. In such cases, you can try to flush out the line to remove any obstructions. Turn off the water supply to the ice maker and disconnect the water line. Place a bucket under the disconnected end of the line, then open the water supply valve briefly to flush out any debris. Once the line runs clear, reconnect it to the ice maker and turn on the water supply.
Ensure that the water supply line is not bent or kinked, as this can restrict the water flow. Straighten any kinks or loops in the line to ensure a smooth and uninterrupted water flow to the ice maker.
Additionally, check that the water supply line is properly connected at both ends – the ice maker and the main water source. Tighten any loose connections to prevent leaks and maintain a steady water flow.
After addressing any issues with the water supply line, allow the ice maker some time to cycle and start producing ice. It may take a few hours for the ice production to return to normal levels.
If you have checked the water supply line and the issue persists, it may be necessary to consult a professional technician or contact the manufacturer for further assistance. They can perform a thorough inspection of the water supply line and diagnose any other underlying issues that may be affecting the water flow to the ice maker.
Regularly inspecting and maintaining the water supply line is essential for ensuring proper ice production in your ice maker. By addressing any faults or blockages in the water supply line, you can restore the water flow and improve the ice-making process.
Defective Ice Maker Control Module
A defective ice maker control module can cause non-production or low production of ice in an ice maker. The control module is responsible for activating the ice maker when needed, controlling the timing and duration of the ice-making cycle. If it is malfunctioning or faulty, it can disrupt the ice-making process. Here are some steps to address this issue:
First, locate the ice maker control module. It is typically found inside the ice maker itself, either on the front or side. Refer to your appliance’s manual for specific instructions on how to access the control module.
Inspect the control module for any visible signs of damage or malfunction. Look for loose wires, burnt components, or any other indications of a defect. If you notice any issues, it is likely a defective ice maker control module contributing to the problem.
Before proceeding with any repairs, cut off the power supply to the ice maker to avoid any electrical mishaps. This can usually be done by unplugging the appliance or turning off the circuit breaker that supplies power to the ice maker.
Once you have ensured the power is turned off, carefully detach the control module from the ice maker. This may involve removing screws, clips, or connectors. Take note of the wire connections and how they are positioned before disconnecting them.
If you have identified a specific defect or damage on the control module, it may need to be replaced. Contact the manufacturer or a reputable appliance parts supplier to obtain a compatible replacement control module. Follow the manufacturer’s instructions to install the new module, reconnecting the wires and securing the module in place.
If you are unsure about the condition of the control module or how to proceed with the repair, it is advisable to consult a professional technician or contact the manufacturer for assistance. They can provide specialized guidance and ensure that the control module is replaced correctly.
Once the new control module is installed, restore the power supply to the ice maker and allow it some time to initiate the ice-making cycle. It may take a few hours for the ice maker to begin producing ice. Monitor the ice production to ensure that it resumes normal levels.
If the issue persists even after replacing the control module, there may be other underlying problems with the ice maker or its components. In such cases, it is best to seek professional assistance to diagnose and resolve the issue effectively.
By addressing a defective ice maker control module, you can restore the proper functioning of the ice maker and ensure consistent production of ice. Regular maintenance and care of the ice maker can help prolong the lifespan of the control module and prevent future issues.
Low Freezer Temperature
A low freezer temperature is a common factor contributing to non-production or low production of ice in an ice maker. The freezer temperature plays a crucial role in the ice-making process, as it determines the formation and solidification of the ice cubes. If the freezer temperature is too low, it can hinder the ice production. Here are some steps to address this issue:
Start by checking the temperature settings of your freezer. The ideal temperature range for the freezer compartment is typically between 0 to 5 degrees Fahrenheit (-18 to -15 degrees Celsius). Use a freezer thermometer to monitor the actual temperature inside the freezer. Adjust the temperature settings if needed to ensure it falls within this range.
If the freezer temperature is set too low, such as below 0 degrees Fahrenheit (-18 degrees Celsius), it can cause the water in the ice maker to freeze too quickly. This rapid freezing can lead to small or incomplete ice cubes. Adjust the temperature settings to a slightly higher level within the recommended range and allow the ice maker some time to adjust to the new temperature.
On the other hand, if the freezer temperature is too high, such as above 5 degrees Fahrenheit (-15 degrees Celsius), it can hinder the ice-making process. The water may not freeze properly or take longer to solidify, resulting in reduced ice production. Adjust the temperature settings to a slightly lower level within the recommended range and monitor if ice production improves.
To help regulate and maintain the proper freezer temperature, it’s important to ensure that the freezer door seals tightly. Check the door gasket for any signs of wear, damage, or gaps. A faulty door seal can cause temperature fluctuations and impact the ice-making process. If necessary, replace the door gasket to ensure a proper seal.
Additionally, avoid overloading the freezer with a large amount of food items. An overcrowded freezer can obstruct the airflow and cause uneven temperature distribution. This can affect the ice production and overall performance of the ice maker. Organize the freezer contents to allow for proper air circulation and ensure even cooling.
Regularly cleaning the freezer and removing any ice build-up can also help maintain optimal temperature conditions. Ice accumulation can insulate the freezer compartment, causing temperature fluctuations and affecting ice production. Defrost the freezer as needed or use a freezer-safe defrosting solution to remove any ice buildup.
By maintaining a proper freezer temperature, you can ensure the optimal conditions for ice production in your ice maker. Monitoring the temperature, adjusting the settings as necessary, and keeping the freezer clean and organized can significantly improve ice production and the overall performance of your ice maker.
Check the water supply to the ice maker, as a lack of water flow or a clogged water line can cause non-production or low production of ice. Also, ensure the temperature in the freezer is set correctly for ice production.
Damaged or Dirty Condenser Coils
Damaged or dirty condenser coils can contribute to non-production or low production of ice in an ice maker. Condenser coils are responsible for releasing heat from the freezer, helping to maintain the proper temperature for ice production. If the coils become damaged or dirty, they can hinder the cooling process and impact the ice-making capabilities. Here are some steps to address this issue:
Start by locating the condenser coils in your refrigerator. They are typically found at the back of the appliance or beneath the refrigerator behind a removable panel. Consult your appliance’s manual if you are unsure about the exact location of the condenser coils.
Inspect the condenser coils for any visible damage, such as bent fins or leaks. Bent fins can restrict the airflow and reduce the cooling efficiency. If you notice any significant damage, it may be necessary to replace the condenser coils. Contact a professional technician or the manufacturer for assistance with repairing or replacing the coils.
If the condenser coils appear to be in good condition, they may be dirty or clogged with dust, lint, or pet hair. This can inhibit heat dissipation and lead to higher freezer temperatures. Use a soft brush or a vacuum cleaner with a brush attachment to gently remove the debris from the coils. It’s best to brush in a downward motion to avoid further damaging the fins.
While cleaning the condenser coils, take care not to apply excessive pressure or use sharp objects, as this can cause irreparable damage. If the coils are too dirty to clean effectively, consider using a coil cleaning brush or contacting a professional technician for assistance.
In addition to cleaning the condenser coils, ensure that there is adequate clearance around the refrigerator. Proper airflow around the appliance is essential for optimal cooling performance. Remove any obstructions, such as furniture or other appliances, that may obstruct the airflow and impede the heat dissipation.
Regularly cleaning the condenser coils and maintaining proper clearance around the refrigerator can help ensure efficient cooling and improve ice production. Aim to clean the coils at least once or twice a year, or more frequently if you have pets or the environment is particularly dusty.
After cleaning or repairing the condenser coils, allow the ice maker some time to adjust to the improved cooling conditions. It may take a few hours for the ice maker to resume normal ice production.
If you have cleaned the condenser coils and the issue persists, there may be other underlying problems with the ice maker or the freezer. In such cases, it is advisable to seek the assistance of a professional technician or contact the manufacturer for further troubleshooting and support.
By addressing damaged or dirty condenser coils, you can ensure proper heat dissipation and maintain optimal cooling performance in your freezer. This, in turn, will help improve ice production and the overall efficiency of your ice maker.
Read more: Where Can I Buy A Ice Maker
Faulty Ice Maker Thermostat
A faulty ice maker thermostat can contribute to non-production or low production of ice in an ice maker. The thermostat is responsible for regulating the temperature inside the ice maker, determining when it should cycle on to produce ice. If the thermostat becomes defective or malfunctions, it can disrupt the ice-making process. Here are some steps to address this issue:
Start by locating the ice maker thermostat. It is typically found inside the ice maker, attached to the side or underneath the ice mold. Consult your appliance’s manual or contact the manufacturer if you are unsure about the exact location of the thermostat.
Inspect the thermostat for any visible signs of damage or malfunction. Look for loose wires, burnt components, or any other indications of a defect. If you notice any issues, it is likely a faulty ice maker thermostat contributing to the problem.
Before proceeding with any repairs, cut off the power supply to the ice maker to avoid any electrical mishaps. This can usually be done by unplugging the appliance or turning off the circuit breaker that supplies power to the ice maker.
Once you have ensured the power is turned off, carefully detach the thermostat from the ice maker. This may involve removing screws, clips, or connectors. Take note of the wire connections and how they are positioned before disconnecting them.
If you have identified a specific defect or damage on the thermostat, it will likely need to be replaced. Contact the manufacturer or a reputable appliance parts supplier to obtain a compatible replacement thermostat. Follow the manufacturer’s instructions to install the new thermostat, reconnecting the wires and securing the thermostat in place.
If you are unsure about the condition of the thermostat or how to proceed with the repair, it is advisable to consult a professional technician or contact the manufacturer for guidance. They can provide specialized expertise and ensure that the thermostat is replaced correctly.
Once the new thermostat is installed, restore the power supply to the ice maker and allow it some time to initiate the ice-making cycle. It may take a few hours for the ice maker to begin producing ice again. Monitor the ice production to ensure that it resumes normal levels.
If the issue persists even after replacing the thermostat, there may be other underlying problems with the ice maker or its components. In such cases, it is best to seek professional assistance to diagnose and resolve the issue effectively.
By addressing a faulty ice maker thermostat, you can restore the proper functioning of the ice maker and ensure consistent production of ice. Regular maintenance and care of the ice maker can help prevent future issues with the thermostat and maintain optimal ice production.
Malfunctioning Ice Maker Motor
A malfunctioning ice maker motor can be a significant factor contributing to non-production or low production of ice in an ice maker. The motor is responsible for powering the ice-making process, driving the rotation of the ice mold and ejecting the ice cubes. If the motor becomes damaged or malfunctions, it can disrupt the ice-making cycle and hinder ice production. Here are some steps to address this issue:
Begin by locating the ice maker motor. It is typically found inside the ice maker unit, adjacent to the ice mold. Consult your appliance’s manual or contact the manufacturer if you are unsure about the exact location of the motor.
Inspect the motor for any visible signs of damage or malfunction. Look for burnt components, loose wires, or any other indications of a defect. If you notice any issues, it is likely a malfunctioning ice maker motor contributing to the problem.
Before proceeding with any repairs, cut off the power supply to the ice maker to avoid any electrical mishaps. This can usually be done by unplugging the appliance or turning off the circuit breaker that supplies power to the ice maker.
Once you have ensured the power is turned off, carefully detach the motor from the ice maker. This may involve removing screws, clips, or connectors. Take note of the wire connections and how they are positioned before disconnecting them.
If you have identified a specific defect or damage in the motor, it will likely need to be replaced. Contact the manufacturer or a reputable appliance parts supplier to obtain a compatible replacement motor. Follow the manufacturer’s instructions to install the new motor, reconnecting the wires and securing the motor in place.
If you are unsure about the condition of the motor or how to proceed with the repair, it is advisable to consult a professional technician or contact the manufacturer for guidance. They can provide specialized expertise and ensure that the motor is replaced correctly.
Once the new motor is installed, restore the power supply to the ice maker and allow it some time to initiate the ice-making cycle. It may take a few hours for the ice maker to begin producing ice again. Monitor the ice production to ensure that it resumes normal levels.
If the issue persists even after replacing the motor, there may be other underlying problems with the ice maker or its components. In such cases, it is best to seek professional assistance to diagnose and resolve the issue effectively.
By addressing a malfunctioning ice maker motor, you can restore the proper functioning of the ice maker and ensure consistent production of ice. Regular maintenance and care of the ice maker can help prevent future issues with the motor and maintain optimal ice production.
Blocked or Frozen Ice Maker Supply Line
A blocked or frozen ice maker supply line is a common issue that can lead to non-production or low production of ice in an ice maker. The supply line carries water from the main water source to the ice maker, and if it becomes blocked or frozen, it can disrupt the water flow and hinder ice production. Here are some steps to address this issue:
Start by inspecting the ice maker supply line for any visible obstructions. Check for kinks, bends, or any objects that may be blocking the line. Straighten out any kinks or bends, and remove any blockages to restore a smooth water flow.
If the supply line appears to be clear but you suspect it may be frozen, you can try thawing the line to remove the ice buildup. Start by turning off the water supply to the ice maker. This can usually be done by turning off the valve connected to the supply line.
Next, locate the frozen section of the supply line. It is typically found near the back of the freezer or where the line enters the ice maker. Carefully apply heat to the frozen area to thaw the ice. You can use a hairdryer set to low heat, a warm towel, or a heat gun set to a low temperature. Ensure that the heat is applied gradually and evenly to avoid damaging the supply line.
Continue applying heat until the ice has melted and the supply line is clear. Be patient and avoid rushing the process, as it may take some time for the ice to fully thaw.
Once the ice has thawed, turn the water supply back on and monitor the water flow to the ice maker. Check for any leaks or irregularities in the water flow. If the water flow is restored, allow the ice maker some time to initiate the ice-making cycle and resume normal ice production.
If the supply line remains blocked or continues to freeze, there may be an underlying issue with the insulation or location of the line. In such cases, it may be necessary to seek the assistance of a professional plumber or contact the manufacturer for further troubleshooting and support.
To prevent future blockages or freezing of the supply line, consider insulating the exposed sections of the line to protect it from extreme temperatures. Additionally, regularly inspect and clean the supply line to remove any debris or sediments that could contribute to blockages.
By addressing a blocked or frozen ice maker supply line, you can restore the water flow to the ice maker and ensure consistent ice production. Regular maintenance and care of the supply line can help prevent future issues and ensure smooth operation of your ice maker.
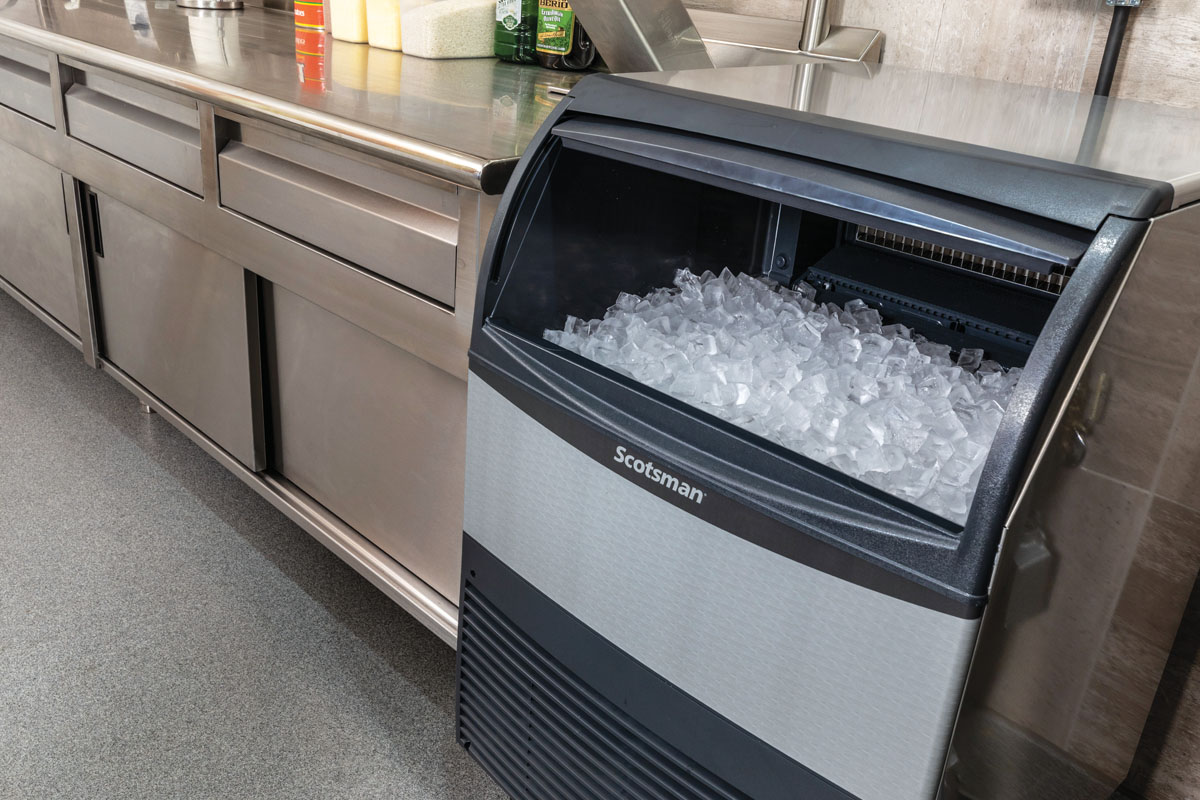
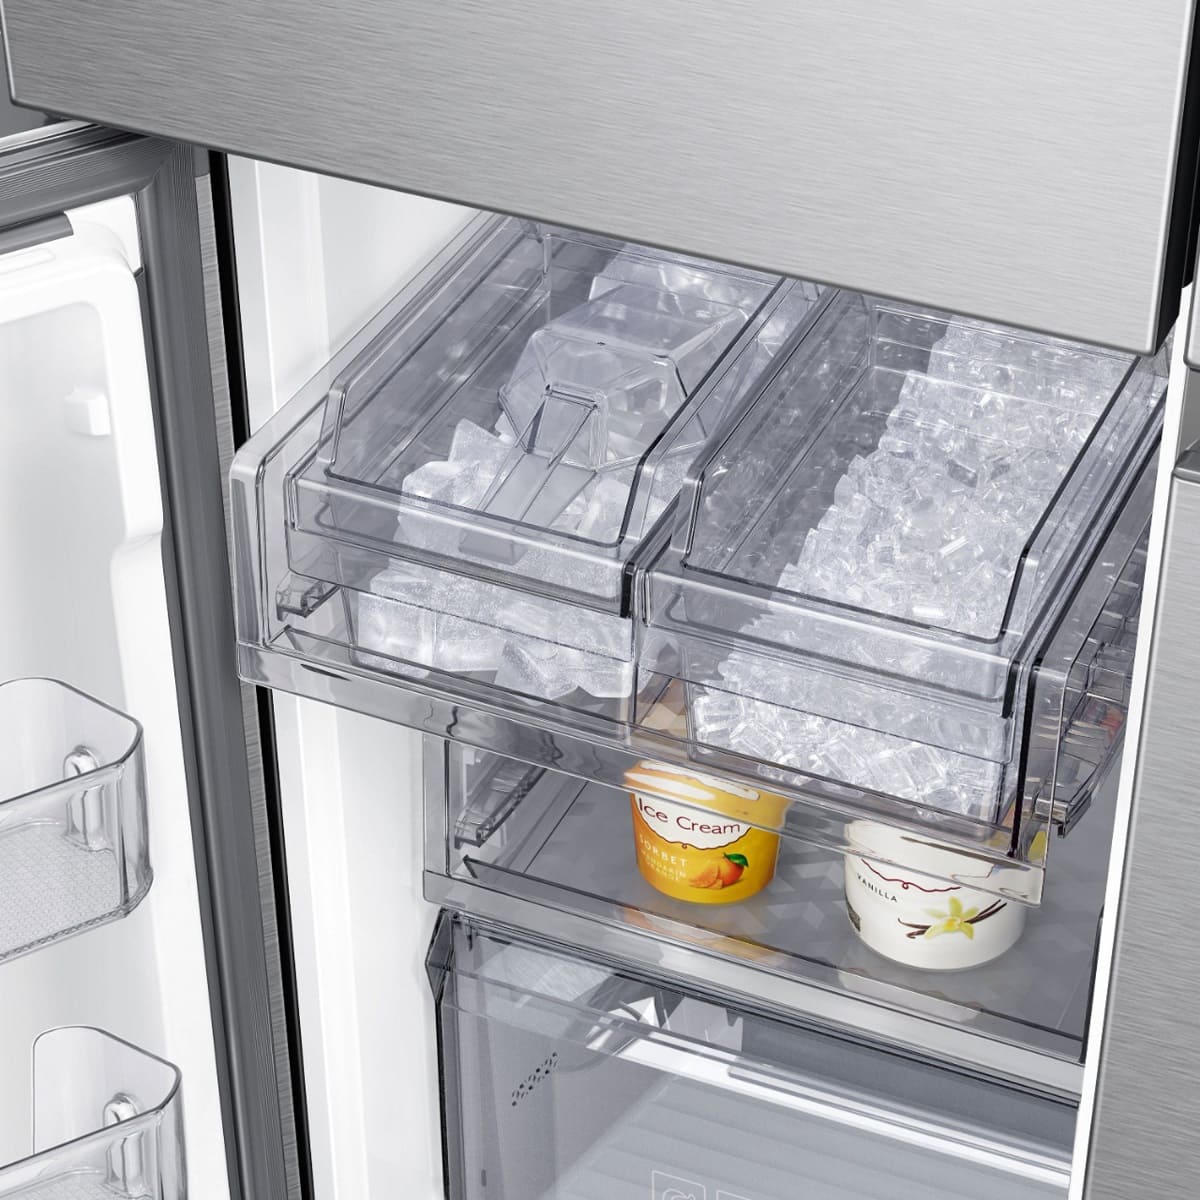
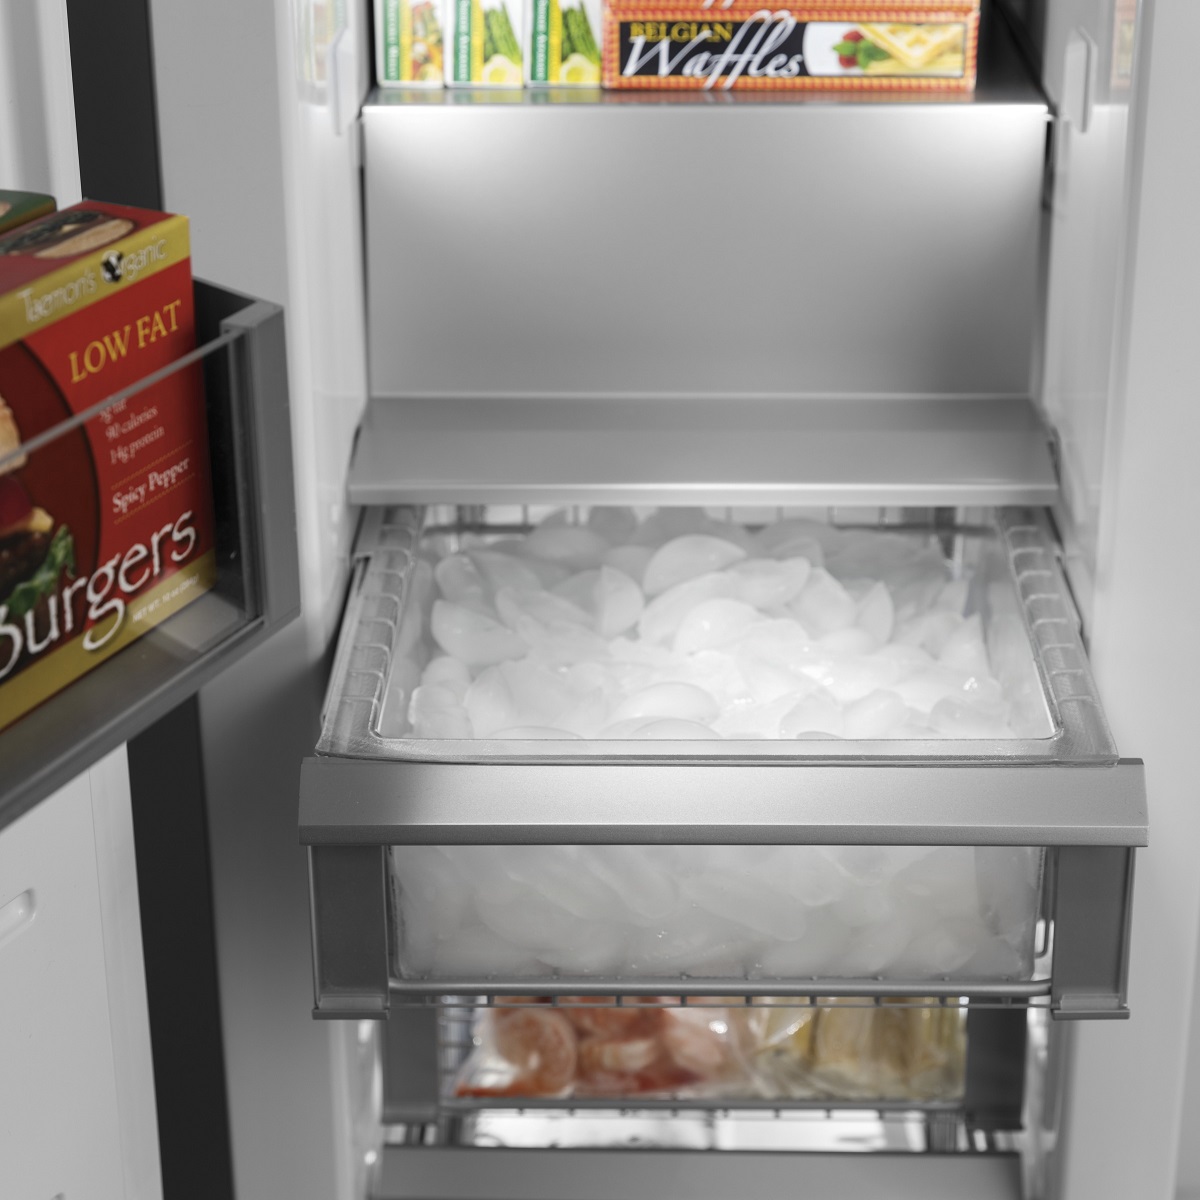
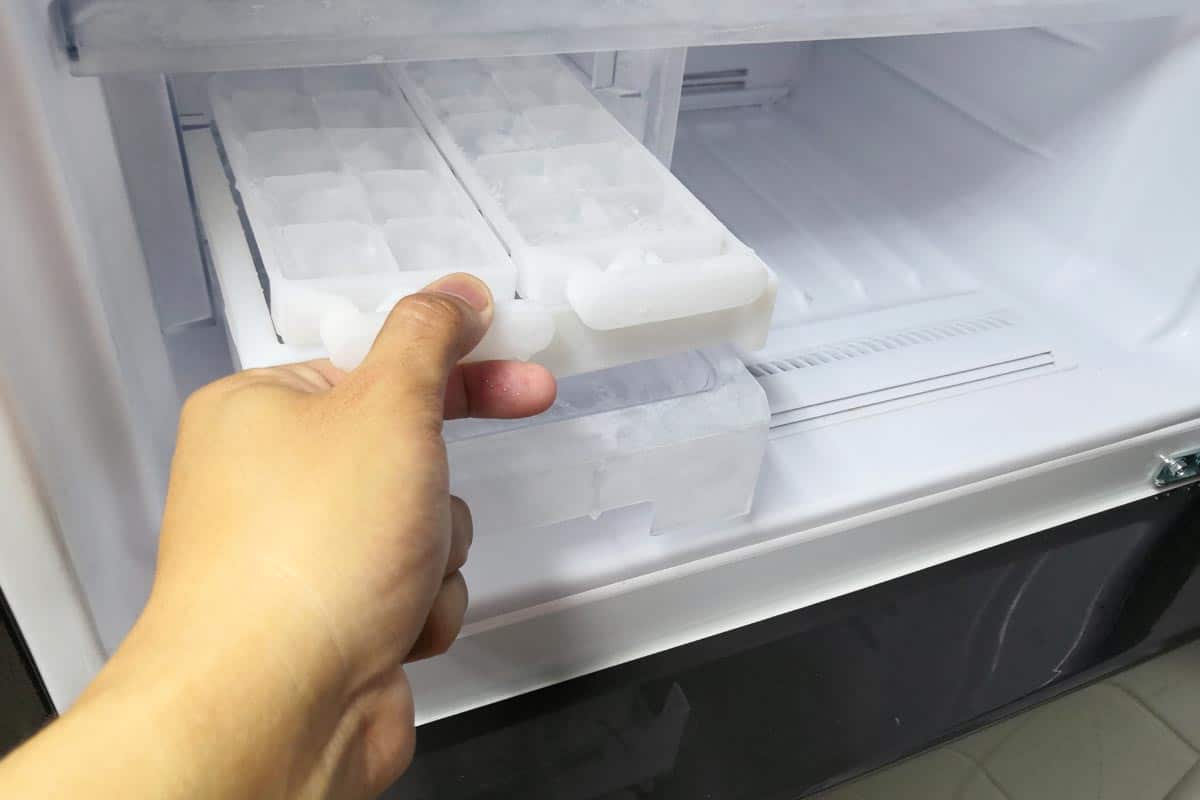
Overfilled or Jammed Ice Bin
An overfilled or jammed ice bin can cause non-production or low production of ice in an ice maker. The ice bin is where the ice cubes are collected and stored until they are ready to be dispensed. If the ice bin becomes overfilled or if the ice cubes are stuck or jammed in the bin, it can prevent the ice maker from producing more ice. Here are some steps to address this issue:
First, inspect the ice bin to determine if it is overfilled. If the ice reaches the top or exceeds the recommended level, it can interfere with the proper functioning of the ice maker. Remove excess ice from the bin to allow space for new ice production.
If the ice bin is not overfilled but you suspect that the ice cubes may be jammed or stuck, it’s important to clear the jam to restore the ice-making process. Start by manually removing any visible ice cubes that may be blocking the ice maker mechanism. Use a clean, dry towel or a plastic utensil to gently dislodge and remove any obstructions.
Check the ice bin for any signs of damage, such as cracks or misalignment, that may be causing the ice cubes to get stuck. If necessary, repair or replace the ice bin to ensure smooth operation.
Once the ice bin is cleared and any necessary repairs are made, slide the bin back into place and ensure it is securely positioned. Close the freezer door and allow the ice maker some time to initiate the ice-making cycle and resume normal ice production.
Regularly monitoring the ice bin and ensuring that it is not overfilled or jammed can help maintain optimal ice production in your ice maker. Empty the ice bin regularly to prevent it from reaching its maximum capacity, and periodically check for any obstructions or blockages that may hinder the ice-making process.
If you have cleared the ice bin and addressed any issues, but the ice maker still fails to produce ice or produces it at a significantly lower rate, there may be other underlying problems with the ice maker or its components. In such cases, it is best to seek professional assistance or contact the manufacturer for further troubleshooting and support.
By addressing an overfilled or jammed ice bin, you can ensure the smooth functioning of the ice maker and promote consistent ice production. Regular maintenance and care of the ice bin will help prevent future issues and keep your ice maker operating efficiently.
Read more: What Is A Nugget Ice Maker
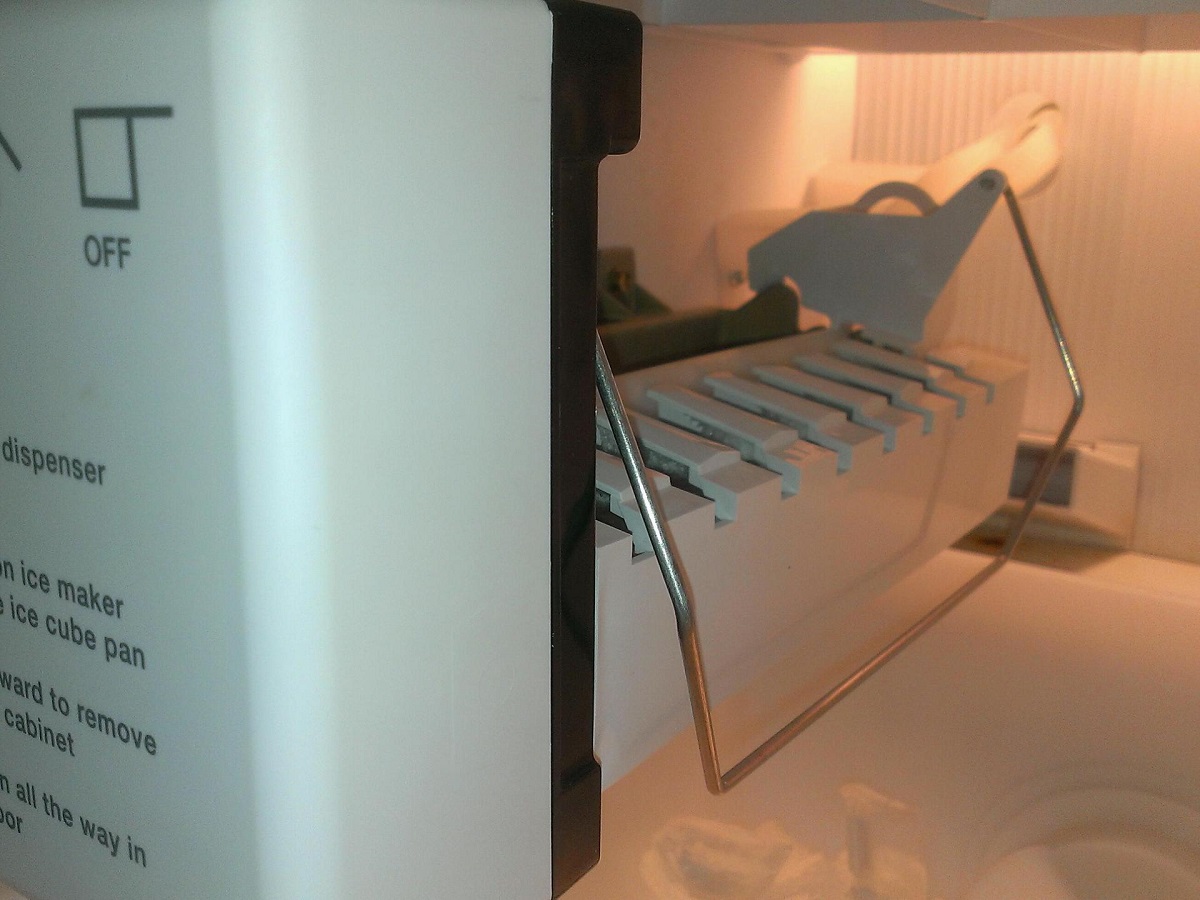
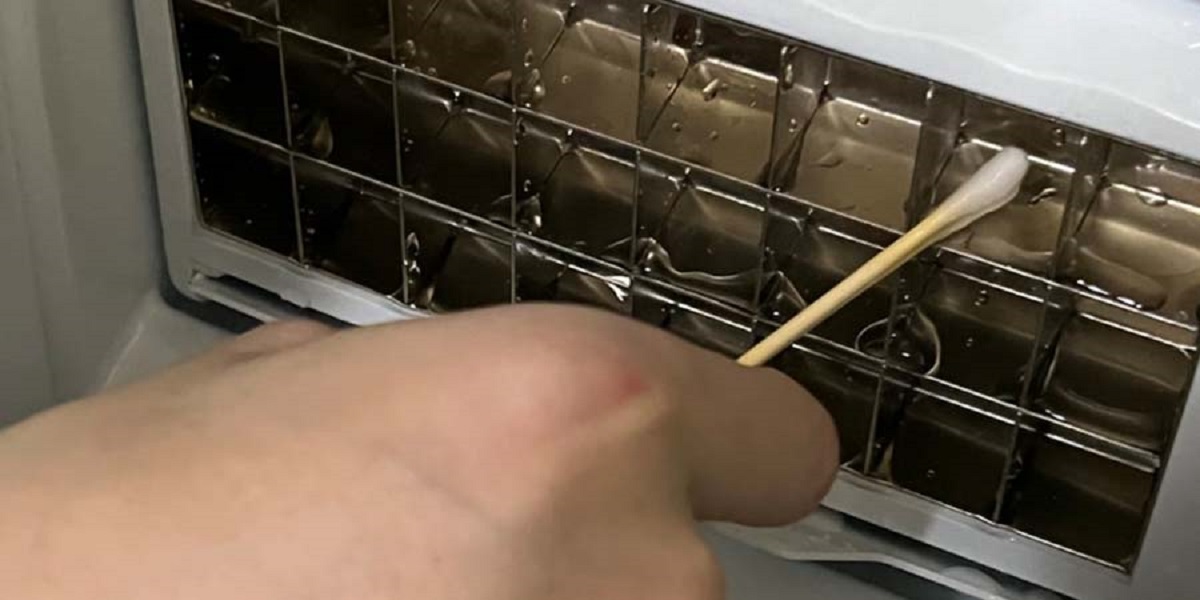
Faulty Shut-Off Arm or Sensor
A faulty shut-off arm or sensor can contribute to non-production or low production of ice in an ice maker. The shut-off arm or sensor is responsible for detecting when the ice bin is full and signaling the ice maker to stop producing ice. If the shut-off arm or sensor becomes defective or malfunctions, it can disrupt the ice-making cycle and prevent the ice maker from producing more ice. Here are some steps to address this issue:
First, locate the shut-off arm or sensor in your ice maker. The shut-off arm is a mechanical device that can be raised or lowered to control the ice production. The sensor, on the other hand, is an electronic component that detects the ice level in the bin. Consult your appliance’s manual or contact the manufacturer if you are unsure about the exact location of the shut-off arm or sensor.
Inspect the shut-off arm or sensor for any visible signs of damage or malfunction. Ensure that the shut-off arm moves freely and is properly aligned with the ice bin. If you notice any issues, such as a loose or misaligned arm or a faulty sensor, it may be causing the ice maker to stop producing ice prematurely.
Before proceeding with any repairs, cut off the power supply to the ice maker to avoid any electrical mishaps. This can usually be done by unplugging the appliance or turning off the circuit breaker that supplies power to the ice maker.
Once you have ensured the power is turned off, carefully inspect and adjust the position of the shut-off arm, if applicable. Make sure it is properly aligned and moves freely without any obstructions. If necessary, tighten any loose connections or replace any damaged components.
If your ice maker uses a sensor instead of a shut-off arm, check the sensor for any dirt or debris that may be interfering with its function. Clean the sensor using a soft cloth or a cotton swab dipped in mild soapy water. Dry it thoroughly before reassembling the ice maker.
Once you have repaired or adjusted the shut-off arm or sensor, restore the power supply to the ice maker and allow it some time to initiate the ice-making cycle. It may take a few hours for the ice maker to begin producing ice again. Monitor the ice production to ensure that it resumes normal levels.
If the issue persists even after repairing the shut-off arm or sensor, there may be other underlying problems with the ice maker or its components. In such cases, it is best to seek professional assistance to diagnose and resolve the issue effectively.
Regularly inspecting and maintaining the shut-off arm or sensor will help ensure proper detection of the ice level in the bin and promote consistent ice production. By addressing a faulty shut-off arm or sensor, you can restore the proper functioning of the ice maker and enjoy a steady supply of ice.
Conclusion
Experiencing non-production or low production of ice in an ice maker can be frustrating, but by identifying the common causes and taking the appropriate steps to address them, you can often resolve the issue without having to call for professional assistance. In this article, we explored several potential culprits that can hinder ice production in an ice maker, including insufficient water supply, clogged water inlet valves, malfunctioning water filters, faulty water supply lines, defective control modules, low freezer temperatures, damaged or dirty condenser coils, faulty thermostats, malfunctioning motor, blocked or frozen supply lines, overfilled or jammed ice bins, and faulty shut-off arms or sensors.
By understanding these common causes and following the suggested troubleshooting steps, you can troubleshoot and resolve many issues with your ice maker. Maintaining a consistent water supply, cleaning or replacing filters and valves, ensuring adequate freezer temperature, cleaning condenser coils, and addressing issues with the thermostat, motor, supply line, ice bin, and shut-off mechanisms are all important steps in ensuring optimal ice production.
Regular maintenance and care of your ice maker are crucial in preventing future problems and ensuring its longevity. Regularly inspecting and cleaning key components, such as the water inlet valve, condenser coils, and supply lines, can help maintain efficient ice production. Additionally, following manufacturer recommendations for filter replacement and insulating exposed water lines can prevent blockages and freezing.
If you have tried the recommended troubleshooting steps and the ice maker still does not produce ice or produces it at a significantly lower rate, it may be necessary to seek professional assistance. A trained technician can diagnose and repair any underlying issues that may require specialized knowledge or equipment.
Remember, each ice maker is unique, and the specific troubleshooting steps may vary depending on the make and model of your appliance. Always refer to the manufacturer’s instructions and guidelines for your specific ice maker when performing maintenance or repairs.
By being proactive in maintaining and troubleshooting your ice maker, you can ensure its reliable performance and enjoy a continuous supply of ice for your drinks and daily needs.
Frequently Asked Questions about What Can Be A Cause Of Non-Production To Low Production Of Ice In The Ice Maker?
Was this page helpful?
At Storables.com, we guarantee accurate and reliable information. Our content, validated by Expert Board Contributors, is crafted following stringent Editorial Policies. We're committed to providing you with well-researched, expert-backed insights for all your informational needs.

0 thoughts on “What Can Be A Cause Of Non-Production To Low Production Of Ice In The Ice Maker?”