Articles
Why Is My Ice Maker Not Dropping Ice
Modified: February 27, 2024
Discover why your ice maker is not dropping ice with our informative articles. Get expert tips and solutions to fix this common issue.
(Many of the links in this article redirect to a specific reviewed product. Your purchase of these products through affiliate links helps to generate commission for Storables.com, at no extra cost. Learn more)
Introduction
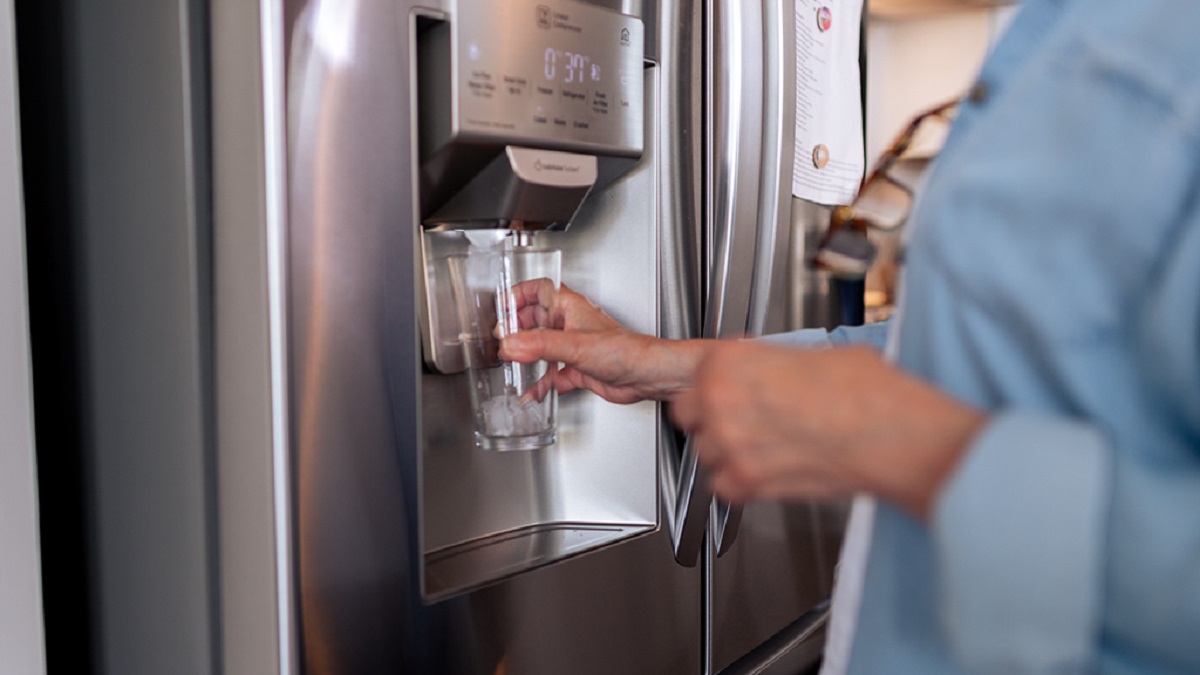
Having an ice maker in your refrigerator can be incredibly convenient, providing you with a steady supply of ice cubes for your cold beverages and food preservation needs. However, it can be frustrating when your ice maker stops dropping ice. There are several possible causes for this issue, ranging from simple fixes to more complex repairs. In this article, we will explore the common reasons why your ice maker is not dropping ice and provide solutions to help you get it working again.
Before we delve into the potential causes and solutions, it’s important to understand how an ice maker works. The process begins with the water supply, which is typically connected to a water line running from your household plumbing. The water is directed into the ice maker through a water inlet valve. Once inside the ice maker, the water is frozen into ice cubes, which are then released into the ice bin for storage. Finally, the ice is dispensed into your glass or container when you activate the ice dispenser.
Now, let’s explore some of the possible causes and solutions for an ice maker not dropping ice.
Key Takeaways:
- Regularly checking and maintaining the water supply, water filter, and inlet valve can help troubleshoot and resolve issues with your ice maker not dropping ice, ensuring a steady supply of ice cubes for your needs.
- Inspecting and repairing faulty ice maker components, such as the motor, ejector motor, thermostat, and ice mold heater, can help restore proper ice-making functionality and ensure your ice maker operates efficiently.
Read more: Why Is My LG Ice Maker Not Dropping Ice
Possible Causes of an Ice Maker Not Dropping Ice
When your ice maker fails to drop ice cubes, it could be due to various reasons. Understanding the potential causes can help you troubleshoot the issue more effectively. Here are some of the common culprits:
- Lack of Water Supply: One of the primary reasons for an ice maker not dropping ice is a lack of water supply. If the water line is not properly connected or the water supply to the refrigerator is turned off, the ice maker won’t be able to produce ice.
- Clogged Water Filter: Over time, the water filter in your refrigerator can become clogged with debris and impurities. This can restrict the water flow to the ice maker, preventing it from producing ice or dropping ice cubes into the bin.
- Malfunctioning Water Inlet Valve: The water inlet valve controls the flow of water into the ice maker. If it becomes faulty or clogged, it may not allow water to enter the ice maker, resulting in no ice production. A malfunctioning water inlet valve can be caused by wear and tear or a buildup of mineral deposits.
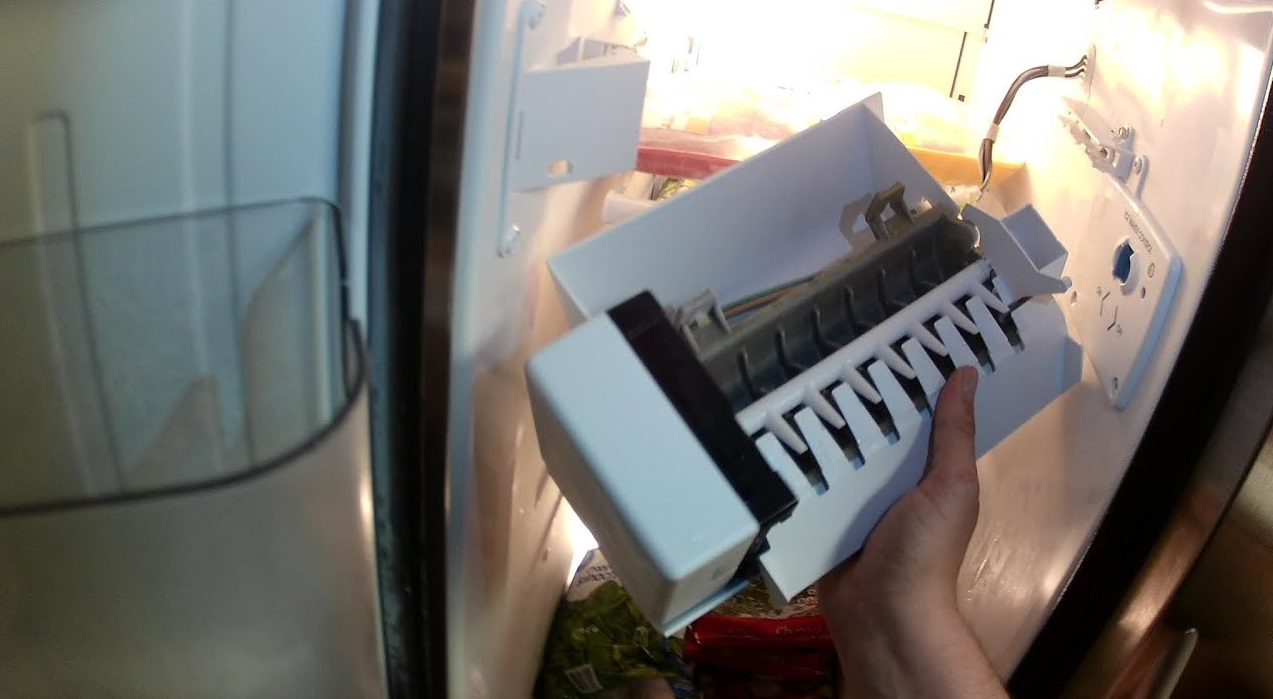
- Faulty Ice Maker Components: There are various components within the ice maker that can malfunction, causing it to stop dropping ice cubes. These include the ice maker motor, ejector motor, thermostat, or ice mold heater. When any of these components fail, it can disrupt the ice-making process.
Identifying the specific cause of the problem will help you determine the appropriate solution for fixing your ice maker. In the following sections, we will explore these causes in more detail and provide step-by-step solutions to troubleshoot and resolve the issue.
Lack of Water Supply
One of the common reasons for an ice maker not dropping ice is a lack of water supply. Without a steady flow of water, the ice maker cannot produce ice cubes. Here are a few possible reasons why you may have a lack of water supply:
- Disconnected Water Line: Check if the water line that connects your refrigerator to the household plumbing is properly connected. Sometimes, the water line can become loose or disconnected, resulting in no water reaching the ice maker. Inspect the water line and reconnect it securely, if necessary.
- Turned-off Water Supply: Ensure that the water supply to the refrigerator is turned on. It is not uncommon for the water supply valve to accidentally get shut off, especially during maintenance or repairs. Locate the water supply valve and make sure it is fully open to allow water to flow to the ice maker.
- Frozen Water Line: In colder climates or during winter months, the water line supplying water to the ice maker can freeze. This can obstruct the flow of water and prevent ice production. If you suspect a frozen water line, you can try thawing it by using a hairdryer or applying warm towels to the water line until the ice melts.
- Low Water Pressure: Insufficient water pressure can also hinder the functioning of the ice maker. Check if there is adequate water pressure coming from the household plumbing. If the water pressure is low, you may need to contact a plumber to address the issue.
Once you have examined these potential issues and taken the necessary steps to restore the water supply, monitor your ice maker to see if it begins producing ice again. If the problem persists, it may be caused by another factor, such as a clogged water filter or a malfunctioning component. In the following sections, we will explore these possibilities and provide solutions to help you troubleshoot your ice maker further.
Clogged Water Filter
A clogged water filter is another common culprit behind an ice maker not dropping ice. Over time, the water filter in your refrigerator can become filled with sediment, debris, and impurities. This can restrict the water flow and prevent the ice maker from producing ice cubes. Here’s what you can do to address a clogged water filter:
- Locate the Water Filter: The water filter is typically located either inside the refrigerator compartment or behind a panel at the bottom of the fridge. Refer to your refrigerator’s manual or manufacturer’s instructions to find the specific location of the water filter.
- Turn off the Water Supply: Before removing the water filter, it’s important to turn off the water supply to the refrigerator. Look for the shut-off valve near the water line or refer to your home’s main water supply valve to avoid any potential leaks or damage.
- Remove and Inspect the Water Filter: Carefully remove the water filter from its housing. Examine the filter for any visible signs of clogging or discoloration. If the filter appears dirty or clogged, it’s a clear indication that it needs to be replaced.
- Replace the Water Filter: Depending on the type of water filter, you may need to twist or push to remove it from the housing. Replace the old filter with a new one that is compatible with your refrigerator model. Follow the manufacturer’s instructions for proper installation.
- Flush the Water System: After installing the new water filter, it’s essential to flush the water system to remove any trapped air or debris. Run water through the dispenser for a few minutes or until the water runs clear. This will ensure that your ice maker receives a clean and steady water supply.
After replacing the water filter and flushing the water system, monitor your ice maker to see if it starts dropping ice again. If the clogged water filter was the cause of the issue, this should resolve the problem. However, if the ice maker continues to malfunction, there may be another underlying cause, such as a faulty water inlet valve or a component within the ice maker. In the following sections, we will explore these possibilities and provide solutions to further troubleshoot your ice maker.
Malfunctioning Water Inlet Valve
The water inlet valve plays a crucial role in supplying water to your ice maker. When it becomes faulty or clogged, it can disrupt the flow of water and prevent the ice maker from producing and dropping ice cubes. Here’s how you can address a malfunctioning water inlet valve:
- Locate the Water Inlet Valve: The water inlet valve is typically located at the back of the refrigerator, behind an access panel. Refer to your refrigerator’s manual or manufacturer’s instructions to find the specific location of the water inlet valve.
- Turn off the Water Supply: Before working on the water inlet valve, it’s important to turn off the water supply to the refrigerator. Locate the shut-off valve near the water line or refer to your home’s main water supply valve. This will prevent any water leakage or damage.
- Inspect the Water Inlet Valve: Carefully examine the water inlet valve for any visible signs of damage or clogging. Look for mineral deposits, debris, or signs of wear and tear. If the valve appears to be damaged or clogged, it may need to be replaced.
- Replace the Water Inlet Valve: To replace the water inlet valve, you will need to disconnect the water supply line and electrical connections. Consult your refrigerator’s manual or manufacturer’s instructions for specific guidance on how to remove and replace the water inlet valve. Install the new valve using the provided instructions.
- Test the New Water Inlet Valve: After installing the new water inlet valve, turn on the water supply and test the ice maker. Monitor the ice maker to see if it starts producing and dropping ice cubes. If the water inlet valve was the cause of the problem, this should resolve the issue.
If replacing the water inlet valve does not fix the problem and your ice maker is still not dropping ice, there may be another underlying issue. It’s possible that a different component within the ice maker, such as the ice maker motor or thermostat, is malfunctioning. In the next section, we will explore these possibilities and provide solutions to help you troubleshoot further.
Read more: Why Is My Samsung Ice Maker Not Dropping Ice
Faulty Ice Maker Components
When your ice maker fails to drop ice cubes, it’s possible that one or more components within the ice maker itself are faulty. Several components work together to freeze water and release ice cubes into the bin. Here are some key components that could be causing the problem:
- Ice Maker Motor: The ice maker motor is responsible for running the ice-making cycle. If the motor is faulty or damaged, it may not properly initiate the ice-making process, resulting in no ice production. Replacing the motor may be necessary if it is deemed malfunctioning.
- Ejector Motor: The ejector motor is responsible for ejecting the ice cubes from the mold into the ice bin. If this motor fails or becomes stuck, it can prevent the ice cubes from dropping. Cleaning or replacing the ejector motor may be required.
- Thermostat: The thermostat monitors the temperature inside the ice maker. If the thermostat is not functioning properly, it may not signal the ice maker to release the ice cubes into the bin. Testing and calibrating the thermostat may be necessary to ensure it is functioning correctly.
- Ice Mold Heater: The ice mold heater is responsible for gently heating the ice mold to release the ice cubes. If the heater is defective, the ice cubes may become stuck in the mold and fail to drop. Replacing the ice mold heater can help restore proper ice-making functionality.
To determine which component is causing the issue, it is recommended to consult your refrigerator’s manual or seek professional assistance. An experienced technician will be able to diagnose the problem accurately and guide you on repairing or replacing the faulty component.
While it can be frustrating to have a malfunctioning ice maker, addressing the faulty components can help resolve the problem and get your ice maker back to producing and dropping ice cubes. Regular maintenance and cleaning of the ice maker can also help prevent component issues and ensure smooth operation in the long run.
Now that you are aware of the potential causes and solutions for an ice maker not dropping ice, you can take the necessary steps to troubleshoot the issue. Remember to always prioritize safety and consult professional help when needed. Enjoy the convenience of having a fully functional ice maker and chilled beverages whenever you need them!
Check if the water supply line is connected and not kinked. Also, ensure the freezer is set to the proper temperature (0°F). If the issue persists, consider calling a professional for further inspection.
Solutions to Fix an Ice Maker Not Dropping Ice
When your ice maker stops dropping ice, it can be frustrating. Luckily, there are several solutions you can try to get it working again. Here are some steps you can take to troubleshoot and fix the issue:
- Checking and Reconnecting the Water Supply: Ensure that the water line supplying water to the ice maker is properly connected and the water supply valve is fully open. If the water line is disconnected or the valve is turned off, reconnect and open them to allow water to flow to the ice maker.
- Replacing a Clogged Water Filter: If the water filter is clogged, it can restrict the water flow to the ice maker. Remove the old water filter and replace it with a new one. Follow the manufacturer’s instructions for proper installation and flushing the water system to remove any trapped air or debris.
- Fixing a Faulty Water Inlet Valve: If the water inlet valve is malfunctioning or clogged, it can hinder the water flow to the ice maker. Replace the water inlet valve following the manufacturer’s instructions to restore proper water supply to the ice maker.
- Inspecting and Repairing Ice Maker Components: Check the various components within the ice maker, such as the ice maker motor, ejector motor, thermostat, and ice mold heater. If any of these components are faulty or damaged, they may need to be repaired or replaced. Consult your refrigerator’s manual or seek professional assistance for proper diagnosis and repair.
It’s important to note that while these solutions can address common issues that cause an ice maker to stop dropping ice, there may be other underlying causes. If the problem persists after trying these solutions, it is recommended to consult a qualified technician or contact the manufacturer for further assistance.
Regular maintenance and cleaning of your ice maker can also help prevent issues and ensure optimal performance. Follow the manufacturer’s guidelines for cleaning and maintenance, such as removing and cleaning the ice bin periodically and checking for any debris or ice buildup within the ice maker.
By following these solutions and taking proper care of your ice maker, you can get it back to producing and dropping ice cubes efficiently, keeping your beverages and food chilled to perfection.
Disclaimer: The information in this article is for general informational purposes only and does not constitute professional advice. Always consult the manufacturer’s guidelines or seek professional assistance for specific issues with your ice maker.
Checking and Reconnecting the Water Supply
If your ice maker is not dropping ice, one of the first things you should check is the water supply. A lack of water supply can prevent the ice maker from producing ice cubes. Here are the steps to check and reconnect the water supply:
- Locate the Water Line: Begin by locating the water line that connects your refrigerator to the household plumbing. The water line is usually located at the back or bottom of the refrigerator.
- Check for Disconnections: Inspect the water line to see if it is properly connected to both the refrigerator and the household plumbing. Over time, the water line may become loose or disconnected due to vibrations or movement.
- Reconnect the Water Line: If you find that the water line is disconnected, carefully reconnect it to both the refrigerator and the household plumbing. Ensure that the connection is secure and tight to prevent any leaks.
- Turn on the Water Supply: Once the water line is properly connected, check the water supply valve. It is typically located near the wall or under the sink. Make sure the water supply valve is fully open to allow water to flow to the ice maker.
- Flush the Water Line: After reconnecting the water line and ensuring the water supply valve is open, it’s recommended to flush the water line. This helps remove any air or debris that may have entered the line during the reconnection process.
- Test the Ice Maker: After completing the above steps, monitor your ice maker to see if it starts producing ice cubes and dropping them into the ice bin. It may take a few hours for the ice maker to cycle and produce ice.
If your ice maker still doesn’t drop ice after checking and reconnecting the water supply, there may be other underlying issues. It is advised to consult your refrigerator’s manual or seek professional assistance for further troubleshooting.
Remember, proper maintenance of your ice maker, including regular cleaning and checking for water line connections, can help prevent issues and ensure smooth ice production. By ensuring a steady water supply to your ice maker, you can enjoy a constant supply of ice cubes for your beverages and food preservation needs.
Disclaimer: The information provided in this article is for general informational purposes only and does not constitute professional advice. Always consult the manufacturer’s guidelines or seek professional repair services for specific issues with your ice maker.
Replacing a Clogged Water Filter
If your ice maker is not dropping ice, a clogged water filter could be the culprit. Over time, water filters in refrigerators can become filled with sediment, debris, and impurities, restricting the water flow to the ice maker. Here’s how you can replace a clogged water filter:
- Locate the Water Filter: The water filter is typically located either inside the refrigerator or behind a panel at the bottom of the fridge. Refer to your refrigerator’s manual or manufacturer’s instructions to find the specific location of the water filter.
- Identify the Type of Water Filter: There are various types of water filters used in refrigerators, such as push-in, twist-in, or drop-down filters. It’s important to identify the type of water filter your refrigerator uses to ensure you purchase the correct replacement filter.
- Turn off the Water Supply: Before replacing the water filter, it’s essential to turn off the water supply to the refrigerator. Locate the shut-off valve near the water line or refer to your home’s main water supply valve. This will prevent any water leakage or damage.
- Remove the Old Water Filter: Carefully remove the old water filter by twisting, pushing, or pulling it, depending on the type of filter. Follow the instructions given in your refrigerator’s manual or on the filter itself. Be cautious to avoid any spills or splashes.
- Prepare the New Water Filter: Take the new water filter out of its packaging. Before installing it, make sure to remove any protective covers or seals. The new filter may need to be flushed with water or soaked for a certain period, as indicated in the manufacturer’s instructions.
- Install the New Water Filter: Insert the new water filter into the filter housing, following the arrows or instructions on the filter. Make sure it is inserted firmly and securely to ensure a proper seal. Twist, push, or lock it into place, depending on the type of filter used.
- Flush the Water System: Once the new water filter is installed, it’s important to flush the water system. Run water through the dispenser for a few minutes or until the water runs clear. This helps remove any trapped air or loose debris from the system.
After replacing the clogged water filter and flushing the water system, monitor your ice maker to see if it starts dropping ice again. It may take a few hours for the ice maker to cycle and produce ice cubes.
Remember to follow the manufacturer’s guidelines regarding the lifespan of the water filter and regular replacement intervals. Regularly replacing the water filter will help maintain water quality, prevent clogs, and ensure proper functioning of your ice maker.
Note: The information provided in this article is for general informational purposes only and does not constitute professional advice. Always consult the manufacturer’s guidelines or seek professional assistance for specific issues with your ice maker and water filter.
Read more: Why Is My Ice Melting In My Ice Maker
Fixing a Faulty Water Inlet Valve
If your ice maker is not dropping ice, a faulty water inlet valve could be to blame. The water inlet valve controls the flow of water into the ice maker, and when it is malfunctioning or clogged, it can disrupt the ice-making process. Here’s how you can fix a faulty water inlet valve:
- Locate the Water Inlet Valve: The water inlet valve is typically located at the back of the refrigerator, behind an access panel. Consult your refrigerator’s manual or manufacturer’s instructions to find the specific location of the water inlet valve.
- Turn off the Water Supply: Before working on the water inlet valve, it’s important to turn off the water supply to the refrigerator. Locate the shut-off valve near the water line or refer to your home’s main water supply valve to prevent any water leakage or damage.
- Inspect the Water Inlet Valve: Carefully inspect the water inlet valve for any visible signs of damage or clogging. Look for mineral deposits, debris, or signs of wear and tear. If the valve appears to be either damaged or clogged, it may need to be replaced.
- Replace the Water Inlet Valve: To replace the water inlet valve, you will need to disconnect the water supply line and electrical connections. Consult your refrigerator’s manual or manufacturer’s instructions for specific guidance on how to remove and replace the water inlet valve. Install the new valve using the provided instructions.
- Test the New Water Inlet Valve: After installing the new water inlet valve, turn on the water supply and test the ice maker. Monitor the ice maker to see if it starts producing and dropping ice cubes. If the water inlet valve was the cause of the problem, this should resolve the issue.
If replacing the water inlet valve does not fix the problem and your ice maker is still not dropping ice, there may be other underlying issues. It’s recommended to consult your refrigerator’s manual or seek professional assistance for further troubleshooting and repair.
Regular maintenance and cleaning of your ice maker, including checking and replacing the water inlet valve if necessary, can help prolong the life of your appliance and ensure smooth ice production. By taking care of your ice maker, you can enjoy a continuous supply of ice cubes for your beverages and cooling needs.
Disclaimer: The information provided in this article is for general informational purposes only and does not constitute professional advice. Always consult the manufacturer’s guidelines or seek professional assistance for specific issues with your ice maker and water inlet valve.
Inspecting and Repairing Ice Maker Components
If your ice maker is not dropping ice, there may be issues with specific components within the ice maker itself. Inspecting and repairing these components can help resolve the problem and get your ice maker back to producing and dropping ice cubes. Here’s how you can go about it:
- Ice Maker Motor: Start by inspecting the ice maker motor, which is responsible for running the ice-making cycle. Check for any visible signs of damage or wear. If the motor is faulty or damaged, it may need to be replaced to restore proper ice-making functionality.
- Ejector Motor: Examine the ejector motor, which is responsible for ejecting the ice cubes from the mold into the ice bin. Look for any signs of damage or obstructions that may be preventing it from functioning properly. Cleaning or replacing the ejector motor may be necessary to address the issue.
- Thermostat: Inspect the thermostat, which monitors the temperature inside the ice maker. If the thermostat is not working correctly, it may not signal the ice maker to release the ice cubes into the bin. Testing and calibrating the thermostat can help ensure it is functioning accurately for proper ice production.
- Ice Mold Heater: Take a closer look at the ice mold heater, which is responsible for gently heating the ice mold to release the ice cubes. If the heater is defective or damaged, the ice cubes may become stuck and fail to drop. Replacing the ice mold heater can help rectify the issue.
- Professional Assistance: If you are unsure about the condition of the components or lack experience in repairing ice maker components, it’s best to seek professional assistance. An experienced technician can accurately diagnose the problem and advise on the necessary repairs or replacements.
When addressing ice maker component issues, it’s important to follow proper safety precautions and refer to your refrigerator’s manual or manufacturer’s instructions. This will ensure that you are performing the necessary inspections and repairs correctly.
Regular maintenance and cleaning of your ice maker can help prevent component issues and ensure optimal performance. Clear any ice or debris that may accumulate in the ice maker, and follow the manufacturer’s guidelines for cleaning and maintenance.
By inspecting and repairing ice maker components, you can troubleshoot and resolve the issue of your ice maker not dropping ice. Enjoy the convenience of having a functioning ice maker, providing you with a steady supply of ice cubes whenever you need them.
Disclaimer: The information provided in this article is for general informational purposes only and does not constitute professional advice. Always consult the manufacturer’s guidelines or seek professional assistance for specific issues with your ice maker and its components.
Conclusion
Having an ice maker that is not dropping ice can be frustrating, but it’s a problem that can often be resolved with the right troubleshooting steps. In this article, we have explored the possible causes of an ice maker not dropping ice and provided solutions to help you fix the issue.
We started by discussing the common reasons why an ice maker may fail to drop ice, including a lack of water supply, a clogged water filter, a malfunctioning water inlet valve, and faulty ice maker components. Each of these issues requires specific steps to address and resolve.
Whether it’s checking and reconnecting the water supply, replacing a clogged water filter, fixing a faulty water inlet valve, or inspecting and repairing ice maker components, following the proper procedures and guidelines can help you get your ice maker back to producing and dropping ice cubes efficiently.
It’s important to remember that regular maintenance and cleaning of your ice maker can help prevent future issues. Keeping the water supply line clear, replacing the water filter at the recommended intervals, and ensuring the proper functioning of the various components will contribute to the optimal performance of your ice maker.
If you are unsure about the cause or unable to resolve the issue on your own, it is always recommended to consult your refrigerator’s manual, contact the manufacturer’s customer support, or seek assistance from a qualified technician. They can provide further guidance and assistance to help you troubleshoot and fix your ice maker.
With a properly functioning ice maker, you can enjoy the convenience of having a steady supply of ice cubes for your refreshing beverages and food preservation needs. Don’t let an ice maker that is not dropping ice get in the way of your enjoyment. Take the necessary steps to diagnose and resolve the issue, and soon enough, you’ll be enjoying perfectly chilled drinks and ice-cold treats once again.
Disclaimer: The information provided in this article is for general informational purposes only and does not constitute professional advice. Always consult the manufacturer’s guidelines or seek professional assistance for specific issues with your ice maker.
Frequently Asked Questions about Why Is My Ice Maker Not Dropping Ice
Was this page helpful?
At Storables.com, we guarantee accurate and reliable information. Our content, validated by Expert Board Contributors, is crafted following stringent Editorial Policies. We're committed to providing you with well-researched, expert-backed insights for all your informational needs.


0 thoughts on “Why Is My Ice Maker Not Dropping Ice”