Articles
What Do You Use To Clean Snap-On Hand Tools
Modified: August 28, 2024
Find the best articles on what you can use to clean your Snap On hand tools. Explore various methods and keep your tools in top shape!
(Many of the links in this article redirect to a specific reviewed product. Your purchase of these products through affiliate links helps to generate commission for Storables.com, at no extra cost. Learn more)
Introduction
Cleanliness is an essential aspect of maintaining the quality and performance of any tool, and Snap On hand tools are no exception. As professional mechanics and enthusiasts alike rely on these high-quality tools to tackle various automotive, industrial, and DIY projects, it becomes crucial to keep them clean and free from dirt, grime, and rust.
Regular cleaning of Snap On hand tools not only helps in preserving their lifespan but also ensures optimal functionality and precision. By removing accumulated debris, grease, and rust, you can prevent the tools from becoming dull, damaged, or compromised in any way. Additionally, a clean and well-maintained tool reflects professionalism and attention to detail, both of which are highly valued in the automotive and industrial sectors.
Given the wide range of Snap On hand tools available, it is important to understand the different cleaning agents and techniques that can be used. From basic soap and water to specialized hand tool cleaners, there are numerous options to choose from depending on the type of tool and the level of cleaning required.
In this article, we will explore the various cleaning agents and methods that can be used to effectively clean Snap On hand tools. Whether you are a professional mechanic looking to maintain the performance of your tools or a DIY enthusiast who values the durability of your equipment, this guide will provide you with the necessary information to keep your Snap On hand tools in top condition.
Key Takeaways:
- Regular cleaning, proper drying, lubrication, and storage practices are crucial for maintaining Snap On hand tools’ longevity, performance, and visual appeal, reflecting professionalism and commitment to quality workmanship.
- Choosing the right cleaning agent, disassembling tools for thorough cleaning, and adopting proper storage practices are essential for preserving Snap On hand tools’ optimal condition, ensuring they remain reliable and ready for use.
Importance of Cleaning Snap On Hand Tools
Keeping your Snap On hand tools clean is essential for several reasons. Let’s explore why maintaining cleanliness is important and how it contributes to the longevity, efficiency, and overall performance of your tools.
1. Preventing Rust: Rust is the enemy of tools. It not only compromises their appearance but also affects their functionality. Snap On hand tools are made of high-quality materials, but if not properly cleaned, they can still be susceptible to rust. Regular cleaning removes moisture, dirt, and debris that can lead to rust formation, thus preserving the integrity and functionality of your tools.
2. Enhancing Performance: Clean hand tools perform better. Dirt or grease buildup on your tools can hinder their ability to grip, cut, or turn with precision. By ensuring that your Snap On hand tools are free from dirt, grease, and other contaminants, you can maintain optimal performance for tasks requiring accuracy and control.
3. Prolonging Lifespan: Snap On hand tools are an investment, and you want them to last as long as possible. Regular cleaning can help extend the lifespan of your tools by preventing corrosion, wear, and tear. Removing debris and rust increases the longevity of the tool’s components, ensuring that they remain in good condition for years to come.
4. Safety First: Clean tools contribute to a safer working environment. When dirt and grease accumulate on hand tools, they can become slippery, which increases the risk of accidents and injuries. By keeping your Snap On hand tools clean, you reduce the chances of slips and mishaps, allowing you to work with confidence and peace of mind.
5. Professionalism: Whether you are a professional mechanic or an enthusiastic hobbyist, maintaining clean hand tools reflects professionalism and attention to detail. When clients or fellow enthusiasts see your well-maintained tools, it speaks volumes about your commitment to your craft and earns you respect in your field.
By prioritizing the cleanliness of your Snap On hand tools, you are investing in their long-term performance and durability. With regular cleaning, you can prevent rust formation, enhance their performance, and prolong their lifespan. Cleaning your tools not only ensures safety but also showcases your professionalism and dedication to your craft. So, let’s dive into the different cleaning agents and techniques you can use to keep your Snap On hand tools in top-notch condition.
Common Cleaning Agents for Snap On Hand Tools
When it comes to cleaning Snap On hand tools, there are various cleaning agents available, each of which serves a specific purpose. Let’s explore some of the commonly used cleaning agents and their effectiveness in removing dirt, grease, and rust from your tools.
1. Soap and Water: One of the simplest and most accessible cleaning agents for Snap On hand tools is a combination of mild soap and water. This solution is effective in removing grease, dirt, and debris from the surface of the tools. Simply mix a few drops of dish soap or hand soap in warm water, and use a brush or sponge to clean the tools thoroughly. Rinse with water and dry the tools before storing them.
2. Rubbing Alcohol: Rubbing alcohol, also known as isopropyl alcohol, is a versatile cleaning agent that can effectively dissolve grease and remove stubborn residues from Snap On hand tools. To use rubbing alcohol for cleaning, simply dampen a cloth or paper towel with alcohol and wipe the tools down. This method is particularly useful for removing sticky residues from adhesives or tapes.
3. Vinegar Solution: Vinegar is an excellent natural cleaning agent that can help remove rust and dissolve mineral deposits from Snap On hand tools. Create a solution by mixing equal parts vinegar and water, and soak the tools for a few hours or overnight. Scrub the tools with a brush to remove rust, rinse with water, and dry thoroughly.
4. Mineral Spirits: Mineral spirits, also known as white spirits, are commonly used as a solvent for removing tough grease and grime from tools. These petroleum-based solvents can effectively dissolve oil-based residues. Use a clean cloth or brush to apply mineral spirits to the tools, scrubbing away stubborn dirt or grease. Make sure to work in a well-ventilated area and follow the safety instructions on the product label.
5. Rust Removers: For tools that have developed rust, specialized rust removers can be used to dissolve and eliminate the rust. These products are designed specifically to target and break down rust, restoring the tool’s surface to its original condition. Follow the manufacturer’s instructions on how to properly use the rust remover, and make sure to thoroughly remove any residue before storing the tools.
6. Commercial Hand Tool Cleaners: There are commercially available hand tool cleaners that are specifically formulated for the cleaning and maintenance of tools. These cleaners often come in spray or liquid form and are designed to remove grease, grime, and rust while protecting the tool’s surface. Follow the instructions provided on the product label to achieve optimal results.
When choosing a cleaning agent for your Snap On hand tools, consider the type of tool, the level of dirt or rust accumulation, and the specific cleaning requirements. Always prioritize safety and follow the manufacturer’s recommendations for cleaning and maintenance. With the right cleaning agent, you can effectively remove dirt, grease, and rust, ensuring that your Snap On hand tools remain in excellent condition for years to come.
Soap and Water
Soap and water is a simple yet effective method for cleaning Snap On hand tools. This cleaning agent is readily available and easy to use, making it a popular choice for routine cleaning and maintenance. Let’s explore how to use soap and water to clean your Snap On hand tools.
Materials Needed:
- Mild dish soap or hand soap
- Warm water
- Brush or sponge
- Clean cloth or towel
Step-by-Step Guide:
- Disassemble the tools if necessary: Before cleaning, disassemble the Snap On hand tools if possible. This allows for a more thorough cleaning by reaching all the nooks and crannies of the tool.
- Pre-clean the tools: Use a brush or cloth to remove any loose dirt, debris, or grease from the surface of the tools. This helps prevent the dirt from spreading and ensures a more effective cleaning process.
- Prepare the soap and water solution: Fill a bucket or sink with warm water and add a few drops of mild dish soap or hand soap. Mix the solution to create a soapy mixture.
- Submerge the tools: Place the Snap On hand tools into the soapy water, ensuring they are fully submerged. Allow them to soak for a few minutes to loosen any dirt or residue.
- Clean the tools: Using a brush or sponge, gently scrub the tools to remove dirt, grease, and any other contaminants. Pay attention to hard-to-reach areas and joints. For stubborn dirt, you can use a toothbrush or a small brush with soft bristles.
- Rinse with water: Once the tools are thoroughly cleaned, rinse them under running water to remove any soap residue. Make sure to rinse off all the soap to avoid leaving behind a film that could attract dirt and cause the tools to become sticky.
- Dry the tools: Use a clean cloth or towel to dry the Snap On hand tools completely. Make sure there is no moisture left on the tools, as this can lead to rust formation. You can also use compressed air or a hairdryer on low heat to speed up the drying process.
- Lubricate the tools: After cleaning and drying, it is a good practice to lubricate the moving parts of the tools with a light machine oil or a specialized tool lubricant. This helps prevent rust and keeps the tools functioning smoothly.
- Properly store the tools: Once the Snap On hand tools are clean and dry, store them in a clean and dry location. Consider using a tool chest, toolbox, or a designated tool rack to keep them organized and protected from moisture or dust.
Regular cleaning using soap and water helps maintain the appearance and performance of Snap On hand tools. By following these steps, you can effectively remove dirt, grease, and other contaminants, ensuring that your tools remain in top-notch condition for your automotive, industrial, or DIY projects.
Rubbing Alcohol
Rubbing alcohol, also known as isopropyl alcohol, is a versatile cleaning agent that can effectively remove grease and stubborn residues from Snap On hand tools. Its solvent properties make it an excellent choice for tackling tough stains, adhesives, and sticky substances. Let’s explore how to use rubbing alcohol to clean your Snap On hand tools.
Materials Needed:
- Rubbing alcohol (isopropyl alcohol)
- Clean cloth or paper towels
- Brush or toothbrush (optional)
Step-by-Step Guide:
- Disassemble the tools if necessary: If your Snap On hand tools are composed of multiple parts, consider disassembling them to clean each piece individually. This allows for better access and a more thorough cleaning.
- Pre-clean the tools: Before using rubbing alcohol, remove any loose dirt, debris, or grease from the surface of the tools. You can use a brush or cloth to gently brush away the dirt or wipe it off with a clean cloth.
- Apply rubbing alcohol: Dampen a clean cloth or paper towel with rubbing alcohol. Gently wipe the surfaces of the tools, focusing on areas with stubborn residues, adhesive, or grease. For intricate or hard-to-reach areas, you can use a toothbrush or a small brush with soft bristles.
- Scrub if necessary: For particularly stubborn stains or sticky residues, you may need to apply some gentle scrubbing. Use the brush or toothbrush to scrub the affected areas, applying a bit more pressure if needed. Ensure that the brush you use is appropriate for the material of the tools to avoid any scratching or damage.
- Rinse and dry: Once you have adequately cleaned the tools with rubbing alcohol, rinse them with water to remove any remaining residue. Then, use a clean, dry cloth or paper towel to dry the tools completely. Ensuring they are thoroughly dry is important to prevent any moisture-induced rusting.
- Lubricate moving parts: After cleaning and drying, it’s a good practice to lubricate the moving parts of the tools with a light machine oil or a specialized tool lubricant. This helps prevent rust formation and keeps the tools functioning smoothly.
- Properly store the tools: Store your Snap On hand tools in a clean and dry location, such as a tool chest, toolbox, or designated tool rack. This will further protect them from moisture and dust, helping to maintain their cleanliness between uses.
Rubbing alcohol is a handy cleaning agent that can effectively remove grease, sticky substances, and adhesives from your Snap On hand tools. By following these steps, you can ensure that your tools are clean, free of residues, and ready to use for your automotive, industrial, or DIY projects.
Vinegar Solution
Vinegar is a versatile and natural cleaning agent that can be used to remove rust and mineral deposits from Snap On hand tools. Its acidic properties make it effective in breaking down and dissolving stubborn residues. Let’s explore how to create and use a vinegar solution to clean your Snap On hand tools.
Materials Needed:
- White vinegar
- Water
- Container or bowl
- Brush or sponge
- Clean cloth or towel
Step-by-Step Guide:
- Dilute the vinegar: Mix equal parts white vinegar and water in a container or bowl. The vinegar acts as the cleaning agent, while the water helps dilute its acidity to reduce any potential damage to the tool’s surface.
- Submerge the tools: Place the Snap On hand tools into the vinegar solution, ensuring they are fully submerged. Allow them to soak for a few hours or overnight. This soaking process will help soften any rust or mineral deposits.
- Scrub the tools: After soaking, use a brush or sponge to scrub the tools. Pay special attention to areas with rust or mineral buildup. Scrub gently to avoid scratching the tool’s surface, but with enough force to remove the rust or deposits effectively.
- Rinse with water: Once the tools have been thoroughly scrubbed, rinse them under running water to remove any vinegar residue. Ensure that all traces of vinegar are completely removed.
- Dry the tools: Use a clean cloth or towel to dry the Snap On hand tools completely. Ensure that there is no moisture left on the tools, as this can lead to rust formation. You can also use compressed air or a hairdryer on low heat to speed up the drying process.
- Lubricate the tools: After cleaning and drying, lubricate the moving parts of the tools with a light machine oil or a specialized tool lubricant. This helps prevent rust and ensures smooth operation.
- Properly store the tools: Store your clean Snap On hand tools in a clean and dry location, such as a tool chest, toolbox, or designated tool rack. This will help protect them from moisture and dust, maintaining their cleanliness for future use.
Vinegar is an effective natural cleaning agent that can remove rust and dissolve mineral deposits from your Snap On hand tools. By following these steps, you can restore the tools to their original condition, ensuring that they are clean and ready for use in your automotive, industrial, or DIY projects.
Mineral Spirits
Mineral spirits, also known as white spirits, are commonly used as a solvent for removing tough grease and grime from Snap On hand tools. These petroleum-based solvents can effectively dissolve oil-based residues and provide a deep clean. Here’s how to use mineral spirits to clean your Snap On hand tools.
Materials Needed:
- Mineral spirits
- Clean cloth or paper towels
- Brush or toothbrush (optional)
Step-by-Step Guide:
- Disassemble the tools if necessary: If your Snap On hand tools have multiple parts or components, consider disassembling them to clean each piece individually. This allows for better access and thorough cleaning.
- Pre-clean the tools: Remove any loose dirt, debris, or grease from the surface of the tools. Use a brush or cloth to gently brush away the dirt or wipe it off with a clean cloth.
- Apply mineral spirits: Dampen a clean cloth or paper towel with mineral spirits. Gently wipe the surfaces of the tools, ensuring all areas are covered. For stubborn grease or grime, you can use a toothbrush or a small brush with soft bristles.
- Scrub if necessary: For particularly tough stains or residues, you may need to apply some gentle scrubbing. Use the brush or toothbrush to scrub the affected areas, applying a little more pressure if needed. Be mindful of the tool’s material and avoid excessive scrubbing that may cause damage.
- Rinse and wipe clean: Once the tools are cleaned with mineral spirits, rinse them with water to remove any remaining residue. Dry the tools with a clean, dry cloth or paper towel to ensure they are completely free of solvent and moisture.
- Lubricate moving parts: After cleaning and drying, it’s good practice to lubricate the moving parts of the tools with a light machine oil or a specialized tool lubricant. This keeps the tools functioning smoothly and helps prevent rust formation.
- Properly store the tools: Store your Snap On hand tools in a clean and dry location, such as a tool chest, toolbox, or designated tool rack. This protects them from moisture and dust, maintaining their cleanliness between uses.
Note: When working with mineral spirits, always ensure proper ventilation and follow the safety instructions on the product label. Avoid any open flames or sparks as mineral spirits are flammable.
Mineral spirits are effective at cutting through tough grease and grime on Snap On hand tools. By following these steps, you can achieve a thorough cleaning, leaving your tools clean and ready for use in automotive, industrial, or DIY projects.
Rust Removers
Over time, Snap On hand tools might develop rust due to exposure to moisture or environmental factors. To effectively remove rust and restore the tools’ surfaces, specialized rust removers can be used. These products are formulated to dissolve and eliminate rust, leaving your tools clean and ready for use. Here’s how to use rust removers to clean your Snap On hand tools.
Materials Needed:
- Rust remover solution
- Container or bowl
- Brush or sponge
- Protective gloves
- Clean cloth or paper towels
Step-by-Step Guide:
- Disassemble the tools if necessary: Consider disassembling your Snap On hand tools if they have multiple parts. This allows for easier cleaning and access to all surfaces affected by rust.
- Pre-clean the tools: Remove any loose dirt, debris, or grease from the surface of the tools. You can use a brush or cloth to gently brush away the dirt or wipe it off with a clean cloth.
- Prepare the rust remover solution: Follow the manufacturer’s instructions to prepare the rust remover solution. Some products come in a ready-to-use form, while others may require dilution with water.
- Submerge the tools: Place the Snap On hand tools into the rust remover solution, ensuring they are fully immersed. Allow them to soak for the recommended duration specified by the product manufacturer. This allows the rust remover solution to penetrate and dissolve the rust.
- Scrub the tools: After soaking, use a brush or sponge to scrub the tools, paying particular attention to areas affected by rust. Apply gentle pressure and continue scrubbing until the rust is entirely removed. For stubborn rust, you may need to repeat the soaking and scrubbing process.
- Rinse with water: Once the rust is removed, thoroughly rinse the tools under running water to remove any remaining rust remover residue. Ensure that all traces of the solution are completely eliminated.
- Dry the tools: Use a clean cloth or paper towel to dry the Snap On hand tools thoroughly. Make sure no moisture remains, as this can lead to the formation of new rust. You can also use compressed air or a hairdryer on a low heat setting to speed up the drying process.
- Lubricate the tools: After cleaning and drying, lubricate the moving parts of the tools with a light machine oil or a specialized tool lubricant. This helps prevent rust formation and ensures smooth operation.
- Properly store the tools: Store your cleaned Snap On hand tools in a clean and dry location, such as a tool chest, toolbox, or designated tool rack. This will protect them from moisture and dust, helping to maintain their cleanliness for future use.
By following these steps and using a specialized rust remover, you can effectively eliminate rust from your Snap On hand tools. Remember to always read and follow the instructions provided by the rust remover manufacturer for the best results.
Commercial Hand Tool Cleaners
Commercial hand tool cleaners are products specifically designed for cleaning and maintaining Snap On hand tools. These cleaners are formulated to efficiently remove dirt, grease, grime, and even stubborn stains from the surfaces of the tools. Using a commercial hand tool cleaner can save you time and effort while providing optimal cleaning results. Here’s how to use commercial hand tool cleaners to clean your Snap On hand tools.
Materials Needed:
- Commercial hand tool cleaner
- Clean cloth or paper towels
- Brush or sponge
- Clean container (if necessary)
Step-by-Step Guide:
- Pre-clean the tools: Remove any loose dirt, debris, or grease from the surface of the tools. You can use a brush or cloth to gently brush away the dirt or wipe it off with a clean cloth.
- Read the instructions: Carefully read and follow the instructions provided on the commercial hand tool cleaner package. Each product may have specific usage guidelines and safety precautions.
- Apply the cleaner: Apply the commercial hand tool cleaner to the tool’s surfaces as directed. This may involve spraying the cleaner directly onto the tool or applying it to a cloth or sponge before wiping down the tools.
- Scrub if necessary: If there are stubborn stains or heavy deposits on the tools, use a brush or sponge to scrub the affected areas. Apply gentle pressure and continue scrubbing until the dirt or stains are removed.
- Rinse or wipe clean: Depending on the instructions provided, you may need to rinse the tools with water or simply wipe off the cleaner with a clean cloth or paper towel. Make sure to remove any residue from the cleaner to prevent it from attracting dust or becoming sticky.
- Dry the tools: Use a clean cloth or paper towel to dry the Snap On hand tools thoroughly. Ensure that no moisture remains, as this can lead to the formation of rust or other damage. If needed, use compressed air or a hairdryer on a low heat setting to speed up the drying process.
- Lubricate the tools: After cleaning and drying, lubricate the moving parts of the tools with a light machine oil or a specialized tool lubricant. This helps prevent rust formation and ensures smooth operation.
- Properly store the tools: Store your cleaned Snap On hand tools in a clean and dry location, such as a tool chest, toolbox, or designated tool rack. This will safeguard them from moisture and dust, maintaining their cleanliness for future use.
Commercial hand tool cleaners are convenient and effective solutions for cleaning your Snap On hand tools. Always follow the instructions provided by the manufacturer and take necessary safety precautions when using these cleaners. With the right commercial cleaner, you can easily maintain the cleanliness and performance of your Snap On hand tools.
To clean Snap On hand tools, use a mild solvent or degreaser to remove dirt and grime. Then, wipe them down with a clean cloth and apply a light coat of oil to prevent rust.
Read more: Where Are Snap-On Hand Tools Made
Step-by-Step Guide on Cleaning Snap On Hand Tools
Cleaning your Snap On hand tools regularly is essential for maintaining their performance, longevity, and appearance. Follow this step-by-step guide to ensure a thorough cleaning process that will leave your tools in top condition.
Materials Needed:
- Soap and water
- Rubbing alcohol
- Vinegar solution
- Mineral spirits
- Rust remover (if needed)
- Commercial hand tool cleaner (optional)
- Brushes and sponges
- Clean cloth or paper towels
- Clean container or bowl
- Protective gloves
Step 1: Disassemble the tools if necessary
Before cleaning your Snap On hand tools, consider disassembling them if possible. This allows for better access, ensuring that every part is thoroughly cleaned.
Step 2: Pre-clean the tools
Use a brush or cloth to remove any loose dirt, debris, or grease from the surface of the tools. This initial pre-cleaning step helps in avoiding the spread of dirt during the cleaning process.
Step 3: Choose a suitable cleaning agent
Depending on the level of dirt, grease, or rust on your Snap On hand tools, choose a suitable cleaning agent. Options include soap and water, rubbing alcohol, vinegar solution, mineral spirits, or a commercial hand tool cleaner.
Step 4: Cleaning process for different types of hand tools
Each type of hand tool may require specific cleaning techniques. Here’s a general cleaning process:
- Surface Clean: Apply the chosen cleaning agent to a cloth or sponge, and wipe down the surfaces of the tools. Remove dirt, grease, and grime, paying attention to hard-to-reach areas. Scrub if necessary.
- Rust Removal: If you encounter rust on your tools, apply a rust remover as directed. Allow it to penetrate the rusted areas, then scrub gently to remove the rust.
Step 5: Drying and lubricating the tools
After cleaning, rinse the tools with water if required, ensuring all cleaning agents are removed. Dry the tools thoroughly with a clean cloth or paper towels to prevent moisture-induced rust. Finally, lubricate the moving parts of the tools with a light machine oil or a specialized tool lubricant.
Step 6: Proper storage practices
Store your clean Snap On hand tools in a clean, dry location, such as a tool chest, toolbox, or designated tool rack. This protects them from moisture and dust, ensuring they stay clean between uses.
Step 7: Optional: Using a commercial hand tool cleaner
If preferred, you can use a commercial hand tool cleaner following the instructions provided by the manufacturer. These cleaners are specifically formulated for efficient tool cleaning and can be used as an alternative to the aforementioned cleaning agents.
By following this step-by-step guide, you’ll be able to clean your Snap On hand tools effectively, promoting their performance, durability, and visual appeal. Regular cleaning and proper maintenance ensure that your tools remain in optimal condition for all your automotive, industrial, or DIY projects.
Disassemble the Tools If Necessary
Disassembling your Snap On hand tools, if possible, before cleaning them is an important step in ensuring a thorough and effective cleaning process. By taking apart the tools, you can access hard-to-reach areas and clean each component more thoroughly. Here’s a step-by-step guide on disassembling your tools for cleaning:
Step 1: Gather the Necessary Tools:
Before disassembling your Snap On hand tools, gather the tools you’ll need for the process. These may include screwdrivers, wrenches, pliers, or any other tools that are specific to the type of hand tool you are cleaning.
Step 2: Refer to the Manufacturer’s Instructions:
Check the manufacturer’s instructions or any available documentation for guidance on disassembling your specific Snap On hand tools. The instructions may provide details on which components can be safely disassembled and how to remove them without causing damage.
Step 3: Identify Removable Parts:
Take a close look at each Snap On hand tool and identify the parts that can be disassembled. Look for screws, bolts, or any visible indicators that suggest certain components can be separated from the main body of the tool.
Step 4: Gather a Clean Workspace:
Prepare a clean, well-lit workspace where you can disassemble the tools. Lay down a soft cloth or an old towel to protect the surface and prevent small parts from rolling away or getting damaged.
Step 5: Loosen and Remove Screws or Fasteners:
Using the appropriate tools, loosen and remove any screws, bolts, or fasteners that are holding the tool components together. Keep track of these small parts and set them aside in a safe place. Consider using a magnetic tray or container to keep them organized and prevent them from getting lost.
Step 6: Separate the Tool Components:
Once the screws or fasteners are removed, gently separate the tool components. Be cautious not to force any parts that seem resistant, as this may cause damage. If necessary, refer to the manufacturer’s instructions or seek guidance from a professional to determine the best way to safely separate difficult-to-remove components.
Step 7: Clean Each Component Individually:
With the tools disassembled, you can now clean each component individually, ensuring a thorough cleaning process. Depending on the material and type of component, you can use appropriate cleaning agents, brushes, or tools to remove dirt, grease, or rust.
Step 8: Rinse and Dry Components:
After cleaning each component, rinse them with water if necessary to remove any cleaning agents or residue. Use a clean cloth or paper towel to dry them thoroughly, ensuring there is no moisture left that could lead to rust formation.
Step 9: Reassemble the Tools:
Once all the components are clean and dry, follow the reverse order of disassembly to reassemble the Snap On hand tools. Carefully align the parts, insert any screws or fasteners, and tighten them securely. Take care not to overtighten and risk damaging the tool or its threads.
By following these steps to disassemble your Snap On hand tools before cleaning, you can effectively access and clean each component for a thorough maintenance process. This ensures that every part of the tool is cleaned, helping to maintain its performance, longevity, and overall condition.
Pre-Clean the Tools
Before diving into the main cleaning process, it is important to pre-clean your Snap On hand tools. This step helps remove loose debris, dirt, and grease from the surface of the tools, making the subsequent cleaning more effective. Here’s a step-by-step guide on pre-cleaning your tools:
Step 1: Gather Your Cleaning Supplies:
Before you begin pre-cleaning your Snap On hand tools, gather the necessary supplies. These may include a brush, a cloth or paper towels, and possibly a mild soap or degreaser solution.
Step 2: Inspect the Tools:
Take a close look at each tool to identify any visible dirt, debris, or grease. Pay attention to areas such as joints, handles, and crevices where dirt can accumulate. This inspection will help you determine the level of pre-cleaning required for each tool.
Step 3: Remove Loose Debris:
Using a brush or a cloth, gently brush off any loose debris or dirt from the surface of the tools. Start by sweeping in one direction to prevent debris from spreading. Pay special attention to hard-to-reach areas and grooves where dirt can be trapped.
Step 4: Wipe Off Grease:
For tools with visible grease or oily residue, use a cloth or paper towel to wipe off as much grease as possible. Apply gentle pressure to lift and remove the grease. If the grease seems stubborn, you can dampen the cloth with a mild soap or degreaser solution to help break down the grease before wiping.
Step 5: Use a Degreaser (if necessary):
If the tools have excessive grease buildup or stubborn stains, you can use a mild soap or degreaser solution. Wet a cloth with the solution and gently scrub the affected areas to break down the grease. Rinse the cloth frequently and use clean sections as you progress to avoid redistributing the grease.
Step 6: Inspect and Repeat if Necessary:
Once you have pre-cleaned all the tools, closely inspect them to ensure that loose debris and grease have been effectively removed. If you notice any remaining dirt or stains, repeat the pre-cleaning process using a different approach or a stronger cleaning agent if necessary.
Step 7: Dry the Tools:
After pre-cleaning, make sure to dry the Snap On hand tools thoroughly. Use a clean cloth or paper towels to wipe the tools and remove any moisture. This step is crucial in preventing water-induced rust.
By pre-cleaning your Snap On hand tools, you remove loose debris and grease, allowing you to focus on the more targeted main cleaning process. This preparatory step ensures a more effective overall cleaning and maintenance of your tools, prolonging their life and performance.
Choose a Suitable Cleaning Agent
When it comes to cleaning your Snap On hand tools effectively, choosing the right cleaning agent is crucial. The choice of cleaning agent depends on the type of dirt, grease, or rust present on the tools, as well as the material of the tools themselves. Here are some common cleaning agents to consider:
1. Soap and Water:
Soap and water are a simple and effective cleaning agent for general dirt, dust, and light grease. Mild dish soap or hand soap mixed with warm water can help break down the grime and make it easier to remove. This option is usually safe for most tool materials and can be easily accessible.
2. Rubbing Alcohol:
Rubbing alcohol, also known as isopropyl alcohol, is a versatile cleaning agent that is effective at removing stubborn grease, adhesives, or sticky residues. It evaporates quickly and leaves no residue behind. It is particularly useful for cleaning metal surfaces and is safe to use on most tool materials.
3. Vinegar Solution:
A vinegar solution can be effective in removing rust and mineral deposits from Snap On hand tools. Mix equal parts vinegar and water to create a solution. Vinegar’s acidic properties can help dissolve rust, and it is suitable for use on most tool materials. However, be cautious when using vinegar on tools with wooden handles, as excessive exposure can cause damage.
4. Mineral Spirits:
Mineral spirits, also known as white spirits, are petroleum-based solvents that can be used to remove tough grease and grime from tools. They are effective on oil-based residues and can help dissolve stubborn grease. Ensure adequate ventilation when using mineral spirits, as they have a strong odor and can be flammable.
5. Rust Removers:
If your Snap On hand tools have developed rust, specialized rust removers are designed to dissolve and remove rust effectively. These products are formulated to target rust specifically, restoring the tool’s surface. Follow the instructions provided with the rust remover and take precautions to protect yourself and the tool.
6. Commercial Hand Tool Cleaners:
Commercial hand tool cleaners are specifically designed to clean and maintain tools. They often come in spray or liquid form and are formulated to remove dirt, grease, and rust while protecting the tool’s surface. These cleaners can be convenient and effective, but be sure to follow the manufacturer’s instructions.
Considerations:
When choosing a cleaning agent, consider the specific cleaning needs of your tools, the level of dirt or grease buildup, and the material of the tools. Always refer to the manufacturer’s recommendations for cleaning and maintenance, especially if your tools have coatings or specialized finishes that may require specific cleaning agents or methods.
By choosing a suitable cleaning agent, you can ensure that your Snap On hand tools are effectively cleaned without causing any damage or compromising their performance. Proper cleaning agents help remove dirt, grease, and rust, bringing your tools back to their optimal condition for your automotive, industrial, or DIY projects.
Read more: How Do You Clean Rusty Hand Tools
Cleaning Process for Different Types of Hand Tools
Each type of hand tool requires specific cleaning techniques to ensure a thorough and effective cleaning process. Here’s a guide on how to clean different types of Snap On hand tools:
1. Wrenches and Pliers:
Start by wiping down the surface of the wrenches and pliers with a cloth or paper towel to remove any loose dirt or debris. For stubborn dirt or grease, use a cloth dampened with a mild soap and water solution or rubbing alcohol to clean the tools. Pay attention to the hinges and movable parts, ensuring they move freely after cleaning. Dry the tools thoroughly before storing them.
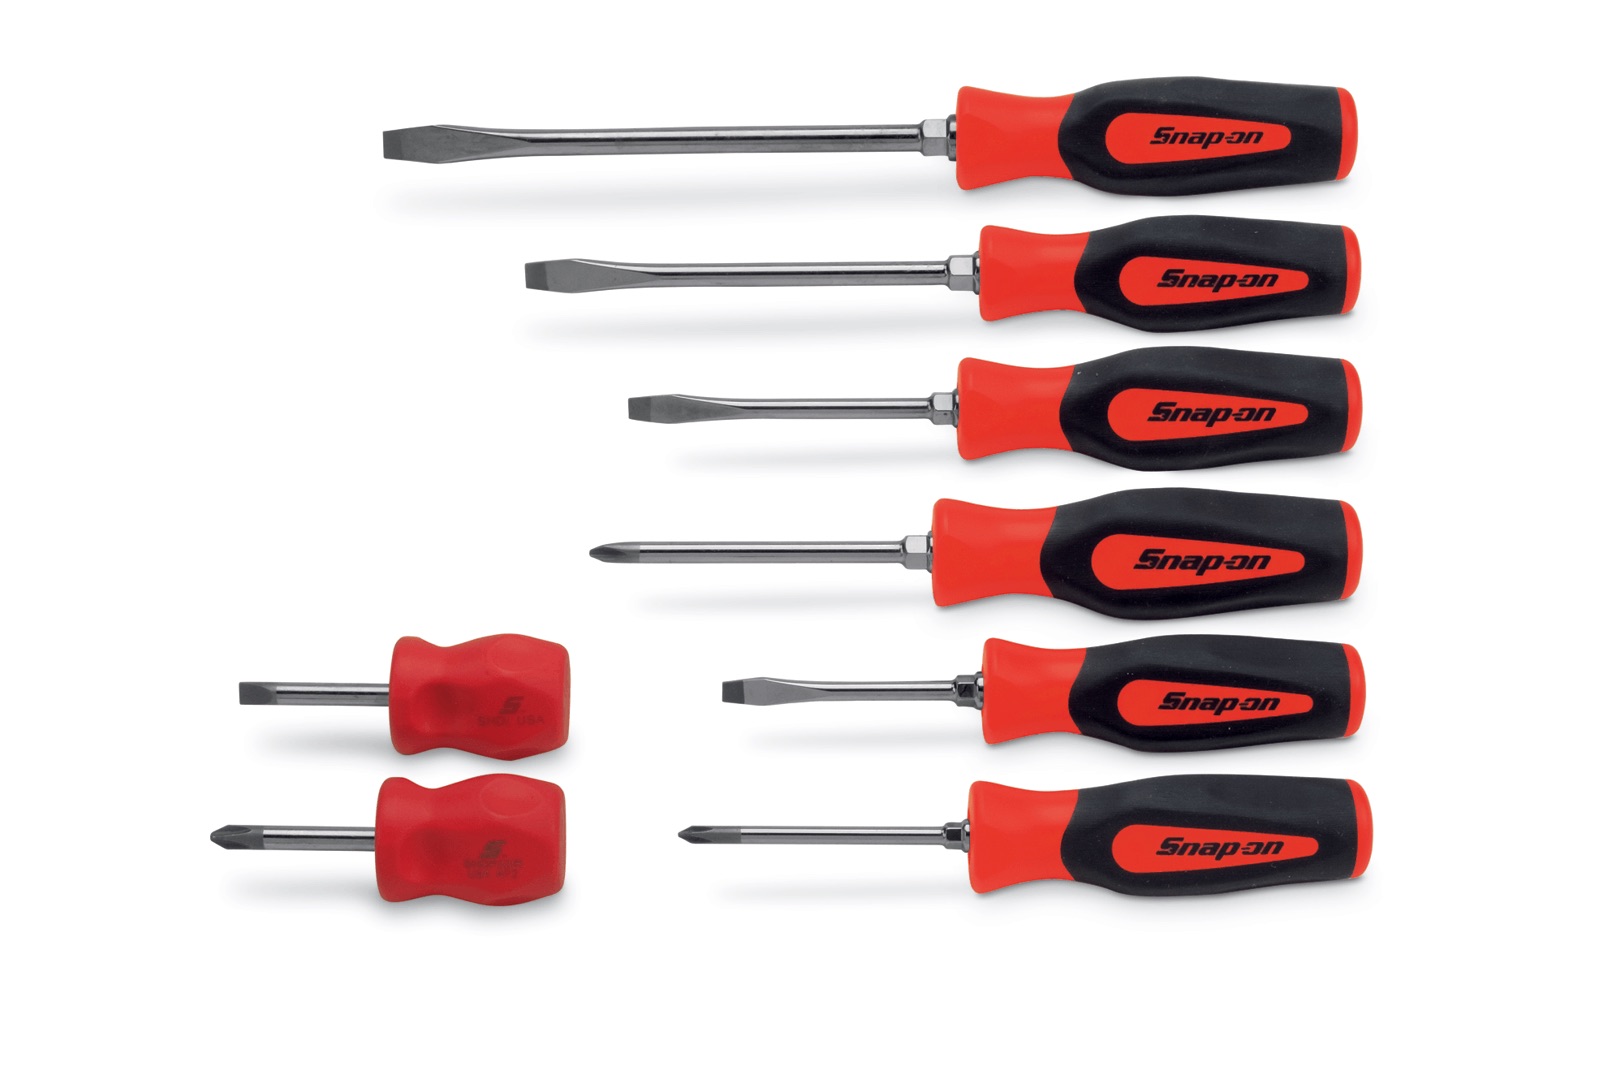
2. Screwdrivers:
Begin by wiping the screwdriver handles with a cloth dampened in a mild soap and water solution. For the metal shafts, rubbing alcohol can effectively remove dirt and grease. Pay attention to the tip of the screwdriver and clean any accumulated debris or residue. Dry the tools completely before use or storage.
3. Cutting Tools (e.g., Snips, Cutters):
First, clean the cutting tools by wiping the blades and handles with a cloth dampened in rubbing alcohol. Pay special attention to the cutting edges and crevices, as they tend to accumulate dirt and debris. If there is any stubborn residue, use a toothbrush or small brush to scrub the blades gently. Ensure the tools are completely dry before storing.
4. Hammers and Mallets:
For hammers and mallets, start by wiping the handles with a cloth dampened in a mild soap and water solution. Next, use a brush or cloth to clean the hammerheads or mallet faces. For stubborn dirt or rust, consider using a rust remover or vinegar solution, followed by thorough rinsing and drying. Ensure all components are completely dry before storing.
5. Ratchets and Sockets:
Begin by wiping down the ratchet handles and socket handles with a cloth or paper towel to remove loose dirt or grease. For the sockets, use a brush or cloth to clean both the inside and outside surfaces. Ensure the ratchets move freely and apply a light machine oil or tool lubricant to the moving parts for smooth operation. Dry all components thoroughly before storing.
6. Specialty Tools (e.g., Torque Wrenches, Diagnostic Tools):
For specialty tools, refer to the manufacturer’s instructions for cleaning and maintenance. Follow the specific guidance provided to ensure proper care and functionality of these tools. Use appropriate cleaning agents, brushes, or cloths suitable for the specific type of tool and the materials it is made of.
Remember to always thoroughly dry your cleaned Snap On hand tools and lubricate the moving parts as necessary before storing them. Carefully follow any additional cleaning and maintenance instructions specific to your tools to ensure their longevity and optimal performance.
Drying and Lubricating the Tools
After cleaning your Snap On hand tools, it is essential to thoroughly dry them and apply proper lubrication to ensure their optimal performance and prevent corrosion. Here’s a step-by-step guide on how to dry and lubricate your tools:
Step 1: Remove Excess Moisture:
Using a clean cloth or paper towels, carefully wipe down the surfaces of the tools to remove any excess moisture. Pay close attention to areas where water or cleaning agents may have accumulated, such as joints or crevices.
Step 2: Allow Air-Drying:
After wiping away the excess moisture, allow your Snap On hand tools to air-dry naturally in a well-ventilated area. This will ensure that all remaining moisture evaporates completely. Avoid using high heat sources like hair dryers, as excessive heat can damage the tool’s finishes or internal components.
Step 3: Inspect for Residual Moisture:
Once the tools appear dry, carefully inspect them to ensure there is no residual moisture. Check for any signs of dampness, especially in hard-to-reach areas or crevices.
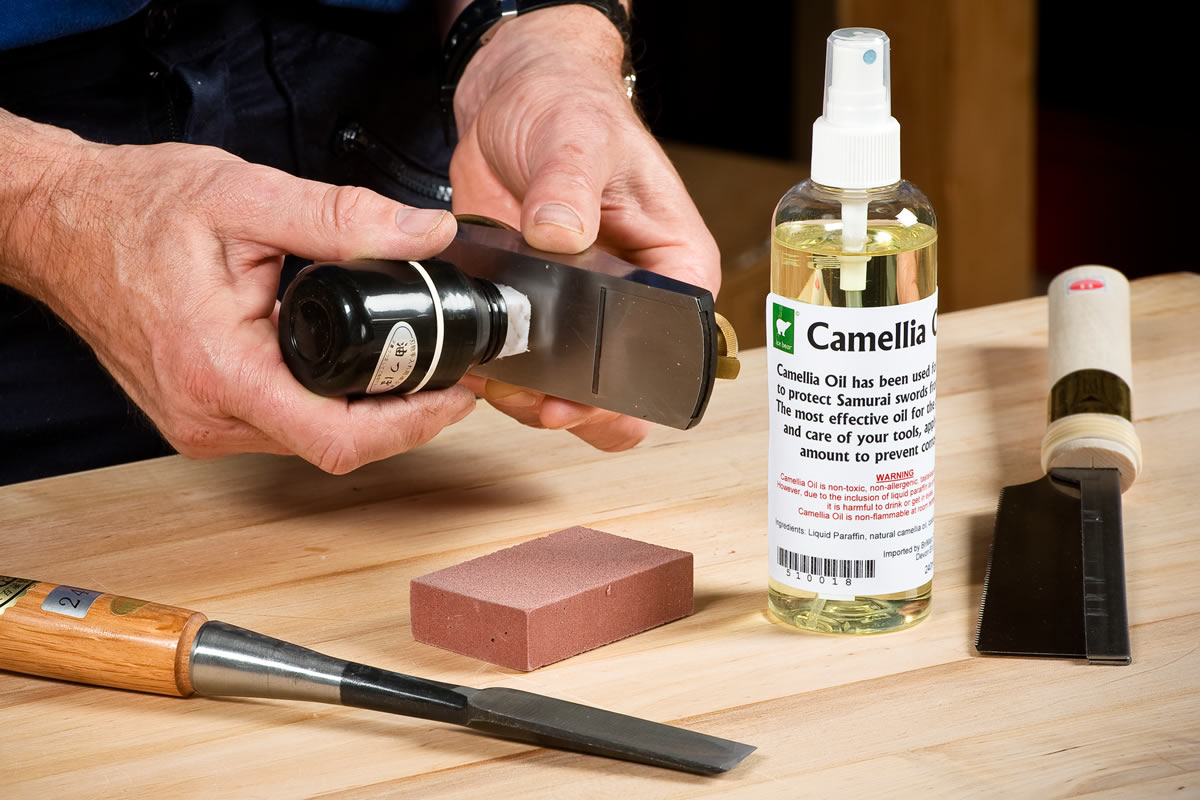
Step 4: Apply Lubrication:
After confirming that your Snap On hand tools are dry, apply a suitable lubricant to the moving parts and any areas that may benefit from additional lubrication. Lubrication helps reduce friction, prevents rust formation, and allows the tools to function smoothly.
Step 5: Choose the Right Lubricant:
Consider the type of tool and the manufacturer’s recommendations when selecting a lubricant. Light machine oil, such as 3-in-1 oil or specialized tool lubricants, are often suitable for most hand tools. Apply a few drops of the lubricant to the pivot points, hinges, and other moving parts that require lubrication.
Step 6: Work the Lubricant:
Once you have applied the lubricant, work the lubricant into the moving parts by operating the tools a few times. This helps distribute the lubricant evenly and ensures that the lubrication reaches all necessary areas.
Step 7: Wipe Off Excess Lubricant:
Using a clean cloth, gently wipe off any excess lubricant from the tool’s surface. This prevents the tools from becoming sticky and attracting dirt or dust.
Step 8: Store in a Clean, Dry Place:
Finally, store your dry and lubricated Snap On hand tools in a clean, dry place, such as a tool chest, toolbox, or designated tool rack. Proper storage helps protect the tools from moisture, dust, and other elements that may compromise their cleanliness and performance.
By following these steps to dry and lubricate your Snap On hand tools, you can enhance their longevity and maintain their optimal functionality. Regularly checking for and treating any signs of moisture or corrosion will help ensure your tools are always in top condition for your automotive, industrial, or DIY projects.
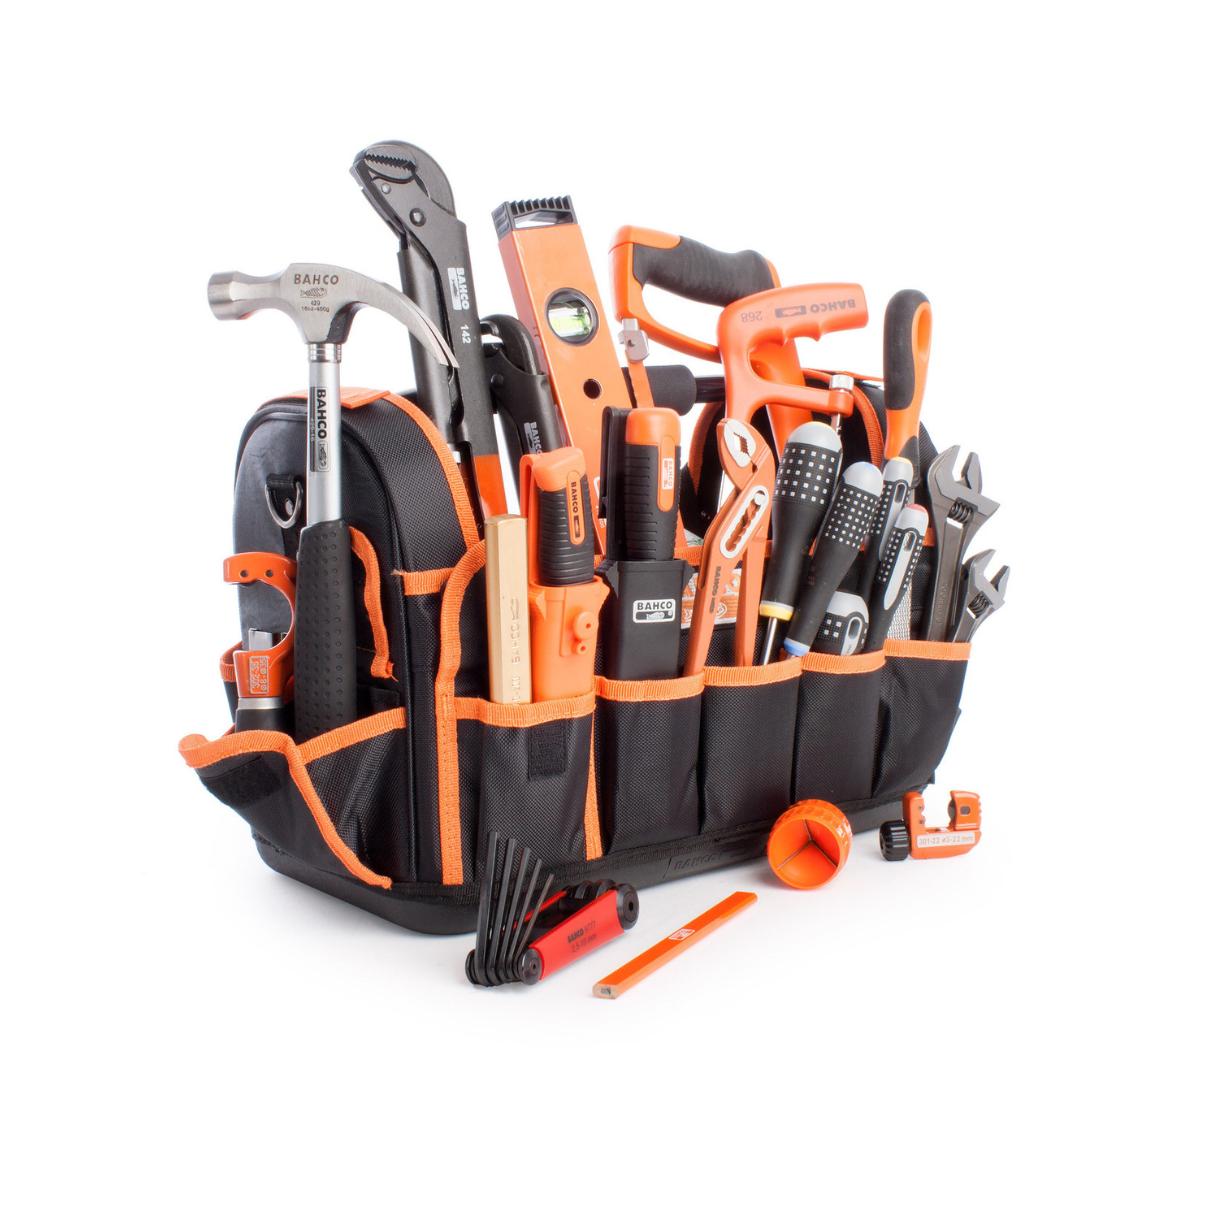
Proper Storage Practices
Proper storage of your Snap On hand tools is important for maintaining their cleanliness, protecting them from damage, and prolonging their lifespan. By following these proper storage practices, you can ensure that your tools are readily accessible, organized, and in optimal condition for future use:
Step 1: Clean and Dry:
Before storing your Snap On hand tools, make sure they are clean and thoroughly dry. Residual moisture can lead to rust formation, so ensure that all parts of the tools are completely dry to avoid any potential damage.
Step 2: Organize and Arrange:
Arrange your tools in a logical and organized manner. Consider using trays, foam inserts, or tool chests with compartments to keep your tools neatly separated and easily accessible. This not only helps maintain cleanliness but also prevents tools from getting damaged or lost.
Step 3: Tool Racks and Magnetic Strips:
Utilize tool racks or magnetic strips to keep your Snap On hand tools within reach. These storage solutions allow you to hang your tools on walls or pegboards, saving valuable workspace and preventing clutter. It also helps to quickly identify and retrieve the tools you need.
Step 4: Keep Tools in Cases:
If your Snap On hand tools came with their own storage cases, make use of them. These cases are designed to protect and store the tools securely, preventing damage during transportation or storage. Ensure that the tools fit properly in their designated slots within the case for added protection.
Step 5: Climate-Controlled Environment:
Store your tools in a clean, dry, and climate-controlled environment. Extreme temperature and humidity fluctuations can damage the tools and lead to rust formation. Avoid areas prone to dampness or humidity, such as basements or attics.
Step 6: Protect Against Moisture:
Add moisture-absorbing packets or desiccants to the storage area to help combat any excess moisture and keep your tools dry. These packets are available commercially and can help prevent rust and other damage caused by moisture accumulation.
Step 7: Regular Inspections:
Periodically inspect your stored Snap On hand tools to ensure they remain in good condition. Check for any signs of rust, corrosion, or wear. Address any issues promptly to prevent further damage or deterioration.
Step 8: Regular Maintenance:
Even during storage, continue to perform regular maintenance on your Snap On hand tools. This may include cleaning, lubricating moving parts, and checking for any wear or damage. Adhering to a consistent maintenance routine ensures that your tools are always ready for use.
By following these proper storage practices, you can keep your Snap On hand tools in excellent condition, ready for whenever you need them. Properly stored tools not only remain clean and protected but also contribute to a more efficient and enjoyable working experience.
Conclusion
Maintaining the cleanliness and condition of your Snap On hand tools is essential for their optimal performance, longevity, and your overall productivity. Regular cleaning, proper drying, lubrication, and storage practices are key to ensuring that your tools remain in excellent condition for years to come.
Throughout this article, we have explored various cleaning agents and techniques for cleaning Snap On hand tools. From basic soap and water to specialized rust removers or commercial hand tool cleaners, each cleaning agent serves a specific purpose and should be chosen based on the type of dirt, grease, or rust present on your tools.
Remember to disassemble the tools, if possible, to access hard-to-reach areas and clean each component thoroughly. Pre-cleaning to remove loose debris, choosing a suitable cleaning agent, and following the appropriate cleaning methods for different types of hand tools will ensure a thorough and effective cleaning process.
Proper drying is crucial to prevent moisture-induced rust, and applying the right lubricant afterwards helps maintain smooth operation and prevents corrosion. Finally, adopting proper storage practices, such as organizing and arranging tools, using tool racks or magnetic strips, and storing tools in clean, dry, and climate-controlled environments, ensures that your tools are readily accessible and protected from damage.
By following these guidelines, you can prolong the lifespan of your Snap On hand tools, maintain their optimal performance, and preserve their visual appeal. Regular maintenance and attention to cleanliness reflect professionalism and a commitment to quality workmanship.
So, whether you’re a professional mechanic relying on Snap On hand tools for day-to-day operations or an enthusiastic DIYer taking on various projects, remember that proper cleaning and maintenance of your tools are essential for successful and enjoyable outcomes.
Take pride in your Snap On hand tools by treating them with care, cleaning them regularly, and implementing proper storage practices. Your tools will thank you with enhanced longevity, reliability, and continued outstanding performance.
Frequently Asked Questions about What Do You Use To Clean Snap-On Hand Tools
Was this page helpful?
At Storables.com, we guarantee accurate and reliable information. Our content, validated by Expert Board Contributors, is crafted following stringent Editorial Policies. We're committed to providing you with well-researched, expert-backed insights for all your informational needs.

0 thoughts on “What Do You Use To Clean Snap-On Hand Tools”