Articles
What Does A Jointer Do In Woodworking
Modified: October 22, 2024
Discover the importance of a jointer in woodworking with our informative articles. Learn how this essential tool enhances your woodworking projects.
(Many of the links in this article redirect to a specific reviewed product. Your purchase of these products through affiliate links helps to generate commission for Storables.com, at no extra cost. Learn more)
Introduction
Woodworking is a timeless craft that has been practiced for centuries. Whether you’re a professional carpenter or a passionate hobbyist, having the right tools is essential to achieve high-quality results. One such tool that plays a crucial role in woodworking is the jointer.
In simple terms, a jointer is a machine used to create smooth, flat surfaces on a piece of wood. It is a versatile and valuable tool that helps woodworkers achieve precise and professional-looking finishes. Whether you’re working on a small DIY project or a large-scale woodworking endeavor, understanding what a jointer does and how to use it effectively can significantly enhance the overall outcome of your woodworking projects.
In this article, we will explore the various functions of a jointer, its working principle, and the benefits it offers in the world of woodworking. By the end, you’ll have a clear understanding of what a jointer does and how it can elevate the quality of your woodworking projects.
So, let’s dive in and explore the fascinating world of jointers and their role in woodworking!
Key Takeaways:
- A jointer is a versatile woodworking tool that can create flat surfaces, square edges, and eliminate warping and twisting in wood, enhancing the quality and stability of woodworking projects.
- Understanding the functions of different types of jointers, from benchtop to power jointers, allows woodworkers to choose the right tool for their specific project needs, space, and budget constraints.
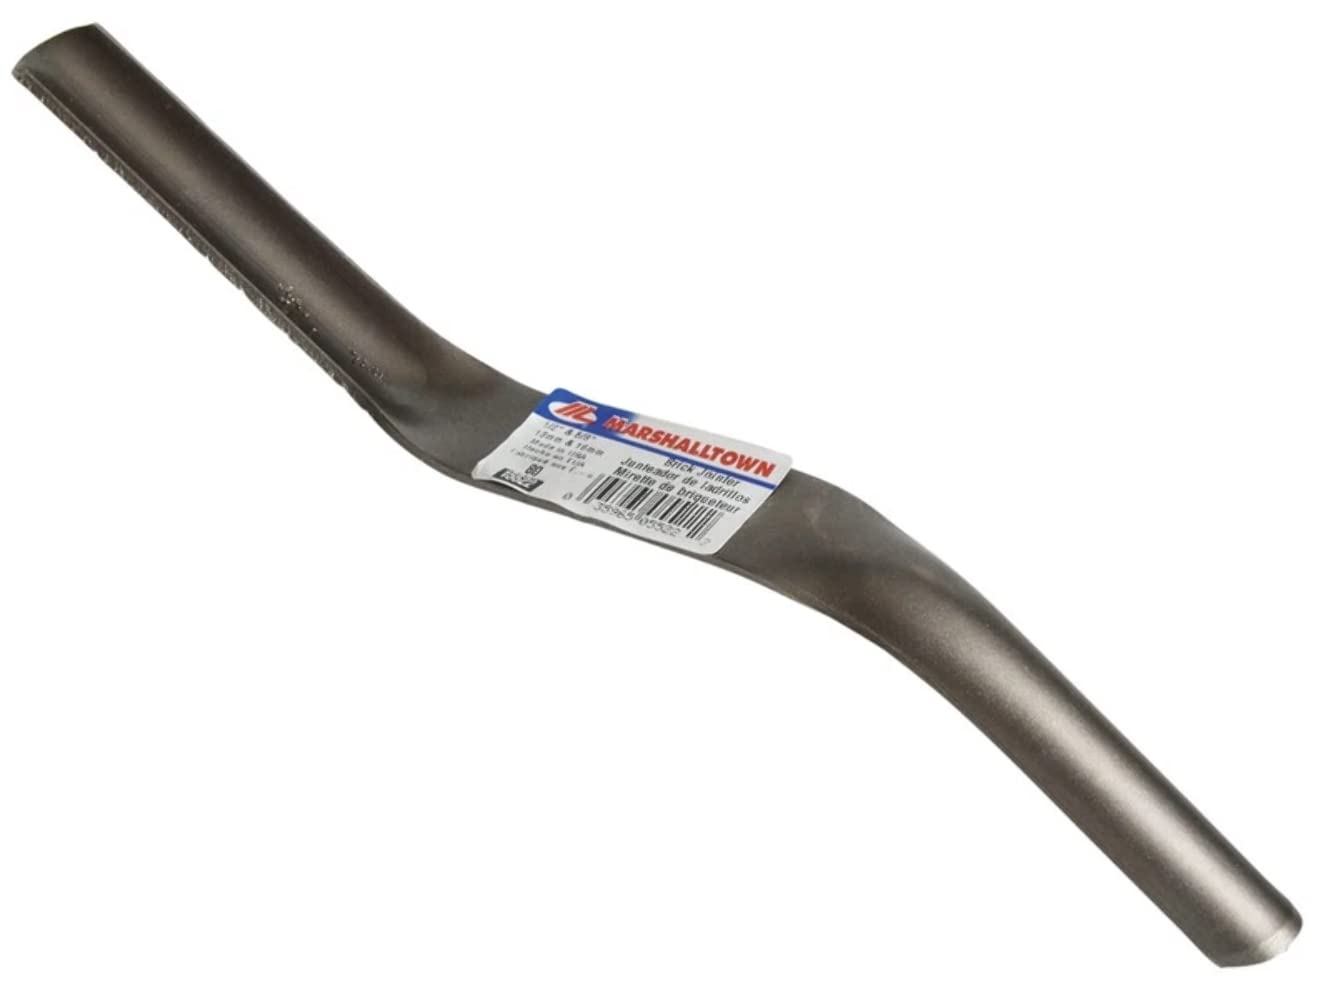
Read more: What Is A Brick Jointer
Definition of a Jointer
A jointer is a woodworking machine that is specifically designed to flatten and straighten the surface of a board. It is an essential tool in any woodshop, providing woodworkers with the ability to achieve accurate and seamless joinery.
The primary purpose of a jointer is to create a level and smooth surface on the face of a board, making it easier to work with and ensuring a tight and secure joint when two pieces of wood are joined together. By removing imperfections like twists, warps, and bumps, the jointer enables woodworkers to create seamless and professional-looking surfaces.
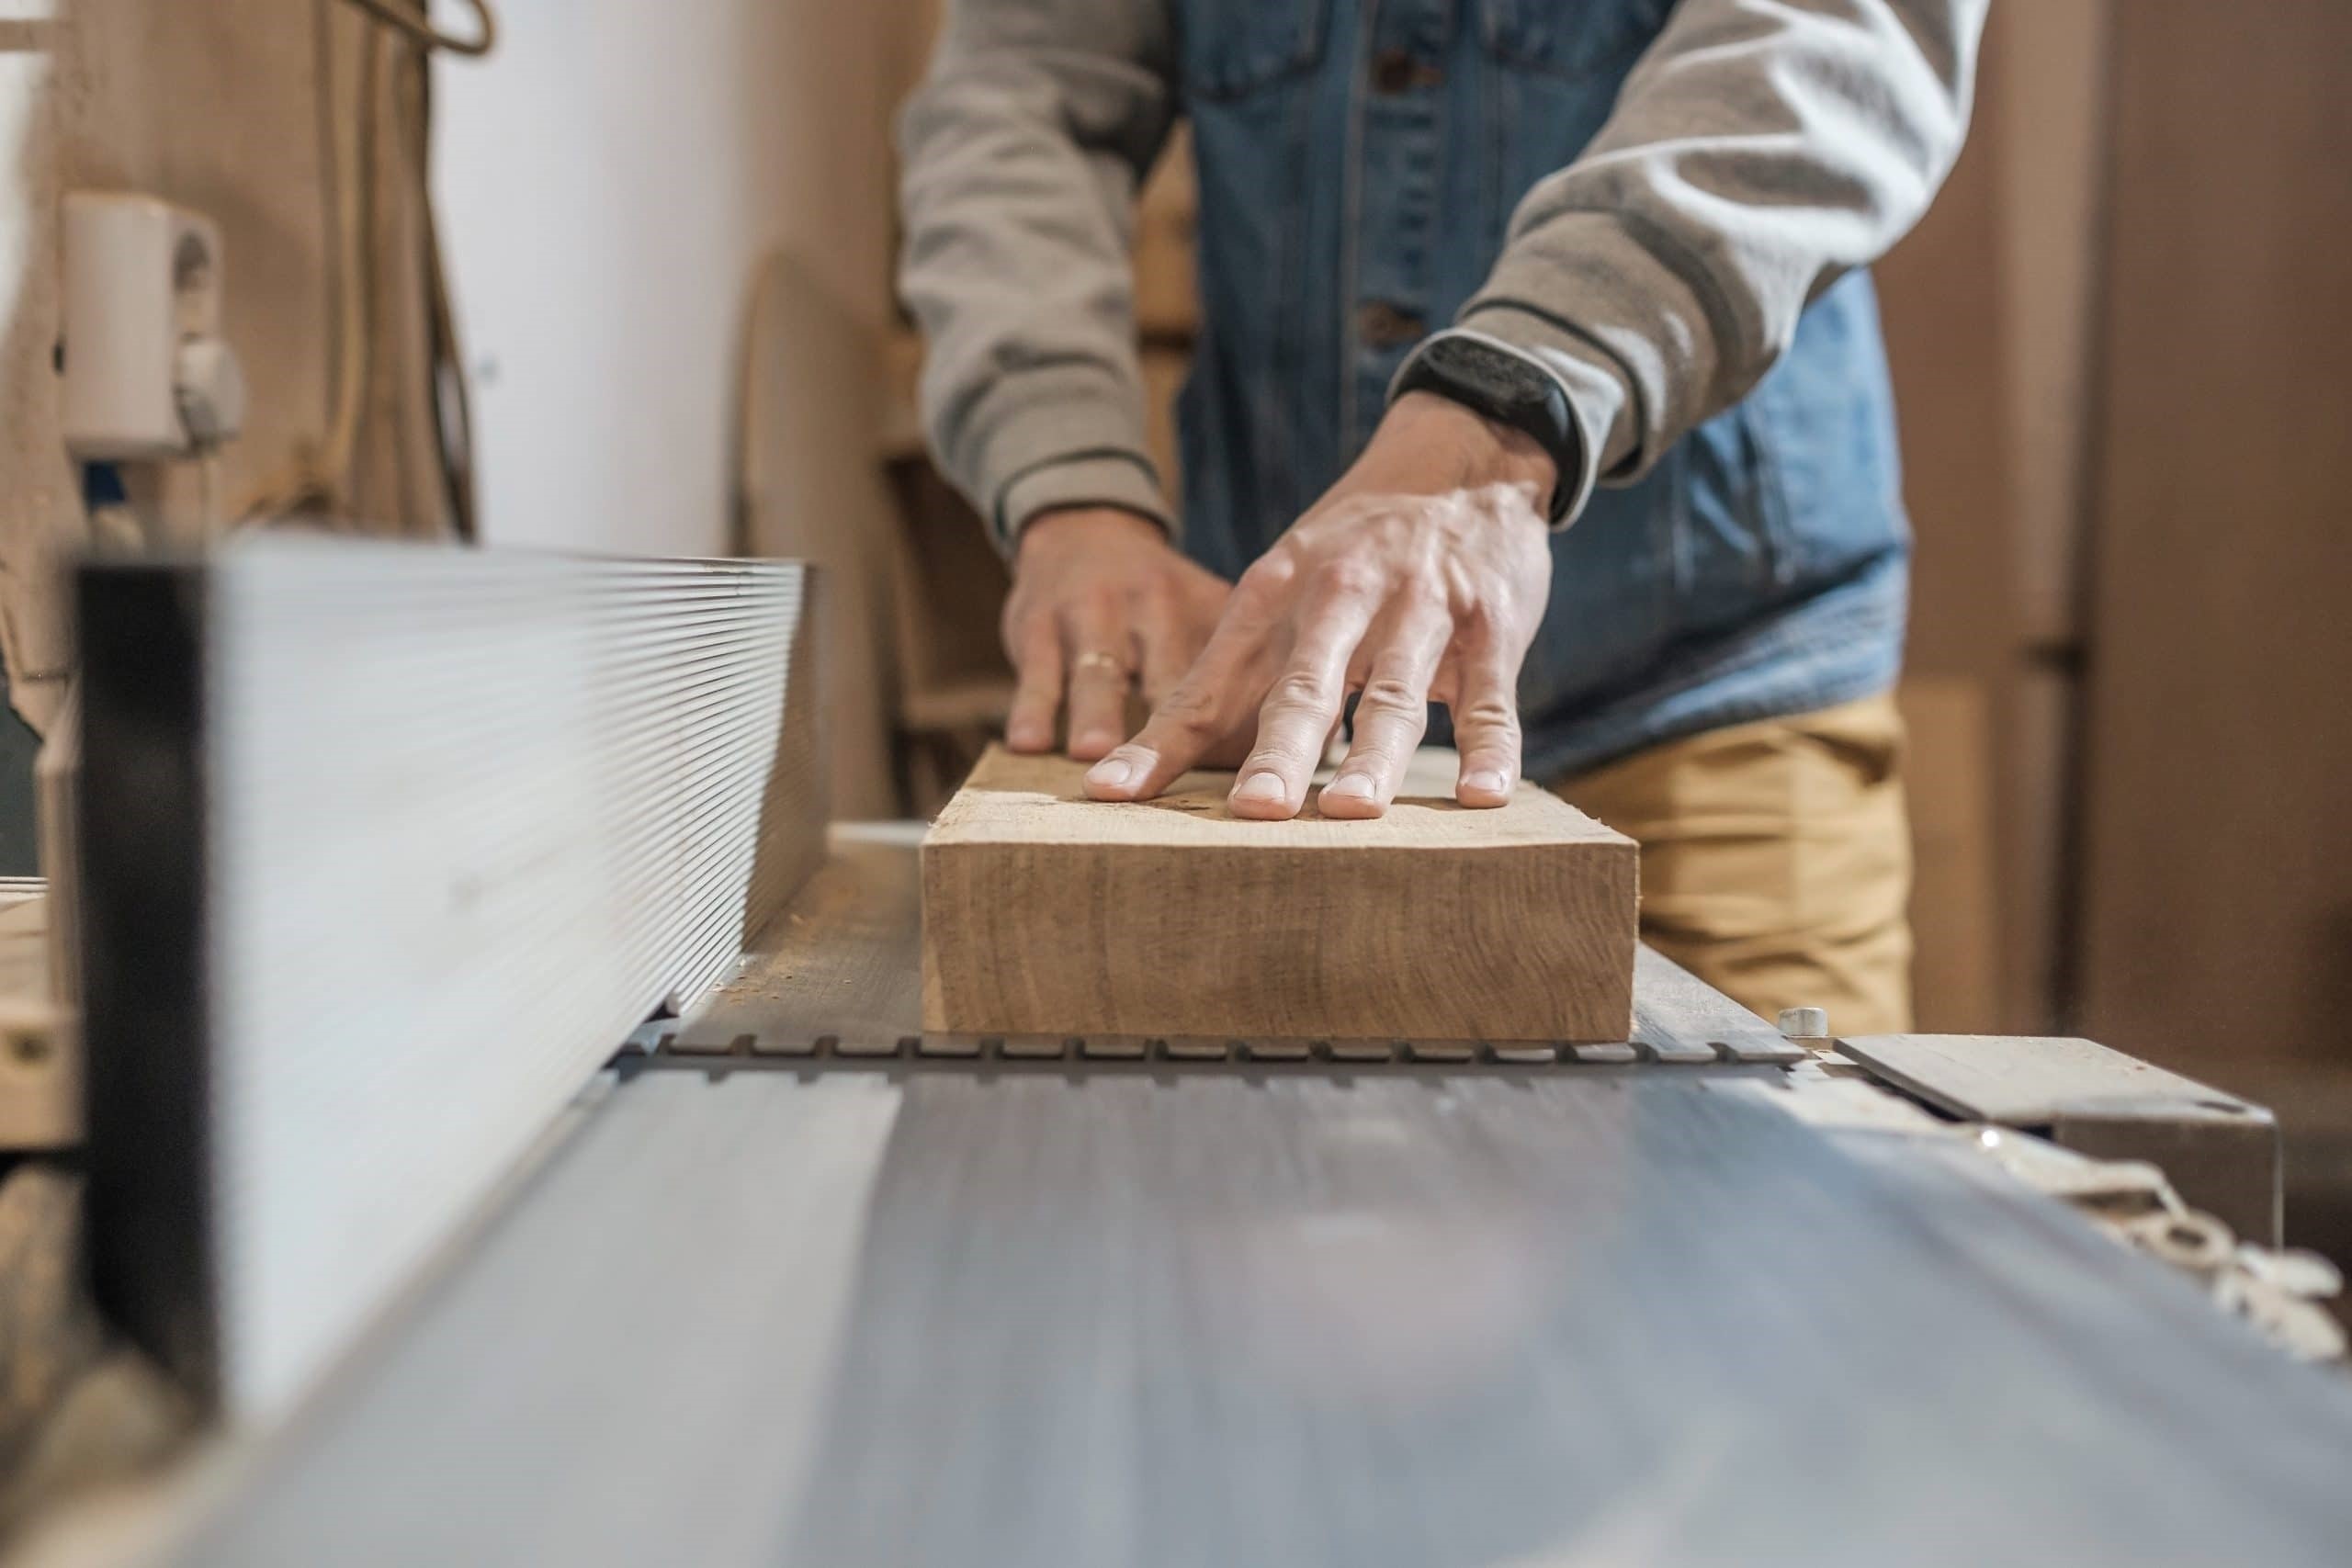
A typical jointer consists of a flat, infeed table and a rotating cutting head with sharp blades. The board is fed onto the infeed table, and as it passes over the cutting head, the blades remove the desired amount of material to create a flat and smooth surface. The board then exits the machine onto the outfeed table, resulting in a perfectly flat and straightened piece of wood.
It’s important to note that jointers come in various sizes and configurations to accommodate different woodworking needs. From small benchtop jointers suitable for hobbyists to larger industrial-sized jointers used in professional woodworking shops, there’s a jointer for every level of woodworking expertise.
Now that we have a clear understanding of what a jointer is, let’s explore how this powerful tool actually works to achieve its purpose in woodworking.
How Does a Jointer Work?
To understand how a jointer works, it’s important to break down its components and their functions:
1. Infeed Table: The infeed table is the flat surface where the board is initially placed. It is adjustable, allowing woodworkers to determine the depth of cut. The infeed table sets the starting point for the board as it moves through the jointer.
2. Cutting Head: The cutting head is made up of a set of sharp blades, typically three or four, mounted on a rotating cutterhead. These blades are responsible for removing material from the surface of the board, ensuring it becomes flat and smooth. The cutting head can be adjusted to control the depth of cut, allowing woodworkers to remove precisely the desired amount of material.
3. Outfeed Table: The outfeed table is the flat surface where the board exits the jointer. It is positioned relative to the cutting head to ensure that the desired thickness of the board is maintained as it passes through the machine.
The process of using a jointer involves the following steps:
1. Board Preparation: Before using the jointer, it’s important to prepare the board. This includes ensuring that one edge of the board is flat and straight, which will serve as a reference surface against the jointer’s fence.
2. Board Placement: The prepared board is placed on the infeed table, with the reference edge against the fence. The board is then pushed forward, feeding through the jointer.
3. Material Removal: As the board moves across the cutting head, the rotating blades remove a thin layer of material from the surface. The depth of cut is determined by the position of the cutting head and can be adjusted according to the woodworker’s preference.
4. Continual Feeding: The woodworker continues to push the board forward, ensuring a consistent and continuous feed rate. This helps achieve an even and smooth surface throughout the entire length of the board.
5. Checking the Result: Once the board has passed through the jointer and reached the outfeed table, it can be inspected for a flat and smooth surface. Woodworkers can use a straightedge or a square to check for any remaining imperfections and make further adjustments if necessary.
By following these steps, woodworkers can effectively use a jointer to create flat, smooth, and straight surfaces on their boards. The jointer’s cutting blades work in conjunction with the adjustable tables to remove any irregularities, resulting in high-quality and precise woodwork.
Functions of a Jointer in Woodworking
A jointer serves several important functions in woodworking, each contributing to the overall quality and precision of the finished woodwork. Let’s explore some of the key functions of a jointer:
1. Planing and Surfacing: The primary function of a jointer is to plane and surface the face of a board. Through its rotating blades, a jointer removes the rough and uneven surface, creating a flat and smooth finish. This function is crucial for preparing boards for further woodworking processes like joinery, laminating, or finishing.
2. Creating Square Edges: In addition to surfacing the face of a board, a jointer is also used to create square and straight edges. By aligning the reference edge of the board against the jointer’s fence, the blades can remove any irregularities or angles, ensuring that the resulting edge is perfectly perpendicular to the reference face.
3. Making Perfectly Flat Surfaces: The jointer’s capability to flatten surfaces is vital for creating flat tabletops, panels, or other wooden components. By removing any twists, warps, or bows from the boards, a jointer allows woodworkers to create consistent and level surfaces, ensuring a seamless joinery and improved stability in final woodworking projects.
4. Eliminating Warping and Twisting: Wood naturally tends to warp and twist due to changes in moisture content and environmental conditions. A jointer helps to combat these issues by removing material from the uneven surface of the board, bringing it back to a flat and even state. This process not only enhances the appearance of the wood but also improves its structural integrity.
5. Jointing Face Grain and End Grain: A jointer is capable of jointing both face grain and end grain. Jointing face grain involves running the face of the board along the jointer’s outfeed table to create a flat and smooth surface. Jointing end grain, on the other hand, requires adjusting the jointer’s fence to a 90-degree angle and carefully feeding the end grain of the board across the cutting head. This allows woodworkers to achieve accurate and precise end grain surfaces for joinery and other woodworking applications.
The functions of a jointer play a significant role in setting the foundation for the woodworking process. By ensuring flat, smooth, and properly aligned surfaces and edges, a jointer helps woodworkers achieve precise and professional results in their projects. It is an indispensable tool that enhances both the aesthetic appeal and functional qualities of the final woodwork.
Planing and Surfacing
One of the primary functions of a jointer is planing and surfacing the face of a board. This process involves removing the rough and uneven surface of the wood, creating a flat and smooth finish. Planing and surfacing are fundamental steps in woodworking, as they lay the foundation for further processes like joinery, laminating, or finishing.
When a rough board is passed through a jointer, the rotating blades of the cutting head come into action. These sharp blades remove the high points of the wood, gradually leveling the surface. The blades of the jointer can be adjusted to control the depth of cut, enabling woodworkers to remove a precise amount of material.
Planing and surfacing with a jointer not only improves the appearance and aesthetics of the wood but also provides practical benefits. By creating a flat and smooth surface, woodworkers can ensure better stability and fit during joinery. It allows for seamless connections between boards and enhances the overall strength and integrity of the final woodworking project.
The jointer’s ability to plane and surface is particularly useful when working with rough lumber or reclaimed wood. These materials often have uneven surfaces, rough edges, and natural defects. By using a jointer, woodworkers can transform these imperfect pieces into clean, level, and workable boards.
To achieve optimal results when planing and surfacing with a jointer, it’s important to follow a few key guidelines:
1. Start with a well-prepared board: Before using the jointer, ensure that the board is flat on one side and has one straight edge. This will serve as a reference surface against the jointer’s fence, providing a guide for achieving a level and flat result.
2. Adjust the depth of cut: Set the jointer’s blades to the desired depth of cut. It is best to start with a shallow cut and gradually increase the depth until the desired surface is achieved. Taking off too much material in a single pass may result in tear-out or an uneven surface.
3. Maintain a consistent feed rate: To achieve an even and smooth result, it is essential to maintain a consistent feed rate as the board passes through the jointer. Push the board steadily and smoothly across the cutting head while applying even pressure.
4. Monitor the output: As the board moves through the jointer, keep an eye on the resulting surface. Inspect it for any signs of remaining imperfections or inconsistencies. If necessary, make adjustments to the jointer’s settings or repeat the process to ensure a flawless surface.
Planing and surfacing with a jointer provide woodworkers with the ability to transform rough, uneven, and imperfect boards into smooth, level, and workable pieces of wood. By utilizing this fundamental function of a jointer, woodworkers can set the stage for achieving beautifully crafted and professional-looking woodworking projects.
Read more: What Tools Do I Need For Woodworking
Creating Square Edges
In addition to planing and surfacing, a jointer is an invaluable tool for creating square edges on a piece of wood. Square edges are essential in woodworking as they ensure proper joinery, precise alignment, and help achieve clean and professional results in various woodworking projects.
To create square edges using a jointer, the woodworker starts with a board that has at least one flat and straight reference edge. This reference edge is then placed against the jointer’s fence, which acts as a guide for maintaining a perpendicular angle between the reference face and the resulting edge.
As the board is fed through the jointer, the rotating blades of the cutting head remove material from the uneven edge, resulting in a straight and square edge. The depth of cut is adjustable, allowing woodworkers to remove precisely the desired amount of material to achieve a perfectly square edge.
Creating square edges with a jointer is crucial for tasks such as edge joining, where two or more boards are glued together to create larger panels or tabletops. With square edges, the boards fit tightly together, ensuring a solid and seamless joint.
Besides improving joinery, square edges are also essential for accurate and precise alignment when working on projects such as cabinetry, door frames, or furniture construction. Square edges provide a reference point for measuring and marking, ensuring proper fitting of components and maintaining overall symmetry in the final product.
Woodworkers can follow these steps to create square edges using a jointer effectively:
1. Start with a flat reference edge: Ensure that you have at least one flat and straight reference edge on the board. This edge will be used as a guide against the jointer’s fence.
2. Adjust the jointer’s fence angle: Set the jointer’s fence to a 90-degree angle with the jointer bed or table. It is essential to ensure that the fence is perfectly square to maintain precise perpendicular edges.
3. Position the board and make the cut: Place the reference edge of the board against the jointer’s fence and feed it smoothly through the jointer. Apply even pressure and maintain a consistent feed rate to achieve a uniform cut along the edge.
4. Repeat if necessary: After making the initial cut, inspect the resulting edge for any imperfections or irregularities. If needed, make additional passes with the jointer to achieve a perfectly square and clean edge.
By utilizing a jointer to create square edges, woodworkers can achieve precise joinery and ensure proper alignment in their woodworking projects. These square edges contribute to the overall quality and professional look of the final product, making the jointer an essential tool for any woodworking shop.
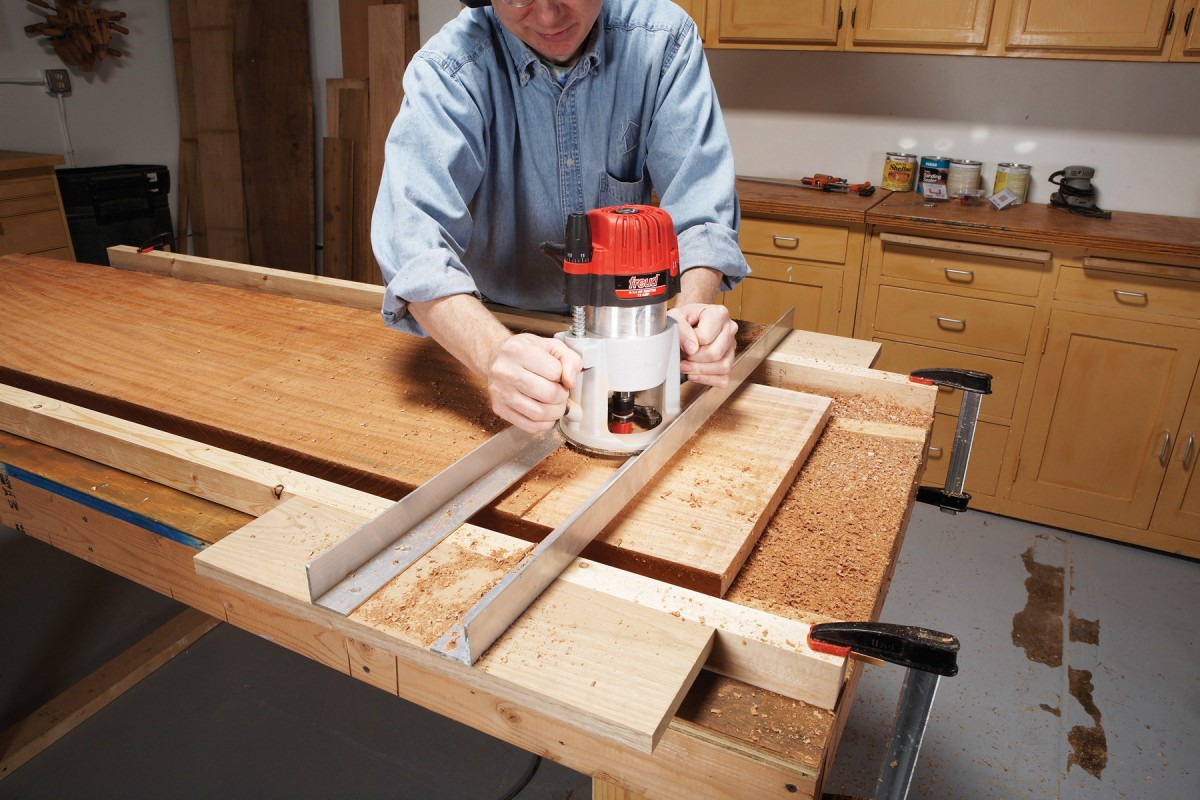
A jointer is used to create a flat surface on the edge of a board, making it easier to join with another board. It also helps to create a smooth and straight edge for better woodworking projects.
Making Perfectly Flat Surfaces
One of the key functions of a jointer in woodworking is to make perfectly flat surfaces on pieces of wood. Creating flat surfaces is crucial for various projects such as tabletops, panels, or other wooden components where a smooth and level finish is desired. A jointer plays a critical role in achieving this flatness and ensuring the overall quality of the woodworking project.
When a board is passed through a jointer, the rotating blades of the cutting head remove material from the surface, effectively leveling it. By removing any twists, warps, or bows in the wood, the jointer helps create perfectly flat surfaces that are aesthetically pleasing and functionally stable.
To make perfectly flat surfaces using a jointer, follow these steps:
1. Board selection: Choose a board that is as flat as possible to begin with. Although a jointer can handle some degree of imperfections, starting with a relatively flat board will yield better results.
2. Board preparation: Ensure one face of the board is flat, and one edge is straight. These will be used as reference surfaces against the jointer’s tables and fence, respectively.
3. Adjust the jointer: Set the jointer’s tables parallel to each other and adjust the depth of cut according to the amount of material you want to remove. A shallower cut is generally preferred to avoid tear-out or excessive removal.
4. Face jointing: Place the reference face of the board on the jointer’s infeed table, with the reference edge firmly against the fence. Slowly and steadily push the board across the jointer’s cutting head. The blades will remove material from the high points, gradually making the face of the board flat and even.
5. Repeat if necessary: After the initial pass, check the face of the board for any remaining high points or inconsistencies. Make additional passes, taking off small amounts of material each time, until the surface is perfectly flat.
6. Surface flattening: Use the jointer’s infeed and outfeed tables to support the weight of the board while passing it over the cutting head. This ensures consistent and even removal of material, resulting in a uniformly flat surface.
By making perfectly flat surfaces with a jointer, woodworkers can achieve seamless joinery, improved stability, and better overall aesthetics in their projects. Flat surfaces provide a solid foundation for further woodworking processes like joinery, gluing, or finishing. They contribute to the overall quality and professional look of the finished piece.
It’s important to note that for larger or wider boards, a jointer may not be able to flatten the entire surface in one pass. In such cases, additional techniques like using a planer or a thickness sander can be employed to achieve complete surface flatness.
In summary, a jointer is an invaluable tool for making perfectly flat surfaces in woodworking. Its ability to remove high points and level the surface of the wood ensures the creation of high-quality, stable, and visually appealing woodworking projects.
Eliminating Warping and Twisting
Warping and twisting are common issues that woodworkers encounter when working with raw lumber. These natural deformations occur due to changes in moisture content, internal stresses, or irregular growth patterns in the wood. However, a jointer can effectively eliminate warping and twisting, transforming rough and uneven boards into flat and stable pieces of wood.
A jointer works by removing material from the surface of the wood, specifically targeting the high points that cause warping and twisting. As the board is fed through the jointer, the rotating blades of the cutting head level the surface, taking off small amounts of material in the process. This consistent removal of material helps to eliminate warping and twisting, resulting in a flat and stable surface.
By removing the high points, such as raised edges or bows, a jointer brings the entire surface of the board into alignment. This creates a flat and even plane, reducing or even completely eliminating warping and twisting. The jointer’s ability to handle different irregularities in the wood makes it an essential tool in achieving stability and precision in woodworking projects.
To effectively eliminate warping and twisting with a jointer, follow these steps:
1. Evaluate the board: Inspect the board for any visible signs of warping or twisting. Identify the areas that require attention and determine the severity of the deformations.
2. Set up the jointer: Adjust the jointer’s tables to ensure they are parallel and properly aligned. Set the depth of cut based on the severity of the deformations you are trying to correct.
3. Face jointing: Begin by face jointing the board to create a flat surface. Place the board on the jointer’s infeed table, ensuring the reference face is against the table and the reference edge is against the fence. Slowly pass the board over the cutting head, removing material to level the surface.
4. Repeat the process: Check the face of the board to see if any warping or twisting remains. If necessary, make additional passes with the jointer, gradually removing material until the surface is flat and free from deformations.
5. Edge jointing: After achieving a flat face, proceed to edge jointing to create straight and square edges. Place the reference edge of the board against the jointer’s fence and pass it over the cutting head, removing any irregularities along the edge.
By using a jointer to eliminate warping and twisting, woodworkers can transform rough and uneven boards into stable and workable pieces of wood. This process not only improves the aesthetic appeal of the wood but also enhances its structural integrity. It ensures that the final woodworking project is more stable, reliable, and visually pleasing.
It’s important to note that while a jointer can effectively address issues of warping and twisting, it is essential to store and handle the wood properly to prevent future deformations. Proper moisture control and acclimation, use of straight-grain lumber, and appropriate storage techniques can help minimize the likelihood of warping and twisting in the long run.
In summary, a jointer is a valuable tool for eliminating warping and twisting in woodworking projects. Its ability to level the surface and remove high points allows woodworkers to work with flat and stable boards, resulting in better craftsmanship and more successful woodworking endeavors.
Jointing Face Grain and End Grain
A jointer is a versatile woodworking tool that can be used to joint both face grain and end grain. Jointing is the process of creating flat and smooth surfaces on wood, ensuring stability and accuracy in joinery and other woodworking applications. Understanding how to effectively joint both face grain and end grain is crucial for achieving precise and professional results.
1. Jointing Face Grain:
Jointing face grain involves creating a flat and smooth surface along the length of the wood’s grain. This is typically done to remove imperfections, such as twists, warps, or bows, and prepare the wood for further processing like edge joining or panel construction.
To joint face grain using a jointer, follow these steps:
– Start by ensuring one face of the board is flat and used as a reference surface.
– Adjust the jointer’s tables to be parallel and set the desired depth of cut.
– Place the reference face of the board against the jointer’s infeed table and firmly against the jointer’s fence.
– Feed the board smoothly across the cutting head, applying even pressure, to remove any unevenness and create a flat surface.
– Check the face of the board for any remaining imperfections, making additional passes if necessary, until the surface is flat and smooth.
2. Jointing End Grain:
Jointing end grain involves creating a flat and square surface on the end of the wood, perpendicular to the grain. This is often required for applications like joinery, where precise and accurate end grain surfaces are necessary for strong and seamless connections.
To joint end grain using a jointer, follow these steps:
– Adjust the jointer’s fence to be perpendicular to the jointer’s table.
– Place the end grain of the board against the jointer’s fence, ensuring it is firmly supported.
– Feed the board carefully into the rotating cutting head, making sure to maintain control and apply consistent pressure.
– Make a pass or multiple passes, adjusting the depth of cut as needed, to achieve a flat and square end grain surface.
It’s important to note that jointing end grain can be more challenging than jointing face grain, as the end grain tends to be more prone to tear-out or chipping. To reduce the risk of damage, taking lighter passes and using a high-quality jointer with sharp blades is recommended. Additionally, it’s advisable to follow up jointing end grain with further sanding or other finishing techniques for the best results.
By effectively jointing both face grain and end grain using a jointer, woodworkers can achieve precise and flat surfaces, enhancing the overall quality and fit of their woodworking projects. Whether it’s creating smooth tabletops, square-edged boards, or accurately fitting joinery, mastering the jointing process is key to successful woodworking endeavors.
Read more: What Hand Tools Do I Need For Woodworking
Types of Jointers
Jointers come in various types and sizes to cater to the diverse needs and preferences of woodworkers. Understanding the different types of jointers available can help you choose the one that best suits your woodworking projects. Here are the most common types of jointers:
1. Benchtop Jointer:
Benchtop jointers are compact and portable, designed to be placed on a workbench or sturdy surface. They are ideal for small woodworking shops or hobbyists who have limited space. Although they have smaller cutting capacities compared to larger jointers, benchtop jointers can still effectively surface and square small to medium-sized boards.
2. Open Stand Jointer:
Open stand jointers have a sturdy and open frame, providing stability and support during operation. They are larger than benchtop jointers and often come with longer cutting tables and greater cutting capacities. Open stand jointers are suitable for both small to medium-sized woodworking shops and professional settings.
3. Closed Stand Jointer:
Closed stand jointers have a cabinet-style base that encloses the motor and other internal components. This design provides increased stability and helps dampen vibrations during operation, resulting in smoother and more precise cuts. Closed stand jointers are typically larger and more robust, making them suitable for larger woodworking projects and professional use.
4. Helical Head Jointer:
A helical head jointer features a cutting head with multiple small, square, and spiral-shaped carbide inserts. These inserts are arranged in a helical pattern, offering several cutting edges that reduce tear-out and produce a smoother finish compared to traditional straight knives. Helical head jointers are known for their quieter operation and longer intervals between blade changes.
5. Spiral Head Jointer:
Similar to helical head jointers, spiral head jointers also use carbide inserts. However, unlike the helical pattern, the inserts are arranged in a spiral fashion for cutting. Spiral head jointers provide excellent surface finish, reduced tear-out, and longer blade life, making them suitable for demanding woodworking projects.
6. Combo Jointer/Planer:
A combo jointer/planer is a versatile machine that combines the functions of a jointer and a thickness planer. It allows woodworkers to switch between jointing and planing operations without the need for separate machines. Combo jointer/planers are ideal for those with limited space or budget constraints but still require the benefits of both jointing and planing capabilities.
7. Power Jointer:
Power jointers are industrial-grade jointers designed for heavy-duty woodworking operations. They are large, robust, and equipped with powerful motors and ample cutting capacities. Power jointers are commonly found in professional woodworking shops, where they can handle large boards and deliver precise, high-quality results consistently.
When choosing a jointer, factors such as the size of the materials you work with, the available space, your budget, and the level of precision required should be considered. Whether you opt for a compact benchtop jointer or a powerful industrial-grade model, selecting the right jointer for your specific needs will greatly contribute to the efficiency and success of your woodworking projects.
Conclusion
Jointers are invaluable tools in the world of woodworking, offering a range of functions that significantly enhance the quality and precision of projects. From planing and surfacing to creating square edges, making perfectly flat surfaces, and eliminating warping and twisting, jointers provide woodworkers with the means to transform rough lumber into beautifully crafted pieces.
By utilizing a jointer, woodworkers can achieve flat and smooth surfaces, ensuring seamless joinery, improved stability, and a professional finish in their woodworking projects. The ability to create square edges allows for precise alignment and accurate joinery, while the capability to make perfectly flat surfaces ensures a solid foundation for various woodworking processes.
Additionally, jointers play a vital role in eliminating common wood deformations such as warping and twisting. By removing material from the high points and leveling the surface, jointers assist in creating stable and reliable woodwork that withstands the test of time.
Woodworkers can choose from different types of jointers, including benchtop jointers for smaller projects, open or closed stand jointers for medium-sized woodworking shops, helical or spiral head jointers for enhanced cutting performance, and power jointers for heavy-duty industrial use. Selecting the right type of jointer based on specific project requirements, space availability, and budget constraints is crucial to achieving optimal results.
In conclusion, incorporating a jointer into your woodworking arsenal empowers you to achieve remarkable craftsmanship and precision. By understanding the functions of a jointer, from planing and surfacing to creating square edges and making perfectly flat surfaces, you can elevate your woodworking projects to new heights of excellence. Utilize the power and versatility of a jointer to unlock endless possibilities in woodworking, creating stunning pieces that showcase your skills and passion for the craft.
Frequently Asked Questions about What Does A Jointer Do In Woodworking
Was this page helpful?
At Storables.com, we guarantee accurate and reliable information. Our content, validated by Expert Board Contributors, is crafted following stringent Editorial Policies. We're committed to providing you with well-researched, expert-backed insights for all your informational needs.


0 thoughts on “What Does A Jointer Do In Woodworking”