Home> Woodworking Skills

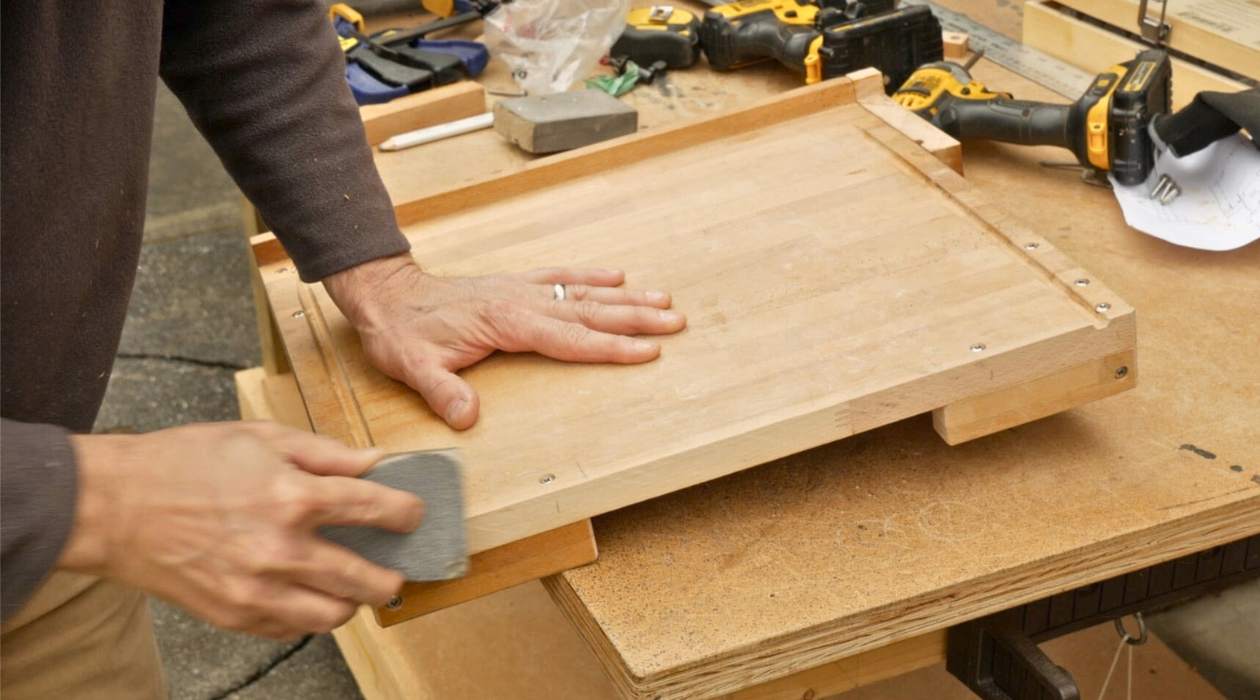
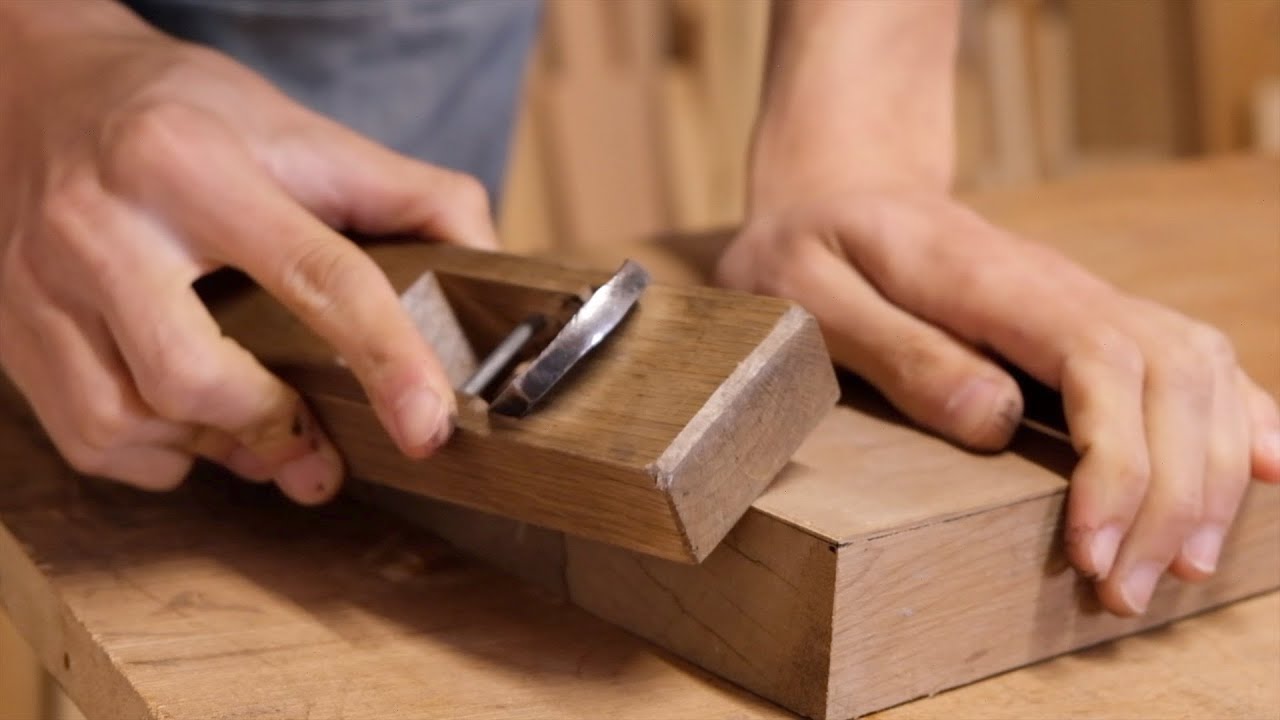
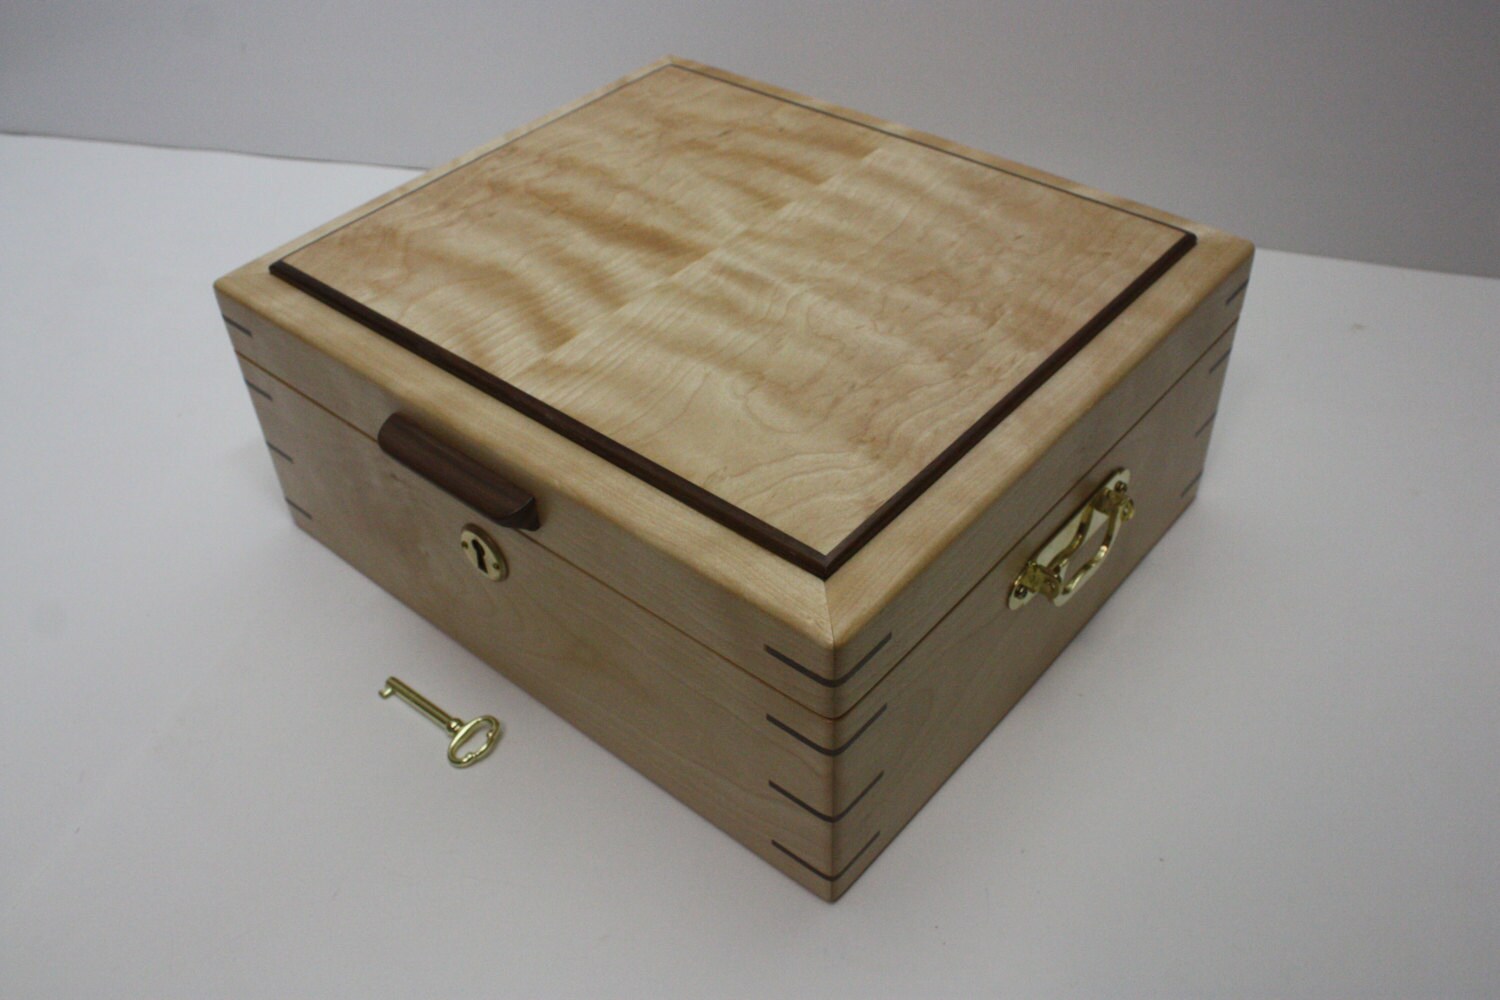
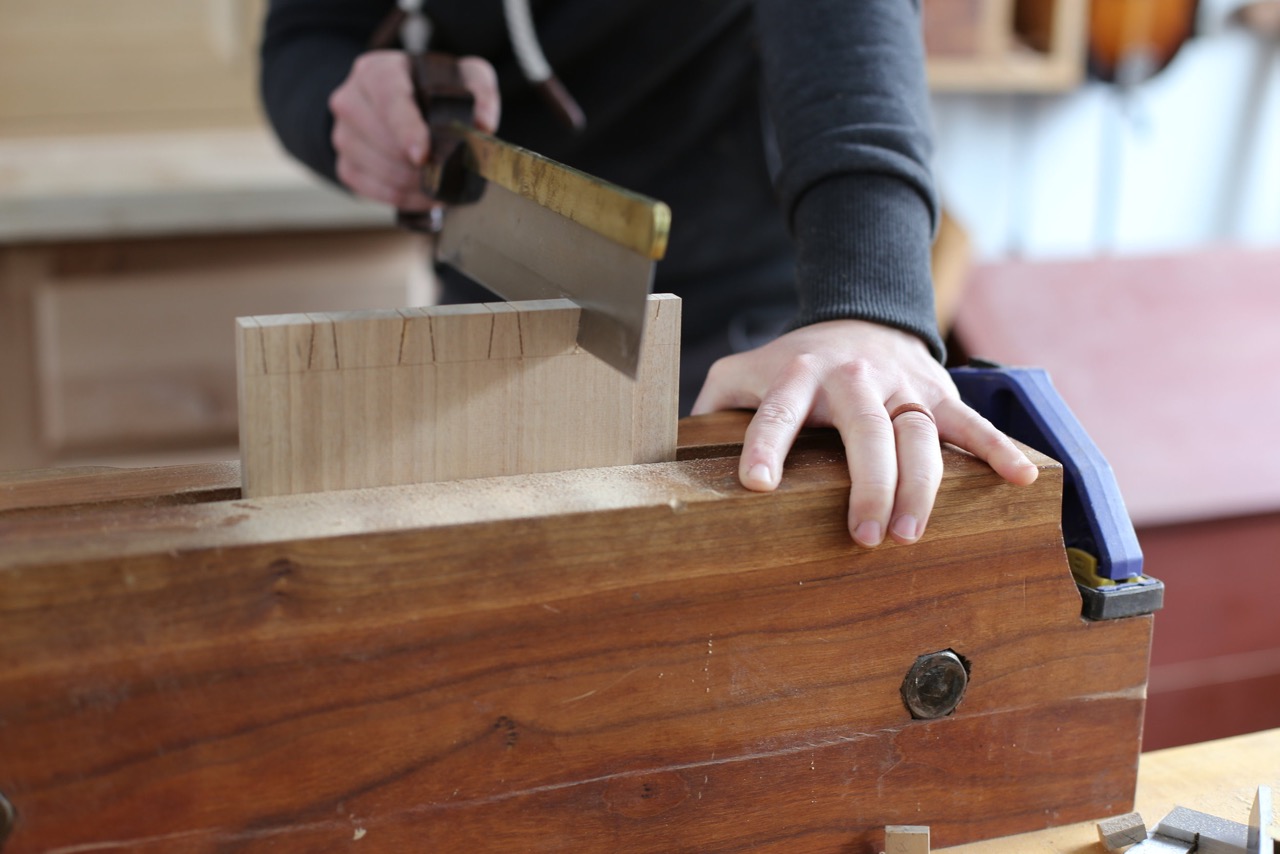
Master Woodworking Skills: A Comprehensive Guide for Beginners & Pros

November 9, 2023

Unlock your woodworking potential! Learn the basics, history, modern practices, and proper tool use & maintenance to enhance your woodworking skills.

13 Amazing Wood Dresser for 2023

13 Amazing Wood Dresser for 2023

By: Sophia Turner • Your Ultimate Guide To All Things Furniture

Read More
How To Install Newel Post On Flat Floor

How To Install Newel Post On Flat Floor

By: William Harrison • Articles

Read More
How To Build Accent Chairs For Living Room

How To Build Accent Chairs For Living Room

By: Amelia Brooks • Articles

Read More
How To Make A Cutting Board Using Hand Tools

How To Make A Cutting Board Using Hand Tools

By: Alexander Johnson • Articles

Read More
How To Flatten Board With Hand Tools

How To Flatten Board With Hand Tools

By: Henry Campbell • Articles

Read More
How To Make Dovetail Joints With Hand Tools
How To Make A Birch Box With Hand Tools

How To Make A Birch Box With Hand Tools

By: Isabella Mitchell • Articles

Read More
How To Make Trim Using Hand Tools

How To Make Trim Using Hand Tools

By: Emily Roberts • Articles

Read More

Introduction

Woodworking is a time-honored and practical profession turned hobby that combines creativity and precision cutting. From crafting intricate furniture to constructing storage solutions, woodworking skills can prove invaluable around the house. It all starts with understanding the basics, then continuously honing these skills over time.

Woodworking can be a hobby or a career, a method of relaxation or a mode of expression, and an outlet for creativity or a necessary skill in home improvement. No matter why you are interested in woodworking, this article aims to equip you with fundamental knowledge and skills.

History of Woodworking

Woodworking carries a rich and fascinating history that spans thousands of years. It’s one of the oldest crafts in the world, with evidence of woodworking practices dating back to the early Egypt and China. These ancient craftspeople designed and built everything from furniture to buildings with nothing more than their hands, basic tools, and their ingenuity.

Innovation and the industrial revolution saw significant evolution in the woodworking industry. With the advent of machines, more complex, sturdier and diverse range of wooden items were manufactured. Despite the technological advancements, the traditional and manual skills remain relevant and highly valued in today’s modern woodcraft.

Modern Woodworking Practices

The current age of woodworking embraces both traditional techniques and advanced machinery, like Computer Numerical Control (CNC) routers, laser cutters, and 3D printers. However, despite these advancements, the essence of woodworking remains rooted in understanding the medium – wood – and mastering the fundamental manual skills.

Basic Tools in Woodworking

The foundation of any successful woodworking project lies in understanding and properly utilizing the basic tools at your disposal. Some of the essential woodworking tools include – measuring tapes, squares, levels, saws, chisels, hammers, planes, drills, and clamps. Each of these tools has a specific purpose, and understanding their use will significantly enhance the quality of your work.

A well-crafted tool, when wielded properly, can create impeccable designs and sturdy structures. While most tools come with instruction manuals, the real knack comes from practice and understanding how the tool reacts with various types of wood. Besides using the tools correctly, proper maintenance also preserves the life of your tools and ensures their efficiency.

Proper Tool Maintenance

Caring and maintaining your woodworking tools is equally important to assure their longevity and maintaining your safety. Tools should be kept clean, sharp, and dry to prevent corrosion, failure, or damage during use. Regular inspections help in identifying any damage or issues that could lead to accidents or inefficient work.

Safety Measures in Woodworking

Like any craft involving tools and machines, woodworking comes with potential hazards. Hence, it’s critical to understand and follow necessary safety protocols to minimize the risk of injuries. These range from wearing the right personal protective equipment (PPE) to understanding the safe operation of tools.

Essential PPE for woodworking includes safety glasses to protect your eyes from dust and flying particles, hearing protection for operating loud tools, and gloves to safeguard you from cuts and splinters. It’s also recommended to use a dust mask or respirator in a well-ventilated area to avoid inhaling harmful dust or fumes.

Safe Operating Procedures

In addition to using PPE, understanding and following safe operating procedures for each tool is essential. For instance, never reach over a saw blade, always clamp your workpiece securely, and ensure all cutting tools are sharp and well-maintained. Safety should always be the first consideration when working with woodworking tools.

Woodworking Vocabulary

Like any industry, woodworking has its specific jargon, and understanding this vocabulary is crucial for any aspiring woodworker. Knowing the correct terms will make it easier for you to understand plans, follow tutorials, and communicate with other woodworkers effectively.

For example, terms like ‘dado’ refer to a slot cut into the surface of a piece of wood, ‘kerf’ represents the width of a cut made by a saw blade, and ‘miter joint’ is where two pieces meet at a 45-degree angle. But don’t worry if these terms sound foreign; you’ll naturally learn and understand them as you delve deeper into woodworking.

The Language of Woodworking

Overall, the language of woodworking is an integral part of the process. Understanding it will increase efficiency, enhance creativity, and ensure the communication of accurate, detailed information. Furthermore, learning the industry language will help you feel more confident and integrated into the woodworking community.

Understanding Wood

Wood is a versatile and complex material. Therefore, understanding different types of woods, their characteristics, and ways to work with them is vital in woodworking. Wood types can be generally classified into two categories: Hardwood derived from deciduous trees, and Softwood derived from coniferous trees. Each type has its strengths and preferable usages.

For instance, Hardwoods like oak, walnut, and maple are denser and harder. They’re often used for furniture, flooring, or any project that requires durability. On the other hand, Softwoods like pine, fir, and cedar are less dense making them easier to work with. They’re generally used for framing, outdoor furniture and projects where the wood will be painted.

Selecting the Right Wood

Choosing the right wood type for your project depends on the project’s needs. Consider factors like strength, durability, grain pattern, colour, and cost when selecting your wood. Understanding the properties of different types of woods will help you make the correct choice for your project, ultimately affecting the quality and longevity of your work.

Basic Woodworking Skills – Measuring

Accurate measuring is a fundamental woodworking skill. A minor miscalculation in measurement can lead to unsatisfactory results. Hence, the adage “measure twice, cut once” holds true in woodworking.

There are a variety of measuring tools necessary for woodworking. The common ones include the tape measure, used for taking long measurements; a try square for checking the right angles and measuring shorter lengths; a sliding bevel for measuring and marking any angle, marking gauge for depth and parallel measurements, and calipers for measuring the diameter of cylindrical objects.

Acquiring Accurate Measurements

For accurate measurement, it is crucial to remember a few things. Firstly, ensure your measuring tool starts and ends exactly where it should. Secondly, ensure straight and clear marking. Lastly, use the same measuring device for the entire project to maintain consistency as minor differences can occur between different rulers or tapes.

Basic Woodworking Skills – Cutting

Cutting is another elemental woodworking skill. It involves resizing and shaping the wood to fit your project using different tools. The kind of saw used depends on the type of cut you need to make. The hand saw is good for basic straight cuts, while a circular saw or jigsaw can manage more complex cuts.

Safety should be a priority while cutting. Hold the saw firmly but do not force it through the wood – let the tool do the work. Make sure to maintain a safe distance between your free hand and the blade.

Earning Accurate Cuts

For accurate cuts, always mark the cut line clearly on the wood. For straight cuts, use a square to draw a straight guide line. Practice is especially crucial for gaining proficiency in cutting – the more you cut, the better you will become at it.

Basic Woodworking Skills – Sanding

Sanding wood is a necessary skill in woodworking, primarily done to prepare the wood surface for finishing. It helps to smooth the surface, remove scratches and create a better bond for stains or paints.

Different grits of sandpaper are used for different stages of sanding. Start with lower grit numbers for initial rough sanding and progress to higher grit numbers for finer sanding. Always sand along the grain of the wood, not against it.

Proper Sanding Techniques

For effective sanding, ensure that you use the right technique. Sand in circles or along the grain, not against it. Use an even pressure, altering your grip as necessary to sand curved or detailed areas. Always finish off with a finer grit sandpaper to give the wood a smooth finish – this preparatory stage is particularly important if you plan to apply finish or paint.

Basic Woodworking Skills – Joining

Joining is an essential woodworking skill that involves connecting pieces of wood together to create a solid, structurally sound piece. The type and design of the joint used depends largely on the nature of the project being undertaken. Some commonly used woodworking joints include butt joints, lap joints, mortise and tenon, and dovetails.

The tools typically used in joining wood include clamps, which hold the pieces together, woodworking glues, that provide the basic adhesion, and various types of fasteners like screws and nails. Power tools such as routers and saws, might be needed to create more complex joints.

Mastering the Art of Joining

To become efficient in joining, it’s essential to understand the strengths and weaknesses of different types of joints. Further, always make sure your cuts are precise. Misalignment can lead to weak structures. Wood glue is usually stronger than the wood itself, so apply it liberally and remember to wipe away any excess that squeezes out. Whenever possible, reinforce your joints with nails, screws or dowels for additional strength.

Woodworking Joints – Butt Joint

The Butt joint is the simplest type of joint and it’s quite easy to make. It involves butting two pieces of wood together (hence the name) and joining them with glue and often a few nails or screws. While not the strongest of joints, it’s often used in light duty applications – such as in framing or when creating panels.

Despite its simplicity, it’s very important to make sure that the ends of the wood that are being joined are cut as squarely as possible. Any inaccuracies will result in gaps and a weak joint.

Perfecting the Butt Joint

For stronger butt joints, reinforce them with dowels, biscuits, or screws. When screwing a butt joint, always remember to drill pilot holes to prevent the wood from splitting. For glue-based joints, always clamp your workpieces together while the glue dries for a stronger bond. Remember, the strength of a butt joint depends upon the quality of the adhesive and the area over which it is applied.

Woodworking Joints – Lap Joint

The Lap joint is another basic woodworking joint where half of each of the two pieces being joined is removed, and the remaining halves interlock. It’s stronger than a butt joint and is often used in frame construction.

To create a lap joint, you need to accurately mark out the thickness of the material to be removed on each of the workpieces. Accuracy is vital for a tight-fitting joint. Common tools used to cut out the material include a table saw, hand saw or a chisel.

Mastering the Lap Joint

When creating a lap joint, ensure a snug fit between the interlocking pieces. A loose lap joint will be weak and may lead to structural failures. It’s best to make a few practice cuts on scrap pieces before cutting the actual workpieces. Lastly, a lap joint should always be glued and clamped together while drying to ensure optimal strength and stability.

Woodworking Joints – Mortise and Tenon

The Mortise and Tenon joint is one of the oldest and strongest woodworking joints, often employed in furniture and cabinetry. It involves the insertion of a tenon (a projecting piece of wood) into a matching cavity or hole known as the mortise. Once inserted, the tenon is glued and it forms an extremely strong joint due to the high surface area available for bonding.

Creating a mortise and tenon joint requires precision. The mortise hole and the tenon must be accurately sized to achieve a snug fit. Tools commonly used in making mortise and tenon include a bench chisel for mortises and a tenon saw for tenons.

Mastering the Mortise and Tenon

The key to a successful mortise and tenon joint lies in the precise cutting of the mortise hole and the tenon that will fit into it. The tenon must be cut to a size slightly less than the mortise hole to ensure a snug fit. Too loose, and the joint will lack strength. Too tight, and it may split the wood when inserted. Always test the fit before applying the glue and remember to allow the joint to dry properly before applying any stress.

Woodworking Joints – Dovetail

Dovetail joints are widely regarded as a symbol of quality in woodworking. They are used primarily in cabinetmaking and joinery as a form of flare to your projects. The joint’s name comes from the fact that it looks like the tail of a dove when viewed from the side. Their interlocking design provides maximum strength, eliminating the need for nails or screws.

The process of creating dovetail joints involves a fair bit of complexity. Tools typically used for dovetailing include a dovetail saw, chisels, and often a router with a dovetailing bit for machine-made dovetails.

Mastering the Dovetail Joint

The success in creating dovetail joints depends on precision in layout and cutting. Since the joint’s effectiveness is largely based on the friction between the interlocked pieces, the fit needs to be very snug. It’s best to practice this joint on spare pieces of wood before moving to your project material. Remember to be patient, as this joint may take a few tries to perfect.

Constructing Simple Structures

Once one has mastered these basic woodworking joints, they can move on to creating simple wooden structures. The construction of these structures will provide practical experience in applying the woodworking skills acquired. The structures can range from small utility items like sturdy shelves and storage boxes to basic furniture like stools or benches.

Before constructing any piece, it’s essential to have a detailed plan that includes precise measurements, the type of wood required and the best tools to use. The assembly process usually involves measuring and cutting the parts, preparing the joints, assembling the parts and finally applying a finish.

Constructing a Basic Shelf

In starting to construct simple structures, a basic shelf is a good first project. Select a durable wood and measure the desired length, width, and thickness. Cut the planks according to the size, sand the cut edges to smooth them out, and put together using any of the joint options discussed. Lastly, apply a finish to increase the shelf’s longevity and to improve its aesthetics.

Importance of Finishing in Woodworking

Finishing in woodworking is equally crucial as it enhances the elegance, longevity, and resistance of wooden furniture and items. Wood finishes protect the wood’s surface from moisture, humidity, stains, light, and abrasion. They bring out the natural beauty of the wood, emphasizing its color, grain, and texture.

Wood finish comes in different forms such as oils, waxes, varnish, lacquer, paint, and stains. Each finish type has its own set of advantages and is used in specific conditions or woodworking projects. The most significant factor in selecting a finish type is the end purpose of the wooden furniture or item.

Choosing the Appropriate Finish

While selecting the finishing material, you must consider the function and the location of the furniture piece. For instance, a table kept in a room with high moisture and humidity levels needs a moisture-resistant finish like varnish or polyurethane. The aesthetic aspect also plays a crucial role in choosing the finish. Some woodworkers might prefer the natural look of oils and waxes, whereas others may favor the lustrous appeal that a lacquer or varnish imparts.

Staining Wood

Wood stain is a colorant, typically a type of dye or pigment, that is mixed with a carrier agent like water, oil, or alcohol. It is used for changing the wood color while highlighting the wood grain pattern. Wood stain lets you create a variety of effects, ranging from a dramatic dark hue to a gentle wash of color.

Staining is an effective method to achieve a uniform color especially when working with woods that differ in color and grain pattern. It’s also useful in making inexpensive woods imitate the look of fine hardwoods. Do note that staining doesn’t offer any protective qualities and should always be follow up with a protective finishing coat.

Applying Wood Stain

Before staining, it’s crucial to prepare the wood surface thoroughly by sanding it evenly. Stain should always be stirred, not shaken, to mix it properly without creating bubbles. Use a brush or a cloth to apply the stain, making sure to work along the grain of the wood. Excess stain should be wiped away promptly to prevent uneven coloration. Always test the stain on an inconspicuous area or a scrap piece of wood to ensure it gives the intended color.

Varnishing Wood

Varnish is a protective clear finish that provides robust protection against scratches, heat, and water. It’s composed of a drying oil, a resin, and a solvent or thinner. It forms a hard, lustrous finish with an excellent level of shine that can enhance the natural appearance of the wood.

Many woodworkers favor varnish for its durability and versatility. It is best used for interior furnishings and outdoor furniture as it can provide UV resistance minor moisture protection. As with a wood stain, the wood surface must be well-prepared before varnishing.

Proper Varnish Application

When varnishing, use a clean brush and apply thin, even strokes, tipping off along the grain. Avoid over-brushing, and never try to spread the varnish too thin. While applying, don’t allow the edges to dry before you extend the varnished area; this will help avoid visible seams when the project is dry. Remember, multiple thin coats tend to be more durable and look better than one thick coat.

Painting Wood

Painting wood can be a great way to add colour, personality, and vibrance to wooden pieces. Paints not only improve the appearance of the wooden projects, but also provide a protective layer, especially if the furniture is located outside or in a harsh environment.

Paints come in a variety of types, including water-based (acrylic), oil-based, latex, and enamel. Each type has its peculiarities and uses. For instance, acrylic or latex paint is mostly used for indoor furniture because of their low fume emission, while oil-based paint is prevalent for outdoor furniture due to its durability and resistivity towards harsh weather conditions.

Steps in Painting Wood

Before painting the wood, ensure the surface is clean, and apply a primer coat to seal the wood and enable the paint to adhere properly. After the primer dries, apply the paint in thin, even layers, allowing each layer to dry before applying the next. Complete the painting process with a clear protective finish like a polyurethane coating to increase the lifespan of the painted wood.

Woodworking Plans

Woodworking plans are essential blueprints that guide the creation process for any woodworking project, whether it’s a piece of furniture or a storage unit. These plans comprise detailed step-by-step instructions, material and tool lists, diagrams, and measurements.

They guide both the novice woodworker and the experienced craftsman, enhancing accuracy, efficiency and reducing errors and waste of materials. Woodworking plans can range from simple designs for beginners to intricate plans for complex projects.

Interpreting Woodworking Plans

Understanding woodworking plans requires deciphering the symbols, scales, dimensions, and technical terminology used in the plan. Start by examining the entire plan to understand the big picture, then proceed to clarify individual elements of the project, including the type of wood required, other materials, the necessary tools, and the sequence of construction.

Woodworking for Storage

Woodworking is a versatile skill that you can use to create efficient storage solutions. These might range from bookshelves, cabinets, and wardrobes to smaller units like spice racks, jewelry boxes, or wall shelves.

With woodworking, you can not only create practical storage options but also personalize them to match your home’s décor and specific storage needs. Wood offers durability and sustainable qualities that few other materials can match. It brings warmth, character, and an organic touch to any space.

Building a Basic Storage Unit

Begin your storage project by planning according to your needs, available space, and skill level. Draft a sketch or plan with accurate measurements. Next, gather all necessary materials and tools and familiarize yourself with safety protocols and procedures related to each tool. Begin your project by cutting out individual pieces according to the plan, sanding them smooth, and finally, assembling them according to the plan. A basic storage unit can be as simple as a wooden crate or a multi-shelf bookcase.

Home Improvement through Woodworking

Woodworking is an invaluable skill for home improvement projects, offering both practical and aesthetic benefits. From constructing built-in cabinets and shelves to creating striking wooden wall panels, there’s a wide range of home improvement projects that can elevate the value and aesthetic appeal of a property.

For smaller projects, crafting your own picture frames, mirror frames, or decorative wall pieces can add a personal touch and warmth to your home. Bigger projects can range from developing wood flooring to creating bespoke furniture pieces or even remodeling a kitchen or bathroom with custom wood cabinets.

Steps to Successful Home Improvement with Woodworking

The first step is identifying the areas of your home that could benefit from woodworking improvement. Next, plan your project carefully, considering the type of wood and tools needed, along with the time and cost involved. Begin by working on smaller projects before proceeding to larger ones. Learn from each completed project and continue improving your woodworking skills over time. Finally, ensure all projects are completed with proper finish to enhance durability and give a well-rounded look.

Maintaining Wooden Furniture and Structures

Wooden furniture pieces and structures elevate the beauty of our homes and workspaces, but to ensure their longevity, they need proper maintenance. While wood is generally sturdy, it can still be vulnerable to factors such as moisture, sunlight, and pests, that can deteriorate its quality over time. Therefore, routine cleaning, treating, finishing, and repairing are essential aspects of wooden furniture and structures maintenance.

Regular dusting, using suitable wood cleaners, ensuring the furniture isn’t exposed to direct sunlight for extended periods, using coasters and mats to avoid surface damage are some ways to maintain your furniture. Prompt treatment of spills and avoiding the use of harsh chemical cleaners can also help maintain the sheen of the furniture.

Maintenance Tips for Wooden Furniture and Structures

Inspect furniture regularly for any signs of damage or wearing out. Minor scratches or dents can be repaired using a wood filler or color-matched furniture markers. For pest invasion, a pest-control treatment may be necessary. Furthermore, consider periodic refinishing for wooden furniture and structures to restore their shine and add a layer of protection.

Advanced Woodworking Skills

Once you’ve mastered the basics of woodworking, stepping into advanced woodworking can open doors to create more complex, durable, and refined wooden objects. This can include learning intricate joinery techniques such as creating dovetails, finger joints, and tongue-and-groove joints.

Furthermore, understanding advanced finishing techniques like French polishing, and achieving complex geometrical shapes and designs using router tables or lathes constitutes advancing your woodworking skills. Altogether, these skills can significantly enhance your capacity to create professional-grade pieces with high precision.

Mastering Advanced Woodworking Skills

To attain these skills, you might consider enrolling in advanced woodworking classes, both online or offline, or seeking the mentorship of an experienced woodworker. Practice remains key, so take on progressively challenging projects that push your current skill set. Reading advanced woodworking books and attending woodworking workshops or demonstrations can expose you to new techniques and tips. With patience, practice, and persistent learning, mastering advanced woodworking skills can be an achievable goal.

DIY Woodworking Projects

There’s an immense satisfaction derived from creating something using your own hands and skills, especially when that something is as practical and aesthetic as a well-crafted piece of wooden furniture or décor. DIY woodworking projects serve as a creative outlet, and are often cost-effective alternatives to buying premade items. They offer an opportunity to customize and create what’s exactly needed for your home.

Configurations could range from small décor items such as picture frames, coat hooks, or birdhouses, to bigger projects like shelves, cabinets, tables, or even a deck. DIY projects allow you to adapt and scale designs to suit your space and style preferences.

Getting Started with DIY Woodworking

To undertake DIY woodworking, you need basic woodworking tools, appropriate safety gear, a working space, and a well-thought-out plan. Starter kits and detailed project plans are readily available online to accommodate different skill levels. It’s highly beneficial to start with simpler projects and gradually move on to complex ones as your skills develop.

Woodworking Classes and Resources

Attending woodworking classes can fast-track your learning process, provide hands-on experience, and add structure to your woodworking journey. Guided by experienced instructors, these classes demystify complex woodworking concepts and techniques. They typically cover tool usage, project planning, and execution while maintaining a strong emphasis on safety.

Resources for learning woodworking are abundant. This includes a vast array of books, online courses, tutorial videos, forums, blogs, and social media groups dedicated to woodworking. These resources cater to diverse learning styles, and most importantly, they allow learning at your own pace, from the comfort of your home.

Finding the Right Woodworking Class

When choosing a woodworking class, consider factors such as curriculum, instructor credentials, class size, availability of tools and materials, and student reviews. Community colleges, adult education centers, and even some hardware stores offer woodworking classes. Online platforms like Udemy, SkillShare, and Coursera offer highly rated courses taught by industry professionals.

Eco-friendly Woodworking

Responsible and sustainable woodworking practices are important for the environment. This includes using materials and tools that have minimal impact on the environment and safe disposal of waste.

One way to practice eco-friendly woodworking is by using locally sourced lumber from sustainable forests. Buying second-hand or repurposing wood is also an excellent way to reduce environmental impact. Using water-based finishes instead of oil-based ones, and ensuring optimal usage of materials to reduce waste, are other ways to maintain eco-friendly practices.

Making Eco-friendly Choices in Woodworking

Consider working with certified suppliers who provide sustainably harvested or reclaimed wood. Tools also matter; hand tools, for instance, have less carbon footprint than power tools. Also consider investing in high-quality tools which last longer, reducing the need for replacements. Lastly, ensure safe disposal of waste; sawdust could be composted or used in gardening, while larger waste can be used in other projects or donated.

Investing in Quality Tools

To experience efficiency and safety in the woodworking process, an investment in quality tools cannot be overstated. Quality tools outlast and outperform their cheaper counterparts, providing consistent, reliable service for years. They offer better accuracy and precision, making your work easier and giving a superior finish to your projects.

Quality tools include a range of hand tools and power tools. Hand tools, such as chisels, mallets, hand planes, and saws, give you control and finesse, particularly in detailed work. Power tools like circular saws, routers, and drills speed up the work and ease laborious tasks. It’s important to buy tools from reputable brands known for their durability and effectiveness.

Maintaining Your Woodworking Tools

Maintaining tools is equally important to enhance their lifespan and performance. This includes regular cleaning to remove dust and debris, periodic sharpening for cutting tools, and proper storage to prevent damage or deterioration. It is also crucial to understand and follow the manufacturer’s instructions for the use and care of each device.

The Art of Woodworking

Woodworking goes beyond the mere process of cutting, shaping, and joining pieces of wood; it’s a form of artistic expression, requiring creativity, finesse, and an innate understanding of the material. The uniqueness of every piece of wood—the grain, texture, colour—becomes a canvas for a woodworker, and the finished product, a masterpiece.

From the meticulously hand-carved figurines to beautifully designed furniture pieces or intricate marquetry, every woodworking creation stands as a testament to crafting skills and artistic vision. Moreover, the sustainable nature of wood as a material adds to the appeal, making woodworking a preferred craft for many environment-conscious artisans.

Innovations in Woodworking Art

With advancements in tools and techniques, woodworking art has evolved over time, accommodating intricate designs and innovative creations. Digital precision tools, like CNC routers, laser cutters, and 3D printers, have expanded the boundaries of what’s possible in woodworking, allowing complex patterns, precise cuts, and detailed carvings.

Conclusion

Woodworking is a rewarding pursuit, blending practical skills with artistic expression. The satisfaction derived from creating with your hands is unmatched, and the resulting products can serve a variety of purposes—from fulfilling personal needs to improving your home or even becoming a source of income.

You may start with simple tools and basic skills, but with practice, dedication, and lifelong learning—using resources and training courses—you can enhance your capabilities tremendously. The commitment to quality tools ensures safety and effectiveness in your work while nurturing eco-friendly practices underlines the importance of sustainability in this age-old craft. Overall, woodworking is a valuable skill that fosters creativity, self-reliance, and respect for the environment.

As you embark or continue on your woodworking journey, embrace the process, enjoy the progress, and cherish the reward of creating something meaningful and beautiful with your hands. Happy woodworking!