Articles
What Kind Of Drywall To Use In A Basement
Modified: October 20, 2024
Looking for articles about what kind of drywall is best for your basement? Find expert advice and recommendations to ensure a successful renovation project.
(Many of the links in this article redirect to a specific reviewed product. Your purchase of these products through affiliate links helps to generate commission for Storables.com, at no extra cost. Learn more)
Introduction
When it comes to finishing a basement, choosing the right materials is crucial in creating a durable and visually appealing space. Drywall is a popular choice for basement walls due to its affordability, versatility, and ease of installation. Whether you’re converting your basement into a cozy family room or a functional home office, using the right kind of drywall can make all the difference in creating a comfortable and long-lasting space.
In this article, we will explore the benefits of using drywall in basements, factors to consider when choosing the right type of drywall, the different types of drywall suitable for basements, the installation process, and important maintenance tips to ensure the longevity of your basement walls.
Let’s dive in and discover what kind of drywall is best suited for your basement project!
Key Takeaways:
- Choosing the right kind of drywall for your basement is crucial for creating a durable, visually appealing, and functional space. Factors such as moisture resistance, mold resistance, and insulation should be carefully considered to ensure optimal performance.
- Proper maintenance, including regular inspections, addressing moisture issues, and prompt repairs, is vital in ensuring the longevity and durability of your basement drywall. By following these maintenance tips, you can keep your basement walls in excellent condition for years to come.
Read more: How To Drywall A Basement Ceiling
Benefits of Using Drywall in Basements
Drywall offers several benefits when it comes to finishing basement walls. Here are some of the key advantages:
- Affordability: Drywall is a cost-effective option compared to other wall finishing materials. It is widely available and relatively inexpensive, making it a budget-friendly choice for basement renovations.
- Easy Installation: Drywall is relatively easy to install, especially for those with basic DIY skills. With the right tools and equipment, you can hang drywall sheets and finish them in a short amount of time.
- Smooth and Seamless Appearance: Drywall creates a smooth and seamless finish on the walls, providing a clean and professional look. This makes it easy to paint or wallpaper over the drywall to match your desired aesthetic.
- No Moisture Absorption: Unlike materials such as wood paneling or wallpaper, drywall does not absorb moisture. This helps to prevent mold and mildew growth in the basement, ensuring a healthier environment.
- No Pest Attraction: Drywall does not attract pests like rodents or insects, making it a more hygienic option for basement walls. With proper insulation and sealing, drywall can help keep unwanted critters at bay.
- No Odor Emission: Drywall does not emit any strong odors, unlike some other wall materials. This is particularly important for basement spaces that may be used for living, entertaining, or working.
Overall, drywall offers a cost-effective, easy-to-install, and visually appealing solution for finishing basement walls. It provides a smooth and seamless finish while helping to prevent moisture-related issues such as mold and pest infestation. Now, let’s explore the factors to consider when choosing the right type of drywall for your basement project.
Factors to Consider When Choosing Drywall for Basements
When selecting the right type of drywall for your basement, it’s important to consider the following factors to ensure optimal performance:
- Moisture Resistance: Basements are prone to moisture-related issues, such as dampness and water seepage. Therefore, it’s essential to choose moisture-resistant drywall that can withstand the potentially humid environment.
- Mold Resistance: Mold growth is a common problem in basements due to high humidity levels. Opt for drywall that is specifically designed to resist mold and mildew to protect your basement from potential health hazards and structural damage.
- Fire Resistance: Safety is paramount, especially in enclosed spaces like basements. Select drywall that has fire-resistant properties to help mitigate fire hazards and safeguard your basement.
- Insulation: Basements can be colder than the rest of the house, so choosing drywall with good insulation properties can help regulate the temperature and improve energy efficiency.
- Noise Reduction: If you plan to use your basement as a home theater or a music studio, consider drywall that has soundproofing qualities to minimize noise transmission between the basement and the rest of the house.
- Thickness: The thickness of the drywall can affect its durability and resistance to impact. Thicker drywall can provide better protection against dents and damage, especially in high-traffic areas.
- Code Compliance: Research and ensure that the type of drywall you choose meets the building codes and regulations in your area. Compliance with these codes is essential for the safety and legality of your basement renovation project.
By considering these factors, you can select the right type of drywall that suits the unique requirements of your basement. In the next section, we will explore the different types of drywall that are suitable for basement applications.
Types of Drywall Suitable for Basements
There are several types of drywall available, each with its own unique properties. When it comes to basements, it’s important to choose a type of drywall that can withstand the specific challenges of this environment. Here are three types of drywall that are suitable for basements:
- Standard Drywall:
Standard drywall, also known as regular drywall or gypsum board, is the most common type of drywall used in residential construction. It is suitable for basements that have low to moderate moisture levels. However, it is important to note that standard drywall is not suitable for areas that are prone to excessive moisture or potential water leaks.
- Moisture and Mold Resistant Drywall:
To address moisture issues in basements, moisture and mold resistant drywall is an excellent choice. This type of drywall is made with a special additive that provides enhanced protection against mold and mildew growth. It has a water-resistant core and a moisture-resistant facing, making it ideal for basements with higher humidity levels or areas that may experience occasional moisture exposure.
- Cement Board:
Cement board, also known as cementitious backer board, is a durable and moisture-resistant alternative to traditional drywall. It is made from a combination of cement and fiberglass mesh, which makes it highly resistant to moisture and mold. Cement board is an excellent choice for basements with high moisture levels, such as those located below grade or in areas prone to water intrusion.
When choosing the type of drywall for your basement, consider the moisture levels, potential for water leaks or seepage, and the overall climate and conditions of your basement. Consulting with a professional can help you determine the best type of drywall suited to your specific basement needs.
Now that you have an understanding of the different types of drywall suitable for basements, let’s move on to the installation process.
Standard Drywall
Standard drywall, also known as regular drywall or gypsum board, is the most common type of drywall used in residential construction. It consists of a gypsum core surrounded by paper facings and is suitable for basements that have low to moderate moisture levels.
Standard drywall is typically 1/2-inch thick, but other thickness options, such as 3/8-inch or 5/8-inch, are also available. Thicker drywall can provide better soundproofing and resistance to impact, making it suitable for areas with higher traffic or potential for dents.
Before installing standard drywall in your basement, it’s important to ensure that the walls are properly prepared. This involves cleaning the walls, removing any existing finishes or debris, and repairing any cracks or uneven surfaces. Inspecting the walls for signs of moisture or mold is also crucial to address any potential issues before installation.
To install standard drywall, start by measuring the wall height and cutting the drywall sheets to size using a utility knife or a drywall saw. Make sure to leave a small gap between the bottom of the drywall sheets and the floor to allow for expansion. Then, attach the drywall sheets to the walls using drywall screws or nails, spacing them 16 inches apart along the edges and 12 inches apart in the center.
Once the drywall sheets are installed, the joints between them need to be finished. This involves applying drywall tape over the joints and then covering them with several layers of joint compound. Sanding the joint compound smooth and applying a primer before painting or adding any other finishing touches completes the process.
While standard drywall is a cost-effective and popular option, it is important to note that it is not suitable for areas that are prone to excessive moisture or potential water leaks. In such cases, moisture and mold resistant drywall or cement board should be used to ensure the durability and longevity of the basement walls.
Now that you’re familiar with standard drywall, let’s move on to exploring other types of drywall suitable for basements.
Moisture and Mold Resistant Drywall
Moisture and mold resistant drywall is specifically designed to combat the challenges of moisture and mold growth, making it an excellent choice for basements with higher humidity levels or areas that may experience occasional moisture exposure.
This type of drywall is made with a special additive that provides enhanced protection against mold and mildew. It has a water-resistant core and a moisture-resistant facing, which helps prevent moisture from seeping into the drywall and creating an environment conducive to mold growth.
Moisture and mold resistant drywall is available in different thicknesses, typically ranging from 1/2-inch to 5/8-inch. Thicker drywall can offer better resistance to impact and sound transmission.
Before installing moisture and mold resistant drywall in your basement, it’s important to properly prepare the walls. Clean the walls thoroughly, removing any existing finishes or debris. Repair any cracks or uneven surfaces and address any moisture issues, such as leaks or dampness, to ensure a suitable environment for the drywall installation.
The installation process for moisture and mold resistant drywall is similar to that of standard drywall. Measure and cut the drywall sheets to size, leaving a small gap between the sheets and the floor for expansion. Attach the drywall sheets to the walls using drywall screws or nails, spacing them according to standard drywall installation guidelines.
Once the drywall sheets are installed, the joints between them need to be finished. Apply drywall tape over the joints and cover them with several layers of joint compound to create a seamless surface. Sand the joint compound smooth and finish the drywall with paint or other desired finishes.
Moisture and mold resistant drywall provides an added layer of protection against potential moisture-related issues in the basement. However, it is important to note that while it is more resistant to moisture and mold than standard drywall, it is not completely waterproof. It is still important to address any moisture issues in the basement and ensure proper ventilation and insulation to prevent excessive moisture buildup.
Now that you’re familiar with moisture and mold resistant drywall, let’s move on to exploring another type of drywall suitable for basements: cement board.
Cement Board
Cement board, also known as cementitious backer board, is a durable and moisture-resistant alternative to traditional drywall. It is made from a combination of cement and fiberglass mesh, which gives it exceptional strength and resistance to moisture and mold.
Due to its inherent properties, cement board is an ideal choice for basements with high moisture levels, such as those located below grade or in areas prone to water intrusion. It can withstand exposure to moisture without warping or deteriorating, making it a reliable option for long-term durability.
When installing cement board in your basement, it’s important to properly prepare the walls. Clean the walls thoroughly and ensure that they are free from any debris, dirt, or grease. Address any cracks or uneven surfaces, and repair any moisture issues or leaks to create a suitable environment for the installation.
Cement board is typically available in 1/2-inch or 1/4-inch thicknesses. The thicker option provides better soundproofing and impact resistance. Measure and cut the cement board sheets to size using a cement board scoring tool or a power saw with a carbide-tipped blade.
Attach the cement board sheets to the walls using corrosion-resistant screws or nails specifically designed for cement board installation. Leave a small gap between the sheets for expansion, and use fiberglass mesh tape to cover the joints. Apply a coat of thin-set mortar over the tape, ensuring a smooth and seamless finish.
The final step is to apply a waterproofing membrane over the cement board to further protect against moisture. This can be done using a liquid waterproofing membrane applied with a brush or roller, following the manufacturer’s instructions.
Cement board provides excellent resistance to moisture, mold, and impact, making it a reliable choice for basement walls. However, it is important to note that cement board is heavier and more labor-intensive to install compared to drywall. Be sure to follow proper safety precautions when handling and installing cement board.
Now that you’re familiar with cement board, you have a better understanding of the types of drywall suitable for basements. In the next section, we will delve into the installation process for drywall in basements.
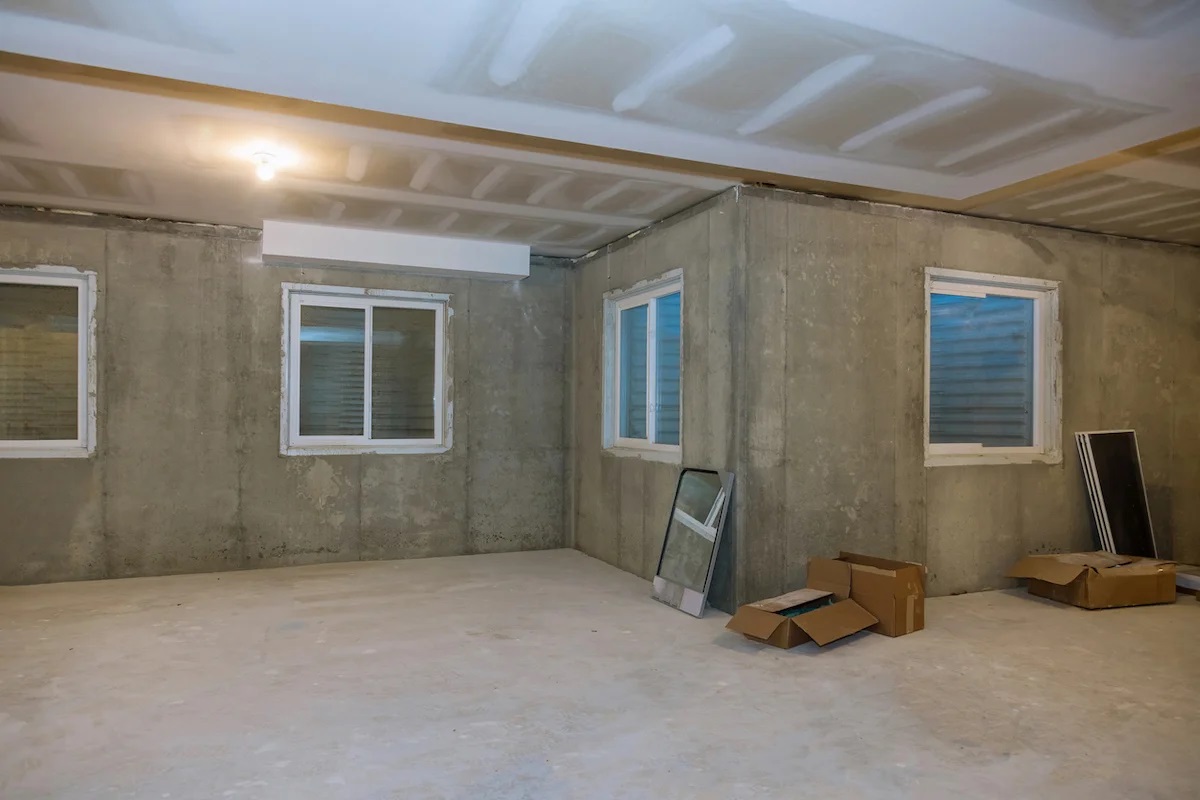
Installation Process for Drywall in Basements
The installation process for drywall in basements involves several steps to ensure a professional and durable finish. Here is a step-by-step guide to help you with the installation process:
- Preparing the Basement Walls:
Before installing drywall, make sure the walls are clean and free from any debris or obstructions. Remove any existing finishes, such as wallpaper or paneling. Repair any cracks, holes, or uneven surfaces on the walls, ensuring a smooth and even base for the drywall.
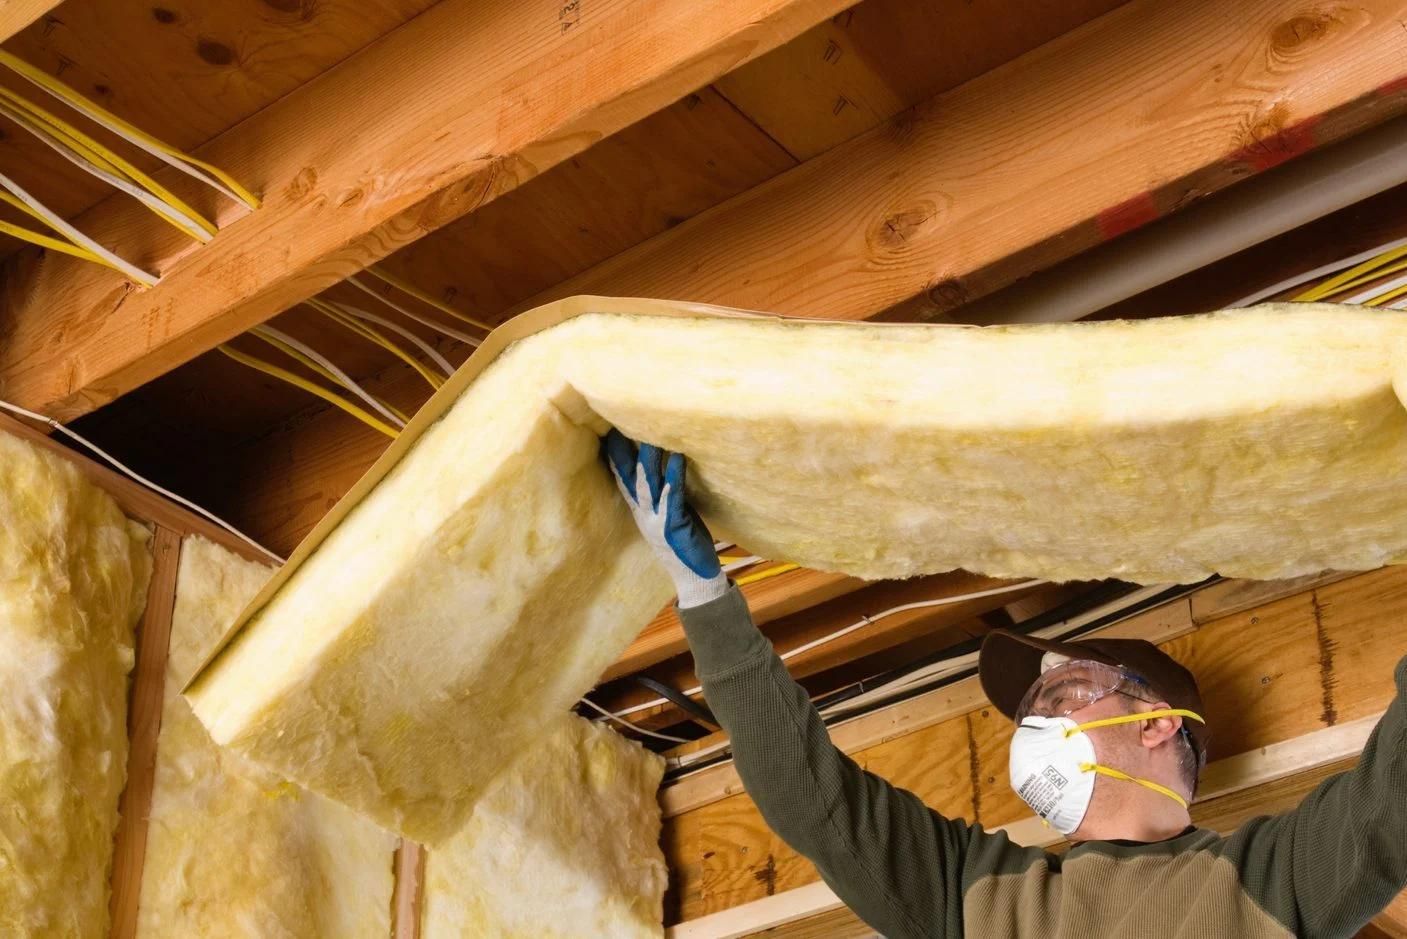
- Sealing and Insulating the Basement:
Prior to installing drywall, it’s important to seal and insulate the basement properly. This helps to prevent moisture penetration and improve energy efficiency. Consider using a vapor barrier on the walls to prevent moisture from seeping through. Insulate the walls with a suitable insulation material such as fiberglass or foam boards.
- Hanging Drywall Sheets:
Measure and cut the drywall sheets to fit the walls, leaving a small gap between the sheets and the floor for expansion. Start by hanging the drywall sheets vertically on the walls. Use drywall screws or nails to attach the drywall sheets to the wall studs. Space the screws or nails approximately 16 inches apart along the edges and 12 inches apart in the center to ensure secure attachment.
- Taping and Finishing the Joints:
Once the drywall sheets are securely fastened, it’s time to tape and finish the joints between the sheets. Apply drywall joint tape over the seams, making sure it is centered along the joint. Use a taping knife to apply joint compound over the tape, feathering it out onto the drywall sheets to create a smooth transition. Allow the joint compound to dry according to the manufacturer’s instructions, and then sand it down to create a seamless finish.
- Painting and Finishing Touches:
After the joint compound is dry and sanded, you can proceed with painting the drywall. Apply a coat of primer to seal the drywall and provide a base for the paint. Once the primer is dry, apply the desired paint color to complete the finish. You can also add additional finishing touches such as molding or trim to enhance the aesthetic appeal of the basement.
Remember to follow safety guidelines and proper installation techniques when working with drywall. If you’re unsure about any step of the process, it’s always recommended to consult a professional for guidance.
Now that you have a better understanding of the installation process, let’s move on to some important maintenance tips for drywall in basements.
Use moisture-resistant drywall, also known as green board, for basement walls to prevent mold and mildew growth in damp environments. It’s designed to withstand moisture and is a good choice for basement applications.
Preparing the Basement Walls
Preparing the basement walls is a crucial step in ensuring a successful drywall installation. Proper preparation creates a smooth and stable surface for the drywall and helps address any underlying issues. Here are the key steps for preparing the basement walls:
- Cleaning: Start by thoroughly cleaning the walls to remove any dust, dirt, or debris. Use a broom, vacuum, or damp cloth to ensure the surface is clean and free from loose particles. This will help the drywall adhere properly to the walls.
- Removal of Existing Finishes: If there are any existing finishes on the walls, such as wallpaper, paneling, or paint, they need to be removed. Use appropriate tools and techniques to safely strip off the finishes and expose the bare walls.
- Repairing Cracks and Holes: Inspect the walls for any cracks, holes, or other imperfections. Repair them using a suitable filler or patching compound. Smooth out the surface and allow the repairs to dry and cure fully before proceeding with the installation.
- Leveling and Smoothing: In some cases, the walls may have uneven surfaces or textures. Use sandpaper, sanding blocks, or a sander to level out any high spots and smooth the surface. This will help avoid bumps or irregularities in the finished drywall.
- Addressing Moisture Issues: Basements are prone to moisture problems, so it’s essential to address any issues before installing drywall. Look for signs of water leaks, dampness, or mold growth. If necessary, consult a professional to assess and address the moisture sources and ensure proper waterproofing measures are in place.
By following these steps, you can ensure that the basement walls are clean, stable, and ready for drywall installation. Proper preparation sets the foundation for a successful project and helps to avoid potential issues down the line. Once the walls are prepared, you can proceed with sealing, insulating, and hanging the drywall sheets.
Now that you understand the importance of preparing the basement walls, let’s move on to the next step: sealing and insulating the basement.
Read more: How Much Does It Cost To Drywall A Basement
Sealing and Insulating the Basement
Sealing and insulating the basement is an essential step in creating a comfortable and energy-efficient space. It helps to prevent moisture penetration, control temperature, and improve overall insulation. Here are the key steps for sealing and insulating the basement:
- Vapor Barrier: Install a vapor barrier on the walls to prevent moisture from seeping through the basement walls. The vapor barrier acts as a barrier against moisture migration and helps to protect the drywall and insulation from potential water damage. Secure the vapor barrier to the walls, ensuring it is properly sealed and covers the entire surface area.
- Insulation Material: Choose an appropriate insulation material for your basement. Common options include fiberglass batts, foam boards, or spray foam insulation. Consider the insulation’s R-value, which measures its thermal resistance. Install the insulation between wall studs and ensure proper coverage to achieve optimal energy efficiency.
- Foam Sealant: Use foam sealant to seal any gaps, cracks, or holes in the basement walls or around windows and doors. This helps to prevent air leakage and improve the overall effectiveness of the insulation. Apply the foam sealant according to the manufacturer’s instructions, ensuring a tight seal.
- Electrical Outlets and Fixtures: Pay attention to electrical outlets and fixtures on the basement walls. Install outlet foam gaskets to create a tight seal around the outlets, preventing air leakage. Use insulated cover plates for light switches and electrical fixtures to further enhance energy efficiency.
- Moisture Control: In addition to sealing and insulating, it’s important to address any moisture issues in the basement. This may involve repairing any water leaks, ensuring proper drainage, or installing a dehumidifier to maintain optimal humidity levels.
Properly sealing and insulating the basement helps create a more comfortable living space while reducing energy consumption. It also helps protect the drywall and other materials from potential moisture damage, ensuring the longevity of the basement walls. Once the basement is properly sealed and insulated, you can proceed with hanging the drywall sheets.
Now that you understand the importance of sealing and insulating the basement, let’s move on to the next step: hanging drywall sheets.
Hanging Drywall Sheets
The process of hanging drywall sheets in the basement is a crucial step in creating a sturdy and visually appealing wall surface. Here are the key steps to follow when hanging drywall sheets:
- Measure and Cut: Measure the height and width of the walls to determine the size of the drywall sheets needed. Use a utility knife or a drywall saw to cut the sheets accordingly. Ensure that the cuts are precise and clean for a proper fit.
- Start from the Ceiling: Begin the installation process by hanging the first drywall sheet from the ceiling. Align the top edge of the sheet with the ceiling joists and hold it in place with the help of an assistant or a drywall lift. Use screws or nails to secure the sheet to the wall studs, placing them approximately 16 inches apart along the edges and 12 inches apart in the center.
- Continue Horizontally: Move horizontally across the wall, hanging the subsequent drywall sheets. Ensure a snug fit between each sheet, but leave a small gap (about 1/8 inch) between them to allow for slight expansion. Repeat the process until you have covered the entire wall surface.
- Trimming and Cutouts: As you reach corners, windows, and doors, you may need to make specific cuts or create openings in the drywall to accommodate these features. Measure carefully and use a jigsaw or a drywall saw to make accurate cuts or cutouts as needed. Ensure a proper fit around corners and openings.
- Securing and Fastening: Once all the drywall sheets are hung, go back and make sure they are securely fastened to the wall studs. Check for any loose spots or gaps and add additional screws or nails where necessary. Take care not to overdrive the screws or nails, as it may damage the drywall.
Remember to work systematically and take your time to ensure accurate measurements and proper installation. It is recommended to seek assistance from a professional or someone experienced in drywall installation if you are unsure about any aspect of the process.
Once the drywall sheets are properly hung, you can move on to the next step: taping and finishing the joints between the sheets.
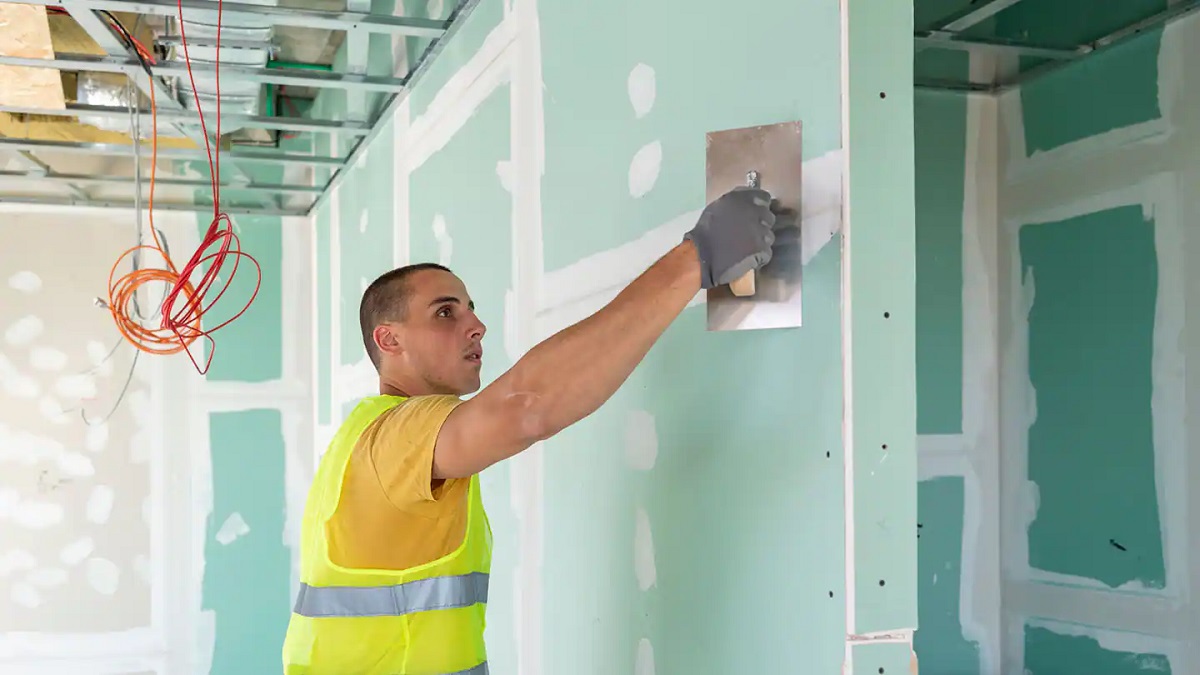
Taping and Finishing the Joints
After hanging the drywall sheets, the next step in the installation process is taping and finishing the joints between the sheets. This ensures a seamless and professional-looking wall surface. Here’s a step-by-step guide on how to tape and finish the joints:
- Apply Drywall Tape: Start by applying drywall joint tape over the joints between the drywall sheets. Use a taping knife or your fingers to press the tape firmly onto the joint, ensuring it is centered along the seam. Continue along each joint, overlapping the tape slightly at the corners.
- Apply Joint Compound: Once the tape is applied, use a taping knife to spread a thin layer of joint compound over the tape and feather it out onto the drywall sheets. Gradually build up the joint compound, applying multiple thin layers to achieve a smooth and seamless finish. Be sure to blend the edges of the compound with the surrounding wall surface.
- Allow Time to Dry: Allow the joint compound to dry according to the manufacturer’s instructions. This typically takes a few hours, but it’s best to wait at least 24 hours between coats to ensure proper drying. Avoid sanding or applying additional layers until the previous coat is completely dry.
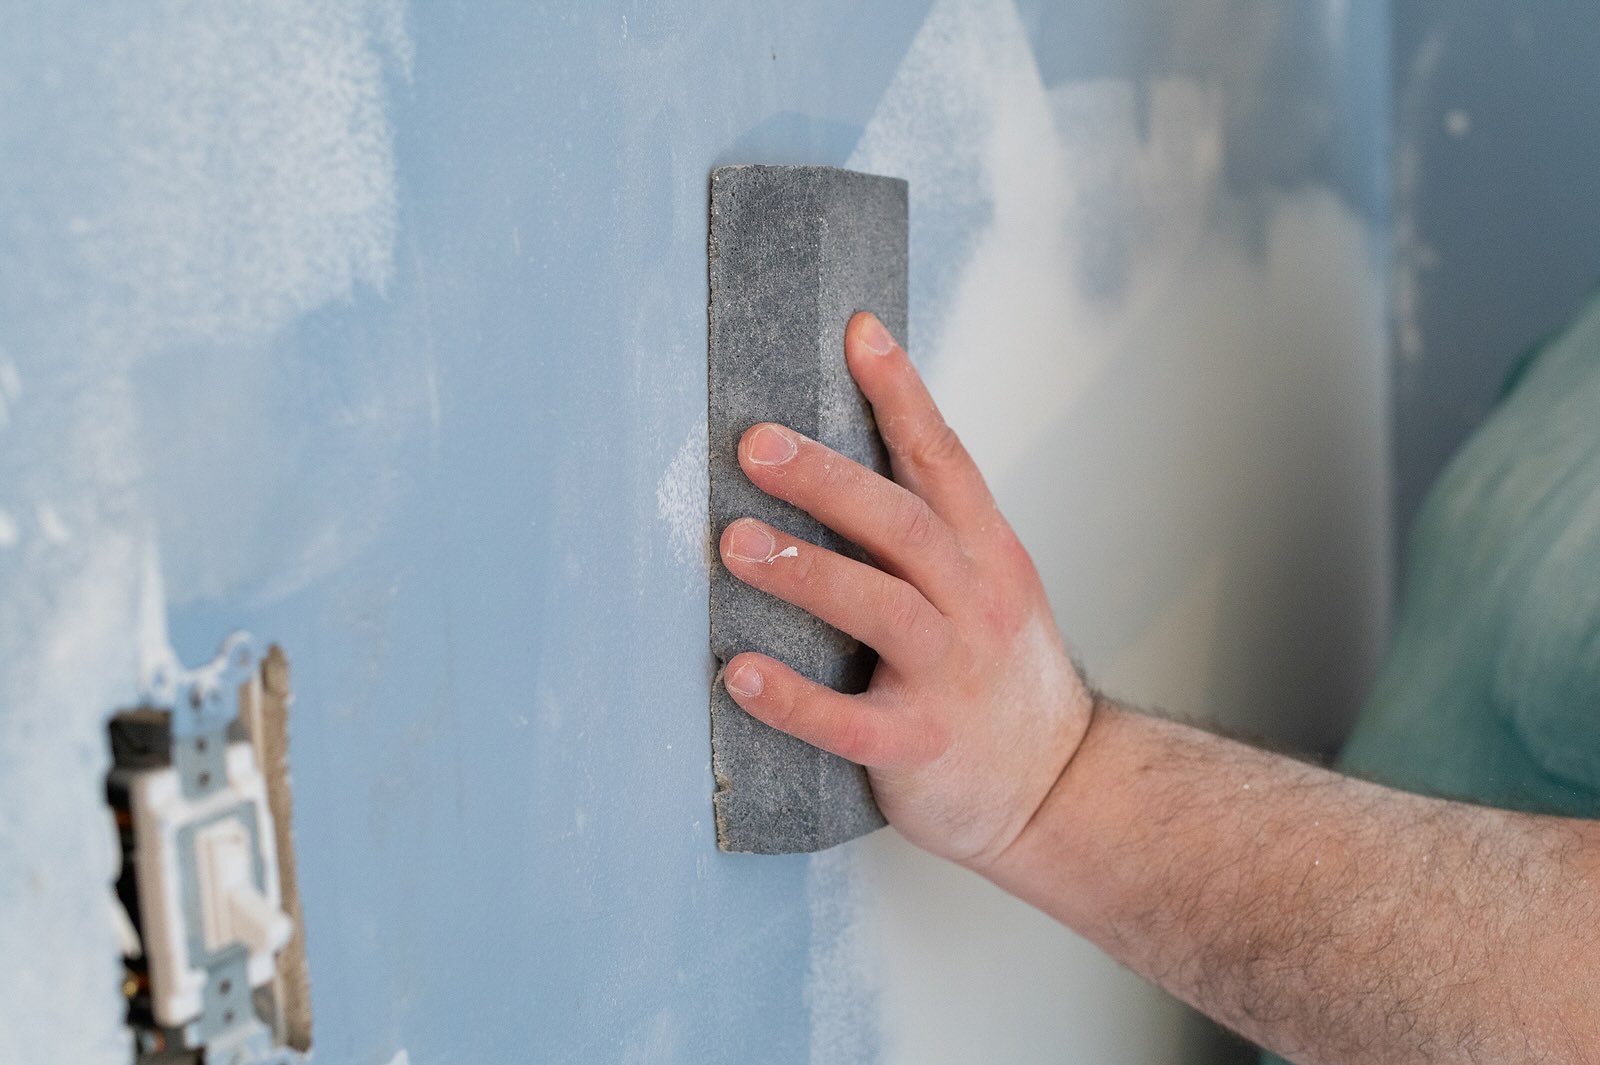
- Sanding: Once the joint compound is dry, use fine-grit sandpaper or a sanding sponge to lightly sand the dried compound. Sand in smooth, even strokes, being careful not to press too hard to avoid damaging the drywall surface. Sanding helps to create a smooth and uniform finish.
- Apply Additional Coats and Sanding: Apply additional coats of joint compound as needed to fill any remaining gaps or imperfections. Repeat the drying and sanding process between each coat to achieve a seamless finish. Remember to blend the joint compound with the surrounding wall surface for a smooth transition.
Once you’re satisfied with the smoothness and appearance of the joints, you can proceed with painting or adding any other desired finishes to complete the look of your basement walls. It’s important to follow safety precautions, such as wearing a dust mask and proper eye protection, during the sanding process.
Taping and finishing the joints may require some practice to achieve a professional result. If you’re unsure about this step or want to ensure a flawless finish, seeking the assistance of a professional drywall finisher is recommended.
With the joints finished and the drywall surface ready, you can move on to the final step: painting and adding finishing touches to your basement walls.
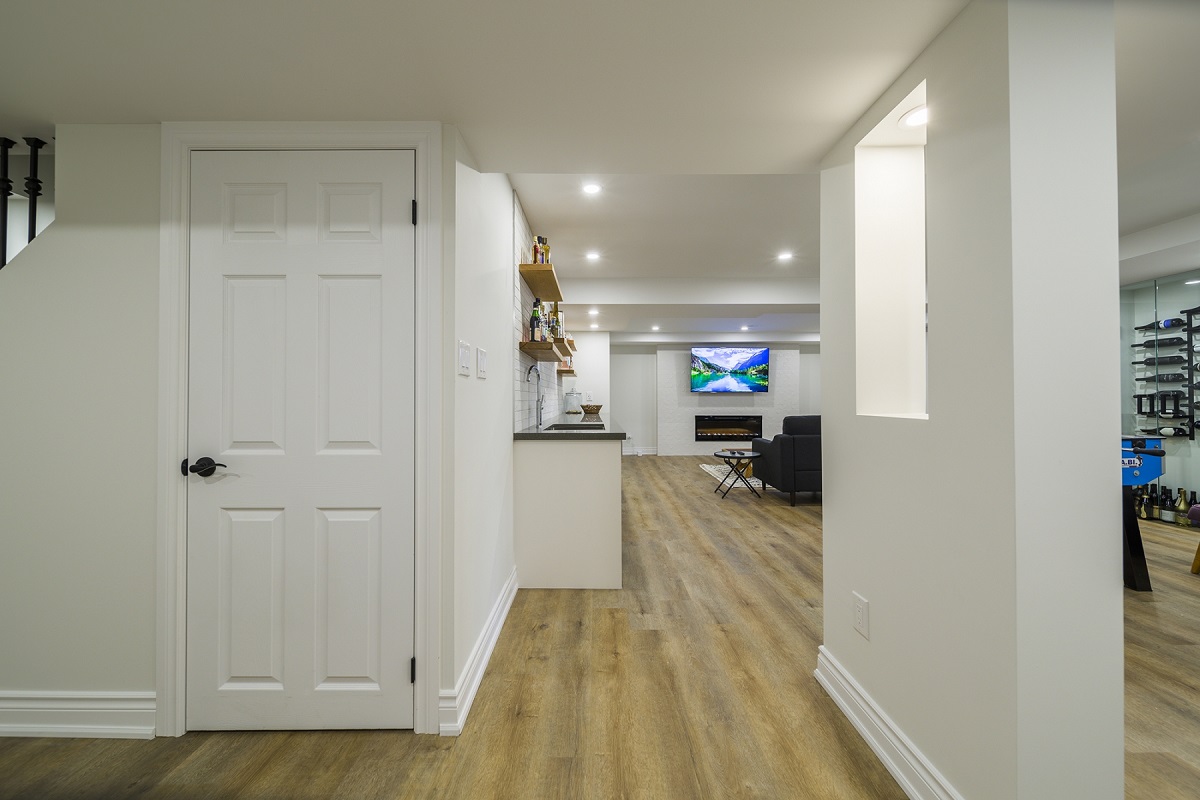
Painting and Finishing Touches
Once the drywall installation and joint finishing process is complete, it’s time to add the final touches to your basement walls. Painting the walls not only enhances the visual appeal but also adds a protective layer to the drywall. Here are the steps for painting and finishing your basement walls:
- Prepare the Surface: Before painting, make sure the drywall surface is clean and free from any dust or debris. Wipe down the walls with a dry cloth or use a mild cleaning solution if necessary. This step ensures that the paint adheres properly to the surface.
- Prime the Drywall: Applying a coat of primer is recommended before painting. The primer helps to seal the drywall and creates a smooth base for the paint. Use a roller or a brush to apply the primer evenly on the walls, following the manufacturer’s instructions for drying time.
- Choose the Right Paint: Select a paint color and finish that suits your desired aesthetic for the basement. Consider factors such as the lighting in the space and the overall atmosphere you want to create. Semi-gloss or satin finishes are often chosen for their durability and ease of cleaning in basements.
- Paint the Walls: Start by cutting in around the edges of the walls with a brush to ensure clean lines. Then, use a roller to apply the paint to the larger areas, working in sections from top to bottom. Apply multiple coats as needed, allowing each coat to dry before applying the next. Be sure to follow the drying time specified on the paint can.
- Finishing Touches: Once the paint is dry, you can add any desired finishing touches to enhance the appearance of your basement walls. This can include adding trim molding around windows and doors, installing baseboards, or incorporating decorative elements such as wallpaper or accent colors. These finishing touches can help tie the whole look of your basement together.
Take your time during the painting process to ensure a smooth and even application. Avoid painting in high humidity conditions or extreme temperatures, as it can affect the drying and curing of the paint. Properly ventilate the space to promote air circulation and aid in the drying process.
Remember to clean your painting tools promptly after use to ensure their longevity. Dispose of any leftover paint and paint cans according to proper disposal guidelines in your area.
With the painting and finishing touches completed, your basement walls are now ready to be enjoyed as a functional and aesthetically pleasing space.
Now that you have a comprehensive understanding of the installation and finishing process, let’s move on to important maintenance tips to ensure the longevity of your basement drywall.
Read more: What To Use To Mount Towel Bar Into Drywall
Maintenance Tips for Drywall in Basements
To ensure the longevity and durability of your basement drywall, it’s important to follow proper maintenance practices. Here are some key tips to help you maintain your basement drywall:
- Monitor and Address Moisture: Keep an eye out for any signs of moisture in your basement, such as water leaks, dampness, or condensation. Moisture can lead to mold growth and damage the drywall. Address any moisture issues promptly and ensure proper ventilation and insulation to prevent excessive moisture buildup.
- Use Mild Cleaning Solutions: When cleaning your basement walls, use mild cleaning solutions and a soft cloth or sponge. Avoid abrasive cleaners or harsh chemicals that can damage the drywall surface or compromise the paint finish.
- Repair Damage Promptly: If you notice any cracks, dents, or holes in the drywall, repair them promptly. Use a suitable patching compound and follow the proper repair techniques. Ignoring small damages can lead to more significant issues down the line.
- Be Mindful of Furniture and Fixtures: When placing furniture or hanging fixtures, take care not to damage the drywall. Use proper wall anchors or screws for heavier items and avoid excessive pressure or force that can dent or puncture the drywall surface.
- Inspect for Mold: Regularly inspect your basement drywall for any signs of mold or mildew. Pay attention to areas that may be more prone to moisture, such as corners or near windows. If you detect any mold growth, take immediate action to address the issue and prevent its spread.
- Keep Humidity Levels in Check: Maintain proper humidity levels in your basement to prevent excessive moisture. Use dehumidifiers if necessary, particularly in humid climates or during periods of increased humidity. Proper ventilation and airflow can also help control moisture levels.
- Avoid Excessive Weight on Walls: Avoid placing excessive weight on your basement walls, particularly in areas that are not reinforced with additional support. Heavy fixtures or shelves should be properly anchored to studs or supported by other means to avoid putting strain on the drywall.
- Periodic Inspections: Regularly inspect your basement drywall for any signs of damage, wear, or deterioration. Look for cracks, peeling paint, or any changes in the wall surface. Detecting issues early allows for timely repairs and prevents them from worsening.
By following these maintenance tips, you can ensure the longevity and integrity of your basement drywall. Proper care and attention will help keep your basement walls in excellent condition for years to come.
Now that you have a solid understanding of maintenance tips for your basement drywall, let’s wrap up this article.
Conclusion
Choosing the right kind of drywall for your basement is crucial in creating a durable, visually appealing, and functional space. Whether you’re converting your basement into a cozy living area, a home office, or a recreational room, using the appropriate type of drywall can make a significant difference in the overall outcome of your project.
We explored the benefits of using drywall in basements, including its affordability, ease of installation, and smooth, seamless appearance. Drywall provides a cost-effective solution that can be customized to suit any style or design preference.
Factors such as moisture resistance, mold resistance, fire resistance, insulation, and noise reduction should all be carefully considered when selecting the type of drywall for your basement. Moisture and mold resistant drywall and cement board are excellent options for basements with higher humidity levels or potential moisture exposure.
The installation process involves preparing the basement walls, sealing and insulating the space, hanging the drywall sheets, and properly finishing the joints with taping and joint compound. Once the drywall is installed and finished, painting and adding finishing touches such as trim or wallpaper can further enhance the aesthetic appeal of the space.
Proper maintenance is vital in ensuring the longevity and durability of your basement drywall. Regular inspections, addressing moisture issues, prompt repairs, and practicing mindful furniture placement are all important aspects of maintaining your drywall in good condition.
In conclusion, drywall is an excellent choice for finishing basement walls due to its affordability, versatility, and ease of installation. By selecting the appropriate type of drywall, following proper installation techniques, and practicing regular maintenance, you can create a beautiful and long-lasting basement space that meets your needs and enhances the overall value of your home.
Frequently Asked Questions about What Kind Of Drywall To Use In A Basement
Was this page helpful?
At Storables.com, we guarantee accurate and reliable information. Our content, validated by Expert Board Contributors, is crafted following stringent Editorial Policies. We're committed to providing you with well-researched, expert-backed insights for all your informational needs.


0 thoughts on “What Kind Of Drywall To Use In A Basement”