Articles
How To Install A Sump Pump In A Basement
Modified: February 24, 2024
Learn step-by-step how to install a sump pump in your basement with our informative articles. Ensure a dry and protected space for your home.
(Many of the links in this article redirect to a specific reviewed product. Your purchase of these products through affiliate links helps to generate commission for Storables.com, at no extra cost. Learn more)
Introduction
Welcome to our guide on how to install a sump pump in a basement! If you have a basement prone to flooding or excessive moisture, a sump pump can be a lifesaver. By effectively removing water from your basement, a sump pump helps prevent water damage, mold growth, and other related issues.
In this comprehensive guide, we’ll walk you through the step-by-step process of installing a sump pump in your basement. Whether you’re a DIY enthusiast or a homeowner looking to tackle this project on your own, we’ve got you covered.
Installing a sump pump may seem like a daunting task, but with the right tools, materials, and guidance, you can do it successfully. However, it’s important to note that if you’re unsure about any part of the installation process, it’s always best to consult a professional to ensure the job is done safely and correctly.
Now, let’s dive in and learn how to install a sump pump in your basement so that you can enjoy a dry and protected space.
Key Takeaways:
- Proper preparation is crucial for sump pump installation. Clearing the area, sealing cracks, and ensuring proper drainage sets the stage for a successful and effective sump pump system.
- Regular testing and maintenance are essential for sump pump functionality. Testing the pump, checking the backup system, and establishing a maintenance schedule ensure ongoing protection against water damage.
Read more: How Much To Install Sump Pump In Basement
Step 1: Gather the Necessary Tools and Materials
The first step in installing a sump pump in your basement is to gather all the necessary tools and materials. Having everything prepared ahead of time will make the installation process smoother and more efficient.
Here is a list of tools and materials you will need:
- Sump pump
- Sump pump basin or pit
- PVC pipes and connectors
- Check valve
- Tape measure
- Level
- Hammer
- Screwdriver
- Adjustable wrench
- Hacksaw or PVC pipe cutter
- Drill
- Concrete saw or jackhammer (if necessary)
- Bucket and sponges
- Gravel
- PVC primer and cement
- Electrical wires and connectors
- Waterproof sealant
- Safety goggles and gloves
Ensure that you have all the tools and materials listed above before you begin the installation process. Additionally, make sure to read and understand the manufacturer’s instructions for the sump pump and other equipment you will be using.
Once you have gathered all the necessary tools and materials, you are ready to move on to the next step of choosing the location for your sump pump.
Step 2: Choose the Location for Your Sump Pump
Choosing the right location for your sump pump is crucial for its effectiveness in removing water from your basement. Here are a few factors to consider when deciding where to place your sump pump:
- Lowest point: Identify the lowest point in your basement where water tends to accumulate. This is usually where you’ll want to install your sump pump.
- Accessible area: Ensure that the chosen location is easily accessible for maintenance and repairs, as well as for monitoring the pump’s operation.
- Distance from walls and pillars: Keep the sump pump a few feet away from the walls and pillars to allow proper water flow and avoid any potential interference.
- Electrical outlet availability: Make sure there is an electrical outlet nearby to plug in the sump pump. If there isn’t one, you may need to hire an electrician to install an outlet.
- Drainage system: Consider the existing drainage system in your basement. Ideally, your sump pump should be connected to a drain or a suitable outlet to expel the water safely.
Once you have determined the location, mark it on the floor using a tape measure and level to ensure accurate placement. It’s also a good idea to consult any local building codes or regulations to ensure compliance.
Remember, the chosen location should ensure proper water drainage and easy access for maintenance. By selecting the right spot, you can set up your sump pump for optimal performance in keeping your basement dry and protected.
Now that you have chosen the location for your sump pump, it’s time to move on to preparing the basement for installation.
Step 3: Prepare the Basement for Installation
Before installing the sump pump, it’s important to properly prepare the basement to ensure a successful installation. Follow these steps to prepare your basement:
- Clear the area: Remove any objects, furniture, or debris from the designated installation area. Clearing the space will make it easier to work and provide a clear path for the sump pump.
- Inspect the basement walls and floor: Check for any cracks, leaks, or signs of water damage on the basement walls and floor. Address any issues before proceeding with the installation to prevent further water seepage or damage.
- Seal any cracks: If you notice any cracks in the basement walls or floor, use a waterproof sealant to seal them. This will help prevent water from entering the basement and ensure a more effective sump pump operation.
- Ensure proper drainage: Make sure the existing drainage system in your basement is functional and clear of any obstructions. Clear any clogs or debris from drains or pipes to ensure proper water flow.
- Level the floor: If the installation area is uneven, use a leveling compound or self-leveling concrete to create a level surface. This will ensure the sump pump sits securely and operates efficiently.
- Protect against moisture: Install a vapor barrier or moisture-resistant paint on the basement walls and floor to prevent moisture buildup and potential damage to the sump pump.
By properly preparing the basement, you create a solid foundation for the sump pump installation. This step ensures that the sump pump will operate effectively and efficiently in keeping your basement dry and free from water damage.
Once you have completed the necessary preparations, you’re ready to move on to the next step: digging the sump pit.
Step 4: Dig the Sump Pit
Digging the sump pit is an essential part of the sump pump installation process. The sump pit serves as a collection point for water that enters your basement, allowing the sump pump to pump it out. Follow these steps to dig the sump pit:
- Mark the pit location: Using the measurements from your earlier planning, mark the dimensions of the sump pit on the basement floor. Typically, a pit with a diameter of 18 to 24 inches is sufficient.
- Prepare the tools: Gather the necessary tools for digging, such as a shovel, pickaxe, and a wheelbarrow to remove the excavated soil.
- Start digging: Begin digging the pit by excavating the marked area. Remove the soil and debris from the pit, placing it into the wheelbarrow or other disposal containers. Dig to a depth of around 24 to 30 inches, or as determined by the specific requirements of your sump pump and basin.
- Ensure proper slope: As you dig, create a slight slope at the bottom of the pit to guide the water toward the sump pump. This ensures efficient water collection and drainage.
- Smooth the pit walls: Smooth out the walls of the pit to remove any sharp edges or rough surfaces. This will prevent damage to the sump pump and facilitate smooth water flow.
- Inspect for leaks: Thoroughly inspect the pit for any cracks or leaks. If you notice any, use a waterproof sealant to seal them before proceeding.
Once you have finished digging the sump pit and ensuring a proper slope, you are ready to move forward with the installation of the sump pump basin.
Remember, proper excavation of the sump pit is crucial to ensure the effective functioning of your sump pump. By creating a well-designed pit, water will efficiently flow towards the pump for removal, keeping your basement dry and protected.
Read more: What Is Sump Pump In Basement
Step 5: Install the Sump Pump Basin
Now that you have successfully dug the sump pit, it’s time to move on to installing the sump pump basin. The basin houses the sump pump and acts as a reservoir for the collected water. Follow these steps to install the sump pump basin:
- Prepare the basin: Before placing the basin in the sump pit, drill a small hole in the side of the basin near the top. This hole will serve as an overflow outlet in case the water level in the pit exceeds the capacity of the basin.
- Position the basin: Carefully lower the sump pump basin into the sump pit. Make sure it sits securely on the bottom and is level, using a level if necessary. Ensure that the overflow hole faces away from any walls for proper drainage.
- Adjust the height: Depending on the depth of your sump pit, you may need to adjust the height of the basin. Use a stack of bricks or concrete blocks if needed to raise the basin so that the pump is positioned slightly above the bottom of the pit.
- Add gravel: After positioning the basin, fill the area around it with clean gravel. This helps with drainage and prevents debris from clogging the pump. Fill the pit with gravel up to the top of the basin.
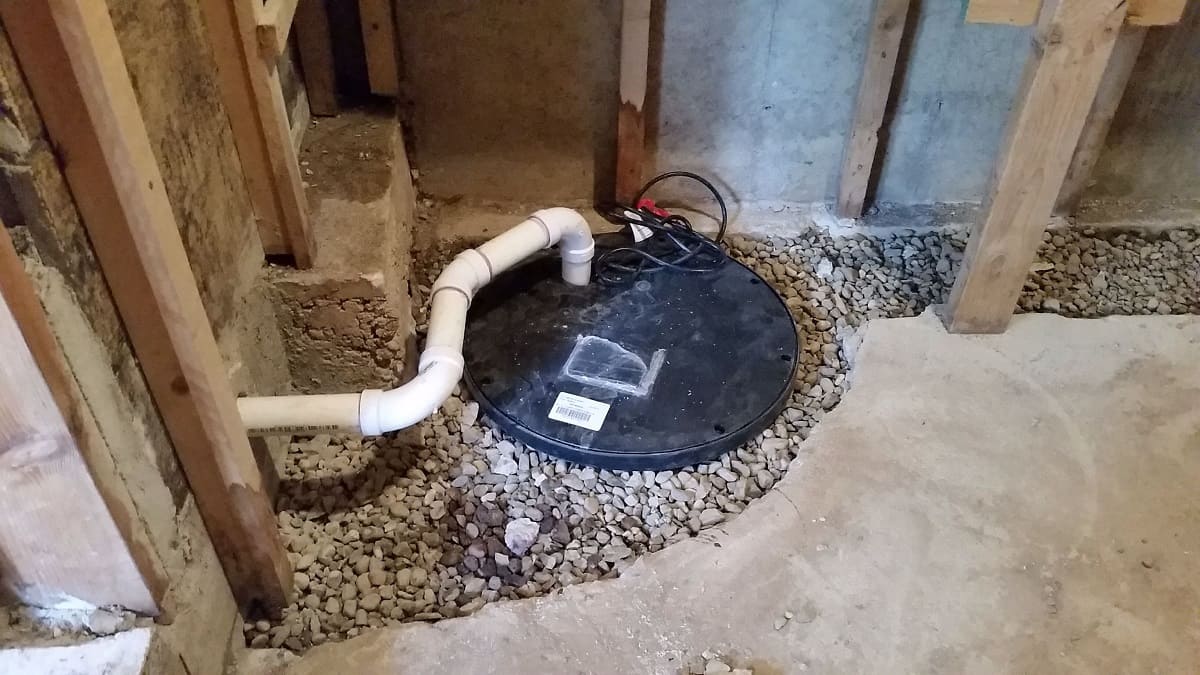
- Secure the lid: Place the lid on top of the sump pump basin. Ensure that it fits securely and provides easy access to the pump for maintenance and repairs. Some lids may require screws or sealant to secure them in place.
By installing the sump pump basin properly, you create a containment space for the pump and a collection point for water. The gravel surrounding the basin facilitates drainage while preventing debris from obstructing the pump’s operation.
With the sump basin in place, you’re now ready to move on to connecting the sump pump itself.
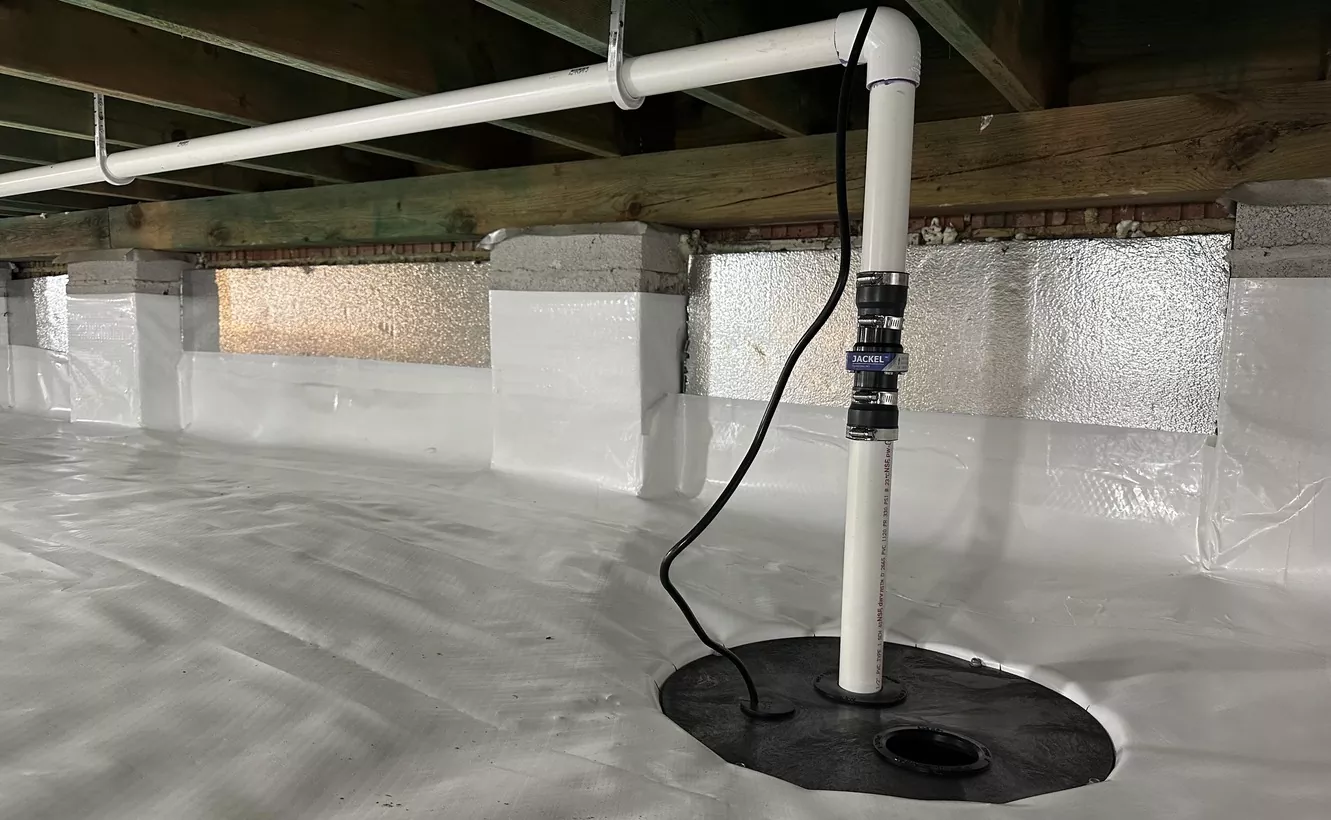
Make sure to choose the right location for your sump pump in the basement, preferably near a perimeter wall and away from any obstructions. This will ensure efficient water drainage.
Step 6: Connect the Sump Pump
Connecting the sump pump is a critical step in the installation process. This step involves connecting the pump to the necessary electrical power source as well as the discharge pipe. Here’s how to connect the sump pump:
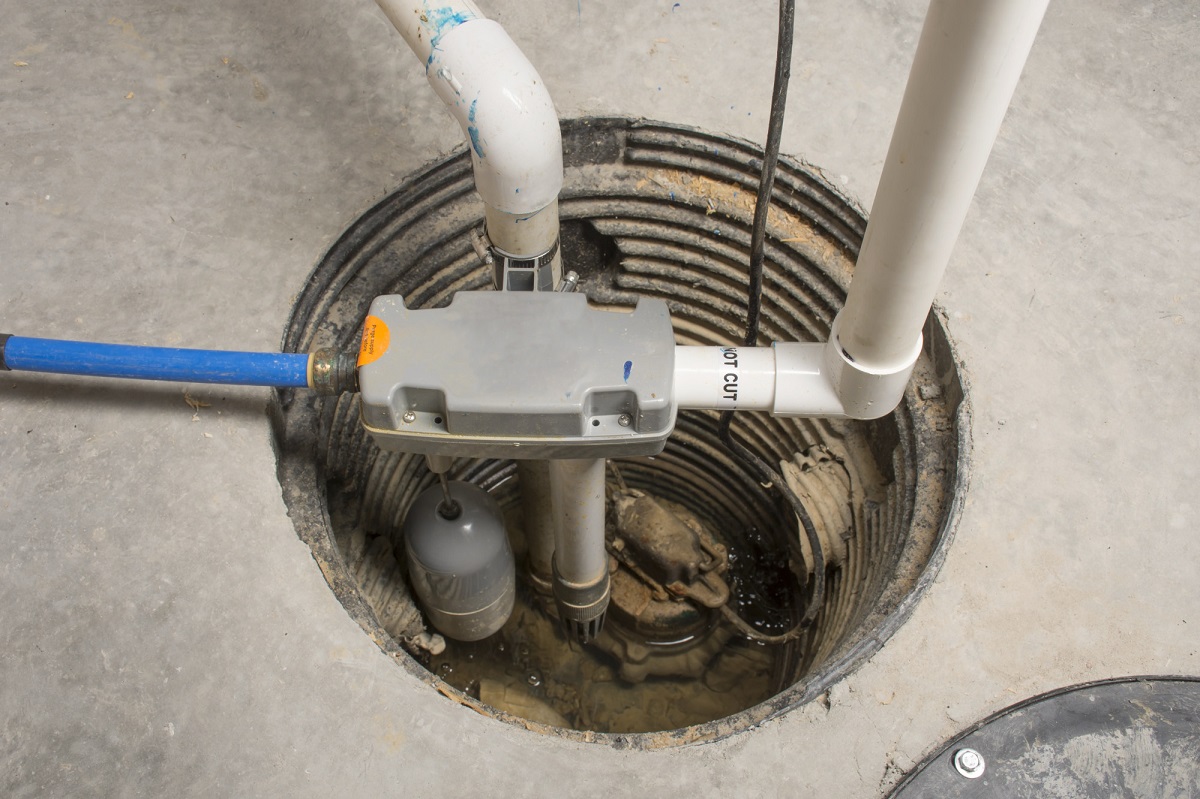
- Position the pump: Place the sump pump inside the sump basin, ensuring that it is centered and upright. Position the pump in a way that the float switch or sensor is unobstructed and can freely move up and down.
- Connect the power cord: Plug the sump pump’s power cord into a nearby electrical outlet. If there isn’t a conveniently located outlet, consider using an extension cord or hiring an electrician to install one.
- Check the float switch: Test the float switch by manually raising it to the highest position. The pump should start automatically. Lower the float switch to its lowest position, and the pump should stop. This ensures that the automatic operation of the pump is functioning correctly.
- Secure the pump: Use bricks, concrete blocks, or straps to secure the sump pump in place. This helps prevent movement or tipping while it operates and ensures a stable installation.
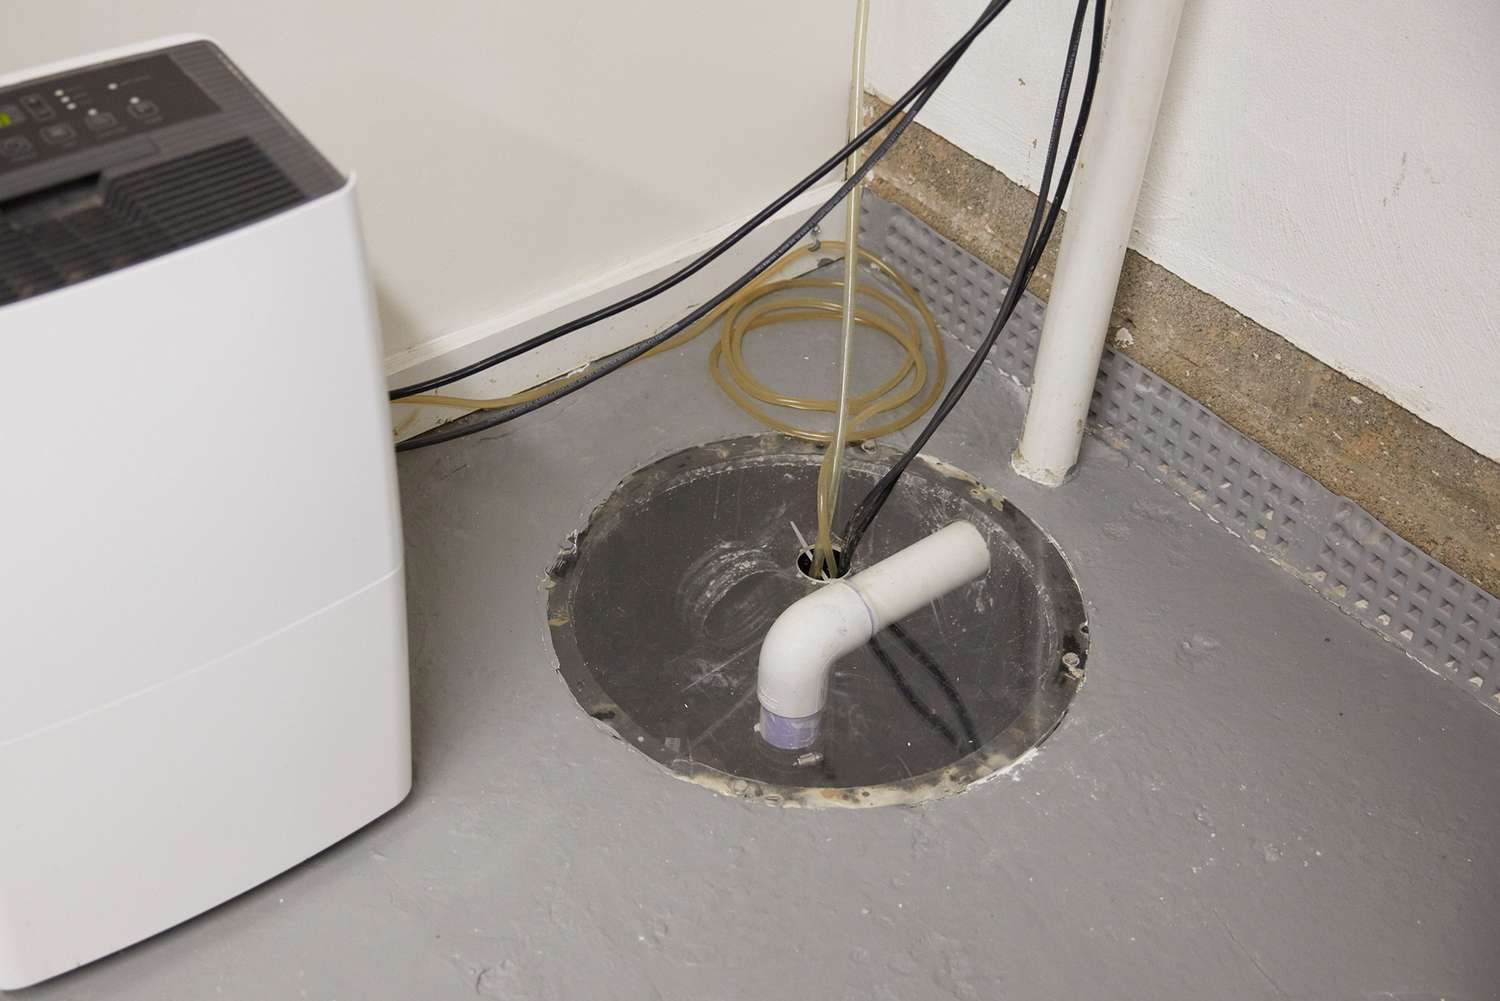
- Connect the discharge pipe: Attach a PVC pipe to the pump’s outlet, using connectors and adhesive as necessary. The diameter of the pipe should match the pump’s outlet size. Extend the pipe vertically above the sump pit’s rim, ensuring a snug and secure connection.
By properly connecting the sump pump, you ensure its functionality and reliability in removing water from your basement. The power connection enables the pump to operate automatically when water reaches a certain level, while the discharge pipe directs the water away from your basement.
Once you have connected the sump pump, it’s time to move on to the installation of the check valve.
Step 7: Install the Check Valve
The check valve plays a crucial role in the proper functioning of your sump pump system. It prevents water from flowing back into the sump pit once it has been pumped out, reducing the risk of pump cycling and potential damage. Follow these steps to install the check valve:
- Locate the discharge pipe: Identify the discharge pipe that leads away from the sump pit. It is the pipe that extends vertically from the sump pump outlet.
- Cut the pipe: Using a hacksaw or PVC pipe cutter, cut a section of the discharge pipe near the sump pump outlet. Ensure that the cut is clean and straight.
- Prepare the check valve: Take the check valve and remove any caps or stoppers. Check the arrow on the valve, which indicates the direction of water flow. It should point away from the sump pump and towards the outside of your home.
- Attach the check valve: Insert one end of the check valve onto the pipe leading from the sump pump outlet. Use PVC primer on both the pipe and the inside of the valve end. Apply PVC cement to the pipe and the outside of the valve end, then firmly push them together. Hold the connection for a few seconds to allow the cement to set.
- Reattach the pipe: Attach the other end of the check valve onto the remaining section of the discharge pipe. Use the same process of priming and cementing to secure the connection.
- Test for a secure connection: Once the cement has dried, run water through the sump pump system to ensure there are no leaks at the check valve connection. Fix any leaks with additional PVC cement if necessary.
Installing the check valve is crucial to prevent water from flowing back into the sump pit and causing unnecessary cycling of the pump. This ensures the efficient and reliable operation of your sump pump system.
Now that the check valve is successfully installed, you can proceed to the next step: installing the discharge pipe.
Step 8: Install the Discharge Pipe
The discharge pipe is responsible for directing the water pumped by the sump pump away from your home’s foundation. Proper installation of the discharge pipe is crucial to ensure efficient water removal and prevent water damage. Follow these steps to install the discharge pipe:
- Determine the discharge point: Decide where you want the water to be discharged, such as a drainage ditch, storm drain, or a designated area away from your home’s foundation.
- Measure and cut the pipe: Using a hacksaw or PVC pipe cutter, measure and cut a section of PVC pipe that will reach from the check valve to the desired discharge point. Ensure that the cut is clean and straight.
- Attach the pipe: Connect the cut section of PVC pipe to the check valve outlet. Use PVC primer on both the pipe and inside of the check valve end. Apply PVC cement to the pipe and outside of the check valve end, then firmly push them together. Hold the connection for a few seconds to allow the cement to set.
- Create a slope: To ensure proper water flow, slightly slope the discharge pipe away from the house. This will facilitate the smooth flow of water away from the foundation.
- Secure the pipe: Use pipe hangers or clamps to secure the discharge pipe along its length. This will prevent it from shifting or becoming dislodged over time.
- Test the system: Once the discharge pipe is installed, do a final check for any leaks along the connections. Run water through the system to ensure proper water flow and drainage.
Proper installation of the discharge pipe is essential for directing water away from your home’s foundation, protecting it from potential water damage. It ensures that the water pumped out by the sump pump is effectively and safely discharged.
Now that the discharge pipe is in place, you can move on to testing the sump pump.
Read more: What Sump Pump Is Best For A Basement
Step 9: Test the Sump Pump
Testing the sump pump is a crucial step in the installation process to ensure that it is functioning properly and ready for action. Here’s how you can test your sump pump:
- Add water: Pour a sufficient amount of water into the sump pit to raise the water level above the float switch. This simulates a high-water level scenario, triggering the sump pump to activate.
- Observe the pump operation: Watch and listen as the sump pump turns on. The pump should start pumping water out of the pit, and you should hear the sound of the motor. Check for any unusual noises, vibrations, or leaks during this process.
- Monitor the drainage: Ensure that the water is being effectively pumped out of the sump pit and directed through the discharge pipe. Verify that the water is flowing away from your home’s foundation as intended.
- Wait for the pump to turn off: Once the water level in the pit lowers, the float switch should trigger the pump to turn off automatically. This demonstrates that the pump’s automated operation is functioning correctly.
- Repeat the test: Conduct this test a few more times to ensure consistent and reliable pump operation. Pay attention to any irregularities or issues that may arise.
By testing your sump pump, you can verify that it is working correctly and ready to handle any water intrusion in your basement. Regular testing, especially during heavy rain seasons or periods of high water table, is recommended to ensure its ongoing functionality.
If you notice any issues or concerns during the testing process, it is advisable to consult a professional to address the problem before relying on the sump pump to protect your basement from water damage.
Now that you have tested the sump pump successfully, you can proceed to the final step: finishing the installation.
Step 10: Finish the Installation
Congratulations! You’re almost done with the sump pump installation. The final step involves finishing up a few tasks to ensure everything is secure and functioning optimally. Here’s what you need to do:
- Clean up the work area: Remove any debris, tools, or materials from the installation site. Clean up the area to leave it neat and tidy.
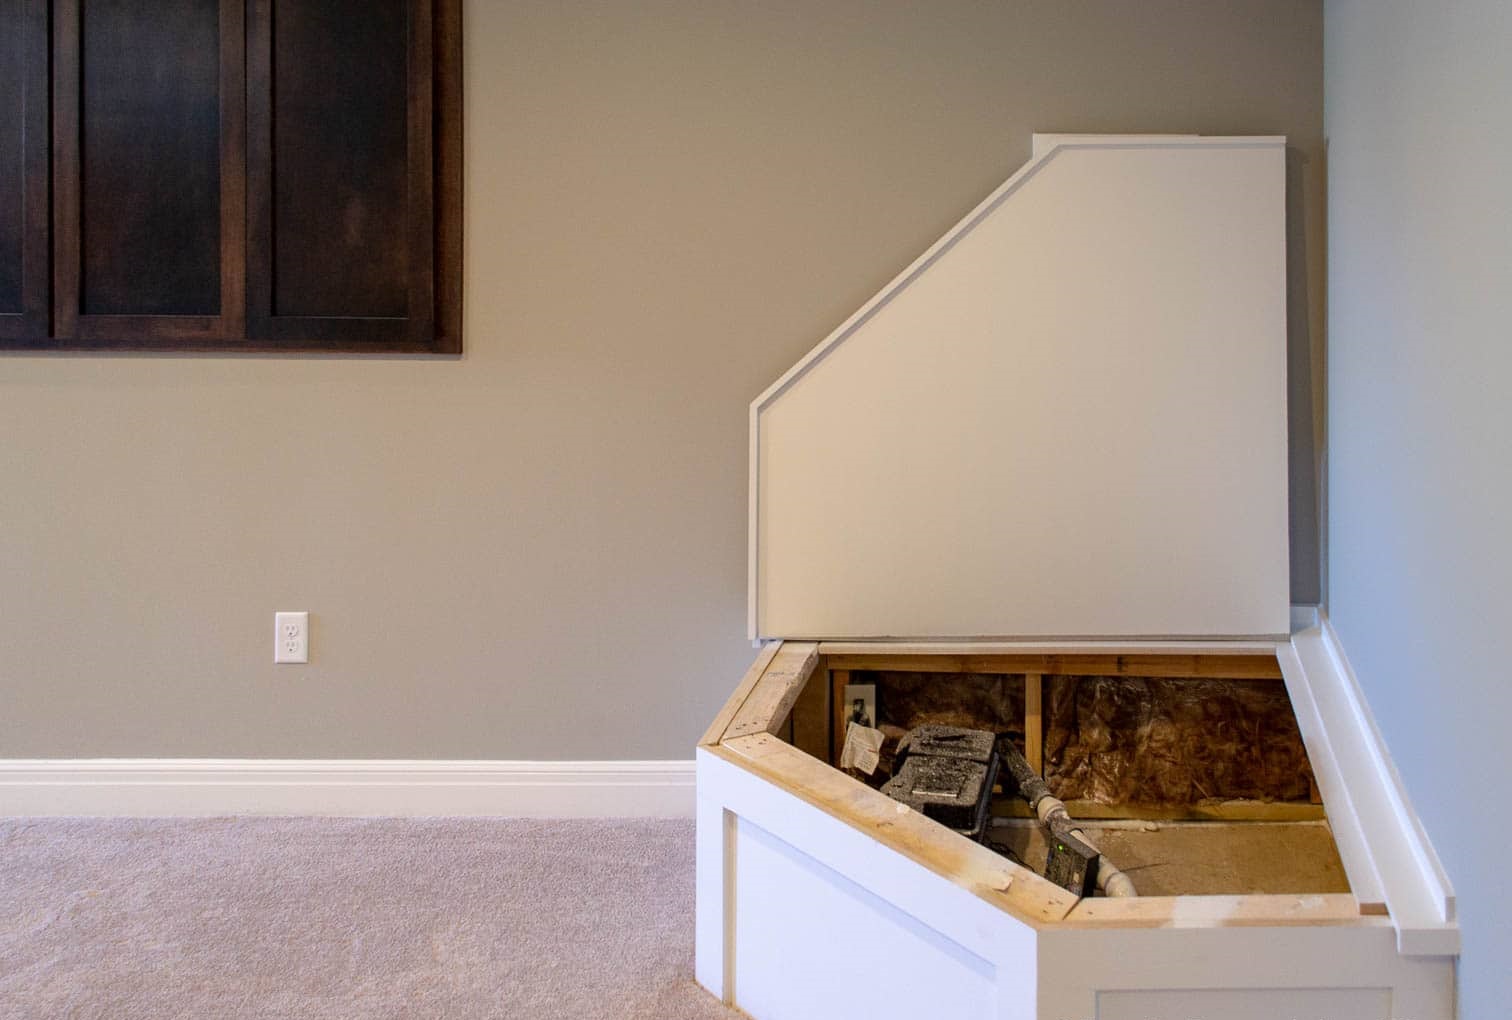
- Secure the access lid: Ensure that the access lid to the sump pump basin is securely in place. This will prevent any unwanted dust, debris, or pests from entering the pit.
- Test the backup system (if applicable): If you have a backup sump pump or a battery-operated backup system, test its functionality as well. This will provide added protection in the event of a power outage or primary pump failure.
- Create a maintenance schedule: Establish a regular maintenance schedule for your sump pump. This may include tasks such as checking the float switch, cleaning the pump components, and inspecting the discharge pipe for any potential clogs or obstructions.
- Keep records: Keep a record of the installation, including any warranty information, manuals, and receipts. This will come in handy for future reference or if you need to contact the manufacturer or installer for assistance.
- Consider a battery backup system: For added peace of mind, consider investing in a battery backup system for your sump pump. This will ensure that the pump continues to operate even during power outages, providing continuous water removal and protection for your basement.
By completing these final steps, you have successfully installed a sump pump in your basement. This reliable system will help keep your basement dry and protect it from potential water damage.
Remember to regularly inspect and maintain your sump pump system to ensure its long-term efficiency and effectiveness. If you encounter any issues or have concerns about your sump pump, don’t hesitate to seek professional assistance.
With the installation complete, you can now enjoy the peace of mind that comes with a well-functioning sump pump system.
Thank you for following this guide, and we hope it has been helpful in your sump pump installation journey!
Conclusion
Installing a sump pump in your basement is a wise decision to protect your home from water damage and the associated problems that come with it. By following the step-by-step guide outlined in this article, you can successfully install a sump pump and have a reliable system in place to keep your basement dry.
Throughout the installation process, we covered important tasks such as gathering the necessary tools and materials, choosing the right location for the sump pump, preparing the basement, digging the sump pit, installing the sump pump basin, connecting the sump pump, installing the check valve, and setting up the discharge pipe.
We emphasized the importance of testing the sump pump to ensure its proper functionality and reliability. Regular maintenance and testing are crucial to keeping the sump pump in top condition and ready to handle any moisture or water intrusion scenarios.
Remember, if at any point during the installation process you feel uncertain or encounter difficulties, it is highly recommended to seek assistance from a professional. They can provide expert guidance and ensure that your sump pump is installed correctly and according to local building codes and regulations.
By installing a sump pump, you are taking proactive steps to protect your home and basement from potential water damage. A properly installed and maintained sump pump system will provide you with peace of mind, knowing that your basement is safeguarded against water intrusion.
Thank you for following this comprehensive guide on how to install a sump pump in your basement. We hope it has been informative, and we wish you success in your sump pump installation project!
Frequently Asked Questions about How To Install A Sump Pump In A Basement
Was this page helpful?
At Storables.com, we guarantee accurate and reliable information. Our content, validated by Expert Board Contributors, is crafted following stringent Editorial Policies. We're committed to providing you with well-researched, expert-backed insights for all your informational needs.


0 thoughts on “How To Install A Sump Pump In A Basement”