Articles
Why Is My Blender Smoking
Modified: August 25, 2024
Find articles and tips to understand why your blender is smoking and how to fix it. Keep your blender in top shape with these helpful articles.
(Many of the links in this article redirect to a specific reviewed product. Your purchase of these products through affiliate links helps to generate commission for Storables.com, at no extra cost. Learn more)
Introduction
Blenders have become an essential kitchen appliance for many households, allowing us to effortlessly blend and mix ingredients for various recipes. However, there may come a time when you notice something unusual: your blender starts smoking. This can be a cause for concern, as it is not a normal behavior for a blender to emit smoke. Understanding the reasons behind this issue can help you troubleshoot the problem and ensure the longevity of your blender.
In this article, we will explore the common causes of blender smoking and provide you with valuable information on troubleshooting and safety precautions. So, if you’ve ever wondered, “Why is my blender smoking?” keep reading to find out.
Key Takeaways:
- Keep your blender in top shape by avoiding overloading, cleaning it thoroughly, and replacing worn-out motor brushes. Prioritize safety and follow manufacturer guidelines for optimal performance and longevity.
- If your blender starts smoking, prioritize safety by immediately turning it off, unplugging it, and seeking professional assistance. Follow proper maintenance and care tips to prevent potential issues and ensure safe and efficient blending.
Read more: Why Is My Toaster Smoking
Understanding the Basics of Blenders
Before delving into the reasons why your blender may be smoking, it’s essential to have a basic understanding of how blenders work. Blenders consist of a motor, blending blades, a pitcher or jar, and various controls and settings.
The motor is the heart of the blender and is responsible for powering the blades that mix and blend the ingredients. It is typically located at the base of the blender and is connected to the blending blades through a shaft. The speed and power of the motor determine the efficiency and performance of the blender.
The blending blades, also known as the cutting assembly, are usually made of stainless steel and are designed to chop, grind, and blend ingredients. The shape and arrangement of the blades may vary depending on the blender model, but they all serve the same purpose – to create a vortex that pulls the ingredients towards the blades for thorough mixing.
The pitcher or jar is where you place the ingredients for blending. It is typically made of plastic, glass, or stainless steel and comes with a secure lid to prevent any spillage during operation. The size of the pitcher may vary, with some blenders offering different capacity options.
Blenders also feature various controls and settings that allow you to adjust the blending speed and duration according to your needs. These controls may include buttons for low, medium, and high speeds, as well as pulse functions for short bursts of blending.
Now that you have a basic understanding of the key components of a blender, let’s explore the common causes of blender smoking and what you can do to troubleshoot the issue.
Common Causes of Blender Smoking
If you’ve noticed smoke coming from your blender, it indicates that there is a problem that needs to be addressed. Here are some common causes of blender smoking:
1. Overheating Motor
One of the most common causes of blender smoking is an overheating motor. The motor of a blender can generate a significant amount of heat due to the power it requires to blend ingredients effectively. If the motor becomes too hot, it may start to smoke as a result. This can happen if you’ve been using the blender for an extended period or if you’ve been operating it at high speeds for a long duration.
2. Worn-out Motor Brushes
The motor brushes in a blender are responsible for conducting electric current to the motor’s armature. Over time, these brushes can become worn out or damaged, affecting the electrical connection and potentially causing the motor to overheat. When the motor brushes are not working properly, it can lead to smoke coming from the blender.
Read more: Why Is My Air Conditioner Smoking
3. Excessive Load
Blending heavy or dense loads can put a strain on the motor and cause it to overwork, leading to overheating and eventually smoking. It’s important to follow the blender’s capacity guidelines and avoid overloading it with ingredients beyond its recommended limit. Blending in smaller batches or using a more powerful blender for heavier loads can help prevent excessive strain on the motor.
4. Faulty Electrical Connections
Another possible cause of blender smoking is faulty electrical connections. Loose wires or improper connections can create electrical arcing, which generates heat and can result in smoke. Inspecting the power cord, plug, and internal wiring for any signs of damage or loose connections is necessary to ensure safe operation of the blender.
These are just some of the common causes of blender smoking. In the next section, we’ll provide tips for proper blender maintenance and care to help prevent these issues and prolong the lifespan of your blender.
Overheating Motor
One of the common causes of a smoking blender is an overheating motor. Blenders have powerful motors that generate heat while operating, especially during prolonged use or when blending tough ingredients. However, excessive heat can cause the motor to overheat and emit smoke, indicating a problem that needs to be addressed.
There are several factors that can contribute to an overheating motor in a blender:
1. Prolonged Use
Blending for an extended period without giving the motor a chance to cool down can lead to overheating. Continuous use can cause the motor to work harder and generate more heat, eventually resulting in smoke. It’s important to follow the manufacturer’s guidelines regarding recommended blending durations and give the motor enough time to rest between sessions.
Read more: Why Is My Stove Top Smoking
2. High Speeds
Using the blender at high speeds for a prolonged period can also cause the motor to overheat. High-speed settings generate more power, requiring the motor to work harder and produce more heat. It’s advisable to use the appropriate speed setting for the ingredients being blended and avoid running the blender on high speeds for extended periods if not necessary.
3. Insufficient Ventilation
Adequate airflow is vital for dissipating heat generated by the blender’s motor. If the blender is placed in an enclosed space or the air vents are blocked, it can restrict the ventilation, causing heat to build up and resulting in an overheating motor. Ensure that the blender is placed on a flat surface with enough space around it for proper air circulation.
4. Malfunctioning Cooling System
In some cases, the cooling system of the blender may not be functioning properly, leading to inadequate heat dissipation and an overheating motor. This can be due to a faulty cooling fan or improper assembly of the cooling components. If you suspect an issue with the cooling system, it’s recommended to contact the manufacturer or seek professional assistance for repairs.
To prevent an overheating motor in your blender, here are some tips:
- Follow the recommended blending durations and give the motor ample time to rest.
- Use the appropriate speed setting based on the ingredients and avoid running on high speeds unnecessarily.
- Ensure sufficient ventilation around the blender by placing it on a flat surface with unobstructed air vents.
- Regularly clean the blender to remove any debris that can block the cooling system.
- If you notice any signs of overheating, such as smoke or a burning smell, immediately turn off the blender and allow it to cool down before investigating or using it again.
By taking these precautions and addressing any issues promptly, you can prevent an overheating motor in your blender and ensure its optimal performance and longevity.
Worn-out Motor Brushes
Another common cause of a smoking blender is worn-out motor brushes. Motor brushes are small components located inside the motor of the blender that facilitate the transfer of electrical current to the motor’s armature. Over time, these brushes can become worn or damaged, affecting their ability to conduct electricity properly.
When the motor brushes are worn out, they can cause various issues, including an overheating motor and smoke. Here’s how worn-out motor brushes can lead to these problems:
Read more: Why Is My Air Fryer Smoking
1. Decreased Electrical Contact
As motor brushes wear down, they may not make sufficient contact with the armature, leading to an inconsistent flow of electrical current. This can result in increased resistance and heat generation within the motor. The excess heat can cause the motor to overheat and emit smoke during operation.
2. Increased Friction
Worn-out motor brushes can cause increased friction between the brushes and the armature. This friction can create additional heat, contributing to an overheating motor. The excessive heat generated can ultimately lead to smoke coming from the blender.
3. Inadequate Brush Spring Tension
Motor brushes are typically held in place by springs that provide the necessary tension for proper contact with the armature. Over time, these springs can weaken or lose tension, causing the brushes to have inadequate contact with the armature. This can result in poor electrical transfer, increased heat, and ultimately, a smoking blender.
4. Carbon Buildup
Motor brushes are made of carbon, and as they wear down, they can leave behind carbon residue or buildup. This carbon buildup can affect the performance of the brushes, leading to decreased electrical conductivity and increased heat generation. If the carbon buildup becomes excessive, it can contribute to the motor overheating and producing smoke.
If you suspect that worn-out motor brushes are causing your blender to smoke, it’s essential to address the issue promptly. Here are some steps you can take:
- Refer to the blender’s user manual or contact the manufacturer to determine if the motor brushes are replaceable.
- If replacement brushes are available, consider purchasing a set and following the manufacturer’s instructions for replacing them.
- If you’re not comfortable replacing the motor brushes yourself, it’s advisable to seek professional assistance or take the blender to an authorized service center for repairs.
- Regularly inspect and clean the motor brushes to remove any carbon buildup and ensure proper functionality.
- Handle the motor brushes with care to avoid damaging them during cleaning or replacement.
By addressing worn-out motor brushes promptly, you can prevent further damage to the blender’s motor and ensure its efficient and safe operation.
Read more: Why Are My Stove Burners Smoking
Excessive Load
Blenders are designed to handle a range of ingredients and blending tasks. However, overloading the blender with excessive or heavy loads can strain the motor and cause it to overheat, leading to smoke. Understanding the limitations of your blender and using it within its recommended capacity is crucial to prevent this issue.
Here are some factors that can contribute to an excessive load on the blender:
1. Quantity of Ingredients
Blending too many ingredients at once can put a strain on the blender’s motor. If the pitcher or jar is filled beyond its capacity, the ingredients may not blend properly, and the motor will have to work harder to process the excessive load. This increased workload can lead to overheating and eventually result in smoke.
2. Density of Ingredients
Some ingredients, such as frozen fruits, ice cubes, or hard vegetables, are denser and more challenging to blend. When these denser ingredients are blended in large quantities, they can create a heavy load on the blender’s motor. The motor may struggle to process these ingredients, generating more heat and potentially causing smoke.
3. Tough or Fibrous Ingredients
Blending tough or fibrous ingredients, like nuts, seeds, or fibrous vegetables, can also contribute to an excessive load on the blender. These ingredients require more power and time to blend properly, which can lead to increased strain on the motor. If the blender is unable to handle the load, it may overheat and emit smoke.
Read more: Why Does My Blender Smell
4. Continuous Use
Using the blender continuously for an extended period can also lead to an excessive load. Continuous operation without allowing the motor to rest can cause it to overheat due to prolonged strain. It’s important to give the blender breaks between blending sessions to prevent overheating and the associated risks.
To avoid putting an excessive load on your blender, follow these tips:
- Ensure you are aware of the blender’s capacity and avoid exceeding it.
- Blend ingredients in smaller batches if necessary.
- If blending dense or tough ingredients, add them gradually to ensure smoother blending.
- Avoid continuous use and give the blender breaks to cool down between blending sessions.
- Consider investing in a more powerful blender if you frequently blend heavy or dense loads.
By following these guidelines, you can prevent the blender from experiencing an excessive load, minimize the risk of overheating, and maintain its optimal performance.
Faulty Electrical Connections
Faulty electrical connections can be another cause of a blender smoking. Electrical issues can lead to the generation of heat, arcing, and ultimately, smoke. It is crucial to ensure that the electrical connections within your blender are in good condition to prevent any potential hazards.
1. Loose Wires
If the wires inside the blender become loose, it can lead to improper electrical connections. Loose wires can create resistance, causing heat to build up and potentially lead to smoke. It is essential to periodically inspect the wiring connections in your blender and ensure that they are secure.
2. Damaged Power Cord
A damaged power cord can compromise the electrical connections and pose a safety hazard. If the power cord is frayed, cracked, or shows signs of wear and tear, it should be replaced immediately. Using a damaged power cord can increase the risk of electrical problems, including smoking.
Read more: Why Does My Blender Not Blend
3. Poor Quality Electrical Components
In some cases, blenders with poor quality electrical components may be more prone to electrical issues. Low-quality wiring, connectors, or switches can lead to faulty electrical connections and potential smoking. It is advisable to purchase blenders from reputable brands known for their quality and safety standards.
4. Incorrect Assembly
If the blender has been disassembled for cleaning or maintenance and not properly reassembled, it can result in faulty electrical connections. For example, if the wires are not securely connected or if components are not aligned correctly, it can cause electrical arcing and smoke. Always ensure that you follow the manufacturer’s instructions when disassembling and reassembling your blender.
5. External Power Source Issues
It’s worth mentioning that the cause of electrical problems may not always be within the blender itself. Issues with the external power source, such as a faulty outlet or power surge, can also lead to smoking. Ensure that the outlet you are using is in good condition and can handle the power requirement of your blender.
If you suspect faulty electrical connections in your blender, here are some steps to address the issue:
- Ensure that the blender is unplugged from the power source before inspecting any electrical components.
- Check the power cord for any damage or loose connections. If there are any issues, replace the power cord with a new one.
- Inspect the internal wiring connections, ensuring that they are secure and properly aligned. If loose or disconnected wires are found, reattach them or seek professional assistance if needed.
- If you are unsure about the electrical components or lack the necessary skills, it’s recommended to contact the manufacturer or a qualified technician for assistance.
- Consider using a power surge protector or voltage stabilizer to protect your blender from electrical issues caused by external sources.
By addressing faulty electrical connections promptly and ensuring proper maintenance, you can minimize the risk of smoking and maintain a safe operating environment for your blender.
Blender Maintenance and Care Tips
Proper maintenance and care are essential to keep your blender in optimal condition and prevent issues such as smoking. By following these tips, you can prolong the lifespan of your blender and ensure its safe and efficient operation:
Read more: Why Is My Smoke Not Going Up Chimney
1. Cleaning the Blender Properly
After each use, make sure to clean the blender thoroughly. Remove any remaining food residue or liquid from the pitcher or jar, the blending blades, and the lid. Depending on the blender model, you may be able to disassemble these parts for easier cleaning. Use warm soapy water and a non-abrasive sponge or brush to remove any stuck-on residue. Rinse thoroughly and allow the parts to dry completely before reassembling.
2. Avoiding Overloading the Blender
Follow the manufacturer’s instructions for the maximum capacity of the blender. Avoid overloading the blender with excessive quantities or dense ingredients. If necessary, blend in smaller batches to ensure proper blending and prevent strain on the motor.
3. Replacing Motor Brushes
If your blender has replaceable motor brushes and you suspect they are worn out or damaged, consider replacing them. Follow the manufacturer’s instructions or seek professional assistance to ensure safe and proper replacement of the motor brushes.
4. Regular Inspections
Periodically inspect the blender for any signs of wear and tear or loose components. Check the power cord, switches, and electrical connections for any damage or loose connections. If any issues are found, promptly address them or seek professional assistance as needed.
Read more: Why Is My Nest Smoke Detector Beeping
5. Safe Handling and Storage
When handling the blender, be cautious of the sharp blending blades. Always handle the blades with care and avoid direct contact. Store the blender in a safe and dry place, ensuring that it is not exposed to extreme temperatures or moisture that may damage the electrical components.
6. Avoiding Excessive Heat
Prevent the blender from being exposed to excessive heat or direct heat sources. Avoid placing the blender near stovetops, ovens, or other appliances that generate heat. Excessive heat can damage the blender’s internal components and increase the risk of smoking.
7. Regular Maintenance
Follow the specific maintenance recommendations provided by the blender manufacturer. This may include lubricating the blender’s bearings or cleaning specific components on a regular basis. Adhering to these maintenance guidelines can help keep your blender functioning properly.
By implementing these maintenance and care tips, you can ensure the longevity of your blender and minimize the likelihood of smoking or other issues. Additionally, always refer to the user manual and follow any specific instructions provided by the manufacturer for your particular blender model.
Cleaning the Blender Properly
Cleaning your blender properly is essential not only for maintaining hygiene but also for ensuring the longevity of the appliance. Here are some steps to follow for effective and thorough cleaning:
Read more: Why Is My Smoke Detector Leaking Water
1. Disassemble the Blender
Before cleaning, disassemble the blender by removing the pitcher or jar from the base. If applicable, detach the blending blades and any other removable parts. Be sure to consult the user manual for your specific blender model to understand which parts are removable.
2. Pre-Rinse and Pre-Soak
Begin by rinsing out the pitcher or jar with warm water. This step helps remove any loose food particles remaining from the previous use. For stubborn residue, you can pre-soak the pitcher or jar in warm soapy water for a few minutes to help loosen the debris.
3. Wash with Mild Soap and Water
Using a mild dish soap, apply a small amount to a sponge or non-abrasive brush. Gently scrub the pitcher or jar, focusing on the inside surfaces. Pay extra attention to the areas around the blades and the bottom of the pitcher or jar. Make sure to clean the lid as well. Rinse all the parts thoroughly with warm water to remove any soap residue.
4. Remove and Clean the Blending Blades
If your blender’s blades are removable, take them out carefully and wash them separately. Use caution as the blades may be sharp. Clean the blades with warm soapy water, ensuring to remove any food particles or residue. If necessary, use a brush to clean between the blades. Rinse the blades thoroughly and dry them before reassembling.
Read more: Why Did My Blender Stop Working
5. Dry All Parts
After cleaning, ensure that all parts of the blender are completely dry before reassembling. You can either air dry them or use a clean towel or cloth to wipe them dry. Moisture trapped in the blender can lead to mold or electrical issues, so it’s vital to take this step seriously.
6. Clean the Base
To clean the base of the blender, unplug the electrical cord and wipe the exterior surface with a damp cloth or sponge. Avoid submerging the base in water or using abrasive cleaners, as they can damage the electronic components.
7. Clean the Control Panel
Use a slightly damp cloth or sponge to wipe the control panel and buttons carefully. Avoid excessive moisture and ensure that the cloth or sponge is not dripping wet.
8. Regular Cleaning Routine
Clean your blender after each use to prevent any buildup of residue or mold. Regular cleaning not only keeps your blender in optimal condition but also ensures that blended foods and ingredients don’t affect the taste or quality of future blends.
By following these steps and incorporating a regular cleaning routine, you can keep your blender clean, hygienic, and functioning effectively for years to come.
Avoiding Overloading the Blender
Properly using your blender and avoiding overloading it is crucial for its optimal performance and to prevent potential issues such as overheating or smoking. Here are some tips to help you avoid overloading your blender:
1. Know the Blender’s Capacity
Every blender has a maximum capacity, which indicates the recommended volume of ingredients it can handle. It’s important to familiarize yourself with your blender’s capacity guidelines. Overloading the blender by exceeding its capacity can strain the motor and affect the blending efficiency.
2. Follow the Recommended Portions
When preparing recipes or blending ingredients, follow the recommended portions to ensure that you stay within the blender’s capacity limits. If a recipe requires a larger quantity, consider blending in smaller batches to maintain proper blending consistency and prevent overloading.
3. Add Ingredients Gradually
If your recipe involves blending multiple ingredients, it’s best to add them gradually rather than all at once. This helps distribute the load more evenly and allows the blender to process the ingredients effectively. Adding ingredients in smaller increments also prevents excessive strain on the motor.
Read more: Why Does Smoke Come Out Of My Fireplace
4. Cut Ingredients into Smaller Pieces
For harder or larger ingredients, such as fruits, vegetables, or ice, it’s advisable to cut them into smaller, manageable pieces before adding them to the blender. This reduces the workload on the motor and ensures that the ingredients are evenly processed without overloading the blender.
5. Consider the Density of Ingredients
Some ingredients, such as liquids, are less dense compared to others, like nuts or seeds. When blending a combination of ingredients with different densities, it’s important to strike the right balance. Begin with the less dense ingredients and gradually add the denser ones to prevent overloading the blender.
6. Avoid Overfilling the Pitcher or Jar
When placing ingredients in the blender, avoid overfilling the pitcher or jar. The contents need space for proper circulation and blending. Overfilled pitchers can lead to uneven blending, strain the motor, and potentially result in overheating. Leave some room at the top to allow for proper blending action.
7. Make Use of Pulse Mode
If your blender has a pulse mode, utilize it for ingredients that require short bursts of blending. The pulse mode provides controlled bursts of power, allowing you to achieve the desired consistency while preventing the motor from becoming overloaded.
Read more: Why Is My Blender Leaking From The Bottom
8. Consider Upgrading to a More Powerful Blender
If you frequently find yourself needing to blend large or hard loads, it may be worth considering upgrading to a more powerful blender model. High-performance blenders are designed to handle heavier loads without strain, ensuring efficient blending and reducing the risk of overloading.
By following these tips and being mindful of the blender’s capacity and the ingredients you’re blending, you can avoid overloading your blender, promote its longevity, and enjoy consistent and efficient blending performance.
Replacing Motor Brushes
Motor brushes are crucial components in a blender that facilitate the flow of electrical current from the power source to the motor’s armature. Over time, these brushes can wear out and affect the performance of the blender. If you suspect that your blender’s motor brushes are worn or damaged, replacing them can help restore optimal functionality. Here’s a step-by-step guide to replacing motor brushes:
1. Gather the Necessary Tools
Before you begin, make sure you have the necessary tools and replacement brushes. Typically, you’ll need a screwdriver, a small brush or cloth for cleaning, and the appropriate replacement brushes for your specific blender model. Consult the user manual or contact the manufacturer to ensure you have the correct replacement brushes.
2. Unplug the Blender
Ensure that the blender is unplugged from the power source before starting any work. This is necessary to prevent any electrical accidents or damage during the replacement process.
Read more: Why Is My Ninja Blender Power Light Blinking
3. Locate the Motor Brushes
The motor brushes are usually located near the motor in the base of the blender. Consult the user manual or the manufacturer’s instructions to identify the specific location and access points for the motor brushes.
4. Remove the Old Brushes
Using a screwdriver, carefully remove any screws or fasteners that hold the motor brush assembly in place. Gently disconnect the old brushes from the motor. Take note of their positioning and how they are connected for reference when installing the new brushes.
5. Clean the Motor Brush Area
While the motor brush assembly is removed, take the opportunity to clean any debris or dust around the area. Use a small brush or cloth to gently remove any dirt or buildup that may have accumulated in the vicinity of the brushes.
6. Install the New Brushes
Take the new motor brushes and align them correctly according to the reference points you identified during removal. Ensure that they fit securely in their designated slots or connectors. Make sure the brushes are positioned correctly, with the contact surface aligned with the motor’s armature.
7. Secure the Motor Brush Assembly
Once the new brushes are in place, reattach the motor brush assembly to its original position. Carefully tighten any screws or fasteners to secure the assembly, ensuring that it is firmly in place.
8. Test the Blender
After the replacement is complete, plug in the blender and test its functionality. Turn on the blender and observe whether it operates smoothly without any smoke or issues. If everything appears normal, congratulations! You have successfully replaced the motor brushes.
If you are unsure or uncomfortable with replacing the motor brushes yourself, it’s recommended to seek professional assistance or take the blender to an authorized service center. They can ensure that the replacement is done correctly and safely.
By replacing worn-out motor brushes, you can restore the performance and functionality of your blender, ensuring its smooth operation for many more blending sessions to come.
Troubleshooting and Safety Precautions
While using a blender, encountering issues or unexpected situations can sometimes happen. By troubleshooting and taking necessary safety precautions, you can address these problems effectively and ensure the safety of yourself and your blender. Here are some essential troubleshooting tips and safety precautions to keep in mind:
1. Identifying Warning Signs
Pay attention to any warning signs that may indicate a problem with your blender. These signs may include unusual noises, excessive vibration, a burning smell, or smoke. If you notice any of these warning signs, immediately stop using the blender and investigate the issue.
2. Steps to Take When Your Blender Smokes
If your blender starts smoking, follow these steps:
- Turn off and unplug the blender immediately to stop the motor from running.
- Allow the blender to cool down completely before proceeding.
- Inspect the blender for any visible damage or electrical issues.
- Clean the blender thoroughly, ensuring that no debris or residue caused the smoking.
- If the smoking persists or the blender shows signs of damage, contact the manufacturer or a professional for further assistance.
3. Ensuring Personal Safety while Dealing with a Smoking Blender
When handling a smoking blender or attempting to troubleshoot the issue, follow these safety precautions:
- Always prioritize personal safety. Do not touch the blender or any internal components while it is powered or smoking.
- Ensure that the blender is unplugged before inspecting or attempting any troubleshooting.
- Keep flammable materials away from the smoking blender.
- Do not attempt to disassemble or repair the blender if you are unsure or lack the necessary knowledge. Seek professional assistance instead.
- Use caution when examining the blender for potential damage or electrical issues. Avoid touching any hot or exposed parts.
- Follow manufacturer instructions for proper maintenance and care to prevent potential issues in the future.
4. Contacting the Manufacturer or Professionals
If you are unsure about the cause of the smoking or encounter persistent issues, it is recommended to contact the manufacturer’s customer support or seek professional help. They can provide guidance, advice, or arrange for repairs if needed.
Remember, your safety is of paramount importance. If you are ever in doubt or feel uncertain about dealing with a smoking blender, prioritize your well-being and consult the appropriate professionals to ensure a safe resolution.
Identifying Warning Signs
When using a blender, it’s important to be aware of any warning signs that may indicate a problem with the appliance. Identifying these signs early on can help you address potential issues and prevent further damage or accidents. Here are some common warning signs to watch out for:
1. Unusual Noises
If your blender starts making unusual or loud noises that are different from its normal operating sounds, it may indicate a problem. Grinding, scraping, rattling, or banging noises can be a sign of loose parts, worn-out components, or an issue with the motor or blade assembly.
2. Excessive Vibration
A well-functioning blender should operate smoothly, with minimal vibration. However, if you notice that your blender is vibrating excessively during use, it could be a cause for concern. Excessive vibration can be a sign of an imbalance, loose parts, or an issue with the motor or blade assembly. It’s important to investigate and address this issue to prevent further damage or accidents.
3. Burning Smell
If you detect a strong burning smell coming from your blender while it’s in operation, it can be an indication of overheating or electrical issues. This burning smell may be accompanied by smoke or the smell of melting plastic. In such cases, it is crucial to immediately turn off and unplug the blender to avoid any potential hazards.
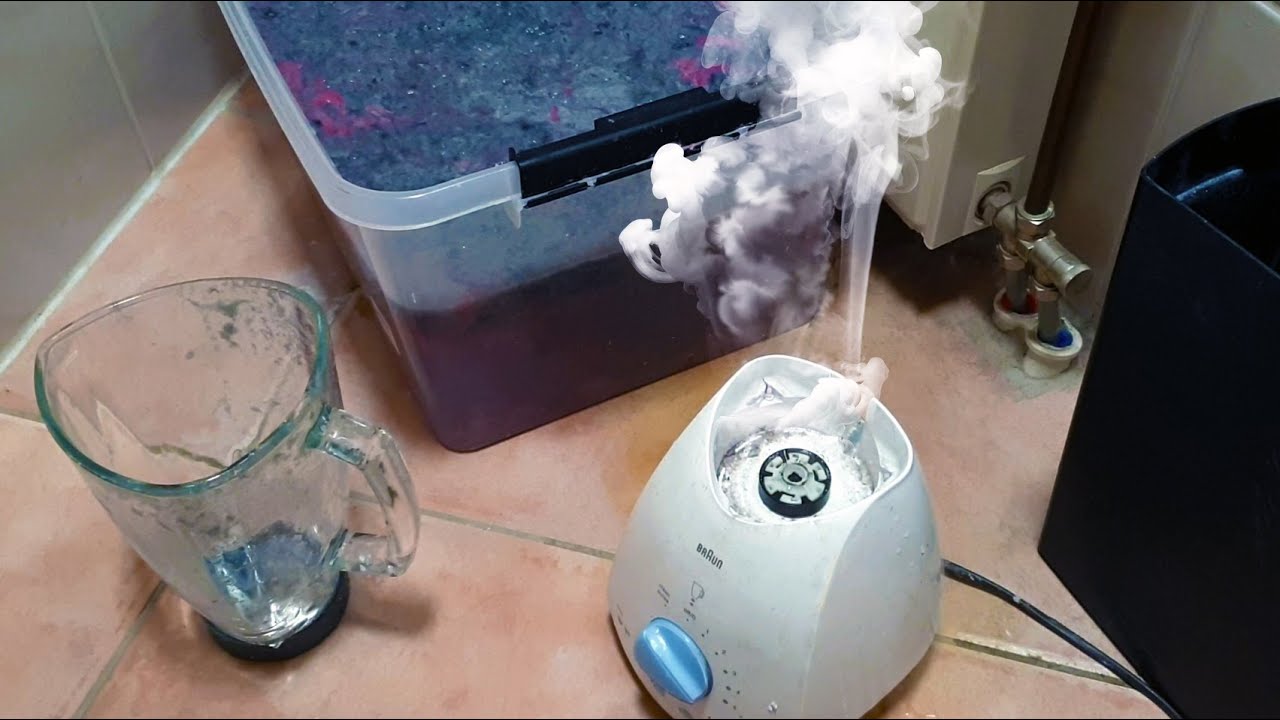
4. Smoke
One of the most obvious and alarming warning signs is smoke coming from the blender. If you observe smoke, it usually indicates a serious problem, such as an overheating motor, faulty electrical components, or excessive strain on the blender’s system. When this occurs, it is essential to cease using the blender immediately, unplug it, and investigate the cause of the smoke.
5. Tripped Circuit Breaker or Power Outage
If the circuit breaker associated with the outlet powering your blender trips or if you experience a power outage when the blender is in use, it may suggest an electrical issue. This interruption of power can be an early indication of problems within the blender’s electrical system or motor.
6. Inconsistent Blending Results
If you notice inconsistent blending results, such as unprocessed chunks or unevenly blended ingredients, it could indicate a problem with the blade assembly or the motor’s performance. This inconsistency may stem from worn-out blades or a motor that is struggling to operate at its full capacity.
If you experience any of these warning signs or notice anything else out of the ordinary while using your blender, it is essential to take action promptly to prevent any potential hazards or further damage. Refer to the troubleshooting steps in your blender’s user manual, contact the manufacturer for guidance, or consult a professional if needed. Safety should always be the top priority when using any electrical appliance.
Steps to Take When Your Blender Smokes
Discovering that your blender is smoking can be alarming, but it’s important to remain calm and take immediate action to address the issue. Here are some steps to follow when your blender starts to smoke:
1. Turn Off and Unplug the Blender
As soon as you notice smoke coming from your blender, turn it off immediately. Press the power switch to the “off” position, and then unplug the blender from the electrical outlet. This will help prevent any potential electrical hazards and minimize the risk of further damage.
2. Allow the Blender to Cool Down
After turning off and unplugging the blender, let it cool down for a sufficient amount of time. This will enable any overheated components or potential fire hazards to cool off and reduce the risk of further smoke or damage.
3. Inspect the Blender for Visible Damage
Once the blender has cooled down, carefully inspect it for any visible signs of damage. Check for melted or discolored parts, loose connections, or any other anomalies that may have contributed to the smoking. If you notice any visible damage, it’s important to avoid using the blender until it has been repaired or evaluated by a professional.
4. Clean the Blender Thoroughly
Clean the blender thoroughly to remove any residue or debris that might have caused the smoking. Take apart any detachable components, such as the pitcher, lid, and blades. Wash each part with warm water and mild dish soap, ensuring that all remnants are thoroughly rinsed away. Do not use the blender until all parts are completely dry.
5. Check the Power Cord and Electrical Connections
Inspect the power cord and electrical connections for any signs of damage. Look for frayed wires, exposed conductors, or loose connections that may have caused electrical issues and contributed to the smoking. If you notice any problems, it’s best to have a qualified technician or electrician repair or replace the damaged components.
6. Contact the Manufacturer or Seek Professional Assistance
If the smoking persists or if you’re uncertain about the cause, contact the blender manufacturer’s customer support for guidance. They can provide specific troubleshooting steps or advise you on the next course of action. Alternatively, you can seek assistance from a professional blender repair service or take the blender to an authorized service center for evaluation and repairs.
It’s crucial to prioritize safety when dealing with a smoking blender. Never attempt to use or repair the appliance while it is smoking or if you suspect any electrical issues. Following these steps will help you address the situation responsibly and minimize any potential risks.
Ensuring Personal Safety while Dealing with a Smoking Blender
When faced with a smoking blender, it’s crucial to prioritize personal safety above all else. Dealing with electrical appliances can present potential hazards, so taking the proper precautions is essential. Here are some safety measures to follow when handling a smoking blender:
1. Prioritize Personal Safety
When you notice a smoking blender, the first and most important step is to ensure your own safety. Avoid touching the blender or any internal components while it is powered or smoking. Maintain a safe distance from the appliance to minimize any potential risks.
2. Immediately Turn Off and Unplug the Blender
As soon as you notice smoke coming from the blender, turn it off immediately. Press the power switch to the “off” position, and then unplug the blender from the electrical outlet. This will help prevent any potential electrical hazards and reduce the risk of further damage or injury.
3. Keep Flammable Materials Away
When dealing with a smoking blender, be mindful of your surroundings. Ensure that flammable materials, such as paper towels, curtains, or other combustible items, are kept away from the blender. This will minimize the risk of fire or spreading of smoke.
4. Refrain from Touching Hot Parts
During the cooling down period, the blender and its components may still be hot. Avoid touching any hot surfaces to prevent burns or other injuries. Allow sufficient time for the appliance to cool down completely before attempting to handle or investigate further.
5. Do Not Attempt Repairs if Unsure
Unless you are a trained professional, it’s important to avoid attempting any repairs or modifications on the smoking blender yourself. DIY repairs can be hazardous and may exacerbate the problem. Instead, contact the manufacturer’s customer support or seek professional assistance from a qualified technician or authorized service center.
6. Seek Manufacturer Guidance
Reach out to the manufacturer’s customer support for guidance on what to do when your blender starts smoking. They can provide specific troubleshooting steps or advise you on the next course of action. Follow their instructions carefully to ensure your own safety and prevent further damage.
7. Consult a Professional
If the smoking persists, the blender shows signs of damage, or you are unsure about the cause, it’s advisable to consult a professional blender repair service or take the appliance to an authorized service center. These experts have the knowledge and expertise to diagnose and address the issue safely and effectively.
Remember, your personal safety is of utmost importance. Never compromise or take unnecessary risks when dealing with a smoking blender. By following these safety precautions, you can minimize potential hazards and ensure a safe environment while addressing the issue.
Conclusion
Experiencing a smoking blender can be concerning, but by understanding the common causes and taking appropriate measures, you can address the issue effectively. In this article, we explored the various reasons why a blender may start smoking, such as an overheating motor, worn-out motor brushes, excessive load, and faulty electrical connections. We also provided tips on proper blender maintenance and care, including cleaning the blender thoroughly, avoiding overloading, and replacing motor brushes when necessary.
When you encounter a smoking blender, it’s important to remain calm and take immediate action to ensure personal safety. This involves turning off and unplugging the blender, allowing it to cool down, inspecting for visible damage, and cleaning the appliance thoroughly. If the smoking persists or there are concerns about electrical issues, it’s advisable to contact the manufacturer’s customer support or seek professional assistance.
Throughout the troubleshooting process, it’s vital to prioritize personal safety by avoiding contact with hot parts, keeping flammable materials away, and refraining from attempting repairs if unsure. Always follow the manufacturer’s guidelines for maintenance, adhere to recommended portion sizes, and handle the blender with care.
By following the tips and precautions outlined in this article, you can maintain the longevity of your blender, prevent smoking or other issues, and enjoy safe and efficient blending for all your culinary needs.
Frequently Asked Questions about Why Is My Blender Smoking
Was this page helpful?
At Storables.com, we guarantee accurate and reliable information. Our content, validated by Expert Board Contributors, is crafted following stringent Editorial Policies. We're committed to providing you with well-researched, expert-backed insights for all your informational needs.
0 thoughts on “Why Is My Blender Smoking”