Articles
Why Does My Blender Not Blend
Modified: August 25, 2024
Discover why your blender is not blending with our informative articles. Get expert tips and troubleshooting advice to fix the issue today.
(Many of the links in this article redirect to a specific reviewed product. Your purchase of these products through affiliate links helps to generate commission for Storables.com, at no extra cost. Learn more)
Introduction
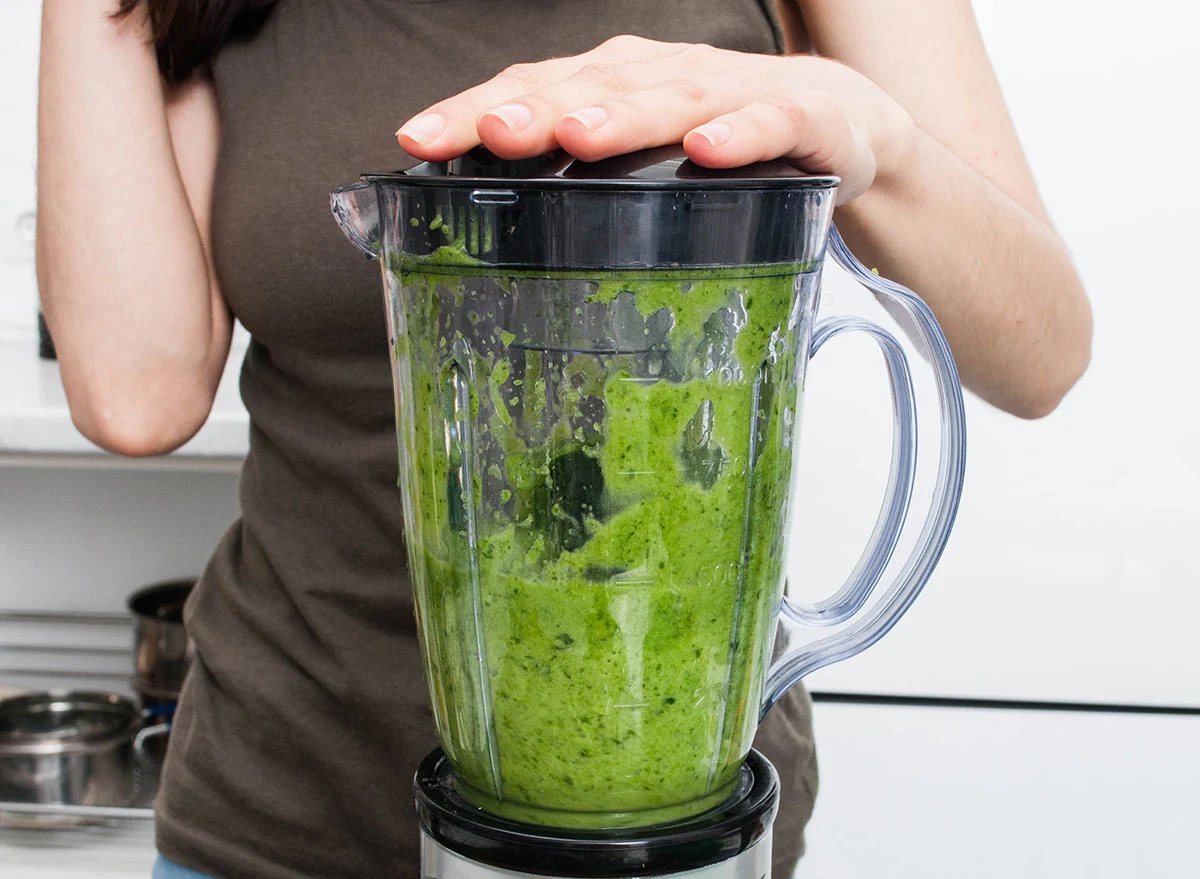
Blenders are essential kitchen appliances for anyone who enjoys cooking or baking. They are versatile tools that can be used to create delicious smoothies, soups, sauces, and more. However, there may be times when you find yourself frustrated because your blender is not blending properly. Whether it’s leaving chunks in your smoothie or struggling to process ingredients, a blender that doesn’t blend can be a major inconvenience.
In this article, we will explore the common causes behind a blender that is not functioning as expected. We will also provide practical solutions to troubleshoot and fix these issues, allowing you to get back to creating perfectly blended concoctions in no time.
So, if you are wondering why your blender is not blending, keep reading to find out the possible reasons and the steps you can take to resolve the problem.
Key Takeaways:
- Ensure proper power supply, sharpen or replace blades, avoid overloading, adjust settings, assemble components correctly, and clean regularly to maintain optimal blender performance.
- Troubleshoot and address power supply issues, maintain sharp blades, blend within capacity, choose correct settings, assemble components securely, and clean to restore effective blending.
Read more: Why Does My Blender Smell
Common Causes of Blender Not Blending
When your blender is not blending properly, there are several potential causes that you should consider. Understanding these common issues can help you diagnose the problem and implement the right solution. Below are some of the most frequent causes of a blender that is not performing as expected:
- Insufficient Power Supply: One of the primary reasons why a blender may fail to blend is due to inadequate power supply. If the blender is not receiving enough electrical power, it may not be able to spin the blades at the necessary speed to effectively blend the ingredients.
- Blunt Blades: Blunt or dull blades can significantly impact the blending performance of a blender. Over time, the blades can become worn out or dull, making them less effective at cutting and blending ingredients. This can result in uneven blending or incomplete processing.
- Overloading the Blender: It is important to remember that blenders have a maximum capacity for ingredients. Overloading the blender can put excessive strain on the motor and prevent the blades from spinning freely. As a result, the blender may struggle to blend the ingredients properly.
- Wrong Blender Settings: Many blenders come with multiple speed settings and blending modes. Using the wrong setting for the specific task at hand can hinder the blending process. It’s crucial to choose the appropriate speed and mode based on the consistency of the ingredients and the desired end result.
- Improper Assembly: Sometimes, a blender may not blend properly due to incorrect assembly. If the jar, lid, or blade assembly are not properly aligned or tightened, the blender may not function as intended. This can result in poor blending performance or even leakage.
- Clogged Blender: Over time, food debris and residue can accumulate in the blender jar, especially if it is not cleaned regularly. A clogged blender can hinder the blades’ movement and prevent proper blending. This can lead to uneven blending or even cause the blender to stop working altogether.
Identifying these common causes can help you pinpoint the issue with your blender and take appropriate actions to fix it. Whether it’s addressing power supply issues, sharpening or replacing blades, adjusting settings, or cleaning the blender, we will explore the solutions for each problem in the upcoming sections. Now, let’s dive into the specific solutions for a blender that does not blend effectively.
Insufficient Power Supply
One of the common causes of a blender not blending properly is an insufficient power supply. Blenders require a sufficient amount of electrical power to spin their blades at the necessary speed and blend ingredients effectively. Here are a few factors to consider if you suspect that your blender is not receiving enough power:
- Power Outlet: Ensure that the blender is plugged into a functional power outlet. Sometimes, the outlet might be faulty, or there might be an issue with the circuit. Try plugging the blender into a different outlet to see if the problem persists.
- Power Source: If you are using an extension cord or power strip to connect the blender to the power source, make sure it is capable of handling the blender’s power requirements. Some extension cords or power strips may not be designed to handle high-powered appliances like blenders.
- Fuse or Circuit Breaker: Check your home’s fuse box or circuit breaker to ensure that the circuit that the blender is connected to has not tripped or blown a fuse. Resetting the fuse or circuit breaker may resolve the power supply issue.
- Power Rating: Each blender has a specific power rating indicated on the appliance or in the user manual. Ensure that the blender’s power rating matches the power supply in your home. Using a blender with higher power requirements without the appropriate power supply can result in insufficient blending performance.
If you have checked the power supply and still suspect that the blender is not receiving enough power, you may need to consult an electrician to assess and resolve any electrical issues in your home. Alternatively, consider using the blender in a different location or with a different power source to determine if the power supply is indeed the problem.
By addressing any power supply issues, you can ensure that your blender receives the necessary power to function optimally, allowing it to blend ingredients effectively and produce smooth and consistent results.
Blunt Blades
Dull or blunt blades are another common cause of a blender not blending properly. Over time, the blades of a blender can become worn out or lose their sharpness, resulting in ineffective blending. Here are some steps you can take to address this issue:
- Inspect the Blades: Carefully examine the blades of your blender. Look for signs of wear, such as dull edges or nicks. If the blades appear damaged, it may be time to sharpen or replace them.
- Sharpen the Blades: If your blender blades are just dull and not damaged, you may be able to restore their sharpness by sharpening them. Some blenders come with blade sharpening instructions and accessories. Follow the instructions provided by the manufacturer to sharpen the blades safely.
- Replace the Blades: If the blades are damaged beyond repair or if sharpening does not improve their effectiveness, it is recommended to replace them. Contact the blender manufacturer or check their website for replacement blade options. Make sure to choose blades that are compatible with your specific blender model.
- Proper Blade Maintenance: To keep your blender blades sharp and in good condition, it is important to clean them properly after each use. Avoid using abrasive scrubbers or harsh chemicals that can damage the blades. Instead, use a soft sponge or brush and mild dish soap to gently clean the blades.
Regularly inspecting and maintaining your blender blades can help ensure their optimal performance and longevity. Sharp blades will be more effective at cutting and blending ingredients, resulting in smoother and more consistent blends.
Overloading the Blender
Overloading the blender is a common mistake that can lead to improper blending and strain on the blender’s motor. Each blender has a recommended maximum capacity, and exceeding this limit can cause the blender to struggle in processing the ingredients. Here are some tips to avoid overloading your blender:
- Check the Blender’s Capacity: Refer to the blender’s user manual or manufacturer’s guidelines to determine its maximum capacity. This information will help you understand the appropriate amount of ingredients you can safely blend at once.
- Measure Ingredients: Use measuring cups or a kitchen scale to accurately measure the ingredients you plan to blend. This will help you ensure you stay within the blender’s recommended capacity.
- Blend in Batches: If you have a large quantity of ingredients to blend, it’s best to do it in batches. Divide the ingredients into smaller portions that fall within the blender’s capacity and blend them separately.
- Add Liquids First: When blending, it is generally recommended to add the liquids first before adding the solid ingredients. This helps create a smoother blending process and prevents the blender from getting overwhelmed by a large amount of dense ingredients.
By following these guidelines, you can prevent overloading your blender and ensure optimal blending performance. Remember, blending in appropriate quantities will not only help the blender to function effectively but also result in better-textured and more evenly blended recipes.
Read more: How To Blend Food Without A Blender
Wrong Blender Settings
Using the wrong blender settings can often lead to improper blending and unsatisfactory results. Many blenders offer multiple speed settings and blending modes designed for different types of ingredients and recipes. Here are a few tips to ensure you choose the correct blender settings for your blending needs:
- Read the User Manual: Familiarize yourself with the instruction manual that comes with your blender. It will provide valuable information about the different settings and how to use them effectively.
- Consider the Ingredients: Take into account the consistency and texture of the ingredients you are blending. For example, if you are blending soft fruits for a smoothie, a low to medium speed setting may be appropriate. On the other hand, if you are crushing ice or blending tougher ingredients, a higher speed setting or a pulse function might be required.
- Experiment: Don’t be afraid to experiment with different settings to find the ideal one for your particular recipe. Start with a lower speed setting and gradually increase it if needed, checking the progress along the way. This will help you achieve the desired texture without overblending or damaging the ingredients.
- Pulse Function: Utilize the pulse function if your blender has one. This setting allows you to quickly blend in short bursts, giving you more control over the blending process. It is particularly useful when you want to achieve a specific consistency or avoid over-processing the ingredients.
By selecting the appropriate blender settings, you can ensure that your ingredients are blended to perfection. Understanding the available settings and experimenting with different options will help you achieve the desired results for your recipes.
Improper Assembly
Improper assembly of the blender components can contribute to a blender not blending properly. It’s crucial to ensure that the jar, lid, and blade assembly are correctly aligned and securely tightened. Here are some steps to ensure proper assembly of your blender:
- Jar Placement: Make sure the blender jar is properly placed on the base. It should sit securely on the base and align with the drive shaft or coupling in the center.
- Blade Attachment: Attach the blade assembly securely onto the drive shaft or coupling at the bottom of the blender jar. It should fit snugly and not wobble or move during blending.
- Lid Positioning: Place the lid onto the jar and ensure it is positioned correctly. Many blenders have alignment indicators or notches to guide proper lid placement. The lid should fit tightly and securely, forming a seal to prevent leaks during blending.
- Tighten Components: Check that all components are tightened properly. This includes securing the jar to the base, tightening the blade assembly, and ensuring the lid is securely fastened. To avoid any accidents, make sure to follow the instructions provided by the manufacturer for tightening and securing the blender parts.
Improperly assembled blenders may not blend properly or may even leak during operation. Double-checking the assembly and ensuring that all components are aligned and securely tightened will help optimize the blending performance and prevent any mishaps.
Clogged Blender
A clogged blender can impede its blending performance and prevent ingredients from being properly processed. Food debris, residue, and buildup can accumulate over time, hindering the movement of the blades. Here are some steps to unclog your blender and ensure optimal blending:
- Power Off and Unplug: Before attempting to unclog the blender, always make sure it is powered off and unplugged for safety.
- Disassemble the Blender: Carefully disassemble the blender by removing the jar, lid, and any detachable blades. This will give you better access to clean the individual components effectively.
- Flush with Warm Water: Rinse the blender jar and detachable components thoroughly with warm water. Use a sponge or brush to scrub away any visible debris or residue. Pay close attention to the blade assembly, as it is a common area for food particles to accumulate.
- Vinegar Solution: If there are stubborn clogs, you can create a cleaning solution using equal parts of white vinegar and warm water. Fill the blender jar with the solution and let it sit for a few minutes to loosen any clogged debris. Then, carefully scrub the jar and components with a sponge or brush. Rinse well with water afterward.
- Small Brush or Toothpick: For hard-to-reach areas, use a small brush or toothpick to dislodge any remaining debris. Be gentle and cautious when using these tools to avoid damaging the blender’s blades or other components.
- Dry Thoroughly and Reassemble: Once you have cleaned all the blender components, make sure to dry them thoroughly before reassembling. Moisture can lead to mold or damage if not properly dried. Once everything is dry, carefully reassemble the blender, ensuring that all parts are aligned and securely tightened.
Regularly cleaning and unclogging your blender will not only improve its performance but also extend its lifespan. By removing any obstructions and maintaining a clean blender, you can enjoy smooth blending and prevent any issues related to clogging.
Check if the blades are dull or if the motor is overheating. Clean the blender thoroughly and ensure all parts are properly assembled before use.
Solutions for a Blender That Does Not Blend
When faced with a blender that is not blending properly, there are several solutions you can try to resolve the issue. Here are some practical steps you can take to get your blender back to optimal performance:
- Checking and Replacing Power Supply: Ensure that the blender is connected to a functioning power outlet and that it is receiving adequate electrical power. If necessary, try using a different power outlet or consult an electrician to address any electrical issues. If the power cord or plug is damaged, consider replacing them to ensure a secure connection.
- Sharpening or Replacing Blades: If the blender blades are dull or damaged, sharpen them if possible. Follow the manufacturer’s instructions for blade sharpening or consider replacing the blades altogether. This will improve the blades’ cutting efficiency and result in better blending performance.
- Reducing Blender Load: Avoid overloading the blender by sticking to its recommended capacity. If you have a large quantity of ingredients, blend them in batches to prevent strain on the motor and ensure effective blending.
- Adjusting Blender Settings: Take proper care in selecting the appropriate blender setting for your specific blending needs. Consider ingredient consistency, texture, and desired outcome. Experiment with different speeds and modes to find the perfect setting for each recipe.
- Properly Assembling Blender Components: Make sure the blender jar, lid, and blade assembly are correctly aligned and securely tightened. Improper assembly can lead to leakage, inefficient blending, or even accidents. Double-check the instructions provided by the manufacturer to ensure proper assembly.
- Cleaning and Unclogging the Blender: Regularly clean your blender to avoid clogs that can hinder its performance. Rinse the components with warm water, use vinegar solutions for stubborn clogs, and scrub with a sponge or brush. Pay attention to hard-to-reach areas and dry all components thoroughly before reassembling.
By implementing these solutions, you can address common issues that may cause your blender to function poorly. Remember to always prioritize safety and follow the manufacturer’s instructions for any maintenance or repairs. With these steps, you can restore your blender’s functionality and enjoy smooth blending once again.
Read more: Why Is My Blender Smoking
Checking and Replacing Power Supply
One of the potential causes for a blender not blending properly is an insufficient or faulty power supply. To troubleshoot and address this issue, follow these steps:
- Verify Power Outlet: Ensure that the blender is connected to a functioning power outlet. Check if other electrical devices work when plugged into the same outlet. If the outlet is not working, try plugging the blender into a different outlet to see if that resolves the issue.
- Power Cord Inspection: Examine the power cord for any signs of damage, including fraying or exposed wires. If you notice any damage, it’s important to replace the power cord to ensure safe and reliable power supply to the blender.
- Plug and Socket Connection: Check if the plug is securely inserted into the socket. Sometimes, a loose connection can lead to insufficient power supply. Ensure that the plug is fully inserted and fitting snugly in the socket.
- Circuit Breaker and Fuse Box: Check your home’s circuit breaker or fuse box to ensure that the circuit the blender is connected to has not tripped or blown a fuse. If it has tripped, reset the circuit breaker or replace the blown fuse to restore the power supply to the blender.
- Power Rating: Verify that the blender’s power requirements match the power supply in your home. Each blender has a specific power rating identified on the appliance or in the user manual. Using a blender with higher power requirements without the appropriate power supply can result in inadequate blending performance.
- Consult an Electrician: If you have checked all the above steps and suspect there may be an underlying electrical issue, it is advisable to consult an electrician. They will be able to assess and resolve any electrical problems in your home’s wiring or outlets that may be affecting the power supply to the blender.
By ensuring a proper power supply, you can provide your blender with the necessary electrical energy to operate at its optimal performance. If there are any concerns or uncertainties regarding the power supply to the blender, it is always best to seek professional assistance to avoid any potential hazards.
Sharpening or Replacing Blades
Dull or damaged blades can significantly impact a blender’s blending performance. If you notice that your blender is not effectively blending ingredients, it may be time to sharpen or replace the blades. Follow these steps to address this issue:
- Inspect the Blades: Carefully examine the blades of your blender. Look for signs of wear, such as dull edges, nicks, or bent blades. If the blades appear damaged, it is recommended to replace them rather than attempting to sharpen them.
- Sharpening the Blades: If your blender’s blades are just dull and not damaged, you can try sharpening them. Some blenders come with blade sharpening instructions and accessories. Follow the manufacturer’s guidelines to sharpen the blades safely. Be cautious when handling sharp objects and follow proper safety measures.
- Replacing the Blades: If the blades on your blender are damaged beyond repair or if sharpening does not improve their performance, it is best to replace them. Contact the blender manufacturer or check their website for replacement blade options. Make sure to choose blades that are compatible with your specific blender model to ensure a proper fit and optimum blending performance.
- Installation: When replacing the blades, carefully follow the instructions provided by the manufacturer for installation. Ensure that the new blades are securely attached to the drive shaft or coupling at the bottom of the blender jar. Proper installation is crucial for safe and efficient blending.
- Regular Maintenance: To keep your blender blades in good condition, it is important to clean them thoroughly after each use. Avoid using abrasive scrubbers or harsh chemicals that can damage the blades. Instead, use a soft sponge or brush and mild dish soap to gently clean the blades. Proper maintenance will help prolong the lifespan of the blades and maintain their sharpness.
Having sharp blades is essential for effective blending. Dull or damaged blades can result in uneven blending, chunky textures, and ineffective processing of ingredients. Whether you choose to sharpen or replace the blades, maintaining their sharpness is crucial for achieving smooth and consistent blending results.
Reducing Blender Load
Overloading the blender with too many ingredients can strain the motor and hinder its blending performance. To ensure optimal blending, it’s important to follow the blender’s recommended capacity and reduce the blender load. Here are some tips to help you achieve the right blending balance:
- Read the User Manual: Refer to the blender’s user manual or manufacturer’s guidelines to determine its recommended capacity. This information will guide you in understanding the appropriate amount of ingredients to blend at once.
- Measure Ingredients: Use measuring cups or a kitchen scale to accurately measure the ingredients. This not only helps you stick within the blender’s recommended capacity but also ensures balanced ratios for desired flavors and textures.
- Blend in Batches: If you have a large quantity of ingredients, it’s best to blend them in batches. Divide the ingredients into smaller portions that fall within the blender’s capacity and blend them separately. This approach allows for better control and ensures thorough blending of each batch.
- Layer Ingredients Properly: When blending multiple ingredients, layer them properly. Start with liquids or soft ingredients at the bottom, followed by denser or harder ingredients. This layering technique promotes smoother blending by allowing the blades to interact with the ingredients more efficiently.
- Follow Progressive Blending: Instead of adding all ingredients at once, gradually increase the blender load. This technique is especially useful for heavy or fibrous ingredients that require more power to break down. Adding ingredients in stages ensures consistent blending throughout the process.
- Pulse Technique: Utilize the pulse function of your blender. This intermittent blending technique helps break down larger ingredients or challenging textures by delivering short bursts of power without overloading the motor. Use the pulse function strategically, adjusting the duration and frequency as needed.
By reducing the blender load and following these tips, you can avoid straining the blender’s motor and improve the overall blending performance. It will also help you achieve smoother textures and more even blending results, enhancing the overall quality of your recipes.
Adjusting Blender Settings
Choosing the right blender settings is key to achieving the desired blending results. Many blenders offer multiple speed settings, blending modes, and additional features to accommodate different ingredients and recipes. Here are some tips to help you adjust the blender settings effectively:
- Read the User Manual: Familiarize yourself with the instruction manual provided by the blender manufacturer. It will provide detailed information about the various settings and features available, as well as guidelines for selecting the appropriate setting for different types of ingredients.
- Consider Ingredient Consistency: Take into account the consistency and texture of the ingredients you are blending. For example, if you are blending soft fruits for a smoothie, a low to medium speed setting may be appropriate. On the other hand, if you are crushing ice or blending tougher ingredients, a higher speed setting or a pulse function might be required.
- Experiment: Each blender and recipe may have specific requirements, so don’t be afraid to experiment with different settings. Start with a lower speed setting and gradually increase it if needed, observing the blending progress along the way. This will help you achieve the desired texture without overblending or damaging the ingredients.
- Pulse Function: Many blenders come equipped with a pulse function, which allows you to blend in short bursts of power. This feature is particularly useful when you need more control over the blending process or when you want to achieve a specific consistency. Use the pulse function to quickly blend, chop, or mix ingredients without continuously running the blender.
- Programmed Modes: Some blenders have pre-programmed modes for specific recipes or tasks, such as smoothies, soups, or ice crushing. These modes automatically adjust the speed and duration based on the selected recipe, taking the guesswork out of achieving optimal results. Utilize these programmed modes when appropriate, as they are tailored to specific blending needs.
Adjusting the blender settings correctly will ensure that you achieve the desired blending outcome for your recipes. Don’t be afraid to try different settings and modes to discover the functionality and versatility of your blender. With practice, you will gain a better understanding of how to achieve the perfect blend for your favorite recipes.
Read more: How To Blend Tomatoes Without A Blender
Properly Assembling Blender Components
Proper assembly of the blender components is crucial for its optimal functioning and blending performance. Ensuring that the jar, lid, and blade assembly are correctly aligned and securely fastened will help prevent leaks, ensure efficient blending, and avoid any safety issues. Follow these steps to properly assemble your blender:
- Jar Placement: Place the blender jar on the base, making sure it sits securely and aligns with the drive shaft or coupling in the center. This ensures that the jar remains stable during blending.
- Blade Attachment: Attach the blade assembly onto the drive shaft or coupling at the bottom of the blender jar. It should fit snugly and securely without any wobbling or movement. The blades must be properly aligned and central to the jar for effective blending.
- Lid Positioning: Place the lid onto the jar and make sure it is positioned correctly. Many blenders have alignment indicators or notches that help guide proper lid placement. Ensure that the lid fits tightly and securely, creating a seal to prevent any leaks during blending.
- Tighten Components: Double-check that all components are securely tightened. Ensure that the jar is firmly attached to the base, the blade assembly is properly tightened onto the drive shaft, and the lid is securely fastened. Be cautious not to overtighten, as it may make subsequent disassembly difficult.
- Safety Features: Familiarize yourself with the specific safety features of your blender, such as interlocking mechanisms or safety locks. Make sure these features are engaged and properly functioning during assembly. These safety measures help prevent accidental operation or injuries while using the blender.
Properly assembling the blender components is essential for safe and efficient blending. Incorrect assembly can lead to leakage, inefficient blending, or even pose a risk to the user. Always refer to the manufacturer’s instructions and guidelines for specific assembly procedures and safety precautions to ensure the best possible blending experience.
Cleaning and Unclogging the Blender
Regular cleaning and maintenance of your blender are essential to ensure its proper functioning and prevent clogs that can hinder blending performance. Follow these steps to effectively clean and unclog your blender:
- Power Off and Unplug: Start by ensuring that the blender is powered off and unplugged for safety purposes.
- Disassemble the Blender: Carefully disassemble the blender by removing the jar, lid, and any detachable blades or attachments. This allows for better access to clean each component effectively.
- Rinse with Warm Water: Rinse the blender jar and all detachable components thoroughly with warm water. This helps remove any loose debris or residue from the surfaces.
- Use Dish Soap or Vinegar Solution: Apply a small amount of mild dish soap to a sponge or brush, and gently scrub the jar, lid, and blade assembly to remove any stubborn residue. Alternatively, you can create a cleaning solution using equal parts of white vinegar and warm water and use it to clean the components. Vinegar helps break down buildup and remove odors.
- Pay Attention to Blade Assembly: Pay extra attention to cleaning the blade assembly, as it is common for food particles to accumulate in this area. Use caution when cleaning the blades to avoid injury. Consider using a small brush or toothbrush to reach any tight spaces between the blades.
- Unclog with Baking Soda and Vinegar: If there are stubborn clogs in the blender, you can try using a mixture of baking soda and vinegar. Add a tablespoon of baking soda to the blender jar, followed by a cup of vinegar. Let the mixture sit for a few minutes to allow the chemical reaction to break down clogs. Then, flush the jar with warm water and scrub as needed.
- Dry Components Thoroughly: After cleaning, make sure to dry all the components thoroughly before reassembling the blender. Moisture left behind can lead to mold or damage if not properly dried.
- Reassemble and Test: Carefully reassemble the blender, ensuring that all components are aligned and properly tightened. Once assembled, conduct a test run by blending a small amount of water to ensure that everything is functioning correctly.
Regular cleaning and unclogging of your blender will help maintain its performance, prevent odors, and extend its life. By keeping your blender clean, you can enjoy smooth and efficient blending for a wide range of recipes.
Conclusion
A blender not blending properly can be frustrating, but with some troubleshooting and maintenance, you can often resolve the issue and get your blender back to its optimal performance. In this article, we explored several common causes of a blender not blending effectively and provided practical solutions to address each problem.
We discussed the importance of ensuring a proper power supply and provided steps to check and replace the power source if needed. Dull or damaged blades can hinder blending, so we recommended sharpening or replacing them for better cutting efficiency. Overloading the blender can strain the motor, so we emphasized the importance of reducing the blender load and blending in batches.
Choosing the correct blender settings for your ingredients is crucial, and we provided guidance on how to adjust the settings wisely. Properly assembling the blender components ensures efficient blending and avoids leaks or safety hazards. Additionally, regular cleaning and unclogging of the blender help maintain its performance and prevent buildup.
By following these solutions, you can overcome the challenges of a blender that does not blend properly and enjoy smooth and consistent blending results. Remember to consult the manufacturer’s instructions and guidelines for your specific blender model, and always prioritize safety when handling and operating the blender.
So, the next time you encounter blending difficulties, don’t panic. Assess the potential causes we discussed, implement the appropriate solutions, and soon enough, you’ll be back to creating delicious smoothies, sauces, soups, and more. With a properly functioning blender, your culinary adventures will be taken to new heights.
Frequently Asked Questions about Why Does My Blender Not Blend
Was this page helpful?
At Storables.com, we guarantee accurate and reliable information. Our content, validated by Expert Board Contributors, is crafted following stringent Editorial Policies. We're committed to providing you with well-researched, expert-backed insights for all your informational needs.


0 thoughts on “Why Does My Blender Not Blend”