Articles
Why Is My Computer Making A Fan Noise
Modified: March 25, 2024
Find helpful articles on why your computer is making a fan noise. Learn how to troubleshoot and fix this common issue.
(Many of the links in this article redirect to a specific reviewed product. Your purchase of these products through affiliate links helps to generate commission for Storables.com, at no extra cost. Learn more)
Introduction
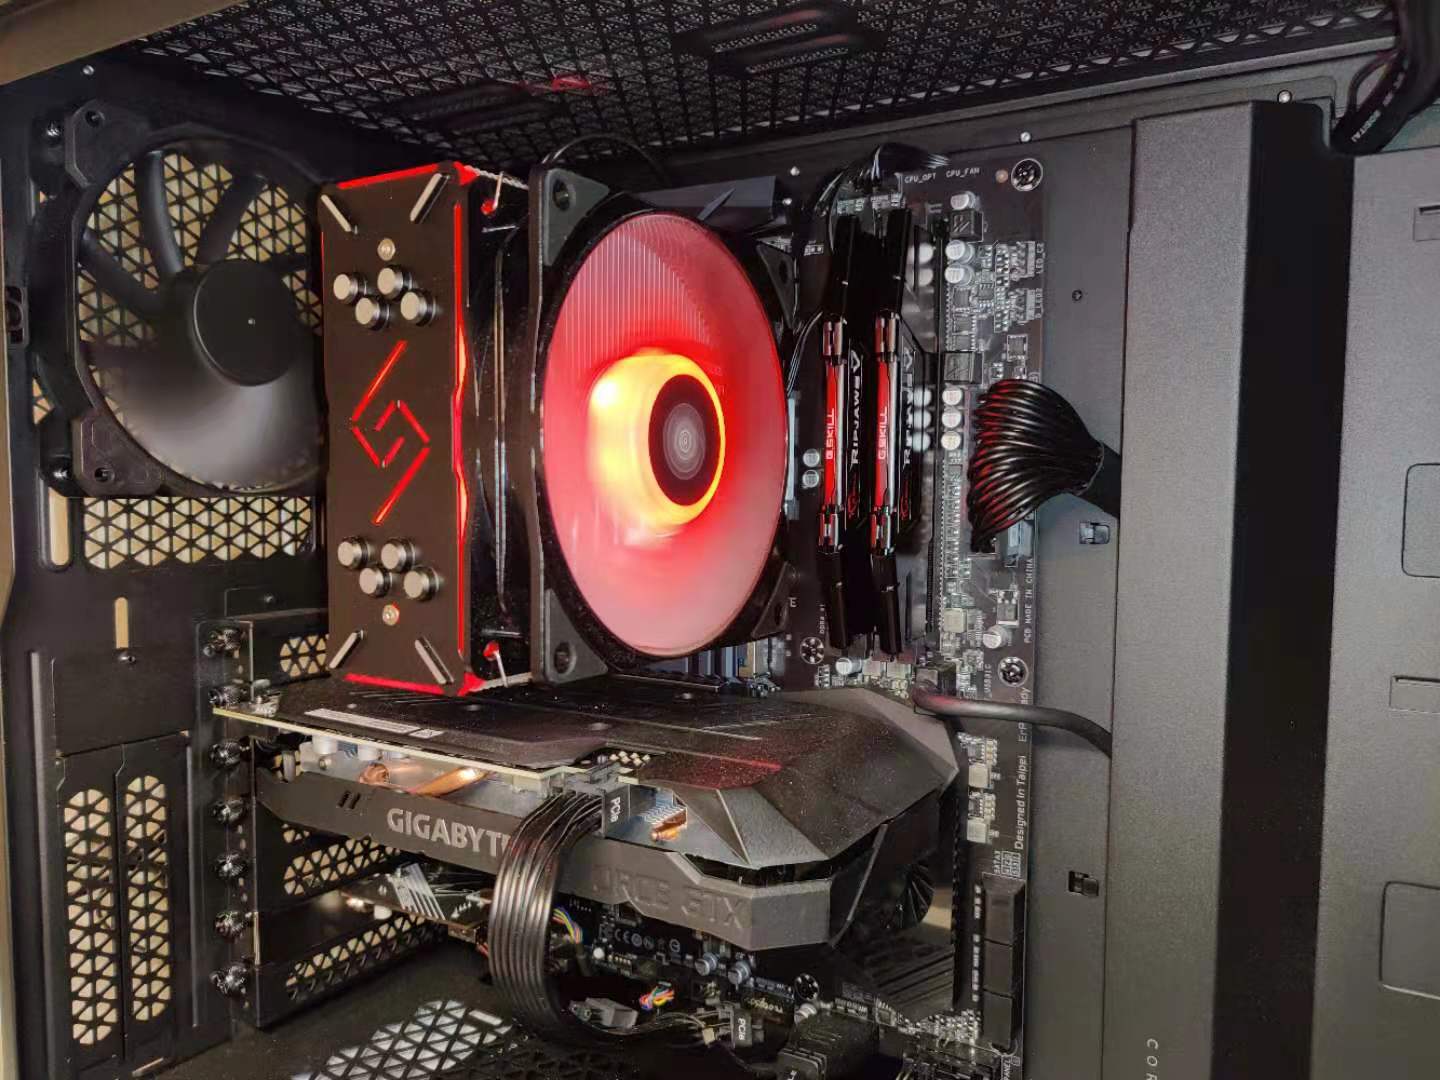
Are you tired of the constant humming and whirring noise coming from your computer? The culprit behind this irritating sound is most likely the fan. The fan plays a crucial role in keeping your computer’s components cool and preventing overheating, but it can also be a source of frustration when it becomes loud and noisy.
This article aims to shed light on the common causes of fan noise and provide you with practical solutions to reduce or eliminate it. By understanding these factors and taking appropriate measures, you can restore peace and quiet to your computer environment.
So, let’s dive into the world of fan noise and discover why your computer is making that annoying sound.
Key Takeaways:
- Regularly cleaning the fan and vents is crucial to reduce fan noise and maintain optimal airflow, promoting a quieter and more efficient computing experience.
- Addressing common causes of fan noise, such as faulty fans, overheating, and high CPU usage, can lead to a quieter and more comfortable computing environment.
Read more: Why Does My Fan Make Noise
Common Causes of Fan Noise
The following are some common causes of fan noise in computers:
- Dust and Dirt Accumulation: Over time, dust and dirt can accumulate on the fan blades and hinder its rotation. This can cause the fan to become unbalanced, resulting in noise.
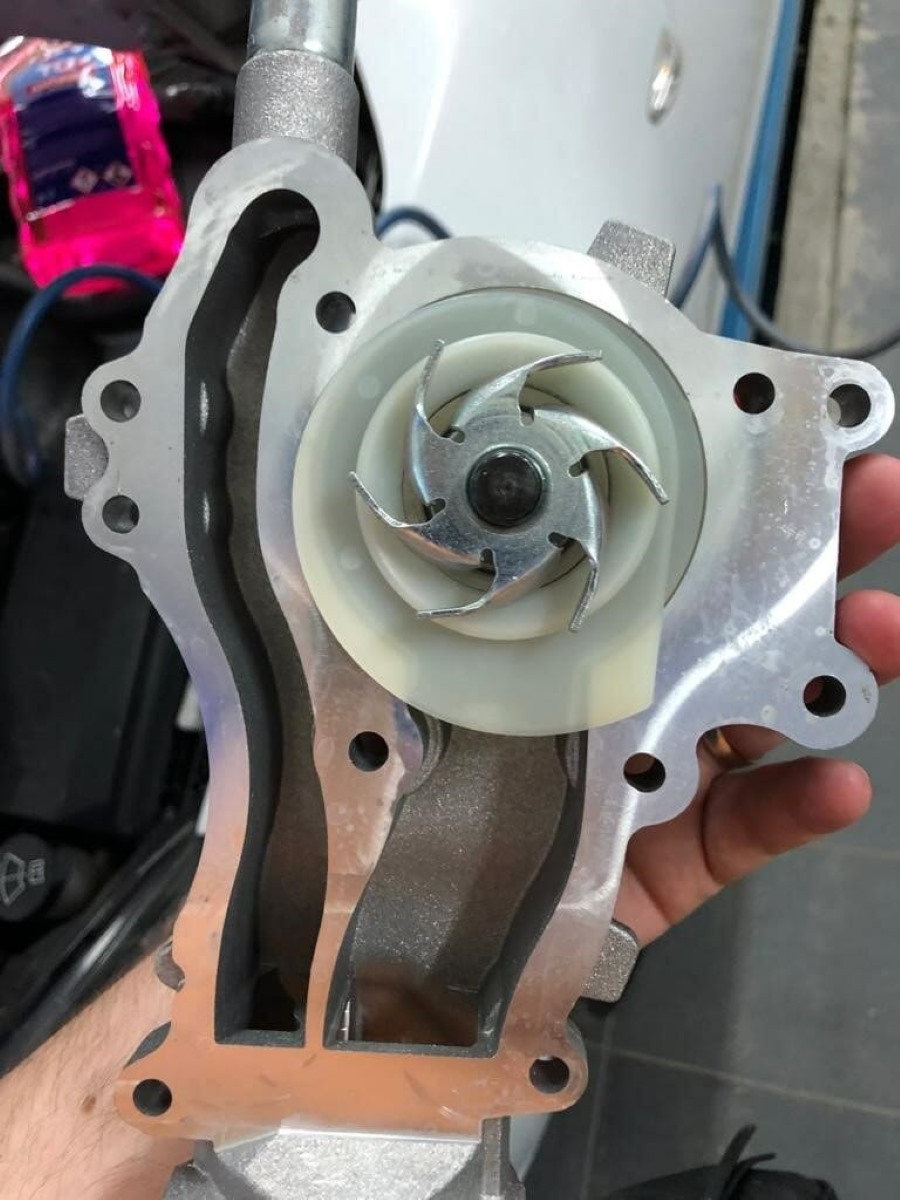
- Faulty Fan or Fan Bearings: If the fan itself is damaged or the fan bearings are worn out, it can create a grinding or rattling noise when it spins.
- Overheating Issues: When your computer’s internal temperature rises, the fan speeds up to cool down the components. In some cases, excessive heat can cause the fan to operate at higher speeds, leading to louder noise.
- Heavy Workload or High CPU Usage: Running resource-intensive tasks or programs that demand a lot of processing power can increase the workload on your CPU, leading to higher fan speeds and noise.
- Incorrect Fan Speed Settings: Sometimes, the fan speed settings in the computer’s BIOS may be set too high, causing the fan to operate at a louder noise level than necessary.
By identifying the root cause of the fan noise, you can then take appropriate actions to address the issue and restore the tranquility of your computer environment. In the next section, we will discuss various solutions to help reduce fan noise effectively.
Dust and Dirt Accumulation
Dust and dirt accumulation is one of the most common causes of fan noise in computers. Over time, the fan blades and vents can accumulate a layer of dust, which can hinder the fan’s rotation and create an unbalanced operation. This leads to increased vibrations and noise.
To address this issue, regular cleaning of the fan and vents is necessary. Here’s a step-by-step guide to help you clean the fan:
- Turn off your computer and unplug it from the power source for safety.
- Open the computer case or access the laptop’s bottom panel to expose the fan.
- Using a can of compressed air, gently blow away the dust and dirt from the fan blades, vents, and surrounding areas. Make sure to hold the can upright to prevent any moisture from entering the system.
- If there are stubborn dust particles or grime, you can use a soft brush or cotton swabs lightly moistened with rubbing alcohol to clean the fan blades and vents, being careful not to apply too much pressure.
- After cleaning, allow the system to dry completely before closing the case or reattaching the panel.
Regularly performing this cleaning routine can help prevent dust buildup and maintain optimal airflow, reducing fan noise and improving overall system performance.
Faulty Fan or Fan Bearings
If your computer’s fan is making a grinding or rattling noise, it could indicate a faulty fan or worn-out fan bearings. Over time, the constant rotation of the fan can cause the bearings to wear down, resulting in a noisy operation.
In such cases, the best solution is to replace the faulty fan or its bearings. Here’s how you can do it:
- Turn off your computer and unplug it from the power source for safety.
- Open the computer case or access the laptop’s bottom panel to locate the fan.
- Identify the type and size of the fan by noting down the model number or measuring its dimensions.
- Find a replacement fan that matches the specifications of the faulty one. You can order a new fan from the computer’s manufacturer or reputable online retailers.
- Once you have the replacement fan, carefully disconnect the power cable and any other connectors attached to the old fan.
- Remove the screws or clips securing the fan in place and gently remove it from the system.
- Install the new fan by connecting the power cable and securing it with the screws or clips.
- Close the computer case or reattach the bottom panel.
- Plug in your computer and turn it on to ensure that the new fan is functioning properly and the noise has been eliminated.
Replacing a faulty fan or its bearings might require some technical skills. If you are not confident in doing it yourself, it is recommended to seek assistance from a professional technician.
By replacing the faulty fan or its bearings, you can restore a quiet and efficient cooling system for your computer.
Overheating Issues
Overheating is a common issue that can cause the fan in your computer to work harder and produce more noise. When the internal components of your computer reach higher temperatures than normal, the fan speeds up in an attempt to dissipate the excess heat and cool down the system.
There are several reasons why your computer may be experiencing overheating issues:
- Dust and Dirt: Dust and dirt can accumulate on the cooling system components, obstructing airflow and causing heat buildup.
- Insufficient Ventilation: If your computer is placed in a confined space or the vents are blocked, it can impede the proper airflow, resulting in increased temperatures.
- Faulty Thermal Paste: The thermal paste, which helps transfer heat between the CPU and the cooler, may need to be replaced if it has dried out or become ineffective.
- Inadequate Cooling System: If your computer’s cooling system, including the fan and heat sink, is not sufficient for the CPU’s power and heat output, it can lead to overheating.
To address overheating issues and reduce fan noise, here are some recommended solutions:
- Clean the Vents and Cooling System: Regularly clean the vents and cooling system using compressed air to remove dust and dirt, allowing for better airflow.
- Ensure Proper Ventilation: Make sure your computer is placed in a well-ventilated area and there are no obstructions that block the vents.
- Replace Thermal Paste: If the thermal paste is dried out or ineffective, consider replacing it to improve heat transfer between the CPU and cooler.
- Upgrade the Cooling System: If your computer’s cooling system is inadequate, you may need to upgrade to a more powerful fan, heat sink, or liquid cooling solution.
By taking these measures, you can effectively manage the temperature of your computer and reduce fan noise caused by overheating.
Read more: Why Does My Attic Fan Make Noise
Heavy Workload or High CPU Usage
Another common cause of fan noise in computers is a heavy workload or high CPU usage. When your computer is performing resource-intensive tasks or running programs that demand a lot of processing power, it puts a significant load on the CPU. This, in turn, generates more heat that needs to be dissipated, leading to increased fan speeds and noise.
To reduce fan noise caused by heavy workload or high CPU usage, you can take the following steps:
- Monitor and Close Unnecessary Programs: Keep an eye on the resource usage of your computer and close any unnecessary programs or processes that are consuming a significant amount of CPU power.
- Optimize Resource Usage: If certain programs are consistently causing high CPU usage, consider optimizing their settings or finding alternatives that are less resource-intensive.
- Upgrade Hardware: If your computer consistently struggles with heavy workloads, it may be worth considering upgrading your CPU or adding more RAM to improve performance and decrease the load on the system.
- Use Task Manager or Activity Monitor: Use the built-in task manager or activity monitor in your operating system to identify processes that are using excessive CPU resources and terminate or prioritize them accordingly.
By managing and optimizing your computer’s CPU usage, you can reduce the workload on the processor and subsequently lower the fan speeds and noise levels.
It is important to note that in some cases, such as running demanding software or performing complex tasks, higher fan speeds and noise may be inevitable. However, by taking these steps, you can minimize unnecessary noise and ensure that your computer operates as efficiently and quietly as possible.
Incorrect Fan Speed Settings
Incorrect fan speed settings in the computer’s BIOS can also contribute to fan noise. Sometimes, the default settings or configurations may set the fan speed higher than necessary, resulting in increased noise levels.
To address this issue, you can manually adjust the fan speed settings in the BIOS to optimize the balance between cooling performance and noise reduction. Here’s how you can do it:
- Access the BIOS settings by restarting your computer and pressing the designated key (usually Del, F2, or F10) during the boot process. Consult your computer’s manual or manufacturer’s website for the specific key for your system.
- Navigate to the section that controls the fan speed or fan control settings. The exact location and terminology may vary depending on your computer’s BIOS version and manufacturer.
- Look for options such as “Fan Speed Control,” “Fan Profile,” or “Smart Fan.” These settings allow you to adjust the fan speed based on temperature thresholds or manually set a specific speed.
- Choose the desired fan speed configuration that provides adequate cooling while keeping the noise levels at an acceptable level.
- Save your changes and exit the BIOS. Your computer will now operate with the adjusted fan speed settings.
It is important to note that manually adjusting the fan speed settings requires some careful consideration. If the fan speed is set too low, it may result in inadequate cooling and potential overheating. On the other hand, if the fan speed is set too high, it may generate unnecessary noise. Finding the right balance is key.
By adjusting the fan speed settings in the BIOS, you can fine-tune the cooling performance of your computer and minimize fan noise without compromising on cooling efficiency.
Check for dust buildup in the fan and clean it using compressed air. If the noise persists, it could be a sign of a failing fan or overheating, so consider getting it checked by a professional.
Solutions to Reduce Fan Noise
Fan noise can be bothersome, but fortunately, there are several solutions that can help you minimize or eliminate it. Here are some effective strategies to reduce fan noise in your computer:
- Cleaning the Fan and Vents: Regularly clean the fan blades and vents to remove dust and dirt accumulation. This allows for better airflow and reduces the fan’s workload, resulting in quieter operation.
- Replacing Faulty Fan or Bearings: If your fan is making grinding or rattling noises, consider replacing the faulty fan or its bearings. This will restore smooth and silent operation.
- Ensuring Proper Ventilation: Make sure your computer is placed in a well-ventilated area, avoiding blocked vents that can impede airflow. Adequate ventilation helps to keep the components cooler and prevents the fan from working excessively.
- Managing CPU Usage and Workload: Monitor and close unnecessary programs that are consuming high CPU resources. Optimizing resource usage reduces the load on the CPU, resulting in lower fan speeds and reduced noise levels.
- Adjusting Fan Speed Settings: Access the BIOS settings and manually adjust the fan speed settings to strike a balance between cooling performance and noise reduction. Experiment with different configurations to find the optimal setting for your system.
Implementing these solutions can significantly reduce fan noise and create a more pleasant computing experience. However, it’s important to note that in some cases, such as during intensive tasks or in high-performance systems, the fan noise may increase temporarily. This is normal and necessary to maintain proper cooling.
If you have attempted these solutions and are still experiencing excessive fan noise, it may be advisable to consult a professional technician or the manufacturer for further assistance. They can provide specialized guidance or diagnose any underlying issues that may be causing the noise.
By taking proactive steps to address fan noise, you can enjoy a quieter and more comfortable computing environment while ensuring optimal performance and system longevity.
Cleaning the Fan and Vents
Regularly cleaning the fan and vents is a crucial step in reducing fan noise and maintaining optimal airflow in your computer. Dust and dirt accumulation on the fan blades and vents can hinder the fan’s rotation, causing it to work harder and create more noise. Here’s a step-by-step guide on how to clean the fan and vents:
- Turn off your computer and unplug it from the power source for safety purposes.
- Open your computer case by removing the screws or latches holding it together. If you have a laptop, consult the manufacturer’s manual or website for instructions on accessing the vents and fan.
- Locate the fan(s) inside your computer. There may be one or more fans depending on the system’s configuration.
- Use a can of compressed air to blow away dust and dirt from the fan blades, vents, and surrounding areas. Hold the can upright and use short bursts of air to prevent any moisture from entering the system.
- If there are stubborn dust particles or grime, you can use a soft brush or a cotton swab lightly moistened with rubbing alcohol to carefully clean the fan blades and vents. Gently wipe away the dirt, taking care not to apply excessive pressure to avoid damaging the components.
- Clean the surrounding areas, including heat sinks and other nearby components, to ensure optimal airflow.
- Allow the system to dry completely before closing the computer case or reattaching the panel.
It is recommended to clean the fan and vents every few months, or more frequently if you live in a dusty environment. By doing so, you can prevent dust buildup, improve airflow, and reduce the fan speed and noise levels.
Remember, cleaning the fan and vents is a simple and effective solution that can significantly reduce fan noise in your computer. Regular maintenance in this regard can prolong the lifespan of your components and maintain optimal performance.
Read more: Why Is My Projector Making Noise
Replacing Faulty Fan or Bearings
If your computer’s fan is making grinding, rattling, or clicking noises, it could indicate a faulty fan or worn-out bearings. Over time, the constant rotation of the fan can cause the bearings to wear down, resulting in noise and potential damage to the fan. In such cases, replacing the faulty fan or its bearings is the recommended solution.
Here’s a step-by-step guide on how to replace a faulty fan or its bearings:
- Turn off your computer and unplug it from the power source for safety reasons.
- Open your computer case or access the laptop’s bottom panel to locate the fan that needs replacement.
- Identify the type and size of the fan by noting down the model number or measuring its dimensions. This information will help you find a suitable replacement fan.
- Order a new fan from the manufacturer or a reputable online retailer. Ensure that the replacement fan matches the specifications of the faulty one.
- Once you have the replacement fan, carefully disconnect the power cable and any other connectors attached to the old fan. Take note of how the cables are plugged in for easy reconnection later.
- Remove the screws or clips securing the fan in place and gently remove it from the system.
- Install the new fan by connecting the power cable and securing it with the screws or clips. Make sure the fan is properly aligned and securely fastened.
- Close the computer case or reattach the bottom panel.
- Plug in your computer and turn it on to ensure that the new fan is functioning properly and the noise has been eliminated.
It’s important to note that the process of replacing a fan or its bearings may vary depending on the specific computer model. Consult your computer’s manual or the manufacturer’s website for detailed instructions tailored to your system.
If you are not confident in replacing the fan yourself, it is advisable to seek assistance from a professional technician. They have the necessary expertise to handle the replacement safely and efficiently.
By replacing a faulty fan or its bearings, you can restore the normal functioning of the cooling system in your computer and enjoy a quieter computing experience.
Ensuring Proper Ventilation
Proper ventilation is essential for maintaining optimal airflow in your computer and preventing excessive fan noise. When your computer is placed in a confined or poorly ventilated space, it can lead to inadequate air circulation and increased temperatures, causing the fan to work harder and create more noise. Here are some steps to ensure proper ventilation:
- Placement: Position your computer in a well-ventilated area, away from walls, obstacles, or other heat sources. This allows for better airflow around the system.
- Clear Vents: Ensure that the vents on your computer case or laptop are clear of any obstructions, such as dust, papers, or other objects. Blocked vents hinder the intake and exhaust of air, disrupting the cooling process.
- Elevate the System: If you’re using a desktop computer, consider placing it on an elevated stand or using rubber feet to create space between the case and the surface it sits on. This allows air to circulate freely underneath the system.
- Use Cooling Pads or Stands: For laptops, using cooling pads or stands with built-in fans can help improve airflow and reduce heat buildup. These accessories provide additional ventilation and prevent the laptop from resting directly on surfaces that can hinder airflow.
- Cable Management: Organize and manage cables inside your computer case to avoid clutter and interference with airflow. Use cable ties or routing channels to secure and route cables away from fans and obstructing vents.
- Regular Cleaning: Regularly clean the vents and fans to remove dust and dirt buildup. Dust can accumulate over time and restrict airflow, leading to higher temperatures and increased fan noise.
By following these steps, you can ensure proper ventilation for your computer, allowing for better airflow and improved cooling performance. This, in turn, helps to reduce the workload on the fan and minimizes fan noise.
Remember, maintaining proper ventilation is an ongoing process. Regularly inspect and clean the vents, and periodically assess the placement of your computer to ensure that it remains in a well-ventilated environment.
Managing CPU Usage and Workload
One of the factors that can contribute to fan noise in computers is a heavy workload or high CPU usage. When your computer is running resource-intensive tasks or programs, it puts strain on the CPU, generating more heat that needs to be dissipated. This can result in increased fan speeds and noise. To effectively manage CPU usage and reduce fan noise, consider the following strategies:
- Monitor and Close Unnecessary Programs: Keep an eye on the programs running on your computer and close any unnecessary ones that are consuming a significant amount of CPU resources. This will help lighten the workload on the CPU and reduce the demand for cooling.
- Optimize Resource Usage: Some programs may have settings that allow you to optimize their resource usage. Adjusting these settings or finding alternative programs with lower resource requirements can help reduce CPU usage and consequently lower fan speeds and noise.
- Upgrade Hardware: If your computer consistently struggles with high CPU usage, it may be worth considering upgrading your hardware, such as the CPU itself or adding more RAM. A more powerful CPU or increased memory can handle higher workloads more efficiently, resulting in lower CPU usage and fan noise.
- Utilize Task Manager or Activity Monitor: Use the built-in task manager or activity monitor in your operating system to identify processes that are consuming excessive CPU resources. From there, you can determine whether to terminate or prioritize certain tasks to reduce CPU usage.
While it is normal for fan speeds to increase temporarily during demanding tasks, managing CPU usage helps keep the fan noise at a tolerable level. By implementing these strategies, you can optimize your computer’s performance and minimize unnecessary noise.
Remember, each computer setup and usage pattern is unique. It is recommended to find the right balance between resource-intensive tasks and noise reduction that suits your specific needs and preferences.
Adjusting Fan Speed Settings
Adjusting the fan speed settings in the BIOS can be an effective way to reduce fan noise without compromising cooling performance. Sometimes, the default settings in the computer’s BIOS may set the fan speed higher than necessary, resulting in increased noise levels. By manually adjusting the fan speed settings, you can find the optimal balance between cooling efficiency and noise reduction.
Here are the steps to adjust the fan speed settings in the BIOS:
- Restart your computer: Save any ongoing work and restart your computer.
- Access the BIOS: During the boot process, press the designated key (usually Del, F2, or F10) to access the BIOS settings. The specific key may vary depending on your computer’s manufacturer and model. Refer to your computer’s manual or the manufacturer’s website for precise instructions.
- Navigate to Fan Control Options: Look for the section in the BIOS that allows you to control the fan speed. The location and terminology may vary depending on the BIOS version and manufacturer.
- Adjust Fan Speed Settings: Depending on your BIOS, you may have different options for controlling the fan speed. You can choose to set fixed fan speeds, enable a fan curve based on temperature thresholds, or adjust the fan speed manually.
- Save and Exit: After making the desired changes, save the settings and exit the BIOS. Your computer will now operate with the adjusted fan speed configuration.
When adjusting the fan speed settings, it’s important to strike a balance. Setting the fan speed too low may result in inadequate cooling and potential overheating, while setting it too high may generate unnecessary noise. Experiment with different configurations and monitor your computer’s temperature under different workloads to find the optimal fan speed setting that keeps noise levels at an acceptable level while ensuring proper cooling.
Keep in mind that not all BIOS versions or computer models offer advanced fan speed control options. If your BIOS does not provide the necessary options, you may need to explore third-party software solutions or hardware fan controllers to adjust the fan speeds.
By adjusting the fan speed settings in the BIOS, you can customize the cooling performance of your computer and find an optimal balance between noise reduction and temperature management.
Read more: Why Is My HVAC Making Noise
Conclusion
Fan noise can be a common annoyance for computer users, but there are several effective solutions to reduce or eliminate it. By addressing the common causes of fan noise, such as dust accumulation, faulty fans or bearings, overheating, high CPU usage, and incorrect fan speed settings, you can achieve a quieter and more comfortable computing experience.
Regularly cleaning the fan and vents helps prevent dust buildup and ensures proper airflow. Replacing faulty fans or worn-out bearings restores smooth and silent operation. Ensuring proper ventilation by placing your computer in a well-ventilated area and keeping the vents clear promotes optimal airflow. Managing CPU usage and workload by closing unnecessary programs, optimizing resource usage, and considering hardware upgrades can reduce the workload on the CPU and subsequently lower fan speeds and noise levels. Additionally, adjusting fan speed settings in the BIOS allows you to find the right balance between cooling efficiency and noise reduction.
It’s important to remember that some fan noise is normal during intensive tasks or in high-performance systems. However, with the appropriate measures in place, you can minimize unnecessary noise and create a more pleasant computing environment.
Whether you’re a casual user or a power user, taking proactive steps to address fan noise not only improves your overall experience but also contributes to the longevity and performance of your computer.
So, don’t let fan noise disrupt your workflow or enjoyment. Implement these solutions and enjoy a quieter, more efficient, and more enjoyable computing environment.
Frequently Asked Questions about Why Is My Computer Making A Fan Noise
Was this page helpful?
At Storables.com, we guarantee accurate and reliable information. Our content, validated by Expert Board Contributors, is crafted following stringent Editorial Policies. We're committed to providing you with well-researched, expert-backed insights for all your informational needs.


0 thoughts on “Why Is My Computer Making A Fan Noise”