Articles
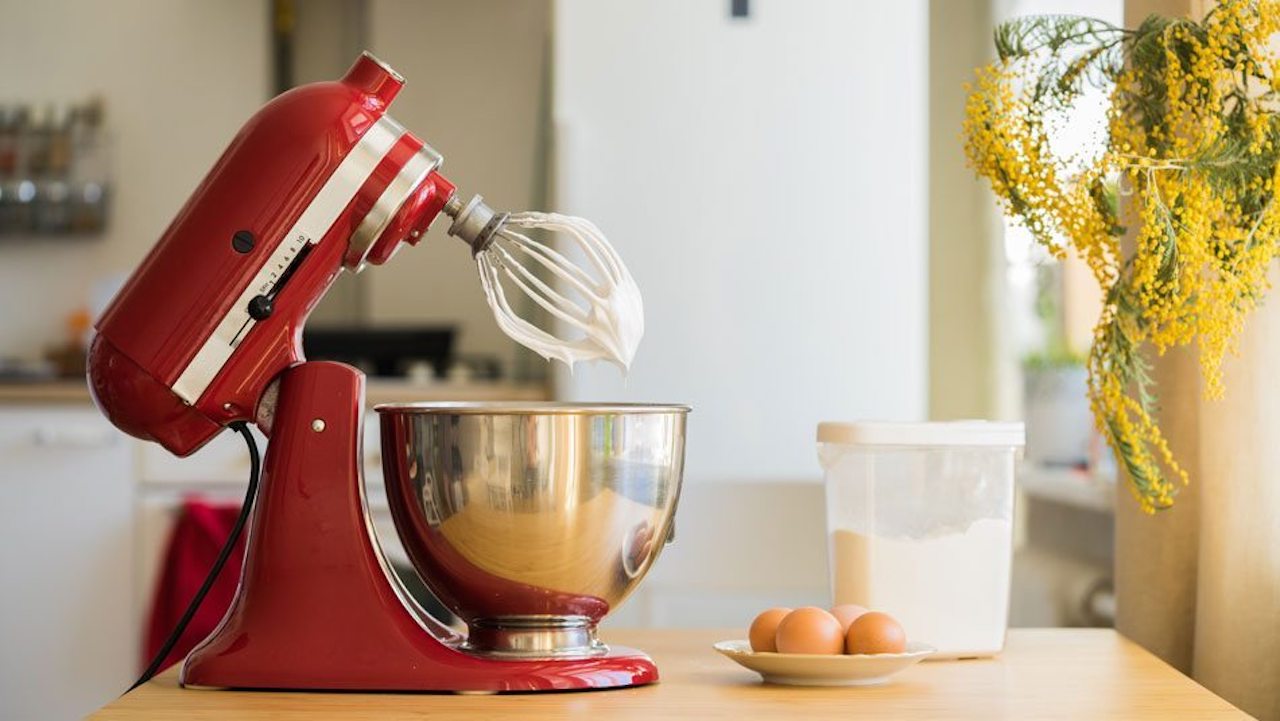
Why Is My Kitchenaid Mixer Making Noise
Modified: August 25, 2024
Discover the reasons behind your noisy Kitchenaid mixer and learn how to fix it with our informative articles.
(Many of the links in this article redirect to a specific reviewed product. Your purchase of these products through affiliate links helps to generate commission for Storables.com, at no extra cost. Learn more)
Introduction
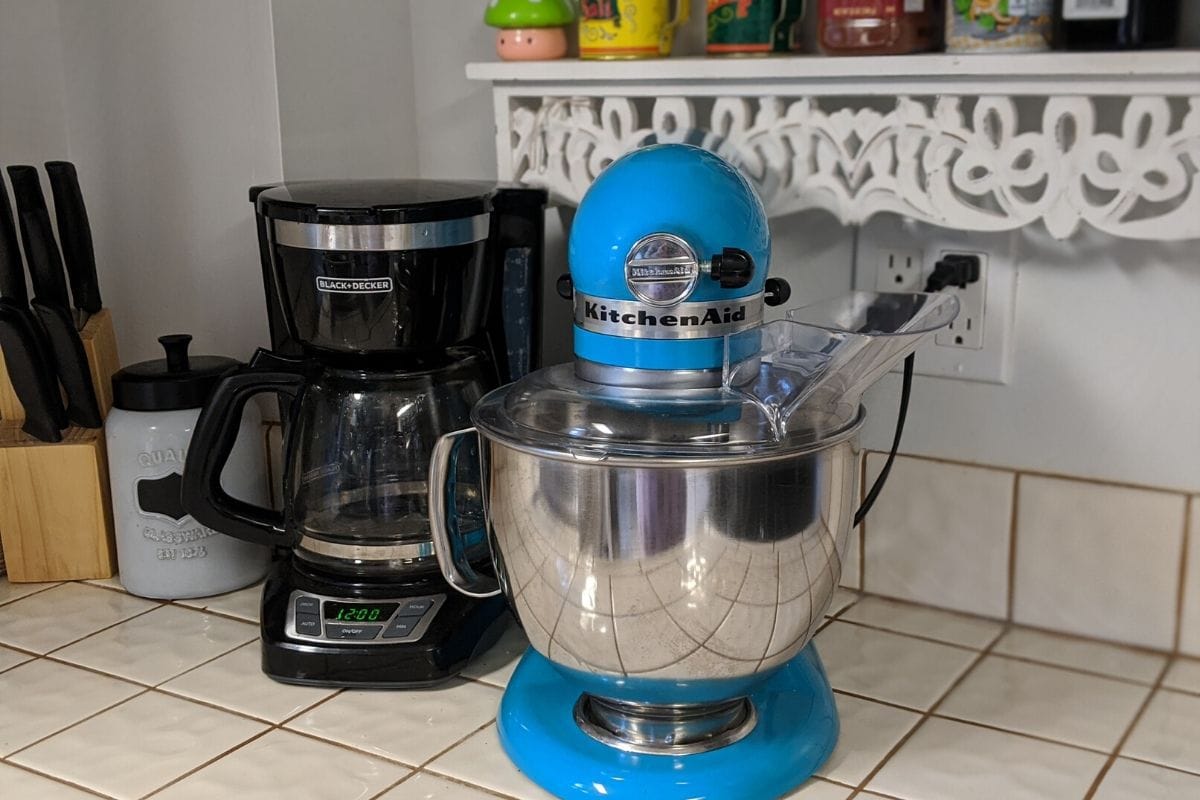
A KitchenAid mixer is a valuable and versatile tool in any kitchen. It makes baking tasks much easier, whether you’re whipping up a batch of cookies or kneading bread dough. However, what do you do when your trusty KitchenAid mixer starts making strange and loud noises? Don’t panic! In this article, we will explore the common causes of a noisy KitchenAid mixer and provide you with practical solutions to fix the problem.
It’s essential to address any unusual noises coming from your KitchenAid mixer promptly. Ignoring the noise can lead to further damage and even breakage of the machine. By understanding the causes behind the noise, you can take the necessary steps to rectify the issue and enjoy a quieter and more efficient mixing experience.
Key Takeaways:
- Keep your KitchenAid mixer quiet by replacing worn-out motor brushes and repairing or replacing faulty gears. Regular maintenance and avoiding overloading the mixing bowl are essential for a quieter and more efficient mixing experience.
- Address noisy KitchenAid mixer issues by tightening attachments and performing regular maintenance. Avoid overloading the mixing bowl and follow manufacturer’s guidelines for quieter and more efficient mixing.
Read more: Why Is My Kitchenaid Mixer Bouncing
Common Causes of KitchenAid Mixer Noise
When your KitchenAid mixer is making noise, there could be several potential reasons. Here are some common culprits:
- Worn Out Motor Brushes: Over time, the motor brushes inside the mixer can become worn out, resulting in a noisy operation. These brushes are responsible for conducting electricity and powering the mixer’s motor. If they are worn or damaged, they can cause the motor to make grinding or squealing sounds.
- Faulty Gears: The KitchenAid mixer relies on gears to transfer power from the motor to the attachments. If these gears become damaged or worn, they can create loud clunking or grinding noises. The gears may need lubrication or replacement to resolve the issue.
- Loose Attachments: Sometimes, the noise is not coming from the mixer itself, but from loose attachments. Check if all the attachments, such as the beater, whisk, or dough hook, are securely attached to the mixer’s hub. Loose attachments can create rattling or scraping sounds.
- Improper Maintenance: Lack of regular maintenance can also contribute to a noisy KitchenAid mixer. If the moving parts inside the mixer are not cleaned or lubricated regularly, they can become noisy and less efficient. Accumulated debris or lack of lubrication can cause grinding or squeaking noises.
- Overloaded Mixing Bowl: KitchenAid mixers have a specified capacity for each type of dough or batter. If you overload the mixing bowl with too much mixture or dense dough, the motor may strain, causing noise. Be mindful of the recommended maximum capacity to avoid overloading the mixer.
Identifying the specific cause of the noise will help you determine the appropriate solution. In the next section, we will discuss how to fix a noisy KitchenAid mixer and get it back to its quiet and efficient operation.
Worn Out Motor Brushes
One of the common causes of a noisy KitchenAid mixer is worn-out motor brushes. The motor brushes are small carbon blocks that conduct electricity to power the motor. Over time, these brushes can become worn and start to create friction, resulting in a grinding or squealing noise.
To fix this issue, you will need to replace the motor brushes. Here’s how:
- Unplug the mixer: Before you start any repairs, ensure that the mixer is unplugged from the power source to avoid any accidents.
- Remove the brush covers: Locate the brush covers on the sides of the mixer near the motor housing. Use a screwdriver to gently remove the brush covers.
- Inspect the motor brushes: Take a close look at the motor brushes to check for any signs of wear or damage. If the brushes appear significantly worn or have broken bristles, they need to be replaced.
- Replace the motor brushes: Purchase a new set of motor brushes compatible with your KitchenAid mixer model. Align the brushes correctly in their respective slots and secure them in place.
- Reattach the brush covers: Once the new motor brushes are installed, reattach the brush covers by screwing them back into place.
- Test the mixer: Plug the mixer back in and turn it on to see if the noise has been resolved. If the noise persists, you may need to investigate other potential causes.
By replacing the worn-out motor brushes, you can restore the smooth and quiet operation of your KitchenAid mixer. However, if the noise continues even after replacing the brushes, it’s advisable to explore other possible causes and solutions.
Faulty Gears
If your KitchenAid mixer is making clunking or grinding noises, the issue may lie with faulty gears. The gears inside the mixer are responsible for transferring power from the motor to the attachments, ensuring smooth and efficient mixing.
To address this problem, follow these steps:
- Unplug the mixer: Before working on any repairs, always make sure to disconnect the mixer from the power source.
- Inspect the gears: Carefully examine the gears inside the motor housing for any signs of wear, breakage, or misalignment. Damaged or worn gears can cause noise during operation.
- Lubricate the gears: If the gears appear to be in good condition, but noise persists, they may need lubrication. Use a food-grade lubricant, such as silicone-based grease, to apply a small amount to the gears. This helps reduce friction and quietens the operation.
- Replace faulty gears: In more extreme cases, where the gears are visibly damaged or worn, they may need to be replaced. Consult the KitchenAid user manual or contact customer support for instructions on how to obtain the correct replacement gears for your specific mixer model.
- Reassemble the mixer: Once the lubrication or replacement of gears is complete, carefully put the mixer back together, ensuring all parts are securely in place.
- Test the mixer: Plug the mixer in and turn it on to see if the noise issue has been resolved. The mixer should now operate smoothly and quietly.
Addressing faulty gears in your KitchenAid mixer can significantly improve its performance and reduce noise levels. Proper maintenance and lubrication of the gears, along with timely replacement when necessary, will help ensure years of quality mixing.
Loose Attachments
If you hear rattling or scraping noises coming from your KitchenAid mixer, the issue may be due to loose attachments. Over time, the vibrations from mixing can cause the attachments, such as the beater, whisk, or dough hook, to become loose, resulting in noisy operation.
Here’s how you can address this problem:
- Turn off and unplug the mixer: Before inspecting the attachments, make sure the mixer is turned off and unplugged to ensure your safety.
- Tighten the attachments: Gently wiggle each attachment to check for any movement or looseness. If you notice any looseness, use the attachment’s screw or knob to tighten it securely onto the mixer’s hub. Ensure it is fastened snugly to minimize any potential noise.
- Check for debris: While checking the attachments, also look for any accumulated debris or food particles in the attachment area or the hub. Use a clean, damp cloth or a soft brush to remove any debris and ensure a proper fit.
- Inspect the attachments: Examine the attachments themselves for any signs of damage, such as cracks or excessive wear. If any attachments are damaged, they may need to be replaced with new ones to ensure smooth and quiet operation.
- Reattach and test: After tightening the attachments and ensuring they are clean, reattach them to the mixer’s hub. Plug the mixer back in, turn it on, and listen for any abnormal noise. If the noise has been resolved, you have successfully addressed the issue.
Regularly checking and tightening the attachments not only eliminates noise but also ensures a secure and efficient mixing process. It’s good practice to inspect the attachments before each use to prevent possible issues from arising.
Read more: Why Is My HVAC Making Noise
Improper Maintenance
Improper maintenance can contribute to a noisy KitchenAid mixer. Over time, the moving parts inside the mixer can accumulate dirt, debris, and old grease, leading to increased friction and noise during operation. Regular maintenance is crucial to keep your mixer running smoothly and quietly.
Follow these steps to properly maintain your KitchenAid mixer:
- Unplug the mixer: Before starting any maintenance tasks, make sure the mixer is unplugged and turned off to ensure safety.
- Clean the exterior: Use a soft, damp cloth to wipe down the exterior of the mixer, removing any accumulated dust or food particles. Pay attention to the crevices and hard-to-reach areas.
- Clean the attachments: Remove the attachments, such as the beater, whisk, or dough hook, and wash them with warm, soapy water. Rinse thoroughly and dry them before reattaching them to the mixer.
- Remove and clean the mixing bowl: Take out the mixing bowl and clean it with warm, soapy water. Scrub away any residue, and dry the bowl completely before reinserting it into the mixer.
- Lubricate the moving parts: Apply a small amount of food-grade lubricant, such as mineral oil or petroleum jelly, to the moving parts, such as the planetary or transmission gears. This lubrication helps reduce friction and noise. Be sure to follow the manufacturer’s instructions regarding lubrication.
- Inspect and clean the motor housing: Carefully remove the motor housing cover and inspect it for any dirt or debris. Use a soft brush or cloth to gently clean the inside of the motor housing.
- Reassemble and test: Once you have completed the cleaning and lubrication, reassemble the mixer and plug it back in. Turn it on to ensure it operates smoothly and quietly, free of any noise.
Maintaining your KitchenAid mixer regularly is essential for its longevity and performance. By keeping the moving parts clean and lubricated, you can reduce noise and enjoy a smooth mixing experience every time.
Overloaded Mixing Bowl
Overloading the mixing bowl of your KitchenAid mixer can cause strain on the motor and result in excessive noise during operation. Each KitchenAid mixer has a specified capacity for different types of batters or dough, and exceeding that capacity can lead to a noisy mixing experience.
Here are some tips to avoid overloading the mixing bowl:
- Refer to the manufacturer’s guidelines: Familiarize yourself with the recommended capacity for your specific KitchenAid mixer model. The user manual usually provides information on the maximum amount of ingredients the mixer can handle.
- Measure ingredients accurately: Use measuring cups or a kitchen scale to ensure precise measurements of the ingredients. This helps you avoid adding excessive amounts of mixture to the mixing bowl.
- Split the mixture: If you need to make a large batch, consider dividing it into smaller portions and mix them in separate rounds. This allows for proper mixing without overloading the mixer.
- Monitor the mixing process: Keep an eye on the mixing progress and the load on the motor. If you notice the mixer struggling or making excessive noise during operation, stop the mixer and reduce the amount of mixture in the bowl.
- Use the correct speed setting: Adjust the speed setting of your mixer according to the ingredients and the type of mixing required. Higher speeds may be necessary for dense dough, while lower speeds are suitable for lighter batters. Using the correct speed setting helps prevent strain on the motor.
By adhering to the recommended capacity and closely monitoring the mixing process, you can prevent overloading the mixing bowl of your KitchenAid mixer. This ensures quieter operation and prolongs the lifespan of your appliance.
Check to make sure the beater is not hitting the sides of the bowl. Adjust the height of the beater or the position of the bowl to eliminate the noise.
How to Fix a Noisy KitchenAid Mixer
Dealing with a noisy KitchenAid mixer can be frustrating, but fortunately, there are several solutions to address the issue. By following these steps, you can restore your mixer to its quiet and efficient operation:
- Identify the specific cause: Determine the source of the noise by considering the common causes mentioned earlier, such as worn-out motor brushes, faulty gears, loose attachments, improper maintenance, or overloading of the mixing bowl.
- Replace worn-out motor brushes: If the noise is due to worn-out motor brushes, you will need to purchase a new set of brushes compatible with your mixer model. Follow the instructions to replace the brushes and secure them properly.
- Repair or replace faulty gears: In case of faulty gears, lubrication may solve the problem. Apply food-grade lubricant to the gears following the manufacturer’s recommendations. If the gears are visibly damaged or worn, they will need to be replaced with the appropriate replacements for your specific mixer model.
- Tighten loose attachments: If the noise is caused by loose attachments, simply tighten them securely onto the mixer’s hub. Ensure a snug fit to eliminate any rattling or scraping sounds.
- Perform regular maintenance: Keep your KitchenAid mixer in good condition by practicing regular maintenance. Clean the mixer’s exterior, attachments, and mixing bowl after each use. Lubricate the moving parts as recommended, and inspect the motor housing for any dirt or debris.
- Avoid overloading the mixing bowl: Follow the manufacturer’s guidelines regarding the maximum capacity of your mixer. Measure ingredients accurately and split large batches if necessary to avoid overloading the mixing bowl.
It’s important to note that if the noise persists after attempting these solutions, it may be best to seek professional assistance. Contact KitchenAid’s customer support or consult a repair technician who specializes in KitchenAid mixers for further evaluation and repair.
By addressing the specific cause of the noise and implementing proper maintenance, you can enjoy a quieter and more efficient mixing experience with your KitchenAid mixer for years to come.
Replace Motor Brushes
If your KitchenAid mixer is making a grinding or squealing noise, worn-out motor brushes could be the culprit. Motor brushes are small carbon blocks that conduct electricity to power the motor. Over time, these brushes can become worn and create friction, resulting in noisy operation.
To replace the motor brushes, follow these steps:
- Ensure the mixer is unplugged: Before you begin any repairs, make sure the mixer is unplugged from the power source to prevent any accidents.
- Locate the motor brush covers: The motor brushes are typically located on both sides of the mixer near the motor housing. They are covered with protective caps, so you will need to remove them to access the brushes.
- Remove the motor brush covers: Use a screwdriver or a small tool to gently pry off the brush covers. Be careful not to damage the covers or the surrounding area.
- Inspect the motor brushes: Take a close look at the motor brushes to see if they are worn down or damaged. Worn-out brushes will appear shorter and have frayed or chipped bristles.
- Remove the old brushes: Carefully pull out the old motor brushes from their slots. You may need to wiggle them a bit to loosen them if they are stuck. Note the positioning of the brushes as you will need to install the new ones in the same way.
- Install the new motor brushes: Insert the new motor brushes into the slots in the same orientation as the old ones. Make sure they are secure and properly inserted.
- Replace the brush covers: Once the new motor brushes are in place, snap the brush covers back onto the mixer. Ensure that they are securely and correctly positioned.
- Test the mixer: Plug the mixer back in and turn it on to test if the noise has been eliminated. If the noise persists, there may be another underlying issue that needs to be addressed.
By replacing the worn-out motor brushes, you can restore smooth and quiet operation to your KitchenAid mixer. If you are unsure about replacing the brushes yourself, or if the noise continues after replacement, it is recommended to seek professional assistance or contact KitchenAid customer support for further guidance.
Read more: Why Is My Projector Making Noise
Repair or Replace Gears
If your KitchenAid mixer is making clunking or grinding noises, the gears may be the culprit. The gears in a KitchenAid mixer are responsible for transferring power from the motor to the attachments, ensuring smooth and efficient operation. Over time, these gears can become worn or damaged, resulting in noisy operation.
To address the issue of faulty gears, here are the steps you can take:
- Unplug the mixer: Before starting any repairs, ensure that the mixer is unplugged from the power source to prevent any accidents.
- Inspect the gears: Carefully examine the gears inside the motor housing to check for any signs of wear, damage, or misalignment. Look for chipped or broken teeth, excessive wear, or any visible issues.
- Apply lubrication: If the gears appear to be in good condition but are still causing noise, applying lubrication may help. Use a food-grade lubricant recommended by the manufacturer and apply a small amount to the gears. Be sure to follow the manufacturer’s instructions for lubrication.
- Replace faulty gears: If the gears are visibly damaged or worn beyond repair, they will need to be replaced. Contact KitchenAid customer support or consult a professional technician who specializes in KitchenAid mixers to obtain the correct replacement gears for your specific model.
- Follow the replacement process: If you choose to replace the gears yourself, refer to the KitchenAid mixer’s user manual for detailed instructions on the replacement process. Carefully follow the steps outlined to ensure a proper and successful replacement.
- Reassemble the mixer: Once the gears have been repaired or replaced, carefully reassemble the mixer, ensuring all parts are properly aligned and secured.
- Test the mixer: Plug the mixer back in and turn it on to see if the noise issue has been resolved. The mixer should now operate smoothly and quietly.
If you are not comfortable performing the gear repair or replacement yourself, it is recommended to seek professional assistance or contact KitchenAid customer support for guidance. They can provide the necessary support and ensure that the repairs are done correctly.
Tighten Attachments
If your KitchenAid mixer is making rattling or scraping noises, the issue may be due to loose attachments. Over time, the vibrations from mixing can cause the attachments, such as the beater, whisk, or dough hook, to become loose, resulting in a noisy operation.
To address this problem, follow these steps to tighten the attachments:
- Turn off and unplug the mixer: Before inspecting the attachments, ensure that the mixer is turned off and unplugged to ensure safety.
- Inspect the attachments: Gently wiggle each attachment to check for any movement or looseness. If you notice any attachments that are loose, proceed to the next step.
- Tighten the attachments: Using the appropriate screw or knob, tighten the attachments securely onto the mixer’s hub. Ensure that they are fastened snugly to eliminate any potential noise.
- Check for debris: While inspecting the attachments, also check for any accumulated debris or food particles in the attachment area or the hub. Use a clean, damp cloth or a soft brush to remove any debris and ensure a proper fit.
- Inspect the attachments: Take a closer look at the attachments themselves for any signs of damage, such as cracks or excessive wear. If any attachments are damaged, they may need to be replaced to ensure smooth and quiet operation.
- Reattach and test: After tightening the attachments and ensuring they are clean, reattach them to the mixer’s hub. Plug the mixer back in, turn it on, and listen for any abnormal noise. If the noise has been resolved, you have successfully addressed the issue.
Regularly checking and tightening the attachments not only eliminates noise but also ensures a secure and efficient mixing process. It’s good practice to inspect the attachments before each use to prevent any potential issues from arising. If the noise persists even after tightening the attachments or replacing damaged ones, it is advisable to seek professional assistance or contact KitchenAid customer support for further guidance.
Perform Regular Maintenance
Regular maintenance is key to keeping your KitchenAid mixer in optimal condition and ensuring smooth and quiet operation. Lack of maintenance can contribute to increased noise and decreased efficiency. By following these maintenance tips, you can prevent potential issues and enjoy a quieter mixing experience:
- Unplug the mixer: Before starting any maintenance tasks, always make sure the mixer is unplugged from the power source for safety.
- Clean the exterior: Use a soft, damp cloth to wipe down the exterior of the mixer, removing any accumulated dust or food particles. Pay attention to all crevices and hard-to-reach areas.
- Clean the attachments: Remove the attachments, such as the beater, whisk, or dough hook, and wash them with warm, soapy water. Rinse them thoroughly and dry them before reattaching them to the mixer.
- Remove and clean the mixing bowl: Take out the mixing bowl and clean it with warm, soapy water. Scrub away any residue, and dry the bowl completely before reinserting it into the mixer.
- Lubricate the moving parts: Apply a small amount of food-grade lubricant, such as mineral oil or petroleum jelly, to the moving parts of the mixer. This includes the planetary or transmission gears and any other areas that require lubrication. Be sure to follow the manufacturer’s instructions on lubrication.
- Inspect and clean the motor housing: Carefully remove the motor housing cover and inspect it for any dirt or debris. Use a soft brush or cloth to gently clean the inside of the motor housing. Ensure it is free from any obstructions that could affect the mixer’s performance and noise level.
- Reassemble the mixer: Once you have completed the cleaning and lubrication, reassemble the mixer, ensuring all parts are securely in place.
- Test the mixer: Plug the mixer back in and turn it on to ensure it operates smoothly and quietly, free of any noise. If you notice any ongoing issues or unusual noise, further investigation or professional assistance may be required.
Performing regular maintenance on your KitchenAid mixer not only reduces noise but also extends its lifespan. By keeping the moving parts clean, lubricated, and well-maintained, you can enjoy many years of trouble-free operation. Refer to the user manual for additional maintenance recommendations specific to your mixer model, and contact KitchenAid customer support if you have any questions or concerns.
Avoid Overloading the Mixing Bowl
Overloading the mixing bowl of your KitchenAid mixer can lead to strain on the motor, which can result in excessive noise during operation. Each KitchenAid mixer has a specific capacity for different types of batters or doughs, and exceeding that capacity can cause a noisy mixing experience.
To avoid overloading the mixing bowl and minimize noise, follow these tips:
- Refer to the manufacturer’s guidelines: Familiarize yourself with the recommended capacity for your specific KitchenAid mixer model. The user manual usually provides information on the maximum amount of ingredients the mixer can handle.
- Measure ingredients accurately: Use measuring cups or a kitchen scale to ensure precise measurements of the ingredients. This helps you avoid adding excessive amounts of mixture to the mixing bowl.
- Split the mixture: If you need to make a large batch, consider dividing it into smaller portions and mix them in separate rounds. This allows for proper mixing without overloading the mixer.
- Monitor the mixing process: Keep an eye on the mixing progress and the load on the motor. If you notice the mixer struggling or making excessive noise during operation, stop the mixer and reduce the amount of mixture in the bowl. Resume mixing once the load is at a manageable level.
- Use the correct speed setting: Adjust the speed setting of your mixer according to the ingredients and the type of mixing required. Higher speeds may be necessary for dense dough, while lower speeds are suitable for lighter batters. Using the correct speed setting helps prevent strain on the motor and reduces noise.
Following these guidelines will help you avoid overloading the mixing bowl and reduce excessive noise during mixing. It’s important to note that overloading the mixer can not only create noise but also affect the performance and longevity of the machine. Adhering to the recommended capacity and using the appropriate speed settings will result in quieter and more efficient mixing sessions with your KitchenAid mixer.
Read more: Why Does My Kitchenaid Mixer Wobble
Conclusion
A noisy KitchenAid mixer can be a frustrating experience, but by identifying the cause and implementing the appropriate solutions, you can enjoy a quieter and more efficient mixing process.
In this article, we explored the common causes of a noisy KitchenAid mixer, including worn-out motor brushes, faulty gears, loose attachments, improper maintenance, and overloading of the mixing bowl. We discussed the steps to address each issue, such as replacing worn-out motor brushes, repairing or replacing faulty gears, tightening attachments, performing regular maintenance, and avoiding overloading the mixing bowl.
Regular maintenance is crucial to keep your KitchenAid mixer in optimal condition. Cleaning the exterior, attachments, and mixing bowl, lubricating the moving parts, and inspecting the motor housing are essential steps to ensure smooth and quiet operation. Additionally, measuring ingredients accurately, splitting larger batches, and using the correct speed settings help prevent overloading the mixer and minimize noise.
If the noise persists even after following the suggested solutions, it is advisable to seek professional assistance or contact KitchenAid customer support for further guidance.
By addressing and resolving the causes of the noise, you can restore your KitchenAid mixer to its quiet operation, allowing you to enjoy the baking process without any distractions. With proper care and maintenance, your KitchenAid mixer will continue to be a valuable and reliable tool in your kitchen for years to come.
Frequently Asked Questions about Why Is My Kitchenaid Mixer Making Noise
Was this page helpful?
At Storables.com, we guarantee accurate and reliable information. Our content, validated by Expert Board Contributors, is crafted following stringent Editorial Policies. We're committed to providing you with well-researched, expert-backed insights for all your informational needs.


0 thoughts on “Why Is My Kitchenaid Mixer Making Noise”