Articles
How To Make A Ceiling Fan Smart
Modified: January 6, 2024
Upgrade your ceiling fan with this informative article. Learn how to turn your standard fan into a smart one, controlling it from your phone or smart home system.
(Many of the links in this article redirect to a specific reviewed product. Your purchase of these products through affiliate links helps to generate commission for Storables.com, at no extra cost. Learn more)
Introduction
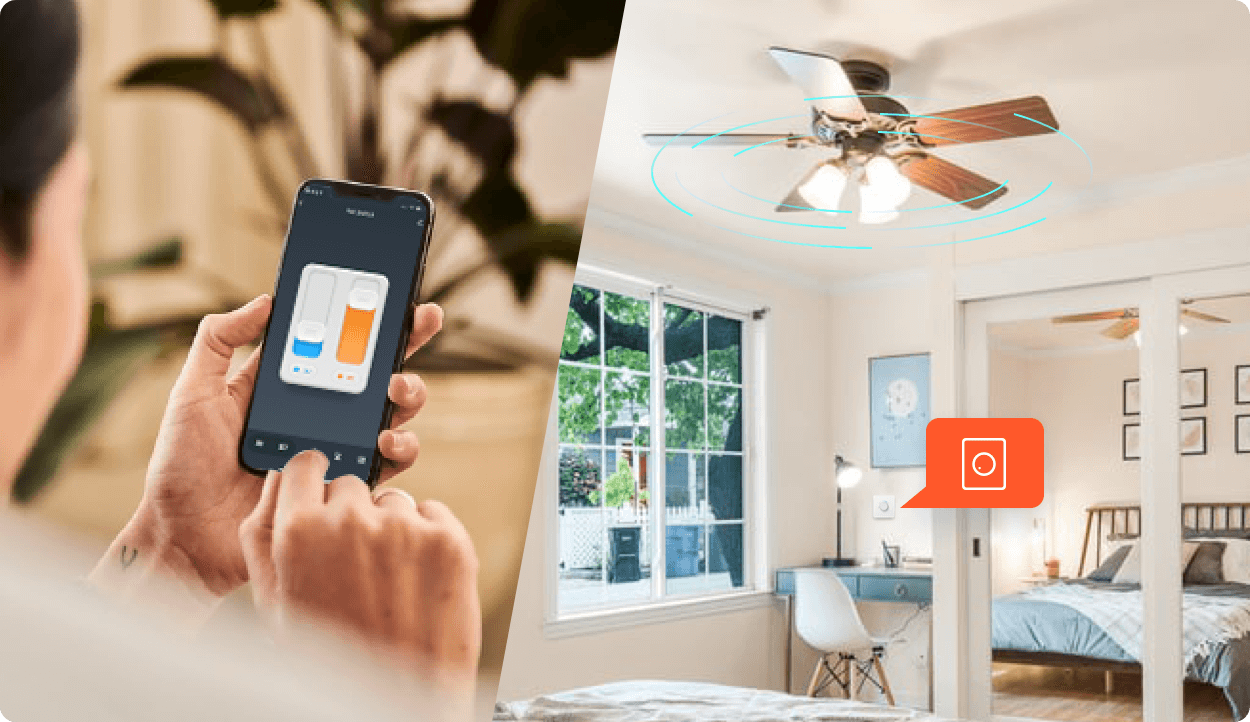
Every day, our homes are becoming increasingly connected and intelligent. From smart thermostats to voice-controlled assistants, homeowners now have the ability to automate and control their living spaces with ease. One area that often gets overlooked in the realm of smart home technology is the humble ceiling fan. While ceiling fans serve as a practical and energy-efficient way to cool and circulate air in a room, they are often left out of the smart home equation.
However, with the right tools and know-how, you can easily transform your regular ceiling fan into a smart one. By making your ceiling fan smart, you will gain the ability to control its speed, direction, and even set timers and schedules using your smartphone or voice commands. No more reaching for the pull chain or fumbling for a remote control; your ceiling fan will be at your command at all times.
In this article, we will guide you through the process of making a ceiling fan smart. We will cover the tools and materials you will need, step-by-step instructions on how to install a smart fan controller, and how to connect it to your smart home system. So let’s dive in and bring your ceiling fan into the future!
Key Takeaways:
- Transform your regular ceiling fan into a smart one to enjoy convenient control, energy efficiency, and seamless integration with your smart home ecosystem. Elevate your comfort and enhance your living experience with a smart ceiling fan.
- Prioritize safety, follow manufacturer’s instructions, and regularly update firmware and app to ensure optimal performance of your smart ceiling fan. Enjoy the convenience, energy savings, and comfort brought by your new smart home addition.
Read also: 12 Best Smart Ceiling Fan for 2024
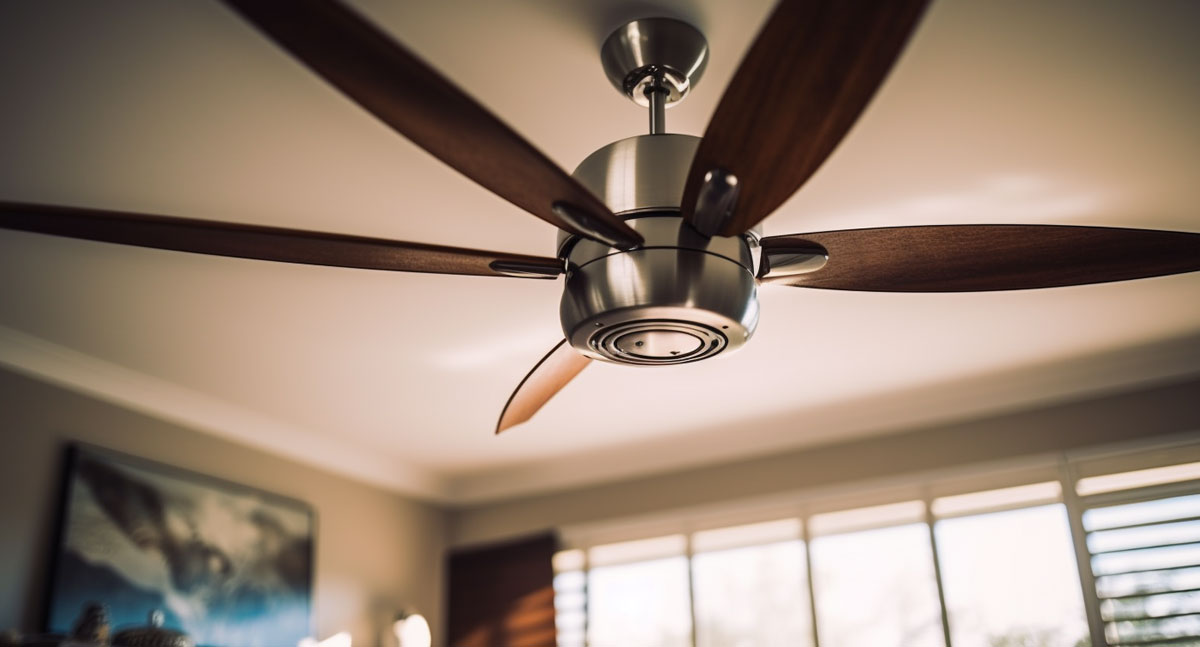
What is a Smart Ceiling Fan
A smart ceiling fan is a technologically advanced version of a traditional ceiling fan. It is equipped with built-in Wi-Fi or Bluetooth connectivity, allowing it to be controlled remotely using a smartphone, smart home hub, or voice-assistant devices such as Amazon Echo or Google Home. With a smart ceiling fan, you can easily adjust its speed, change the direction of rotation, and even set schedules and timers.
Most smart ceiling fans come with their own companion apps, which provide a user-friendly interface for controlling various aspects of the fan’s functionality. These apps often include features like adjustable speed settings, breeze mode, sleep mode, and even integration with other smart home devices.
One of the most significant advantages of a smart ceiling fan is the convenience it offers. Instead of having to use a pull chain or a remote control to adjust the fan settings, you can simply use your smartphone or voice commands to control the fan from anywhere in your home.
Another benefit of a smart ceiling fan is its energy-saving capabilities. Many smart fans have sensors that can detect room occupancy, temperature, and humidity levels to automatically adjust the fan speed and airflow. This ensures that the fan operates at an optimal level, reducing energy consumption and saving you money on your utility bills.
Additionally, smart ceiling fans can be integrated into your existing smart home ecosystem. They can be synchronized with other devices such as smart thermostats, lighting systems, and motion sensors, allowing for seamless automation and coordination between different aspects of your home. For example, you can set up your smart fan to turn on when the temperature rises above a certain threshold or to turn off when there is no one in the room.
Overall, a smart ceiling fan offers convenience, energy efficiency, and the ability to integrate into your smart home setup. By upgrading your existing ceiling fan with smart technology, you can enjoy a more comfortable and efficient living environment while adding a touch of modernity to your home.
Why Should You Make Your Ceiling Fan Smart
Turning your regular ceiling fan into a smart one offers numerous benefits that can enhance your comfort, convenience, and energy efficiency. Here are some compelling reasons why you should consider making your ceiling fan smart:
1. Convenience and Ease of Control
With a smart ceiling fan, you can have complete control over its settings using your smartphone or voice commands. No more searching for the remote control or getting up to adjust the fan’s speed. You can effortlessly change the fan’s settings from the comfort of your couch or bed.
2. Energy Efficiency
Smart ceiling fans often come with energy-saving features that can help lower your energy consumption. These fans can automatically adjust their speed and airflow based on room occupancy, temperature, and humidity levels. By optimizing the fan’s operation, you can reduce your energy usage and save money on your electricity bills.
Read more: How To Make Ceiling Fan Faster
3. Integration with Smart Home Ecosystem
By making your ceiling fan smart, you can integrate it into your existing smart home ecosystem. This means you can synchronize it with other devices in your home, such as smart thermostats, lighting systems, and motion sensors. For example, you can set up your fan to turn on when the temperature rises or to coordinate its operation with your lighting system.
4. Remote Accessibility
With a smart ceiling fan, you can control the fan’s settings even when you are away from home. This is particularly useful if you want to turn the fan on before you arrive home to have a comfortable environment waiting for you. By using the companion app on your smartphone, you can easily control the fan’s settings from anywhere with an internet connection.
5. Schedule and Automation
A smart ceiling fan allows you to create schedules and automate its operation. You can set specific times for the fan to turn on, adjust the speed, or change the rotation direction. This is especially useful if you follow a routine or want the fan to operate according to your preferred settings at different times of the day.
6. Improved Comfort
A smart ceiling fan gives you the ability to fine-tune its settings according to your comfort preferences. You can adjust the fan’s speed to your liking or activate features like breeze mode or sleep mode for a more soothing airflow. This level of customization ensures that you can enjoy optimal comfort in any season.
Overall, transforming your regular ceiling fan into a smart one offers a plethora of advantages. From the convenience of control to energy efficiency and integration with your smart home ecosystem, making your ceiling fan smart is a worthwhile investment that can elevate your comfort and enhance your daily living experience.
Read more: Who Makes The Best Ceiling Fans
Tools and Materials Needed
To successfully make your ceiling fan smart, you will need the following tools and materials:
- Smart ceiling fan kit: Look for a kit that is compatible with your existing ceiling fan. This kit will include a smart fan controller and any necessary accessories.
- Screwdriver: A Phillips-head screwdriver will be needed to remove the existing fan controller and install the smart fan controller.
- Wire cutter/stripper: This tool will be used to cut and strip the wires during the installation process.
- Electrical tape: Use electrical tape to secure and insulate the wire connections.
- Wire connectors: These connectors are used to join wires together securely.
- Ladder or step stool: To safely reach and access your ceiling fan, a ladder or step stool will be necessary.
- Smartphone or tablet: You will need a smartphone or tablet to control and set up the smart ceiling fan.
- Wire nuts: These are used to secure the connections between wires.
- Voltage tester: A voltage tester is used to ensure that the power to the ceiling fan is turned off before beginning the installation process.
It is important to ensure that you have all the necessary tools and materials before starting the installation process. This will help make the process smoother and more efficient, preventing any delays or interruptions.
Additionally, always refer to the specific instructions provided with the smart ceiling fan kit, as they may vary slightly depending on the manufacturer. Following the instructions precisely will help ensure a successful and safe installation of your smart ceiling fan.
Step 1: Select a Smart Ceiling Fan Kit
The first step in making your ceiling fan smart is to select a suitable smart ceiling fan kit. There are various options available in the market, so it’s important to choose one that is compatible with your existing ceiling fan and meets your specific needs.
Here are a few factors to consider when selecting a smart ceiling fan kit:
Compatibility
Ensure that the kit you choose is compatible with your current ceiling fan. Some smart ceiling fan kits are designed to work with specific fan models or brands, while others are more universal. Read the product descriptions and specifications carefully to make sure the kit will work with your fan.
Features
Consider the features offered by the smart ceiling fan kit. Look for features like adjustable speed settings, reverse direction control, and compatibility with voice-assistant devices or smart home hubs. Some kits may also offer additional features like timer settings and integration with other smart home devices.
Ease of Installation
Check if the smart ceiling fan kit comes with clear and detailed installation instructions. Look for kits that are designed for DIY installation and require minimal wiring or modifications. This will make the installation process easier and less time-consuming.
Budget
Consider your budget when selecting a smart ceiling fan kit. The prices of these kits can vary depending on the brand, features, and compatibility. Set a budget and look for a kit that meets your requirements within that budget.
Once you have selected a smart ceiling fan kit that meets your criteria, you are ready to move on to the next step of the installation process. Remember to carefully read the installation instructions provided with the kit to ensure a smooth and successful installation.
Step 2: Turn off the Power
Safety should always be the top priority when working with electrical components. Before you begin installing the smart ceiling fan kit, it is crucial to turn off the power to the existing ceiling fan. This step will help prevent any potential electrical accidents or injuries during the installation process.
Follow these steps to turn off the power:
1. Locate the Circuit Breaker
Locate the circuit breaker panel in your home. It is usually located in the basement, garage, or utility room. The circuit breaker panel houses the electrical switches that control the power supply to different areas of your home.
Read more: Who Makes Harbor Breeze Ceiling Fans
2. Identify the Correct Circuit
Identify the circuit breaker that controls the power supply to your ceiling fan. This may require some trial and error or consulting the home’s electrical diagram if available. Look for labels or markings on the circuit breaker panel that indicate the corresponding circuit for the ceiling fan.
3. Switch Off the Circuit
Once you have identified the correct circuit, switch it off by flipping the corresponding circuit breaker switch to the “Off” position. This will cut off the power supply to the ceiling fan and ensure a safe working environment.
4. Test the Power
To ensure that the power is properly turned off, test the wires using a non-contact voltage tester. Hold the tester near the wires and check for any voltage readings. If the voltage tester does not indicate any electrical activity, it is safe to proceed with the installation. However, if there is still voltage present, double-check the circuit breaker and consult a professional if necessary.
It is important to note that turning off the circuit breaker should only be done by individuals with knowledge of electrical safety procedures. If you are unsure or uncomfortable working with electricity, it is recommended to seek the assistance of a licensed electrician.
By following the proper safety precautions and turning off the power, you can proceed with peace of mind to the next step of installing your smart ceiling fan kit.
Step 3: Remove the Existing Fan Controller
Now that the power is turned off, it’s time to remove the existing fan controller from your ceiling fan. The fan controller is typically located in the switch housing or motor housing of the fan. Removing the old controller will make way for the installation of the new smart fan controller.
Follow these steps to remove the existing fan controller:
Read more: Why Do Ceiling Fans Make Noise
1. Locate the Fan Controller
Locate the switch housing of your ceiling fan. This is usually found just below the fan blades and may be covered by a decorative plate or housing. Remove any screws or attachments holding the plate in place and set them aside.
2. Examine the Wiring Connections
Take a close look at the wiring connections and how they are connected to the existing fan controller. Observe the color-coded wires and their positions. It may be helpful to take a picture or make notes of the wiring configuration for reference during the installation process.
3. Disconnect the Wiring
Using a screwdriver or pliers, carefully loosen and disconnect the wires from the existing fan controller. Gently pull apart the wire connectors or remove the screws that secure the wires in place. Take note of which wires are connected to which terminals.
4. Remove the Fan Controller
Once the wiring is disconnected, remove the existing fan controller from the switch housing. This may involve unscrewing it or releasing any clasps or attachments holding it in place. Keep the old fan controller aside as it will no longer be needed.
It is important to work methodically and pay attention to the wiring connections during this step. If you are unsure about any aspect of disconnecting the existing fan controller, consult the manufacturer’s instructions or seek the assistance of a professional electrician.
With the old fan controller removed, you are now ready to proceed to the next step of the installation process: installing the new smart fan controller.
Read more: How To Change A Ceiling Fan
Step 4: Install the Smart Fan Controller
Now that you have removed the old fan controller, it’s time to install the new smart fan controller. The smart fan controller is the key component that will enable your ceiling fan to become smart and controllable through your smartphone or smart home system.
Follow these steps to install the smart fan controller:
1. Prepare the Smart Fan Controller
Start by unpacking the smart fan controller from the kit and familiarize yourself with its components. Read the manufacturer’s instructions carefully to understand the specific installation requirements and any additional tools or materials that may be needed.
2. Mount the Smart Fan Controller
Identify the mounting location for the smart fan controller. This is usually inside the switch housing or in close proximity to the ceiling fan. Position the controller in the desired location and secure it using the provided screws or mounting brackets. Ensure that the controller is properly aligned and firmly attached.
3. Connect the Wires
Next, carefully reconnect the wires to the smart fan controller. Refer to the manufacturer’s instructions or the notes you made during the removal of the old fan controller to ensure the correct connections.
Typically, the smart fan controller will have labeled terminals for the different wires. Connect the corresponding wires by inserting them into their respective terminals or attaching them using wire connectors. Make sure the connections are secure and tightened properly.
Read more: How To Repair Ceiling Fan
4. Secure the Wiring
Once all the wires are connected, carefully tuck them back into the switch housing or along the designated wiring path. Use zip ties or clips to neatly secure the wiring and prevent any interference with the fan motor or other components.
5. Test the Installation
Before proceeding further, turn on the power and test the smart fan controller to ensure it is functioning correctly. Use the provided instructions to pair the controller with your smartphone or smart home system and test its functionality. Make sure you can adjust the fan’s speed and control other features using the smart controls.
If everything is working as expected, turn off the power again to proceed to the next step. If you encounter any issues or difficulties, consult the manufacturer’s instructions or seek assistance from customer support.
Congratulations! You have successfully installed the smart fan controller, bringing your ceiling fan one step closer to becoming a smart device. Now, it’s time to move on to the next step: connecting the smart ceiling fan to your smart home system.
Step 5: Connect the Wires
With the smart fan controller installed, the next step is to connect the wires to ensure proper electrical functionality. Properly connecting the wires will ensure that your smart ceiling fan operates smoothly and safely.
Follow these steps to connect the wires:
1. Identify the Wires
Take a close look at the wires from your ceiling fan. You will typically find three or four wires: a black (hot) wire, a white (neutral) wire, a green or bare (ground) wire, and sometimes a blue (light) wire.
Read more: How To Dispose Ceiling Fans
2. Match and Connect the Wires
Match the wires from your ceiling fan to the corresponding wires on the smart fan controller.
- Connect the black wire (hot) from the ceiling fan to the black wire on the smart fan controller.
- Connect the white wire (neutral) from the ceiling fan to the white wire on the smart fan controller.
- If you have a blue wire for the ceiling fan light, connect it to the blue wire on the smart fan controller.
- Connect the green or bare wire (ground) from the ceiling fan to the green or ground wire on the smart fan controller.
Follow the manufacturer’s instructions or refer to the included wiring diagram for any specific instructions related to your smart fan controller’s wiring configuration.
3. Secure the Wire Connections
After connecting the wires, use wire connectors or twist the wires together and cover them with electrical tape to secure the connections. Make sure the connections are tight and insulated to prevent any loose or exposed wires.
4. Double-check the Connections
Before proceeding further, double-check all the wire connections to ensure they are properly made and secure. It is important to take your time and ensure that all connections are correct to prevent any electrical issues or malfunctions.
5. Bundle and Secure the Wires
Once the connections are verified, carefully bundle and secure the wires with zip ties or clips. This will help keep the wires organized, prevent them from interfering with other components, and ensure the overall safety and neatness of the ceiling fan wiring.
Remember to follow all electrical safety procedures and guidelines during the process of connecting the wires. If you are unsure or uncomfortable working with electrical wiring, it is always best to seek the assistance of a professional electrician.
With the wires properly connected, you are now ready to move on to the next step of the installation process: attaching the smart ceiling fan controller to its designated location.
Read more: How To Use A Ceiling Fan
Step 6: Attach the Smart Ceiling Fan Controller
Now that the wires are connected, it’s time to attach the smart ceiling fan controller securely to its designated location. Properly securing the controller will ensure stability and maintain the integrity of the installation.
Follow these steps to attach the smart ceiling fan controller:
1. Position the Controller
Identify the ideal location for mounting the smart ceiling fan controller. It should be easily accessible and within reach for convenient operation and maintenance.
2. Align the Screw Holes
Align the screw holes on the smart ceiling fan controller with the corresponding holes or slots on the switch housing or mounting bracket. Ensure the controller is aligned straight and level for a clean and professional finish.
3. Insert and Tighten the Screws
Insert the screws provided with the smart ceiling fan controller into the aligned screw holes. Use a screwdriver to tighten the screws securely, but be cautious not to overtighten them, as it can damage the controller or the mounting surface.
Double-check that the controller is firmly and securely attached to the switch housing or mounting bracket. Ensure there is no wobbling or movement when lightly touched.
Read more: How To Buy Ceiling Fan
4. Verify Accessibility
Verify that you have easy access to the smart ceiling fan controller’s buttons, dials, or touch-screen interface. Check for any buttons or controls that may obstruct access or hinder operation. Adjust the position, if necessary, to ensure easy and convenient access.
5. Test the Controls
Before proceeding further, turn on the power and test the smart ceiling fan controller. Verify that all controls and functions are working properly. Ensure you can adjust the fan speed, change the rotation direction, or activate any additional features as intended.
If you encounter any issues or malfunctions, refer to the manufacturer’s instructions, troubleshoot the problems, or seek assistance from customer support.
With the smart ceiling fan controller securely attached, you are now ready to progress to the next step: connecting the smart ceiling fan to your smart home system.
Step 7: Connect to the Smart Home System
After successfully installing the smart ceiling fan controller, the next step is to connect it to your smart home system. This will allow you to control and automate your fan using your smartphone, tablet, or voice commands through a compatible smart home assistant or hub.
Follow these steps to connect your smart ceiling fan to the smart home system:
1. Download the App
Start by downloading the app provided by the manufacturer of your smart ceiling fan controller. The app can typically be found on your device’s app store (e.g., Google Play Store, Apple App Store). Install the app and launch it on your device.
Read more: How A Ceiling Fan Works
2. Create an Account
Follow the app’s prompts to create an account or sign in with an existing one. Registration might require providing your email address, creating a password, and agreeing to the terms and conditions. This account will be used to control and manage your smart ceiling fan.
3. Add the Smart Ceiling Fan
In the app, navigate to the “Add Device” or “Add Fan” section. Follow the on-screen instructions to add your smart ceiling fan to the app. This may involve scanning a QR code on the fan controller or entering a unique identification number.
4. Connect to Wi-Fi
Ensure your smartphone or tablet is connected to your Wi-Fi network. Follow the app’s instructions to connect the smart ceiling fan controller to your home’s Wi-Fi network. This step is crucial for communication between the smart fan controller, your device, and the smart home system.
5. Perform Device Setup
The app will guide you through the device setup process. This usually involves configuring preferences, setting up schedules, and customizing fan settings. Follow the on-screen instructions to tailor the smart ceiling fan to your preferences.
Read more: How To Update A Ceiling Fan
6. Integrate with Smart Home System
If you have a smart home hub or system in place, follow the app’s instructions to integrate the smart ceiling fan into your existing smart home system. This will allow you to control the fan using voice commands through smart home assistants like Amazon Alexa, Google Assistant, or Apple HomeKit.
7. Test and Troubleshoot
Finally, test the connection and functionality of the smart ceiling fan. Use the app or smart home assistant to adjust the fan speed, direction, or any other available features. If you encounter any issues or connectivity problems, consult the app’s troubleshooting guide or contact the manufacturer’s customer support for assistance.
Once everything is set up and working correctly, you can now enjoy the convenience of controlling and automating your ceiling fan through your smart home system.
Step 8: Test and Troubleshoot
After connecting your smart ceiling fan to your smart home system, it’s important to thoroughly test the functionality and troubleshoot any potential issues. This step will ensure that your fan operates smoothly and that any glitches or problems are addressed promptly.
Follow these steps to test and troubleshoot your smart ceiling fan:
1. Test Basic Functions
Start by testing the basic functions of your smart ceiling fan. Use the app or smart home assistant to turn the fan on and off, adjust the speed, and change the rotation direction. Verify that each function works as expected and that there are no unusual noises or vibrations.
Read more: How To Choose Ceiling Fan
2. Verify Sensor and Automation Features
If your smart ceiling fan has sensor or automation features, such as occupancy sensors or temperature controls, test those functionalities. Walk around the room and observe if the fan adjusts its speed based on movement or if it responds correctly to changes in room temperature.
3. Set up Schedules and Timers
Take advantage of the scheduling and timer features available in the app or smart home system. Set up specific schedules or timers for the fan to turn on or off at designated times. Verify that the fan follows the programmed schedule accurately.
4. Troubleshoot Connectivity Issues
If you encounter connectivity issues between your smart ceiling fan and the app or smart home assistant, try the following troubleshooting steps:
- Make sure your smartphone or tablet is connected to the same Wi-Fi network as your smart ceiling fan.
- Check that the smart ceiling fan is within the range of your Wi-Fi signal.
- Restart your Wi-Fi router and try reconnecting the fan to the network.
- Update the firmware of the smart ceiling fan controller through the app, if available.
5. Contact Customer Support
If you are unable to resolve any functionality or connectivity issues on your own, don’t hesitate to contact the manufacturer’s customer support. They can provide further troubleshooting assistance or offer guidance on resolving specific problems.
Read more: How Are Ceiling Fans Mounted
6. Enjoy Your Smart Ceiling Fan
Once you have completed the testing and troubleshooting process, you can now sit back and enjoy the convenience and comfort of your smart ceiling fan. Take advantage of the app or smart home system to adjust settings, create schedules, and enjoy a cool and inviting atmosphere with ease.
It’s important to periodically check for app updates and firmware updates for your smart ceiling fan controller to ensure you have the latest features and optimizations. This will help maintain the functionality and performance of your smart ceiling fan over time.
With the testing and troubleshooting process completed, you have successfully made your ceiling fan smart and integrated it into your smart home system.
ConclusionCongratulations on successfully making your ceiling fan smart! By following the steps outlined in this guide, you have transformed your regular ceiling fan into a convenient and controllable device that can be operated from your smartphone or through your smart home system.
A smart ceiling fan offers a multitude of benefits, including enhanced convenience, energy efficiency, and integration with your smart home ecosystem. With the ability to adjust fan speed, change rotation direction, set schedules, and automate its operation, you can create the perfect environment for comfort and energy savings.
Throughout the installation process, it’s important to prioritize safety. Always turn off the power before working with electrical components, and if you’re uncertain, seek the assistance of a licensed electrician. Additionally, carefully read and follow the manufacturer’s instructions provided with your smart ceiling fan kit to ensure proper installation and functionality.
Remember to regularly update the smart fan controller’s firmware and the associated app to benefit from the latest features and improvements. This will ensure that your smart ceiling fan remains up-to-date and performs optimally over time.
With your smart ceiling fan installed and connected to your smart home system, you now have the power to control and customize your fan’s settings in a way that is convenient and tailored to your preferences. Whether it’s adjusting the speed, scheduling operation, or integrating with other smart devices in your home, your smart ceiling fan will elevate your comfort and enhance your lifestyle.
Enjoy the convenience, energy savings, and comfort that your new smart ceiling fan brings. Sit back, relax, and let your smart home system take care of keeping the air flowing just the way you like it.
Frequently Asked Questions about How To Make A Ceiling Fan Smart
Was this page helpful?
At Storables.com, we guarantee accurate and reliable information. Our content, validated by Expert Board Contributors, is crafted following stringent Editorial Policies. We're committed to providing you with well-researched, expert-backed insights for all your informational needs.
0 thoughts on “How To Make A Ceiling Fan Smart”