Articles
Why Is My Toilet Hissing
Modified: October 20, 2024
"Why Is My Toilet Hissing" is a comprehensive article that explores the reasons behind toilet hissing and provides effective solutions. Read now to fix this common plumbing issue.
(Many of the links in this article redirect to a specific reviewed product. Your purchase of these products through affiliate links helps to generate commission for Storables.com, at no extra cost. Learn more)
Introduction
A hissing toilet can be a perplexing problem for homeowners. The continuous sound of water rushing through the toilet tank can be not only annoying, but it can also indicate an underlying issue with your toilet’s functionality. Understanding the common causes of a hissing toilet and how to troubleshoot the problem can help you avoid costly repairs and restore peace and tranquility to your bathroom.
In this article, we will explore the common causes of a hissing toilet and provide step-by-step instructions on how to troubleshoot and resolve the issue. By the end, you’ll have the knowledge to diagnose and fix your hissing toilet, saving you time, money, and frustration.
So, let’s dive in and uncover the reasons behind that persistent hissing sound in your bathroom.
Key Takeaways:
- Troubleshoot a hissing toilet by inspecting the fill valve, checking the flapper, and evaluating water pressure. Seek professional help if needed to ensure a properly functioning toilet.
- Prevent future toilet issues by maintaining proper ventilation, clearing potential clogs, and seeking professional assistance when necessary. Enjoy a peaceful and efficient bathroom experience.
Read more: Why Is My Air Conditioner Hissing
Common Causes of a Hissing Toilet
A hissing toilet can have several underlying causes. Identifying the root cause is crucial in order to effectively troubleshoot and resolve the issue. Here are some of the common culprits behind a hissing toilet:
- Faulty Fill Valve: The fill valve is responsible for regulating the water level in the toilet tank. If the fill valve is faulty or worn out, it may not close properly, causing water to continuously flow into the tank, resulting in a hissing sound.
- Worn-out Flapper: The flapper is a rubber seal located at the bottom of the toilet tank. It allows water to flow from the tank into the bowl when the toilet is flushed. If the flapper is worn out or improperly seated, water may leak from the tank into the bowl, leading to a hissing sound.
- Malfunctioning Ballcock Assembly: The ballcock assembly controls the flow of water into the toilet tank. If it is not functioning correctly, it can result in a continuous flow of water, causing the toilet to hiss.
- Water Pressure Issues: High water pressure can lead to a hissing toilet. When the water pressure is too high, it can cause the fill valve to stay open, resulting in constant water flow and the hissing sound.
- Plumbing Ventilation Problems: Plumbing systems require proper ventilation to function correctly. If there is a blockage or restriction in the ventilation system, it can create pressure imbalances and cause a hissing sound in the toilet.
- Partially Clogged Toilet: A partially clogged toilet can disrupt the proper flow of water, causing it to hiss. A clog can be caused by various factors, such as excessive toilet paper or foreign objects obstructing the drainage pipe.
Now that we have explored the common causes of a hissing toilet, let’s move on to troubleshooting the issue.
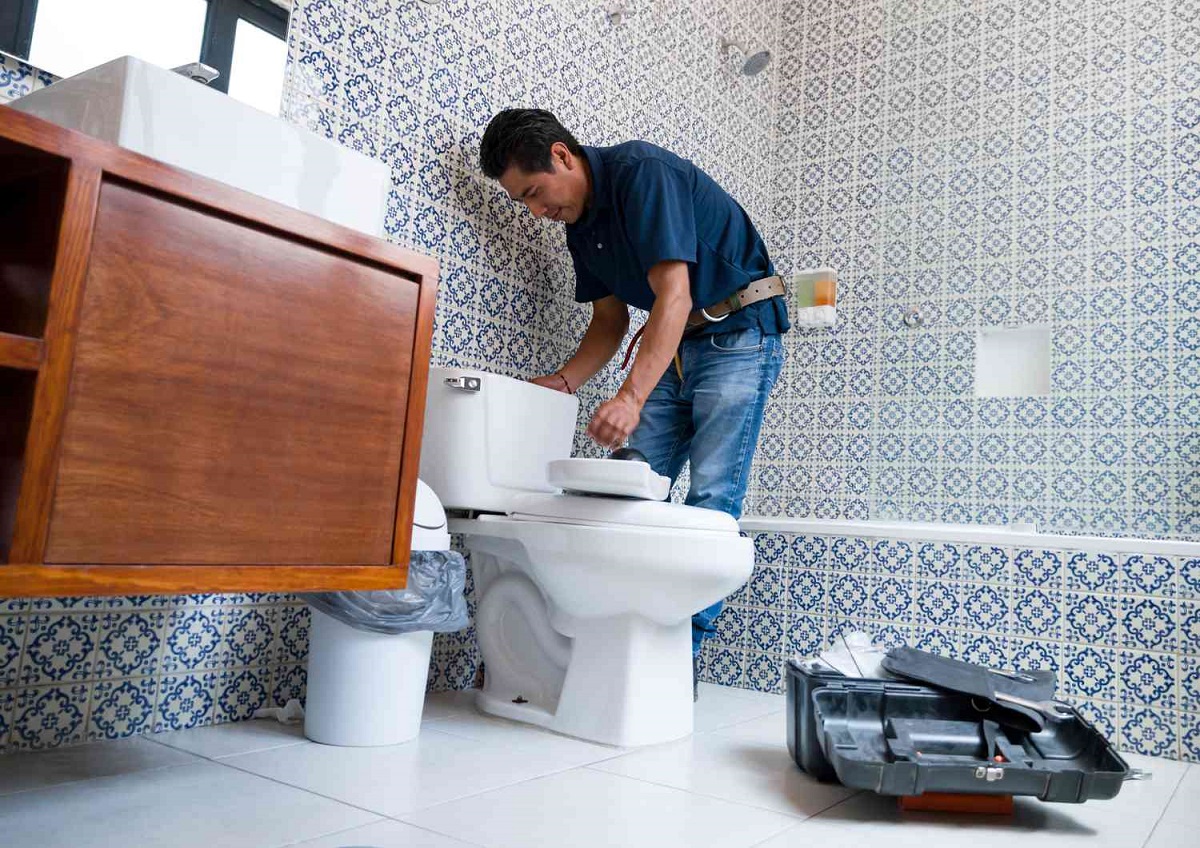
Faulty Fill Valve
The fill valve is an essential component of your toilet’s flushing system. It is responsible for controlling the water level inside the tank and refilling it after each flush. When the fill valve becomes faulty, it can cause water to continuously flow into the tank, resulting in a hissing sound.
To diagnose a faulty fill valve, follow these steps:
- Start by removing the lid from the toilet tank. Be cautious, as the lid may be heavy and fragile.
- Inspect the fill valve, which is usually located on the left side of the tank. It is connected to the water supply line and has a float attached to it.
- Check for any visible signs of damage, such as cracks or leaks, on the fill valve and its components.
- If the fill valve appears to be damaged or worn out, it is best to replace it with a new one. You can find fill valve replacement kits at most hardware stores.
- Follow the manufacturer’s instructions to disconnect the old fill valve and install the new one.
- Once the new fill valve is installed, turn on the water supply and allow the tank to fill. Observe if the hissing sound has stopped. If it has, congratulations! You have successfully resolved the issue. If not, move on to the next troubleshooting step.
It is important to note that if you are uncomfortable or unsure about replacing the fill valve yourself, it is recommended to seek the assistance of a professional plumber. They have the expertise and tools needed to fix the issue safely and effectively.
Now that we have covered the first common cause of a hissing toilet, let’s move on to the next one: a worn-out flapper.
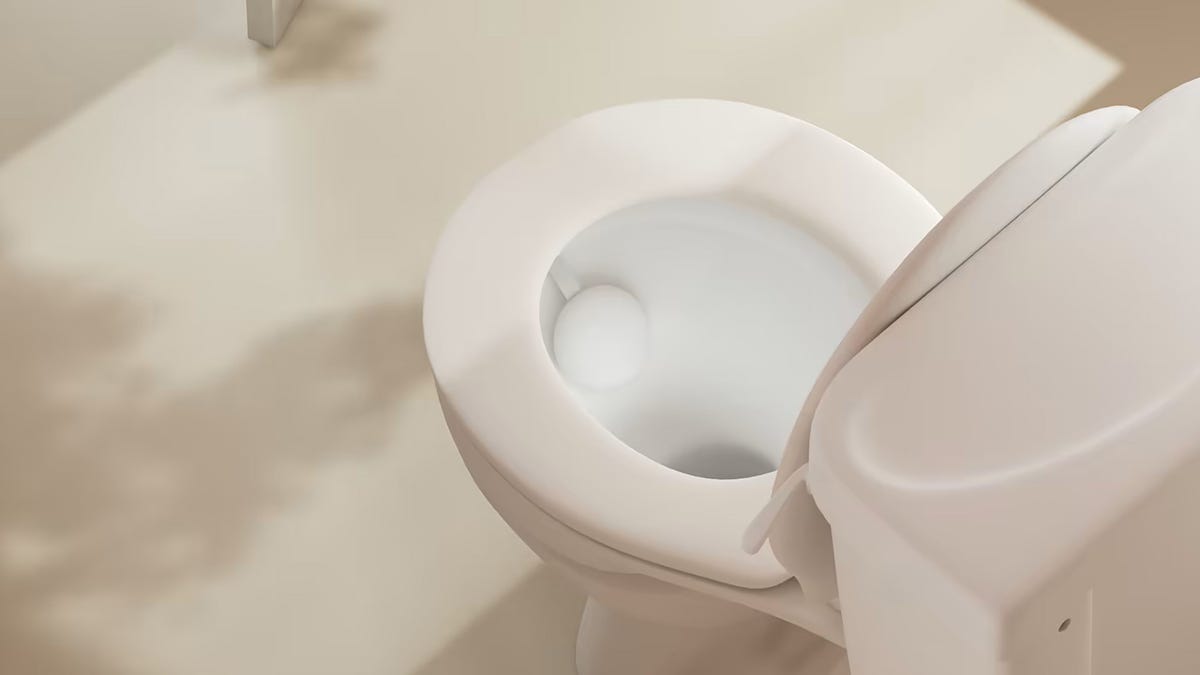
Worn-out Flapper
The flapper is a crucial component of your toilet’s flushing system. It is a rubber seal located at the bottom of the toilet tank and is responsible for allowing water to flow from the tank into the bowl when the toilet is flushed. Over time, the flapper can wear out, lose its sealing ability, and result in water leakage, causing a hissing sound.
To troubleshoot a worn-out flapper, follow these steps:
- Start by removing the lid from the toilet tank. Take caution as the lid might be heavy and fragile.
- Inspect the flapper, which is usually round and attached to a chain or lever.
- Check if the flapper is seated properly at the bottom of the tank and if it is worn, cracked, or damaged.
- If the flapper is worn out, it is best to replace it with a new one. Flappers can be found at most hardware stores.
- Before replacing the flapper, turn off the water supply to the toilet by closing the shut-off valve located behind or near the toilet.
- Detach the chain or lever connected to the old flapper, and remove the flapper from its seat.
- Install the new flapper, ensuring that it is securely seated at the bottom of the tank.
- Reconnect the chain or lever to the new flapper, making sure it has the right amount of slack to allow the flapper to open and close smoothly.
- Turn on the water supply and allow the tank to fill. Check if the hissing sound has ceased. If it has, you have successfully resolved the issue. If not, move on to the next troubleshooting step.
If you are unsure about replacing the flapper yourself or if the hissing sound persists after replacing the flapper, it is advisable to seek the help of a professional plumber. They can accurately diagnose the problem and provide a solution.
Next, we will explore the third common cause of a hissing toilet: a malfunctioning ballcock assembly.
Malfunctioning Ballcock Assembly
The ballcock assembly, also known as the fill valve or float valve, is responsible for regulating the flow of water into the toilet tank. When the toilet is flushed, the ballcock assembly opens to allow water to fill the tank. If the ballcock assembly is malfunctioning, it can result in a constant flow of water, leading to a hissing sound.
To troubleshoot a malfunctioning ballcock assembly, follow these steps:
- Begin by removing the lid from the toilet tank. Take care as the lid may be heavy and fragile.
- Locate the ballcock assembly, which is usually on the left side of the tank and connected to the water supply line.
- Observe the ballcock assembly for any visible signs of damage or misalignment.
- If the assembly appears damaged or misaligned, it may need to be adjusted or replaced.
- Make sure the water supply to the toilet is turned off by closing the shut-off valve located behind or near the toilet.
- Disconnect any attachments, such as the float arm, from the ballcock assembly.
- If adjusting the ballcock assembly, consult the manufacturer’s instructions to ensure the proper adjustment.
- If the ballcock assembly is damaged or cannot be adjusted, it is best to replace it with a new one. Replacement ballcock assemblies can be found at most hardware stores.
- Install the new ballcock assembly according to the manufacturer’s instructions.
- Reconnect any attachments, such as the float arm, to the new ballcock assembly.
- Turn on the water supply and allow the tank to fill. Check if the hissing sound has stopped. If it has, you have successfully resolved the issue. If not, proceed to the next troubleshooting step.
If you are uncertain about adjusting or replacing the ballcock assembly yourself, or if the hissing sound persists after troubleshooting, it is recommended to contact a professional plumber for assistance. They will have the expertise and knowledge to properly diagnose and resolve the issue.
Next, we will discuss the potential fourth cause of a hissing toilet: water pressure issues.
Read more: Why Is There Ants In My Toilet Bowl
Water Pressure Issues
Water pressure plays a crucial role in the proper functioning of your toilet. If the water pressure is too high, it can cause the fill valve to stay open, resulting in a constant flow of water and a hissing sound. Conversely, low water pressure can also cause problems with the toilet’s flushing system.
To troubleshoot water pressure issues, follow these steps:
- Check the water pressure in your home. You can use a water pressure gauge to measure the pressure at a tap or consult a professional plumber to conduct the test.
- If the water pressure is too high, it might be necessary to install a pressure-reducing valve. This valve will help regulate the water pressure throughout your plumbing system.
- If the water pressure is too low, there may be an issue with the water supply to your home or a clog in the plumbing pipes. You may need to contact your water utility company or a professional plumber to address the issue.
- Depending on the outcome of the water pressure test, various solutions may be required, such as adjusting or installing a pressure-reducing valve, addressing water supply issues, or clearing clogs in the plumbing system.
- Once the necessary adjustments or repairs are made to regulate the water pressure, check if the hissing sound has ceased. If it has, you have successfully resolved the issue. If not, proceed to the next troubleshooting step.
If you are unsure about adjusting or addressing water pressure issues yourself, it is recommended to consult a professional plumber. They will have the expertise and knowledge to properly diagnose the water pressure problem and provide an appropriate solution.
Next, we will discuss another potential cause of a hissing toilet: plumbing ventilation problems.
Plumbing Ventilation Problems
Proper plumbing ventilation is essential for the efficient operation of your toilet and the entire plumbing system. Vent pipes allow air to enter the plumbing system, preventing pressure imbalances and ensuring smooth drainage. When there is a blockage or restriction in the plumbing ventilation system, it can lead to a hissing sound in the toilet.
To troubleshoot plumbing ventilation problems, follow these steps:
- Inspect the plumbing vent pipes on your roof. These pipes should extend above the roofline and allow air to enter the plumbing system.
- Check for any visible signs of blockages, such as debris or nests from animals.
- If you notice any blockages, try to clear them using a plumbing snake or a garden hose with a high-pressure nozzle.
- In some cases, you may need to contact a professional plumber to fully assess and clear the blockage in the plumbing vent pipes.
- After clearing any blockages, check if the hissing sound has stopped. If it has, you have successfully resolved the issue. If not, move on to the next troubleshooting step.
It is important to remember that working on plumbing ventilation systems can be complex and potentially hazardous. If you are uncomfortable or unsure about addressing plumbing ventilation problems yourself, it is best to seek the assistance of a professional plumber who can safely and effectively resolve the issue.
Lastly, we will explore the sixth and final common cause of a hissing toilet: a partially clogged toilet.
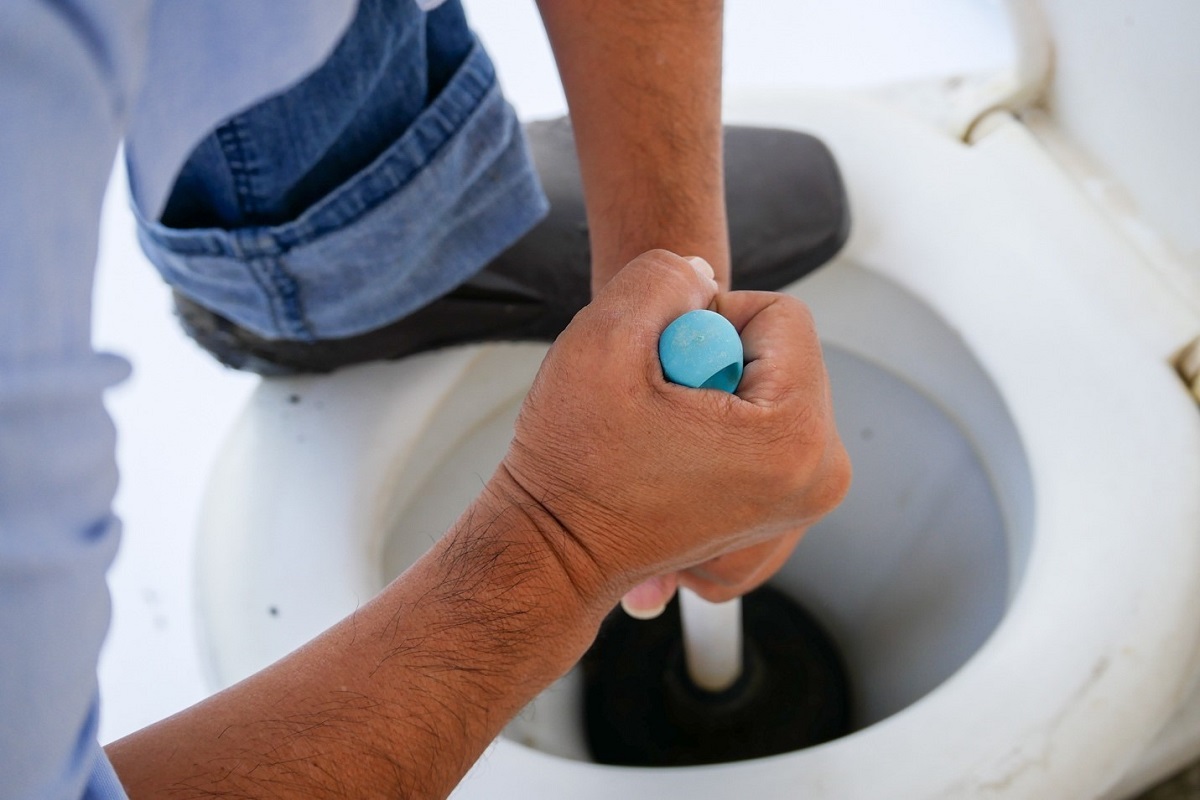
Partially Clogged Toilet
A partially clogged toilet can disrupt the proper flow of water, leading to various issues, including a hissing sound. A clog can be caused by excessive toilet paper, flushing non-flushable items, or other foreign objects obstructing the drainage pipe.
To troubleshoot a partially clogged toilet, follow these steps:
- Start by using a plunger to attempt to clear the clog. Place the plunger over the drain opening and vigorously push and pull to create suction. Repeat this motion several times to dislodge the clog.
- If using a plunger does not resolve the issue, try using a plumbing snake. Insert the snake into the drain opening and rotate it while applying gentle pressure until you encounter resistance. Continue rotating and pushing the snake until you feel the clog break up or become dislodged.
- If the clog persists despite your efforts, it may be necessary to contact a professional plumber to address the issue. They may need to use specialized tools or techniques to clear the stubborn clog.
- After successfully clearing the clog, flush the toilet and observe if the hissing sound has stopped. If it has, you have resolved the issue. If not, it is recommended to move on to the next troubleshooting step or consult a plumber.
It is important to note that prevention is the best approach when it comes to toilet clogs. Avoid flushing excessive toilet paper, feminine hygiene products, or other non-flushable items. Installing a toilet paper holder with a built-in dispenser can help regulate the amount of toilet paper used and reduce the likelihood of clogs.
Remember, if you are unsure about troubleshooting or clearing a partially clogged toilet yourself, do not hesitate to seek the assistance of a professional plumber who can safely and effectively resolve the issue.
Now that we have explored the common causes of a hissing toilet and how to troubleshoot them, you have the knowledge and tools to address this issue. By identifying the root cause and following the appropriate steps, you can successfully resolve the hissing sound and restore your toilet’s functionality.
Always prioritize your safety and, if needed, seek professional help to ensure the proper handling and resolution of any plumbing issues. With the right approach and know-how, you can eliminate the hissing sound and enjoy a peaceful and efficient bathroom experience.
Check the water supply valve behind the toilet to make sure it is fully open. A partially closed valve can cause hissing sounds as water tries to fill the tank.
Troubleshooting the Hissing Toilet
Once you have identified the common causes of a hissing toilet, it’s time to move on to troubleshooting the issue. By following these steps, you can narrow down the problem and find the solution:
- Inspect the Fill Valve: Start by removing the lid from the toilet tank and inspecting the fill valve. Look for any visible signs of damage or misalignment. If the fill valve is faulty, consider replacing it with a new one.
- Check the Flapper: Examine the flapper, located at the bottom of the tank. Ensure it is properly seated and not worn out. If the flapper is damaged, replace it with a new one.
- Examine the Ballcock Assembly: Inspect the ballcock assembly for any signs of damage or misalignment. Adjust or replace the assembly if necessary.
- Evaluate Water Pressure: Measure the water pressure in your home using a gauge. If the pressure is too high, consider installing a pressure-reducing valve. If it is too low, check for water supply issues or clogged pipes.
- Assess Plumbing Ventilation: Inspect the plumbing vent pipes on your roof and clear any blockages or obstructions that may be impeding proper ventilation.
- Clear Any Clogs: If you suspect a partially clogged toilet, use a plunger or plumbing snake to dislodge the clog. Seek professional help if the clog persists.
While troubleshooting, it’s essential to follow the steps in order and observe the impact of each action. Keep in mind that some issues may require the expertise of a professional plumber, especially if the task involves technical adjustments or repairs.
Remember to prioritize your safety throughout the troubleshooting process. Take precautions such as wearing protective gloves and eyewear when working with plumbing components or tools. If you are unsure about any step or encounter difficulties, do not hesitate to seek professional assistance.
By following these troubleshooting steps and addressing the underlying causes, you can successfully resolve the hissing sound in your toilet and restore its proper functionality.
Now, let’s wrap up this article and summarize the key points.
Read more: Why Is My Toilet Tank Sweating
Inspect the Fill Valve
The fill valve is a crucial component of your toilet’s flushing system. It is responsible for regulating the water level in the tank and refilling it after each flush. When the fill valve becomes faulty or worn out, it can result in water continuously flowing into the tank, leading to a hissing sound.
To troubleshoot the fill valve and address the hissing sound, follow these steps:
- Start by safely removing the lid from the toilet tank. Handle the lid with care, as it may be heavy and fragile.
- Locate the fill valve, usually positioned on the left side of the tank. The fill valve has a float mechanism attached to it, which controls the water level.
- Inspect the fill valve for any visible signs of damage, such as cracks, leaks, or misalignment. Pay attention to the connections between the fill valve, the water supply line, and the float mechanism.
- If you notice any damage or wear, it is best to replace the faulty fill valve with a new one. Fill valve replacement kits can be found at most hardware stores.
- Before proceeding with the replacement, turn off the water supply to the toilet. Locate the shut-off valve behind or near the toilet and close it to stop the water flow.
- Next, disconnect the water supply line from the fill valve. Use an adjustable wrench or pliers, if necessary, to loosen and remove the connection.
- Once the water supply line is disconnected, remove any remaining water from the tank by flushing the toilet and holding down the handle to drain the water.
- Follow the manufacturer’s instructions included in the fill valve replacement kit to install the new fill valve. Ensure that all connections are secure and properly aligned.
- Reconnect the water supply line to the new fill valve and tighten the connection using an adjustable wrench or pliers.
- Turn the water supply back on by opening the shut-off valve. Allow the tank to fill, and observe if the hissing sound has ceased. If it has, congratulations! You have successfully resolved the issue. If not, continue troubleshooting using the next step.
If you are unsure about replacing the fill valve yourself or if the hissing sound persists even after replacing the fill valve, it is advisable to seek the help of a professional plumber. They have the experience and expertise to diagnose and address the issue effectively and ensure a proper solution.
Now, let’s move on to the next troubleshooting step: checking the flapper.
Check the Flapper
The flapper is a crucial component of your toilet’s flushing mechanism. It is a rubber seal located at the bottom of the toilet tank and plays a vital role in allowing water to flow from the tank into the bowl when you flush. If the flapper is worn out or improperly seated, it can cause water to leak continuously, resulting in a hissing sound.
To troubleshoot the flapper and address the hissing sound, follow these steps:
- Safely remove the lid from the toilet tank, taking care as it may be heavy or fragile.
- Inspect the flapper, which is typically round and attached to a chain or lever. Ensure that it is properly positioned and seated at the bottom of the tank.
- Check the condition of the flapper for any signs of wear, cracks, or damage. If the flapper appears worn out, it is best to replace it with a new one.
- Before proceeding with the replacement, it is important to turn off the water supply to the toilet. Locate the shut-off valve behind or near the toilet and close it to stop the water flow.
- Detach the chain or lever connected to the old flapper and remove the flapper from its seat at the bottom of the tank.
- Install the new flapper by placing it onto the seat, ensuring a proper fit. Make sure it covers the flush valve opening completely.
- Reconnect the chain or lever to the new flapper, ensuring that it has the right amount of slack to allow the flapper to open and close smoothly during flushing.
- Turn on the water supply by opening the shut-off valve. Allow the tank to fill, and check if the hissing sound has stopped. If it has, congratulations! You have successfully resolved the issue. If not, move on to the next troubleshooting step.
If you are unsure about replacing the flapper yourself or if the hissing sound persists even after replacing the flapper, it is advisable to seek the help of a professional plumber. They have the expertise to properly diagnose the issue and provide the most effective solution.
Now, let’s move on to the next step in troubleshooting: examining the ballcock assembly.
Examine the Ballcock Assembly
The ballcock assembly, also known as the fill valve or float valve, is responsible for regulating the flow of water into the toilet tank. A malfunctioning ballcock assembly can result in a constant flow of water, leading to a hissing sound. To troubleshoot and address the issue, follow these steps:
- Begin by safely removing the lid from the toilet tank. Take care as the lid may be heavy or fragile.
- Locate the ballcock assembly, usually positioned on the left side of the tank and connected to the water supply line.
- Inspect the ballcock assembly for any visible signs of damage, such as cracks, leaks, or misalignment. Pay close attention to the connections between the ballcock assembly, the water supply line, and the float mechanism.
- If you notice any damage or misalignment, you may need to adjust or replace the ballcock assembly.
- If adjustment is required, consult the manufacturer’s instructions or seek guidance from a plumbing professional to ensure proper adjustment of the ballcock assembly.
- If the ballcock assembly is damaged and cannot be repaired, it is best to replace it with a new one. Replacement ballcock assemblies can be found at most hardware stores.
- Before proceeding with the replacement, it is important to turn off the water supply to the toilet. Locate the shut-off valve behind or near the toilet and close it to stop the water flow.
- Disconnect any attachments, such as the float arm or mechanism, from the ballcock assembly.
- Follow the manufacturer’s instructions included in the replacement ballcock assembly to install the new one. Ensure all connections are secure and properly aligned.
- Reconnect any attachments, such as the float arm or mechanism, to the new ballcock assembly.
- Turn on the water supply by opening the shut-off valve. Allow the tank to fill, and observe if the hissing sound has ceased. If it has, congratulations! You have successfully resolved the issue. If not, move on to the next troubleshooting step.
If you are unsure about adjusting or replacing the ballcock assembly or if the hissing sound persists even after troubleshooting, it is advisable to seek the assistance of a professional plumber. They have the knowledge and experience to accurately diagnose the problem and provide an appropriate solution.
Now, let’s move on to the next step in troubleshooting: evaluating water pressure.
Evaluate Water Pressure
Water pressure plays a vital role in the proper functioning of your toilet. If the water pressure is too high, it can cause the fill valve to remain open, leading to a constant flow of water and a hissing sound. Conversely, low water pressure can also cause issues with the toilet’s flushing mechanism. To troubleshoot and address water pressure issues, follow these steps:
- Check the water pressure in your home using a water pressure gauge. You can attach the gauge to a tap or faucet to measure the pressure.
- If the water pressure is excessively high, it may be necessary to install a pressure-reducing valve. This valve helps regulate water pressure throughout the plumbing system, including the toilet.
- If the water pressure is too low, check for any water supply issues that may be affecting the entire household. Contact your water utility company to inquire about any ongoing maintenance or repairs that may be causing the low water pressure.
- Inspect the toilet’s water supply line, fittings, and connections for any signs of damage or leaks. Tighten any loose connections or replace faulty components as needed.
- If the water pressure issue persists, there may be clogs or obstructions in the plumbing pipes. In this case, it is best to contact a professional plumber who can assess the situation and clear any clogs in the plumbing system.
- After addressing the water pressure issues, turn on the water supply to the toilet and allow the tank to fill.
- Observe if the hissing sound has ceased. If it has, congratulations! You have successfully resolved the issue. If not, proceed to the next step in troubleshooting.
If you are unsure about adjusting the water pressure yourself or if the hissing sound persists even after addressing the water pressure issues, it is recommended to seek the help of a professional plumber. They have the expertise to diagnose and rectify the problem effectively.
Now, let’s move on to the next step in troubleshooting: assessing plumbing ventilation.
Read more: Why Is There No Water In My Toilet Bowl
Assess Plumbing Ventilation
Proper plumbing ventilation is essential for the efficient functioning of your toilet and the entire plumbing system. Plumbing vent pipes allow air to enter the system, preventing pressure imbalances and ensuring smooth drainage. If there is a blockage or restriction in the plumbing ventilation system, it can lead to a hissing sound in the toilet. To troubleshoot and address plumbing ventilation issues, follow these steps:
- Inspect the plumbing vent pipes on your roof. These pipes should extend above the roofline and allow air to enter the plumbing system.
- Check for any visible signs of blockages, such as debris, leaves, or nests from animals. These obstructions can hinder the proper flow of air and cause pressure imbalances.
- Use a plumbing snake or a garden hose with a high-pressure nozzle to clear any blockages in the vent pipes. Insert the snake or hose into the pipe and rotate it while applying gentle pressure to dislodge any obstructions.
- If the blockage persists or if you are uncomfortable performing this task yourself, it is advisable to contact a professional plumber with experience in handling ventilation issues.
- After clearing any blockages, turn on the water supply to the toilet and allow the tank to fill.
- Observe if the hissing sound has ceased. If it has, congratulations! You have successfully resolved the issue. If not, proceed to the next step in troubleshooting.
It is important to remember that working on plumbing ventilation systems can be complex and potentially hazardous. If you are unsure about handling ventilation issues yourself or if the hissing sound persists even after clearing the blockages, it is best to seek the assistance of a professional plumber. They have the expertise and proper tools to diagnose and address the problem effectively.
Now, let’s move on to the final step in troubleshooting: clearing any potential toilet clogs.
Clear Any Clogs
A partially clogged toilet can disrupt the proper flow of water, leading to a hissing sound. Clogs can occur due to excessive toilet paper, flushing non-flushable items, or other foreign objects obstructing the drainage pipe. To troubleshoot and address potential toilet clogs, follow these steps:
- Start by using a plunger to attempt to clear the clog. Place the plunger over the drain opening and create a tight seal. Vigorously plunge up and down to create suction and dislodge the clog. Repeat this motion several times until the water begins to drain.
- If plunging does not resolve the clog, try using a plumbing snake. Insert the snake into the drain opening and rotate it while gently pushing it further into the pipe. Continue doing this until you encounter resistance or feel the clog break up.
- If neither plunging nor snaking resolves the clog, it may be necessary to contact a professional plumber. They have specialized tools and techniques to effectively clear stubborn clogs.
- After successfully clearing the clog, flush the toilet and observe if the hissing sound has stopped. If it has, congratulations! You have successfully resolved the issue.
To prevent future clogs, remember to use toilet paper in moderation and avoid flushing non-flushable items such as baby wipes, sanitary pads, or paper towels. Installing a toilet paper holder with a built-in dispenser can help regulate the amount of toilet paper used and reduce the likelihood of clogs.
If you are unsure about clearing a toilet clog yourself or if the hissing sound persists even after clearing the clog, it is advisable to seek the help of a professional plumber. They have the necessary expertise and tools to effectively diagnose and resolve the issue.
Now that you have gone through the troubleshooting steps to address a hissing toilet, you are equipped with the knowledge to tackle the problem. By following these steps and resolving the underlying causes, you can enjoy a properly functioning toilet without any hissing sounds.
If the hissing sound persists or you encounter any difficulties during the troubleshooting process, do not hesitate to seek professional assistance. Prioritizing your safety and ensuring the accuracy of the repairs is essential in maintaining a healthy plumbing system.
Remember, a well-maintained toilet can bring peace and comfort to your home, so take the necessary steps to address any issues promptly and efficiently.
Conclusion
A hissing toilet can be a frustrating problem to deal with, but by understanding the common causes and following the troubleshooting steps outlined in this article, you can successfully resolve the issue and restore your toilet’s functionality.
We have explored the most common causes of a hissing toilet, including a faulty fill valve, worn-out flapper, malfunctioning ballcock assembly, water pressure issues, plumbing ventilation problems, and partially clogged toilet. By systematically examining each potential cause and taking appropriate actions to address them, you can eliminate the hissing sound and prevent further complications.
If you encounter difficulty or lack confidence in addressing the issue yourself, it is always recommended to seek the help of a professional plumber. They possess the expertise, knowledge, and tools to handle complex toilet repairs and ensure a proper solution.
Remember, prevention is key to avoiding future problems with your toilet. Proper maintenance, avoiding excessive toilet paper usage, and refraining from flushing non-flushable items can help prevent clogs and other issues that may lead to a hissing toilet.
By taking the time to troubleshoot and resolve a hissing toilet, you can enjoy a properly functioning bathroom and avoid potential water wastage and costly repairs. Maintaining a healthy plumbing system contributes to the overall convenience and comfort of your home.
Thank you for taking the time to read this article. We hope that the information provided has been helpful in troubleshooting and resolving the hissing sound in your toilet. Remember to prioritize your safety and seek professional help if needed. Here’s to a smoothly functioning and peaceful bathroom experience!
Frequently Asked Questions about Why Is My Toilet Hissing
Was this page helpful?
At Storables.com, we guarantee accurate and reliable information. Our content, validated by Expert Board Contributors, is crafted following stringent Editorial Policies. We're committed to providing you with well-researched, expert-backed insights for all your informational needs.


0 thoughts on “Why Is My Toilet Hissing”