
Articles
Why Is One Of My Stove Burners Not Working
Modified: October 20, 2024
Learn why one of your stove burners is not working with this informative article. Find troubleshooting tips and solutions to get your burner back up and running.
(Many of the links in this article redirect to a specific reviewed product. Your purchase of these products through affiliate links helps to generate commission for Storables.com, at no extra cost. Learn more)
Introduction
When it comes to cooking, having a fully functional stove is essential. But what do you do when one of your stove burners stops working? It can be frustrating and inconvenient, especially if you rely on your stove for daily meal preparations.
There are several possible reasons why a stove burner may not be working, ranging from minor issues that can be easily fixed to more complex problems that require professional assistance. In this article, we will explore the common causes of a non-working stove burner and provide troubleshooting steps to help you identify and resolve the issue.
It’s important to note that the specific troubleshooting steps may vary depending on the type of stove you have, whether it’s an electric or gas stove. However, we will cover the general troubleshooting methods that apply to most types of stoves.
Key Takeaways:
- Troubleshooting a non-working stove burner involves checking the power supply, inspecting the burner element, and examining wiring connections. Regular maintenance can prevent future issues and prolong the stove’s lifespan.
- For gas stoves, cleaning and unclogging gas jets is crucial. If troubleshooting steps don’t resolve the issue, seek professional assistance to ensure safety and proper functionality.
Read more: Why Are My Stove Burners Smoking
Common causes of a non-working stove burner
When you encounter a non-working stove burner, it can be helpful to understand the common causes behind the issue. By identifying the underlying problem, you can take appropriate steps to fix it. Here are some of the most common causes of a non-working stove burner:
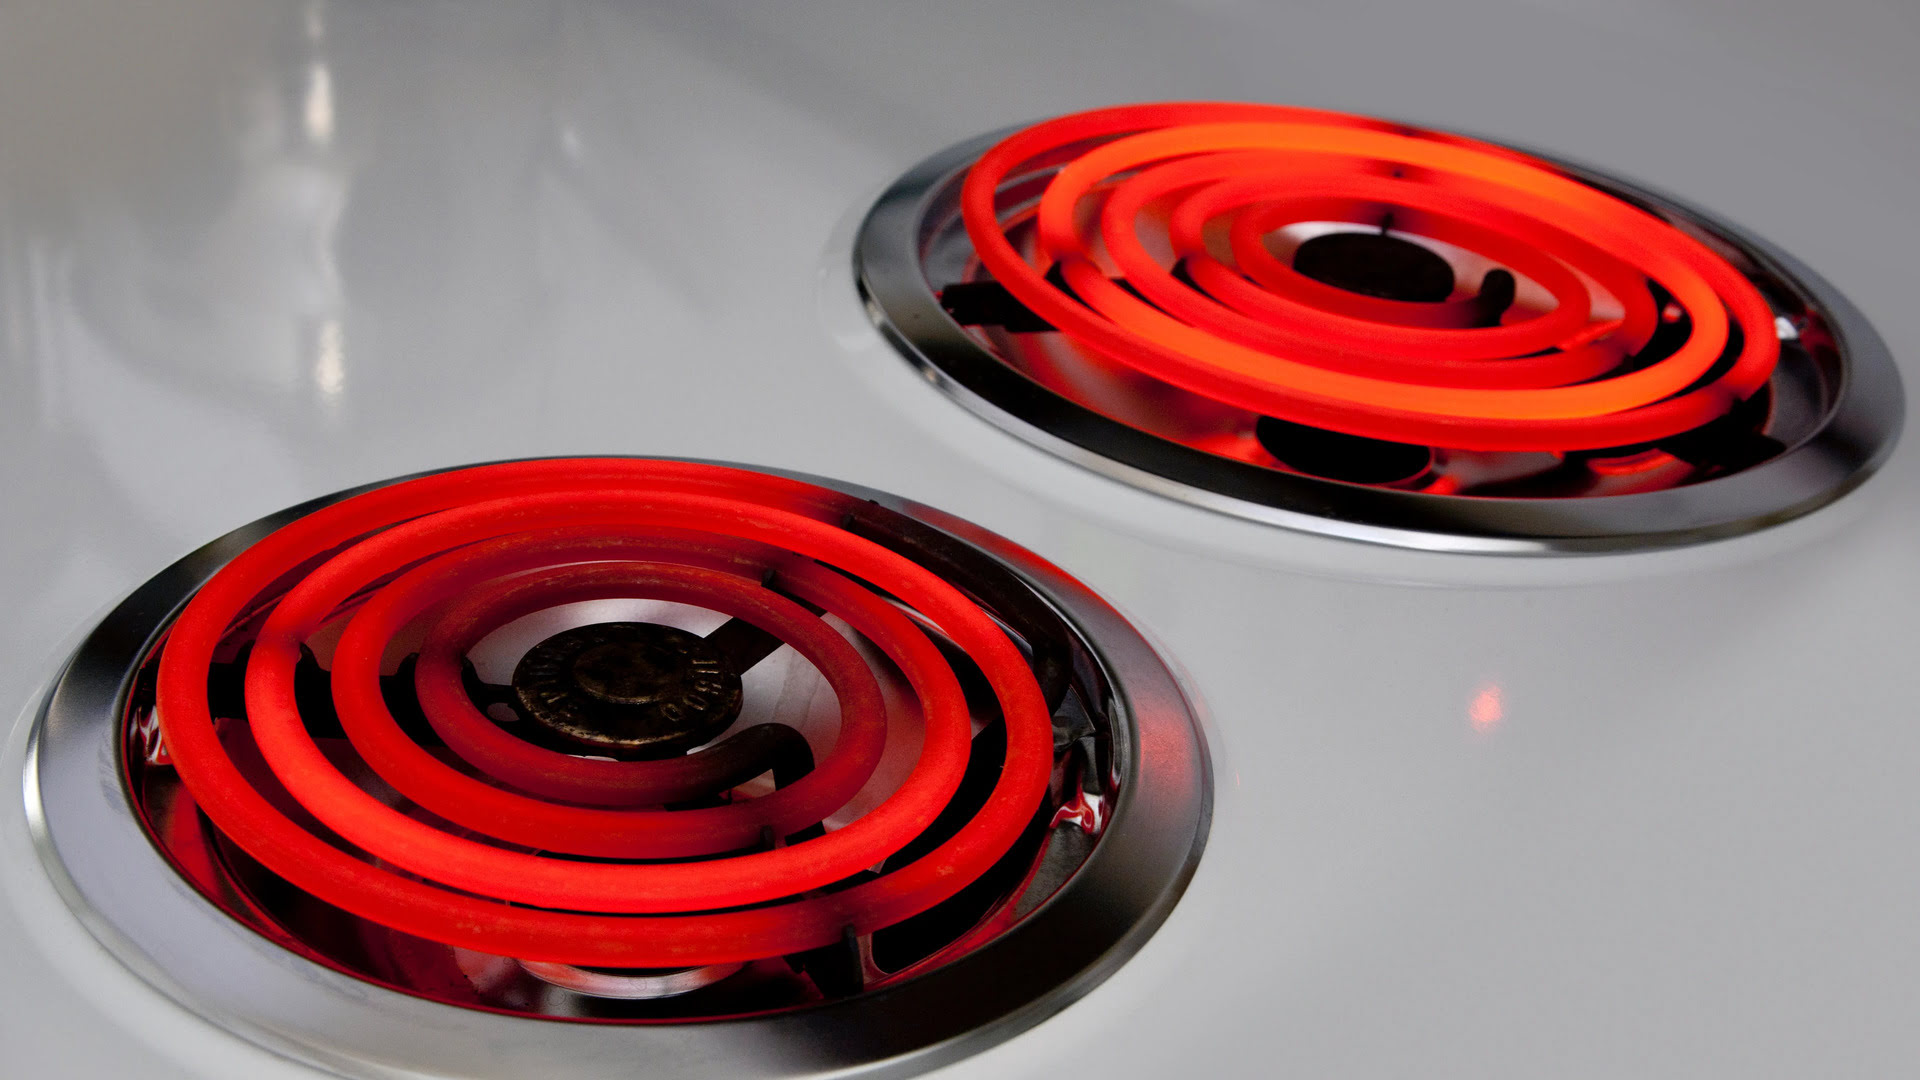
- Faulty burner element: The burner element, in an electric stove, may become defective over time. It can develop cracks, burn marks, or simply stop working altogether. If the burner element is faulty, it will need to be replaced.
- Loose or damaged wiring: Electrical connections can loosen or become damaged, preventing the burner from receiving the necessary power. This can happen due to regular wear and tear or accidental mishandling. Inspecting the wiring connections is important to ensure they are secure and intact.
- Defective burner switch: The burner switch, responsible for controlling the power supply to the burner, may become faulty. This can cause the burner to not receive any power, resulting in a non-working condition. If the burner switch is the issue, it may need to be replaced.
- Faulty control board or ignition module: In some stoves, there is a control board or ignition module that regulates the functioning of the burners. If these components become defective, they can prevent a burner from working properly. Professional assistance may be required to fix or replace these parts.
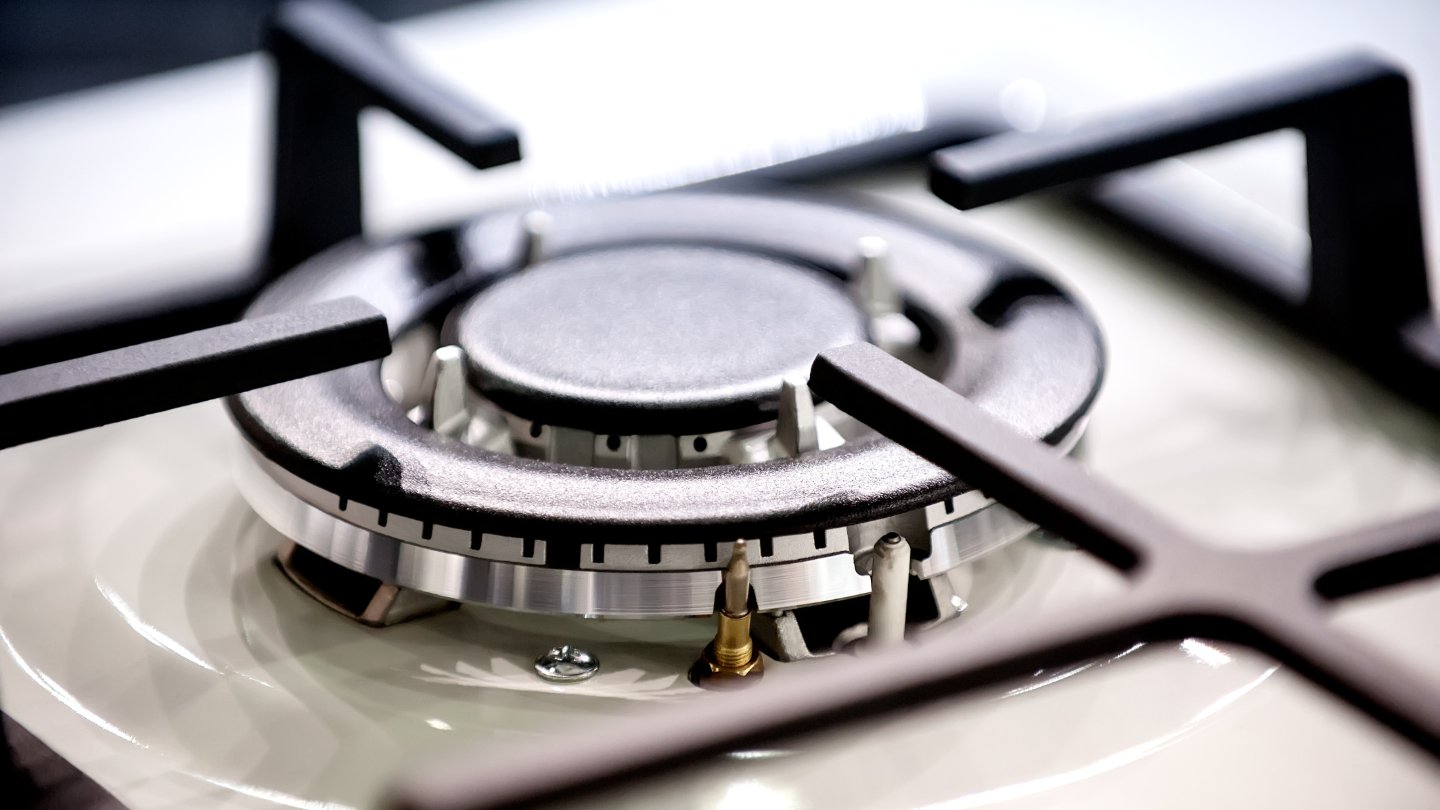
- Clogged or blocked gas jet (for gas stoves): Gas stoves have individual gas jets that provide the flame for each burner. If these jets get clogged or blocked by food debris or other substances, it can obstruct the flow of gas and prevent the burner from functioning. Cleaning and unclogging the gas jets can often resolve this issue.
These are some of the common causes that can lead to a non-working stove burner. However, it’s important to remember that each stove model may have its own unique issues, so it’s always recommended to consult the manufacturer’s manual or seek professional help for specific troubleshooting steps.
Faulty burner element
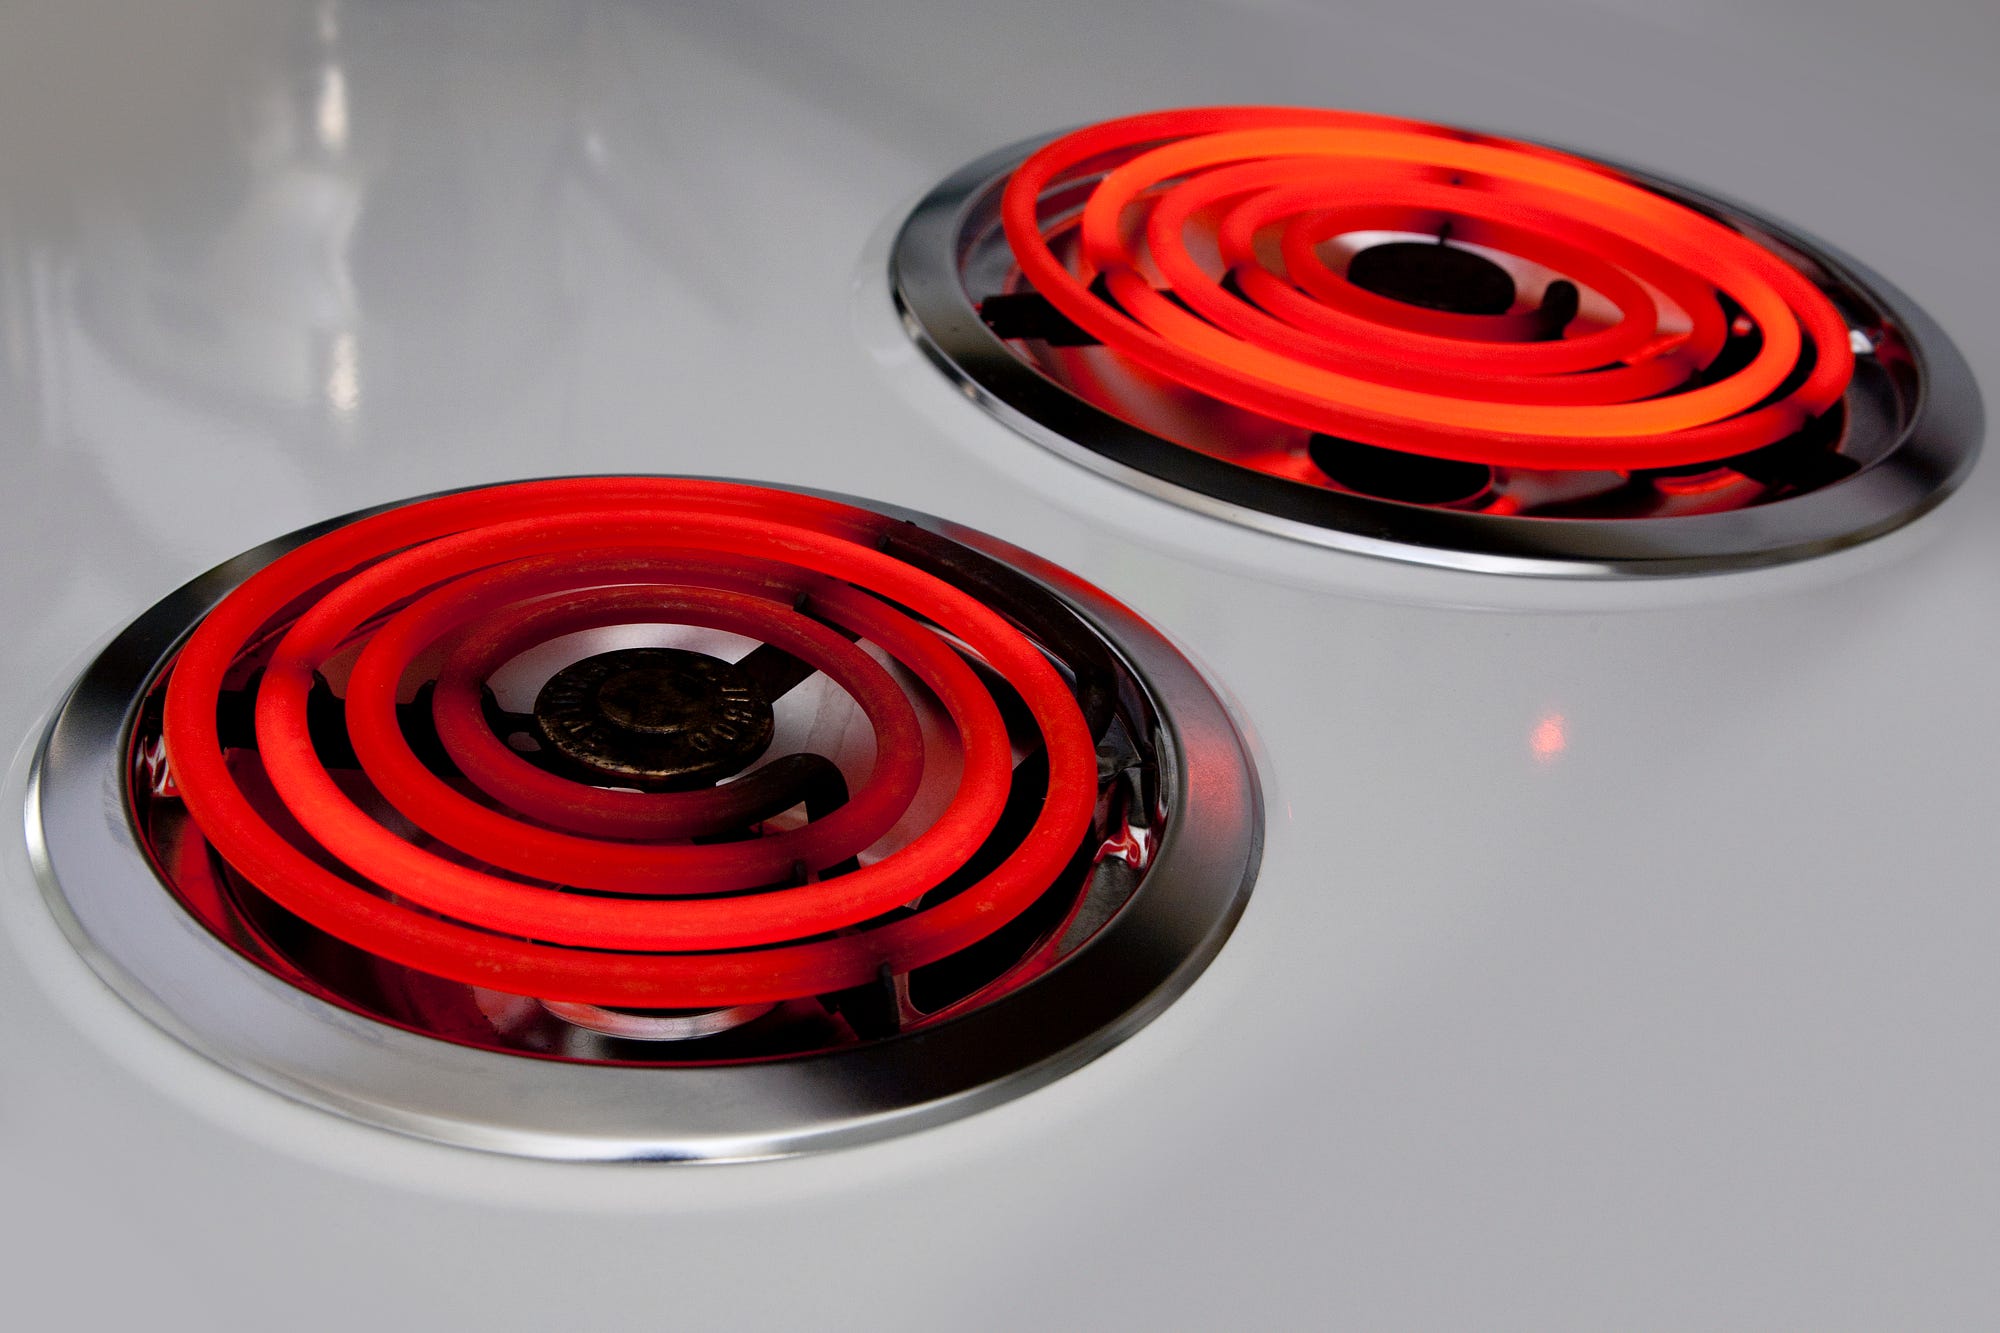
A faulty burner element is one of the most common causes of a non-working stove burner, especially in electric stoves. Over time, the burner element can develop cracks, burn marks, or simply stop working altogether, rendering the burner inoperable.
To determine if the burner element is the issue, start by unplugging the stove or turning off the power supply from the breaker panel. Once the power is off, inspect the burner element for any visible signs of damage. Look for cracks, discoloration, or any burn marks on the surface. If you notice any of these signs, it’s a clear indication that the burner element needs to be replaced.
Replacing a faulty burner element is relatively straightforward. Start by identifying the model and serial number of your stove, which can usually be found on a label or tag attached to the appliance. This information will help you find a compatible replacement burner element. You can either purchase the replacement part from a local appliance store or order it online from the manufacturer’s website or other reputable sources.
Before installing the new burner element, make sure the power is still turned off to avoid any risk of electrical shock. Remove the malfunctioning burner element by gently lifting it away from the stove. Take note of how the element is connected and the wiring configuration, as this will help you install the new one correctly.
Once the old burner element is removed, install the new one by aligning it with the burner socket and gently pressing it down until it sits securely. Connect the wires according to the configuration you observed earlier, ensuring they are well-fitted and secure. Finally, restore power to the stove and test the burner to ensure it is working properly.
If replacing the burner element does not resolve the issue, it may be necessary to investigate further and consult a professional technician or the manufacturer’s customer service for assistance. They will be able to diagnose any underlying problems and provide guidance on the next steps.
Loose or damaged wiring
Another common cause of a non-working stove burner is loose or damaged wiring. Over time, the electrical connections that supply power to the burner can become loose or even damaged, preventing the burner from receiving the necessary electricity.
To determine if loose or damaged wiring is the culprit, start by unplugging the stove or turning off the power supply from the breaker panel to ensure safety. Once the power is off, carefully inspect the wiring connections behind the stove or within the control panel. Look for any loose or disconnected wires, frayed insulation, or signs of burning or melting.
If you find any loose wires, reconnect them firmly and securely. Use a screwdriver or appropriate tool to tighten any terminal screws or wire nuts. Ensure that each wire is connected to the correct corresponding terminal or wire nut, as indicated by different colors or markings. It’s important to follow the wiring diagram or consult the user manual provided by the manufacturer for proper connection instructions.
If you notice any frayed insulation on the wires or signs of burning or melting, it indicates a more serious issue. In such cases, it’s best to consult a professional technician or an electrician to assess and repair the wiring properly. They will have the expertise and tools to safely handle electrical repairs.
After securing and repairing any loose or damaged wiring, restore power to the stove and test the burner to see if it is working properly. Make sure to observe all safety precautions when working with electrical components and always consult a professional if you are unsure or uncomfortable with performing the repairs yourself.
It’s worth noting that prevention is key when it comes to loose or damaged wiring. Regularly inspecting and maintaining the electrical connections in your stove can help prevent future problems. Additionally, avoiding excessive tugging or pulling on the wires and being cautious with any liquids near the stove can help prolong the lifespan of the wiring system.
If addressing the wiring connections does not solve the issue with the non-working stove burner, try moving on to the next troubleshooting steps to identify and resolve the problem.
Defective burner switch
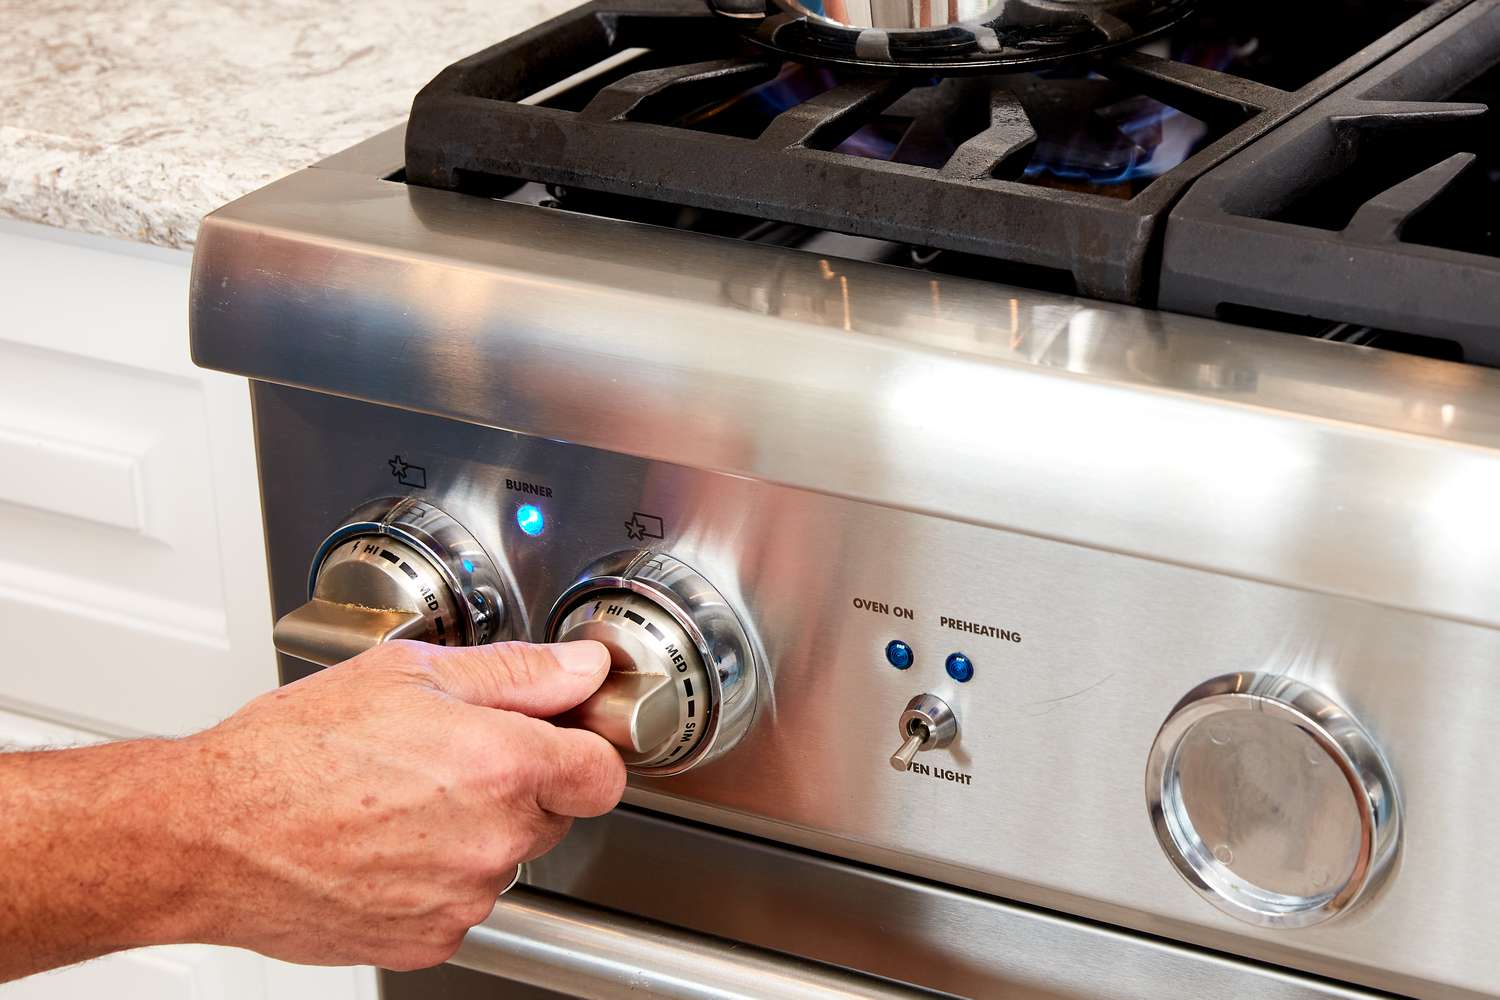
A defective burner switch is another possible cause of a non-working stove burner. The burner switch is responsible for controlling the flow of electricity to the burner, allowing it to heat up. If the switch becomes faulty, it can disrupt the power supply and prevent the burner from functioning properly.
To determine if the burner switch is the issue, start by unplugging the stove or turning off the power supply from the breaker panel to ensure safety. Once the power is off, remove the burner knob by pulling it straight off the switch shaft. This will expose the burner switch.
Inspect the burner switch for any visible signs of damage or wear. Look for any broken or loose components, burnt connections, or melted plastic. If you notice any of these signs, it’s likely that the burner switch is defective and needs to be replaced.
Replacing a defective burner switch requires careful handling and attention to detail. Start by purchasing a replacement switch that is compatible with your stove model. You can find this information in the stove’s user manual or by contacting the manufacturer.
Before attempting to replace the switch, carefully disconnect the wires from the original switch, taking note of their positions and connections. It’s helpful to take a photo or make a diagram to ensure proper reconnection later. Then, remove the old switch by unscrewing it from the control panel and gently pulling it out.
Install the replacement switch by inserting it into the control panel and securing it with screws. Carefully reconnect the wires to the appropriate terminals in accordance with the diagram or photo you created earlier. Ensure that the connections are secure and tightly fastened.
Once the new switch is securely installed and the wires are properly connected, restore power to the stove and test the burner to see if it is working. Turn the burner knob to the desired heat setting, and observe if the burner heats up as expected. If everything is functioning correctly, you have successfully resolved the issue with the defective burner switch.
If replacing the burner switch does not fix the problem, it may be necessary to explore other potential causes or seek the assistance of a professional technician or the manufacturer’s customer service for further guidance.
Read more: Why Is Part Of My Stove Burners Orange
Faulty control board or ignition module
In some stoves, especially those with advanced features, a faulty control board or ignition module can be the cause of a non-working stove burner. The control board or ignition module is responsible for regulating the functioning of the burners, including providing the spark or heat necessary for ignition.
To determine if a faulty control board or ignition module is causing the issue, start by unplugging the stove or turning off the power supply from the breaker panel. Carefully remove any control panel covers or panels to access the control board or ignition module.
Inspect the control board or ignition module for any visible signs of damage, such as burnt components, loose wires, or discoloration. If you notice any of these signs, it’s likely that the control board or ignition module is defective and needs to be replaced.
Replacing a faulty control board or ignition module typically requires professional assistance, as it involves more complex electrical work. It’s best to contact the manufacturer’s customer service or a qualified technician for guidance and support in replacing these components.
If you prefer to attempt the replacement yourself, start by obtaining a compatible replacement control board or ignition module. This information can be found in the stove’s user manual or by contacting the manufacturer.
Before disconnecting any wires or removing the old control board or ignition module, take a photo or make a diagram of the wiring connections to ensure proper reconnection later. Then, carefully disconnect the wires from the old control board or ignition module, taking note of their positions and connections.
Remove the old control board or ignition module from its mounting position, making sure to handle it with care. Install the replacement component in its place, securing it according to the manufacturer’s instructions.
Next, reconnect the wires to the appropriate terminals on the new control board or ignition module, referring to the photo or diagram you created earlier to ensure correct connections. Make sure the connections are secure and tightly fastened.
Once the new control board or ignition module is installed and the wires are properly connected, restore power to the stove and test the burner to ensure it is now functioning. If the burner ignites and works as expected, you have successfully resolved the issue with the faulty control board or ignition module.
If replacing the control board or ignition module does not resolve the problem, it may be necessary to explore other potential causes or seek the assistance of a professional technician or the manufacturer’s customer service for further troubleshooting and assistance.
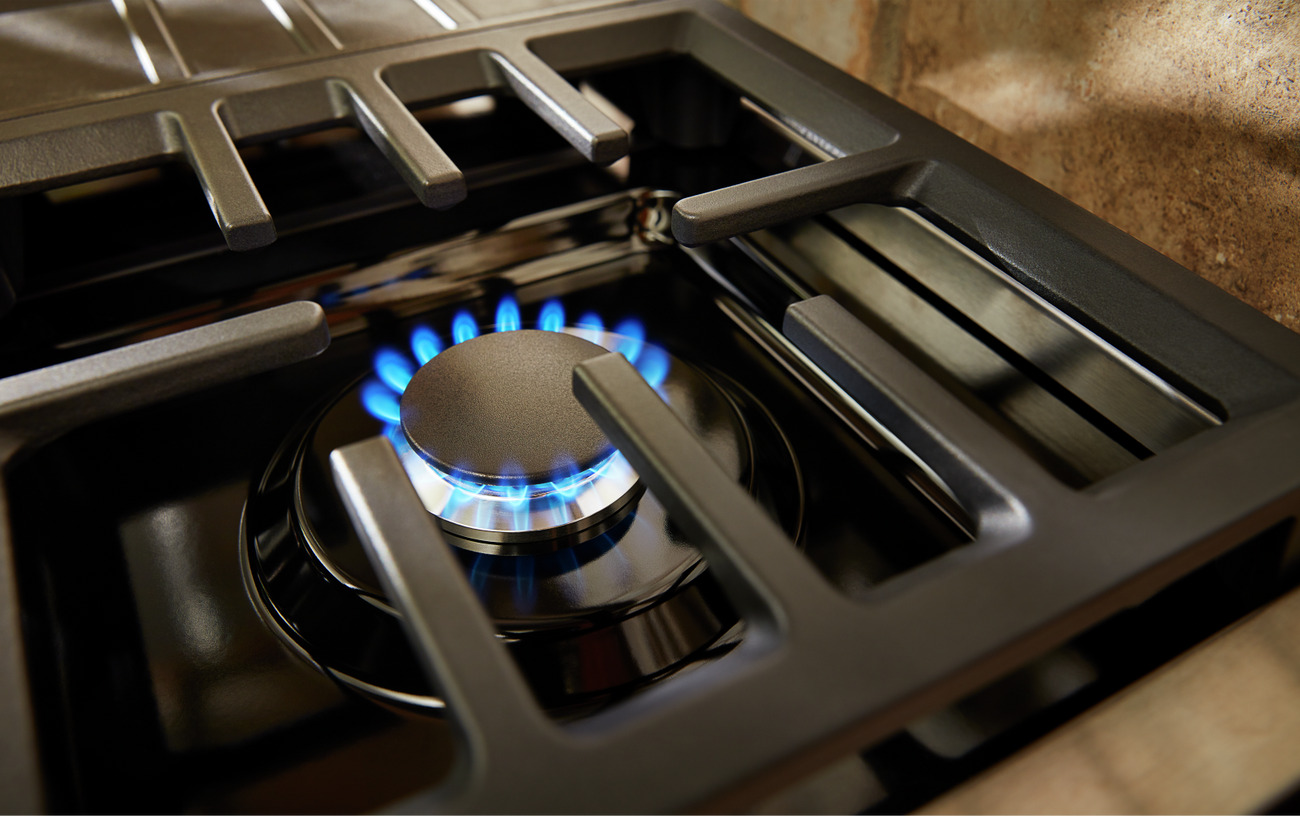
Clogged or blocked gas jet (for gas stoves)
For gas stoves, a common cause of a non-working burner is a clogged or blocked gas jet. Gas stoves have individual gas jets that provide the flame for each burner. Over time, these jets can become clogged with food debris, grease, or other substances, obstructing the flow of gas and preventing the burner from igniting or functioning properly.
To determine if the gas jet is the cause of the issue, start by turning off the gas supply to the stove. This is usually done by turning the gas valve off at the main gas line or using a gas shut-off valve near the stove.
Carefully remove the burner cap and, if applicable, the burner base, to expose the gas jet. Look for any visible signs of blockage, such as dirt, grease, or food particles. A clogged jet may appear discolored or have a buildup of substance around it.
Use a small, soft brush or a straightened paper clip to gently clean the gas jet. Remove any debris or buildup by brushing or carefully inserting the paper clip into the jet to clear the obstruction. Take care not to damage or bend the jet during the cleaning process.
Once the gas jet is cleaned and free from any blockage, reassemble the burner by placing the burner base and cap back in their original positions.
Turn the gas supply back on and light the burner to test if it is now functioning properly. If the burner ignites and produces a steady flame, you have successfully resolved the issue caused by the clogged or blocked gas jet.
If cleaning the gas jet does not solve the problem, there may be other underlying issues, such as a faulty gas valve or regulator. In such cases, it is recommended to consult a professional technician or the manufacturer’s customer service for further troubleshooting and assistance.
Regular maintenance of gas stoves, including periodic cleaning of the gas jets, can help prevent clogging and ensure optimal performance. It is also important to follow proper cooking practices, such as using appropriate cookware and avoiding spills, to minimize the risk of clogging the gas jets in the first place.
Troubleshooting steps for a non-working stove burner
When faced with a non-working stove burner, it’s important to follow a systematic approach to identify and resolve the issue. Here are some troubleshooting steps you can take to pinpoint the problem:
1. Check the power supply
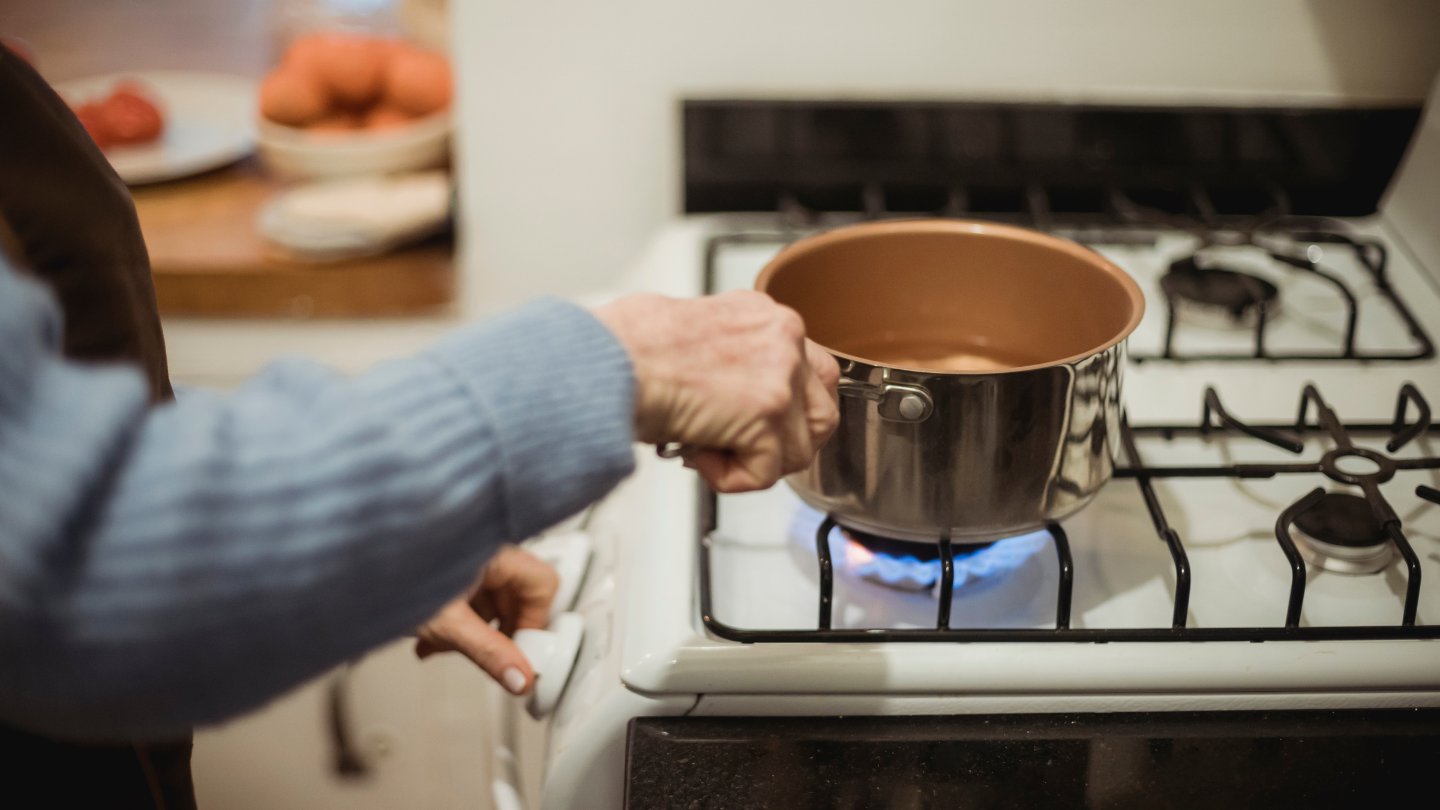
Start by ensuring that the stove is receiving power. If it’s an electric stove, check that it is plugged in properly or that the circuit breaker has not tripped. For gas stoves, make sure the gas supply valve is open and that there are no issues with the gas line.
2. Examine the burner element
If you have an electric stove, inspect the burner element for any visible damage, such as cracks, burn marks, or discoloration. If the element appears faulty, it may need to be replaced.
3. Inspect the wiring connections
Loose or damaged wiring can prevent the burner from receiving power. Carefully examine the wiring connections behind the stove or within the control panel. Reconnect any loose wires and ensure they are securely fastened.
4. Test the burner switch
For electric stoves, check the burner switch by removing the knob and inspecting the switch for any signs of damage or wear. If the switch is defective, it may need to be replaced by a compatible one.
5. Check the control board or ignition module
In stoves with advanced features, a faulty control board or ignition module can be the issue. Inspect these components for any visible damage or signs of malfunction. If necessary, consult a professional technician or the manufacturer’s customer service for assistance in replacing them.
Read more: Why Do My Electric Stove Burners Burn Up?
6. Clean and unclog gas jets (for gas stoves)
If you have a gas stove, check the individual gas jets for blockages. Remove any obstructions using a small brush or a straightened paper clip. Ensure that the gas jets are clean and free from debris to allow proper gas flow.
It’s worth noting that these troubleshooting steps are intended as a general guide and may vary depending on your specific stove model. Always refer to the manufacturer’s manual or consult a professional for specific troubleshooting instructions.
If you are unable to identify and resolve the problem on your own, it is advisable to seek the assistance of a qualified technician or contact the manufacturer’s customer service for further guidance and support.
Check the power supply
When troubleshooting a non-working stove burner, the first step is to ensure that the appliance is receiving the necessary power supply. This step applies primarily to electric stoves, as gas stoves do not require an electrical connection for the burners to function.
Here’s how to check the power supply:
- Verify the plug: Start by checking the power cord of the stove to ensure it is securely plugged into a functioning electrical outlet. Ensure that the outlet itself is working by testing it with another appliance or device.
- Check the circuit breaker: If the stove is properly plugged in but the burner is still not working, check the circuit breaker or fuse box. Look for any tripped circuit breakers or blown fuses related to the stove. If you find any, reset the breaker or replace the fuse to restore power.
- Inspect the wiring: If there are no issues with the power outlet or circuit breaker, you may need to inspect the stove’s wiring. Start by turning off the power supply to the stove at the circuit breaker panel for safety. Then, remove any access panels on the stove to expose the wiring connections.
- Check for loose connections: Inspect the wiring connections to ensure they are securely fastened and free from any loose or dislodged wires. If you notice any loose connections, gently tighten them using a screwdriver or appropriate tool. Ensure that each wire is connected to the correct terminal or wire nut.
- Look for visual damage: While examining the wiring, keep an eye out for any visible signs of damage, such as frayed insulation, melted wires, or burnt components. If you detect any damage, it is recommended to consult a professional technician or an electrician for further evaluation and repair.
- Restore the power and test the burner: Once you have completed the necessary steps, restore the power supply to the stove. Turn on the burner and observe if it starts working properly. If the burner now functions normally, the power supply was likely the cause of the issue.
It is important to follow safety precautions when working with electrical components. If you are unsure or uncomfortable with checking the power supply or handling electrical repairs, it is always best to consult a professional technician or contact the manufacturer’s customer service for assistance.
Examine the burner element
One possible cause of a non-working stove burner is a faulty burner element. In an electric stove, the burner element is responsible for generating heat. Over time, this element can become damaged or worn out, resulting in the burner not functioning properly. Here’s how to examine the burner element and determine if it is the cause of the issue:
- Turn off the power: Before inspecting the burner element, ensure that the stove is completely turned off and disconnected from the power supply. This will prevent any risk of electrical shock and ensure your safety.
- Remove any obstacles: Clear the area around the burner you want to examine. Remove any pots, pans, or debris from the burner and its surrounding area to gain easy access.
- Inspect the burner element: Carefully examine the burner element for any visible signs of damage, such as cracks, burn marks, or discoloration. Use a flashlight if necessary to get a better view. Pay close attention to the coils of the burner element to look for any irregularities.
- Look for loose connections: While inspecting the burner element, also check the terminals or connections where the element plugs into the stove. Ensure that the connections are secure and tight. Loose or corroded connections can lead to a poor electrical connection and cause the burner not to function.
- Perform a visual and tactile inspection: Run your hand lightly over the surface of the burner element to feel for any abnormalities or rough spots. Sometimes, there may be imperfections that are not immediately visible but can be detected by touch.
- Compare with other elements: If your stove has multiple burners, compare the questionable burner element with the others that are working correctly. Look for any noticeable differences in appearance or texture that could indicate a problem.
If you identify any significant damage, burn marks, or cracks in the burner element, it is likely the source of the problem. In this case, you will need to replace the faulty burner element with a new one. Refer to the manufacturer’s guidelines or consult a professional technician to ensure you select the appropriate replacement part for your stove model.
It’s important to exercise caution when handling the burner element, especially if it is damaged or has sharp edges. Wear protective gloves if necessary and follow proper safety measures when removing and installing the replacement element.
If the burner element appears to be in good condition and you don’t notice any obvious issues, it’s time to move on to the next troubleshooting steps to further diagnose and resolve the problem with the non-working stove burner.
Inspect the wiring connections
When troubleshooting a non-working stove burner, it’s essential to inspect the wiring connections to ensure they are secure and intact. Loose or damaged wiring can prevent the burner from receiving the necessary electricity. Here’s how to inspect the wiring connections:
- Safety first: Before beginning any inspection or repair work, ensure that the stove is unplugged or the power supply is turned off at the circuit breaker. This will prevent any risk of electrical shock and ensure your safety.
- Remove burner elements and pans: For easier access, remove the burner elements and any pots or pans from the stove’s surface. This will give you a clear view of the wiring connections.
- Open the stove panel: Depending on the stove model, you may need to remove the control panel or access the wiring connections from the back of the stove. Consult the manufacturer’s manual or follow the specific instructions for your stove.
- Inspect the wiring: Carefully examine the wiring connections for any signs of damage, such as loose wires, frayed insulation, or burnt components. Look for any visible disconnections or signs of overheating.
- Check terminal screws or wire nuts: Ensure that any terminal screws or wire nuts connecting the wires are securely tightened. Loose connections can disrupt the flow of electricity to the burner, causing it to malfunction.
- Repair or replace: If you find any loose wires, reconnect them firmly and securely. If you notice any frayed insulation or damaged wires, these will need to be repaired or replaced. It’s recommended to consult a professional technician or an electrician to handle these repairs properly.
While inspecting the wiring connections, it’s crucial to follow safety precautions to avoid any accidents. If you are not comfortable working with electrical components, it’s best to seek the assistance of a qualified technician or contact the manufacturer’s customer service for guidance and support.
By inspecting and maintaining the wiring connections regularly, you can help prevent issues with non-working stove burners. Regular cleaning, checking for loose connections, and addressing any wiring concerns promptly can ensure the proper functioning of your stove.
If the inspection of the wiring connections does not resolve the issue, continue to the next troubleshooting steps to further diagnose the problem with the non-working stove burner.
Check if the burner is properly connected and the socket is not damaged. Clean the burner and the socket to ensure a good connection. If the issue persists, it may be a faulty burner or socket that needs to be replaced.
Read more: How Electric Stove Burners Work
Test the burner switch
If you have an electric stove and the burner is not working, a faulty burner switch could be the culprit. The burner switch controls the power supply to the burner, and if it is defective, it can prevent the burner from functioning. Here’s how to test the burner switch:
- Safety first: Before starting any testing or repair work, ensure that the stove is unplugged or the power supply is turned off at the circuit breaker. This will prevent any risk of electrical shock and ensure your safety.
- Access the burner switch: Depending on your stove model, the burner switch may be located behind the control panel or beneath the surface of the stove. Consult the manufacturer’s manual or follow the specific instructions for your stove to access the switch.
- Label the wires: Before removing any wires, label them or take a photo to ensure that you can correctly reconnect them later. This will help prevent confusion and ensure proper connections after testing the switch.
- Use a multimeter: Set your multimeter to the continuity or resistance mode. Touch the probes of the multimeter to the terminals of the burner switch. When the switch is turned on, there should be continuity or a low resistance reading. When the switch is turned off, there should be no continuity or a high resistance reading.
- Observe the switch: While testing with the multimeter, observe the burner switch for any signs of physical damage, such as melted parts or loose connections. If there is visible damage, the switch is likely faulty and needs to be replaced.
- Test other switches: If your stove has multiple switches for different burners, repeat the testing process for each switch to compare the results. This can help you identify whether the issue is specific to the burner switch or a more general electrical problem with the stove.
If the burner switch shows good continuity or resistance when turned on and no continuity or high resistance when turned off, it is functioning correctly. In this case, the issue may lie elsewhere, such as with the burner element or the control board. Consult the manufacturer’s manual or a professional technician for further troubleshooting guidance.
However, if the burner switch fails the continuity or resistance test or shows signs of damage, it is likely the cause of the non-working stove burner. In this case, you will need to replace the faulty burner switch. Refer to the manufacturer’s guidelines or consult a professional technician to ensure you select the appropriate replacement part for your stove model.
Always exercise caution when working with electrical components and, if you are unsure or uncomfortable with testing or replacing the burner switch, it is best to seek the assistance of a qualified technician or contact the manufacturer’s customer service for further guidance and support.
Check the control board or ignition module
In some stoves, especially those with advanced features, a non-working burner can be attributed to a faulty control board or ignition module. These components are responsible for regulating burner functions, such as providing the spark or heat required for ignition. Here’s how to check the control board or ignition module:
- Safety precautions: Before beginning any inspection or repair work, ensure that the stove is unplugged or the power supply is turned off at the circuit breaker. This will prevent any risk of electrical shock and ensure your safety.
- Access the control board or ignition module: Depending on your stove model, these components may be located behind the control panel or inside the stove. Consult the manufacturer’s manual or follow the specific instructions for your stove to access these parts.
- Visual inspection: Carefully examine the control board or ignition module for any visible signs of damage, such as burnt components, loose wires, or discoloration. Look for any obvious physical abnormalities or indications of malfunction.
- Testing with a multimeter: Use a multimeter to test the voltage and continuity of the control board or ignition module, following the manufacturer’s guidelines or specifications for your specific stove model. Compare the measured values with the expected range or reference values to determine if the component is functioning correctly.
- Consult a professional: If you are unsure about the testing process or do not have experience working with electrical components, it is advisable to consult a professional technician or contact the manufacturer’s customer service for further guidance and support.
If you detect any visible damage, loose connections, or signs of malfunction during the inspection, it is likely that the control board or ignition module is faulty. In this case, the component may need to be repaired or replaced.
Replacing or repairing the control board or ignition module often requires expert knowledge and specialized tools. It is recommended to seek the assistance of a professional technician or contact the manufacturer’s customer service for further troubleshooting and assistance.
Attempting to repair or replace these components without the necessary expertise may result in further damage or voiding of warranties. It’s always best to leave complex electrical repairs to qualified professionals to ensure your safety and avoid causing additional issues with your stove.
By following these steps, you can determine if a faulty control board or ignition module is the cause of the non-working stove burner. This will help you make informed decisions regarding repair or replacement and ultimately resolve the issue efficiently.
Clean and unclog gas jets (for gas stoves)
For gas stoves, a common cause of a non-working burner is a clogged or blocked gas jet. Gas jets provide the flame for each burner, and if they become obstructed, it can impede the flow of gas and prevent the burner from igniting or functioning properly. Here’s how to clean and unclog the gas jets:
- Ensure safety: Before starting any maintenance, turn off the gas supply to the stove. Locate the gas shut-off valve either behind the stove or near the gas line and close it to prevent any gas leakage during the cleaning process.
- Remove grates and burner caps: Take off the grates and burner caps from the affected burner to expose the gas jets. Set them aside in a safe place.
- Inspect the gas jets: Carefully examine the gas jets for any visible signs of blockage or debris. Look for food particles, grease, or other residue that may be obstructing the gas flow. Use a flashlight if necessary to get a clearer view.
- Clean the gas jets: Use a small, soft brush or a straightened paper clip to gently clean the gas jets. Carefully insert the brush bristles or the paper clip into the jet openings and remove any debris or buildup. Be gentle and avoid damaging the jets during the cleaning process.
- Use compressed air: If there are stubborn blockages that the brush or paper clip cannot remove, you can also try using a can of compressed air to blow out any remaining debris. The force of the air can dislodge and clear obstructions in the gas jets.
- Reassemble the burner: After cleaning the gas jets, reassemble the burner by placing the burner caps and grates back in their original positions. Ensure that they are properly aligned and securely in place.
- Restore gas supply and test the burner: Turn on the gas supply valve and restore the gas flow to the stove. Test the burner by turning the corresponding knob to the desired heat setting and try igniting it. If the burner ignites and produces a steady flame, you have successfully resolved the issue caused by the clogged or blocked gas jets.
Regularly cleaning and maintaining the gas jets in your stove can help prevent blockages and ensure optimal burner performance. It is also important to follow proper cooking practices, such as avoiding spills or excessive grease buildup, to minimize the risk of future clogs.
If cleaning and unclogging the gas jets does not resolve the issue with the non-working burner, there may be other underlying problems, such as a faulty gas valve or regulator. In such cases, it is recommended to consult a professional technician or contact the manufacturer’s customer service for further troubleshooting and assistance.
Conclusion
Having a non-working stove burner can be frustrating, but with the right troubleshooting steps, you can identify and resolve the issue. In this article, we explored some common causes of non-working stove burners and provided steps to help you troubleshoot and fix the problem.
From a faulty burner element to loose wiring, a defective burner switch, or a malfunctioning control board or ignition module, there are various components that can contribute to a non-working stove burner. By systematically examining each potential cause, you can determine the root of the problem and take appropriate action.
For electric stoves, checking the power supply, inspecting the burner element, examining the wiring connections, testing the burner switch, and investigating the control board or ignition module can help identify the issue. Gas stoves, on the other hand, may require cleaning and unclogging the gas jets in addition to these steps.
It’s important to prioritize safety by following proper precautions and turning off the power supply or gas before performing any maintenance or repairs. If you are uncertain or uncomfortable with the troubleshooting process, it’s advised to seek the assistance of a professional technician or contact the manufacturer’s customer service for guidance.
Regular maintenance, such as cleaning the gas jets, inspecting the wiring connections, and ensuring proper usage and care, can help prevent future problems and prolong the lifespan of your stove.
In conclusion, by understanding the common causes and applying the troubleshooting steps mentioned in this article, you will be better equipped to address non-working stove burners. Remember to refer to the manufacturer’s guidelines and seek professional assistance when needed. With patience and careful attention, you can restore your stove’s functionality and get back to enjoying your favorite meals and culinary adventures.
Read more: Why Is My Induction Cooktop Not Working
References
- “Troubleshooting Guide for Common Stove Burner Problems” – The Spruce
- “How to Troubleshoot and Repair Electric Range Burner Elements” – The Spruce
- “Electric Stove Burner Troubleshooting Tips” – American Home Shield
- “Troubleshooting Gas Stove Burner Ignition Problems” – The Spruce
- How to Clean Gas Stove Burners and Grates” – The Spruce
- “Stove Burner Not Working? Here Are the Most Common Fixes” – Bob Vila
- “5 Most Common Stove Problems and Their Solutions” – Angie’s List
- “Troubleshooting Gas Range and Oven Problems” – HomeTips
Please note that the references mentioned above are for informational purposes and provide additional resources related to troubleshooting stove burner issues. It’s always recommended to consult the manufacturer’s manual or seek professional assistance for specific troubleshooting steps and guidelines pertaining to your specific stove model.
Frequently Asked Questions about Why Is One Of My Stove Burners Not Working
Was this page helpful?
At Storables.com, we guarantee accurate and reliable information. Our content, validated by Expert Board Contributors, is crafted following stringent Editorial Policies. We're committed to providing you with well-researched, expert-backed insights for all your informational needs.


0 thoughts on “Why Is One Of My Stove Burners Not Working”