Home>Articles>What Is Causing My Gas Stove Burners Not To Ignite When Turning Them On?
Articles
What Is Causing My Gas Stove Burners Not To Ignite When Turning Them On?
Modified: October 27, 2024
Discover common causes for gas stove burners not igniting and learn how to troubleshoot this issue in our informative articles.
(Many of the links in this article redirect to a specific reviewed product. Your purchase of these products through affiliate links helps to generate commission for Storables.com, at no extra cost. Learn more)
Introduction
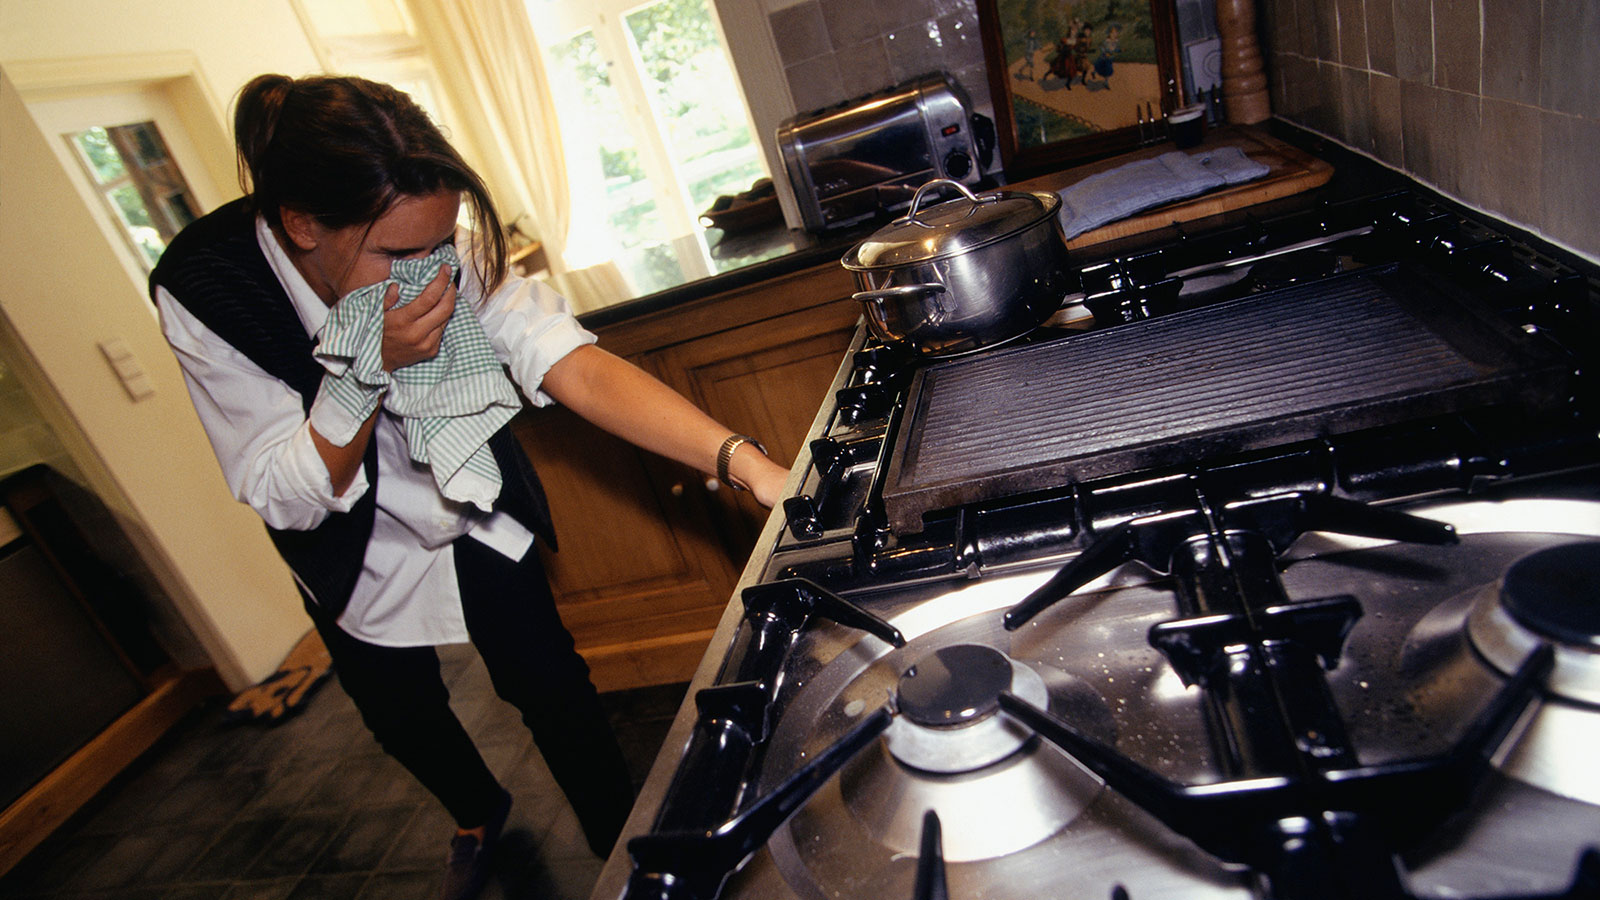
There’s nothing more frustrating than turning the knob on your gas stove and having the burners fail to ignite. It can put a halt to your cooking plans, leaving you with uncooked meals and a lot of frustration. But why does this happen? What are the common causes behind gas stove burners not igniting?
In this article, we will explore some of the most common reasons why your gas stove burners may not be igniting when you try to turn them on. We’ll also provide troubleshooting steps to help you fix the issue and get your burners back in working order.
Before we dive into the potential causes, it’s important to note that dealing with gas appliances can be dangerous if you’re not experienced or comfortable doing so. If you’re unsure or uncomfortable with troubleshooting your gas stove, it’s always best to seek the help of a professional technician who can safely diagnose and fix the issue for you.
Now, let’s explore some of the common causes for gas stove burners not igniting. By understanding these potential culprits, you’ll be better equipped to identify and potentially resolve the issue yourself or communicate it effectively to a professional technician.
Key Takeaways:
- Regularly cleaning the burner and checking the igniter can help resolve gas stove burner ignition issues, ensuring optimal performance and reliable ignition for hassle-free cooking experiences.
- Verifying the gas supply, inspecting the control valve, and examining electrical connections are crucial steps to troubleshoot and address gas stove burner ignition problems, promoting safe and efficient operation.
Common Causes for Gas Stove Burners Not Igniting
When your gas stove burners refuse to ignite, it can be frustrating and inconvenient. However, by understanding the common causes behind this issue, you can determine the best course of action to fix it. Here are some potential reasons why your gas stove burners may not be igniting:
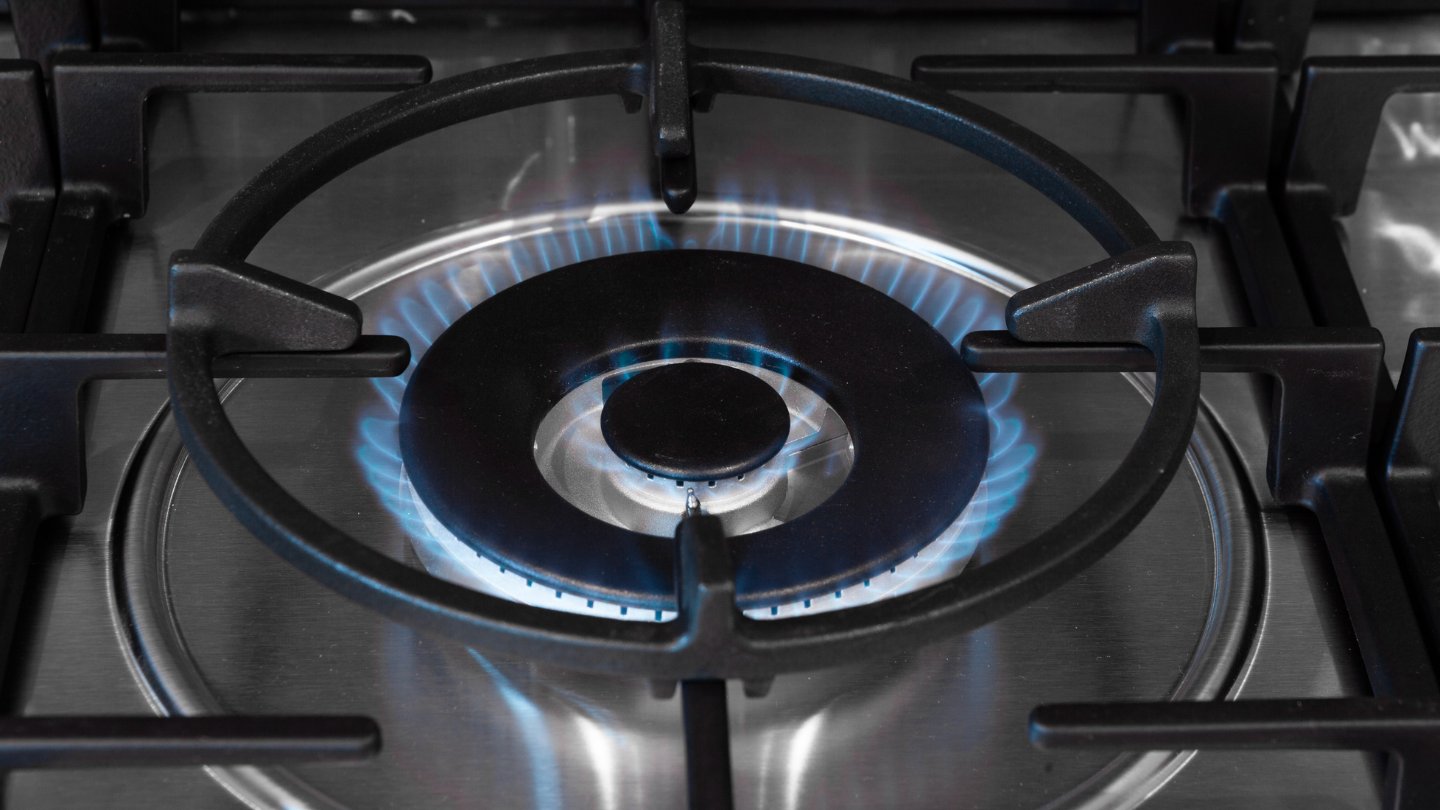
1. Burner Clogged with Debris: Over time, various debris such as food particles, grease, or dust can accumulate on the burner, restricting the flow of gas and preventing proper ignition. This buildup can hinder the effectiveness of the ignition system and lead to ignition failure.
2. Igniter Not Functioning Properly: The igniter, also known as the spark electrode, is responsible for producing the spark that ignites the gas. If the igniter is faulty or dirty, it may not generate a strong enough spark to ignite the gas, resulting in burner failure.
3. Gas Supply Issues: Insufficient gas supply or a disconnected gas line can prevent the burners from igniting. Gas supply issues can arise from a closed or partially closed gas valve, low gas pressure, or a problem with the gas line connection.
4. Faulty Control Valve: The control valve regulates the flow of gas to the burner. If the control valve is faulty or damaged, it may not be allowing the proper amount of gas to reach the burner, causing ignition failure.
5. Electrical Connection Problems: In gas stoves with electronic ignition systems, faulty electrical connections can disrupt the flow of electricity to the igniter, preventing it from producing a spark. Loose or damaged wires and corroded connections can contribute to this issue.
6. Defective Spark Module: The spark module is responsible for sending an electrical pulse to the igniter, creating the spark needed for ignition. If the spark module is defective or worn out, it may not be able to deliver the necessary electrical pulse, resulting in ignition failure.
7. Gas Regulator Malfunction: The gas regulator controls the pressure of gas flowing from the supply line to the stove burners. If the regulator is faulty or malfunctioning, it may not be providing the correct gas pressure, leading to ignition problems.
These are just a few of the common causes for gas stove burners not igniting. It’s essential to identify the specific cause of the issue before attempting any repairs. In the next section, we will discuss troubleshooting steps to help you fix the problem and get your burners working again.
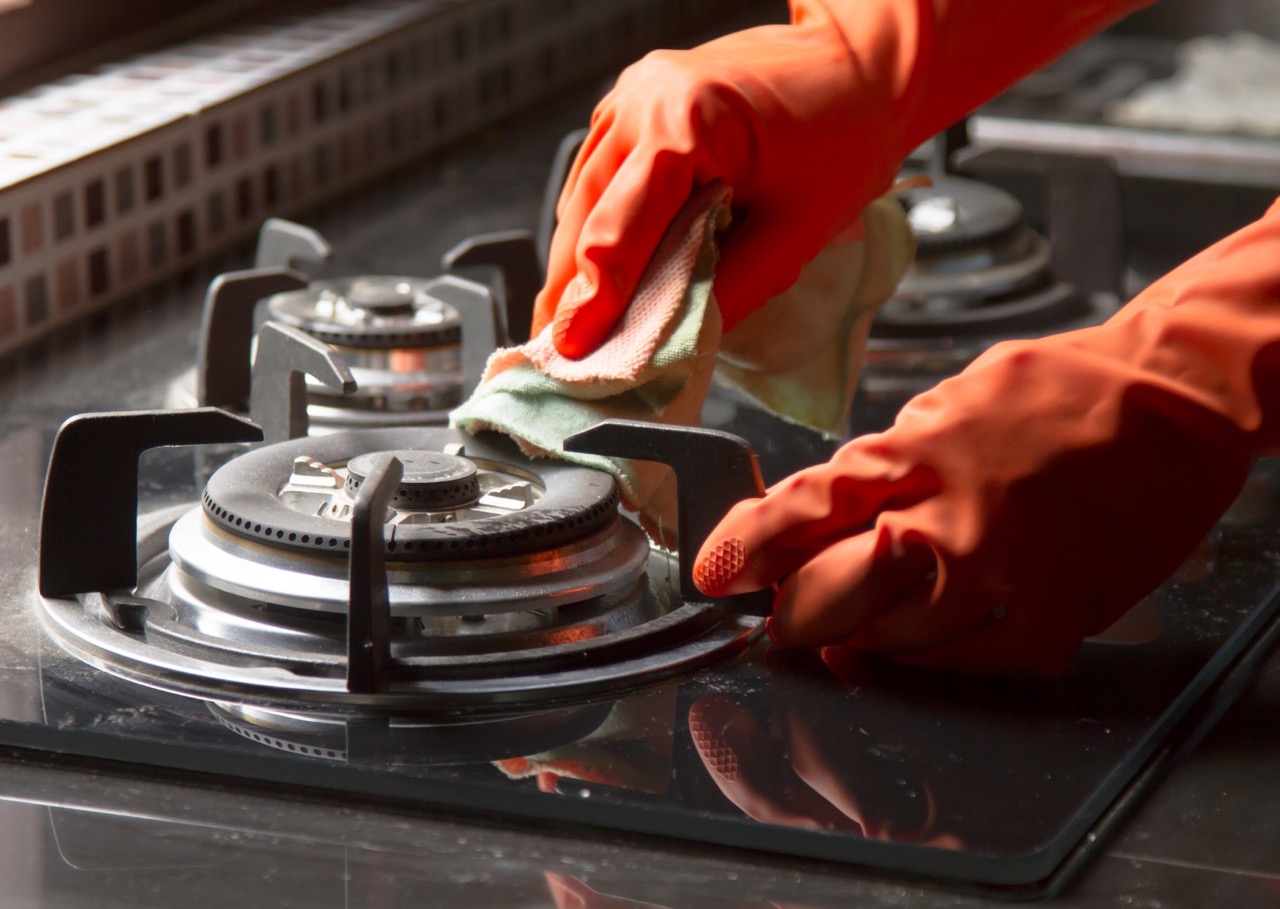
Burner Clogged with Debris
One of the most common reasons why gas stove burners fail to ignite is a clogged burner. Over time, food particles, grease, and other debris can accumulate on the burner, blocking the flow of gas and inhibiting proper ignition.
When the burner is clogged, the gas cannot disperse evenly, leading to a weak flame or no flame at all. Fortunately, this issue is relatively easy to fix with some thorough cleaning. Here are a few steps to help you unclog a burner:
1. Turn off the gas supply: Before you start cleaning the burner, ensure that the gas supply to the stove is turned off. This is crucial to prevent any accidental leaks or gas-related hazards.
2. Remove the burner: To clean the burner effectively, it’s best to remove it from the stovetop. Depending on your stove model, you may need to lift the burner or release it using a latch or screw. Refer to your stove’s user manual for specific instructions.
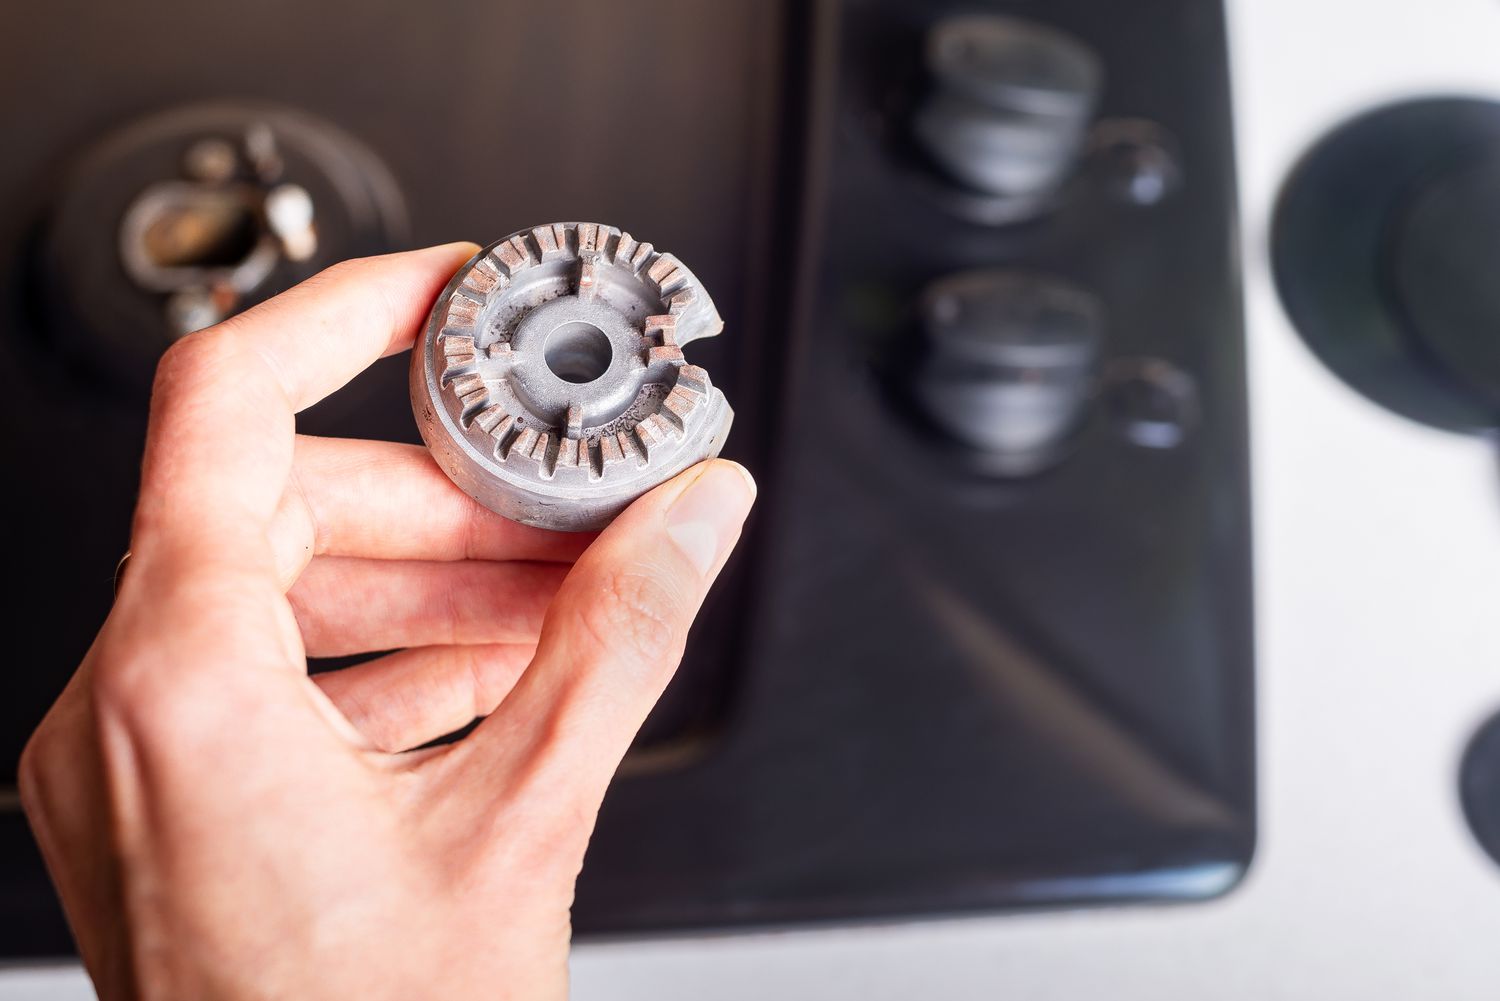
3. Clean the burner holes: Once the burner is detached, examine the small holes on the burner plate. These holes deliver the gas for combustion, so it’s important to ensure they are clear of any obstructions. Use a soft brush or toothbrush to gently scrub away any debris, being careful not to damage the burner.
4. Soak the burner: If the debris is particularly stubborn, you can soak the burner in warm, soapy water to loosen and dissolve the buildup. Allow the burner to sit in the soapy water for about 15-30 minutes, then scrub it again to remove any remaining residue.
5. Dry and reassemble: After cleaning, thoroughly dry the burner to prevent moisture from interfering with ignition. Once it’s completely dry, reattach the burner to the stovetop, ensuring it is properly aligned and secured.
6. Test the ignition: With the burner reinstalled, turn on the gas supply and attempt to ignite the burner. If it ignites successfully and produces a steady flame, then the cleaning process was effective in resolving the clog issue. However, if the burner still fails to ignite, you may need to explore other potential causes.
By regularly cleaning your burner to prevent debris buildup, you can ensure optimal performance and reliable ignition. However, if the issue persists or if you’re uncomfortable performing the cleaning yourself, it’s recommended to consult a professional technician for assistance.
Igniter Not Functioning Properly
Another common cause of gas stove burners failing to ignite is a malfunctioning igniter. The igniter, also known as the spark electrode, is responsible for generating the spark that ignites the gas. If the igniter is dirty or faulty, it may not produce a strong enough spark to ignite the gas, resulting in ignition failure.
Here’s what you can do to troubleshoot and address an igniter that is not functioning properly:
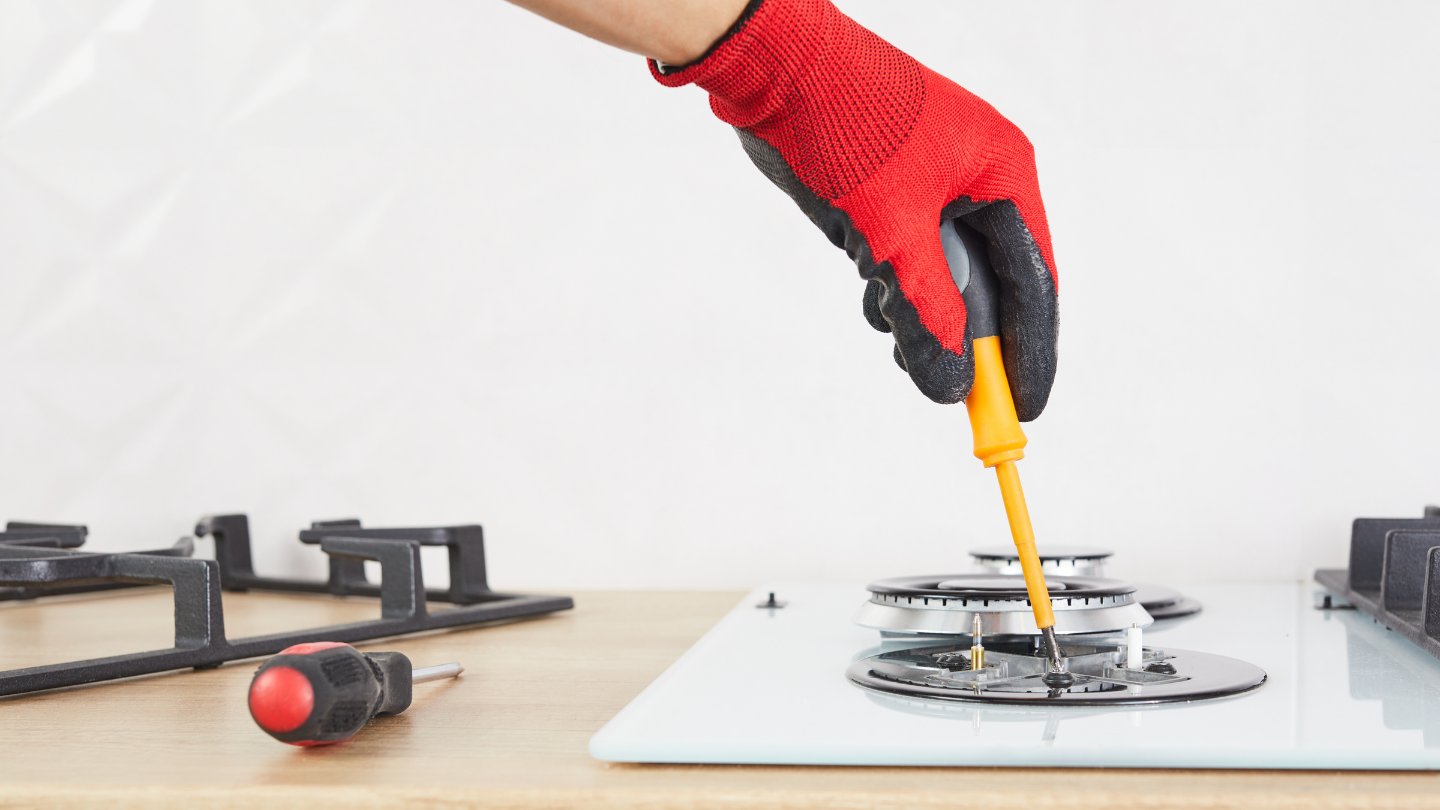
1. Visual inspection: Start by visually inspecting the igniter. Look for any signs of damage or wear, such as visible cracks or corrosion on the igniter tip or surrounding components. If you notice any damage, the igniter may need to be replaced.
2. Cleaning the igniter: Over time, the igniter can become dirty or covered in residue, hindering its ability to produce a spark. Use a soft brush or a toothbrush to gently clean the igniter and remove any dirt or buildup. Be careful not to apply excessive force or damage the delicate igniter surface.
3. Adjusting the igniter position: In some cases, the igniter may be misaligned or too far away from the burner. Ensure that the igniter is properly positioned, close enough to create a spark near the gas outlet holes on the burner. Refer to your stove’s user manual for guidance on adjusting the igniter position.
4. Checking the wiring: Inspect the electrical connections between the igniter and the control module. Loose or damaged wiring can disrupt the flow of electricity, preventing the igniter from functioning correctly. Gently wiggle the wires to ensure they are securely connected and not loose or frayed. If you notice any issues, it’s best to consult a professional technician to handle the electrical repairs.
5. Testing the igniter: If you have access to a multimeter or a continuity tester, you can perform a simple test to check the igniter’s functionality. Set the multimeter to the appropriate mode, and carefully touch the igniter’s connector terminals with the meter’s probes. If the reading shows continuity or a low resistance value, this indicates that the igniter is still in good working condition. However, if the reading is high or there is no continuity, it’s likely that the igniter needs to be replaced.
If after performing these troubleshooting steps, the igniter still fails to produce a spark or ignite the gas, it may be necessary to replace the igniter. It’s recommended to consult a professional technician or contact the manufacturer for further assistance and to ensure proper installation of a new igniter if required.
Gas Supply Issues
Gas supply issues can also contribute to gas stove burners failing to ignite. Insufficient gas supply or a disconnected gas line can disrupt the flow of gas to the burners, preventing them from igniting properly. Here are some steps to troubleshoot and address common gas supply issues:
1. Check the gas valve: Ensure that the gas valve supplying gas to your stove is fully open. Sometimes, the gas valve can accidentally be partially closed or turned off, restricting the gas flow. Turn the valve counterclockwise to open it fully and verify if this resolves the issue.
2. Check for gas line obstructions: Inspect the gas line connected to your stove for any obstructions or kinks. Ensure that the gas line is free of any debris, such as dust or lint, which may impede the gas flow. If you find any blockages or kinks, gently clear the area or straighten the line to restore proper gas flow.
3. Verify gas pressure: Gas stoves require a specific gas pressure to function properly. If the gas pressure is too low, the burners may not ignite or produce a weak flame. Contact your gas supplier or a professional technician to measure and adjust the gas pressure if necessary.
4. Check for gas leaks: Gas leaks can be hazardous, so it’s essential to ensure that there are no gas leaks in the vicinity of your stove. Use a mixture of water and soap to create a soapy solution, then apply it to the gas line connections, including where the line connects to the stove and to the gas valve. If you see bubbles forming, this indicates a gas leak. In this case, turn off the gas supply and consult a professional technician immediately for repairs.
5. Inspect the gas shut-off valve: For safety purposes, gas stoves are typically equipped with a gas shut-off valve. This valve allows you to isolate the gas supply to the stove if needed. Check if the gas shut-off valve, usually located near the stove or in the kitchen, is fully open and not inadvertently closed.
If you have performed these steps and are still experiencing gas supply issues, it’s crucial to contact a professional technician or your gas supplier. They will have the expertise and necessary equipment to accurately diagnose the problem and take appropriate measures to restore the gas supply to your stove.
Remember, dealing with gas appliances can be dangerous, so always prioritize your safety and seek professional assistance when needed.
Faulty Control Valve
A faulty control valve is another possible cause of gas stove burners failing to ignite. The control valve regulates the flow of gas to the burner, and if it is malfunctioning or damaged, it may not deliver the appropriate amount of gas required for ignition. Here’s how to troubleshoot a faulty control valve:
1. Inspect the control valve: Start by visually inspecting the control valve for any signs of damage or wear. Look for cracks, corrosion, or any other visible abnormalities. If you notice any issues, it’s likely that the control valve needs to be replaced.
2. Clean the control valve: If there are no visible issues with the control valve, it’s possible that it may be clogged or obstructed. Use a soft brush to gently clean around the control valve, removing any dirt or debris that may be hindering its functionality. Be careful not to damage any delicate components during the cleaning process.
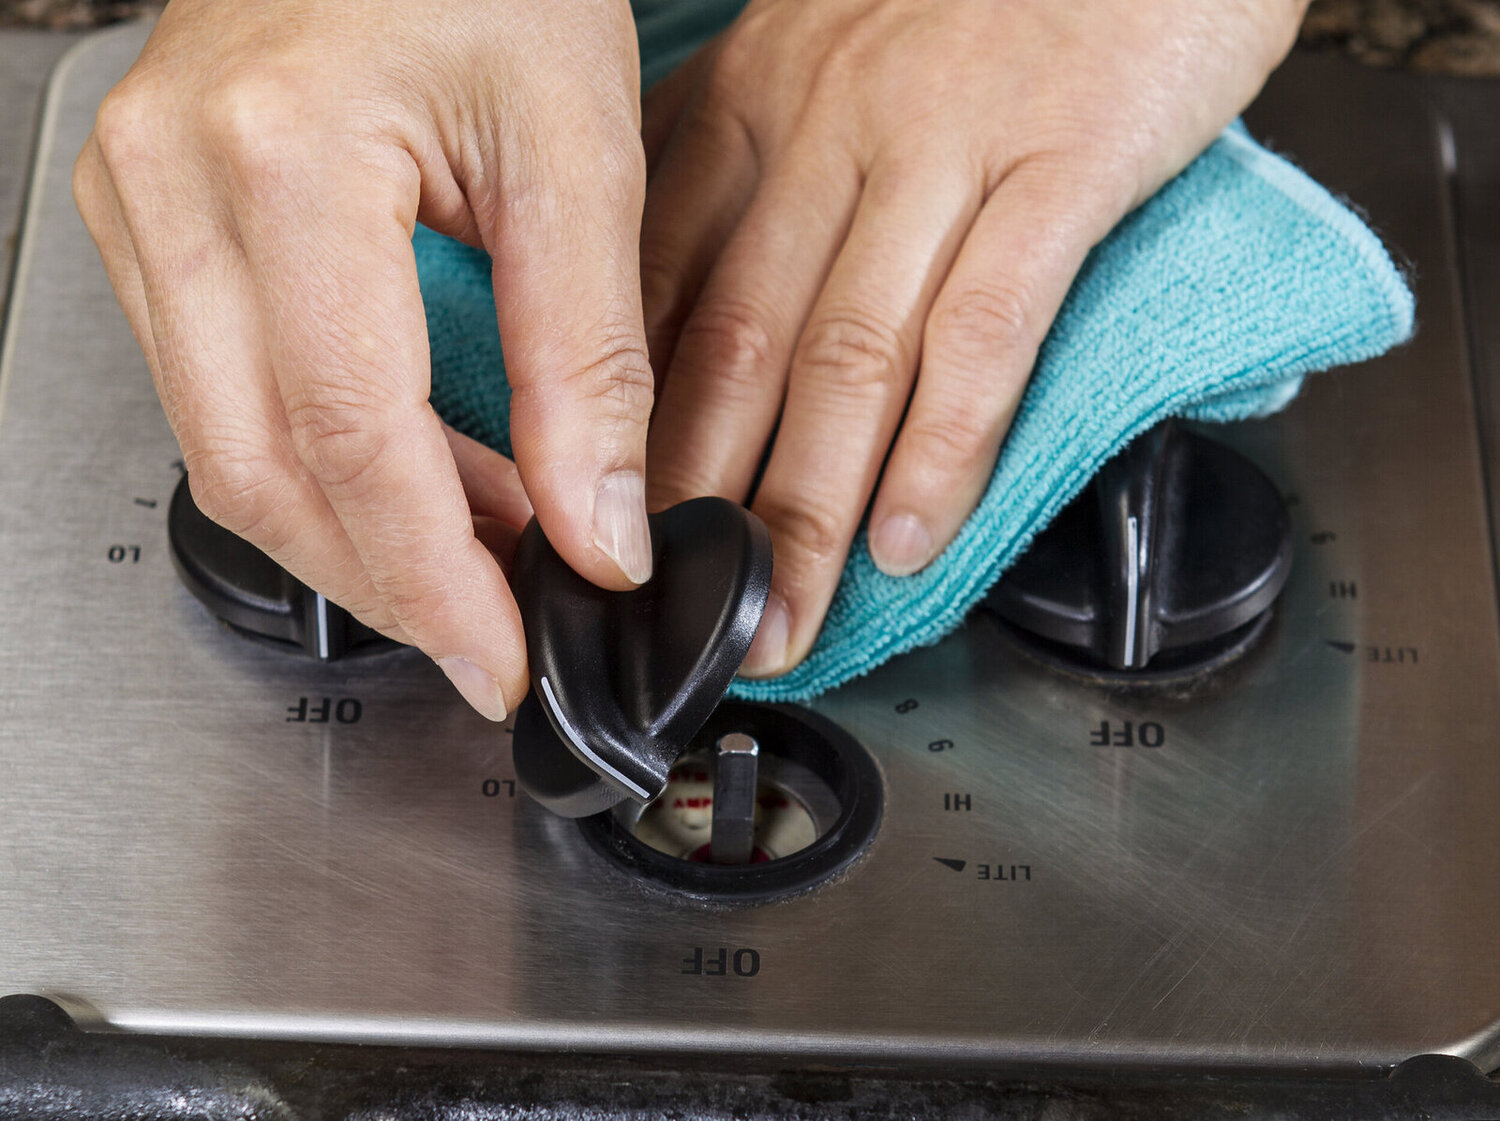
3. Check the control valve knob: Ensure that the control valve knob is securely connected to the valve shaft. If it is loose or detached, it may not be properly turning the valve to allow the gas flow. Tighten or reattach the knob as necessary.
4. Test the control valve: To determine if the control valve is faulty, you can perform a simple test. Turn off the gas supply to the stove and disconnect the gas line from the valve. Using a multimeter or a gas pressure gauge, measure the gas pressure coming from the valve with the control knob turned on. If there is no gas pressure or it is significantly lower than expected, this indicates a faulty control valve that needs to be replaced.
5. Consult a professional technician: If you suspect that the control valve is faulty or if you are unsure about performing any troubleshooting steps, it is best to consult a professional technician. They have the expertise and knowledge to accurately diagnose the issue and safely replace the control valve if necessary.
Remember, working with gas appliances can be hazardous, so always prioritize your safety and seek professional help when needed. A trained technician will be able to accurately assess the situation and provide the appropriate solution to get your gas stove burners igniting again.
Electrical Connection Problems
Electrical connection problems can be another underlying cause of gas stove burners failing to ignite. Gas stoves with electronic ignition systems rely on proper electrical connections to deliver the spark that ignites the gas. If there are issues with the wiring or connections, the spark may not be produced, resulting in ignition failure. Here are some steps to troubleshoot electrical connection problems:
1. Inspect the wiring: Begin by visually inspecting the electrical wiring connected to the igniter and control module. Look for any signs of frayed, loose, or damaged wires. If you notice any issues, it’s important to have a professional technician repair or replace the wiring to ensure safety.
2. Test the outlet or power source: Check if the outlet or power source supplying electricity to your gas stove is functioning properly. Plug in a different device or use a voltage tester to verify that there is power reaching the outlet. If there is no power, check the circuit breaker or fuse box to ensure the circuit is not tripped or blown.
3. Check the control module: The control module is a crucial component that sends electrical pulses to the igniters, creating the spark for ignition. Inspect the control module for any visible damage or signs of malfunction. If it appears to be faulty, it will need to be replaced by a professional technician.
4. Ensure proper grounding: Gas stoves with electronic ignition systems require proper grounding to ensure safe operation. Check if the stove is properly grounded to prevent electrical issues. If you suspect a grounding problem, it’s best to seek the help of a professional electrician to assess and address the issue.
5. Inspect the ignition switch: If your gas stove has an ignition switch, make sure that it is functioning correctly. Test the switch by turning it on and off to verify if it is properly activating the ignition system. If the switch is faulty or not making proper contact, it may need to be replaced.
6. Consult a professional technician: If you’re uncertain about performing electrical troubleshooting or if the issue persists after checking the above steps, it’s advisable to consult a professional technician. They have the expertise and necessary equipment to diagnose and repair electrical connection problems safely.
Electrical connection problems can be complex and potentially hazardous, so it’s crucial to prioritize your safety and seek professional assistance when needed. An experienced technician will be able to identify and resolve any electrical issues, ensuring that your gas stove burners can ignite properly.
Defective Spark Module
A defective spark module can also be a culprit behind gas stove burners failing to ignite. The spark module is responsible for sending electrical pulses to the igniters, creating the spark needed for ignition. If the spark module is faulty or worn out, it may not be able to deliver the necessary electrical pulse, resulting in ignition failure. Here’s how to troubleshoot a defective spark module:
1. Visual inspection: Start by visually inspecting the spark module for any visible signs of damage, such as burnt or corroded components. Look for loose or disconnected wiring as well. If you notice any issues, it’s likely that the spark module needs to be replaced.
2. Check the wiring connections: Ensure that all the wiring connections to the spark module are secure and properly attached. Loose or damaged wiring can disrupt the electrical flow and affect the spark module’s functionality.
3. Test with a multimeter: If you have access to a multimeter, you can perform a simple test to check the spark module’s functionality. Set the multimeter to measure voltage, and carefully touch the appropriate terminals of the spark module with the meter’s probes. Activate the ignition switch or turn on the burner to see if the multimeter detects a voltage reading. If there is no voltage or a significantly low reading, it indicates a defective spark module.
4. Replace the spark module: If you have determined that the spark module is defective, it will need to be replaced. Contact the manufacturer or consult a professional technician to obtain a compatible replacement spark module for your specific stove model. Installing a new spark module should be done by someone with proper knowledge and expertise to ensure safety and proper functioning.
5. Consult a professional technician: If you’re uncertain about performing the spark module replacement or if the issue persists after replacing the spark module, it’s advisable to consult a professional technician. They have the experience and necessary tools to diagnose and repair the spark module issue properly.
Remember, working with electrical components can be dangerous, so always prioritize your safety and seek professional assistance when needed. A qualified technician will be able to accurately diagnose the problem and replace the defective spark module if necessary, ensuring that your gas stove burners can ignite effectively.
Gas Regulator Malfunction
A malfunctioning gas regulator can be a potential cause of gas stove burners failing to ignite. The gas regulator plays a crucial role in controlling and maintaining the pressure of gas flowing from the supply line to the stove burners. If the regulator is faulty or not functioning properly, it may either restrict or allow excessive gas flow, leading to ignition problems. Here’s how to troubleshoot a gas regulator malfunction:
1. Check for gas pressure issues: Insufficient gas pressure can prevent the burners from igniting properly. Start by ensuring that the gas supply is turned on and the valve is fully open. If the gas pressure seems low, you may need to contact your gas supplier to check the pressure coming into your home or consult a professional technician to measure and adjust the gas pressure if necessary.
2. Inspect the gas regulator: Visually inspect the gas regulator for any visible signs of damage, such as cracks or leaks. Check the regulator’s connections to ensure they are secure without any loose or damaged fittings. If you notice any issues, it’s likely that the gas regulator needs to be replaced.
3. Testing the regulator: If you have a gas pressure gauge, you can test the regulator’s functionality. Connect the pressure gauge to a gas outlet on your stove and turn on a burner. The reading on the gauge should correspond to the recommended pressure for your specific stove model. If the pressure is significantly higher or lower, it indicates a malfunctioning regulator.
4. Consult a professional technician: Gas regulator issues can be complex and dangerous to handle, so it’s recommended to consult a professional technician for proper diagnosis and replacement if necessary. They have the expertise and knowledge to accurately assess the gas regulator and safely perform any required repairs.
Remember, dealing with gas appliances carries potential risks, and it’s essential to prioritize your safety. If you suspect a gas regulator malfunction, it’s crucial to seek professional assistance to ensure proper functioning and prevent any hazardous situations. A qualified technician will be able to diagnose the problem accurately and take appropriate measures to address the gas regulator issue, allowing your gas stove burners to ignite properly.
Check the igniter for any dirt or debris that may be blocking the spark. Clean it with a soft brush or cloth to ensure it can create a spark to ignite the gas.
Troubleshooting Steps to Fix Gas Stove Burners Not Igniting
Experiencing gas stove burners not igniting can be frustrating, but there are several troubleshooting steps you can take to resolve the issue. Here’s a guide to help you fix the problem and get your burners working again:
1. Cleaning the Burner: Start by cleaning the burner thoroughly. Over time, debris and buildup can clog the burner, obstructing the gas flow and preventing ignition. Remove the burner from the stovetop and gently scrub the holes and surface with a soft brush or toothbrush. Ensure the burner is completely dry before reattaching it.
2. Checking the Igniter: Inspect the igniter, also known as the spark electrode, for any damage or dirt buildup. Clean the igniter using a soft brush or toothbrush to remove any debris and ensure it is properly aligned with the burner. If the igniter is damaged or not producing a spark, it may need to be replaced.
3. Verifying Gas Supply: Ensure the gas supply to your stove is turned on and the valve is fully open. Check for any gas leaks around the connections using a mixture of soapy water and look for bubbles forming. If you suspect a gas leak, immediately turn off the gas supply and contact a professional technician.
4. Inspecting the Control Valve: Examine the control valve to ensure it is not damaged or malfunctioning. Ensure the control valve knob is properly connected and turning without any obstruction. If the control valve is faulty, it may need to be replaced by a professional.
5. Examining Electrical Connections: Check the electrical connections, including wires and terminals, between the igniter, control module, and other related components. Make sure the connections are secure and free from any damage or corrosion. Replace or repair any loose or damaged wires as needed.
6. Testing the Spark Module: If you suspect a faulty spark module, test it using a multimeter or consult a professional technician. The spark module should send electrical pulses to the igniter for proper spark generation. If the spark module is defective, it will need to be replaced.
7. Checking the Gas Regulator: Examine the gas regulator for any damage or leaks. Ensure the gas pressure is at the correct level for your stove model. If the regulator is faulty or the pressure is incorrect, consult a professional technician to replace or adjust it accordingly.
Remember, if you’re unsure or uncomfortable with troubleshooting your gas stove, it’s always best to seek the help of a professional technician who can safely diagnose and fix the issue for you. Gas appliances can be dangerous when mishandled, so prioritize your safety and follow proper procedures when troubleshooting and repairing your gas stove burners.
Cleaning the Burner
One of the first troubleshooting steps you should take when your gas stove burners fail to ignite is to clean the burner. Over time, debris, food particles, grease, and other substances can accumulate on the burner, leading to clogs and hindering the flow of gas. Cleaning the burner thoroughly can often resolve the issue and restore proper ignition. Here’s a step-by-step guide to cleaning the burner:
1. Turn off the gas supply: Before you start cleaning the burner, ensure that the gas supply to the stove is turned off. This is crucial to prevent any accidental gas leaks or potential hazards.
2. Remove the burner: Depending on your stove model, the burner may either lift off or require the removal of screws or latches to detach it from the stovetop. Refer to your stove’s user manual for specific instructions on how to remove the burner.
3. Inspect the burner: Once the burner is detached, carefully examine it for any signs of debris or clogs that may be obstructing the gas ports. Look for food particles, grease, or other residue that may have built up over time.
4. Clean the burner holes: Using a soft brush or a toothbrush, gently scrub the burner holes to remove any dirt, grease, or debris. Ensure that the brush reaches into each hole to clear any blockages. For stubborn buildup, you can use a pin or a toothpick to carefully dislodge the debris. Avoid using any abrasive materials or harsh chemicals that could damage the burner.
5. Soak and rinse the burner: If the debris is particularly stubborn, you can soak the burner in warm, soapy water for a few minutes to help loosen it. After soaking, rinse the burner with clean water to remove any remaining soap residue.
6. Dry the burner: Thoroughly dry the burner before reattaching it to the stovetop. Excess moisture can interfere with the ignition process and potentially cause damage. Use a clean cloth or allow the burner to air dry completely before proceeding.
7. Reattach the burner: Once the burner is dry, reattach it to the stovetop, ensuring that it is properly aligned and securely in place. Follow the specific instructions in your stove’s user manual to correctly reinstall the burner.
8. Test the ignition: With the burner reattached, turn on the gas supply and attempt to ignite the burner. If the burner ignites successfully and produces a steady flame, then the cleaning process was effective in resolving the clog issue. However, if the burner still fails to ignite, you may need to explore other potential causes or consult a professional technician for further assistance.
Regularly cleaning your gas stove burners to prevent debris buildup is essential for optimal performance. By following these steps and maintaining a clean burner, you can ensure a reliable and efficient ignition process for your gas stove.
Checking the Igniter
When your gas stove burners fail to ignite, one possible culprit is a malfunctioning or dirty igniter. The igniter, also known as the spark electrode, is responsible for creating the spark that ignites the gas. If the igniter is not functioning properly, it may not generate a strong enough spark to ignite the gas, resulting in burner failure. Follow these steps to check and troubleshoot the igniter:
1. Safety first: Before starting any troubleshooting, make sure the gas supply to the stove is turned off. This will prevent any accidental gas leaks or potential hazards during the process.
2. Visual inspection: Carefully examine the igniter for any visible signs of damage or wear. Look for cracks, chips, or blackened areas on the igniter’s ceramic surface. Damaged or worn-out igniters may need to be replaced.
3. Clean the igniter: If the igniter appears dirty or covered in residue, it may not generate a strong spark. Use a soft brush or toothbrush to gently clean the igniter’s surface. Make sure to remove any dirt, grease, or debris that may be obstructing the spark.
4. Check the alignment: Ensure that the igniter is properly aligned with the burner. It should be close enough so that the spark can reach the gas outlet holes. Check the distance between the igniter and the burner to ensure it’s not too far away, as this can affect the spark’s effectiveness.
5. Test the spark: Turn on the gas supply to the stove. With the room lights dimmed or turned off, observe the igniter when you turn the burner knob. Look for a visible spark near the igniter tip. If you do not see a spark or if it is weak, it may indicate a faulty igniter that needs to be replaced.
6. Measure continuity: If you have access to a multimeter, you can measure the igniter’s continuity. Set the multimeter to the appropriate setting for resistance or continuity. Carefully touch the igniter’s terminals with the meter’s probes. A reading of zero or close to zero indicates good continuity, while a high reading indicates a faulty igniter that should be replaced.
7. Professional assistance: If you’ve performed the above steps and the igniter still fails to function properly, it’s best to consult a professional technician. They can accurately diagnose the issue and provide the necessary repairs or replacement.
By checking and cleaning the igniter, you can ensure it is in good working condition, which is crucial for successful ignition. However, if the issue persists or if you are unsure about performing the troubleshooting steps yourself, it’s always recommended to seek the assistance of a professional technician.
Verifying Gas Supply
When your gas stove burners fail to ignite, it’s important to verify the gas supply to ensure that there’s enough gas reaching the burners. Insufficient or disrupted gas supply can be a common cause of ignition problems. By following these steps, you can check and verify the gas supply to troubleshoot the issue:
1. Check the gas valve: Ensure that the gas valve supplying the stove is fully open. The valve is usually located behind or near the stove. Turn the valve counterclockwise to ensure it is fully open. If the valve was partially closed or turned off, it may have restricted the gas flow, causing the ignition failure.
2. Inspect for gas line obstructions: Examine the gas line connected to your stove for any obstructions that may be interrupting the gas flow. Look for any kinks, bends, or physical blockages that may be preventing the gas from reaching the burners. Carefully straighten or clear any obstructions you find to restore proper gas flow.
3. Test other gas appliances: Check if other gas appliances in your home, such as a gas furnace or water heater, are functioning properly. If none of the gas appliances are working, it could indicate a gas supply issue from the main source. In such cases, it’s advisable to contact your gas supplier or utility company to investigate and resolve the problem.
4. Verify gas pressure: Low gas pressure can impact the ignition of your burners. You can verify the gas pressure using a manometer, a device designed to measure gas pressure. Connect the manometer to the gas line or ask a professional technician to measure the pressure for you. Compare the measured pressure to the manufacturer’s specifications for your specific stove model. If the pressure is significantly below the recommended range, it may indicate a problem with the gas supply that needs to be addressed by a professional.
5. Check for gas leaks: Gas leaks can be dangerous, so it’s crucial to ensure there are no leaks in your system. Mix a solution of water and dish soap in a spray bottle. Spray the mixture onto the gas connections, including the connection between the gas line and the stove and the gas valve. If you observe bubbles forming or a distinct smell of gas, it indicates a gas leak. In such cases, turn off the gas supply immediately and contact a professional technician to repair the leak.
By verifying the gas supply, you can ensure that there’s an adequate and uninterrupted flow of gas to your stove burners. If you encounter any issues during the verification process or if the burners still fail to ignite after confirming the gas supply, it’s recommended to seek the assistance of a professional technician. They will possess the expertise and tools required to troubleshoot and resolve any gas supply problems effectively.
Inspecting the Control Valve
When your gas stove burners fail to ignite, one of the potential causes could be a faulty control valve. The control valve plays a vital role in regulating the flow of gas to the burner. If the control valve is malfunctioning or damaged, it may prevent the proper amount of gas from reaching the burners, resulting in ignition failure. Here are the steps to inspect the control valve:
1. Safety first: Before starting any inspection or troubleshooting, ensure the gas supply to the stove is turned off. This will prevent any accidental gas leaks or hazards during the process.
2. Visual inspection: Begin by visually inspecting the control valve for any visible signs of damage or wear. Look for cracks, corrosion, or any other abnormalities in the valve body, knob, or surrounding components. Pay close attention to the gas inlet and outlet connections as well.
3. Check for leaks: While inspecting the control valve, also look for any signs of gas leaks, such as hissing sounds, distinct gas odor, or the presence of bubbles when performing a soapy water leak test. If you suspect a gas leak, immediately turn off the gas supply and contact a professional technician to resolve the issue.
4. Observe the control valve knob: Ensure the control valve knob is securely attached and functioning correctly. It should turn smoothly without any resistance or obstruction. If the knob feels loose, tighten it or consider replacing it if necessary.
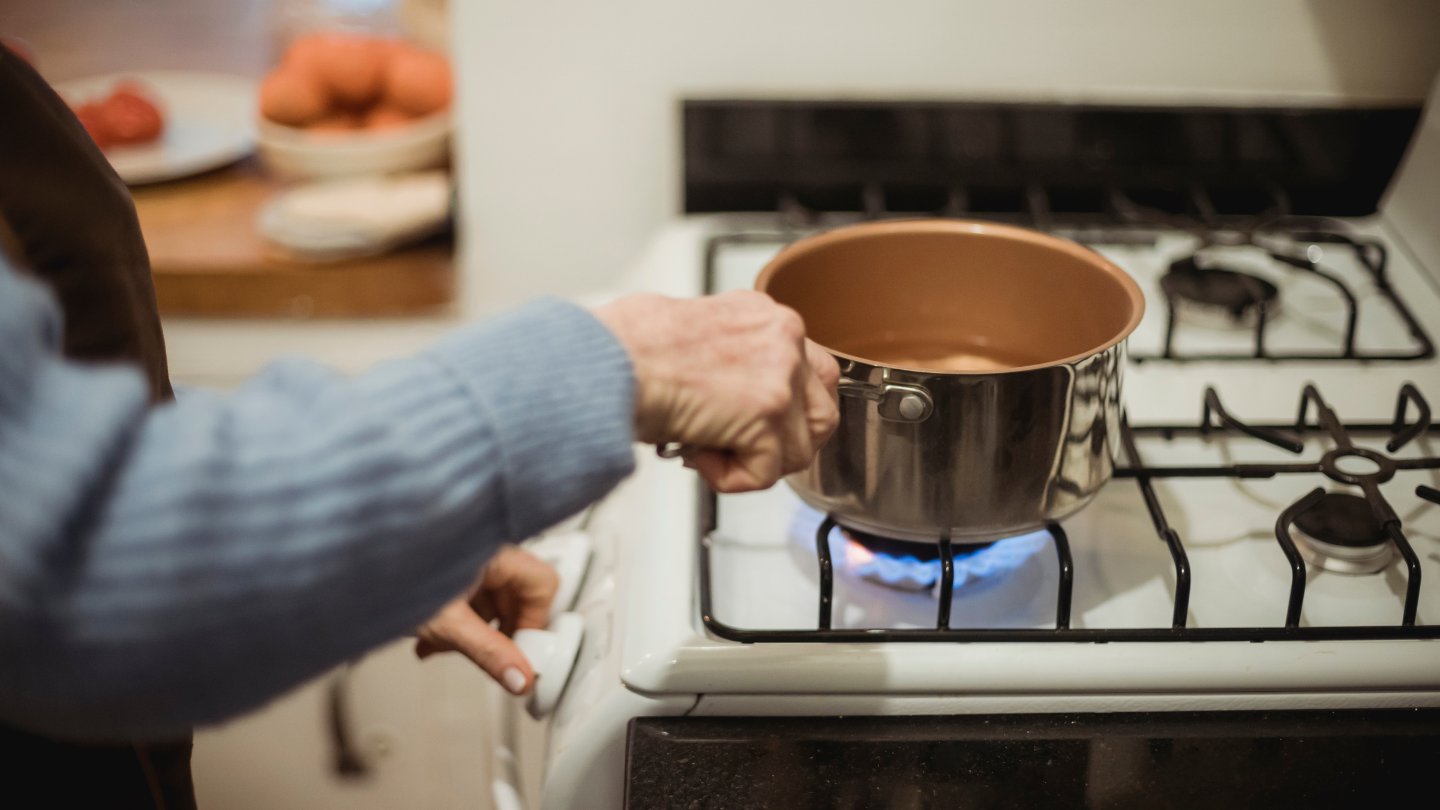
5. Test the control valve operation: Turn the control valve knob to the “Off” position. Then, slowly turn the knob to the “On” position, keeping a watchful eye on the burner. Observe if the valve opens smoothly and if you can hear the sound of gas flowing to the burner. A proper functioning control valve should allow a steady flow of gas.
6. Consult a professional technician: If you suspect any damage to the control valve or if you notice any irregularities during the inspection, it’s advisable to consult a professional technician for further examination. They will have the expertise and knowledge to accurately diagnose any issues with the control valve and provide the necessary repairs or replacement.
Remember, gas appliances can be dangerous when mishandled, and it is crucial to prioritize your safety. If you’re uncertain about inspecting or troubleshooting the control valve, or if the issue persists after inspection, it’s always recommended to seek the assistance of a professional technician. They will have the necessary skills and experience to properly diagnose and address any control valve problems, ensuring the safe and efficient functioning of your gas stove.
Examining Electrical Connections
When your gas stove burners fail to ignite, it’s essential to examine the electrical connections to ensure they are functioning properly. Gas stoves with electronic ignition systems rely on electrical components to generate the spark needed for ignition. Faulty or disrupted electrical connections can prevent the spark from being produced, resulting in ignition failure. Here’s how to examine the electrical connections:
1. Safety first: Before inspecting or working on any electrical components, ensure that the gas supply to the stove is turned off. This will prevent any potential gas leaks or hazards during the process.
2. Visual inspection: Take a close look at the electrical connections between the igniter, control module, and other related components. Look for any visible signs of damage, such as frayed or discolored wiring, loose connections, or corrosion. Pay attention to the wires, terminals, and connectors.
3. Tighten loose connections: If you find any loose connections, gently tighten them using a screwdriver or pliers. Ensure that the connections are snug but be careful not to overtighten and risk damaging the components.
4. Repair damaged wires: If you notice any frayed or damaged wires, they should be repaired or replaced. Cut off the damaged section and strip the insulation to expose fresh wire. Twist the exposed wire strands together and secure them with wire connectors or electrical tape.
5. Check for corrosion: Corrosion can hinder electrical flow and cause poor connection quality. If you find any signs of corrosion on the wires, terminals, or connectors, clean them using a wire brush or electrical contact cleaner. Ensure that the connections are dry before proceeding.
6. Verify continuity: Continuity testing can help identify any breaks or interruptions in the electrical circuit. Using a multimeter, set it to the continuity or resistance mode. Touch the probes to the appropriate connectors or terminals. A continuous beep or a low resistance reading indicates good continuity, while no beep or a high resistance reading could indicate a problem with the circuit.
7. Professional assistance: If you have completed the above steps and are still experiencing ignition failure, or if you are unsure about examining electrical connections, it’s advisable to consult a professional technician. They have the necessary expertise and equipment to accurately diagnose and repair any electrical connection issues.
Remember, dealing with gas appliances and electrical connections can be hazardous, so always prioritize safety. If you’re uncertain or uncomfortable with examining or repairing electrical connections, it’s best to seek the help of a professional technician. They will ensure that the electrical connections are properly evaluated and repaired, allowing your gas stove burners to ignite reliably.
Testing the Spark Module
A malfunctioning spark module can be a possible cause when gas stove burners fail to ignite. The spark module is responsible for sending electrical pulses to the igniter, creating the spark needed for ignition. If the spark module is defective or worn out, it may not generate the necessary electrical pulse, resulting in ignition failure. Here’s how to test the spark module:
1. Safety first: Before starting any testing or troubleshooting, ensure that the gas supply to the stove is turned off. This is crucial to prevent any accidental gas leaks or potential hazards during the process.
2. Locate the spark module: The spark module is usually located behind the stove’s control panel. You may need to remove the control panel or access panel to reach the spark module. Refer to your stove’s user manual for specific instructions on locating the spark module.
3. Inspect the spark module: Carefully examine the spark module for any visible signs of damage, such as burnt components or loose connections. Look for any loose or disconnected wires. If you notice any issues, it’s likely that the spark module needs to be replaced.
4. Test with a multimeter: If you have access to a multimeter, you can perform a simple test to check the functionality of the spark module. Set the multimeter to measure voltage or resistance, depending on the specifications of your spark module. Carefully touch the appropriate terminals or connectors on the spark module with the meter’s probes. Activate the ignition switch or turn on a burner to see if the multimeter detects the expected voltage or resistance reading. Consult your stove’s user manual or contact the manufacturer for the correct voltage or resistance values.
5. Check for spark output: If the multimeter test indicates proper voltage or resistance, it’s time to check for spark output. Turn off the gas supply to the stove. With the room lights dimmed or turned off, activate the ignition switch or turn on a burner. Observe the spark module to see if it produces a visible spark at each igniter or electrode. If there is no spark or multiple sparks, the spark module may be defective and need replacement.
6. Professional assistance: If you have performed the above tests and the spark module is not functioning correctly, or if you’re unsure about testing the spark module yourself, it’s advised to consult a professional technician. They have the expertise and necessary tools to accurately diagnose the issue and provide the necessary repairs or replacement.
Remember, working with gas appliances and electrical components can be dangerous when mishandled. If you’re uncertain about testing the spark module or if the issue persists after testing, it’s always recommended to seek the assistance of a professional technician. They will have the necessary skills and experience to diagnose and address any spark module problems, ensuring the safe and proper functioning of your gas stove.
Checking the Gas Regulator
When gas stove burners fail to ignite, a malfunctioning gas regulator may be the underlying issue. The gas regulator is responsible for controlling and maintaining the pressure of the gas flowing from the supply line to the stove burners. If the gas regulator is faulty or not functioning properly, it can lead to ignition problems. Here are the steps to check the gas regulator:
1. Safety first: Before starting any inspection or troubleshooting, ensure the gas supply to the stove is turned off. This will prevent any accidental gas leaks or hazards during the process.
2. Locate the gas regulator: The gas regulator is typically located near the gas supply line, either before or after the shut-off valve. It may be attached to the stove or mounted on the wall. Refer to your stove’s user manual or consult a professional technician to find the exact location of the gas regulator.
3. Visual inspection: Inspect the gas regulator for any visible signs of damage, such as cracks, leaks, or corrosion. Look for any loose or damaged connections as well. Pay attention to the pressure adjustment knob and ensure it is properly set within the recommended range.
4. Gas pressure measurement: If you have a gas pressure gauge or manometer, you can measure the gas pressure coming from the regulator. Attach the gauge to the gas line either before or after the regulator. Turn the gas supply on and monitor the pressure reading. Compare the measured pressure to the manufacturer’s specifications for your specific stove model. If the pressure is significantly below or above the recommended range, it may indicate a faulty gas regulator.
5. Perform a leak test: While inspecting the gas regulator, it’s a good practice to perform a leak test. Mix a solution of water and dish soap in a spray bottle. Spray the mixture onto the gas regulator’s connections, including the area where it joins the gas supply line and the shut-off valve. Watch for any bubbles forming, as this could indicate a gas leak. If you detect a gas leak, turn off the gas supply immediately and contact a professional technician to address the issue.
6. Consult a professional technician: If you suspect any issues with the gas regulator, or if you’re unsure about the inspection process, it’s advisable to consult a professional technician. They have the expertise and necessary tools to accurately diagnose gas regulator problems and provide the appropriate repairs or replacement.
Remember, dealing with gas appliances and regulators can be hazardous, so always prioritize your safety. If you’re uncertain about checking the gas regulator or if the issue persists after inspection, it’s best to seek the help of a professional technician. They will ensure that the gas regulator is properly evaluated and repaired or replaced if necessary, ensuring the safe operation of your gas stove burners.
Read more: How To Use Gas Stove Burners
Conclusion
When your gas stove burners fail to ignite, it can be a frustrating experience. However, by understanding and addressing the common causes of this issue, you can troubleshoot and resolve the problem effectively. We covered several potential causes, including clogged burners, malfunctioning igniters, gas supply issues, faulty control valves, electrical connection problems, defective spark modules, and gas regulator malfunctions.
Throughout this article, we provided step-by-step troubleshooting steps to help you fix your gas stove burners. From cleaning the burner and checking the igniter to verifying the gas supply, inspecting the control valve, examining electrical connections, testing the spark module, and checking the gas regulator, these steps aimed to identify and address the underlying problems that may be preventing proper ignition.
We must emphasize the importance of prioritizing safety when dealing with gas appliances. If you’re unsure or uncomfortable with any aspect of troubleshooting or repairing your gas stove, it’s always best to seek the guidance of a professional technician. They have the knowledge, experience, and necessary tools to safely diagnose and resolve the issue for you.
By following the troubleshooting steps and seeking professional help when needed, you can successfully diagnose and fix the problems causing your gas stove burners not to ignite. Regular maintenance and cleaning of your gas stove, along with proper usage, can help prevent these issues from occurring in the future.
Remember, if you encounter persistent or complex issues with your gas stove burners, it’s best to consult a professional technician. They will provide the expertise and assistance necessary to ensure the safe and efficient operation of your gas stove.
By addressing and resolving the common causes of gas stove burners not igniting, you’ll be able to enjoy hassle-free cooking experiences and a properly functioning gas stove for years to come.
Frequently Asked Questions about What Is Causing My Gas Stove Burners Not To Ignite When Turning Them On?
Was this page helpful?
At Storables.com, we guarantee accurate and reliable information. Our content, validated by Expert Board Contributors, is crafted following stringent Editorial Policies. We're committed to providing you with well-researched, expert-backed insights for all your informational needs.

0 thoughts on “What Is Causing My Gas Stove Burners Not To Ignite When Turning Them On?”