Home>Construction & Tools>Building Materials>How To Cut A Brick In Half

Building Materials
How To Cut A Brick In Half
Published: January 22, 2024
Learn the best techniques for cutting a brick in half with our step-by-step guide. Get expert tips for working with building materials and achieving precise results. Discover the right tools and safety measures for this essential construction skill.
(Many of the links in this article redirect to a specific reviewed product. Your purchase of these products through affiliate links helps to generate commission for Storables.com, at no extra cost. Learn more)
Introduction
Cutting bricks is a fundamental skill for any DIY enthusiast or construction professional. Whether you are renovating your home, building a patio, or constructing a wall, knowing how to cut a brick in half is essential for achieving a precise fit and a professional finish. While the task may seem daunting at first, with the right tools, techniques, and safety precautions, you can successfully divide bricks to meet your specific project requirements.
In this comprehensive guide, we will walk you through the step-by-step process of cutting a brick in half, providing valuable insights and practical tips along the way. From marking the brick to making the initial cut and completing the process with finesse, you will gain a thorough understanding of this essential skill. Before we delve into the specifics, let's explore the necessary tools and safety precautions to ensure a smooth and secure brick-cutting experience. So, roll up your sleeves, grab your tools, and let's embark on this brick-cutting journey together!
Key Takeaways:
- Cutting a brick in half requires safety gear, a stable work surface, and an angle grinder with a diamond blade. Precision and caution are essential for a professional finish.
- Marking the brick, making the initial cut, and completing the division with finesse are crucial steps in achieving a clean and accurate cut. Patience and attention to detail are key.
Read more: How To Cut A Dresser In Half
Necessary Tools
Before you embark on cutting a brick, it’s crucial to gather the essential tools to ensure a precise and efficient process. Here are the tools you will need:
- Safety Gear: Safety goggles, work gloves, and a dust mask are vital for protecting your eyes, hands, and respiratory system from potential hazards such as flying debris and dust particles.
- Brick Trowel: A sturdy brick trowel will be used for marking the cutting line on the brick and guiding the cutting tool along the desired path.
- Straight Edge: A straight edge, such as a metal ruler or a level, is essential for drawing a straight and precise cutting line on the brick’s surface.
- Marker: A pencil or a marker will be used to clearly delineate the cutting line on the brick, ensuring accuracy during the cutting process.
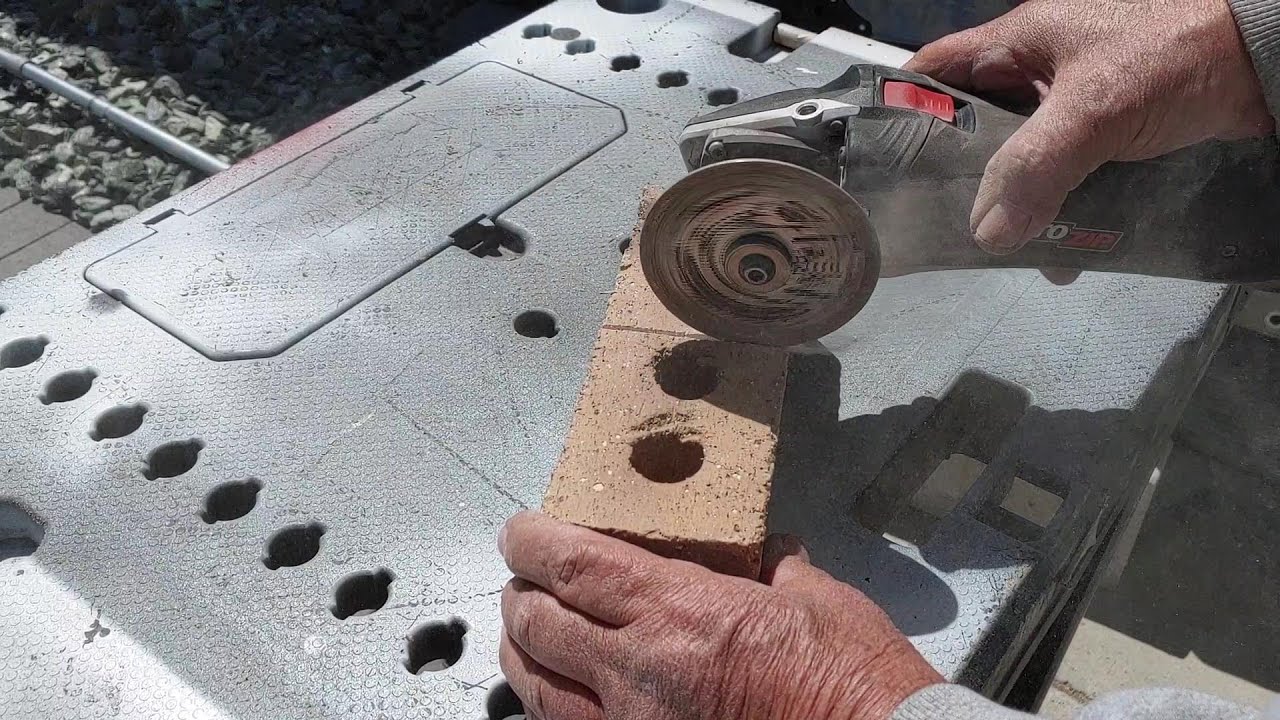
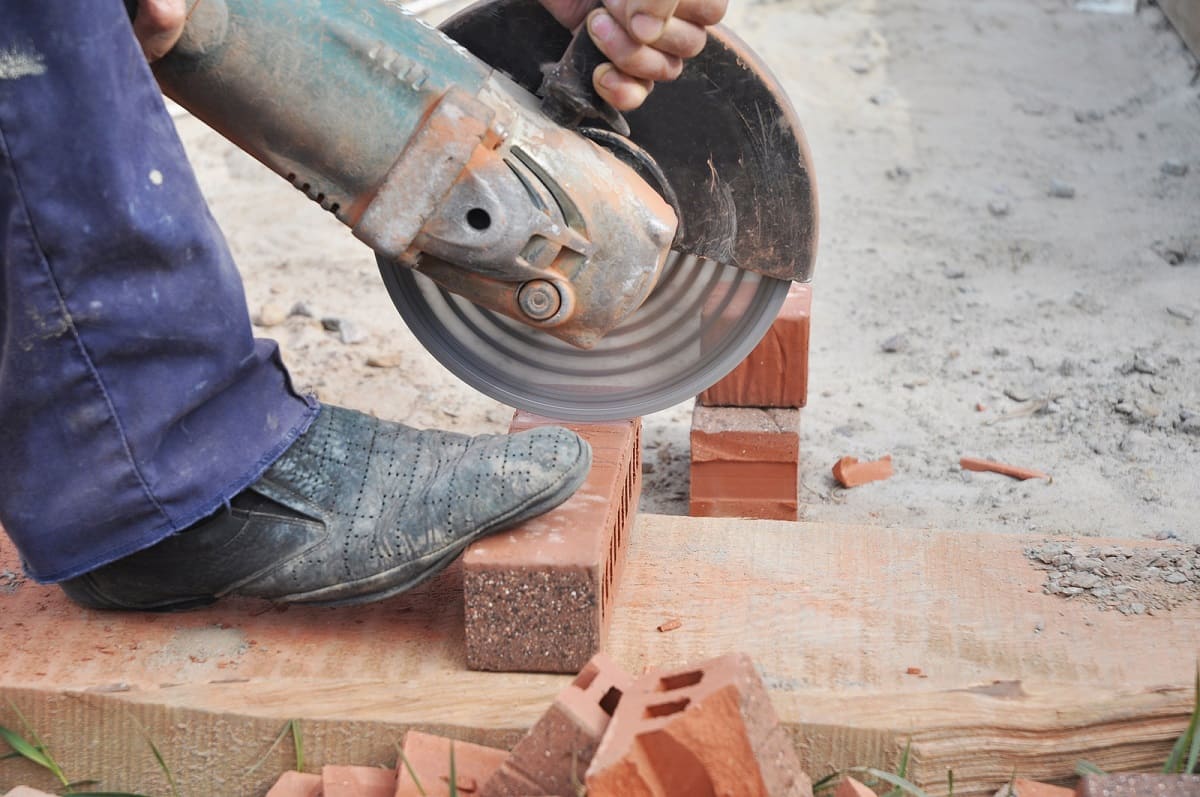
- Angle Grinder with Diamond Blade: An angle grinder equipped with a diamond blade is the primary tool for cutting bricks. The diamond blade’s abrasive surface enables it to slice through the tough material with precision.
- Protective Covering: To contain the debris and prevent it from scattering, laying down a protective covering such as a tarp or a drop cloth is advisable.
- Workbench or Clamp: A stable work surface or a clamp is necessary to secure the brick in place during the cutting process, ensuring stability and safety.
- Vacuum or Brush: After cutting the brick, a vacuum or a brush can be used to clean up the surrounding area, removing any residual dust and debris for a tidy workspace.
By having these tools at your disposal, you will be well-prepared to tackle the brick-cutting process with confidence and precision, setting the stage for a successful outcome.
Safety Precautions
Prior to initiating the brick-cutting process, it’s imperative to prioritize safety by adhering to essential precautions. By taking the following measures, you can safeguard yourself and others from potential hazards associated with brick cutting:
- Wear Protective Gear: Equip yourself with safety goggles to shield your eyes from flying debris, work gloves to protect your hands from sharp edges, and a dust mask to prevent inhalation of brick dust and particles.
- Secure the Work Area: Clear the work area of any unnecessary clutter and ensure that it is well-lit and adequately ventilated. Additionally, establish a designated cutting zone to minimize the risk of accidents.
- Stabilize the Brick: Use a stable workbench or a clamp to secure the brick firmly in place before commencing the cutting process. This prevents the brick from shifting or slipping during cutting, reducing the likelihood of injuries.
- Follow Manufacturer’s Guidelines: Adhere to the manufacturer’s instructions for operating the angle grinder and handling the diamond blade, ensuring that you are familiar with the tool’s features and safety recommendations.
- Minimize Dust Exposure: Brick cutting generates fine dust particles that can pose respiratory risks. To mitigate this, wear a dust mask and consider using a wet cutting method or a dust extraction system to minimize airborne dust.
- Exercise Caution: Approach the cutting process with attentiveness and caution. Avoid rushing the task and maintain a steady hand to ensure precise cuts while minimizing the risk of accidents.
- Dispose of Debris Safely: After cutting the brick, promptly clean up the debris and dispose of it in a secure manner. This prevents tripping hazards and maintains a safe and organized workspace.
By embracing these safety precautions, you can cultivate a secure environment for the brick-cutting endeavor, mitigating potential risks and fostering a smooth and protected workflow. Now that we’ve covered the essential tools and safety measures, let’s proceed to the step-by-step process of cutting a brick in half.
Step 1: Marking the Brick
Before making any cuts, it’s crucial to accurately mark the cutting line on the brick’s surface. This initial step sets the foundation for a precise and controlled cutting process. Follow these steps to mark the brick effectively:
- Select a Suitable Location: Choose a well-lit and spacious area for marking and cutting the brick. Ensure that the work surface is stable and that you have ample room to maneuver comfortably.
- Secure the Brick: Place the brick on a stable workbench or secure it with a clamp to prevent movement during the marking process, ensuring stability and safety.
- Measure and Mark: Use a brick trowel to score a straight line along the surface of the brick, indicating the desired cutting path. A straight edge, such as a metal ruler or a level, can aid in drawing a precise and straight cutting line.
- Double-Check the Alignment: Verify that the marked line is straight, evenly spaced, and aligns with your cutting requirements. Precision at this stage is essential for achieving accurate cuts.
- Label the Waste Section: To avoid confusion during the cutting process, clearly label the section of the brick that will be discarded as waste. This helps maintain clarity and ensures that the correct portion of the brick is removed.
By meticulously marking the brick with precision and attention to detail, you establish a clear cutting guide that will facilitate the subsequent cutting stages. With the brick accurately marked, you are now ready to progress to the next phase: making the initial cut.
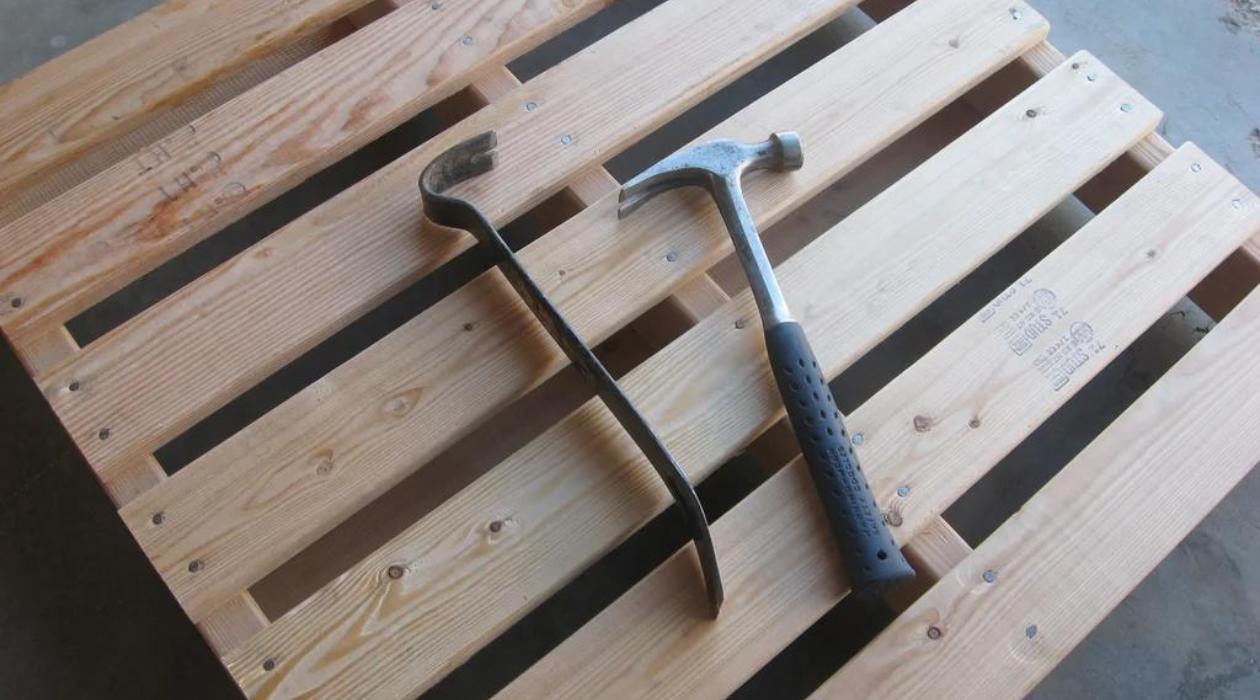
Use a brick chisel and a hammer to score a line across the brick. Then, place the brick on a solid surface and strike it with the hammer along the scored line to split it in half.
Step 2: Making the Initial Cut
Once the brick has been accurately marked, it’s time to initiate the cutting process by creating the initial incision. This step sets the stage for the subsequent cuts, guiding the angle grinder along the designated path. Follow these steps to execute the initial cut effectively:
- Prepare the Angle Grinder: Ensure that the angle grinder is equipped with a diamond blade suitable for cutting through bricks. Familiarize yourself with the grinder’s features and safety guidelines before proceeding.
- Secure the Brick: Confirm that the brick is firmly secured on a stable workbench or clamped in place to prevent movement during the cutting process, ensuring stability and safety.
- Position the Grinder: Hold the angle grinder with a firm grip, positioning the diamond blade precisely over the marked cutting line on the brick’s surface. Maintain a steady stance and a clear line of sight for optimal control.
- Engage the Grinder: Activate the angle grinder and gently lower the diamond blade onto the marked line, initiating the cutting process. Exercise caution and maintain a steady hand as the blade penetrates the surface of the brick.
- Control the Cutting Speed: Gradually guide the angle grinder along the marked line, allowing the diamond blade to cut through the brick at a controlled pace. Avoid applying excessive pressure, as the blade’s abrasive nature facilitates efficient cutting with minimal force.
- Monitor the Cutting Depth: Pay attention to the depth of the cut, ensuring that the diamond blade penetrates the brick to the desired depth without veering off the marked line. Consistent and controlled cutting pressure is key to achieving a precise initial incision.
By executing the initial cut with precision and attentiveness, you establish a clear path for the subsequent cutting stages, laying the groundwork for dividing the brick accurately. With the initial incision complete, it’s time to proceed to the final step: completing the cut with finesse.
Read more: How To Store Half Cut Onion
Step 3: Completing the Cut
As you approach the final stage of cutting the brick, it’s essential to complete the process with finesse and precision. This step involves extending the initial cut to achieve a clean and uniform division of the brick. Follow these steps to complete the cut effectively:
- Reposition the Brick: If necessary, adjust the position of the brick to facilitate a smooth continuation of the cutting process. Ensuring that the brick remains securely anchored is crucial for stability and control.
- Continue the Cutting Motion: Resuming from the endpoint of the initial cut, guide the angle grinder along the marked line, extending the incision through the entire thickness of the brick. Maintain a steady hand and a consistent cutting speed for uniform results.
- Monitor the Cutting Progress: Pay close attention to the progression of the cut, ensuring that the diamond blade follows the designated path without deviating from the marked line. Adjust the cutting pressure as needed to maintain control and precision.
- Avoid Rushing: Exercise patience and attentiveness as you complete the cut, refraining from rushing the process. A steady and deliberate approach ensures that the brick is divided accurately and cleanly, meeting your specific project requirements.
- Inspect the Cut: Once the cut is complete, carefully examine the divided sections of the brick to ensure that the incision is uniform and meets your desired specifications. Any minor adjustments can be made at this stage to refine the cut if necessary.
- Clean the Work Area: After completing the cut, use a vacuum or a brush to remove any residual dust and debris from the work area, leaving behind a tidy and organized workspace.
By conscientiously completing the cut with precision and care, you achieve a clean and accurate division of the brick, ready to be seamlessly integrated into your construction or renovation project. With the cutting process successfully executed, you have acquired a valuable skill that empowers you to tailor bricks to your specific needs with confidence and proficiency.
Conclusion
Congratulations! You have now mastered the art of cutting a brick in half, equipping yourself with valuable skills that can be applied to a myriad of construction and DIY projects. By following the step-by-step process outlined in this guide, you have gained a comprehensive understanding of the necessary tools, safety precautions, and precise techniques required to achieve professional results.
From marking the brick with precision to executing the initial cut and completing the division with finesse, you have navigated each stage with attentiveness and skill. By prioritizing safety, exercising patience, and maintaining a steady hand, you have successfully divided a brick, unlocking the potential to customize building materials to suit your specific requirements.
As you venture into future construction endeavors, whether it involves building a patio, constructing a wall, or embarking on a home renovation project, the knowledge and expertise you have acquired in brick cutting will serve as a valuable asset. With each precise cut, you will bring your vision to life, creating structures that reflect your craftsmanship and attention to detail.
Remember, practice makes perfect, and with each cutting endeavor, your proficiency and confidence will continue to grow. Embrace the satisfaction of transforming raw materials into tailored components, and let your newfound skills elevate your construction pursuits to new heights.
So, armed with your tools, knowledge, and a dash of creativity, step forward with the confidence of a skilled craftsman, ready to shape bricks and bring your construction visions to fruition.
Frequently Asked Questions about How To Cut A Brick In Half
Was this page helpful?
At Storables.com, we guarantee accurate and reliable information. Our content, validated by Expert Board Contributors, is crafted following stringent Editorial Policies. We're committed to providing you with well-researched, expert-backed insights for all your informational needs.








0 thoughts on “How To Cut A Brick In Half”