Home>Storage Ideas>Kitchen Storage>Our Very Best Kitchen Cleaning Tips
Kitchen Storage
Our Very Best Kitchen Cleaning Tips
Modified: September 1, 2024
Discover our top kitchen cleaning tips to keep your space organized and sparkling clean. Get inspired by our creative kitchen storage ideas and make the most of your cooking area.
(Many of the links in this article redirect to a specific reviewed product. Your purchase of these products through affiliate links helps to generate commission for Storables.com, at no extra cost. Learn more)
Introduction
Welcome to our comprehensive guide on kitchen cleaning tips. Keeping your kitchen clean and organized is essential for maintaining a healthy and functional space. A clean kitchen not only promotes hygiene but also enhances the overall cooking experience. In this article, we will share our very best kitchen cleaning tips to help you keep your kitchen spotless and sparkling.
From cleaning countertops to organizing cabinets, we have gathered a range of tips and tricks to cover every aspect of kitchen cleaning. Whether you are a seasoned homemaker or a beginner in the kitchen, these tips will surely make your life easier and help you maintain a pristine cooking environment.
So, let’s get started and discover some effective ways to keep your kitchen clean and clutter-free!
Key Takeaways:
- Transform your kitchen into a pristine and inviting environment by implementing our comprehensive kitchen cleaning tips. From scrubbing stovetops to freshening garbage disposals, these ideas cover every aspect of kitchen cleanliness.
- Maintain a clean and functional kitchen with our expert tips. Organize cabinets, sanitize dishracks, and eliminate fridge odors to create a visually appealing, hygienic, and efficient cooking space.
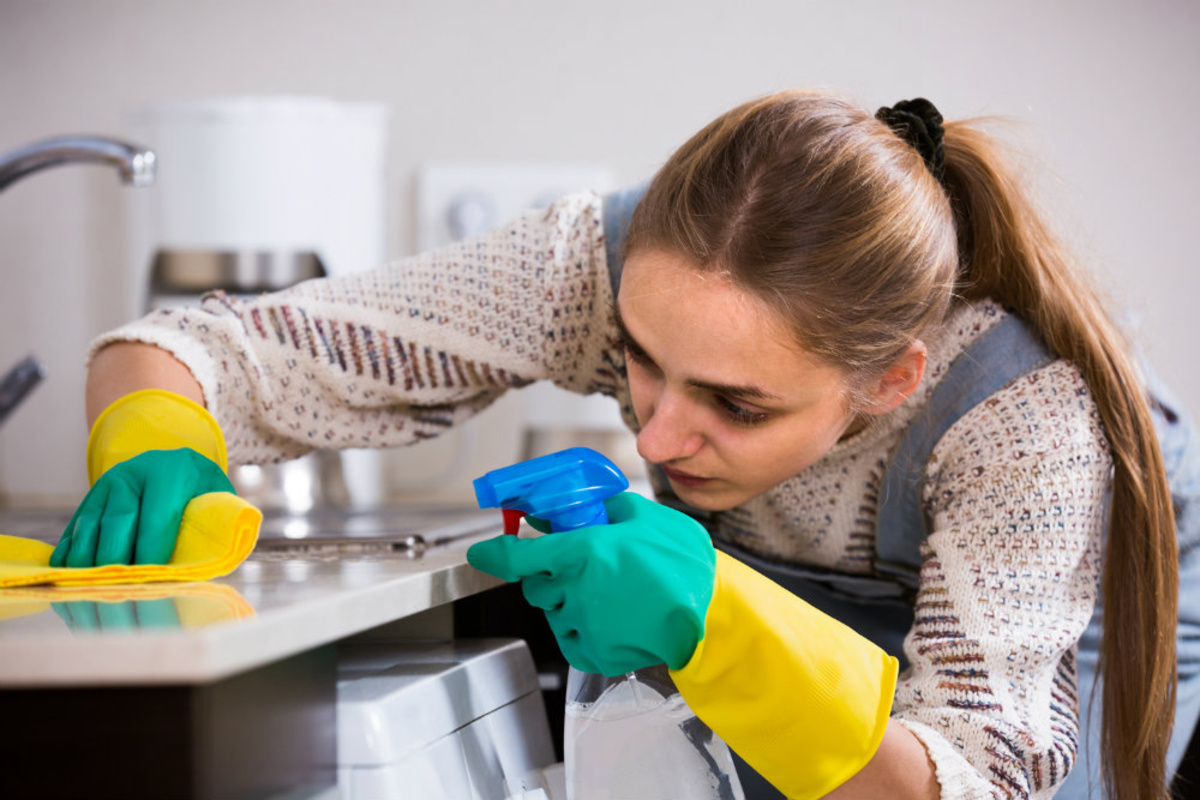
Tip 1: Cleaning Countertops
Countertops are one of the most frequently used surfaces in the kitchen, and therefore, they tend to accumulate dirt, grime, and food particles. Here are some tips to help you clean your countertops effectively:
- Gather your cleaning supplies: Before you begin cleaning your countertops, make sure you have all the necessary supplies on hand. This may include a mild detergent, warm water, a soft cloth or sponge, and a disinfectant spray.
- Clear the counters: Start by removing any items, utensils, or appliances from the countertop. This will allow you to clean the entire surface without any obstructions. Put these items aside or temporarily relocate them to another surface.
- Wipe away loose debris: Use a dry cloth or paper towel to wipe away any loose debris or crumbs on the countertop. This will make the subsequent cleaning process more effective.
- Prepare a cleaning solution: Fill a basin or bucket with warm water and add a few drops of mild detergent. Mix the solution until it becomes soapy.
- Clean the countertop: Dip a soft cloth or sponge into the soapy water and gently scrub the countertop surface. Pay special attention to any stained or sticky areas. Rinse the cloth or sponge regularly to prevent spreading dirt from one area to another.
- Disinfect the surface: Once you have cleaned the countertop, use a disinfectant spray to kill any remaining germs or bacteria. Follow the instructions on the disinfectant product for best results.
- Dry with a clean cloth: After disinfecting, use a clean, dry cloth to wipe down the countertop. This will remove any remaining moisture and leave the surface looking shiny and streak-free.
- Maintain the cleanliness: To keep your countertops clean on a daily basis, make it a habit to wipe them down after each use. This will prevent stains, spills, and grease from building up over time.
By following these simple steps, you can easily achieve clean and hygienic countertops in your kitchen. Remember to choose the appropriate cleaning products based on the material of your countertops to avoid any damage or discoloration.
Tip 2: Scrubbing Stovetop
Keeping your stovetop clean is essential not only for hygiene but also for maintaining its performance and durability. Here are some effective tips for scrubbing your stovetop:
- Gather your cleaning supplies: Before you start scrubbing your stovetop, gather all the necessary cleaning supplies. This may include a non-abrasive cleaner, a soft cloth or sponge, a scraper (if needed), and warm water.
- Remove grates and burners: If your stovetop has removable grates and burners, take them off and place them in a sink filled with warm, soapy water. Let them soak while you clean the surface.
- Wipe away loose debris: Use a dry cloth or paper towel to remove any loose debris or food particles from the stovetop. This will make the scrubbing process more effective.
- Apply a non-abrasive cleaner: Apply a small amount of non-abrasive cleaner onto the stovetop surface. Avoid using harsh or abrasive cleaners that can damage the surface. Follow the instructions on the cleaner for the best results.
- Scrub gently: Use a soft cloth or sponge to gently scrub the stovetop surface in circular motions. Focus on any tough stains or burnt-on food residue. For stubborn stains, you can use a scraper, ensuring it is suitable for your stovetop material.
- Rinse thoroughly: Once you have scrubbed the stovetop, rinse the surface thoroughly with warm water. This will remove any remaining cleaner residue and leave the stovetop sparkling clean.
- Dry with a clean cloth: After rinsing, use a clean, dry cloth to wipe down the stovetop. This will remove any excess moisture and prevent water spots or streaks from forming.
- Clean grates and burners: While the stovetop is drying, take the grates and burners out of the soapy water. Scrub them gently with a sponge or brush, removing any grease or residue. Rinse them thoroughly and let them air dry before placing them back on the stovetop.
- Maintain regular cleaning: To prevent buildup and make future cleaning easier, make it a habit to wipe down your stovetop after each use. This will remove any spills or splatters before they harden and become more difficult to clean.
By following these steps, you can easily scrub your stovetop and maintain its cleanliness. Remember to always refer to the manufacturer’s instructions for specific cleaning recommendations based on the material of your stovetop.
Tip 3: Degreasing Oven
Over time, ovens can accumulate grease, food splatters, and residue, leading to unpleasant odors and potentially affecting its performance. Here are some effective tips for degreasing your oven:
- Gather your cleaning supplies: Before you begin degreasing your oven, make sure you have all the necessary supplies on hand. This may include oven cleaner, baking soda, vinegar, a scrub brush or sponge, gloves, and a cloth or paper towels.
- Remove racks and accessories: Take out the oven racks and any other removable accessories and set them aside. These can be cleaned separately.
- Prepare a cleaning paste: In a small bowl, mix a thick paste using baking soda and water. The paste should have a consistency that allows it to be easily spreadable but not too runny.
- Apply the paste: Use gloves to protect your hands, and use a brush or sponge to spread the baking soda paste all over the interior surfaces of the oven, focusing on greasy areas. Avoid applying the paste to heating elements or any areas specified by the oven manufacturer.
- Let it sit: Allow the baking soda paste to sit on the surfaces for at least 30 minutes or longer. This will help loosen and dissolve the grease and grime.
- Scrub the surfaces: After the waiting period, use a scrub brush or sponge to gently scrub the surfaces, working in circular motions. The baking soda acts as a natural abrasive, helping to remove the grease and tough stains.
- Remove the paste: Wipe away the baking soda paste using a damp cloth or paper towels. Rinse and wring out the cloth or towels regularly to ensure thorough cleaning.
- Focus on stubborn areas: For any stubborn areas or lingering grease, you can spray vinegar directly onto the surface and scrub again. Vinegar is a natural degreaser and helps to break down grease effectively.
- Clean the racks: While the oven is drying, clean the oven racks and accessories. You can use a mixture of warm water and dish soap or a vinegar solution. Scrub them with a sponge or brush, rinse them thoroughly, and let them air dry before placing them back in the oven.
- Wipe down the interior: Once the oven surfaces are dry, use a clean cloth or paper towels to wipe down the interior, removing any remaining residues or moisture.
- Final touch: After degreasing the oven, you can place a bowl of water with lemon slices in the oven and set it to low heat for about 30 minutes. This will help eliminate any remaining odor and leave your oven smelling fresh.
By following these steps, you can effectively degrease your oven and eliminate any built-up grime. Remember to always read and follow the instructions provided by the oven manufacturer and exercise caution when working with cleaning agents and hot surfaces.
Tip 4: Deep Cleaning Sink
The kitchen sink is a high-traffic area that can quickly become a breeding ground for bacteria, food particles, and unpleasant odors. Here are some tips for deep cleaning your sink:
- Clear the sink: Start by removing any dishes, utensils, or debris from the sink. This will give you a clear workspace and allow you to clean the entire surface.
- Scrape away food residue: Use a rubber spatula or scraper to remove any leftover food particles or residue from the sink. Be sure to scrape around the edges and corners where food tends to accumulate.
- Rinse with hot water: Rinse the sink thoroughly with hot water to remove any loose debris and prepare it for cleaning.
- Apply a cleaning solution: Depending on the material of your sink, choose an appropriate cleaning solution. For stainless steel sinks, you can use a mixture of warm water and mild dish soap. For porcelain or ceramic sinks, a baking soda and water paste works well.
- Scrub the sink: Use a soft brush or sponge to scrub the sink surfaces, focusing on any stains or stubborn dirt. Pay attention to areas around the drain and faucet handles where grime can build up. For stainless steel sinks, scrub in the direction of the grain to avoid scratching the surface.
- Clean the drain: To tackle any lingering odor or buildup in the drain, pour a mixture of baking soda and vinegar down the drain. Let it sit for a few minutes to allow the fizzing action to break down any debris, then flush with hot water.
- Remove mineral deposits: If your sink has hard water stains or mineral deposits, you can use a 50/50 solution of water and vinegar. Apply the solution to a soft cloth or sponge and scrub the affected areas. Rinse thoroughly with water afterward.
- Rinse and dry: After scrubbing, rinse the sink thoroughly with warm water to remove any remaining cleaning solution. Dry the sink with a clean cloth to prevent water spots and keep it looking shiny.
- Polish (optional): If you have a stainless steel sink and want to give it an extra shine, you can use a commercial stainless steel cleaner or a few drops of mineral oil. Apply the product according to the instructions and buff the sink with a soft cloth.
- Maintain regular cleaning: To keep your sink clean and hygienic on a daily basis, make it a habit to rinse it after each use and wipe it down with a damp cloth or sponge. Taking these simple steps will prevent dirt and stains from becoming deeply embedded.
By following these steps, you can easily deep clean your kitchen sink and maintain its cleanliness and hygiene. Regular cleaning will not only keep your sink looking pristine but also help prevent the growth of bacteria and reduce unpleasant odors.
Read more: Our Best Cleaning Shortcuts
Tip 5: Organizing Cabinets
Organizing your kitchen cabinets is essential for maximizing storage space and making it easier to find and access your kitchen essentials. Here are some tips for organizing your cabinets:
- Empty and declutter: Start by emptying out all the contents of your cabinets. Sort through your items and declutter by getting rid of any expired products, duplicates, or items that you no longer use or need. This will help create more space for the items you actually use.
- Categorize your items: Group similar items together. For example, store baking supplies in one area, canned goods in another, and cooking utensils in a separate section. This will make it easier to locate and access what you need.
- Invest in storage solutions: Consider investing in storage containers, shelf organizers, and drawer dividers to maximize the use of space inside your cabinets. Utilize vertical space with stackable bins and utilize drawer organizers to keep smaller items neat and easily accessible.
- Use clear containers: Store dry goods, like grains or pasta, in clear, airtight containers. This not only keeps them fresh but also allows you to easily see the contents, making it simple to find what you need at a glance.
- Arrange items by frequency of use: Place frequently used items within easy reach, such as in the front of the cabinet or at eye level. Less frequently used items can be stored in higher or lower shelves.
- Label and categorize: Label containers and shelves to help you locate items quickly. Use stickers or labels to mark the contents of each container or shelf, ensuring everything has a designated place.
- Utilize the inside of cabinet doors: The inside of cabinet doors can provide additional storage space. Install hooks or wire racks on the inside of the doors to hang measuring spoons, oven mitts, or small cutting boards.
- Stack pots and pans: Save cabinet space by stacking pots and pans on top of each other. Consider using stacking pans protectors to prevent scratches and damage.
- Consider adjustable shelving: If possible, install adjustable shelves in your cabinets. This allows you to customize the height of each shelf and accommodate larger or taller items.
- Maintain regular organization: Regularly review and organize your cabinets. Take a few minutes each week to declutter, put items back in their designated places, and ensure that your organization system is still working efficiently.
By following these tips, you can transform your kitchen cabinets into an organized and functional space. Organized cabinets not only make it easier to find what you need but also promote a sense of calm and efficiency in your kitchen.
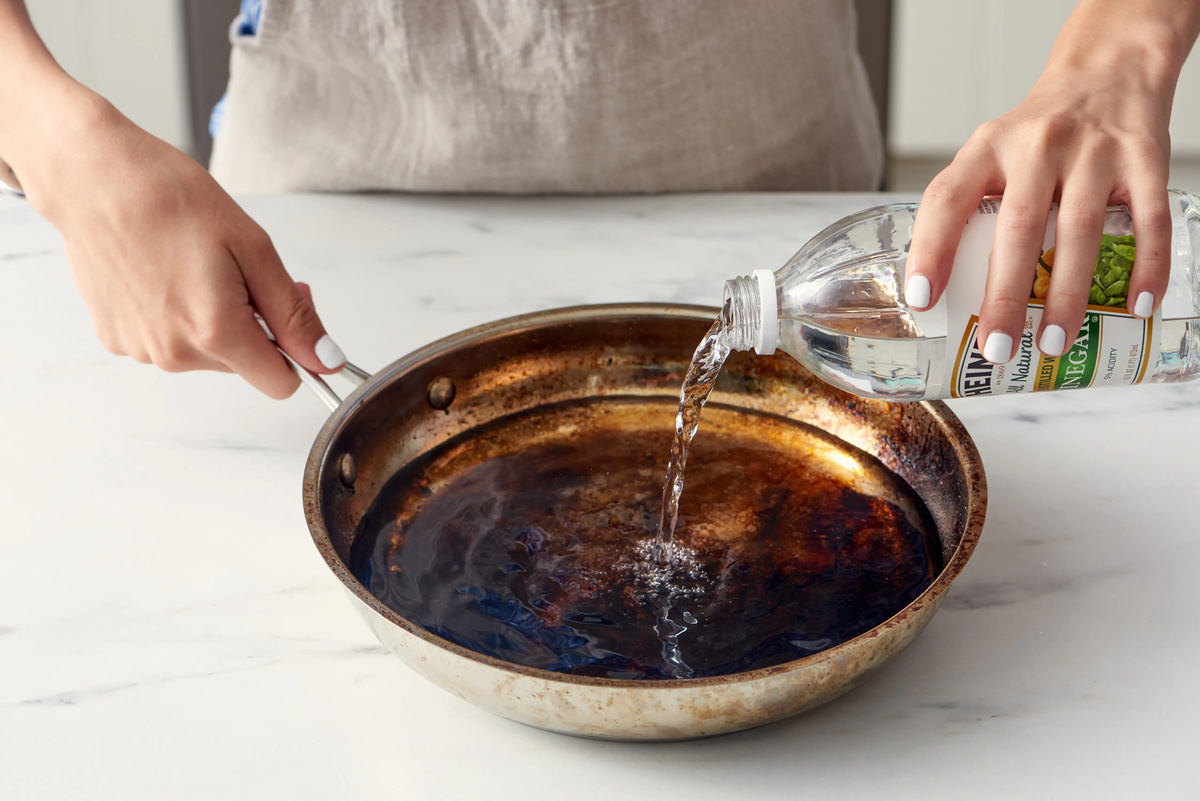
To remove tough grease and grime from kitchen surfaces, mix equal parts of vinegar and water in a spray bottle. Spray the solution on the surface, let it sit for a few minutes, then wipe clean with a microfiber cloth.
Tip 6: Cleaning Appliances
Cleaning your kitchen appliances regularly is important for maintaining their performance and prolonging their lifespan. Here are some tips for cleaning common kitchen appliances:
- Refrigerator: Empty the refrigerator and remove all the shelves, drawers, and trays. Wash them with warm, soapy water and dry them thoroughly. Clean the interior of the refrigerator using a mixture of water and mild detergent. Be sure to wipe down the walls, shelves, and door seals. Remember to also clean the condenser coils, located at the back or underneath the refrigerator, using a vacuum brush attachment or a soft brush.
- Oven: If your oven has a self-cleaning function, follow the manufacturer’s instructions to activate it. This function will heat the oven to a high temperature, effectively burning off any food residues or grease. If you don’t have a self-cleaning oven, remove the oven racks and clean them separately using warm, soapy water. For the oven interior, apply a commercial oven cleaner or a paste made with baking soda and water. Scrub the surfaces and wipe away the cleaner with a damp cloth.
- Microwave: Place a microwave-safe bowl filled with water and a few slices of lemon or a tablespoon of vinegar in the microwave. Heat the mixture on high for a few minutes until it steams. This will help loosen food particles and grease. Then, wipe the interior with a damp cloth or sponge. For stubborn stains, use a mixture of baking soda and water as a scrubbing paste.
- Dishwasher: Remove the dishwasher racks and check for any debris or food particles. Clean the racks using warm, soapy water and a soft brush. Wipe down the interior of the dishwasher with a damp cloth or sponge, paying attention to the edges and corners. To remove any odor or buildup, run a cycle with a dishwasher cleaner or vinegar and baking soda.
- Coffee maker: Follow the manufacturer’s instructions for cleaning your specific coffee maker model. Typically, this involves running a mixture of water and vinegar through the machine to remove mineral deposits and buildup. Be sure to rinse the coffee maker thoroughly afterward to remove any vinegar taste or residue.
- Blender: Disassemble the blender parts and clean them with warm, soapy water. Pay attention to the blade assembly, ensuring that there are no food residues stuck. For tough stains or odors, blend a mixture of warm water and baking soda for a few seconds. Rinse all the parts thoroughly and let them air dry before reassembling.
- Toaster: Unplug the toaster and remove the crumb tray. Clean the crumb tray and the exterior of the toaster with a damp cloth. Turn the toaster upside down and gently shake to remove any loose crumbs. Use a small brush or toothbrush to clean the interior slots.
Remember to always refer to the manufacturer’s instructions for specific cleaning recommendations for your kitchen appliances. Regular cleaning and maintenance will help ensure that your appliances work effectively and last for years to come.
Tip 7: Removing Stains from Cutting Boards
Over time, cutting boards can develop stubborn stains from ingredients like berries, beets, or spices. These stains not only affect the appearance of the cutting board but can also transfer flavors to other foods. Here are some effective tips for removing stains from cutting boards:
- Vinegar and Baking Soda: Create a paste by mixing equal parts of vinegar and baking soda. Apply the paste to the stained area of the cutting board and let it sit for a few minutes. Scrub the stain with a sponge or brush, and then rinse the cutting board thoroughly with warm water.
- Lemon Juice and Salt: Sprinkle the stained area with salt and then squeeze fresh lemon juice over it. Use a sponge or brush to scrub the stain. Let the mixture sit for a few minutes before rinsing the cutting board with warm water. The natural bleaching properties of lemon juice combined with the gentle abrasive nature of salt can help lift the stain.
- Hydrogen Peroxide: Pour hydrogen peroxide directly onto the stain. Let it sit for a few minutes to break down the stain. Scrub the area with a sponge or brush, and then rinse the cutting board thoroughly with warm water. Hydrogen peroxide is a mild bleach that can effectively remove stains.
- Bleach Solution: For tough stains, you can create a solution by mixing 1 tablespoon of bleach with 1 cup of water. Apply the solution to the stained area of the cutting board and let it sit for a few minutes. Rinse the cutting board thoroughly with warm water to remove any traces of the bleach solution.
- Dish Soap and Peroxide: Create a mixture of dish soap and hydrogen peroxide. Apply the mixture to the stained area and let it sit for a few minutes. Scrub the stain with a sponge or brush, and then rinse the cutting board thoroughly with warm water. This combination can effectively remove tough stains and disinfect the cutting board.
- Wooden Cutting Board Treatment: For wooden cutting boards, you can use a mixture of lemon juice and salt to remove stains. Afterward, rinse the cutting board and let it dry completely. To condition and protect the wood, apply a food-safe oil, such as mineral oil or coconut oil, to the entire surface of the cutting board. Let it absorb for a few hours or overnight before wiping off any excess oil with a clean cloth.
Remember to always rinse cutting boards thoroughly after cleaning them and dry them completely before storing. Proper cleaning and maintenance will help keep your cutting boards stain-free and safe for food preparation.
Tip 8: Sanitizing Dishrack
Dishracks are a convenient and essential kitchen tool for drying dishes, but they can quickly become a breeding ground for bacteria and mold if not properly cleaned and sanitized. Here are some tips for sanitizing your dishrack:
- Remove all dishes and utensils: Before sanitizing your dishrack, make sure it is empty of any dishes, utensils, or miscellaneous items. This will allow you to thoroughly clean and disinfect the rack.
- Inspect and clean: Carefully inspect the dishrack for any food debris, mold, or mildew. Use a brush or sponge to scrub away any visible dirt or grime. Pay close attention to crevices, joints, and corners where bacteria can accumulate.
- Hot water soak: Fill a sink or basin with hot water and add a few drops of dish soap or a small amount of bleach. Place the dishrack in the water and let it soak for at least 15 minutes. The hot water will help loosen any remaining dirt and kill some bacteria.
- Vinegar solution: After the soak, drain the water and rinse the dishrack thoroughly. Prepare a solution of equal parts water and white vinegar. Wipe down the entire dishrack, including the wires, with a sponge or cloth soaked in the vinegar solution. Vinegar is a natural disinfectant and helps eliminate odor-causing bacteria.
- Baking soda scrub: For any stubborn stains or lingering odors, create a paste using baking soda and water. Apply the paste to a brush or sponge and scrub the stained areas of the dishrack. Baking soda is a gentle abrasive that helps remove stains and neutralize odors.
- Rinse and dry: After scrubbing, rinse the dishrack thoroughly with hot water to remove any vinegar or baking soda residue. Shake off any excess water and place the dishrack in a well-ventilated area to air dry completely. Make sure it is completely dry before putting the dishes back on to prevent mold or mildew growth.
- Maintenance: To prevent the buildup of grime and bacteria, make it a habit to regularly clean your dishrack. Wipe it down with a vinegar solution at least once a week, and be sure to remove any standing water that may collect on the rack after use.
By following these tips, you can effectively sanitize your dishrack and maintain a clean and hygienic drying space for your dishes. Regular cleaning will ensure that your dishrack remains odor-free and free from harmful bacteria.
Read more: How To Clean Very High Gutters
Tip 9: Freshening Garbage Disposal
A garbage disposal is a convenient appliance in the kitchen that helps break down food waste, but over time, it can develop unpleasant odors. Here are some tips for freshening your garbage disposal:
- Lemon Ice Cubes: Freeze lemon slices in an ice cube tray with distilled vinegar or water. Once frozen, run the lemon ice cubes through the garbage disposal. The ice helps remove debris and the lemon acts as a natural deodorizer.
- Baking Soda and Vinegar: Sprinkle a few tablespoons of baking soda into the garbage disposal. Follow this by pouring a cup of white vinegar into the disposal. Let the mixture foam and sit for a few minutes to break down any food particles and eliminate odors. Finally, run cold water while running the garbage disposal to flush away the mixture.
- Citrus Peels: Toss citrus peels, such as lemon, lime, or orange, into the garbage disposal. Turn on the disposal and run cold water simultaneously to grind the peels, releasing their natural oils and refreshing the disposal.
- Borax and Salt: Mix equal parts of borax and salt in a bowl. Sprinkle the mixture into the garbage disposal while running cold water. Allow it to sit for a few minutes to disinfect and deodorize the disposal. Then, rinse with water to flush away the mixture.
- White Vinegar Soak: Fill a bowl with white vinegar and submerge a scrub brush or an old toothbrush into it. Scrub the rubber splash guard and the inner edges of the garbage disposal. The vinegar helps break down any grime or debris while neutralizing odors.
- Boiling Water: Bring a kettle or pot of water to a boil. Carefully pour the boiling water into the garbage disposal to flush away any debris or residue. The hot water helps remove buildup and freshens the disposal.
- Regular Cleaning: To maintain a fresh-smelling garbage disposal, make it a habit to clean it regularly. Run the disposal with cold water and a small amount of dish soap to remove any lingering residue or odor-causing bacteria. Be sure to run water for a few seconds after turning off the disposal to flush out any remaining debris.
- Avoiding Problematic Foods: To prevent odors and clogs, avoid throwing problematic foods, such as grease, oils, fibrous vegetables, eggshells, or coffee grounds, into the disposal. Dispose of these in the trash or compost instead.
By following these tips, you can effectively freshen your garbage disposal and keep it smelling clean and odor-free. Regular maintenance and proper usage will help keep your garbage disposal running smoothly for years to come.
Tip 10: Getting Rid of Fridge Odors
Dealing with unpleasant odors in the fridge can be a common kitchen challenge. Here are some tips to help you get rid of fridge odors and keep your refrigerator smelling fresh:
- Empty and declutter: Start by removing all items from the refrigerator. Check for any expired or spoiled food and dispose of it. Decluttering will not only eliminate potential odor sources but also create space for proper air circulation.
- Clean with a vinegar solution: Create a solution by mixing equal parts of water and white vinegar. Dip a sponge or cloth into the solution and wipe down all interior surfaces of the fridge, including shelves, drawers, and door seals. Vinegar is a natural deodorizer that helps eliminate odor-causing bacteria.
- Use baking soda: Place an open container of baking soda on a shelf or in the corner of the refrigerator. Baking soda acts as an absorbent and helps neutralize odors. Replace the container every three months for optimal effectiveness.
- Activated charcoal: Place a few pieces of activated charcoal in a small bowl or wrap them in cheesecloth. Activated charcoal is highly effective in absorbing and eliminating odors. Place the charcoal in the fridge and leave it for a few days before replacing or recharging it.
- Coffee grounds: Fill a small bowl with fresh coffee grounds and place it in the refrigerator. Coffee grounds absorb odors and leave a pleasant aroma. Replace the coffee grounds every few weeks for continued effectiveness.
- Vanilla extract: Dab a few drops of vanilla extract onto a cotton ball or a small piece of cloth. Place it in the refrigerator to help neutralize odors and leave a fresh scent. Replace the vanilla extract as needed.
- Proper food storage: Make sure all food items are properly sealed or covered to prevent odors from spreading. Use airtight containers, resealable bags, or plastic wrap to keep food fresh and contained. Labeling containers can also help you easily identify and eliminate any potential odor sources.
- Regular maintenance: Clean out your fridge regularly to prevent odors from building up. Wipe up any spills or leaks immediately, and do a thorough cleaning every few months to maintain freshness. Consider using a mild detergent or specialized fridge cleaning spray for a deeper clean.
- Natural deodorizers: You can use natural deodorizers such as lemon wedges, orange peels, or fresh herbs to combat fridge odors. Place these items in a small bowl or wrap them in cheesecloth and leave them in the refrigerator. These natural ingredients will help absorb and mask unpleasant smells.
- Avoid pungent foods: To prevent strong odors from permeating your fridge, store pungent foods, such as onions, garlic, and strong cheeses, in airtight containers or resealable bags. This will help contain their aromas and prevent them from spreading to other items.
By following these tips, you can effectively eliminate odors from your fridge and maintain a fresh-smelling refrigerator. Remember to perform regular maintenance and keep up with proper food storage practices to prevent odors from recurring.
Conclusion
Maintaining a clean and organized kitchen is essential for a functional and enjoyable cooking space. By implementing the kitchen cleaning tips and ideas we have shared in this comprehensive guide, you can transform your kitchen into a pristine and inviting environment. From cleaning countertops and scrubbing stovetops to degreasing ovens and freshening garbage disposals, these tips cover every aspect of kitchen cleaning.
Organizing cabinets and properly cleaning kitchen appliances are crucial for maximizing space and ensuring optimal performance. Additionally, removing stains from cutting boards and sanitizing dishracks contribute to a safe and hygienic food preparation area. Lastly, freshening the fridge and getting rid of unwanted odors helps maintain a clean and pleasant environment for storing perishables.
Remember, regular maintenance and consistent implementation of these cleaning and organization techniques will ensure a clean and functional kitchen. Incorporate these tips into your cleaning routine to create a space that is not only visually appealing but also promotes hygiene and efficiency.
So, roll up your sleeves, gather your cleaning supplies, and embark on the journey to transform your kitchen into a sparkling and organized space. Enjoy the satisfaction of a clean and efficient kitchen that will inspire your culinary creations and make your time in the kitchen more enjoyable.
Frequently Asked Questions about Our Very Best Kitchen Cleaning Tips
Was this page helpful?
At Storables.com, we guarantee accurate and reliable information. Our content, validated by Expert Board Contributors, is crafted following stringent Editorial Policies. We're committed to providing you with well-researched, expert-backed insights for all your informational needs.


0 thoughts on “Our Very Best Kitchen Cleaning Tips”