Home>Articles>How To Fix An Electrical Cord That Has Been Cut In Half
Articles
How To Fix An Electrical Cord That Has Been Cut In Half
Modified: March 2, 2024
Learn the steps to fix a severed electrical cord in half with this comprehensive article. Get expert advice and tips on how to safely repair cut cords.
(Many of the links in this article redirect to a specific reviewed product. Your purchase of these products through affiliate links helps to generate commission for Storables.com, at no extra cost. Learn more)
Introduction
Electrical cords are an essential part of our daily lives, providing power to our devices and appliances. However, accidents can happen, and sometimes these cords can be accidentally cut in half. When faced with this situation, it’s important to address the issue promptly and safely to ensure proper functioning and prevent any potential hazards.
In this article, we will guide you through the steps to fix a cut electrical cord that has been severed in half. It’s important to note that electrical repairs should only be attempted by individuals with the necessary knowledge and skills. If you are not experienced with electrical repairs, it is highly recommended to contact a licensed electrician to handle the job.
Before we dive into the step-by-step process, let’s go over some general safety precautions that you should always keep in mind when working with electrical cords:
- Make sure to unplug the cord from the power source before starting any repairs.
- Wear appropriate safety gear, such as gloves and safety glasses, to protect yourself from any potential hazards.
- Work in a well-ventilated area to minimize the risk of exposure to fumes.
- If you are unsure about any step of the repair process, do not hesitate to seek professional help.
By following these safety precautions, you can ensure your well-being and prevent accidents while repairing a cut electrical cord.
Key Takeaways:
- Safety is paramount when repairing a cut electrical cord. Always follow safety precautions, turn off the power, wear protective gear, and seek professional help if unsure.
- Properly assess, strip, splice, and insulate the wires when repairing a cut electrical cord. Test the repaired cord for functionality and safety before use.
Safety Precautions
When it comes to electrical repairs, safety should always be the top priority. Repairing a cut electrical cord can be potentially hazardous, so it’s important to take the necessary precautions to protect yourself and others around you. Here are some essential safety measures to follow:
- Turn off the power: Before you begin any repairs, make sure to unplug the cord from the power source. This will prevent any potential electric shocks or short circuits while working on the cord.
- Wear protective gear: It’s crucial to wear appropriate safety equipment, such as insulated gloves and safety glasses, to protect yourself from any potential electrical hazards. These safety measures will reduce the risk of electrical shocks and injuries.
- Work in a well-lit area: Ensure that you have sufficient lighting when working on the cord. This will help you see the details clearly and avoid any mistakes that could lead to further damage or accidents.
- Use insulated tools: When handling the wires, always use insulated tools to reduce the risk of electrical shock. These tools have non-conductive handles that provide an extra layer of protection.
- Keep the area dry: Make sure that the area where you are working is dry to prevent any potential electrical conductivity. Moisture can increase the risk of electrical shocks, so it’s important to work in a dry environment.
- Avoid overloading the circuit: Ensure that the repaired electrical cord is compatible with the device. Overloading the circuit can lead to overheating and cause further damage to the cord or the device.
- Know your limitations: If you are unsure about any step of the repair process or lack the necessary knowledge and skills, it is advisable to seek professional help. Working with electricity can be dangerous, and it’s better to be safe than sorry.
By following these safety precautions, you can minimize the risks involved in repairing a cut electrical cord. Remember, your safety is of utmost importance, so always prioritize caution and take the necessary steps to protect yourself and others.
Gather the Necessary Tools and Materials
Before you begin repairing a cut electrical cord, it’s essential to gather all the necessary tools and materials. Having everything prepared beforehand will ensure a smoother and more efficient repair process. Here’s a list of the tools and materials you’ll need:
- Wire strippers: Wire strippers are used to remove the insulation from the wires, allowing you to make proper connections.
- Utility knife or razor blade: These tools can be handy for cutting and trimming wires and insulation.
- Electrical tape: Electrical tape is used to insulate the repaired connection, providing protection and preventing exposure to bare wires.
- Wire connectors or butt connectors: These connectors are used to join and secure the wires together after they have been stripped.
- Heat shrink tubing: Heat shrink tubing is an alternative to electrical tape for insulating the repaired connection. It shrinks when heated, providing a tight and durable insulation.
- Soldering iron and solder: If you’re comfortable with soldering and have the necessary experience, a soldering iron and solder can be used to create a strong and permanent connection between the wires.
- Multimeter: A multimeter is an essential tool for testing the continuity and voltage of the electrical cord, ensuring that it’s functioning correctly after the repair.
- Protective gloves and safety glasses: These protective gear items will keep you safe while handling the wires and tools, reducing the risk of injuries.
Make sure that all the tools and materials are in good working condition and easily accessible before you begin the repair process. Having everything in order will save you time and help you complete the repair efficiently.
Remember, safety should always be the priority. Follow the safety precautions mentioned earlier and use the tools and materials responsibly to prevent any accidents or injuries during the repair process.
Assess the Damage
Once you have gathered all the necessary tools and materials, the next step is to assess the damage to the cut electrical cord. This will help you determine the extent of the repair required and guide you in making the necessary repairs. Here’s how you can assess the damage:
- Inspect the cut: Carefully examine the cut section of the electrical cord. Note the position and the length of the cut. This will help you determine whether the cord can be repaired or if it needs to be replaced entirely.
- Check for exposed wires: Look for any exposed wires that may be protruding from the cut ends of the cord. Exposed wires can increase the risk of electrical shocks and should be addressed during the repair process.
- Assess the insulation: Evaluate the condition of the insulation around the wires. If the insulation is intact and unaffected by the cut, it may be possible to proceed with a simple repair. However, if the insulation has been damaged or compromised, it may be necessary to replace the affected section of the cord.
- Determine potential hazards: Identify any potential hazards that may have arisen from the cut, such as moisture exposure or proximity to other electrical components. These hazards should be taken into account during the repair process to ensure safety and prevent further damage.
By thoroughly assessing the damage, you can gain a better understanding of the repair requirements. Based on this assessment, you can determine the best approach for fixing the cut electrical cord, whether it involves a simple repair or a more complex replacement.
Remember, if you are uncertain about the extent of the damage or the appropriate course of action, it’s advisable to seek professional assistance. Electrical repairs can be complex, and it’s better to have an expert’s opinion to guarantee the safety and functionality of the repaired cord.
Turn Off the Power
Before you start repairing a cut electrical cord, it is crucial to turn off the power to the cord. This is a vital step to ensure your safety and prevent any potential electrical hazards. Here’s how you can turn off the power:
- Unplug the cord: Start by unplugging the cord from the power source. This will immediately cut off the flow of electricity and eliminate the risk of electric shocks.
- Switch off the circuit breaker: Locate the circuit breaker panel in your home or workplace. Open the panel cover and identify the circuit breaker that controls the power supply to the area where the cord is connected. Flip the switch of that circuit breaker into the “off” position.
- Double-check the power shutdown: Once you have turned off the circuit breaker, it is essential to ensure that the power has been successfully shut down. Test nearby outlets or devices to confirm that they are no longer receiving electricity.
Turning off the power before working on a cut electrical cord is extremely important as it eliminates the risk of electric shocks and other potential accidents. It is crucial to follow these steps to ensure your safety and the safety of others around you.
Remember, electrical repairs should only be undertaken by individuals with the necessary knowledge and skills. If you are unsure or uncomfortable with any step of the repair process, it is always best to consult a licensed electrician who can safely handle the job.
Do not attempt to repair a cut electrical cord that has been cut in half. It is safer to replace the entire cord or seek professional help.
Read more: How To Fix Cut Electrical Cord
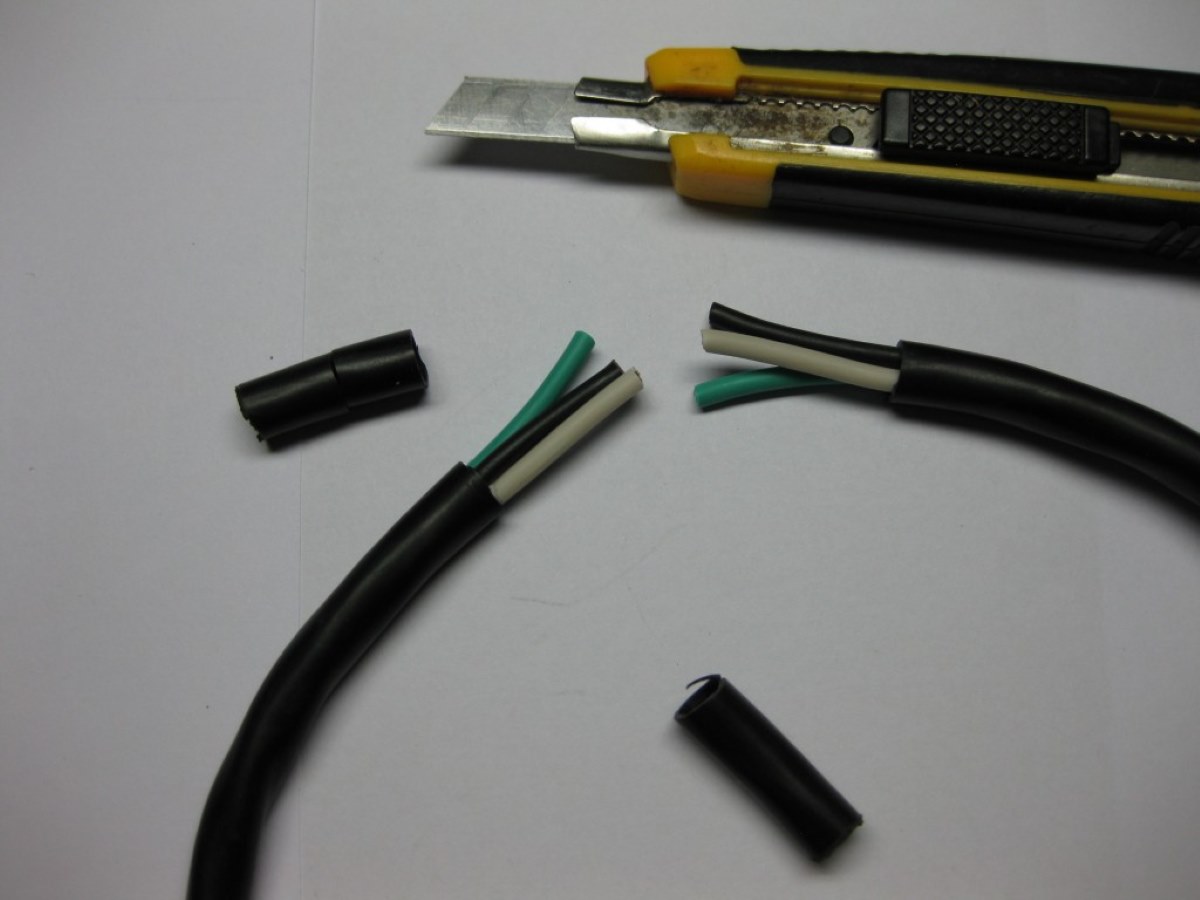
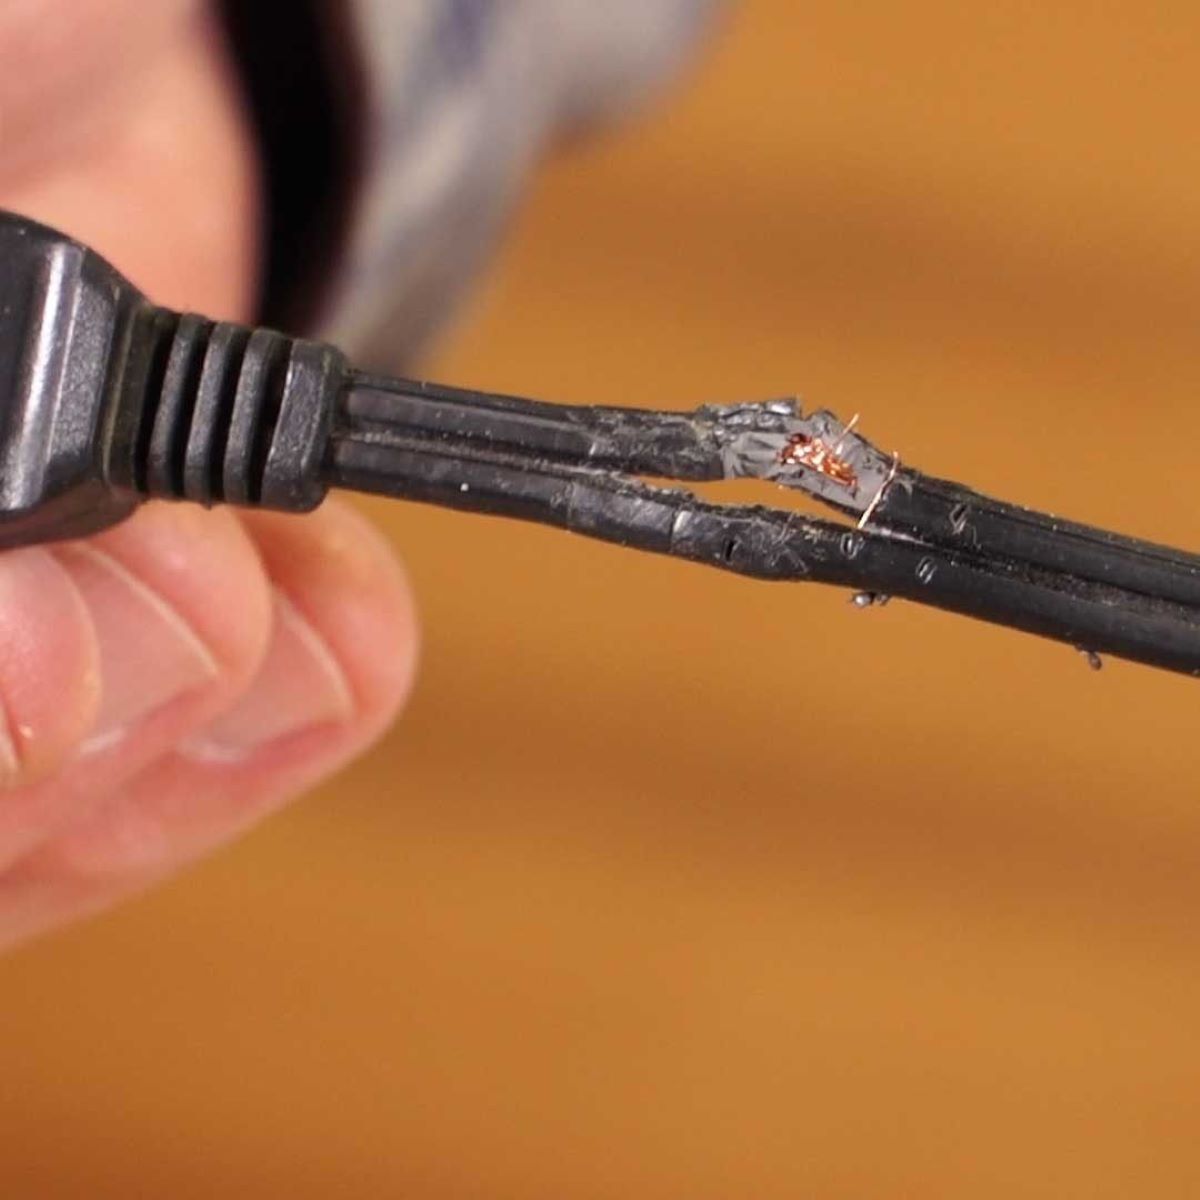
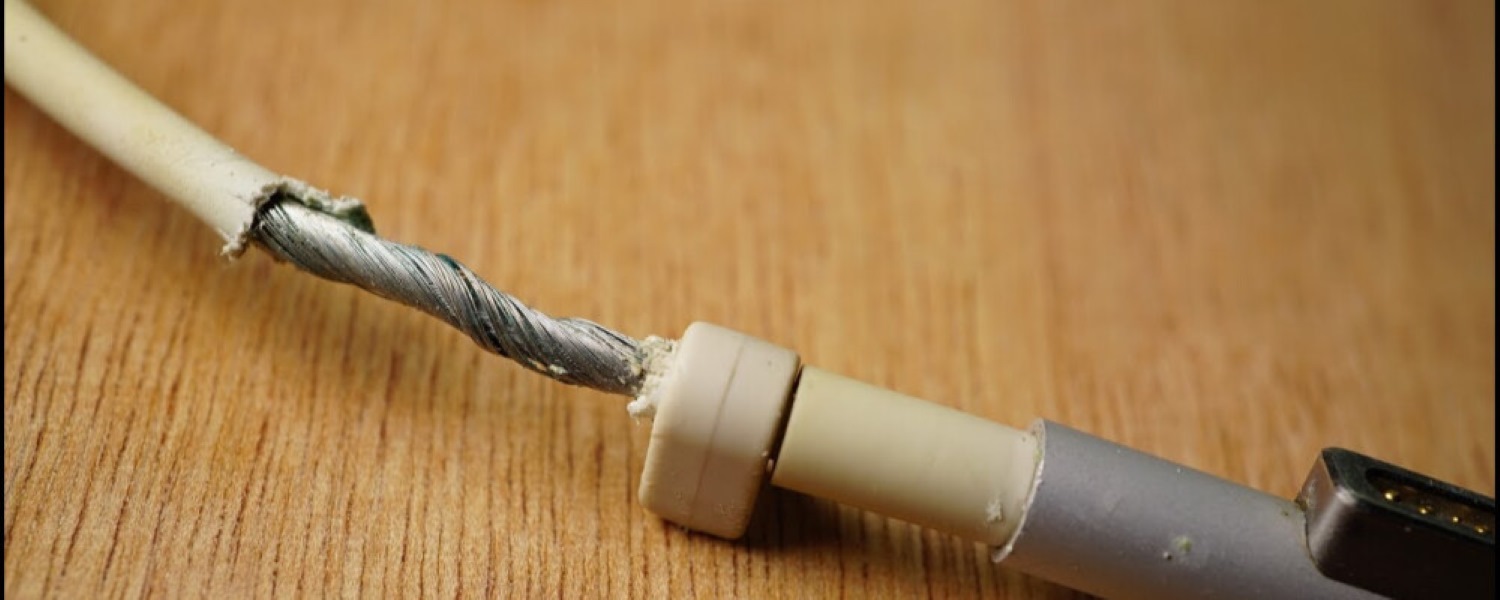
Strip the Insulation
After ensuring the power is turned off, the next step in repairing a cut electrical cord is to strip the insulation. Stripping the insulation allows you to expose the underlying wires and make proper connections. Here’s a step-by-step guide on how to strip the insulation:
- Prepare the wire strippers: Select the appropriate wire stripping notch on your wire strippers based on the size of the wires. Make sure the wire strippers are in good working condition.
- Measure the insulation: Using a measuring tape or a ruler, measure approximately 1-2 inches from the cut ends of the cord. This will be the area where you will strip the insulation.
- Position the wire strippers: Place the jaws of the wire strippers around the cord, ensuring they are positioned just before the measured area. Make sure the jaws fully enclose the cord without cutting into the wires.
- Apply pressure and rotate: Squeeze the handles of the wire strippers firmly to apply pressure on the cord. While maintaining the pressure, rotate the wire strippers around the cord in a circular motion. This action will help cut through the insulation.
- Remove the insulation: Once the wire strippers have made a complete rotation around the cord, release the pressure and carefully pull the insulation away from the cut ends. The insulation should easily slide off, exposing the underlying wires.
- Trim excess insulation: Use a utility knife or a pair of scissors to trim any excess or uneven bits of insulation from the ends of the cord. This will ensure a clean surface for making connections.
Remember to be careful while stripping the insulation to avoid damaging the wires or cutting through them. Take your time and proceed with caution to ensure a successful repair.
Once the insulation is stripped, you can move on to the next step of the repair process, which is splicing the wires. Properly stripped insulation is essential for creating secure and reliable connections between the wires.
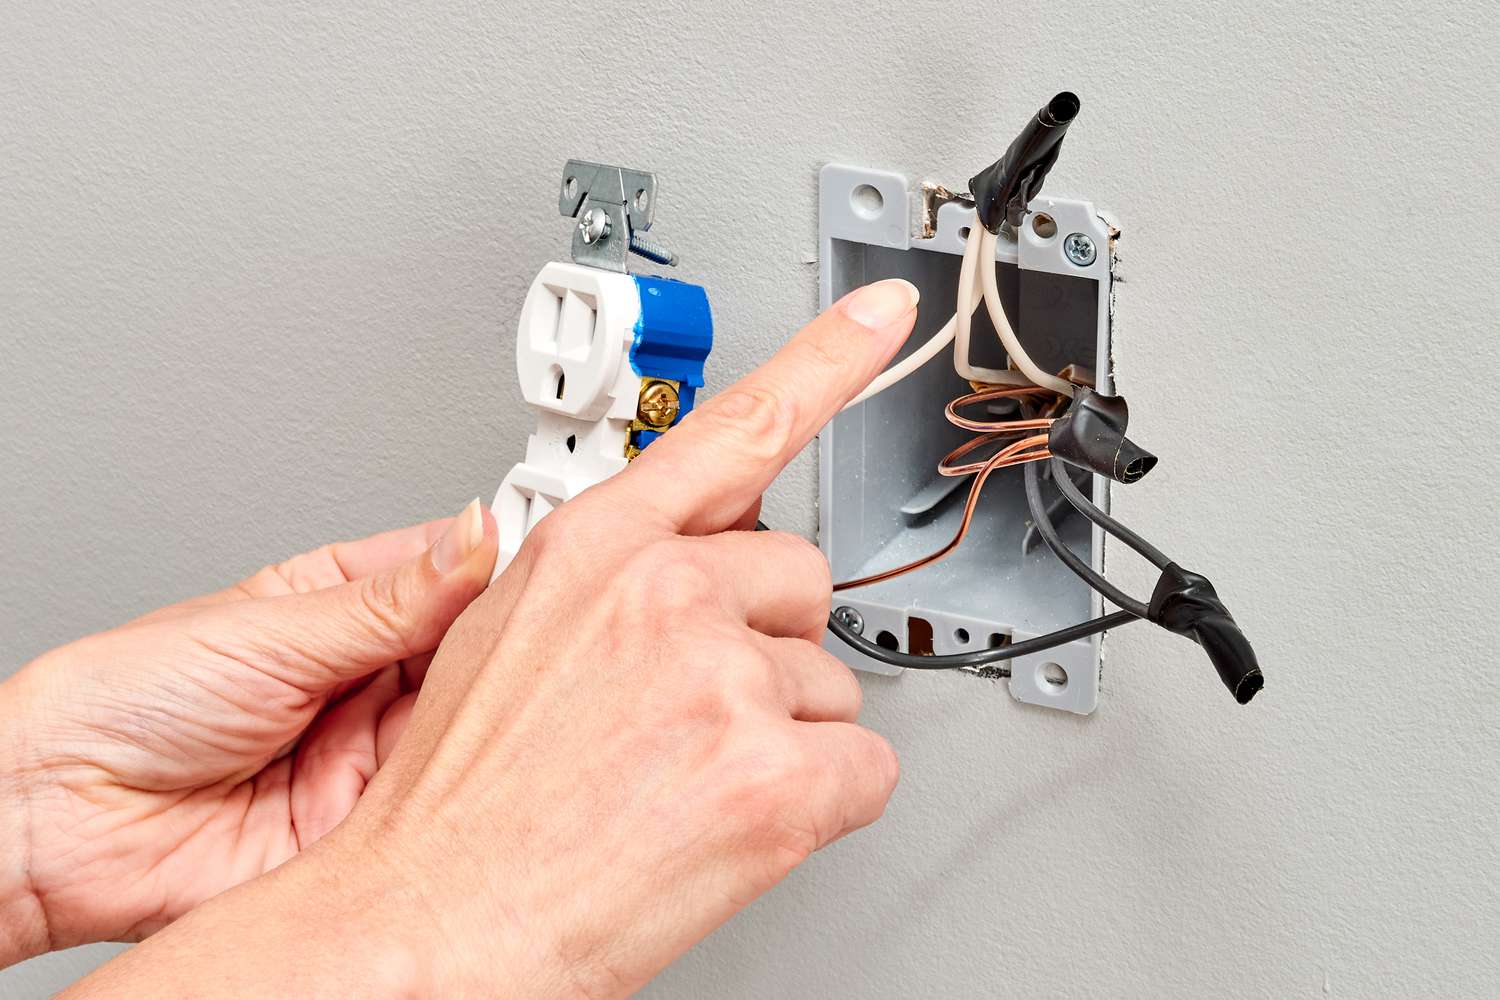
Splice the Wires
After stripping the insulation from the cut ends of the electrical cord, the next step is to splice the wires. Splicing refers to the process of connecting the wires together to restore the electrical continuity. Here’s how you can splice the wires:
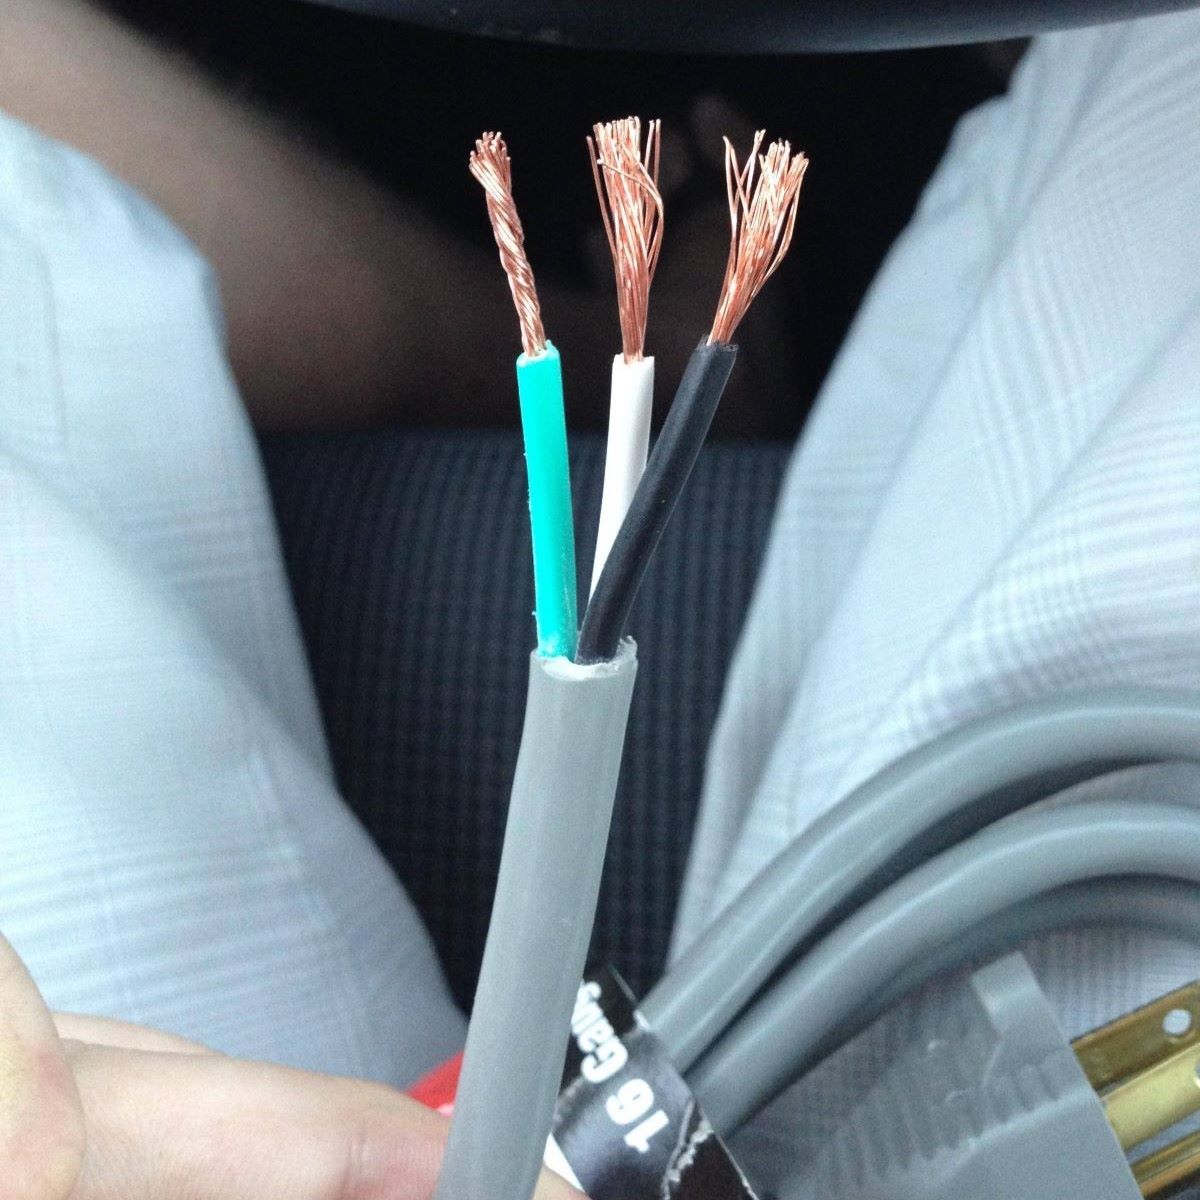
- Identify the wires: Take a close look at the exposed wires. Typically, you will find two or more individual insulated wires within the cord. Identify the corresponding wires that were cut and need to be spliced together.
- Twist the wires: Take each corresponding wire pair and twist them together in a clockwise direction. Make sure the wire strands are securely twisted to ensure a solid connection.
- Secure the connection: To reinforce the connection, you can use wire connectors or butt connectors. Insert the twisted wire ends into the connector, ensuring that all the exposed wires are fully inserted.
- Crimp the connector: Use a crimping tool to secure the wire connector by squeezing it firmly. This will create a tight and reliable connection between the wires.
- Trim any excess wire: After crimping the wire connector, use wire cutters to trim any excess wire sticking out of the connector. This will provide a neater and more professional finish.
It’s important to follow standard wiring practices while splicing the wires. Ensure that the corresponding wires are correctly matched and that the twist and connection are secure. A good connection is crucial for the proper functioning and safety of the electrical cord.
If you are comfortable with soldering and have the necessary experience, you can also solder the connections for added strength and durability. Apply the soldering iron to the twisted wire ends, allowing the solder to melt and fill the gaps between the wires. Be sure to let the solder cool and solidify before proceeding to the next step.
Once the wires are properly spliced, you can move on to the next step of insulating the connection to ensure safety and electrical insulation.
Insulate the Connection
After splicing the wires together, it is crucial to properly insulate the connection. Insulation helps protect the wires from exposure and prevents any potential electrical hazards. Here’s how you can insulate the connection:
- Choose your insulation method: There are two common methods for insulating the connection: using electrical tape or using heat shrink tubing. Both methods are effective, so choose the one that you are most comfortable with and have readily available.
- Using electrical tape: If you choose to use electrical tape, start by wrapping it tightly around the exposed wires. Begin a few inches away from the splice and continue wrapping until you have covered the entire exposed area. Overlap the tape as you wrap to ensure full coverage and a secure insulation. Wrap the tape several times to provide a thick layer of insulation.
- Using heat shrink tubing: If you opt for heat shrink tubing, choose a size that fits snugly around the wires. Slide the heat shrink tubing over the exposed wires, ensuring that it covers the entire splice area. Use a heat source, such as a heat gun, to evenly apply heat to the tubing. As you heat the tubing, it will shrink tightly around the wires, providing a seamless and durable insulation. Allow the heat shrink tubing to cool completely.
Whether you choose electrical tape or heat shrink tubing, it is essential to ensure that the insulation completely covers the exposed wires and the splice. The insulation should be tight and secure to provide proper protection and prevent any accidental contact with live wires.
After insulating the connection, it is advisable to give it a gentle tug to ensure it is firmly secured. This will help guarantee the integrity of the repair and minimize the risk of the wires coming loose.
Proper insulation of the connection is critical for the safe and effective functioning of the repaired electrical cord. It helps prevent electrical shocks, short circuits, and potential damage to the cord or connected devices.
Once the connection is fully insulated, you can move on to the final step: testing the repaired electrical cord.
Test the Repaired Electrical Cord
After completing the repair and insulating the connection, it is important to test the repaired electrical cord to ensure its functionality and safety. Testing will help determine if the repair was successful and if the cord is ready to be used. Here’s how you can test the repaired electrical cord:
- Plug in the cord: Once you have completed the repair and insulation, plug the cord into a power source. Ensure that the power source is compatible with the device you intend to use.
- Switch on the power: Turn on the power source and check if the device connected to the cord is receiving electricity. Look for any signs of power, such as lights turning on or the device powering up.
- Inspect the repaired area: While the cord is powered on, visually inspect the repaired area. Check for any signs of sparking, overheating, or unusual behavior. If you notice any irregularities, immediately unplug the cord and reassess the repair.
- Test the continuity: Use a multimeter to test the continuity of the repaired cord. Set the multimeter to the appropriate continuity or resistance setting and touch the probes to each exposed wire on either side of the repair. The multimeter should indicate a closed circuit, confirming that the wires are properly connected.
- Flex and move the cord: Gently flex and move the repaired cord to ensure that the connection remains intact and does not come loose. Pay attention to any signs of intermittent power loss or flickering, which could indicate a faulty repair.
It is essential to perform these tests to ensure that the repaired electrical cord is functioning properly and is safe to use. By doing so, you can prevent any potential electrical hazards and avoid further damage to the cord or connected devices.
If any issues or abnormalities are detected during testing, it is advisable to revisit the repair process or consult a licensed electrician for assistance. Safety should always be the top priority when dealing with electrical repairs.
Once you are satisfied with the test results and confident in the repaired cord’s functionality, you can proceed to use it as intended. However, continue to monitor the cord during use and be vigilant for any signs of malfunction or damage.
Remember, if at any point you have doubts about the repair or lack the necessary skills and experience, it is always best to seek professional assistance.
Read more: How Can You Repair An Electrical Cord That Has Been Broken Near The Entry To The Vibrator
Conclusion
Repairing a cut electrical cord that has been severed in half may seem like a daunting task, but with the right knowledge and precautions, it can be done safely and effectively. In this article, we have walked you through the step-by-step process of repairing a cut electrical cord, from assessing the damage to testing the repaired cord.
Remember, safety should always be your top priority during electrical repairs. It is important to follow safety precautions, such as turning off the power and wearing protective gear, to prevent accidents and electrical hazards. If you are unsure or uncomfortable with any step of the repair process, it is always recommended to consult a licensed electrician for assistance.
Gathering the necessary tools and materials is essential before starting the repair. Wire strippers, electrical tape or heat shrink tubing, wire connectors, and a multimeter are among the items you may need. Assessing the damage helps you determine the extent of the repair and any potential hazards that need to be addressed.
Stripping the insulation and splicing the wires are critical steps in restoring the electrical continuity. Properly insulating the connection using electrical tape or heat shrink tubing ensures the safety and function of the repaired cord. Testing the repaired electrical cord by plugging it in, checking for power, inspecting for abnormalities, testing continuity, and flexing the cord will help ensure its functionality.
By following the step-by-step guide provided in this article and using caution throughout the process, you can repair a cut electrical cord effectively and safely. However, always keep in mind that electrical repairs can be complex, and it’s vital to seek professional help if you are unsure or uncomfortable with any aspect of the repair.
Remember, your safety and the safety of others is paramount, so take necessary precautions, stay informed, and proceed with confidence. With the right knowledge and proper techniques, you can successfully fix a cut electrical cord and continue to enjoy the convenience and benefits it provides.
Frequently Asked Questions about How To Fix An Electrical Cord That Has Been Cut In Half
Was this page helpful?
At Storables.com, we guarantee accurate and reliable information. Our content, validated by Expert Board Contributors, is crafted following stringent Editorial Policies. We're committed to providing you with well-researched, expert-backed insights for all your informational needs.


0 thoughts on “How To Fix An Electrical Cord That Has Been Cut In Half”