Home>Construction & Tools>Building Materials>How To Make Brick Slips
Building Materials
How To Make Brick Slips
Modified: February 18, 2024
Learn how to make brick slips with our step-by-step guide. Find all the building materials and tools you need for this DIY project.
(Many of the links in this article redirect to a specific reviewed product. Your purchase of these products through affiliate links helps to generate commission for Storables.com, at no extra cost. Learn more)
Introduction
Welcome to the world of brick slips, where traditional charm meets modern design. Brick slips, also known as brick tiles or brick veneers, are a fantastic way to add character and warmth to any interior or exterior space. Whether you're looking to revamp your home, office, or retail space, brick slips offer a versatile and stylish solution that can transform any environment.
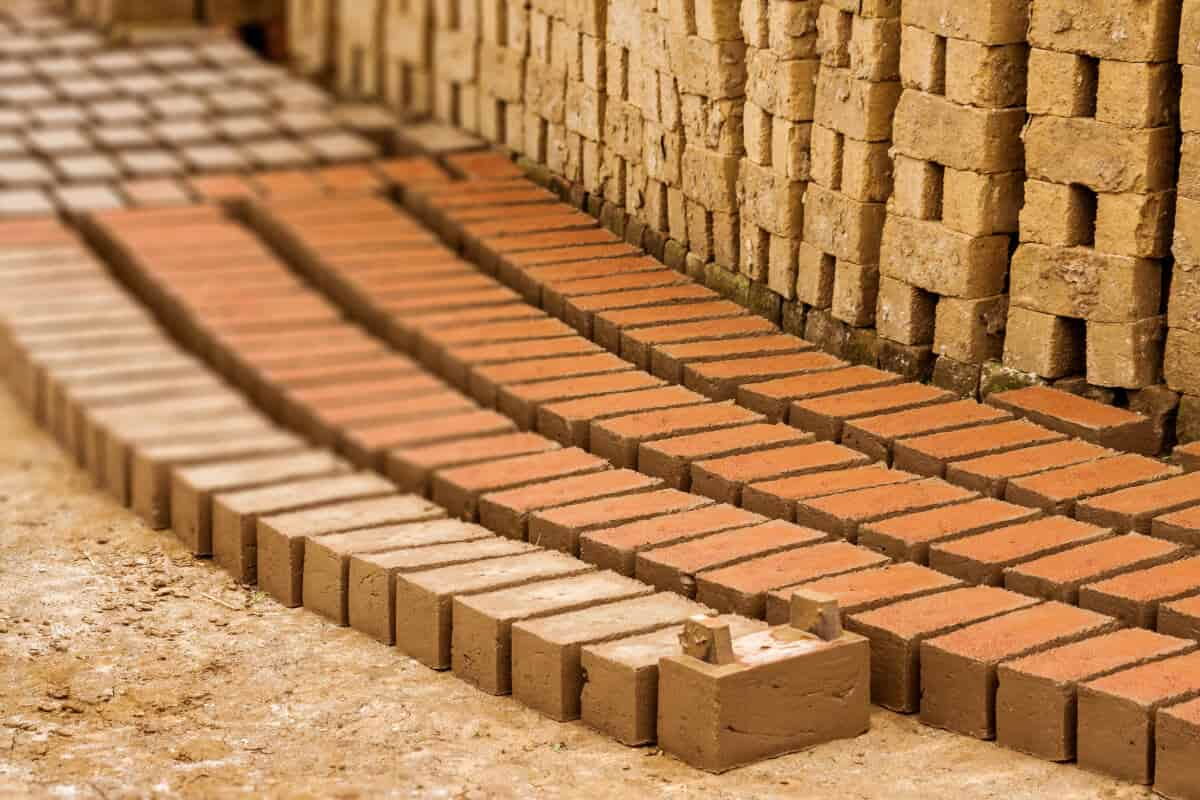
Brick slips are essentially thin sections of brick, typically around 20-25mm in thickness, that replicate the appearance of traditional bricks. They are lightweight, easy to install, and come in a wide range of colors, textures, and finishes, allowing you to achieve the perfect look for your project. Whether you prefer the rustic appeal of weathered bricks or the clean lines of modern brickwork, there's a style to suit every taste.
In this comprehensive guide, we'll take you through the process of creating a stunning brick slip feature, from the materials you'll need to the finishing touches that will bring your vision to life. Whether you're a seasoned DIY enthusiast or a complete novice, this step-by-step tutorial will equip you with the knowledge and confidence to tackle your brick slip project with ease.
So, roll up your sleeves, unleash your creativity, and get ready to embark on a rewarding journey of craftsmanship and design. Let's dive into the world of brick slips and discover how you can elevate your space with the timeless allure of exposed brickwork.
Key Takeaways:
- Brick slips are thin sections of brick that add character to any space. With proper preparation and tools, you can easily install them to transform your environment.
- Mixing mortar and applying it carefully are crucial for a successful brick slip installation. The finishing touches, like grouting and sealing, complete the timeless appeal of exposed brickwork.
Read more: What Is A Brick Slip
Materials Needed
Before diving into the exciting world of brick slip installation, it’s essential to gather all the necessary materials and tools. Proper preparation and having the right supplies at hand will streamline the process and ensure a successful outcome. Here’s a comprehensive list of the materials and tools you’ll need:
- Brick Slips: The star of the show! Choose high-quality brick slips in your preferred color and style. Ensure that you have enough to cover the intended area, accounting for any cuts and wastage.
- Adhesive: Select a suitable adhesive specifically designed for brick slips. It should provide strong adhesion and be suitable for both interior and exterior applications.
- Primer: A bonding primer will help promote adhesion between the substrate and the adhesive, creating a stable base for the brick slips.
- Spacers: These handy little tools will help maintain consistent spacing between the brick slips, ensuring a professional finish.
- Grout: Choose a grout color that complements your brick slips. Opt for a high-quality, flexible grout that can accommodate any movement without cracking.
- Sealant: A suitable sealant will protect the brick slips from moisture and staining, prolonging their lifespan and maintaining their appearance.
- Tools: You’ll need a selection of tools, including a notched trowel for applying the adhesive, a grout float for grouting, a tile cutter or saw for making precise cuts, and a spirit level for ensuring straight and level installation.
- Protective Gear: Safety first! Equip yourself with gloves, safety goggles, and a dust mask to protect against any potential hazards during the installation process.
By having these materials and tools at your disposal, you’ll be well-prepared to embark on your brick slip installation journey with confidence and ease. With everything in place, you’re one step closer to transforming your space with the timeless appeal of brick slips.
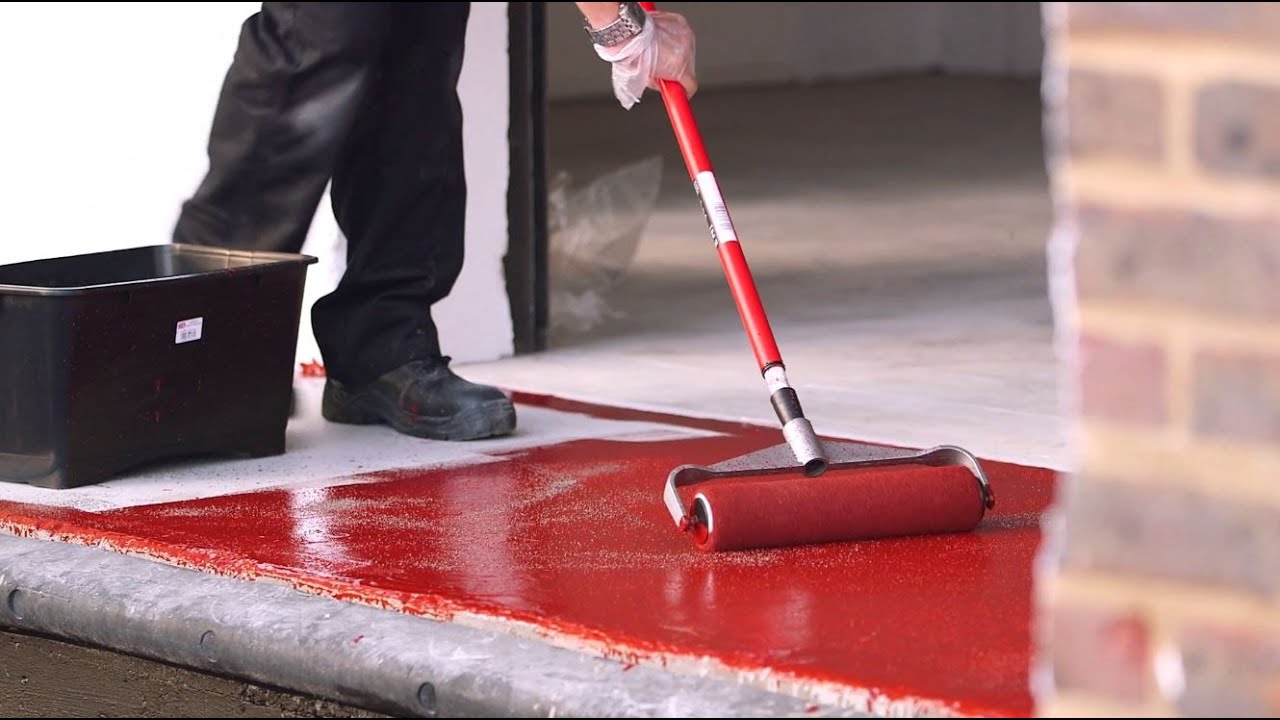
Preparation
Proper preparation is the key to a successful brick slip installation. Before you dive into the exciting process of transforming your space, it’s crucial to ensure that the surface is ready to receive the brick slips. Here’s a step-by-step guide to the essential preparations:
- Clean the Surface: Start by thoroughly cleaning the surface where the brick slips will be installed. Remove any dust, dirt, grease, or loose particles. A clean, debris-free surface will promote better adhesion and a professional finish.
- Inspect the Substrate: Check the substrate (the surface to which the brick slips will be applied) for any damage, unevenness, or moisture issues. Address any structural concerns and ensure that the substrate is sound, level, and free from moisture or contaminants that could compromise the installation.
- Apply Primer: Once the surface is clean and dry, apply a suitable bonding primer according to the manufacturer’s instructions. The primer will enhance adhesion and promote a strong bond between the substrate and the adhesive.
- Plan the Layout: Take the time to plan the layout of the brick slips, considering the pattern, spacing, and positioning. This will help you visualize the final result and make any necessary adjustments before you start applying the adhesive.
- Gather Your Tools: Ensure that all the necessary tools and materials are within reach. Having everything organized and readily available will streamline the installation process and minimize disruptions.
- Protect the Surrounding Area: Depending on the nature of the installation, you may need to protect the surrounding area from potential splashes, spills, or debris. Use appropriate coverings or masking materials to safeguard adjacent surfaces and furnishings.
By diligently following these preparation steps, you’ll create a solid foundation for your brick slip installation project. Taking the time to prepare the surface and gather the essential materials and tools will set the stage for a smooth and successful installation process. With the groundwork laid and the vision in mind, you’re ready to move on to the next exciting phase: mixing the mortar.
Mixing the Mortar
As you venture into the realm of brick slip installation, mastering the art of mixing mortar is a crucial step in achieving a professional and durable finish. The mortar serves as the bonding agent that secures the brick slips to the substrate, providing strength and stability. Here’s a detailed guide to mixing the mortar for your brick slip project:
- Choose the Right Mortar: Select a high-quality mortar that is suitable for the specific requirements of brick slip installation. Opt for a mortar that offers strong adhesion, flexibility, and weather resistance, particularly for exterior applications.
- Measure the Components: Follow the manufacturer’s instructions to measure the correct ratio of mortar mix and water. Consistency is key, so precise measurements are essential for achieving the ideal mortar consistency.
- Mixing Process: Using a clean container, gradually add the mortar mix to the water while stirring continuously. Use a drill with a mixing paddle attachment for larger quantities, ensuring thorough blending without lumps or dry pockets.
- Consistency Check: Aim for a smooth, workable consistency that is not too wet or too dry. The mortar should hold its shape when formed into a mound and exhibit good adhesive properties without being overly runny.
- Rest Period: Allow the mixed mortar to rest for a few minutes, then give it a final stir to ensure uniformity. This resting period allows the ingredients to fully combine and attain the desired workability.
- Use Within Specified Time: Mortar has a limited working time, so it’s essential to use it within the specified timeframe to maintain its adhesive and bonding properties. Avoid remixing old mortar that has started to set.
By mastering the art of mixing mortar, you’ll be well-equipped to handle the adhesive aspect of brick slip installation with confidence and precision. The quality and consistency of the mortar are fundamental to the structural integrity and longevity of your brick slip feature. With the mortar mixed to perfection, you’re now ready to embark on the next phase: applying the mortar to the substrate in preparation for the brick slips.
When making brick slips, ensure that the surface is clean and free of dust or debris before applying adhesive to ensure a strong and long-lasting bond.
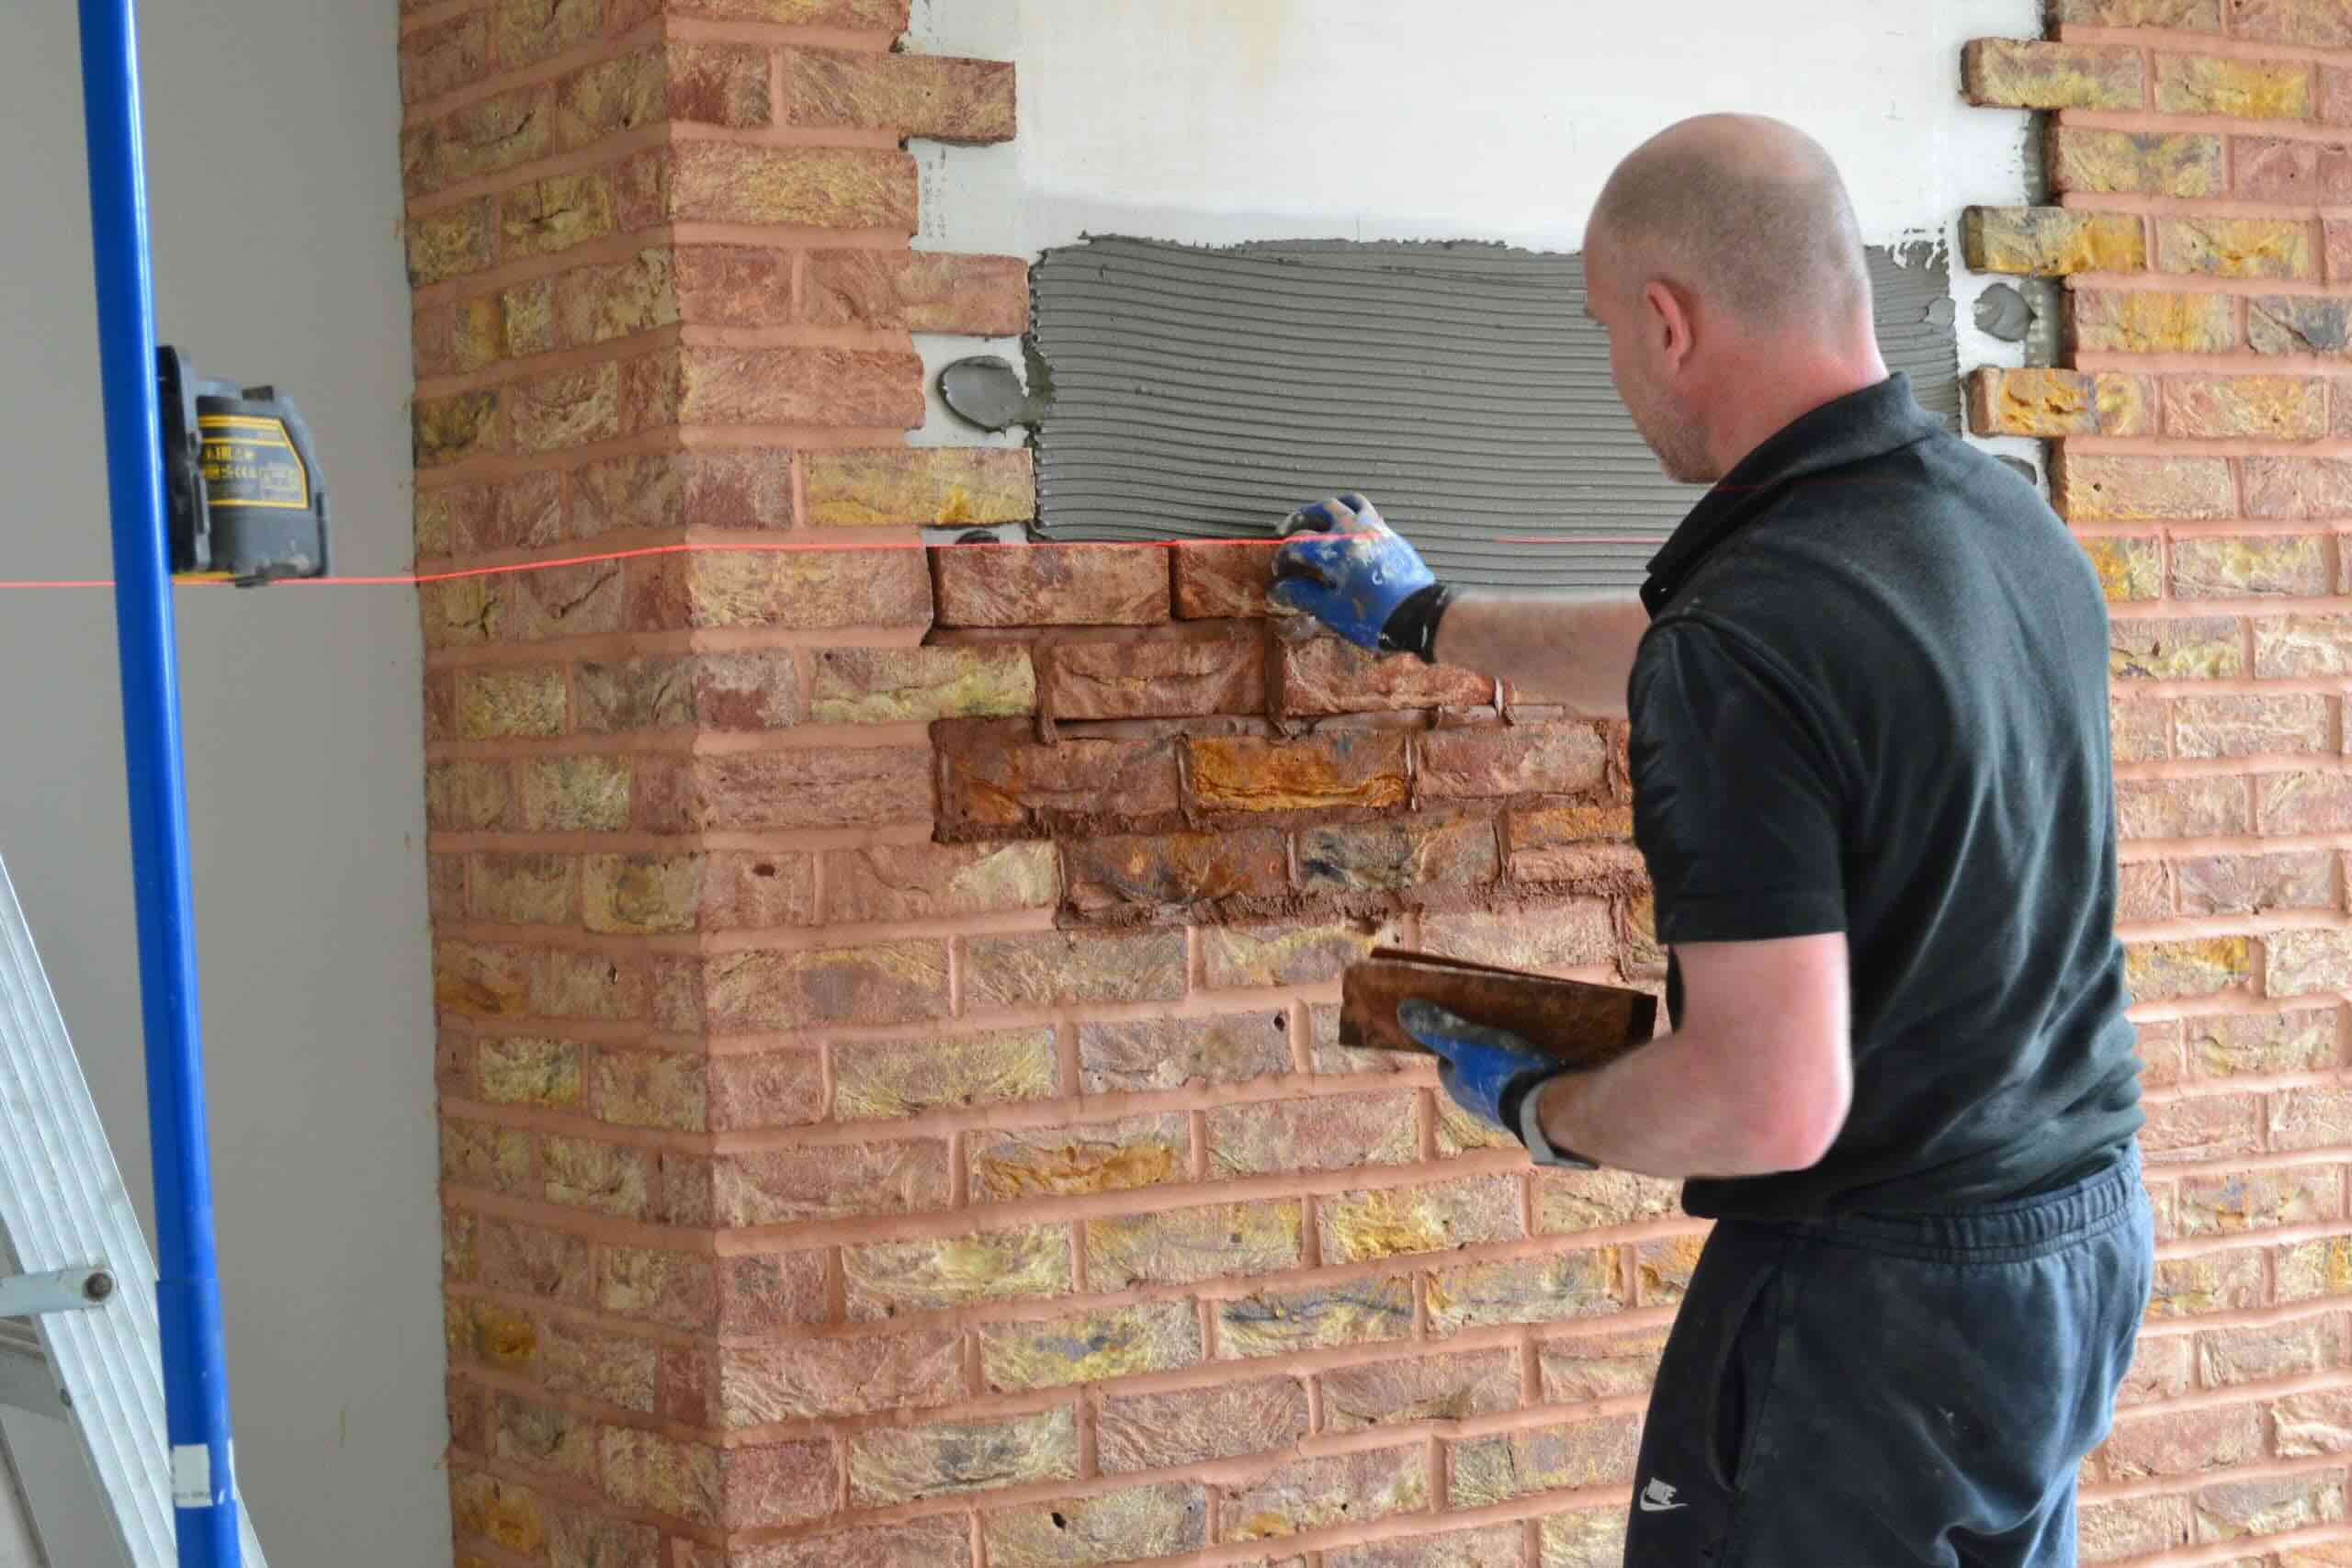
Applying the Mortar
With the mortar mixed to the ideal consistency, it’s time to transition to the application phase, where precision and attention to detail are paramount. Applying the mortar to the substrate sets the stage for the seamless integration of the brick slips, ensuring a strong and enduring bond. Here’s a comprehensive guide to applying the mortar for your brick slip installation:
- Work in Sections: Divide the installation area into manageable sections, working on one area at a time. This approach ensures that the mortar remains workable as you position the brick slips, preventing it from drying out prematurely.
- Use the Notched Trowel: Apply the mortar to the substrate using a notched trowel, creating a consistent bed of adhesive with ridges for enhanced grip. Work the mortar in one direction to ensure uniform coverage and an even surface for the brick slips.
- Maintain Consistent Thickness: Aim for a uniform thickness of mortar to support the brick slips securely. Avoid excessive build-up or thin spots, as these can compromise the stability and alignment of the brick slips.
- Check for Coverage: Periodically lift a corner of the mortar to inspect the coverage and ensure that the substrate is adequately coated. Adequate mortar coverage is essential for achieving a strong bond with the brick slips.
- Adjust for Alignment: As you apply the mortar, use a spirit level to verify that the surface is level and plumb. Making any necessary adjustments at this stage will contribute to a flawless and professional installation.
- Work Efficiently: Mortar has a limited working time, so strive to work efficiently and methodically. Complete one section at a time, ensuring that the mortar remains in an optimal state for receiving the brick slips.
By meticulously following these steps, you’ll lay the groundwork for a seamless and secure foundation that will support the installation of the brick slips. The application of the mortar demands precision and care, setting the stage for the exciting phase of placing and securing the brick slips to bring your vision to life.
Read more: What Makes Non-Slip Shoes Non-Slip
Installing the Brick Slips
As you transition to the installation of the brick slips, you’re poised to witness your vision taking shape, brick by brick. This phase marks the culmination of meticulous preparation and precise application, as the individual brick slips come together to adorn your space with timeless charm. Here’s a detailed guide to installing the brick slips for a stunning and enduring result:
- Begin at the Base: Start at the bottom of the installation area, working your way upward. This approach ensures that any cut or partially visible brick slips are positioned higher up, minimizing their prominence in the overall design.
- Apply Firm Pressure: Press each brick slip firmly into the mortar bed, ensuring good contact and adhesion. A slight twisting motion can help secure the brick slip in place and achieve a level surface.
- Use Spacers: Place spacers between the brick slips to maintain consistent spacing and ensure uniform grout lines. This attention to detail contributes to a professional and polished finish.
- Make Precise Cuts: When reaching the edges or corners, use a tile cutter or saw to make accurate cuts that fit seamlessly into the design. Precision in cutting ensures a seamless and cohesive appearance.
- Verify Alignment: Periodically check the alignment and level of the brick slips using a spirit level. Adjust the positioning as needed to maintain straight, plumb, and uniform rows throughout the installation.
- Work Methodically: Proceed methodically across the installation area, ensuring that each brick slip is placed with care and precision. Consistency in technique and attention to detail will yield a visually stunning and structurally sound result.
As you navigate the installation process, savor the transformation unfolding before your eyes. Each brick slip contributes to the timeless allure of exposed brickwork, infusing your space with character and warmth. With the brick slips securely in place, the final phase of grouting and finishing touches awaits, bringing your vision to its full realization.
Finishing Touches
The finishing touches of a brick slip installation elevate the project from a construction endeavor to a work of art. These final steps are where the individual elements seamlessly merge, and the vision you’ve nurtured comes to fruition. Here’s a comprehensive guide to the finishing touches that will perfect your brick slip installation:
- Remove Spacers: Carefully remove the spacers from between the brick slips before proceeding with the grouting process. Take care not to disturb the positioning of the brick slips as you extract the spacers.
- Prepare the Grout: Select a high-quality grout that complements the color and style of your brick slips. Follow the manufacturer’s instructions to mix the grout to the desired consistency, ensuring a smooth and workable blend.
- Apply the Grout: Using a grout float, apply the grout to the spaces between the brick slips, working it into the joints with firm, diagonal strokes. Ensure that the grout fills the gaps completely for a uniform and professional finish.
- Clean Excess Grout: Once the grout has set for the specified time, use a damp sponge to remove any excess grout from the surface of the brick slips. Rinse the sponge frequently and avoid applying excessive pressure to prevent dislodging the grout from the joints.
- Seal the Brick Slips: After the grout has fully cured, consider applying a suitable sealant to the brick slips. The sealant will protect the brick slips from moisture, staining, and wear, enhancing their longevity and maintaining their aesthetic appeal.
- Inspect and Appreciate: Take a moment to inspect the completed installation, appreciating the transformation and attention to detail. Verify that the grout lines are uniform, the brick slips are securely in place, and the overall appearance aligns with your vision.
With the finishing touches complete, your brick slip installation stands as a testament to craftsmanship and creativity. The seamless integration of the individual components has yielded a captivating feature that enriches your space with timeless elegance. As you admire the finished installation, take pride in the artistry and dedication that have brought your vision to life.
Conclusion
Embarking on a brick slip installation journey is a testament to your creativity, craftsmanship, and vision for transforming spaces into captivating environments. From the meticulous preparations to the final finishing touches, each step has contributed to the creation of a stunning feature that embodies the timeless allure of exposed brickwork. As you conclude this enriching endeavor, reflect on the journey and the enduring impact of your efforts.
Your dedication to mastering the art of brick slip installation has not only resulted in a visually striking addition to your space but has also fostered a deeper appreciation for the artistry and intricacies of construction and design. The fusion of traditional charm and contemporary aesthetics within the realm of brick slips epitomizes the harmonious coexistence of the past and the present, enriching environments with character and warmth.
As you admire the completed installation, take pride in the craftsmanship and attention to detail that have brought your vision to fruition. The seamless integration of the individual brick slips, meticulously applied mortar, and precisely executed finishing touches stands as a testament to your dedication and artistry. Your space now resonates with the timeless appeal of exposed brickwork, inviting admiration and evoking a sense of heritage and authenticity.
May your brick slip installation serve as a source of inspiration and admiration, igniting creativity and admiration in those who encounter its captivating presence. The enduring beauty and craftsmanship of your installation will continue to enrich your space, creating a lasting legacy of artistry and design.
With the completion of your brick slip installation, you have not only transformed a space but have also woven a narrative of creativity, dedication, and timeless elegance. As you embark on future endeavors, may the enduring allure of brick slips continue to inspire and captivate, enriching spaces with their inimitable charm and grace.
Frequently Asked Questions about How To Make Brick Slips
Was this page helpful?
At Storables.com, we guarantee accurate and reliable information. Our content, validated by Expert Board Contributors, is crafted following stringent Editorial Policies. We're committed to providing you with well-researched, expert-backed insights for all your informational needs.


0 thoughts on “How To Make Brick Slips”