Home>Furniture>Living Room Furniture>How To Make Slip Covers For Cushions
Living Room Furniture
How To Make Slip Covers For Cushions
Modified: March 16, 2024
Learn how to make slip covers for your living room furniture cushions with this step-by-step guide. Create a cozy and stylish update for your space.
(Many of the links in this article redirect to a specific reviewed product. Your purchase of these products through affiliate links helps to generate commission for Storables.com, at no extra cost. Learn more)
Introduction
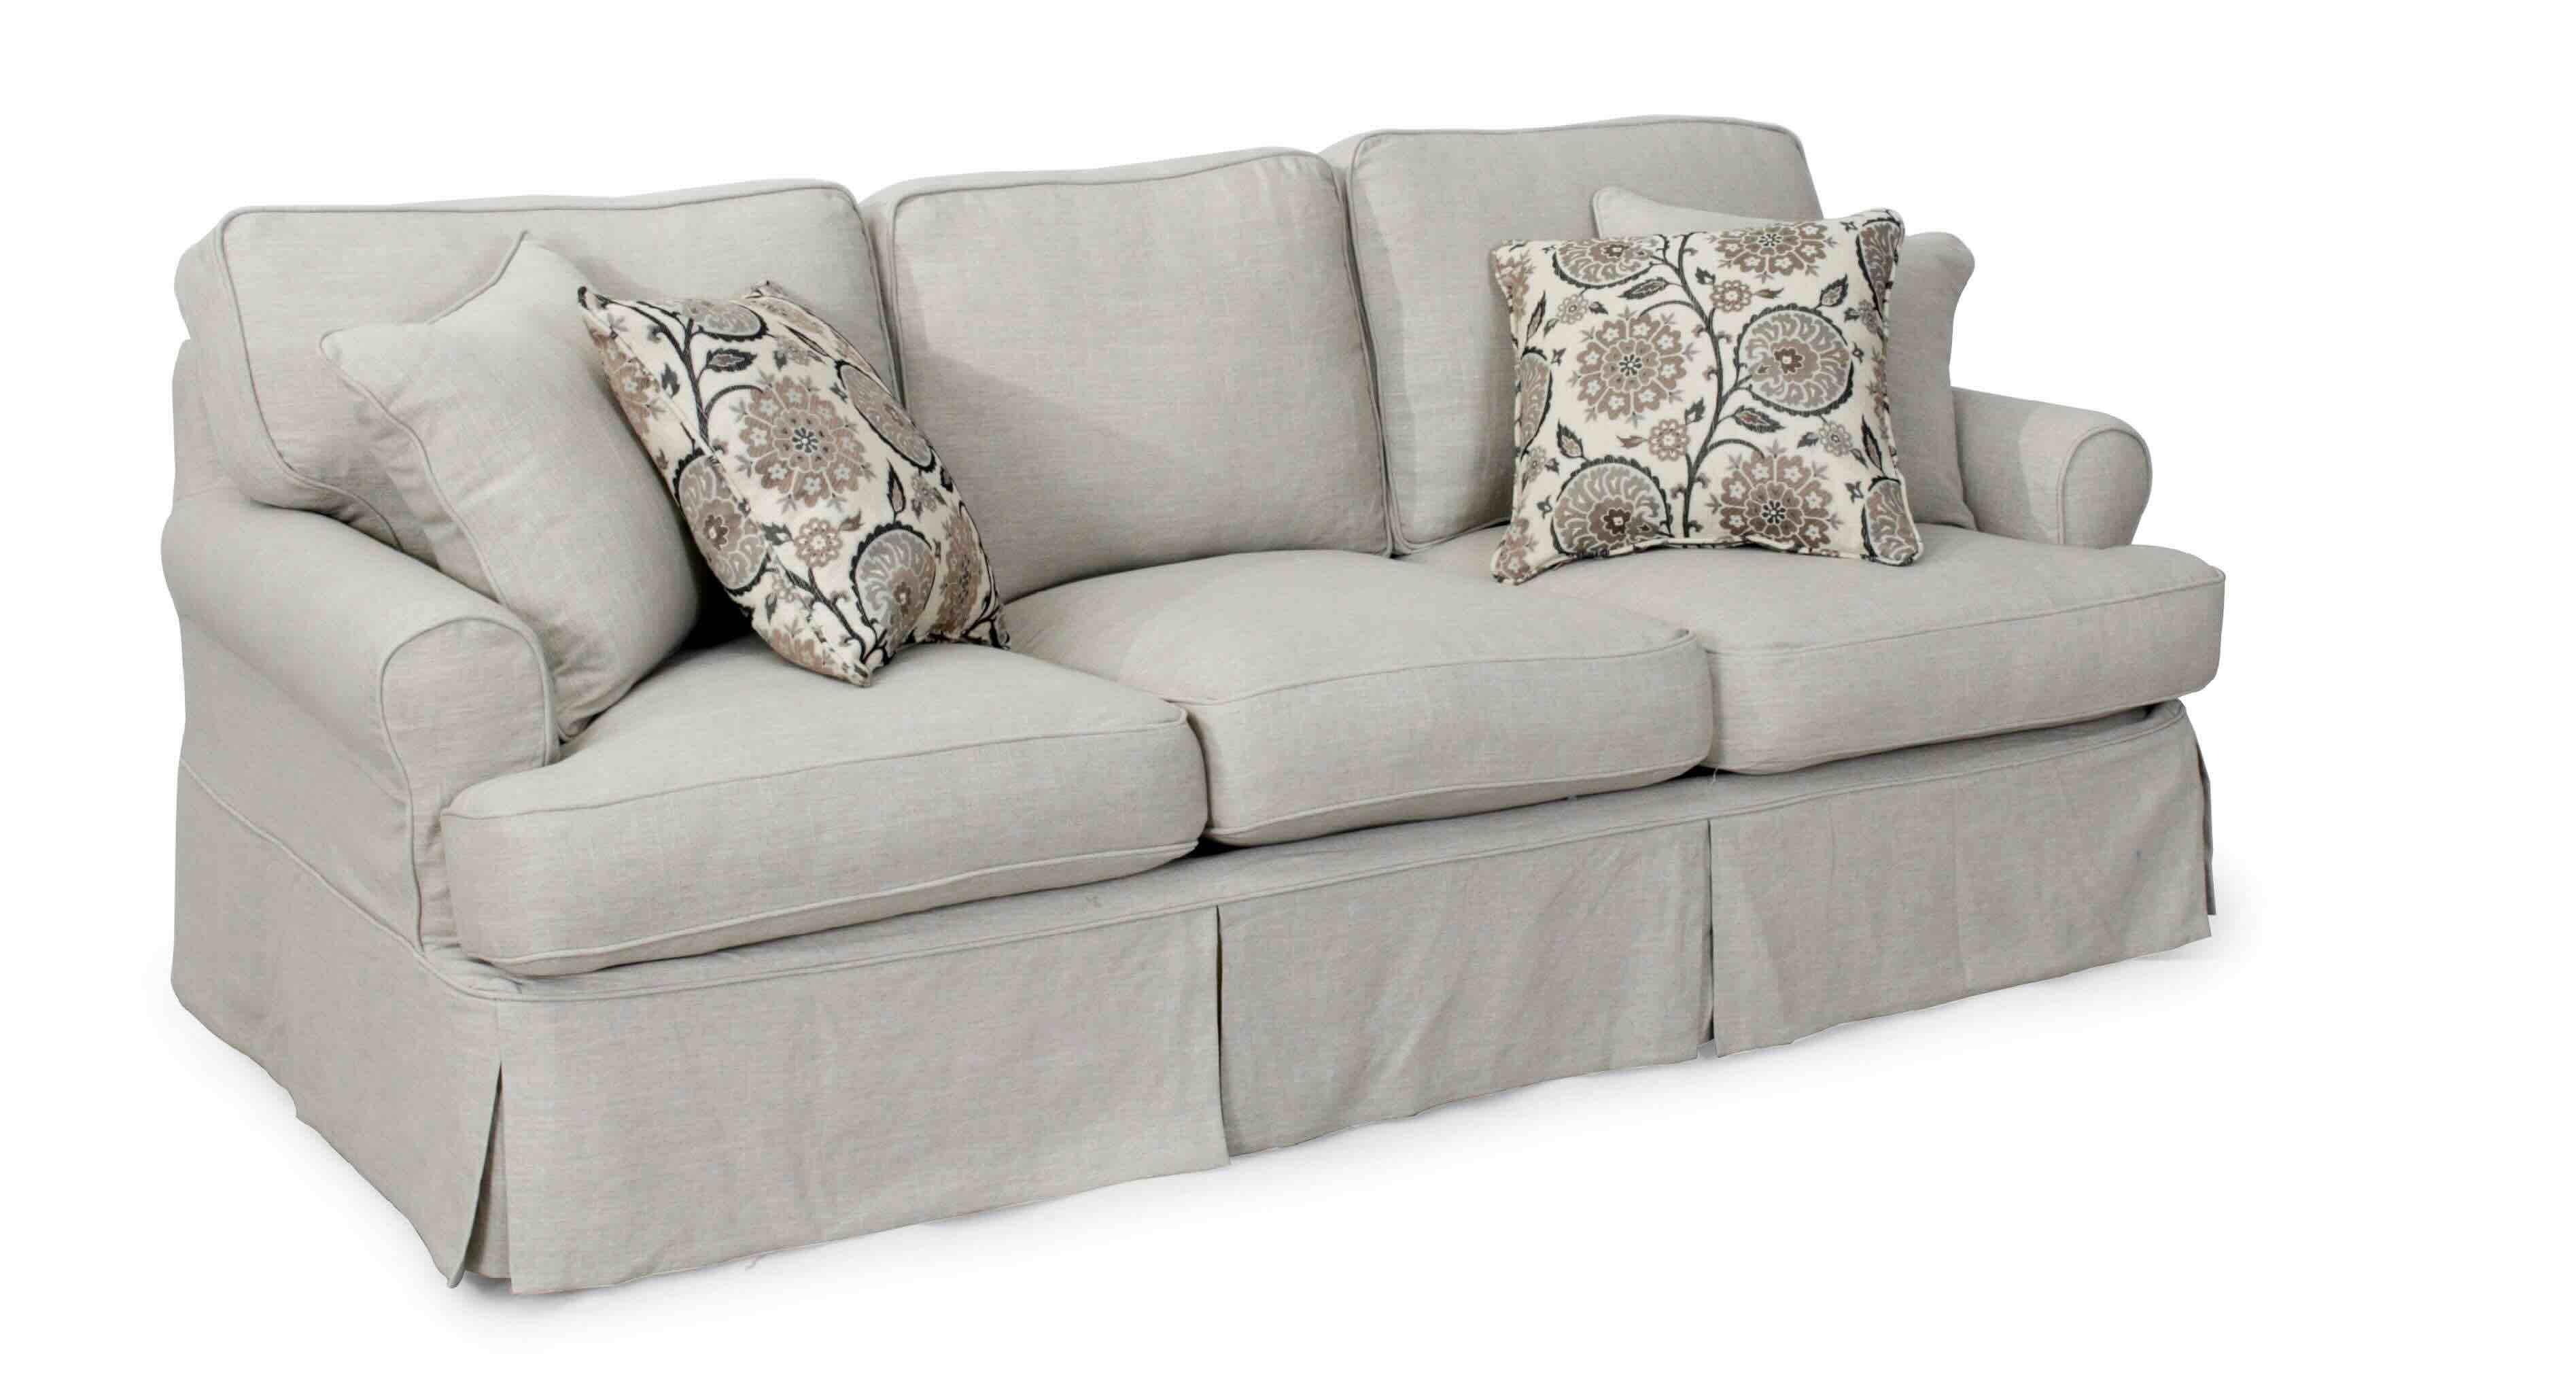
Welcome to our comprehensive guide on how to make slip covers for cushions! Slip covers are a fantastic way to revitalize your living room furniture and give it a fresh new look. Whether you want to protect your cushions from wear and tear or simply update the style, making your own slip covers is a cost-effective and enjoyable DIY project.
In this article, we will walk you through the step-by-step process of creating slip covers for your cushions. We will cover everything from choosing the right fabric to fitting the slip cover onto the cushion. So grab your sewing machine and let’s get started!
Key Takeaways:
- Transform your living room furniture with DIY slip covers! Choose durable, easy-to-clean fabric and follow precise measurements for a professional, personalized look.
- Enjoy a cost-effective and enjoyable DIY project by creating slip covers for your cushions. From fabric selection to fitting, revitalize your living room with style and functionality.
Read more: How To Make Patio Furniture Cushion Covers
Choosing the Right Fabric
When it comes to making slip covers for cushions, selecting the right fabric is crucial. You want a fabric that is both durable and easy to clean, as well as one that complements the style of your living room. Here are a few key factors to consider when choosing the fabric:
- Durability: Look for a fabric that can withstand daily use and is resistant to wear and tear. Fabrics such as denim, canvas, or twill are excellent choices for slip covers.
- Ease of Cleaning: Since slip covers are prone to spills and stains, opt for fabrics that are machine washable or easy to spot clean. Avoid delicate materials that require dry cleaning.
- Color and Pattern: Consider the color scheme and overall aesthetic of your living room. Choose a fabric that complements your existing furniture and décor. Solid colors or subtle patterns are versatile options that can blend seamlessly with various styles.
- Texture: Texture adds visual interest and can enhance the look and feel of your slip covers. You may opt for smooth fabrics like cotton or linen, or explore textures such as velvet or suede for a more luxurious touch.
- Weight: The weight of the fabric should be appropriate for your cushions. Lighter fabrics work well for smaller cushions, while heavier fabrics provide more structure and stability for larger cushions.
Keep in mind that upholstery fabric is often a great choice for slip covers, as it is specifically designed to withstand frequent use and is typically stain-resistant. However, if you prefer a more casual or relaxed look, you can also consider using drapery or outdoor fabrics, which offer a wider range of patterns and colors.
Remember to take swatches of your chosen fabrics home to see how they look in your living room’s lighting before making a final decision. This will help you ensure that the fabric color and pattern harmonize with the overall décor.
Once you’ve settled on the perfect fabric, it’s time to move on to the next step: measuring and calculating the fabric needed.
Measuring and Calculating Fabric Needed
Accurate measurements are essential to ensure your slip covers fit snugly on your cushions. Here’s a step-by-step guide to measuring and calculating the fabric needed:
- Measure the cushion: Start by measuring the length, width, and thickness of your cushion. If your cushion has rounded edges, measure the widest point across. Write down these measurements as they will be used to determine the fabric dimensions.
- Add seam allowance: To allow room for sewing, add 1 inch to each measurement. For example, if your cushion measures 20 inches by 20 inches, add 1 inch to each side, resulting in a fabric size of 22 inches by 22 inches.
- Account for overlap: If your cushion has a boxy shape or rounded corners, you’ll need to account for the extra fabric needed to create a snug fit. Add another 2 inches to each measurement to ensure proper coverage.
- Calculate fabric dimensions: Multiply the final dimensions from step 3 by 2 to account for the top and bottom of the cushion. For example, if your cushion measures 22 inches by 22 inches, the fabric size needed would be 44 inches by 44 inches.
- Consider pattern direction: If your chosen fabric has a directional pattern, you may need to purchase additional fabric to ensure the pattern aligns correctly on each slip cover. Factor in the repeat of the pattern and adjust your fabric calculations accordingly.
It’s always a good idea to double-check your measurements before purchasing fabric to avoid any costly mistakes. Remember, it’s better to have a little extra fabric than not enough.
Once you have determined the fabric dimensions needed, you’re ready to move on to the next step: cutting the fabric pieces.
Cutting the Fabric Pieces
Now that you have calculated the dimensions of the fabric needed, it’s time to cut the fabric pieces for your slip covers. Follow these steps for accurate cutting:
- Prepare the fabric: Lay the fabric flat on a clean, smooth surface. Make sure it is free from wrinkles or creases. If needed, iron the fabric on the appropriate setting to remove any wrinkles.
- Mark the fabric: Using a fabric marker or chalk, mark the dimensions of the fabric on the wrong side of the fabric. Use a straight edge or ruler to ensure accurate lines.
- Cut the fabric: Carefully cut along the marked lines using sharp fabric scissors. Take your time to ensure clean, straight edges.
- Repeat for additional pieces: If you are making slip covers for multiple cushions, repeat steps 2 and 3 for each piece of fabric needed.
While cutting the fabric, it’s important to pay attention to the pattern, especially if it is directional or has a specific design orientation. Make sure each piece is cut in the same direction for uniformity.
Additionally, if you are using a fabric with a nap, such as velvet, make sure all the pieces are cut in the same direction to maintain consistency in color and texture.
Once you have cut all the fabric pieces, you’re ready to move on to the next step: sewing the side seams.
Sewing the Side Seams
Now that you have your fabric pieces cut, it’s time to sew the side seams of your slip covers. Follow these steps to ensure a secure and neat finish:
- Prepare your sewing machine: Set up your sewing machine with a thread color that matches your fabric. Ensure that you have a straight stitch setting and the appropriate needle for the fabric you are working with.
- Pin the fabric: Turn the fabric pieces so that the right sides are facing each other. Align the edges that will be sewn together and pin them in place to secure the fabric.
- Start sewing: Begin sewing along one side of the fabric, using a ½ inch seam allowance. Backstitch at the beginning and end to reinforce the seams. Continue sewing until you reach the end of the fabric.
- Repeat for other sides: Sew the remaining sides of the fabric in the same manner, ensuring consistent seam allowances and backstitching at the beginning and end of each seam.
- Trim excess fabric: Once you have sewn all the side seams, trim any excess fabric close to the seam to reduce bulk and ensure a clean finish.
- Press the seams: Use an iron to press the side seams open or to one side, depending on your fabric. This will help create a crisp and professional look.
Remember to sew at a steady pace and maintain even seam allowances throughout to ensure the slip covers fit properly. Take your time and sew slowly if needed, especially when working with thicker or more delicate fabrics.
After sewing the side seams, you are ready to move on to the next step: hemming the edges of your slip covers.
When making slip covers for cushions, be sure to measure your cushions accurately to ensure a proper fit. Use a durable fabric and consider adding zippers for easy removal and washing.
Read more: How To Keep Couch Cushions From Slipping
Hemming the Edges
After sewing the side seams of your slip covers, it’s time to hem the edges to give them a polished and finished look. Follow these steps to hem the edges:
- Prepare your sewing machine: Set your sewing machine to a straight stitch and choose a thread color that matches your fabric.
- Measure and mark the desired hem width: Determine the desired hem width for your slip covers. This is typically around ½ inch to 1 inch. Use a ruler or measuring tape to mark the hem width along the raw edge of the fabric.
- Fold and press the fabric: Fold the fabric along the marked line and press it with an iron to create a crisp and precise fold.
- Pin the hem in place: Pin the folded hem in place, ensuring that it lays flat and secure. Use enough pins to keep the fabric in place without shifting or bunching.
- Stitch the hem: Starting at one end of the hem, stitch close to the folded edge, removing the pins as you go. Sew all the way around the slip cover, backstitching at the beginning and end to secure the hem.
- Trim any loose threads: Once you have finished hemming, snip off any loose threads for a clean and professional look.
Hemming the edges not only provides a tidy finish but also helps prevent fraying over time. It’s important to take your time when folding and pressing the fabric to ensure a straight and even hem.
If you want to add a decorative touch to your slip covers, you can experiment with different types of hems, such as a rolled hem or a decorative stitch. Just make sure to adjust the hem width and stitch setting accordingly.
After hemming the edges, you’re ready to move on to the next step: attaching Velcro or zippers to your slip covers for easy removal and cleaning.
Attaching Velcro or Zippers
Adding closures to your slip covers, such as Velcro or zippers, offers convenience and ease of use when it comes to removing and washing them. Here are the steps to attach Velcro or zippers to your slip covers:
- Choose the closure method: Decide whether you want to use Velcro or zippers as the closure for your slip covers. Each has its own advantages, so choose the method that suits your preference and sewing skills.
- Measure and mark the placement: Determine where you want the closure to be located on your slip cover. Mark the positions on both the top and bottom fabric pieces, ensuring they line up when the slip cover is assembled.
- For Velcro:
- Sew the soft side: Attach the soft loop side of the Velcro to one fabric piece using a straight stitch. Sew along the marked position, following the edges of the Velcro.
- Sew the rough side: Attach the rough hook side of the Velcro to the opposite fabric piece. Sew along the marked position, again following the edges of the Velcro.
- Overlap and secure: When fitting the slip cover onto the cushion, overlap the Velcro pieces and press them together to secure the slip cover in place.
- For zippers:
- Mark the zipper placement: On one fabric piece, mark the position where the zipper will be inserted. This is typically along one side or at the back of the slip cover.
- Prepare the zipper: Using a seam ripper or scissors, open the seam along the marked position. Place the zipper face down on the wrong side of the fabric, aligning the teeth with the opened seam.
- Sew the zipper: Install a zipper foot on your sewing machine and sew along the edges of the zipper tape, attaching it to the fabric piece. Repeat the process for the other fabric piece, ensuring the zipper aligns when the slip cover is assembled.
- Secure the ends: To prevent the zipper from coming undone, sew a few stitches across the bottom and top ends of the zipper.
- Zip it up: When fitting the slip cover onto the cushion, simply unzip the zipper to remove or insert the cushion.
Both Velcro and zippers provide a secure closure for your slip covers, allowing for easy removal and cleaning. Choose the method that best suits your sewing skills and preferences.
Once you have attached the Velcro or zipper, you’re ready to move on to the next step: creating ties or elastic bands to keep your slip cover in place.
Creating Ties or Elastic Bands
Adding ties or elastic bands to your slip covers helps keep them securely in place on your cushions. These features prevent the slip covers from shifting or sliding, ensuring a neat and tidy look. Here’s how you can create ties or elastic bands for your slip covers:
- Decide on the closure method: Determine whether you want to use ties or elastic bands to secure your slip covers. Ties provide a traditional and decorative touch, while elastic bands offer ease of use.
- Measure and cut the fabric:
- For ties: Measure and cut fabric strips that are approximately 1 inch wide and twice the desired length for each tie. For example, if you want 12-inch ties, cut fabric strips that are 2 inches wide and 24 inches long.
- For elastic bands: Measure and cut elastic bands that are approximately 2 inches shorter than the circumference of your cushion. This allows for a snug fit without excessive tension.
- Prepare the ties or elastic bands:
- For ties: Fold each fabric strip in half lengthwise, with the right sides facing in. Sew along the long edge and one short edge, leaving one short edge open. Trim any excess fabric and turn the strip right side out. Press the ties with an iron for a crisp finish.
- For elastic bands: If the elastic band is not already enclosed within a fabric casing, sew the ends of the elastic together to create a loop. Ensure the loop is secure and will not come undone.
- Attach the ties or elastic bands to the slip covers:
- For ties: Sew one end of each tie to one fabric piece of the slip cover, positioning them at the corners or along the sides. Repeat this step for the other end of each tie, attaching them to the opposite fabric piece. Ensure the ties are evenly spaced and securely sewn.
- For elastic bands: Sew one end of the elastic loop to one fabric piece of the slip cover, positioning it at the corners or along the sides. Repeat this step for the other end of the elastic loop, attaching it to the opposite fabric piece. Ensure the elastic is evenly distributed and securely sewn.
Creating ties or elastic bands not only keeps your slip covers in place but also adds a decorative element. Ties can be tied in bows for a charming accent, while elastic bands provide a clean and seamless look.
Once you have attached the ties or elastic bands, you’re ready to move on to the final step: fitting the slip cover onto your cushion.
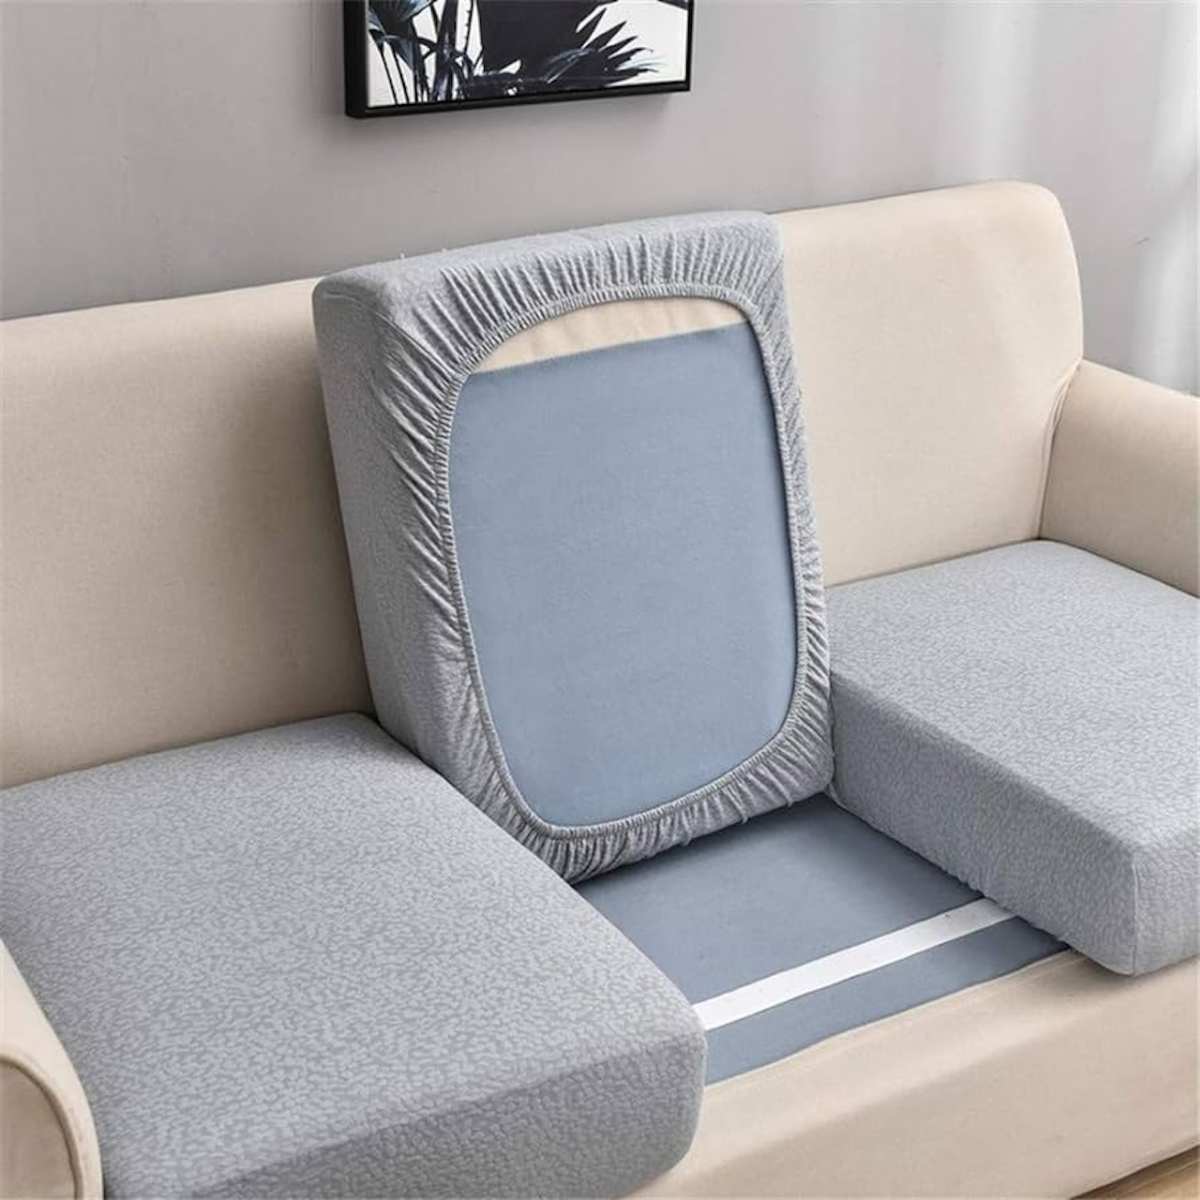
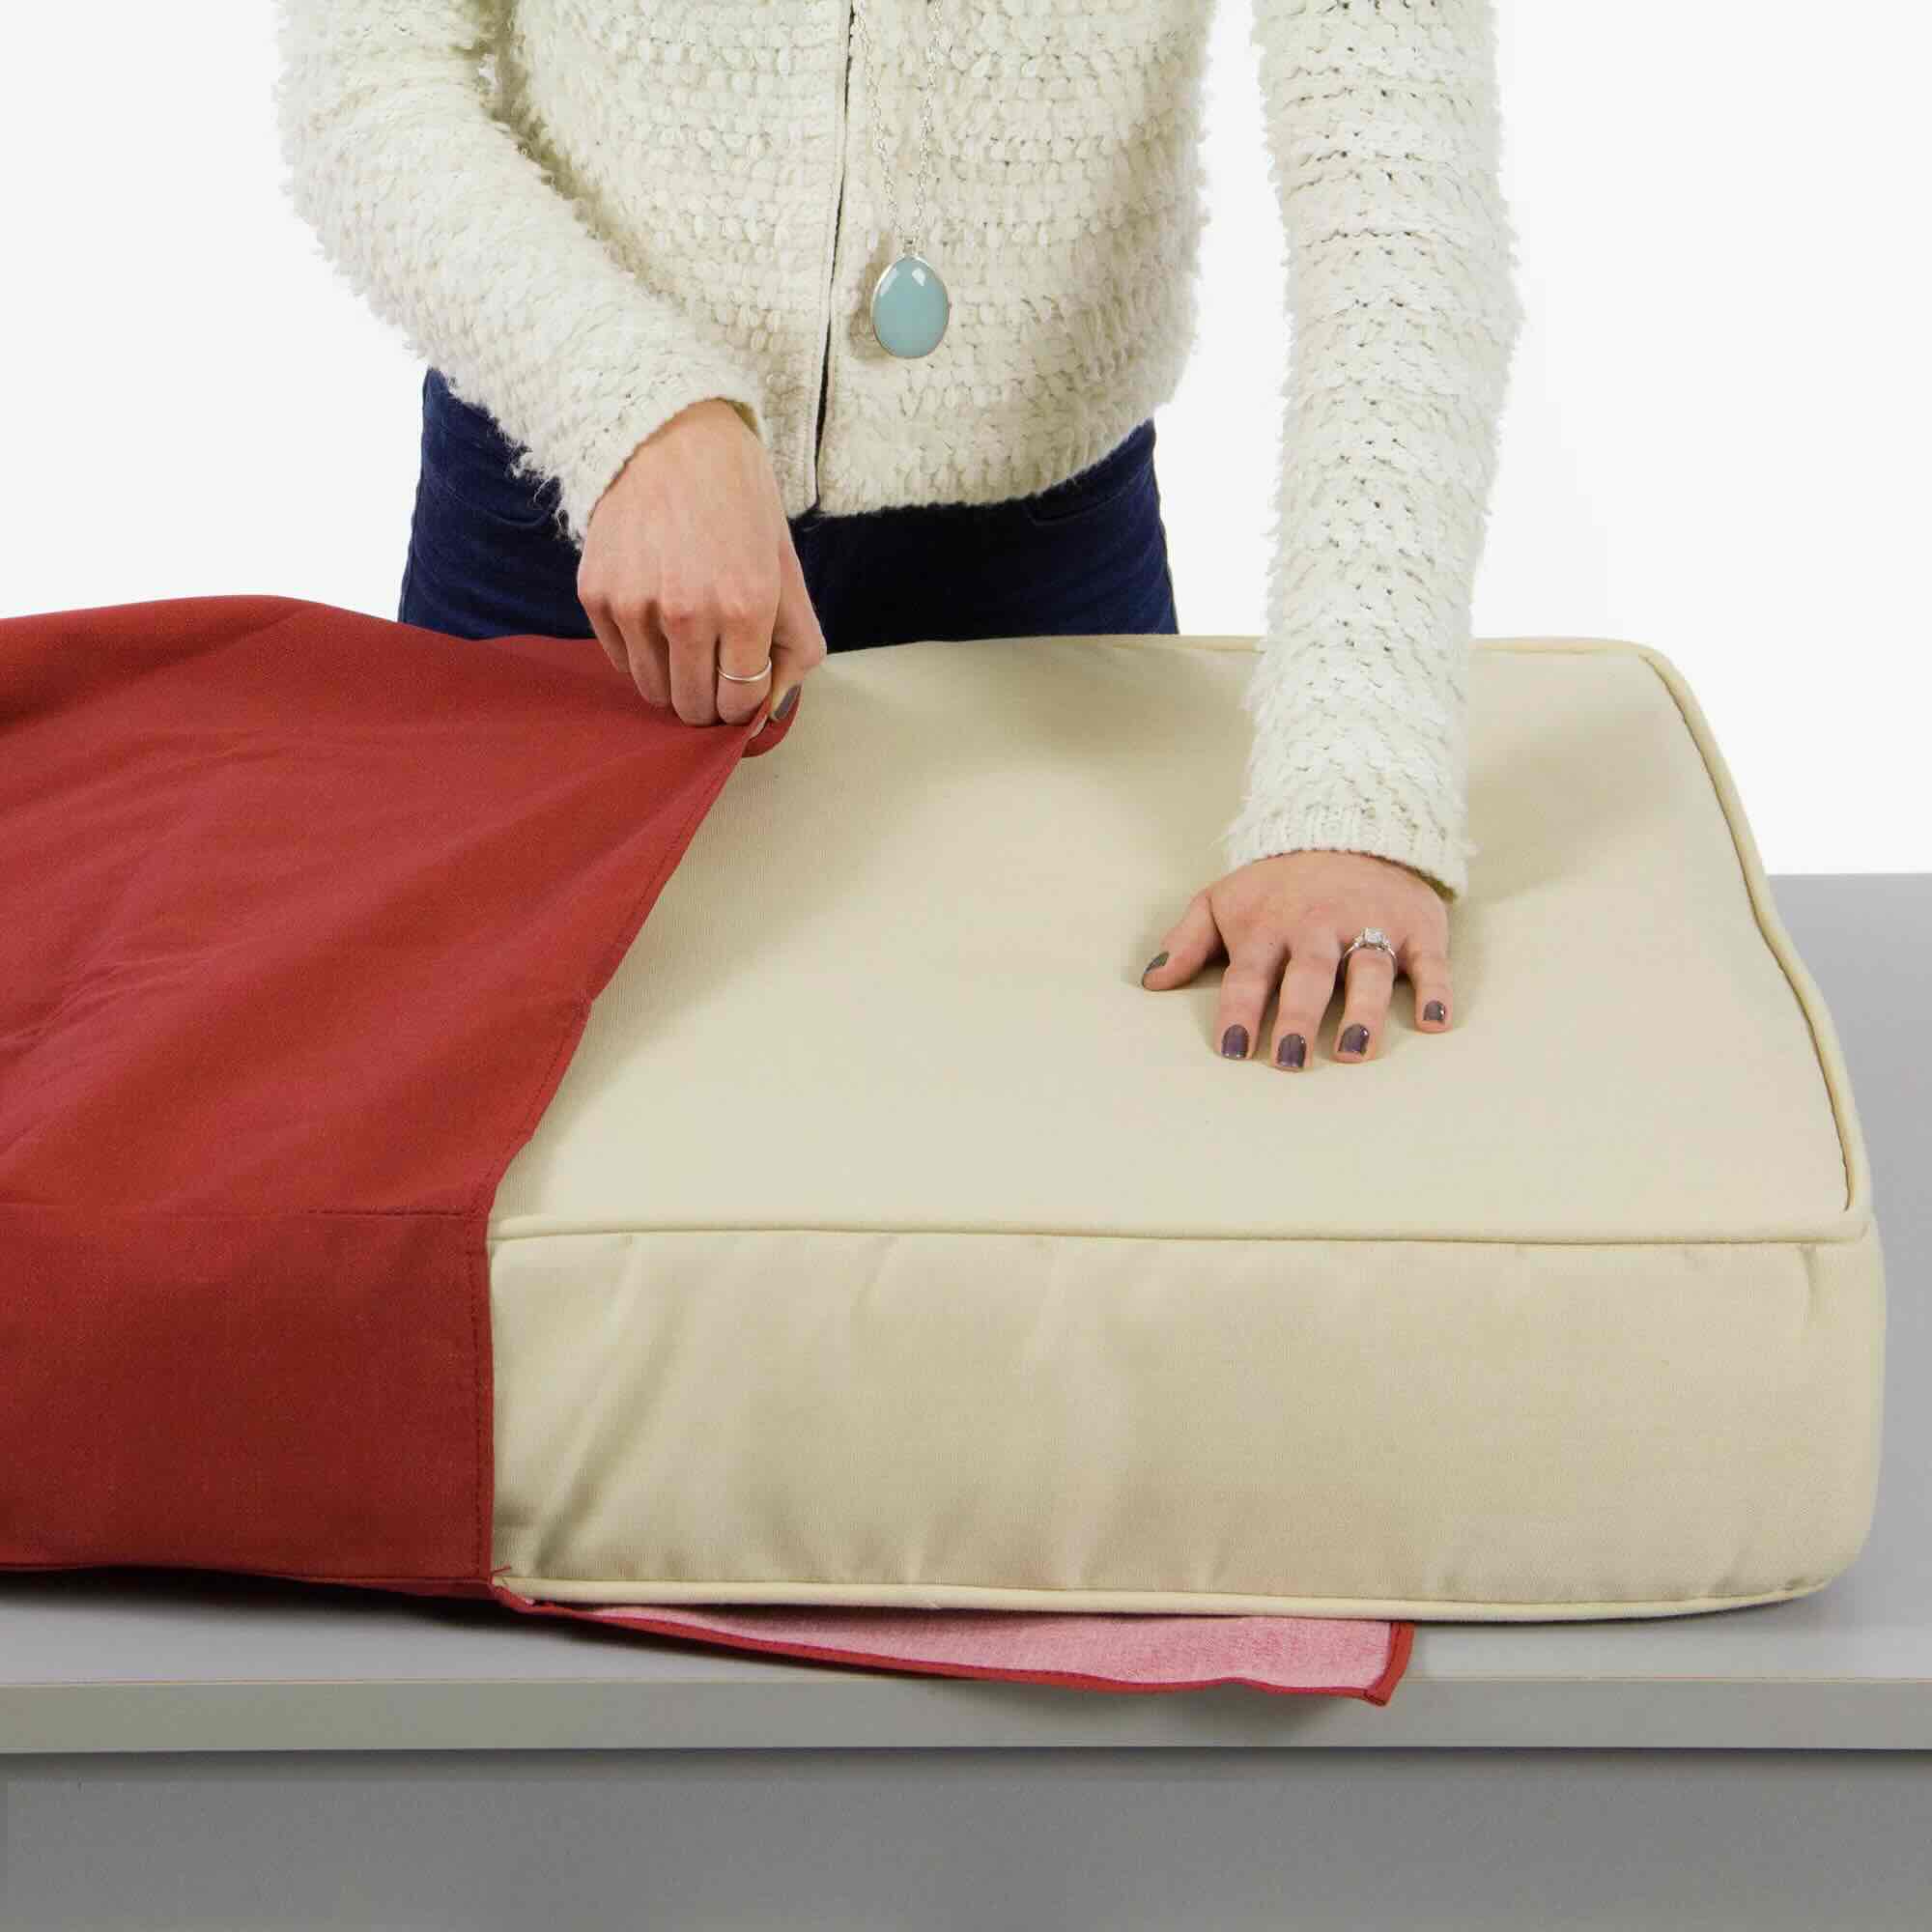
Fitting the Slip Cover onto the Cushion
With all the necessary elements in place, it’s time to finally fit the slip cover onto your cushion. Follow these steps to ensure a smooth and snug fit:
- Open the slip cover: Unzip the zipper or undo any closures to open up the slip cover.
- Position the cushion: Place your cushion in the center of the slip cover, making sure it aligns properly with the edges.
- Tuck and adjust: Begin tucking the slip cover edges underneath the cushion. Smooth out any wrinkles or creases as you go. If you have ties or elastic bands, use them to secure the slip cover in place, tying the ties or stretching the elastic bands around the cushion corners.
- Ensure proper fit: Adjust the slip cover as needed to ensure a snug and tailored fit. Smooth out any excess fabric and make sure the slip cover is centered and symmetrical on the cushion.
- Zip it up or secure the closures: If you have a zipper closure, zip it up completely. If you’re using Velcro closures, press them firmly together. This ensures the slip cover stays in place.
Take your time during the fitting process to ensure a neat and professional finish. Smooth out any wrinkles or gathers, and ensure that all corners are fully covered by the slip cover.
If you have made multiple slip covers, repeat the process for each cushion, ensuring consistent fitting and alignment.
Now that your slip cover is perfectly fitted onto the cushion, step back and admire the transformation. Your living room furniture has a fresh new look!
Before we conclude, let’s do a quick recap of the steps we covered in this guide:
- Choosing the right fabric
- Measuring and calculating fabric needed
- Cutting the fabric pieces
- Sewing the side seams
- Hemming the edges
- Attaching Velcro or zippers
- Creating ties or elastic bands
- Fitting the slip cover onto the cushion
By following these steps, you can create slip covers for your cushions that not only protect them but also add a touch of style to your living room. Enjoy your newly transformed furniture and the satisfaction of a job well done!
Read more: How To Make Brick Slips
Conclusion
Congratulations on completing the process of making slip covers for your cushions! You have embarked on a rewarding DIY project that allows you to breathe new life into your living room furniture and showcase your personal style. By following the steps outlined in this guide, you have gained the knowledge and skills necessary to create slip covers that are not only functional but also aesthetically pleasing.
From choosing the right fabric to fitting the slip covers onto the cushions, each step has been carefully explained to help you achieve a professional and polished result. Remember to consider factors such as durability, ease of cleaning, color and pattern, texture, and weight when selecting the fabric. Accurate measurements, precise cutting, and secure seams ensure a proper fit for your slip covers.
Adding closures like Velcro or zippers allows for easy removal and cleaning, while ties or elastic bands keep the slip covers securely in place. The process may require time and attention to detail, but the end result is well worth the effort.
Now that you have completed your slip covers, step back and admire the transformation they bring to your living room. Not only have you protected your cushions from wear and tear, but you have also created a fresh, updated look for your furniture.
Feel free to experiment with different fabrics, colors, and patterns to change the look of your slip covers whenever you desire. Remember that slip covers are a versatile and cost-effective way to update your living room aesthetic without having to invest in brand-new furniture.
We hope this comprehensive guide on how to make slip covers for your cushions has been informative and inspiring. Enjoy the process of creating slip covers that reflect your personal style and make your living room inviting and comfortable for years to come.
Happy sewing!
Frequently Asked Questions about How To Make Slip Covers For Cushions
Was this page helpful?
At Storables.com, we guarantee accurate and reliable information. Our content, validated by Expert Board Contributors, is crafted following stringent Editorial Policies. We're committed to providing you with well-researched, expert-backed insights for all your informational needs.

0 thoughts on “How To Make Slip Covers For Cushions”