Home>Construction & Tools>Building Materials>How To Make Brick Molds
Building Materials
How To Make Brick Molds
Modified: October 19, 2024
Learn how to make brick molds for your building projects with our step-by-step guide. Create custom molds for your building materials with ease. Ideal for DIY enthusiasts and professionals alike.
(Many of the links in this article redirect to a specific reviewed product. Your purchase of these products through affiliate links helps to generate commission for Storables.com, at no extra cost. Learn more)
Introduction
Welcome to the world of brick making! Whether you're a DIY enthusiast or a professional builder, learning how to make brick molds can be a valuable skill. Brick molds are essential for shaping clay or concrete into sturdy bricks, and by crafting your own molds, you can customize the size and shape of the bricks to suit your specific needs.
In this comprehensive guide, we will walk you through the process of creating brick molds from scratch. From selecting the right materials to designing and constructing the molds, we'll cover every step in detail. By the end of this article, you'll have the knowledge and confidence to embark on your brick-making journey with a personalized touch.
So, roll up your sleeves and get ready to delve into the art of brick mold creation. Whether you're aiming to enhance your construction skills or seeking a fulfilling hands-on project, making brick molds is a rewarding endeavor that opens the door to endless possibilities in building and crafting. Let's dive in and explore the fascinating world of brick mold fabrication.
Key Takeaways:
- Crafting brick molds involves designing, constructing, and curing the mold to shape high-quality bricks. It’s a hands-on, creative process that empowers you to customize bricks for various projects.
- By mastering the art of making brick molds, you gain the ability to bring your creative visions to life with precision and authenticity. It’s a timeless craft that fosters innovation and self-sufficiency.
Read more: How To Make A Wooden Brick Mold
Materials Needed
Before diving into the process of making brick molds, it’s essential to gather the necessary materials. Here’s a comprehensive list of items you’ll need to embark on this creative and practical endeavor:
- Wood: Select high-quality, durable wood for constructing the frame of the brick mold. Opt for sturdy lumber that can withstand the pressure of compacting the brick materials.
- Screws and Nails: Ensure you have an ample supply of screws and nails to assemble the wooden components securely. Choose corrosion-resistant screws and nails to prolong the lifespan of the molds.
- Release Agent: Invest in a reliable release agent to prevent the brick materials from sticking to the mold. This could be a commercial release agent or a homemade solution such as a mixture of diesel and used engine oil.
- Measuring Tape and Square: Accurate measurements and precise angles are crucial in creating uniform and well-defined brick molds. A measuring tape and square will aid in achieving the desired dimensions for your molds.
- Hammer and Saw: These basic carpentry tools are indispensable for cutting and assembling the wooden components of the mold.
- Protective Gear: Safety should always be a priority. Equip yourself with safety goggles, gloves, and a dust mask to shield against potential hazards during the mold-making process.
- Mixing Tubs and Trowels: If you’re planning to create concrete bricks, you’ll need mixing tubs for preparing the concrete mix and trowels for filling the molds with precision.
- Concrete or Clay: Depending on your project requirements, you’ll need either concrete mix for crafting concrete bricks or clay for traditional clay bricks.
By ensuring you have all these materials at your disposal, you’ll be well-equipped to commence the exciting journey of making your own brick molds. With a clear understanding of the essential components, you’re ready to move on to the next phase: designing the mold.
Designing the Mold
Designing the mold is a critical step in the brick-making process, as it determines the shape, size, and structural integrity of the bricks you’ll produce. Here’s a detailed guide to help you design your brick molds effectively:
1. Determine the Brick Dimensions: Consider the specific dimensions required for your project. Whether you’re aiming for standard-sized bricks or custom dimensions, precise measurements are essential. Take into account the length, width, and height of the bricks, ensuring uniformity for a professional finish.
2. Sketch the Mold Design: Begin by sketching the design of the mold on paper, outlining the dimensions and overall structure. This visual representation will serve as a blueprint for constructing the wooden frame.
3. Plan for Reinforcement: Depending on the size and intended use of the bricks, you may need to incorporate reinforcement within the mold design. This could involve adding support beams or braces to enhance the durability of the molds.
4. Consider Interlocking Features: If you plan to create interlocking bricks for enhanced stability in construction projects, factor in the interlocking features within the mold design. This may involve incorporating protrusions and indentations to facilitate a secure fit when assembling the bricks.
5. Ensure Ease of Use: Keep user-friendliness in mind during the design phase. The mold should be designed for easy filling and compacting of the brick materials, allowing for smooth and efficient production.
6. Optimize for Release Agent Application: Design the mold to accommodate the application of the release agent, ensuring that it can be evenly distributed to prevent the bricks from adhering to the mold surfaces.
By following these design considerations, you can create a well-thought-out blueprint for your brick molds. The next step involves bringing your design to life by constructing the molds using the selected materials and a dash of creativity. Let’s delve into the exciting process of constructing the molds from your meticulously planned designs.
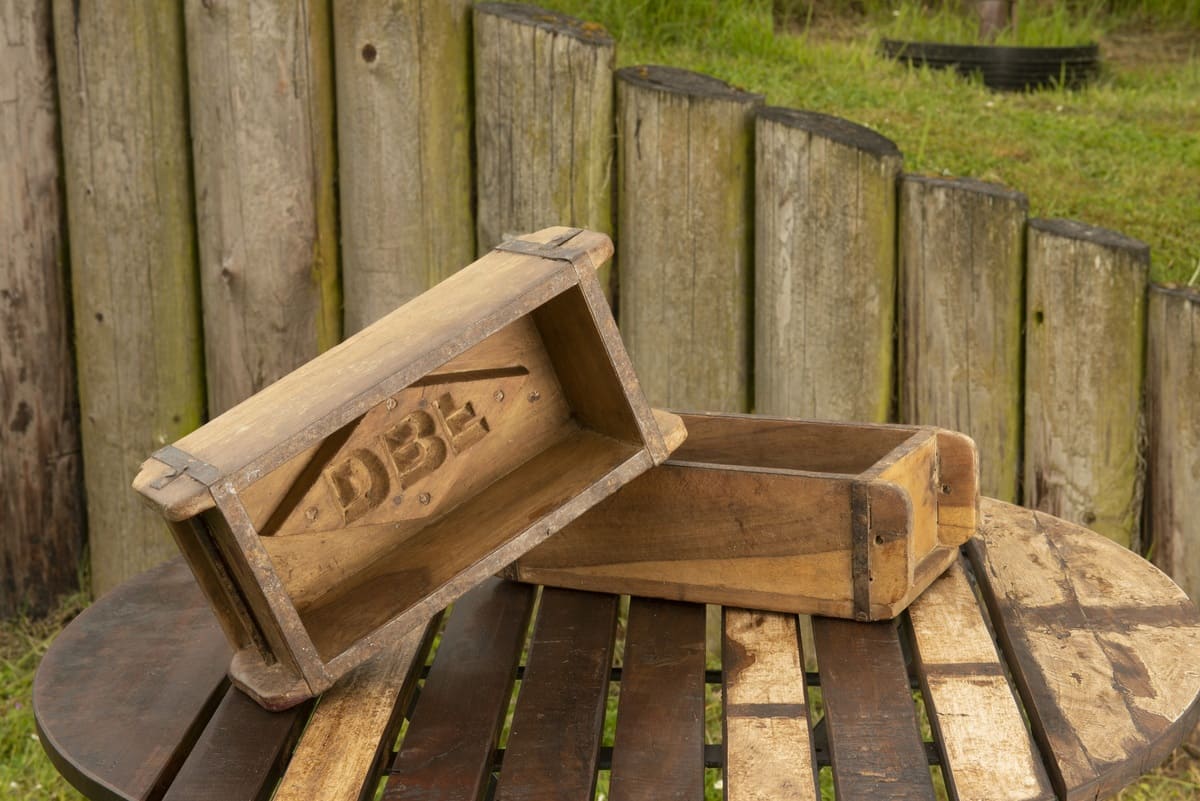
Constructing the Mold
With the design blueprint in hand, it’s time to embark on the construction phase of your brick molds. This step is where your vision begins to take shape, quite literally. Here’s a comprehensive guide to constructing the molds with precision and attention to detail:
1. Cutting the Wood: Begin by cutting the selected wood into individual pieces according to the dimensions outlined in your design. Use a saw to make precise cuts, ensuring that the pieces fit together seamlessly to form the frame of the mold.
2. Assembling the Frame: Utilize screws and nails to assemble the wooden pieces into a sturdy frame. Ensure that the corners are square and the joints are secure, as this will dictate the structural integrity of the mold.
3. Applying Release Agent: Before proceeding with the mold construction, apply a thin, even layer of release agent to the interior surfaces of the mold. This crucial step will prevent the brick materials from adhering to the mold, facilitating easy demolding once the bricks are set.
4. Reinforcement and Support: If your design calls for reinforcement within the mold, such as support beams or braces, this is the stage to incorporate these elements. Ensure that the reinforcement enhances the overall strength and durability of the mold.
5. Fine-Tuning the Design: Assemble the components of the mold with meticulous attention to detail, making any necessary adjustments to ensure that the final structure aligns with your initial design specifications.
6. Quality Checking: Once the construction is complete, conduct a thorough quality check to verify that the mold meets your standards in terms of dimensions, structural integrity, and overall functionality.
By following these steps, you’ll transform your design concept into a tangible and robust brick mold that is ready to bring your brick-making aspirations to fruition. The next phase involves curing the mold to prepare it for the crucial task of shaping bricks with precision and consistency.
When making brick molds, use a high-quality silicone mold material to ensure durability and easy release of the bricks. Make sure to properly measure and mix the mold material according to the manufacturer’s instructions for best results.
Curing the Mold
After the meticulous construction of the brick mold, the next crucial step is curing. Curing the mold is essential to ensure its longevity and optimal performance throughout the brick-making process. Here’s a comprehensive guide to effectively curing your newly constructed mold:
1. Drying Time: Allow the newly constructed mold to air dry for an appropriate duration. This period may vary depending on factors such as humidity and the type of wood used. Ensuring that the mold is thoroughly dried is essential to prevent warping and mold growth.
2. Conditioning the Wood: If the mold is constructed from wood, consider conditioning the surfaces with a wood sealer or preservative to enhance its resistance to moisture and wear. This step is particularly important for outdoor applications or when working with moisture-prone brick materials.
3. Heat Treatment (Optional): For added durability, consider subjecting the mold to a heat treatment process. This can involve exposing the mold to controlled heat to enhance its strength and resilience, particularly if it will be used for high-volume brick production.
4. Application of Release Agent: Once the mold is fully cured and conditioned, reapply the release agent to ensure that the interior surfaces remain adequately lubricated for smooth demolding of the bricks. This step is crucial to maintain the integrity of the mold and facilitate efficient brick production.
5. Quality Assurance: Before proceeding to use the mold for brick production, conduct a final inspection to verify that the curing process has been completed effectively. Ensure that the mold is structurally sound and free from any defects that may compromise its functionality.
By following these steps, you’ll prepare your newly constructed mold for the demanding task of shaping bricks with precision and consistency. With the mold now cured and ready for action, it’s time to explore the exciting process of using the mold to craft high-quality bricks for your diverse construction or crafting projects.
Read more: How To Attach Brick Molding
Using the Mold
Now that your meticulously crafted brick mold is fully cured and ready for action, it’s time to delve into the exciting process of using the mold to craft high-quality bricks. Whether you’re venturing into DIY construction projects or seeking to produce artisanal bricks for creative endeavors, here’s a comprehensive guide on effectively utilizing your brick mold:
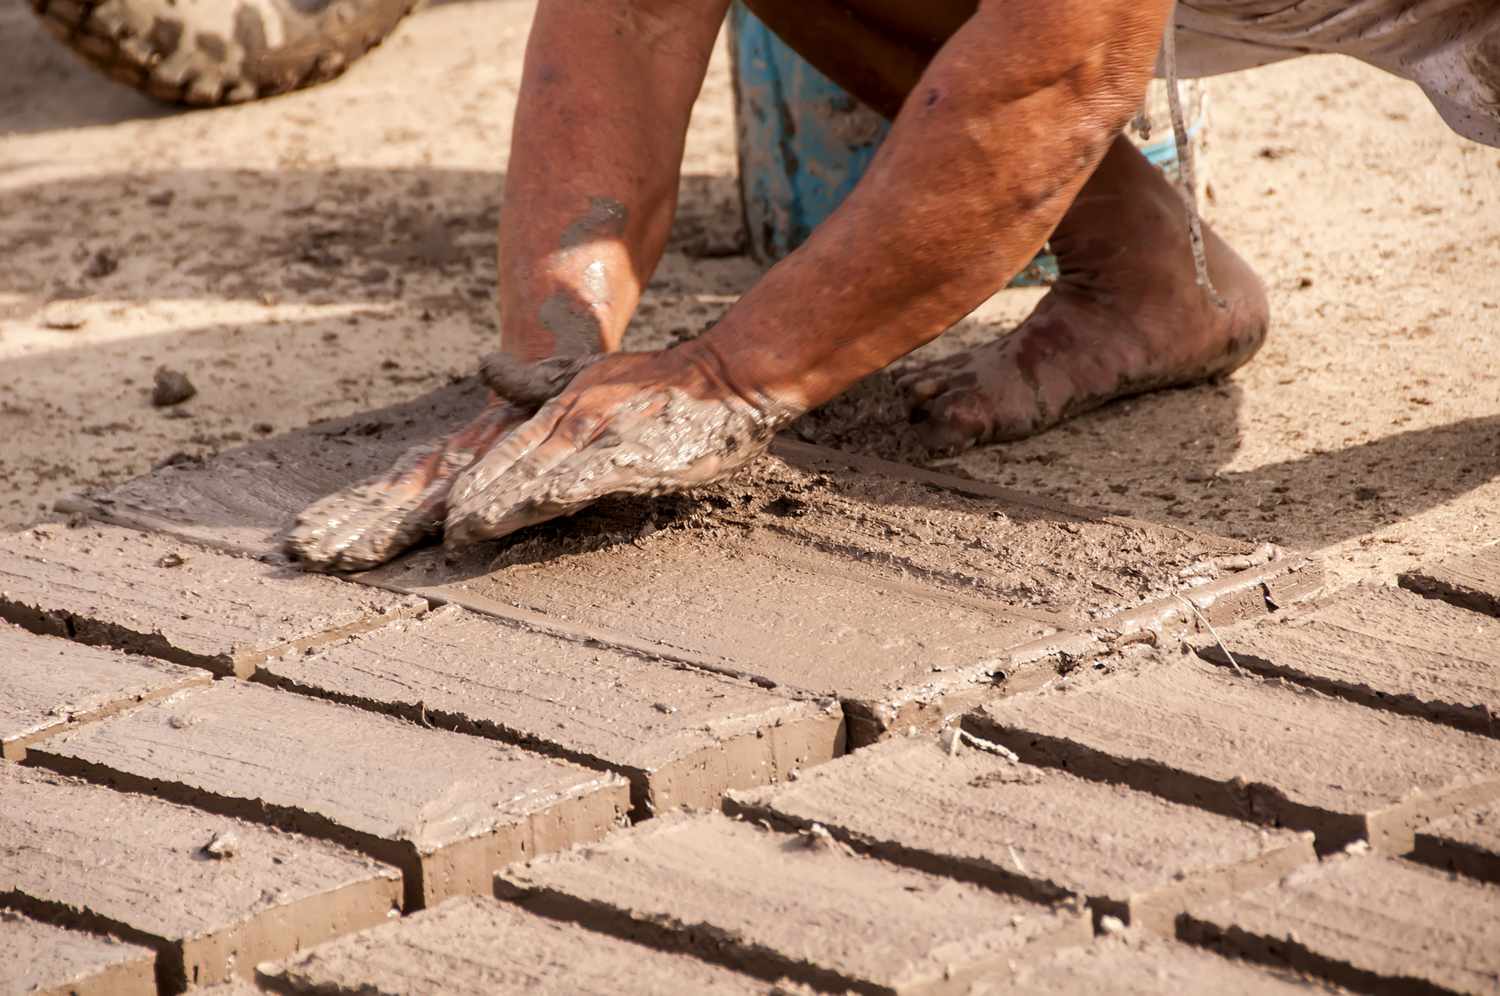
1. Preparing the Brick Materials: Depending on your project requirements, prepare the appropriate brick materials, whether it be concrete mix for sturdy construction bricks or clay for traditional, artisanal creations. Ensure that the materials are mixed to the desired consistency and free from any impurities that may affect the quality of the bricks.
2. Applying the Release Agent: Prior to filling the mold with the brick materials, apply a thin, even layer of the release agent to the interior surfaces. This crucial step ensures that the bricks can be easily demolded without sticking, preserving their shape and integrity.
3. Filling the Mold: Carefully fill the mold with the prepared brick materials, ensuring even distribution and thorough compaction to eliminate air pockets. This process is crucial in shaping bricks that exhibit uniform density and strength.
4. Compacting the Brick Materials: Use a trowel or compactor to compact the brick materials firmly within the mold. This step is essential for achieving well-defined edges and surfaces, contributing to the structural integrity and visual appeal of the bricks.
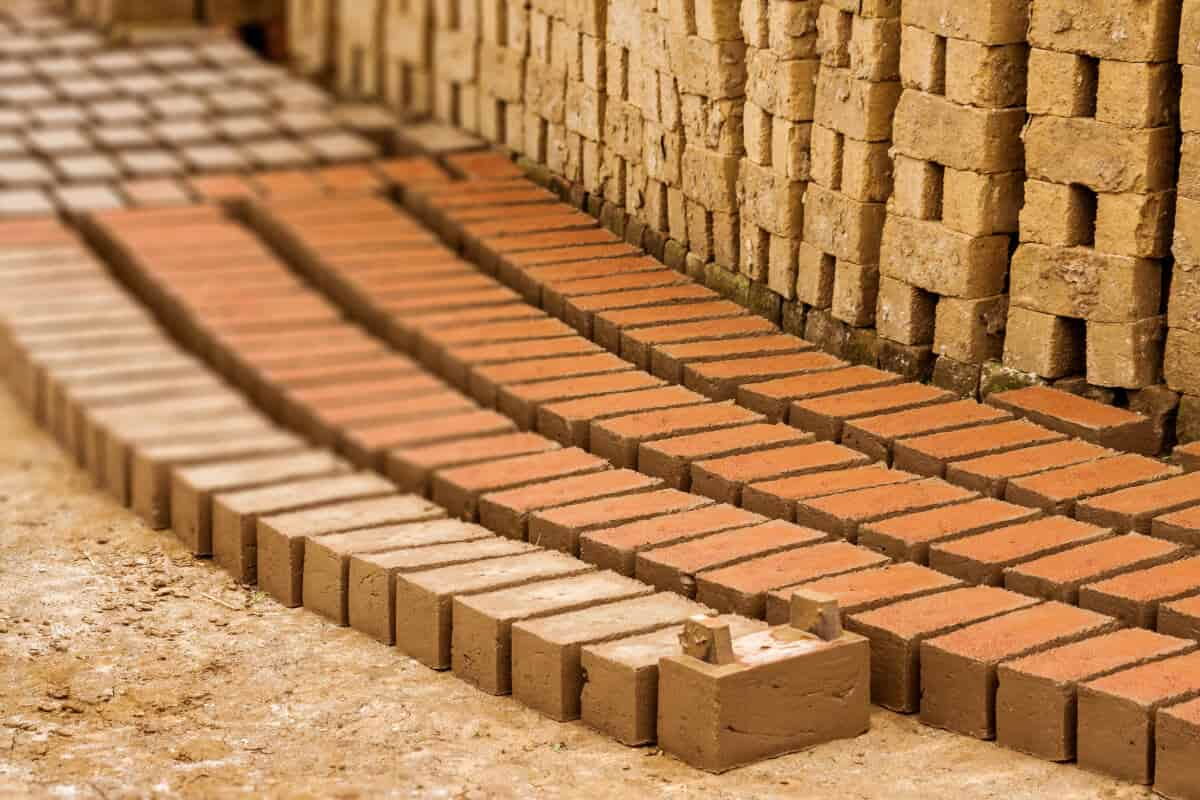
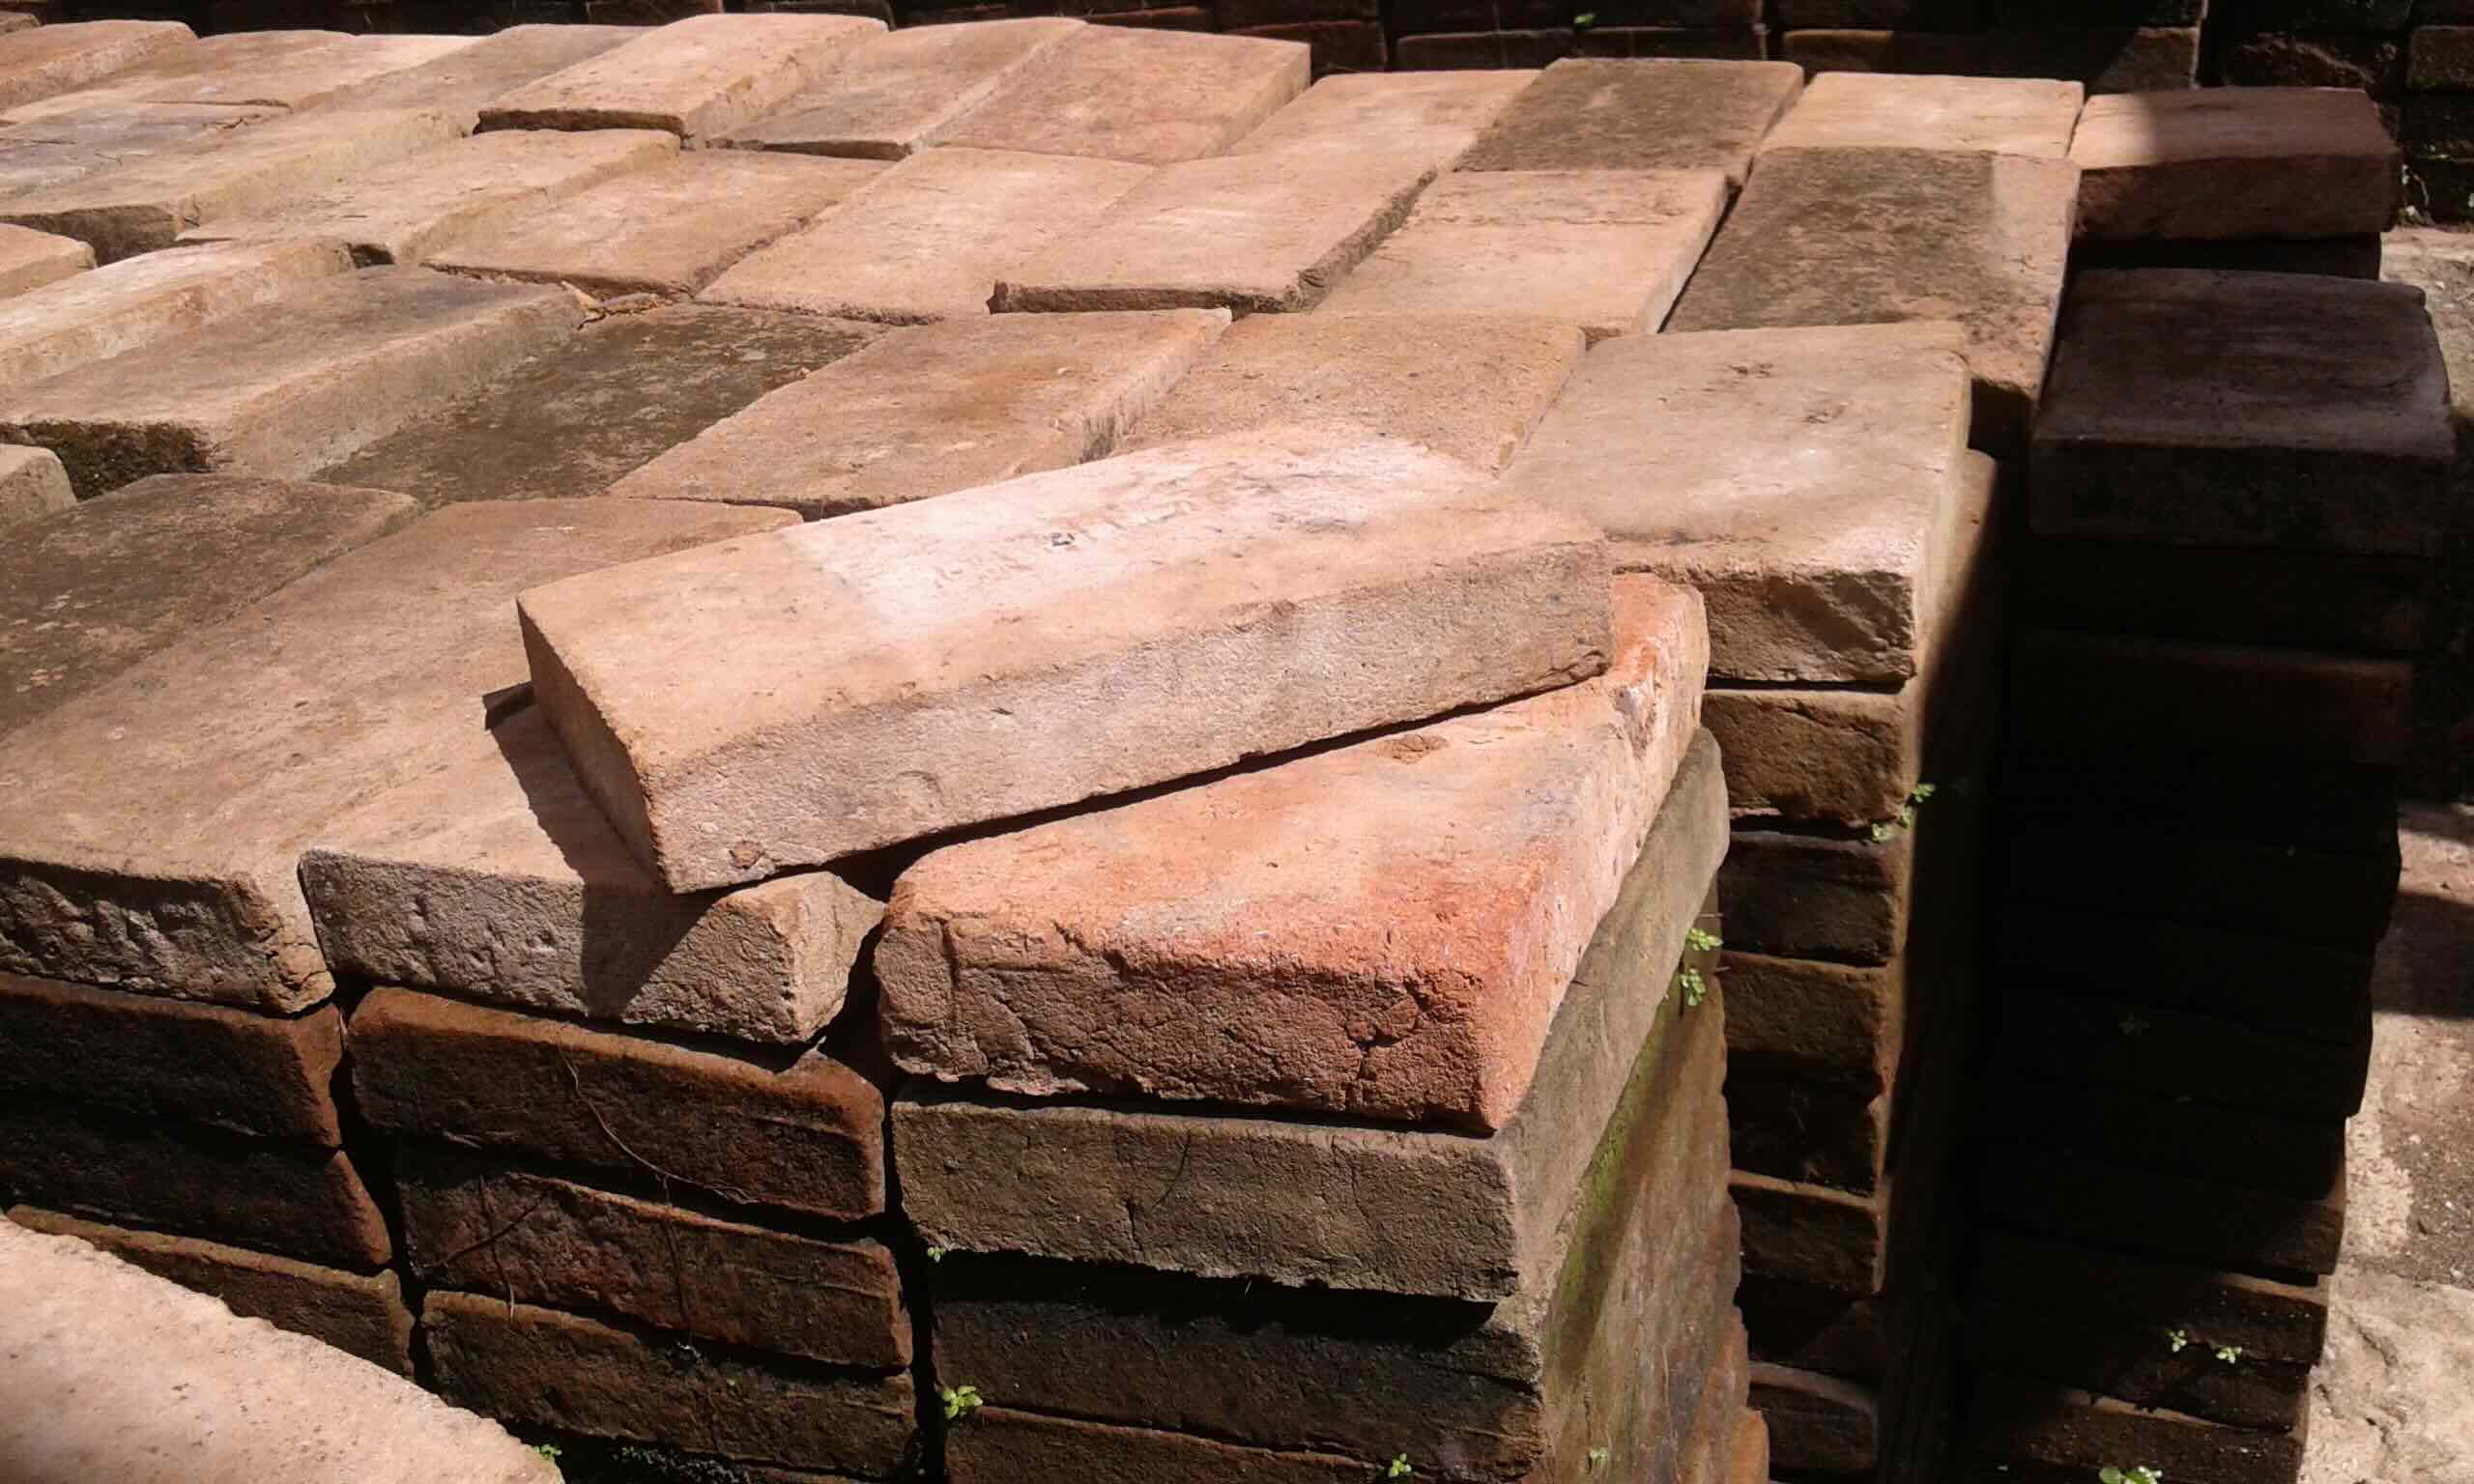
5. Demolding the Bricks: Once the brick materials have set and cured to the appropriate degree, carefully demold the bricks from the mold. The application of the release agent facilitates smooth demolding, allowing the bricks to retain their shape and surface finish.
6. Curing the Bricks: After demolding, allow the freshly shaped bricks to cure and set fully. This curing process may involve air drying or, in the case of concrete bricks, a period of moisture retention to achieve optimal strength and durability.
By following these steps, you can harness the full potential of your brick mold to produce high-quality bricks that meet your exact specifications. Whether you’re creating bricks for construction, landscaping, or artistic endeavors, the process of using the mold empowers you to bring your creative visions to life with precision and craftsmanship.
Conclusion
Congratulations on embarking on the enriching journey of creating your own brick molds! Throughout this comprehensive guide, we’ve delved into the intricate process of crafting brick molds from the initial design phase to the culmination of using the molds to shape high-quality bricks. As you conclude this insightful exploration, it’s essential to reflect on the significance of this skill and the boundless opportunities it presents.
By mastering the art of making brick molds, you’ve equipped yourself with a valuable tool for personal and professional projects. Whether you’re constructing a sturdy brick pathway, crafting custom bricks for artistic endeavors, or engaging in large-scale construction projects, the ability to create bespoke brick molds empowers you to realize your creative visions with precision and authenticity.
Furthermore, the process of making brick molds embodies the fusion of craftsmanship, ingenuity, and practicality. It’s a testament to the timeless art of shaping raw materials into functional and aesthetically pleasing structures. As you hone your skills in mold creation, you’re not only enhancing your proficiency in construction and crafting but also preserving a tradition that has shaped human habitats for centuries.
Moreover, the journey of making brick molds is a testament to the spirit of innovation and self-sufficiency. By customizing the size, shape, and features of your molds, you’re embracing the ethos of tailored solutions and resourcefulness. This hands-on approach fosters a deeper connection to the materials and processes involved, enriching your understanding of the fundamental principles of construction and design.
As you venture forth with your newfound expertise in brick mold creation, remember that the possibilities are as limitless as your imagination. Whether you’re refining your skills, exploring new techniques, or sharing your knowledge with others, the art of making brick molds is a timeless craft that invites continual growth and creativity.
So, as you apply the insights gained from this guide to your future endeavors, may the journey of making brick molds inspire you to build, create, and innovate with unwavering passion and purpose. Here’s to the boundless potential that awaits as you continue to shape your world, one brick at a time.
Frequently Asked Questions about How To Make Brick Molds
Was this page helpful?
At Storables.com, we guarantee accurate and reliable information. Our content, validated by Expert Board Contributors, is crafted following stringent Editorial Policies. We're committed to providing you with well-researched, expert-backed insights for all your informational needs.


0 thoughts on “How To Make Brick Molds”