Home>Dining>Table Decor>How To Make Clear Acrylic Water For Floral Arrangements
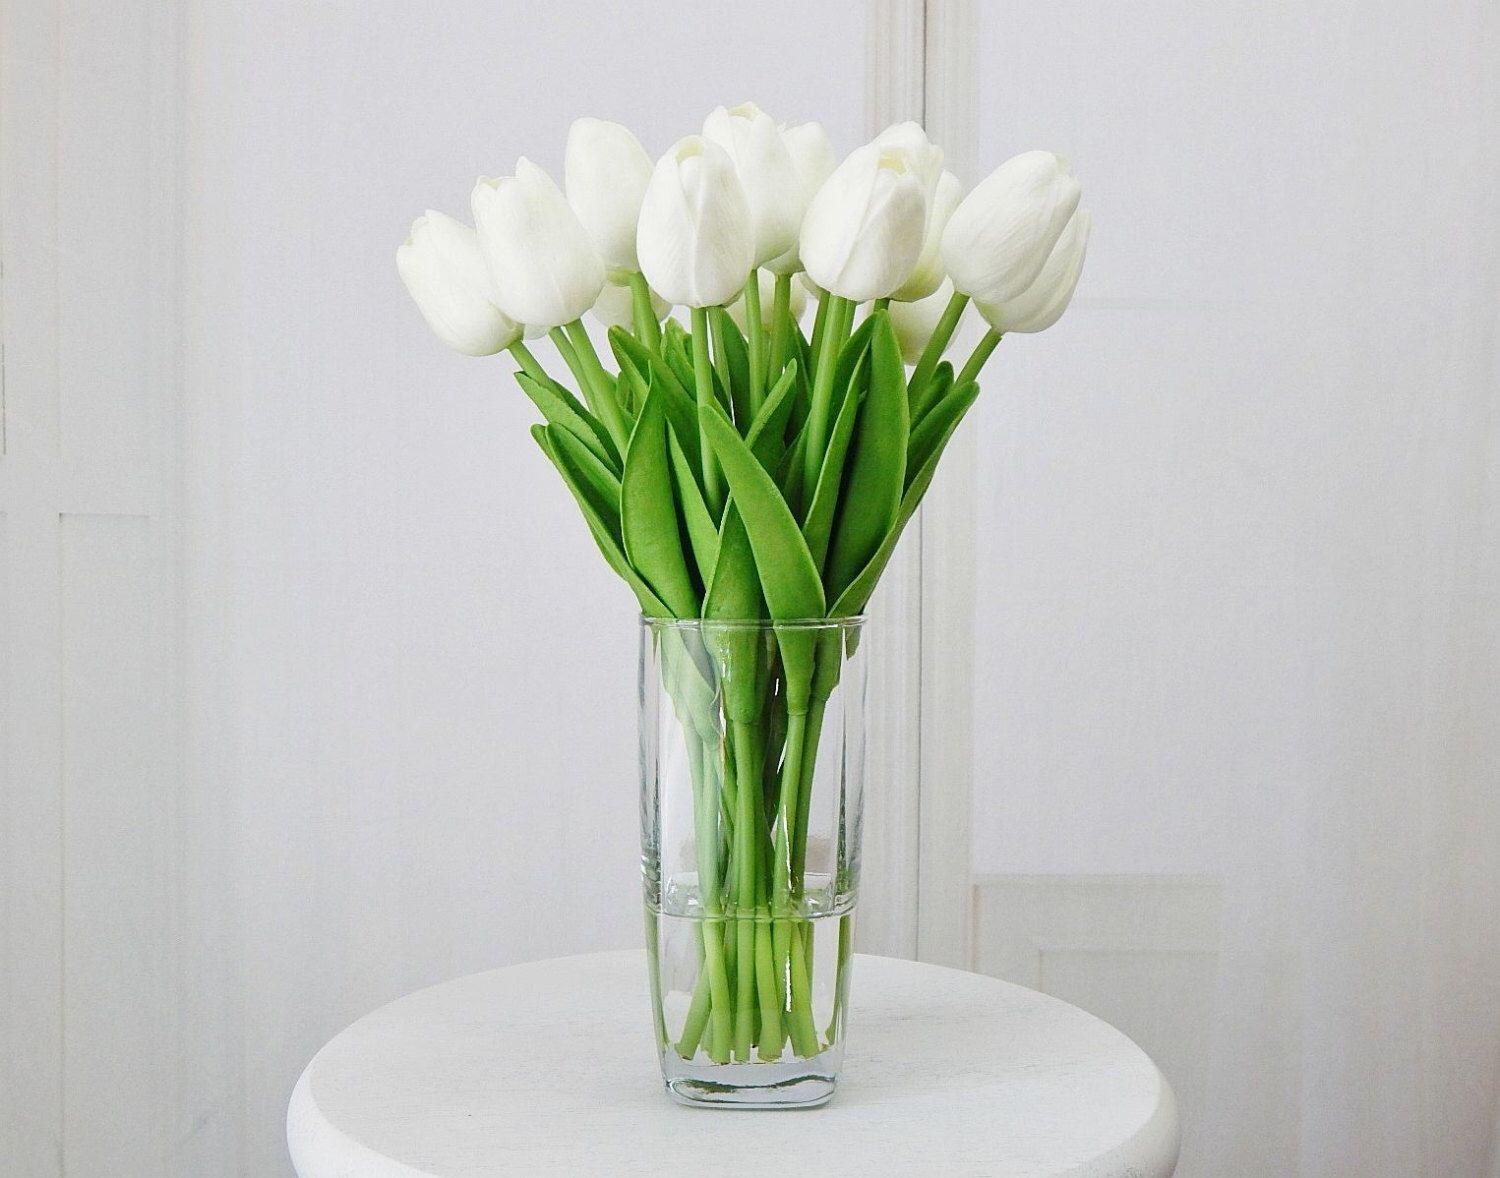

Table Decor
How To Make Clear Acrylic Water For Floral Arrangements
Modified: May 23, 2024
Learn how to make clear acrylic water for floral arrangements with our step-by-step guide. Enhance your table decor effortlessly!
(Many of the links in this article redirect to a specific reviewed product. Your purchase of these products through affiliate links helps to generate commission for Storables.com, at no extra cost. Learn more)
Introduction
Welcome to the world of table decor! When it comes to creating stunning floral arrangements, using clear acrylic water can add a touch of elegance and realism. Clear acrylic water, also known as faux water or resin water, is a gel-like substance that mimics the appearance and texture of real water. It not only provides support for your artificial flowers but also creates a lifelike illusion that will leave your guests in awe.
In this article, we will guide you through the step-by-step process of creating clear acrylic water for your floral arrangements. We will cover everything from choosing the right container to final touches and clean-up. So, let’s dive in and learn how to master the art of clear acrylic water!
Before we begin, let’s go over the materials you will need to make clear acrylic water:
Key Takeaways:
- Create stunning floral arrangements with clear acrylic water for an elegant and realistic centerpiece. From choosing the right container to arranging the flowers, attention to detail is key for a mesmerizing result.
- Master the art of clear acrylic water to elevate your table decor. With creativity and precision, you can impress guests with lifelike floral arrangements that exude elegance and sophistication.
Read more: How To Color Water For Floral Arrangements
Materials Needed
Before you start creating your clear acrylic water, gather the following materials:
- A clear glass or plastic container – Choose a container that complements the size and style of your floral arrangement. Make sure it is watertight and transparent to showcase the clear acrylic water.
- Artificial flowers – Select the flowers you wish to use in your arrangement. Keep in mind that certain types of artificial flowers work better with clear acrylic water, such as silk or latex flowers.
- Clear acrylic water solution – You can purchase a clear acrylic water kit from a craft store or online. These kits typically include a resin and hardener that you will need to mix together.
- Mixing container – Use a disposable plastic cup or a designated mixing container to blend the clear acrylic water solution.
- Stirring stick – A wooden craft stick or disposable utensil will work well for stirring the clear acrylic water mixture.
- Protective gloves – It is important to wear gloves to protect your hands from any chemicals in the clear acrylic water solution.
- Drop cloth or newspaper – Place a drop cloth or spread out old newspapers on your work surface to protect it from any spills or drips.
- Paper towels or cloth – Keep some paper towels or a soft cloth nearby for any cleaning or wiping needs during the process.
Once you have gathered all the necessary materials, you are ready to begin creating your clear acrylic water-filled floral arrangement. Let’s proceed to the next step: choosing the right container!
Step 1: Choosing the Right Container
The first step in creating a stunning floral arrangement with clear acrylic water is to choose the right container. The container you select will not only serve as the base for your arrangement but also determine the overall look and feel of your centerpiece.
Here are a few points to consider when choosing the container:
- Size and Shape: Consider the size and shape of the container based on the type and number of artificial flowers you plan to use. Ensure the container is large enough to accommodate your floral arrangement without overcrowding.
- Visual Appeal: Opt for a container that complements the style and theme of your decor. It could be a simple vase, a decorative glass jar, or even a clear fishbowl for a unique touch.
- Transparency: Clear acrylic water is meant to create the illusion of real water, so it’s crucial to choose a transparent container. Avoid containers that are tinted or have opaque walls.
- Watertight: Ensure that the container is watertight to prevent any leaks or spills once you pour the clear acrylic water. This will not only protect your furniture and surfaces but also help maintain the longevity of your arrangement.
Take your time in selecting the perfect container that fits your vision and enhances the overall aesthetic of your floral arrangement. Once you have found the ideal container, move on to the next step: preparing the artificial flowers!
Step 2: Preparing the Artificial Flowers
Now that you have chosen the perfect container for your clear acrylic water-filled floral arrangement, it’s time to prepare the artificial flowers. Proper preparation of the flowers will ensure that they look their best and fit seamlessly into the arrangement.
Follow these steps to prepare your artificial flowers:
- Inspect the Flowers: Carefully examine each artificial flower for any loose petals, broken stems, or imperfections. If you notice any issues, make the necessary repairs or replacements.
- Trim the Stems: Use a pair of floral shears or wire cutters to trim the stems of the artificial flowers to the desired length. Adjust the length based on the height of your container and the look you want to achieve.
- Remove Excess Foliage: If there are any excess leaves or foliage on the stems that may interfere with the arrangement, carefully remove them. This will help create a cleaner and more natural look.
- Fluff and Shape: Gently fluff and shape the petals and leaves of each artificial flower to give them a more realistic appearance. Manipulate the petals to achieve a natural arrangement and separate any petals that may be sticking together.
Take your time during the preparation process to ensure that each artificial flower is in optimal condition and looks its best. Properly prepped flowers will add to the overall beauty and realism of your clear acrylic water-filled floral arrangement.
Once you have prepared your artificial flowers, let’s move on to the exciting step of preparing the clear acrylic water solution!
Step 3: Preparing the Clear Acrylic Water Solution
Before you can pour the clear acrylic water into the container, you need to prepare the solution. The clear acrylic water solution consists of a resin and hardener that, when mixed together, create the gel-like substance that mimics the appearance of real water.
Here’s how to prepare the clear acrylic water solution:
- Read the Instructions: Carefully read the instructions provided with the clear acrylic water kit. Different kits may have slightly different mixing ratios or specific instructions for the best results.
- Prepare a Mixing Container: Choose a disposable plastic cup or a designated container to mix the resin and hardener. Ensure that the container is clean and free from any debris or residue.
- Put on Protective Gloves: It is essential to protect your hands during this process. Wear gloves to prevent any skin irritation from the resin or hardener.
- Measure the Resin and Hardener: Follow the instructions to determine the correct ratio of resin to hardener. Use a measuring cup or the provided tools in the kit to accurately measure the required amounts.
- Mix Thoroughly: Pour the measured resin and hardener into the mixing container. Use a stirring stick to thoroughly mix the two components together. Stir in a circular motion for a few minutes until the mixture is well combined.
Be sure to follow the instructions provided with your clear acrylic water kit to ensure that you achieve the desired consistency and quality of the solution. Once you have mixed the resin and hardener, you are ready to move on to the next step: pouring the clear acrylic water into the container!
Read more: How To Make Hydrangea Floral Arrangements
Step 4: Mixing the Clear Acrylic Water Solution
Now that you have prepared the clear acrylic water solution by combining the resin and hardener, it’s time to mix it together to create the gel-like substance that will mimic the appearance of real water in your floral arrangement.
Follow these steps to properly mix the clear acrylic water solution:
- Check the Consistency: Before you start mixing, take a moment to check the consistency of the clear acrylic water solution. It should be thick and gooey, similar to the texture of honey. If it seems too runny, you may need to add a bit more resin and hardener and mix it again.
- Stir Gently: Using a clean stirring stick or spoon, gently stir the clear acrylic water solution in a slow, circular motion. Be careful not to introduce air bubbles into the mixture, as these can affect the final appearance of the faux water.
- Mix Thoroughly: Continue stirring the solution for several minutes, ensuring that the resin and hardener are well incorporated. Pay attention to the corners and bottom of the mixing container to prevent any unmixed portions.
- Scrape the Sides: As you mix, occasionally scrape down the sides of the mixing container to catch any residue that may have stuck to the surface. This will ensure that all parts of the clear acrylic water solution are properly combined.
Take your time while mixing the clear acrylic water solution to ensure that it is thoroughly blended. It’s crucial to achieve a smooth and consistent mixture to create a realistic water effect in your floral arrangement.
Once the clear acrylic water solution is well mixed, it’s time to move on to the next step: pouring it into the container!
When making clear acrylic water for floral arrangements, be sure to follow the instructions on the product carefully to achieve the best results. It’s important to mix the solution thoroughly and let it set properly before adding the flowers.
Step 5: Pouring the Clear Acrylic Water into the Container
With the clear acrylic water solution thoroughly mixed, it’s time to pour it into the chosen container to create the illusion of real water for your floral arrangement. This step requires precision and careful handling to achieve the desired effect.
Follow these steps to pour the clear acrylic water into the container:
- Position the Container: Place the container on a stable surface and ensure it is level. This will prevent any unintentional spills or uneven distribution of the clear acrylic water.
- Start Pouring: Slowly pour the clear acrylic water solution into the container, starting from one side. Be cautious not to pour too quickly, as this can create air bubbles in the faux water.
- Fill the Container: Continue pouring the clear acrylic water solution until the container is filled to the desired level. Avoid overfilling the container, as the clear acrylic water will expand slightly as it sets.
- Clear Any Air Bubbles: After pouring the solution, gently tap or shake the container to release any trapped air bubbles. You can also use a toothpick or small skewer to pop any visible bubbles on the surface.
Take your time during the pouring process to ensure a seamless and air bubble-free application of the clear acrylic water. This will contribute to the overall realism and beauty of your floral arrangement.
Once you have poured the clear acrylic water into the container, it’s time to move on to the next step: arranging the artificial flowers!
Step 6: Arranging the Artificial Flowers in the Container
Now that you have poured the clear acrylic water into the container, it’s time to arrange the artificial flowers to create a stunning and realistic centerpiece. The way you arrange the flowers will greatly impact the overall look and feel of your floral arrangement.
Follow these steps to arrange the artificial flowers in the container:
- Visualize the Design: Before placing the flowers in the container, take a moment to visualize the desired design. Consider the height, color, and distribution of the flowers to ensure a balanced and visually pleasing arrangement.
- Insert the Stems: Start by inserting the stems of the artificial flowers into the clear acrylic water, making sure they reach the bottom of the container. Arrange the flowers at different heights to create depth and dimension.
- Create a Focal Point: Choose one or two standout flowers to be the focal point of the arrangement. Position them slightly higher or in the center to draw attention and add visual interest.
- Fill in the Gaps: As you place the flowers in the container, ensure that there are no visible gaps or spaces between them. Fill any open areas with smaller flowers or greenery to create a lush and full-looking arrangement.
- Play with Angles: Experiment with different angles and orientations for each flower to achieve an organic and natural appearance. Vary the direction and tilt of the blooms to add depth and movement to the arrangement.
Take your time during the arrangement process to achieve the desired look. Step back and assess the arrangement from different angles to ensure it looks balanced and visually pleasing from all sides.
Once you have arranged the artificial flowers in the container, it’s time to move on to the next step: allowing the clear acrylic water to set!
Step 7: Allowing the Clear Acrylic Water to Set
After arranging the artificial flowers in the container, it’s important to allow the clear acrylic water to set properly. This step ensures that the faux water solidifies and maintains its realistic appearance, providing stability and longevity to your floral arrangement.
Follow these steps to allow the clear acrylic water to set:
- Choose a Safe Location: Find a safe and undisturbed location where you can place the container. Make sure it remains stationary and untouched during the setting process.
- Check the Drying Time: Refer to the instructions provided with your clear acrylic water kit for the recommended drying time. It usually takes around 24 to 48 hours for the clear acrylic water to fully set and harden.
- Minimize Air Movement: Keep the container away from fans, open windows, or areas with excessive air movement. This will prevent dust or debris from settling on the surface of the clear acrylic water and interfering with its final appearance.
- Avoid Direct Sunlight: While the clear acrylic water is setting, it’s important to avoid direct sunlight. Prolonged exposure to sunlight can cause discoloration and affect the clarity of the faux water.
During the setting process, resist the temptation to touch or disturb the clear acrylic water. Allow it sufficient time to harden and solidify, ensuring a crystal-clear appearance for your floral arrangement.
Once the clear acrylic water has set, you can move on to the final step: adding the finishing touches and cleaning up!
Read more: How To Make Easter Floral Arrangements
Step 8: Final Touches and Clean-Up
With the clear acrylic water fully set, it’s time to add the final touches to your floral arrangement and tidy up any mess that may have accumulated during the process. This step ensures that your centerpiece looks polished and ready to be showcased.
Follow these steps for the final touches and clean-up:
- Trim Excess Stems: Check if any stems of the artificial flowers are protruding above the surface of the clear acrylic water. Use floral shears or wire cutters to carefully trim any excess length to achieve a clean and professional look.
- Arrange Foliage: Take a moment to adjust and arrange any leaves or foliage that may have shifted during the arrangement process. Ensure that the greenery looks balanced and complements the flowers.
- Clean the Container: Wipe down the exterior of the container with a clean cloth or paper towel to remove any smudges or fingerprints. If needed, rinse the inside of the container with water to remove any residue from the clear acrylic water.
- Dispose of Unused Solution: If you have any remaining clear acrylic water solution in the mixing container, follow the manufacturer’s instructions for safe disposal. Do not pour it down the drain, as it can potentially clog the pipes.
- Enjoy Your Floral Arrangement: Once you have completed the final touches and clean-up, step back and admire your beautiful clear acrylic water-filled floral arrangement. Display it in a prominent location where it can be enjoyed by all.
By paying attention to these final details and tidying up, you can ensure that your clear acrylic water floral arrangement looks stunning and professional.
Congratulations! You have successfully created a captivating and lifelike centerpiece using clear acrylic water for your floral arrangement. It’s now time to impress your guests and bask in the beauty of your creation.
Remember, with a little creativity and attention to detail, you can create breathtaking table decor that will leave a lasting impression. Enjoy the art of clear acrylic water and the endless possibilities it brings to your floral arrangements!
Conclusion
Creating a stunning floral arrangement with clear acrylic water is a rewarding and captivating process. It adds a touch of elegance and realism to your table decor, making your centerpiece truly stand out. By following the step-by-step guide outlined in this article, you can master the art of clear acrylic water and create a mesmerizing focal point for any occasion.
From choosing the right container to preparing the clear acrylic water solution and arranging the flowers, each step plays a vital role in achieving a lifelike and visually pleasing result. Take the time to carefully select your container, prepare your artificial flowers, and mix the clear acrylic water solution to perfection. Arranging the flowers with creativity and attention to detail will ensure a breathtaking centerpiece that will amaze your guests.
Throughout the process, be mindful of cleanliness and precision. Avoid air bubbles, keep the clear acrylic water away from direct sunlight during the setting time, and make any necessary adjustments to perfect the arrangement. Remember, even the smallest details can make a significant difference in the final outcome.
By adding the final touches and cleaning up, you will have a polished and professional-looking centerpiece ready to be admired. It’s an opportunity to showcase your creativity and bring a touch of sophistication to any table setting.
Now that you have learned the art of creating clear acrylic water-filled floral arrangements, let your imagination flow and experiment with different types of flowers, containers, and styles. With each new creation, you will refine your skills and continue to amaze yourself and others with your table decor expertise.
So, dive into this exciting world of clear acrylic water and let your floral arrangements become a masterpiece of elegance and beauty. Enjoy the process, and most importantly, have fun creating stunning centerpieces that will leave a lasting impression!
Frequently Asked Questions about How To Make Clear Acrylic Water For Floral Arrangements
Was this page helpful?
At Storables.com, we guarantee accurate and reliable information. Our content, validated by Expert Board Contributors, is crafted following stringent Editorial Policies. We're committed to providing you with well-researched, expert-backed insights for all your informational needs.




0 thoughts on “How To Make Clear Acrylic Water For Floral Arrangements”