Home>Dining>Tableware>What Paint To Use On Ceramic Salt And Pepper Shakers

Tableware
What Paint To Use On Ceramic Salt And Pepper Shakers
Modified: February 27, 2024
Discover the best paint for ceramic salt and pepper shakers! Enhance your tableware with our expert guide on choosing the perfect paint for long-lasting results.
(Many of the links in this article redirect to a specific reviewed product. Your purchase of these products through affiliate links helps to generate commission for Storables.com, at no extra cost. Learn more)
Introduction
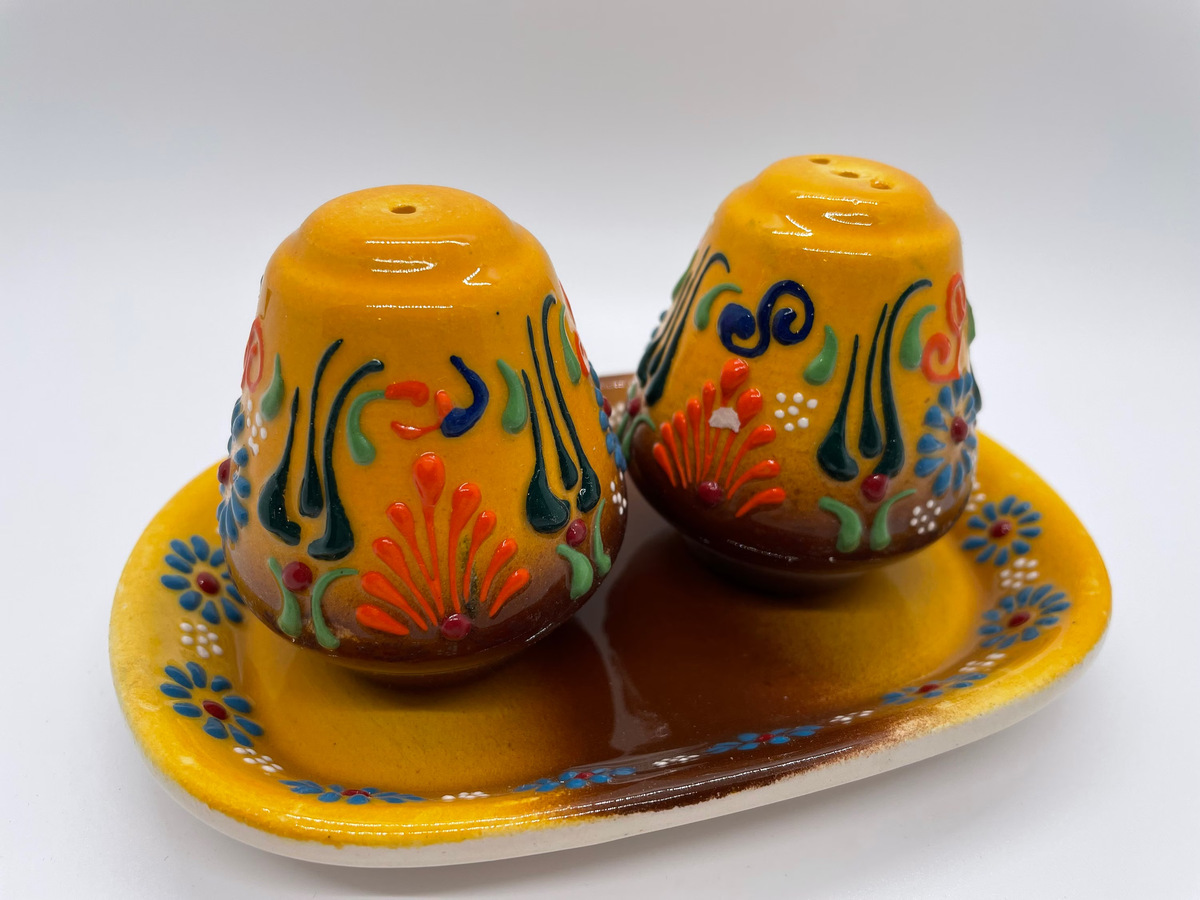
Ceramic salt and pepper shakers not only serve a practical purpose in the kitchen but can also add a touch of style and personality to your dining table. While there are countless designs and patterns available in the market, sometimes you may want to customize or revamp your existing ceramic shakers to better suit your taste. One way to achieve this is by painting them.
Painting ceramic salt and pepper shakers allows you to unleash your creativity and create unique designs that reflect your personal style. However, it’s important to choose the right type of paint to ensure a durable and long-lasting finish. In this article, we will explore the different types of paint suitable for ceramic shakers, the preparation required before painting, the step-by-step process of painting, and some helpful tips and recommendations.
By following the techniques and guidance provided in this article, you’ll be able to transform your plain ceramic salt and pepper shakers into eye-catching pieces that will surely impress your guests.
Key Takeaways:
- Choose the right paint type, prepare the surface thoroughly, and work in thin layers to create durable and personalized ceramic salt and pepper shakers that reflect your creativity and style.
- Enjoy the process of transforming plain ceramic shakers into eye-catching pieces that will impress your guests and elevate your dining table decor. Embrace your artistic side and create unique masterpieces that will be cherished for years to come.
Read more: How To Use Salt And Pepper Shakers
Types of Paint for Ceramic Salt and Pepper Shakers
When it comes to painting ceramic salt and pepper shakers, it’s important to choose a paint that is specifically formulated for use on ceramics. Here are some popular types of paint that are suitable for this purpose:
- Acrylic Paint: Acrylic paint is a versatile and widely available option for painting ceramic salt and pepper shakers. It is water-based, quick-drying, and provides a smooth and glossy finish. Acrylic paint also comes in a wide range of colors, allowing you to easily achieve vibrant and bold designs.
- Enamel Paint: Enamel paint is another excellent choice for painting ceramic shakers. It provides a durable and glossy finish, making it resistant to chipping and fading. Enamel paint is oil-based and requires a longer drying time compared to acrylic paint. It is available in various colors and finishes, including high-gloss and satin.
- Porcelain Paint: Specifically formulated for ceramic and porcelain surfaces, porcelain paint offers a permanent and dishwasher-safe finish. It typically comes in bottles with a fine-tip applicator, making it easier to create intricate designs. Porcelain paint is available in a wide array of colors and can be air-cured or baked for maximum durability.
- Glass Paint: While primarily designed for glass, glass paint can also be used on ceramics. It provides a translucent or transparent finish, allowing light to pass through the painted surface. Glass paint is water-based and available in various colors and finishes. It can be air-cured or baked to ensure the longevity of the painted design.
Before selecting a paint type, consider factors such as your desired finish, ease of application, and the level of durability required. It’s also a good idea to read the manufacturer’s instructions and recommendations to ensure the paint is suitable for ceramic surfaces.
Acrylic Paint
Acrylic paint is a popular and versatile option for painting ceramic salt and pepper shakers. It offers several advantages that make it a preferred choice for both beginners and experienced artists.
One of the main advantages of using acrylic paint is its water-based formula. This means that you can easily clean your brushes and tools with water, eliminating the need for harsh solvents. Additionally, acrylic paint dries quickly, allowing you to build up layers and work on your design without waiting for extended periods.
Acrylic paint is available in a wide range of vibrant colors, making it easy to achieve the desired look for your ceramic shakers. It also comes in different finishes, including matte, satin, and glossy, allowing you to customize the appearance to suit your preferences.
When applying acrylic paint to ceramic surfaces, it’s important to prepare the surface properly by cleaning it thoroughly and ensuring it is free from any dirt or grease. You can use soap and water or a mild abrasive cleaner to clean the ceramic shakers. Once dry, apply a primer specifically designed for acrylics to ensure proper adhesion of the paint.
After applying the primer, you can start painting your ceramic salt and pepper shakers with acrylic paint. Use high-quality brushes suitable for acrylics and apply thin layers of paint, allowing each layer to dry before adding another. This helps prevent clumping or streaks in the paint and ensures a smooth and even finish.
If you want to add more depth and texture to your design, you can also mix in some acrylic mediums, such as glazing medium or texture paste, to create interesting effects.
Once you have finished painting, it’s important to seal the acrylic paint on your ceramic shakers to protect the design. You can use a clear acrylic sealer or a gloss varnish specifically formulated for acrylic paint. Apply a thin and even coat of the sealer, following the manufacturer’s instructions, and allow it to dry completely.
Acrylic paint offers a durable and long-lasting finish, but it’s important to note that it may not be as resistant to chipping and fading as other types of paint, such as enamel or porcelain paint. Therefore, it’s recommended to handle your painted ceramic shakers with care and avoid using abrasive materials for cleaning.
With its versatility and ease of use, acrylic paint is an excellent choice for adding color and design to ceramic salt and pepper shakers. Enjoy the process of creating unique and personalized pieces that will enhance the beauty of your dining table.
Enamel Paint
Enamel paint is a popular choice for painting ceramic salt and pepper shakers due to its durability and glossy finish. It provides a smooth and professional-looking result that can withstand regular use and handling.
Enamel paint is oil-based, which means it takes longer to dry compared to water-based paints like acrylic. However, this longer drying time allows for better flow and leveling, resulting in a more even and smooth application. It also gives you more time to work on intricate details and designs.
Before applying enamel paint to ceramic surfaces, it’s important to ensure that the shakers are clean and free from any dust or grease. You can use soap and water or a mild abrasive cleaner to thoroughly clean them. Once dry, apply a primer specifically formulated for enamel paints to promote adhesion.
When using enamel paint, it’s important to have good ventilation because the fumes can be strong. Work in a well-ventilated area or consider using a respirator mask to protect yourself. Additionally, be mindful of brush strokes as enamel paint tends to leave visible brush marks. To minimize this, use high-quality brushes and apply thin, even coats of paint.
Enamel paint is known for its high gloss finish, but if you prefer a different look, you can find enamel paints with satin or matte finishes as well. This allows you to customize the appearance of your ceramic shakers to match your desired aesthetic.
After painting the ceramic shakers with enamel paint, it’s important to let them cure for a few days to allow the paint to fully harden. This curing process helps enhance the durability and longevity of the paint. Keep in mind that enamel paint can take several weeks to fully cure, so handle your painted shakers with care during this period.
To protect the painted design and ensure its longevity, it’s recommended to seal the enamel paint with a clear varnish or enamel sealer. This extra layer of protection helps prevent chipping and fading, making your painted ceramic shakers more resistant to wear and tear.
Enamel paint offers a durable and professional-looking finish on ceramic salt and pepper shakers. With a wide range of colors to choose from and its ability to withstand regular use, enamel paint is a great option for adding a touch of elegance to your dining table.
Porcelain Paint
Porcelain paint is specifically formulated for painting ceramic and porcelain surfaces, making it an ideal choice for ceramic salt and pepper shakers. It offers a permanent and dishwasher-safe finish, ensuring that your painted design will withstand regular use and washing.
Porcelain paint often comes in bottles with a fine-tip applicator, which allows for precise and intricate designs. This makes it a popular choice for artists and individuals who want to create detailed patterns or personalized artwork on their ceramic shakers.
Before applying porcelain paint, it’s important to properly prepare the ceramic surface to ensure proper adhesion. Clean the shakers thoroughly using soap and water or a mild abrasive cleaner to remove any dirt or grease. Once dry, you can begin painting directly on the ceramic surface without the need for additional primers.
One of the advantages of porcelain paint is its ability to air-cure or be baked for maximum durability. Air-curing involves letting the paint dry and set naturally over a period of days or weeks. Baking the painted ceramic shakers, on the other hand, helps to accelerate the curing process and provides a more durable finish. Follow the manufacturer’s instructions for temperature and baking time to ensure the best results.
Porcelain paint offers a wide range of colors to choose from, including both opaque and translucent options. This allows you to experiment with different effects and achieve the desired look for your ceramic salt and pepper shakers. You can also mix and blend colors to create unique shades that reflect your creativity.
Once you have finished painting, it’s important to handle the ceramic shakers with care while the paint is curing. Avoid touching the painted areas as much as possible to prevent smudging or smearing. Once the paint has fully cured, you can enjoy your beautifully decorated ceramic salt and pepper shakers.
Keep in mind that porcelain paint is permanent and may be more challenging to correct or remove if you make mistakes. Therefore, it’s recommended to practice your design on a test surface or a spare ceramic piece before painting your salt and pepper shakers.
Porcelain paint offers a durable and long-lasting finish that can withstand regular use and washing. With its fine-tip applicator and vibrant color options, porcelain paint allows you to create personalized and eye-catching designs on your ceramic shakers, adding a touch of elegance to your dining table.
Glass Paint
While primarily designed for glass, glass paint can also be used on ceramic surfaces, including salt and pepper shakers. It offers a translucent or transparent finish, allowing light to pass through the painted design, creating a beautiful and unique effect.
Glass paint is water-based and comes in a variety of colors and finishes, making it versatile for creating different looks on your ceramic shakers. You can choose from opaque colors for vibrant and bold designs or translucent colors for a more delicate and subtle appearance.
When using glass paint on ceramic, it’s important to ensure that the surface is clean and free from any dirt or grease. Clean the salt and pepper shakers thoroughly using soap and water or a mild abrasive cleaner. Ensure that they are completely dry before beginning the painting process.
Unlike some other types of paint, glass paint does not typically require a primer for adhesion. You can directly apply the paint to the ceramic surface using a brush or a sponge. Experiment with different techniques, such as stippling or blending, to create interesting textures and effects.
After painting your ceramic shakers with glass paint, it’s important to let the paint dry and cure according to the manufacturer’s instructions. Depending on the specific brand and type of glass paint, this may involve air-drying for a designated period or baking the painted items in the oven to set the paint permanently.
To protect the painted design on your ceramic shakers, you can consider applying a clear varnish or sealer specifically designed for glass or multi-surface use. This additional layer of protection helps to enhance the durability of the painted design and prevents it from chipping or fading over time.
It’s important to note that glass paint may not be as durable as some other types of paint, such as enamel or porcelain paint. Therefore, it’s advisable to handle your painted ceramic shakers with care and avoid using abrasive materials or harsh cleaning agents that may damage or remove the paint.
Glass paint offers a unique and artistic way to decorate ceramic salt and pepper shakers. Its translucent finish allows for creativity and experimentation, giving your ceramic shakers a beautiful and distinct appearance on your dining table.
Preparation for Painting Ceramic Salt and Pepper Shakers
Before you begin the process of painting ceramic salt and pepper shakers, it’s essential to properly prepare the surface to ensure the best results. Taking the time to prepare the ceramic shakers will help the paint adhere properly and create a durable and long-lasting finish.
Here are some steps to follow for preparing your ceramic shakers:
- Clean the Shakers: Thoroughly clean the ceramic shakers using soap and water or a mild abrasive cleaner. This will remove any dirt, dust, grease, or other contaminants that could affect the paint’s adhesion.
- Dry the Shakers: After cleaning, allow the ceramic shakers to dry completely. Ensure that there is no moisture left on the surface before proceeding to the next step. You can use a clean cloth or let them air dry.
- Sand the Surface (Optional): If the ceramic surface has a glossy or smooth finish, you may want to lightly sand it with fine-grit sandpaper. This will create a slightly rough texture that helps the paint adhere better. Be careful not to sand too aggressively to avoid damaging the surface.
- Apply a Primer (Optional): Depending on the type of paint you plan to use, applying a primer may be beneficial. A primer creates a smooth and even base for the paint to adhere to, resulting in better color vibrancy and durability. Choose a primer that is compatible with your chosen paint type and follow the manufacturer’s instructions for application.
By following these steps, you will ensure that your ceramic shakers are clean and ready for painting. Proper preparation is crucial for achieving a professional and long-lasting finish on your ceramic salt and pepper shakers.
Steps to Paint Ceramic Salt and Pepper Shakers
Painting ceramic salt and pepper shakers allows you to transform them into personalized and unique pieces. By following these steps, you can create beautiful designs that will enhance the visual appeal of your dining table.
Here are the steps to paint ceramic salt and pepper shakers:
- Step 1: Clean the Shakers
Start by cleaning the ceramic shakers thoroughly using soap and water or a mild abrasive cleaner. Ensure that all dirt, dust, and grease are removed from the surface. Allow the shakers to dry completely before proceeding to the next step. - Step 2: Apply a Primer (If Needed)
If you’ve decided to use a primer, apply a thin and even layer using a brush suitable for the type of primer you are using. Follow the manufacturer’s instructions for the drying time and number of coats required. Priming helps the paint adhere better and provides a smooth base for the color. - Step 3: Apply the Base Coat
Start by selecting the paint color for the base coat. Use a brush suitable for the type of paint you are using and apply a thin and even layer of paint to the ceramic shakers. Let the base coat dry completely before moving on to the next step. - Step 4: Add Design and Details
Once the base coat is dry, you can start adding your desired design and details to the ceramic shakers. Use a variety of brushes, sponges, or even stencils to create patterns, images, or intricate designs. Take your time and work in layers, allowing each layer to dry before adding more details. - Step 5: Seal the Paint
To protect your painted design and ensure its longevity, it’s important to seal the paint on the ceramic shakers. Choose a clear sealant or varnish that is suitable for the type of paint you used. Apply a thin and even coat, following the manufacturer’s instructions. Allow the sealant to dry completely before using the salt and pepper shakers.
Remember to clean your brushes and tools properly after each painting session to maintain their quality and prevent colors from blending unintentionally.
By following these steps, you can create beautifully painted ceramic salt and pepper shakers that reflect your creativity and style. Have fun with the process and enjoy the satisfaction of showcasing your artistic abilities on your dining table.
When painting ceramic salt and pepper shakers, use acrylic paint for a durable and long-lasting finish. Make sure to clean and dry the shakers thoroughly before painting. Apply multiple thin coats for even coverage.
Step 1: Clean the Shakers
The first step in painting ceramic salt and pepper shakers is to ensure that they are thoroughly cleaned. Cleaning the shakers removes any dirt, grease, or residue that may interfere with the paint’s adhesion, resulting in a smoother and longer-lasting finish.
Here’s how to clean the shakers effectively:
- Gather Supplies: Start by gathering the necessary supplies, including soap, water, a sponge or soft cloth, and if needed, a mild abrasive cleaner. You may also want to have gloves on hand to protect your hands during the cleaning process.
- Rinse the Shakers: Rinse the ceramic salt and pepper shakers under warm water to remove any loose debris on the surface. This will make the cleaning process more effective.
- Apply Soap and Water: Apply a small amount of mild dish soap to a sponge or soft cloth. Gently scrub the surface of the shakers using the soapy sponge, paying attention to any areas with visible stains or build-up.
- Remove Stubborn Stains: For stubborn stains or grease, you may need to use a mild abrasive cleaner. Follow the manufacturer’s instructions and use caution to avoid scratching the ceramic surface. Scrub the stained areas gently until the stains are removed.
- Rinse Thoroughly: Rinse the shakers under warm water to remove any soap or cleaner residue. Make sure to rinse them thoroughly to avoid leaving any residue that could affect the paint’s adhesion.
- Dry Completely: Once rinsed, use a clean towel or let the shakers air dry completely. Ensure that there is no remaining moisture on the surface before proceeding to the next step.
By cleaning the shakers thoroughly, you create a clean canvas for the paint and minimize the risk of paint not adhering properly or coming off easily in the future.
Keep in mind that different types of ceramic shakers may have specific cleaning requirements. Always refer to the manufacturer’s instructions or recommendations for cleaning your specific salt and pepper shakers.
By following this crucial step, you’ll set the foundation for a successful painting process and ensure that your ceramic salt and pepper shakers are ready for the next steps. Now that the shakers are clean and dry, you can proceed to apply a primer, if necessary, to further enhance the paint’s adhesion and create a smooth surface for painting.
Step 2: Apply a Primer
Applying a primer is an optional but beneficial step when painting ceramic salt and pepper shakers. A primer creates a smooth and even base for the paint to adhere to, ensuring better color vibrancy and durability of the final painted design.
Here’s how to apply a primer to your ceramic shakers:
- Choose the Right Primer: Select a primer that is specifically formulated for use on ceramic surfaces. Look for a primer that is compatible with the type of paint you plan to use, such as acrylic or enamel.
- Prepare Your Workspace: Set up your workspace in a well-ventilated area and protect the surrounding surfaces from any potential primer overspray or drips.
- Shake the Primer: Shake the primer can or stir the liquid primer thoroughly to ensure that it is well-mixed. This helps to achieve consistent coverage and adhesion.
- Apply the Primer: Using a brush suitable for the type of primer, apply a thin and even coat of primer to the ceramic shakers. Start from the top and work your way down to avoid any accidental smudging. Ensure that the primer is evenly distributed and covers the entire surface of the shakers.
- Allow the Primer to Dry: Follow the manufacturer’s instructions for the drying time of the primer. Typically, it takes around 1-2 hours for the primer to dry, but this can vary depending on the specific brand and type of primer you are using. Make sure the primer is completely dry before proceeding to the next step.
Applying a primer creates a smoother and more receptive surface for the paint, allowing for better adhesion and color payoff. It also helps to seal any small imperfections or porous areas on the ceramic surface, ensuring a more uniform and professional-looking finish.
However, if you have chosen a high-quality paint that does not require a primer or if you prefer the natural texture of the ceramic, you can skip this step and proceed directly to applying the paint.
With the primer applied and thoroughly dried, your ceramic salt and pepper shakers are now ready for the next step: applying the base coat of paint. This will be the foundation on which you’ll build your desired design and create a personalized look for your shakers.
Step 3: Apply the Base Coat
Once you have cleaned and, if desired, applied a primer to your ceramic salt and pepper shakers, it’s time to apply the base coat of paint. The base coat sets the tone for your design and acts as a foundation for any additional colors or patterns you plan to add.
Follow these steps to apply the base coat:
- Choose the Paint Color: Select the paint color for your base coat. Consider the overall aesthetic you want to achieve and how the color will complement your dining table or kitchen decor.
- Preparation: Ensure that your workspace is well-ventilated and protected from any potential paint drips or spills. Shake the paint bottle or stir the paint thoroughly to ensure it is well-mixed and ready for application.
- Apply the Paint: Using a brush suitable for the type of paint you are using (such as acrylic, enamel, or porcelain paint), apply a thin and even layer of paint to the ceramic shakers. Start from the top and work your way down, making sure to cover the entire surface evenly. Take your time and use long, smooth brushstrokes to achieve a professional-looking finish.
- Drying Time: Follow the manufacturer’s instructions for the drying time of the base coat. The drying time can vary depending on the type of paint and the thickness of the applied layer. Allow the base coat to dry completely before moving on to the next step. This typically takes at least 1-2 hours, but it’s best to let it dry overnight to ensure it is fully cured.
The base coat serves as the background color for your design and provides a solid starting point. It helps the subsequent layers of paint adhere better and ensures that the colors you apply on top appear vibrant and true to their intended shades.
Keep in mind that multiple coats may be necessary to achieve the desired opacity and coverage, especially if you are using lighter or more transparent paint colors. Allow each layer to dry completely before applying the next coat.
Once the base coat is fully dry and you are satisfied with the coverage, you can proceed to the next step: adding your desired design and details to the ceramic shakers.
Step 4: Add Design and Details
Now that you have applied the base coat to your ceramic salt and pepper shakers, it’s time to let your creativity shine by adding your desired design and details. This step allows you to personalize your shakers and make them truly unique.
Follow these steps to add your design and details:
- Plan Your Design: Take some time to brainstorm and plan the design you want to create on your shakers. You can draw inspiration from patterns, nature, or any other elements that resonate with your personal style or the overall theme of your kitchen.
- Choose Your Colors: Select the colors that will bring your design to life. Consider color combinations that complement each other and enhance the overall visual appeal of your shakers. You can use a variety of brushes, sponges, or other tools to achieve different textures and effects.
- Start with the Background: Begin by painting the larger background areas of your design. Use a larger brush to cover these areas smoothly and evenly. Allow the paint to dry before moving on to the next step.
- Add Details and Patterns: Use smaller brushes or paint pens to add intricate details and patterns to your design. Take your time and work carefully, building up the complexity of your design layer by layer. You can create stripes, dots, floral motifs, or any other patterns that suit your vision.
- Let Each Layer Dry: Be patient and allow each layer of paint to dry completely before adding additional details or moving on to the next color. This helps prevent smudging and ensures that the colors maintain their integrity.
- Make Corrections as Needed: If you make any mistakes or are unhappy with a particular element of your design, wait until the paint has fully dried and then carefully remove or repaint the area. It’s always better to take your time and make adjustments rather than rush and end up with a design you’re not satisfied with.
Remember, this is your chance to showcase your artistic skills and express your individuality. Have fun with the process and don’t be afraid to experiment with different techniques and patterns.
Once you are satisfied with the design and all the layers of paint have dried completely, you can move on to the final step: sealing the paint to protect your beautiful artwork on the ceramic shakers.
Step 5: Seal the Paint
After investing time and effort into painting intricate designs on your ceramic salt and pepper shakers, it’s important to seal the paint to protect your artwork and ensure its longevity. Sealing the paint adds an extra layer of protection, making your shakers more resistant to chipping, fading, and wear and tear.
Follow these steps to seal the paint on your ceramic shakers:
- Select the Right Sealer: Choose a clear sealer that is compatible with the type of paint you used on your shakers. It could be a clear acrylic sealer, a gloss varnish, or a sealer specifically designed for ceramics. Make sure to read the instructions on the sealer to ensure its compatibility with your paint type.
- Prepare Your Workspace: Set up your workspace in a well-ventilated area and protect the surrounding surfaces from overspray or drips. Shake the sealer can or stir the liquid sealer thoroughly to ensure it is well-mixed.
- Apply the Sealer: Hold the sealer can or use a brush suitable for the liquid sealer. Apply a thin and even coat of sealer to the painted surface of your shakers. Make sure to cover all areas, including the intricate details of your design. Avoid applying too much sealer, as it may cause the colors to bleed or the paint to become cloudy.
- Follow Drying Time: Allow the sealer to dry completely according to the manufacturer’s instructions. Depending on the specific sealer you’re using, this can take anywhere from a few hours to overnight. Ensure that the shakers are placed in a well-ventilated area during the drying process.
- Apply Additional Coats (If Needed): If you want added protection or a higher gloss finish, you can apply additional coats of sealer. Make sure to allow each coat to dry completely before applying the next one. Multiple thin coats are often better than thick or heavy coats.
Sealing the paint helps to protect your design from moisture, scratches, and fading caused by exposure to sunlight. It also makes your ceramic shakers easier to clean and maintain over time.
Once the sealer has dried completely, your painted ceramic salt and pepper shakers are ready to be displayed and used. Handle them with care to preserve the integrity of the painted design, and avoid using abrasive materials or harsh cleaning agents that may damage the sealer or paint.
By completing this final step, you can enjoy your beautifully painted ceramic shakers for years to come, adding a personalized and artistic touch to your dining experience.
Read more: How To Make Salt And Pepper Shakers
Tips and Recommendations for Painting Ceramic Salt and Pepper Shakers
Painting ceramic salt and pepper shakers can be a fun and rewarding project. To ensure the best results and a smooth painting process, consider these helpful tips and recommendations:
- Choose the Right Paint: Select a paint specifically formulated for use on ceramics, such as acrylic, enamel, porcelain, or glass paint. Each type has its own unique properties and benefits, so choose the one that best suits your needs and desired finish.
- Prepare the Surface Properly: Clean the ceramic shakers thoroughly before starting. Remove any dirt, grease, or residue that may interfere with the paint’s adhesion. Use soap, water, and a mild abrasive cleaner if necessary. Allow the shakers to dry completely before applying any paint.
- Experiment on Test Surfaces: If you’re unsure about a particular painting technique or color combination, it’s a good idea to practice on a spare ceramic piece or a test surface before painting your salt and pepper shakers. This allows you to perfect your technique and experiment without the pressure of potentially ruining your shakers.
- Start with a Base Coat: Applying a base coat of paint creates a solid foundation and helps the subsequent layers adhere better. Choose a color that complements your design and ensures good coverage. Let the base coat dry completely before adding additional layers or details.
- Work in Thin Layers: When adding details or additional colors, it’s best to work in thin layers, allowing each layer to dry before adding the next one. This approach helps prevent smudging and allows you to make adjustments if needed without compromising the entire design.
- Use High-Quality Brushes and Tools: Invest in good-quality brushes suitable for the type of paint you’re using. Different brushes have different effects, so experiment to find the ones that work best for your desired design. Additionally, keep your brushes clean to ensure smooth and precise application.
- Protect Your Design: Once you’re satisfied with your design, apply a sealant or varnish to protect the painted surface. This helps prevent chipping, fading, and damage from everyday use. Follow the manufacturer’s instructions for the recommended drying time and number of coats.
- Handle with Care: While painted ceramic salt and pepper shakers can be durable, they still require careful handling to maintain their beauty. Avoid scratching or banging them against hard surfaces and use gentle cleaning techniques to preserve the painted design.
- Enjoy the Process: Painting ceramic salt and pepper shakers is a creative and enjoyable activity. Embrace the process, have fun, and let your creativity flow. Don’t be afraid to experiment with different techniques, colors, and designs to make your shakers truly unique.
By following these tips and recommendations, you can achieve beautiful and long-lasting painted ceramic salt and pepper shakers that will enhance your dining experience and showcase your artistic flair.
Conclusion
Painting ceramic salt and pepper shakers is a fantastic way to add a personal touch to your dining table decor. Whether you want to revamp old shakers or create custom designs from scratch, this creative endeavor allows you to showcase your artistic skills and elevate the visual appeal of your kitchen.
Throughout this article, we’ve explored the different types of paint suitable for ceramic shakers, including acrylic, enamel, porcelain, and glass paint. Each type offers unique qualities that can help you achieve the desired finish and durability.
We’ve also covered the essential steps involved in painting ceramic shakers, from preparing the surface through applying the base coat, adding intricate designs, and sealing the paint. These steps ensure a smooth and successful painting process, resulting in beautiful and long-lasting creations.
Remember to choose the right paint type for your project, prepare the surface properly, and work in thin layers to achieve depth and detail. Additionally, handle your painted shakers with care and use a sealant or varnish to protect your artwork from everyday wear and tear.
Finally, don’t forget to have fun and let your creativity shine. Painting ceramic salt and pepper shakers offers endless possibilities to create unique designs that reflect your personality and style. Experiment with different techniques, colors, and patterns to bring your vision to life.
So go ahead and embark on your painting journey. Transform your plain ceramic shakers into captivating pieces that will impress your guests and bring joy to your daily dining experience. Enjoy the process, embrace your artistic side, and create masterpieces that will be cherished for years to come.
Frequently Asked Questions about What Paint To Use On Ceramic Salt And Pepper Shakers
Was this page helpful?
At Storables.com, we guarantee accurate and reliable information. Our content, validated by Expert Board Contributors, is crafted following stringent Editorial Policies. We're committed to providing you with well-researched, expert-backed insights for all your informational needs.

0 thoughts on “What Paint To Use On Ceramic Salt And Pepper Shakers”