Home>diy>Home Improvement>How To Survive A Kitchen Renovation

Home Improvement
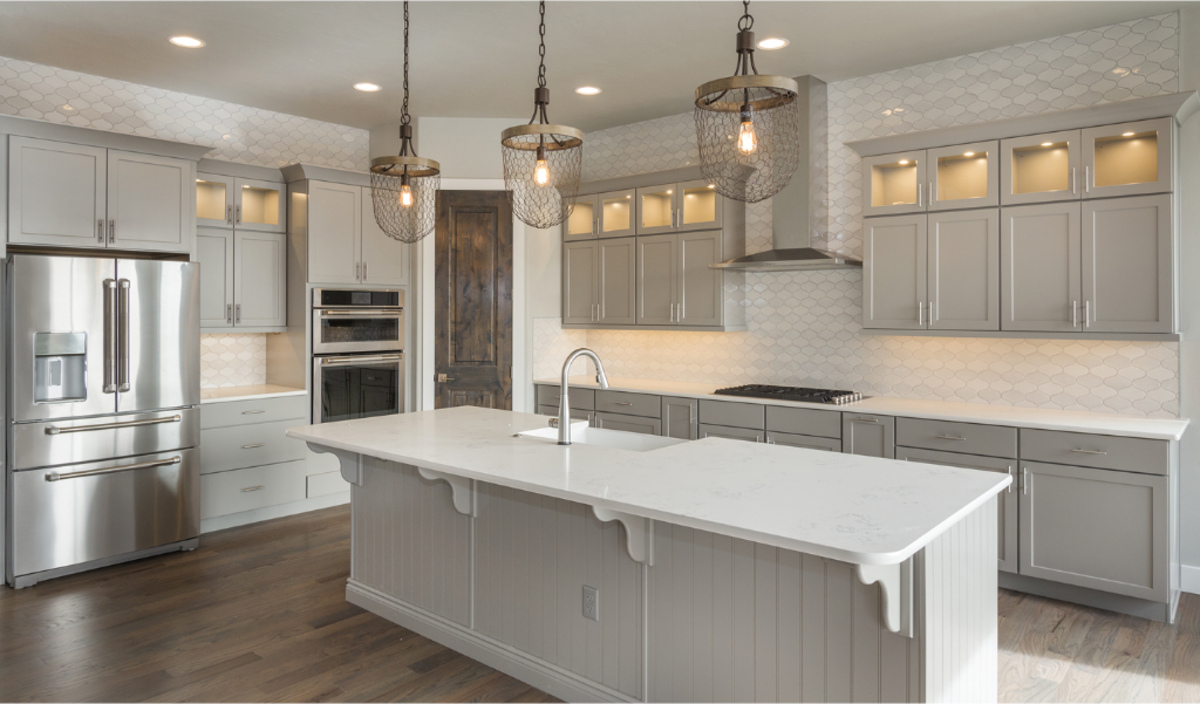
How To Survive A Kitchen Renovation
Modified: August 28, 2024
Discover expert tips on how to survive a home-improvement project and keep your sanity intact during a challenging kitchen renovation.
(Many of the links in this article redirect to a specific reviewed product. Your purchase of these products through affiliate links helps to generate commission for Storables.com, at no extra cost. Learn more)
Introduction
Embarking on a kitchen renovation is an exciting yet daunting endeavor. Whether you’re upgrading the heart of your home for your own enjoyment or to increase the resale value, it’s important to approach the process with careful planning and preparation.
A kitchen renovation involves various stages, from the initial planning and budgeting to the final touches and cleanup. It requires meticulous attention to detail, patience, and a willingness to adapt to unexpected challenges that may arise along the way.
In this comprehensive guide, we will walk you through the essential steps to help you survive and thrive during a kitchen renovation. From finding the right contractor to creating a temporary kitchen setup and managing the renovation progress, we will cover every aspect of the process to ensure a successful and stress-free experience.
So grab a cup of coffee (or your favorite beverage) and let’s dive in!
Key Takeaways:
- Surviving a kitchen renovation requires meticulous planning, effective communication with contractors, and maintaining a positive attitude. Creating a temporary kitchen setup and managing the renovation progress are essential for a successful outcome.
- Dealing with challenges and setbacks during a kitchen renovation calls for flexibility, problem-solving, and effective budget management. Maintaining sanity through self-care, routine, and support is crucial for navigating the renovation process with resilience.
Read more: How To Survive A Home Renovation
Step 1: Planning and Budgeting
The first and most crucial step in any kitchen renovation project is thorough planning and budgeting. Taking the time to carefully consider your needs, preferences, and financial constraints will help you set realistic expectations and ensure a successful outcome.
Start by assessing your current kitchen and identifying aspects that you want to change or improve. Consider factors such as layout, storage, appliances, countertops, flooring, and lighting. Make a list of must-haves and nice-to-haves to prioritize your renovation goals.
Next, determine your budget. Research the average costs for labor, materials, and fixtures in your area and allocate funds accordingly. Remember to factor in unexpected expenses and leave room for contingencies.
Once you have a clear idea of your goals and budget, it’s time to create a detailed plan. Consult with a kitchen designer or architect who can help you optimize the space and create a functional layout. Consider factors such as workflow, ergonomics, and accessibility.
During the planning phase, think about the overall aesthetic you want to achieve. Browse magazines, websites, and social media platforms for inspiration. Create a mood board or save images of kitchens that reflect your desired style.
Additionally, be mindful of the timeline for your renovation. Consider any upcoming events or holidays that may impact your ability to use your kitchen. Factor in the time it will take to obtain permits, order materials, and coordinate with the contractor.
Communication is key during the planning stage. Clearly communicate your expectations, budget, and timeline to your contractor or renovation team. Be open to their suggestions and collaborate to find the best solutions for your renovation.
By investing time and effort into thorough planning and budgeting, you’ll set the foundation for a smooth and successful kitchen renovation project.
Step 2: Finding the Right Contractor
Choosing the right contractor for your kitchen renovation is crucial to ensure a successful and stress-free experience. A skilled and reliable contractor will not only execute your design vision but also provide valuable expertise and guidance throughout the process.
Start by doing thorough research. Ask for recommendations from friends, family, and neighbors who have recently completed a kitchen renovation. Read online reviews and browse contractor directories to find reputable professionals in your area.
Once you’ve narrowed down your options, schedule initial consultations with at least three contractors. During these meetings, ask about their experience, qualifications, and previous kitchen renovation projects. Inquire about the type of services they offer, including design, installation, and project management.
Ask for references and take the time to contact previous clients to inquire about their experience working with the contractor. Ask about the contractor’s communication skills, reliability, and ability to meet deadlines.
Verify that the contractor is licensed, insured, and bonded. This will protect you from liability in case of accidents or damage during the renovation process. Request proof of insurance and ask about any warranties or guarantees offered.
Discuss your budget and timeline with each contractor and get a detailed estimate for the project. Compare the proposals and pay attention to the level of detail provided. A thorough and transparent estimate will help you gauge the contractor’s professionalism and attention to detail.
Trust your instincts and consider the rapport and communication style of each contractor. The kitchen renovation process can be lengthy, so it’s important to choose someone you feel comfortable working with and can trust to bring your vision to life.
Once you have chosen a contractor, make sure to have a written contract in place. The contract should include a detailed scope of work, project timeline, payment schedule, warranty information, and any specific terms or conditions.
Remember, finding the right contractor is essential for a successful kitchen renovation. Take the time to do your research, ask the right questions, and choose someone who understands your vision and can deliver high-quality work within your budget and timeline.
Step 3: Creating a Temporary Kitchen Setup
During a kitchen renovation, it’s essential to plan and create a temporary kitchen setup to ensure you can still prepare meals and maintain some level of functionality in your home. This temporary kitchen will be your lifeline during the renovation process.
Start by designating a space in your home that can serve as your temporary kitchen. This can be a spare room, basement, garage, or even an outdoor area if weather permits. Consider factors such as access to water, electricity, and ventilation.
Next, assess the essential appliances and equipment you’ll need to set up your temporary kitchen. These typically include a microwave, toaster oven, electric kettle, portable electric stovetop, and a small refrigerator. If possible, borrow or rent these items to minimize costs.
Set up a temporary countertop space using folding tables or sturdy countertops placed on sawhorses. Ensure the surface is clean, level, and stable. This will serve as your prep area for preparing meals and storing necessary items.
Create a designated space for your cooking utensils, pots, pans, dishes, and cutlery. Use storage bins or plastic totes to keep everything organized and easily accessible. Label each container to avoid confusion and make unpacking easier once the renovation is complete.
Plan your meals in advance and consider using simple recipes that require minimal cooking time and equipment. Opt for easy-to-prepare meals such as salads, sandwiches, soups, and slow cooker recipes. Stock up on non-perishable pantry items to ensure you have enough food during the renovation.
While your main kitchen is undergoing renovation, it’s essential to maintain cleanliness and hygiene in your temporary kitchen. Clean and sanitize surfaces regularly and wash dishes promptly to avoid any build-up or odors.
Don’t forget to set up a makeshift dining area in a nearby space, such as your living room or dining room. Ensure you have enough seating and a small table or tray for meals.
Lastly, embrace the opportunity to dine out occasionally or order takeout as a treat during the renovation process. This will help alleviate some of the stress and give you a break from cooking in your temporary kitchen.
Creating a temporary kitchen setup requires careful planning and organization. By setting up a functional space and having the necessary appliances and equipment, you’ll be able to navigate through the renovation period with ease and still enjoy homecooked meals.
Step 4: Clearing and Preparing the Space
Before the actual renovation work can begin, it’s important to clear and prepare the space in your kitchen. This step involves removing all existing fixtures, appliances, cabinets, and flooring to create a clean slate for the renovation.
Start by emptying your kitchen cabinets and drawers. Sort through the items and decide what to keep, donate, or discard. Pack away any kitchenware and utensils that you’ll need during the renovation in labeled boxes or storage bins.
Next, remove any appliances such as refrigerators, ovens, and dishwashers. Make sure to disconnect them properly and safely, following the manufacturer’s instructions. Store these appliances in a safe location or consider hiring a storage unit for the duration of the renovation.
If you’re unable to remove larger fixtures or appliances on your own, consider hiring a professional to assist you with their removal. This will ensure that they are handled safely and that no damage is caused in the process.
Once the cabinets and appliances have been removed, focus on removing the flooring and wall coverings. Depending on the material, this may involve pulling up carpet, removing tile, or scraping off wallpaper. Take the necessary precautions and use appropriate tools to protect yourself and the integrity of the space.
Throughout the clearing and preparation process, it’s important to maintain a clean and organized work area. Dispose of debris properly and keep the space free from hazards such as exposed wires or sharp objects.
Consider covering any furniture or fixtures that will remain in the adjacent areas to protect them from dust and debris. Use plastic sheets or drop cloths to create a barrier and minimize the impact of the renovation on the rest of your home.
Finally, take the time to inspect the space for any underlying issues that may need to be addressed before the renovation begins. Look for signs of water damage, mold, or structural issues. It’s important to address these issues early on to avoid further problems down the line.
Clearing and preparing the space sets the stage for the actual renovation work. By taking the time to properly remove fixtures, appliances, and flooring, you’ll ensure a clean and safe environment for the renovation process to begin.
Read more: How To Survive Guarana Seeds
Step 5: Choosing and Ordering Materials and Fixtures
Choosing the right materials and fixtures for your kitchen renovation is an exciting and important step in the process. These elements will not only define the overall look and feel of your kitchen but also contribute to its functionality and durability. Here are some considerations to guide you in making informed decisions:
1. Flooring: Select a flooring material that is durable, easy to clean, and complements your design aesthetic. Options such as hardwood, tile, vinyl, and laminate offer a range of styles and price points.
2. Countertops: Consider factors such as durability, maintenance, and aesthetics when choosing your countertops. Popular choices include granite, quartz, marble, and laminate. Make sure to select a material that can withstand the demands of your kitchen activities.
3. Cabinets: Decide on the style, finish, and material for your kitchen cabinets. Choose between custom, semi-custom, and stock options based on your budget and preferences. Consider factors such as storage needs, functionality, and design cohesion with the rest of your kitchen.
4. Appliances: Select appliances that fit your cooking habits, space, energy efficiency requirements, and design aspirations. Consider the size, features, and finishes that will best suit your needs and aesthetic preferences. Look for reputable brands and read reviews to ensure quality and reliability.
5. Backsplash: Determine the material and design of your backsplash. Popular options include tile, glass, stainless steel, and natural stone. Consider the ease of maintenance, durability, and how it will complement your overall kitchen design.
6. Lighting: Plan the lighting design for your kitchen, including overhead lighting, task lighting, and accent lighting. Consider the placement, type of fixtures, and energy efficiency. Lighting plays a crucial role in creating a functional and visually appealing space.
7. Plumbing fixtures: Choose faucets, sinks, and other plumbing fixtures that not only match your design aesthetic but also meet your functionality needs. Look for features such as water-saving capabilities and durability for long-term use.
When choosing materials and fixtures, it’s important to consider your budget, personal style, and long-term goals. Research different options, visit showrooms, and consult with professionals to make informed decisions that will meet both your aesthetic and practical needs.
Once you have made your selections, it’s time to order the materials and fixtures. Ensure accurate measurements and consult with your contractor or designer to ensure compatibility and proper installation. Keep track of delivery dates and coordinate with your contractor to ensure a seamless process.
Choosing and ordering materials and fixtures may seem overwhelming, but with careful consideration and planning, you can create a kitchen that reflects your personal style and meets your functional requirements.
Plan and set up a temporary kitchen in another area of your home to continue preparing meals during the renovation. This can include a microwave, toaster oven, and mini fridge.
Step 6: Managing the Renovation Progress
Managing the progress of your kitchen renovation is crucial to ensure that the project stays on track and is completed to your satisfaction. Effective project management involves clear communication, regular updates, and addressing any issues or changes that may arise. Here are some tips for successfully managing the renovation progress:
1. Regular Communication: Maintain open and frequent communication with your contractor or renovation team. Schedule regular meetings to discuss the project’s progress, upcoming tasks, and any changes or concerns. Keep a record of all communication and important decisions made throughout the process.
2. On-Site Visits: Visit the renovation site regularly to assess the progress and address any concerns in person. This allows you to have a firsthand understanding of the work being done and ensures that it aligns with your vision and expectations.
3. Timelines and Deadlines: Establish a timeline for the renovation and ensure that key milestones and deadlines are clearly communicated to all parties involved. Regularly check the progress against the schedule and address any delays or issues promptly to keep the project on track.
4. Flexibility and Adaptability: Understand that unexpected issues or changes may arise during the renovation process. Stay flexible and be prepared to make adjustments as needed. Communicate any changes or concerns promptly to your contractor to ensure a timely resolution.
5. Budget Management: Stay on top of your budget and track all expenses related to the renovation. Regularly review invoices and payments to ensure accuracy. Be proactive in addressing any potential cost overruns or unexpected expenses, and discuss these with your contractor.
6. Quality Control: Regularly inspect the work being done and address any quality concerns immediately. Take the time to ensure that workmanship meets your expectations and that any necessary corrections or adjustments are made promptly.
7. Decision-making: Be proactive in making decisions related to the renovation. Timely decision-making helps keep the project moving forward and minimizes delays. Seek input from your contractor or designer when needed, but ultimately make choices that align with your vision and preferences.
8. Documentation: Keep detailed documentation of all renovation-related documents, including contracts, permits, design plans, and receipts. This will help you stay organized and provide a reference point for future needs or inquiries.
Remember, managing the renovation progress requires active involvement and open communication. By staying engaged, adaptable, and organized, you can ensure that your kitchen renovation is completed smoothly and to your satisfaction.
Step 7: Dealing with Challenges and Setbacks
Renovation projects, including kitchen renovations, often come with their fair share of challenges and setbacks. It’s important to be prepared for unexpected obstacles and have strategies in place to handle them effectively. Here are some tips for dealing with challenges and setbacks during your kitchen renovation:
1. Maintain a Positive Attitude: Renovations can be stressful and overwhelming, especially when faced with challenges. Stay positive and remind yourself that setbacks are a normal part of the process. Having a positive mindset will help you approach challenges with a solutions-oriented mindset.
2. Effective Communication: Open and clear communication is crucial when facing challenges. Maintain open lines of communication with your contractor, discussing any concerns or issues that arise promptly. Keep a record of all communication and important decisions made during the process.
3. Problem-Solving and Troubleshooting: When challenges arise, take a proactive approach in finding solutions. Consult with your contractor, designer, or other professionals involved in the renovation project to brainstorm potential solutions and alternatives. Assess the situation, consider all available options, and make a decision based on what aligns best with your goals and constraints.
4. Flexibility and Adaptability: Be prepared to adjust your plans and expectations as needed. Setbacks may require changes to the timeline, design, or budget. Stay flexible and work closely with your contractor to find alternatives or solutions that minimize the impact of the setback.
5. Seek Professional Assistance: In some cases, it may be necessary to bring in specialized professionals to address specific challenges or setbacks. This could include hiring a structural engineer, electrician, or plumber to resolve unexpected issues. Trust their expertise and rely on their guidance to ensure the problem is addressed correctly.
6. Budget Management: Evaluate the impact of the setback on your budget and consider if additional funds are needed to address the issue. Discuss any cost implications with your contractor and ensure that all additional expenses are documented and agreed upon in writing.
7. Patience and Resilience: Renovations can be time-consuming and patience is key. Understand that setbacks are likely to cause delays, but remain resilient and focused on the end goal. Trust that your contractor is working to resolve the issues and keep the project moving forward.
8. Learn from the Experience: Use setbacks and challenges as an opportunity to learn and grow. Reflect on what went wrong and why, and consider how you can prevent similar issues in future renovation projects.
Remember, facing challenges and setbacks during a kitchen renovation is not uncommon. By maintaining a positive attitude, effective communication, and a problem-solving mindset, you can navigate through these obstacles and ensure a successful completion of your renovation project.
Step 8: Maintaining Sanity during the Renovation
Renovating a kitchen can be a stressful and disruptive experience, but there are strategies you can employ to maintain your sanity throughout the process. Here are some tips to help you stay calm and centered during the renovation:
1. Establish Realistic Expectations: Understand that renovations can be messy, time-consuming, and may disrupt your daily routine. Set realistic expectations from the start and be prepared to adapt to temporary inconveniences.
2. Create a Routine: Establish a routine that allows you to maintain a sense of normalcy amidst the renovation chaos. Set specific times for meals, relaxation, and self-care. Having a daily routine can help provide structure and reduce stress.
3. Take Breaks: It’s important to take breaks from the renovation process. Step away from the construction zone and engage in activities that help you relax and recharge. This could be going for a walk, practicing mindfulness or meditation, or indulging in a hobby or interest.
4. Designate a Sanctuary: Set aside a specific area in your home that is not part of the renovation process. This space can be your sanctuary, a place where you can retreat to find peace and tranquility away from the chaos.
5. Stay Organized: Maintaining organization amidst a renovation can help alleviate stress. Keep track of important documents, receipts, and contracts. Use labels and storage bins to keep items organized and easily accessible.
6. Communicate with your Contractor: Regularly communicate with your contractor to ensure you are on the same page. Be open about your concerns or any changes in your expectations. Effective communication can help address issues promptly and prevent misunderstandings.
7. Seek Support: Reach out to friends, family, or support groups who have gone through a renovation process. They can provide empathy, practical advice, and possibly even recommend coping strategies that worked for them.
8. Practice Self-Care: Pay attention to your needs and prioritize self-care throughout the renovation process. Eat well, exercise regularly, and get enough sleep. Take time for activities that bring you joy and help you relax.
9. Focus on the End Result: Remind yourself of the exciting outcome that awaits you at the end of the renovation journey. Visualize how your new kitchen will look and feel, and let that vision keep you motivated and excited for the finished product.
10. Be Grateful: Practice gratitude for the opportunity to renovate and improve your home. Focus on the positive aspects of the process and the progress that is being made. Expressing gratitude can help shift your mindset and make the experience more enjoyable.
Remember, a kitchen renovation can be a challenging experience, but by employing these strategies to maintain your sanity, you can navigate the process with resilience and patience.
Read more: How To Store Food For Survival
Step 9: Finalizing the Renovation and Cleanup
Congratulations! You’ve reached the final step of your kitchen renovation journey. It’s time to put the finishing touches on your project and ensure that everything is cleaned up and ready for use. Here are some essential tasks to complete during this phase:
1. Inspect the Work: Take a thorough walk-through of your newly renovated kitchen. Inspect all aspects of the project to ensure that the work has been completed according to your expectations. Test appliances, check for any visible defects or issues, and make a note of anything that needs attention.
2. Address Any Pending Tasks: If there are any remaining tasks or outstanding work, discuss these with your contractor and ensure they are completed before finalizing the project. This includes touch-ups, installations, or any other tasks that require attention to detail.
3. Finalize Payments: Review the terms of your agreement with the contractor and make any final payments as agreed upon. Ensure that all invoices are accurate and that you have received all necessary documentation and receipts.
4. Clean and Organize: After all construction work is completed, thoroughly clean your new kitchen area. Wipe down surfaces, cabinets, and appliances. Remove any construction debris and dust. Organize your cabinets and drawers, ensuring everything is in its proper place.
5. Test Functionality: Test all appliances, plumbing fixtures, and electrical outlets to ensure they are functioning properly. Check for any leaks, loose connections, or malfunctions. If you come across any issues, notify your contractor to have them addressed promptly.
6. Celebrate and Enjoy: Once everything is cleaned up and in working order, take a moment to celebrate the completion of your kitchen renovation project. Invite friends or family over for a meal and enjoy the space you have worked so hard to create.
7. Maintain and Care for Your New Kitchen: Take the necessary steps to maintain your newly renovated kitchen. Follow any care instructions provided by the manufacturer for your appliances, countertops, and flooring. Keep up with regular cleaning and maintenance tasks to preserve the quality and longevity of your investment.
Remember, the finalization and cleanup stage is the last step in your kitchen renovation journey. Completing these tasks ensures that your new kitchen is not only visually appealing but also functional and ready for use. Take the time to savor your accomplishment and enjoy the fruits of your hard work.
Conclusion
Congratulations on completing your kitchen renovation journey! The process may have been challenging at times, but the end result is a beautiful, functional, and personalized space that reflects your style and meets your needs.
Throughout this comprehensive guide, we have covered the essential steps to help you survive and thrive during a kitchen renovation. From planning and budgeting to finding the right contractor, creating a temporary kitchen setup, and managing the renovation progress, each step has played a crucial role in the success of your project.
We discussed the importance of effective communication, maintaining a positive attitude, and adapting to unexpected challenges. We also emphasized the significance of self-care, maintaining sanity, and celebrating the milestones achieved along the way.
Remember, a successful kitchen renovation requires careful planning, a clear vision, and collaboration with skilled professionals. It’s essential to set realistic expectations, stay organized, and adapt to unforeseen circumstances. By following these steps and leveraging the tips provided, you have navigated the renovation process with grace and determination.
As you embark on this new chapter with your renovated kitchen, continue to care for and maintain your space. Regular cleaning and proper maintenance will help preserve its beauty and functionality for years to come.
Lastly, take a moment to appreciate the transformation you have achieved. Your kitchen is now a reflection of your personal style and a space where memories will be created and cherished. Whether you’re enjoying family meals, hosting gatherings, or simply savoring moments of solitude, your renovated kitchen will be at the heart of it all.
Thank you for joining us on this renovation journey. We hope this guide has provided you with the knowledge and inspiration to create the kitchen of your dreams. Cheers to your beautifully renovated kitchen and the memories that will be made within its walls.
Frequently Asked Questions about How To Survive A Kitchen Renovation
Was this page helpful?
At Storables.com, we guarantee accurate and reliable information. Our content, validated by Expert Board Contributors, is crafted following stringent Editorial Policies. We're committed to providing you with well-researched, expert-backed insights for all your informational needs.


0 thoughts on “How To Survive A Kitchen Renovation”