Home>Furniture & Design>Bathroom Accessories>What Type Of Mortar Do You Use To Set A Bathtub
Bathroom Accessories
What Type Of Mortar Do You Use To Set A Bathtub
Modified: October 20, 2024
Discover the best type of mortar for setting a bathtub and ensure a secure installation. Find the right mortar for your bathroom accessories today!
(Many of the links in this article redirect to a specific reviewed product. Your purchase of these products through affiliate links helps to generate commission for Storables.com, at no extra cost. Learn more)
Introduction
Setting a bathtub is a crucial aspect of bathroom installation, and choosing the right type of mortar is essential for ensuring a secure and long-lasting fit. The mortar used for setting a bathtub plays a pivotal role in providing structural support, stability, and water resistance. It serves as the foundation that anchors the bathtub in place, preventing movement and potential damage over time. Understanding the different types of mortar available and the proper application process is vital for a successful bathtub installation.
In this comprehensive guide, we will delve into the various types of mortar suitable for setting a bathtub, the essential steps for preparing the surface, mixing and applying the mortar, and the crucial aspects of curing and finishing the installation. Whether you are a seasoned professional or a DIY enthusiast, this article aims to equip you with the knowledge and insights necessary to execute a bathtub installation with confidence and precision.
The process of setting a bathtub with mortar involves a combination of technical expertise and practical skill. By familiarizing yourself with the nuances of mortar selection and application, you can ensure that the bathtub is securely positioned and sealed, creating a functional and aesthetically pleasing bathroom space. Let's explore the intricacies of mortar selection and application for setting a bathtub, empowering you to embark on this essential aspect of bathroom design and construction with proficiency and assurance.
Key Takeaways:
- Choose the right mortar for your bathtub installation to ensure durability and water resistance. Options include Portland cement, polymer-modified, epoxy, dry-set, and pre-mixed mortars, each with unique benefits.
- Prepare the surface meticulously, mix and apply the mortar with precision, and focus on curing and finishing for a secure and visually appealing bathtub installation.
Types of Mortar for Setting a Bathtub
When it comes to setting a bathtub, selecting the appropriate type of mortar is crucial for ensuring a secure and durable installation. Different types of mortar offer distinct properties and are designed to meet specific requirements for setting bathtubs. Understanding the characteristics of each type of mortar is essential for making an informed choice that aligns with the unique needs of the installation.
1. Portland Cement Mortar:
Portland cement mortar is a popular choice for setting bathtubs due to its exceptional strength and durability. Composed of Portland cement, sand, and water, this type of mortar provides a solid foundation for securing the bathtub in place. Its ability to withstand heavy loads and resist water penetration makes it well-suited for long-term bathtub installations.
2. Polymer-Modified Mortar:
Polymer-modified mortar offers enhanced flexibility and adhesion, making it an ideal option for setting bathtubs in areas prone to temperature fluctuations and structural movement. The addition of polymers improves the mortar's ability to withstand stress and movement, reducing the risk of cracks and ensuring a reliable bond between the bathtub and the substrate.
3. Epoxy Mortar:
Epoxy mortar is renowned for its exceptional bonding strength and resistance to chemicals and moisture. This type of mortar is particularly suitable for setting bathtubs in environments where exposure to harsh chemicals or frequent water contact is anticipated. Its non-porous nature provides superior protection against water damage, making it a valuable choice for long-lasting bathtub installations.
Read more: What Type Of Mortar For Backsplash
4. Dry-Set Mortar:
Dry-set mortar, also known as dry-pack mortar, is characterized by its minimal water content and high compressive strength. It is commonly used for setting bathtubs in areas where moisture sensitivity is a concern, as its low water content minimizes the risk of water-related issues such as mold and mildew. Dry-set mortar offers excellent stability and is well-suited for supporting heavy bathtub units.
5. Pre-Mixed Mortar:
Pre-mixed mortar offers convenience and ease of use, making it a practical choice for setting bathtubs in residential and commercial settings. This type of mortar is formulated with the ideal blend of cement, sand, and additives, ensuring consistent quality and reliable performance. Its user-friendly nature makes it suitable for DIY bathtub installations, providing a hassle-free solution for achieving a secure and stable fit.
By understanding the unique characteristics and advantages of each type of mortar, you can make an informed decision based on the specific requirements of the bathtub installation. Whether prioritizing strength, flexibility, chemical resistance, or ease of application, selecting the right type of mortar is essential for laying the groundwork for a successful and enduring bathtub setting.
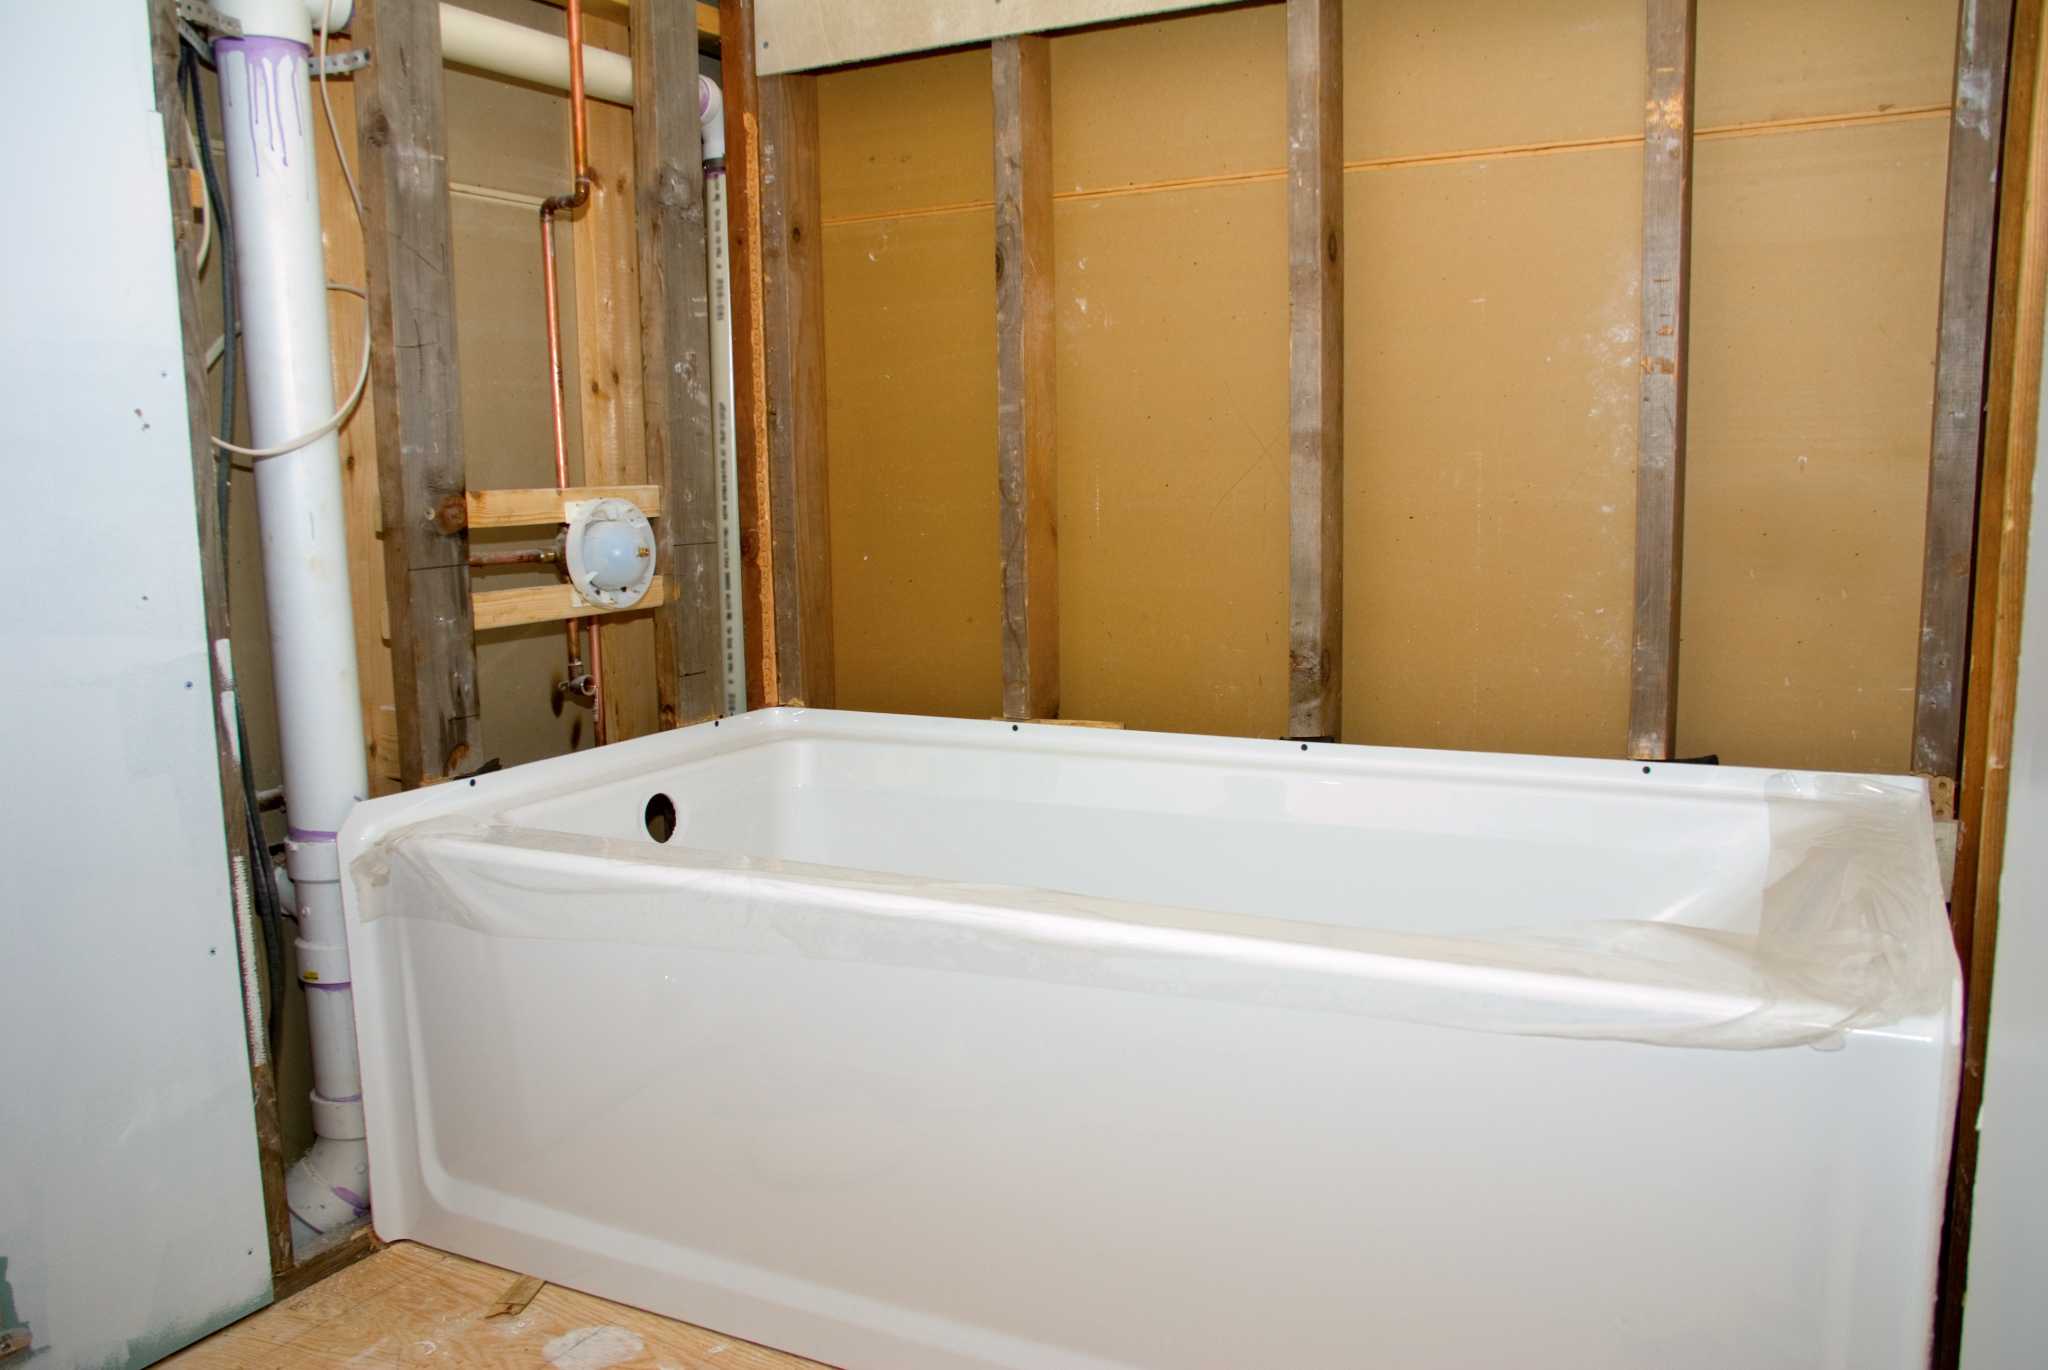
Preparing the Surface for Mortar Application
Before applying the mortar for setting a bathtub, thorough surface preparation is essential to ensure optimal adhesion, stability, and long-term performance. The surface on which the bathtub will be installed must be meticulously cleaned, leveled, and primed to create an ideal substrate for the mortar application.
Cleaning the Surface:
The first step in preparing the surface involves removing any debris, dust, or residues that could compromise the adhesion of the mortar. Using a suitable cleaning solution and a scrubbing brush, the surface should be thoroughly cleaned to eliminate dirt, grease, and other contaminants. Additionally, any existing sealants or adhesives should be completely removed to facilitate a clean and uniform bonding surface.
Read more: What Type Mortar For Stone Veneer
Leveling the Substrate:
Ensuring that the substrate is level and even is crucial for preventing structural issues and ensuring a secure bathtub installation. Any uneven or protruding areas should be carefully addressed, and the substrate should be leveled using a suitable leveling compound or mortar. This step is essential for creating a stable and uniform base that promotes proper weight distribution and minimizes the risk of stress points.
Priming the Surface:
Applying a primer to the prepared surface is a critical preparatory step that enhances the bond between the substrate and the mortar. The primer serves to promote adhesion, reduce porosity, and improve the overall integrity of the substrate. Depending on the specific characteristics of the substrate material, a compatible primer should be selected to optimize the bonding properties and ensure a robust connection between the mortar and the surface.
Inspecting for Structural Integrity:
Before proceeding with the mortar application, a comprehensive inspection of the substrate should be conducted to identify any structural weaknesses or damage. Cracks, deteriorated areas, or instability in the substrate should be addressed and repaired as necessary to fortify the foundation for the bathtub installation. Addressing structural concerns at this stage is crucial for preventing future issues and ensuring the long-term stability of the installation.
By meticulously preparing the surface for mortar application, you can establish a solid and reliable foundation for setting the bathtub. This proactive approach not only enhances the performance of the mortar but also contributes to the overall durability and integrity of the bathtub installation. Investing time and attention in surface preparation sets the stage for a successful and enduring bathtub setting, providing peace of mind and confidence in the structural soundness of the installation.
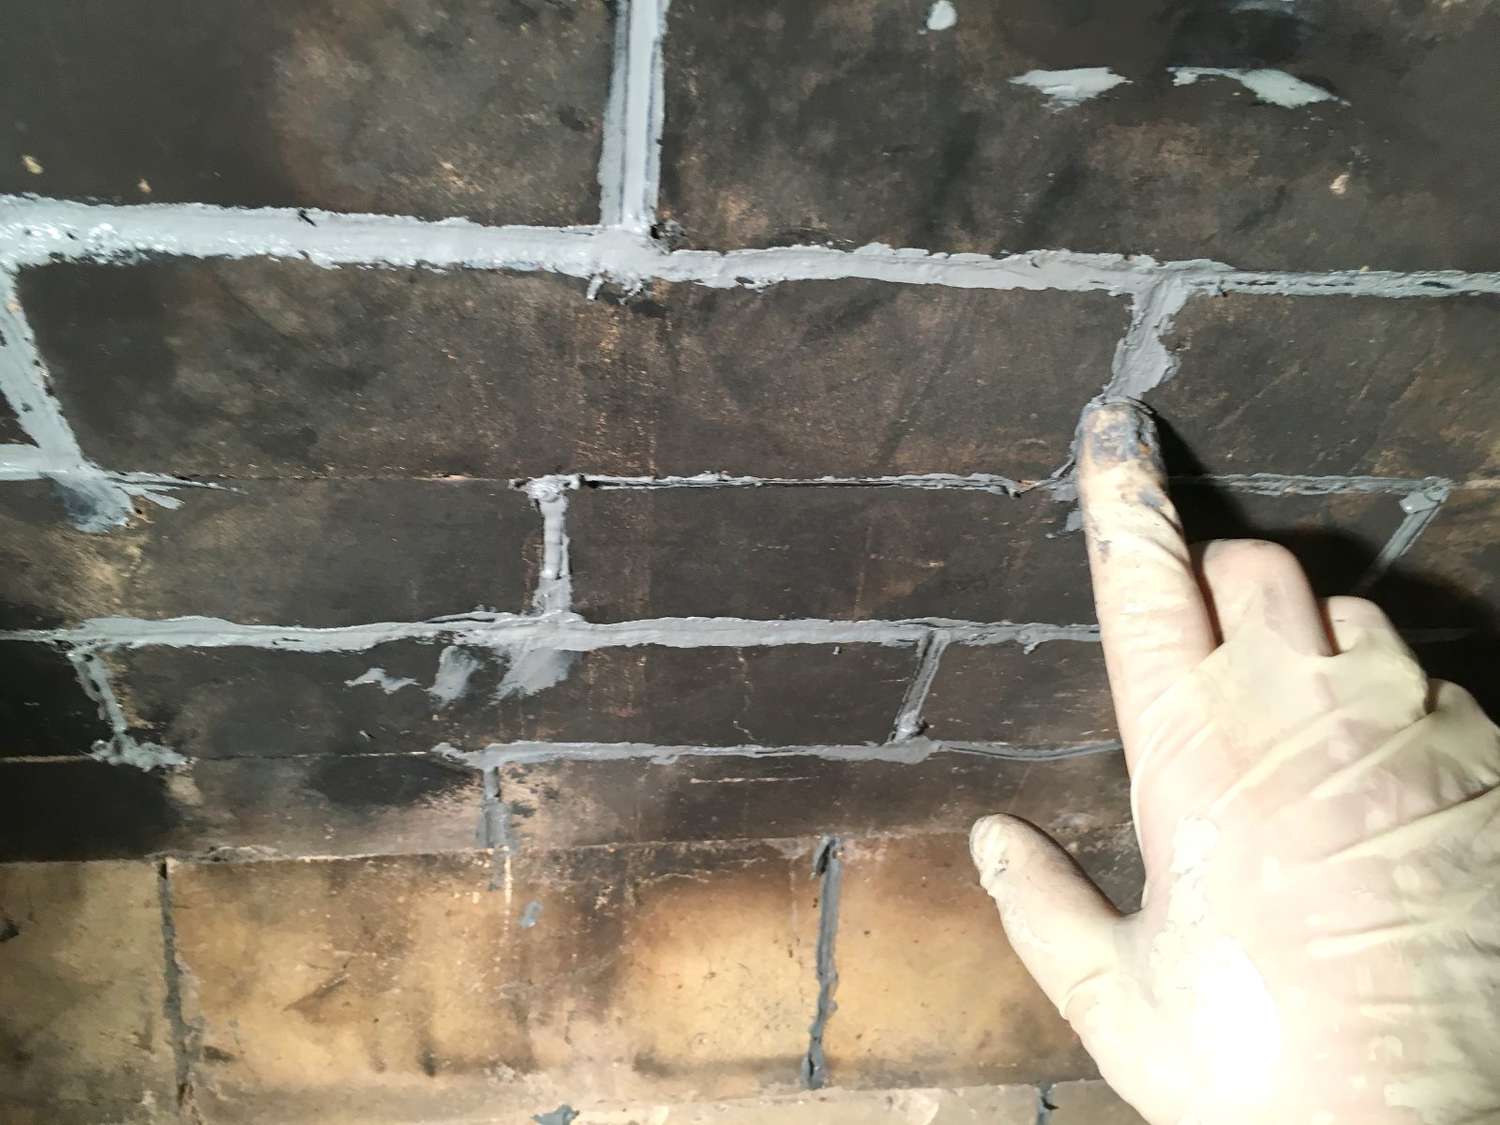
Mixing and Applying the Mortar
Mixing and applying the mortar for setting a bathtub is a critical phase that demands precision, attention to detail, and adherence to best practices. The process involves combining the selected type of mortar with water to achieve the ideal consistency, followed by skillfully applying the mortar to secure the bathtub in place.
Read more: How To Set A Bathtub In Mortar
Mixing the Mortar:
The first step in the process is to prepare the mortar mixture according to the manufacturer's guidelines and specifications. The correct ratio of mortar to water is essential for achieving the desired strength, workability, and adhesion. Using a clean and appropriately sized mixing container, the mortar and water should be combined in a systematic manner, ensuring thorough blending to create a homogeneous mixture. It is crucial to follow the recommended mixing time and technique to avoid inconsistencies in the mortar's properties.
Achieving the Ideal Consistency:
The consistency of the mortar plays a pivotal role in its workability and bonding capabilities. The mortar should be mixed to achieve a smooth, lump-free consistency that allows for easy application and proper adhesion. Care should be taken to avoid over-watering or under-watering the mixture, as this can compromise the mortar's strength and integrity. Achieving the ideal consistency is essential for ensuring that the mortar effectively supports and secures the bathtub without compromising its structural stability.
Applying the Mortar:
Once the mortar is properly mixed, it should be promptly applied to the prepared surface in a consistent and even manner. Using a suitable trowel, the mortar should be spread evenly to create a solid and uniform bed that accommodates the bathtub's base. Careful attention should be given to the thickness and coverage of the mortar layer, ensuring that it provides comprehensive support and contact with the bathtub's underside. The application process requires precision and meticulousness to guarantee a secure and stable fit for the bathtub.
Positioning the Bathtub:
After the mortar has been applied, the bathtub should be carefully lowered into position, ensuring proper alignment and contact with the mortar bed. The bathtub should be gently pressed and adjusted to achieve optimal positioning, allowing the mortar to establish a robust bond between the bathtub and the substrate. Any excess mortar that emerges from the sides should be promptly removed to maintain a clean and professional finish.
Read more: What Type Of Bathtub Is Best
Finishing Touches:
Once the bathtub is in place, any remaining gaps between the bathtub and the surrounding walls or floor should be filled with a suitable sealant to prevent water infiltration and enhance the overall integrity of the installation. The sealant should be applied meticulously to create a watertight barrier, contributing to the longevity and performance of the bathtub setting.
By meticulously following the mixing and application process, you can ensure that the mortar effectively supports and secures the bathtub, creating a stable and durable installation. The careful execution of these steps is instrumental in achieving a successful bathtub setting that meets the highest standards of quality and reliability.
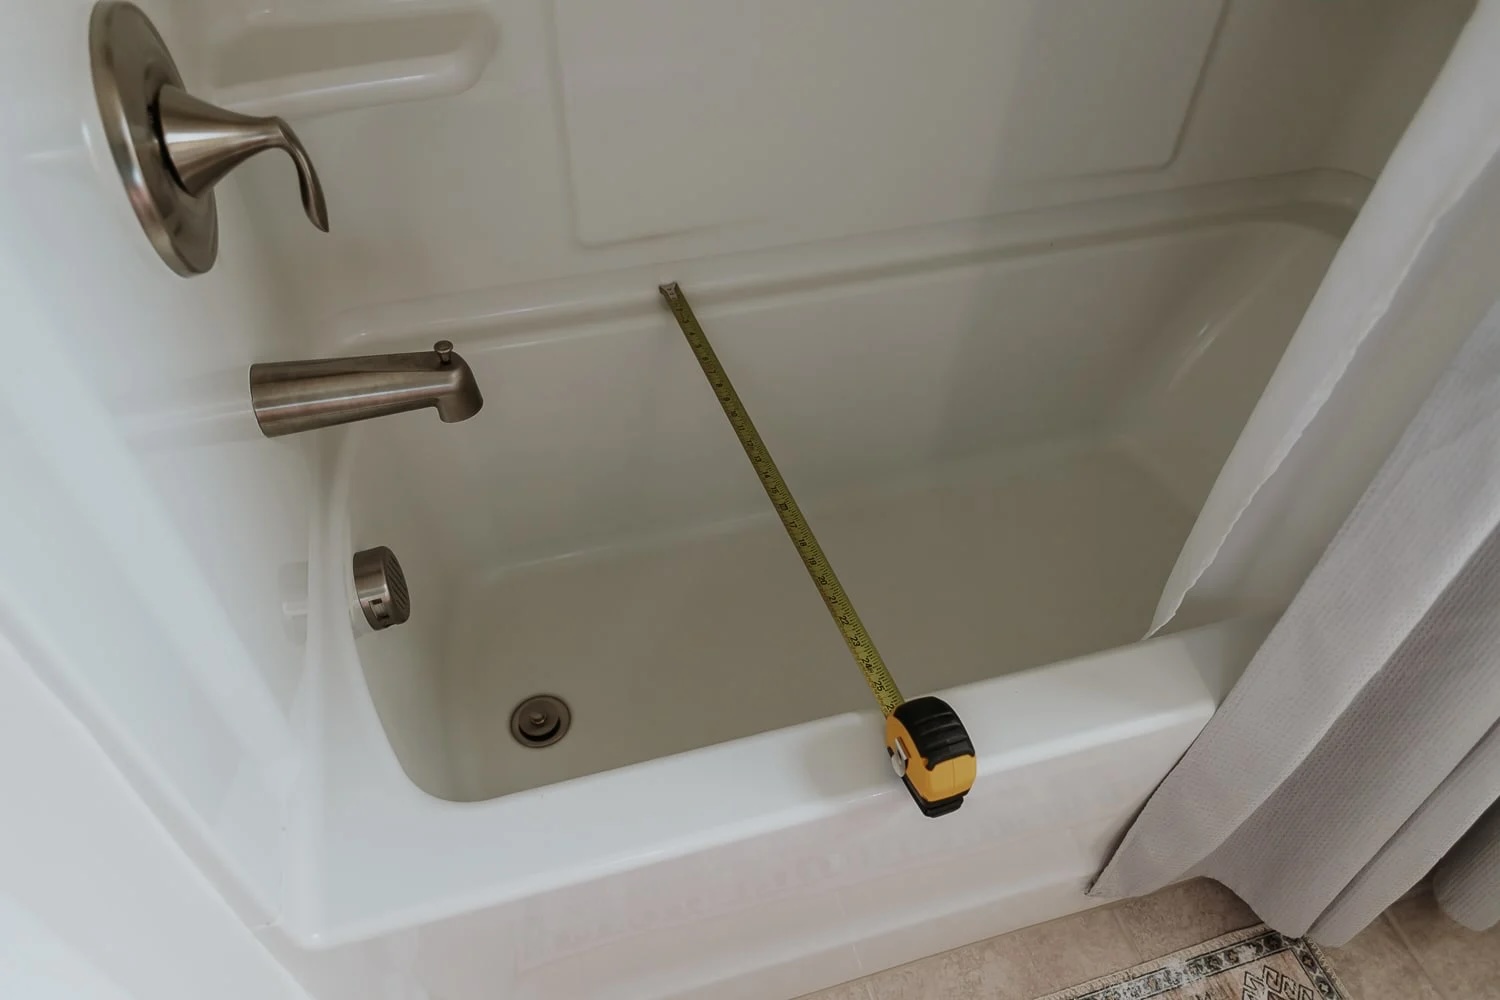
Curing and Finishing the Installation
Curing and finishing the installation of a bathtub involves essential steps that contribute to the overall strength, stability, and aesthetic appeal of the completed setting. Once the bathtub has been securely positioned and the mortar has been applied, attention turns to the crucial processes of curing the mortar and adding the finishing touches to the installation.
Curing the Mortar:
After the bathtub has been set in place and the mortar has been applied, allowing sufficient time for the mortar to cure is imperative for achieving optimal strength and stability. The curing process involves providing the mortar with the ideal conditions for hydration and solidification, allowing it to develop its full load-bearing capacity and resistance to stress. Depending on the type of mortar used, the curing time and environmental considerations may vary. It is essential to adhere to the manufacturer's recommendations regarding curing duration and environmental factors such as temperature and humidity. By allowing the mortar to cure thoroughly, the bathtub installation gains the necessary structural integrity and durability to withstand the demands of regular use and environmental conditions.
Sealing and Finishing:
Once the mortar has completed the curing process, attention can be directed towards the final finishing touches that enhance the overall appearance and functionality of the bathtub installation. Applying a high-quality sealant around the perimeter of the bathtub not only contributes to a polished and professional aesthetic but also serves as a crucial measure for preventing water seepage and maintaining the integrity of the installation. The sealant should be meticulously applied to ensure complete coverage and a watertight seal, safeguarding the surrounding areas from potential water damage and ensuring long-term durability.
In addition to sealing, inspecting the entire installation for any remaining imperfections or gaps is essential. Any areas that require additional caulking or touch-ups should be addressed promptly to achieve a seamless and visually appealing result. Attention to detail during the finishing phase contributes to the overall quality and longevity of the bathtub setting, creating a space that is not only structurally sound but also visually pleasing and resistant to potential water-related issues.
By prioritizing the curing of the mortar and meticulously attending to the finishing details, the installation of the bathtub is brought to completion with a focus on durability, functionality, and aesthetic appeal. These final steps are integral to ensuring that the bathtub setting not only meets the highest standards of quality and performance but also provides a visually appealing and reliable addition to the bathroom space.
Frequently Asked Questions about What Type Of Mortar Do You Use To Set A Bathtub
Was this page helpful?
At Storables.com, we guarantee accurate and reliable information. Our content, validated by Expert Board Contributors, is crafted following stringent Editorial Policies. We're committed to providing you with well-researched, expert-backed insights for all your informational needs.


0 thoughts on “What Type Of Mortar Do You Use To Set A Bathtub”