Home>Furniture & Design>Bathroom Accessories>How To Remove Pop Up Bathtub Drain
Bathroom Accessories
How To Remove Pop Up Bathtub Drain
Published: February 20, 2024
Learn how to remove a pop-up bathtub drain easily with our step-by-step guide. Upgrade your bathroom accessories hassle-free!
(Many of the links in this article redirect to a specific reviewed product. Your purchase of these products through affiliate links helps to generate commission for Storables.com, at no extra cost. Learn more)
Introduction
Removing a pop-up bathtub drain can seem like a daunting task, but with the right tools and a bit of know-how, it's a manageable DIY project that can save you time and money. Over time, pop-up bathtub drains can become clogged with hair, soap scum, and other debris, leading to slow drainage or even complete blockages. By learning how to remove the pop-up bathtub drain, you can effectively clean and maintain your plumbing system, ensuring optimal functionality and preventing potential water damage.
Whether you're renovating your bathroom or simply addressing a drainage issue, understanding the process of removing a pop-up bathtub drain is essential. This guide will walk you through the necessary steps, providing clear instructions and tips to help you complete the task with confidence. From gathering the required tools and materials to executing each step methodically, you'll gain the knowledge and skills needed to tackle this project effectively.
By following the steps outlined in this guide, you'll be able to remove the pop-up bathtub drain without the need for professional assistance. This not only empowers you to take control of your home maintenance but also allows you to address drainage issues promptly, preventing potential water damage and costly repairs down the line. Additionally, by learning how to remove and clean the pop-up bathtub drain, you can maintain a hygienic and pleasant bathroom environment for yourself and your family.
Now, let's dive into the details of the tools and materials you'll need to gather before embarking on this DIY project. With the right equipment at your disposal, you'll be well-prepared to tackle the task of removing the pop-up bathtub drain and ensuring that your plumbing system functions optimally.
Key Takeaways:
- Removing a pop-up bathtub drain is a manageable DIY project that can save time and money. By following the steps in this guide, homeowners can maintain a hygienic and efficient bathroom environment while preventing potential water damage.
- Gathering the right tools and materials is essential for successfully removing a pop-up bathtub drain. With patience and attention to detail, homeowners can tackle this DIY project with confidence and ensure the long-term reliability of their plumbing system.
Read more: How To Remove Drain Plug In Bathtub
Tools and Materials Needed
Before you begin the process of removing a pop-up bathtub drain, it's essential to gather the necessary tools and materials to ensure a smooth and efficient undertaking. Here's a comprehensive list of what you'll need:
Tools:
- Screwdriver Set: A set of screwdrivers, including both flat-head and Phillips-head varieties, will be essential for loosening and removing screws during the disassembly process.
- Needle-Nose Pliers: These specialized pliers are ideal for gripping and manipulating small components within the drain assembly, facilitating their removal.
- Adjustable Wrench: An adjustable wrench will enable you to loosen and remove the nut securing the drain flange, allowing for its extraction from the bathtub.
- Plumbers' Putty Knife: This tool is useful for scraping away old plumbers' putty from the drain flange and ensuring a clean surface for resealing the new drain assembly.
- Pipe Wrench: In some cases, a pipe wrench may be necessary for additional leverage when loosening the drain flange or other components.
Materials:
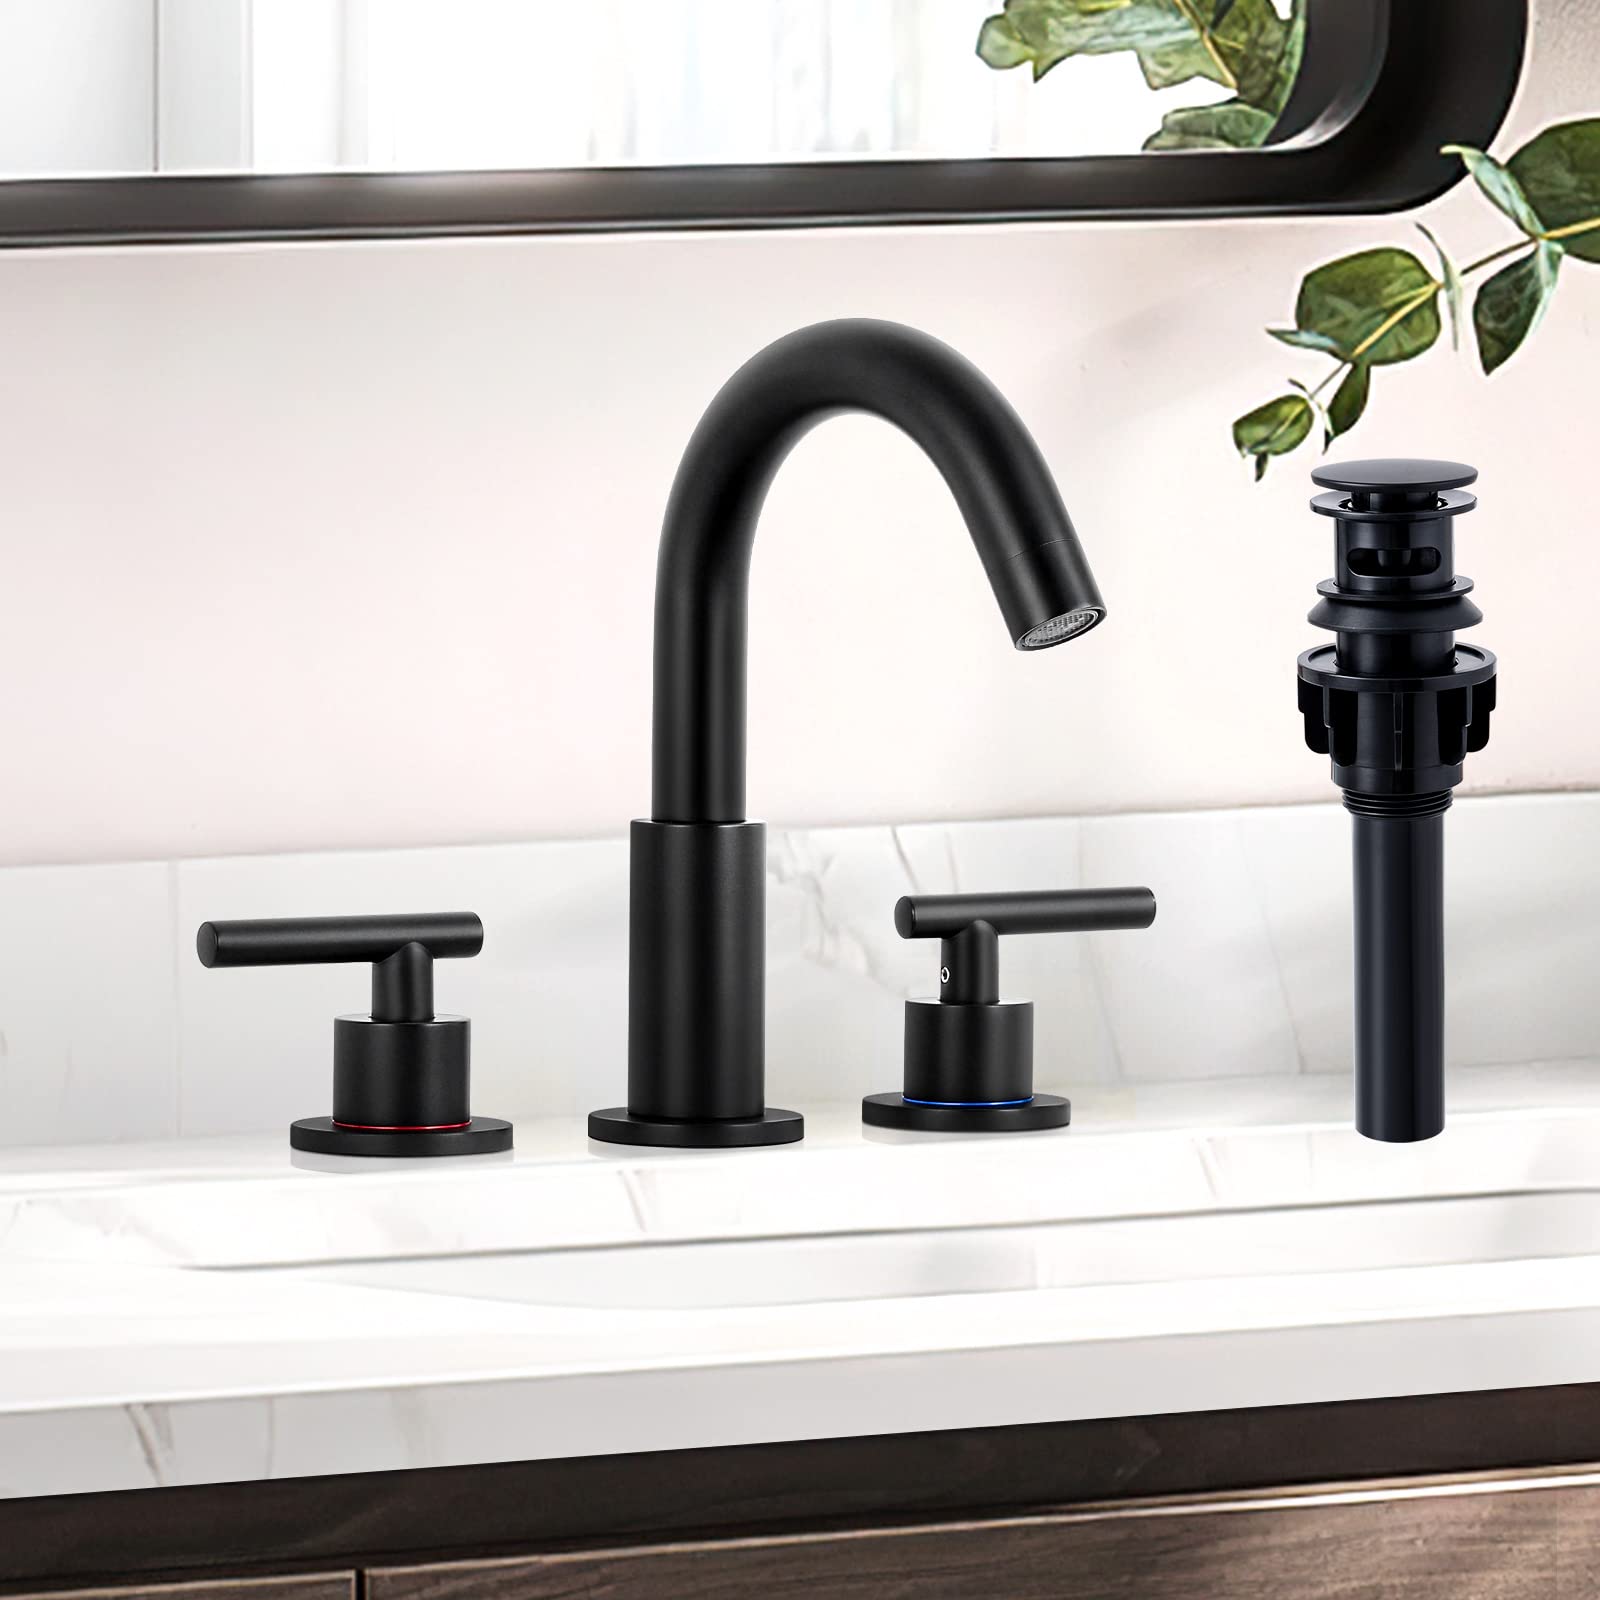
- Replacement Drain Assembly: Depending on your specific needs, you may require a new pop-up drain assembly to replace the existing one. Ensure that the replacement assembly is compatible with your bathtub's design and dimensions.
- Plumbers' Putty: This sealing compound is essential for creating a watertight seal between the new drain assembly and the bathtub, preventing leaks and ensuring proper functionality.
- Cleaning Solution: A mild cleaning solution or bathroom cleaner will be useful for removing any accumulated grime, soap scum, or debris from the drain and surrounding area.
- Rags or Towels: Having a supply of clean rags or towels on hand will allow you to wipe away excess water, cleaning solution, and debris as you work on the drain assembly.
- Rubber Gloves: To protect your hands during the cleaning and removal process, it's advisable to wear rubber gloves, especially when handling potentially unsanitary components.
By ensuring that you have these tools and materials readily available, you'll be well-equipped to proceed with the task of removing the pop-up bathtub drain. With everything in place, you can confidently move on to the next step, which involves removing the stopper from the drain assembly.
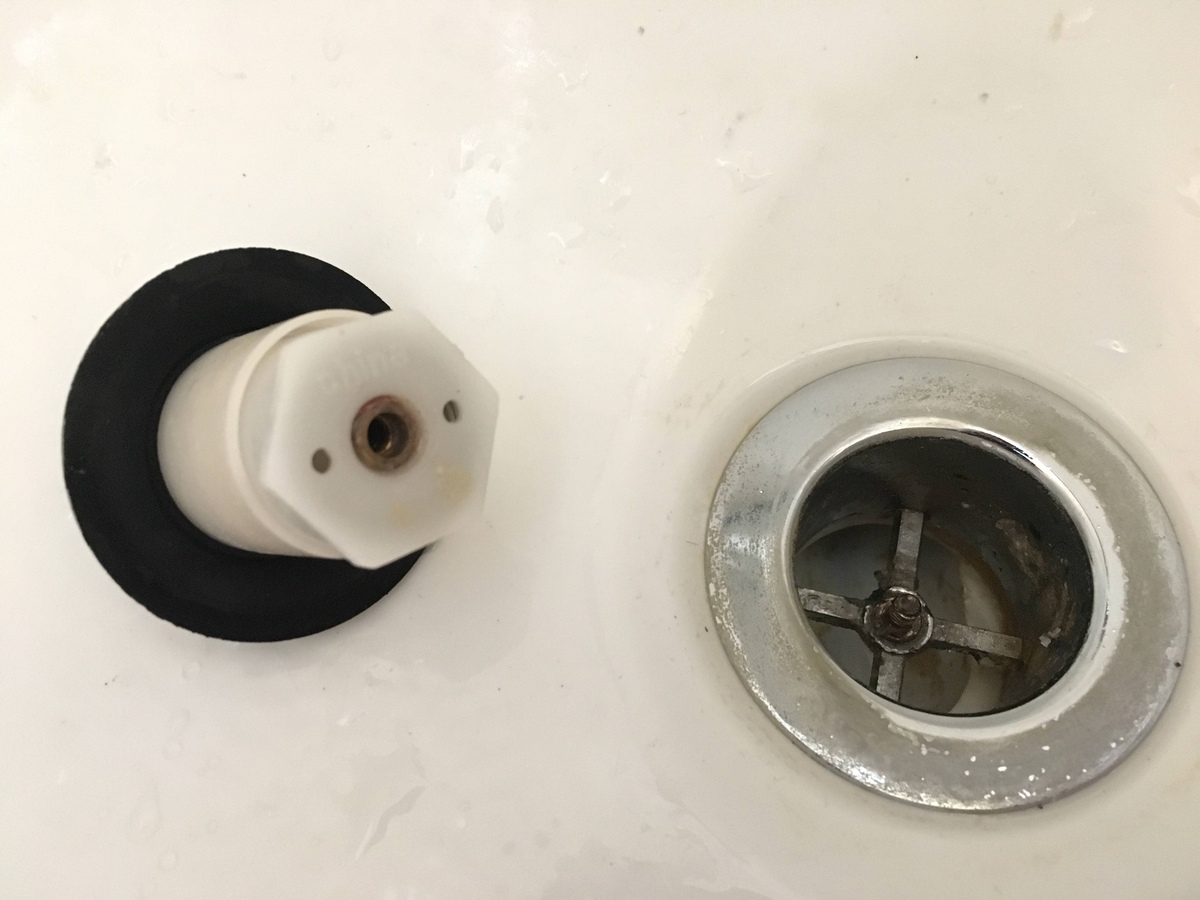
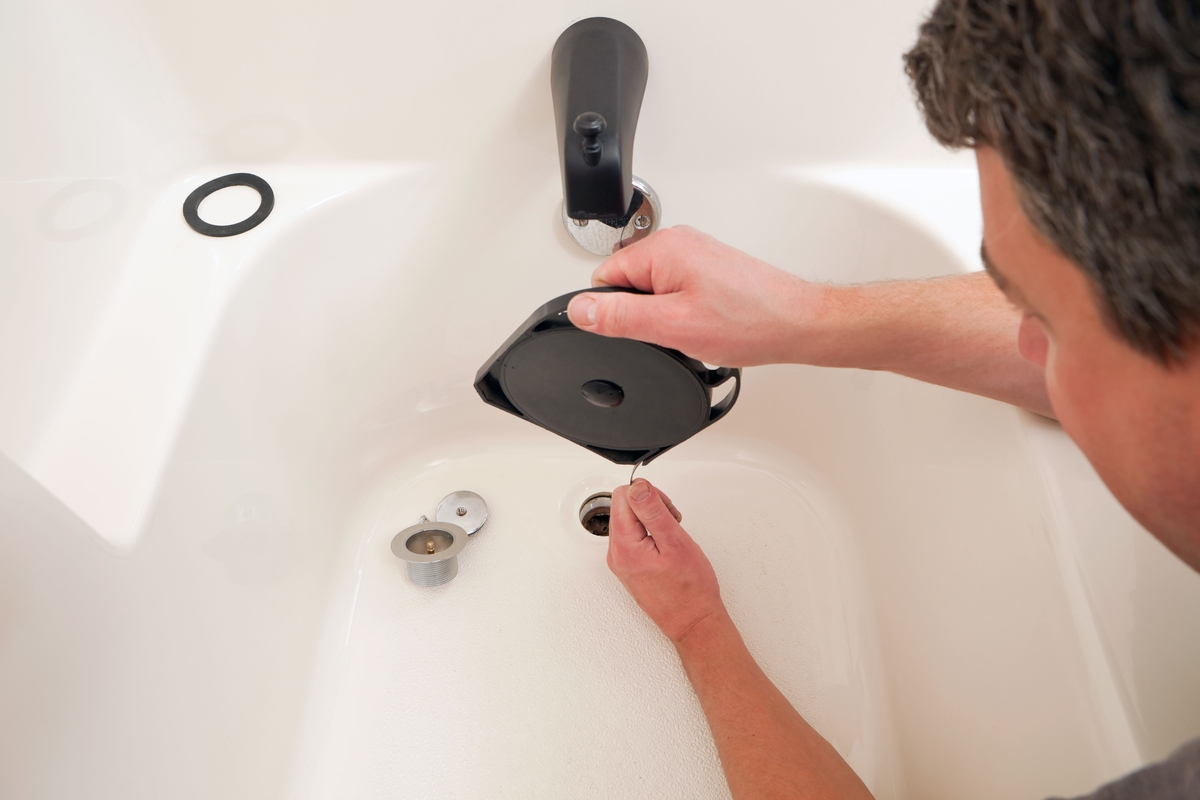
Step 1: Remove the Stopper
The first step in removing a pop-up bathtub drain is to eliminate the stopper from the drain assembly. This process involves disassembling the stopper mechanism to gain access to the underlying components. Here's a detailed guide on how to accomplish this essential initial step:
-
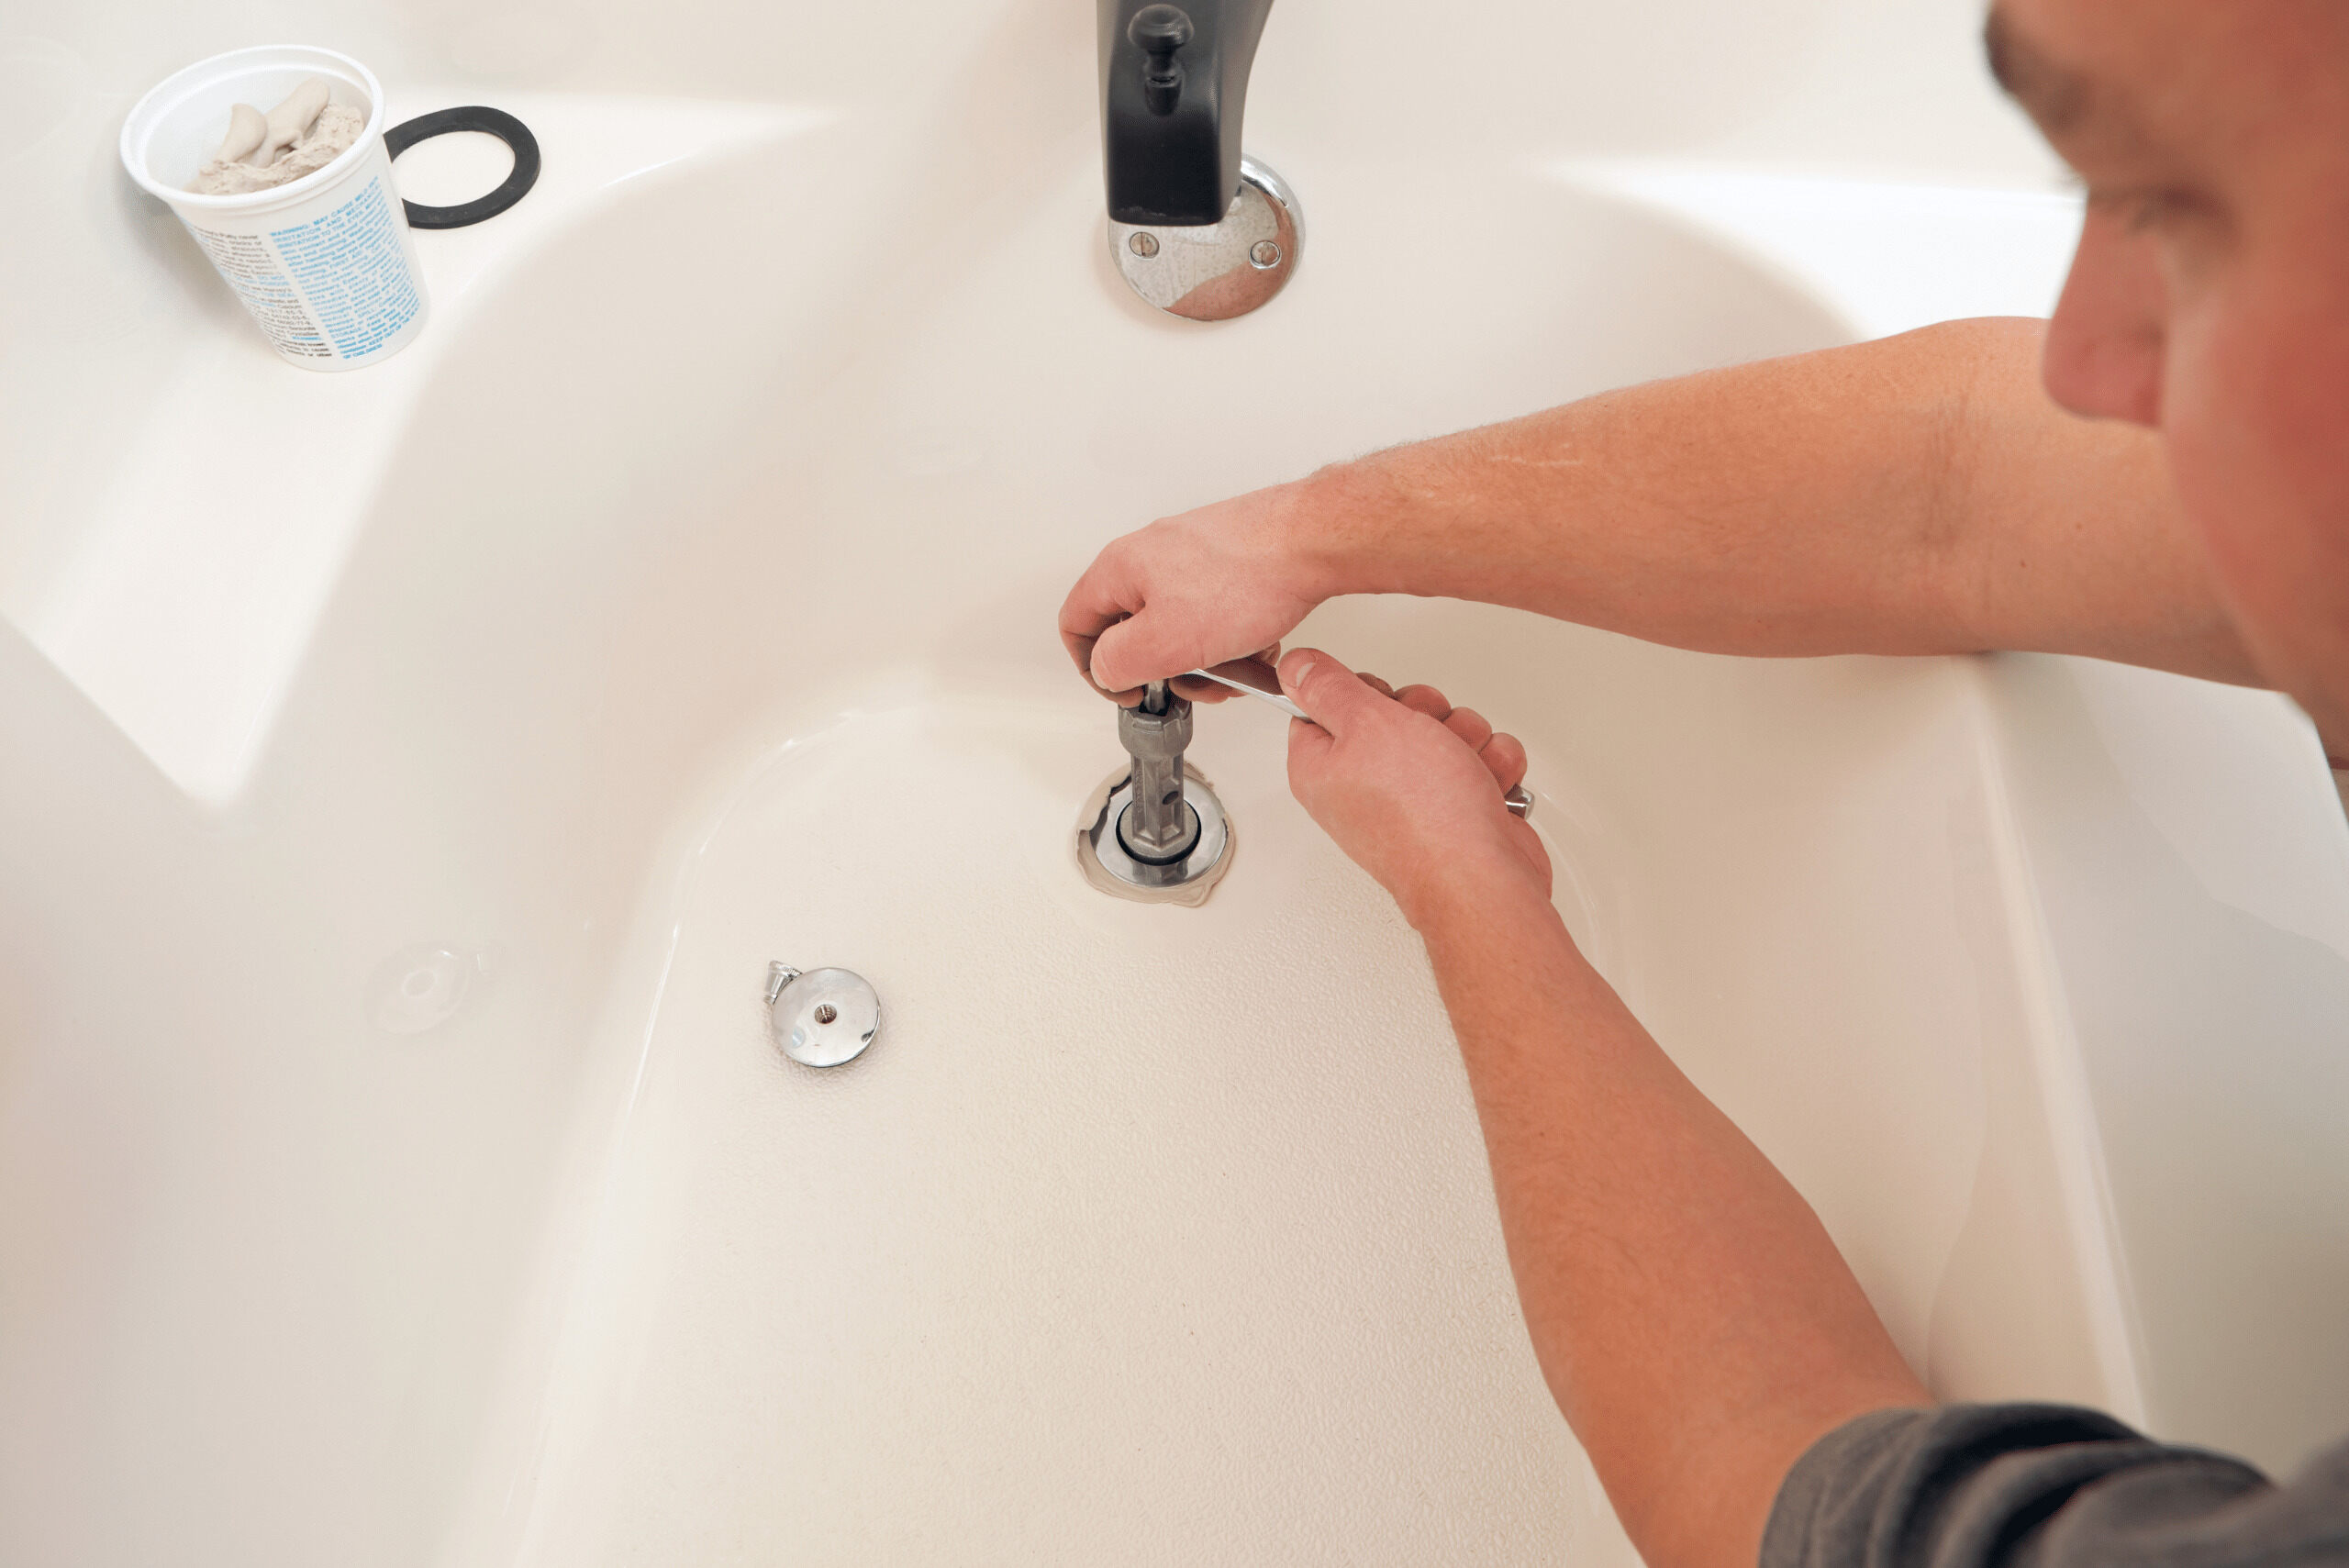
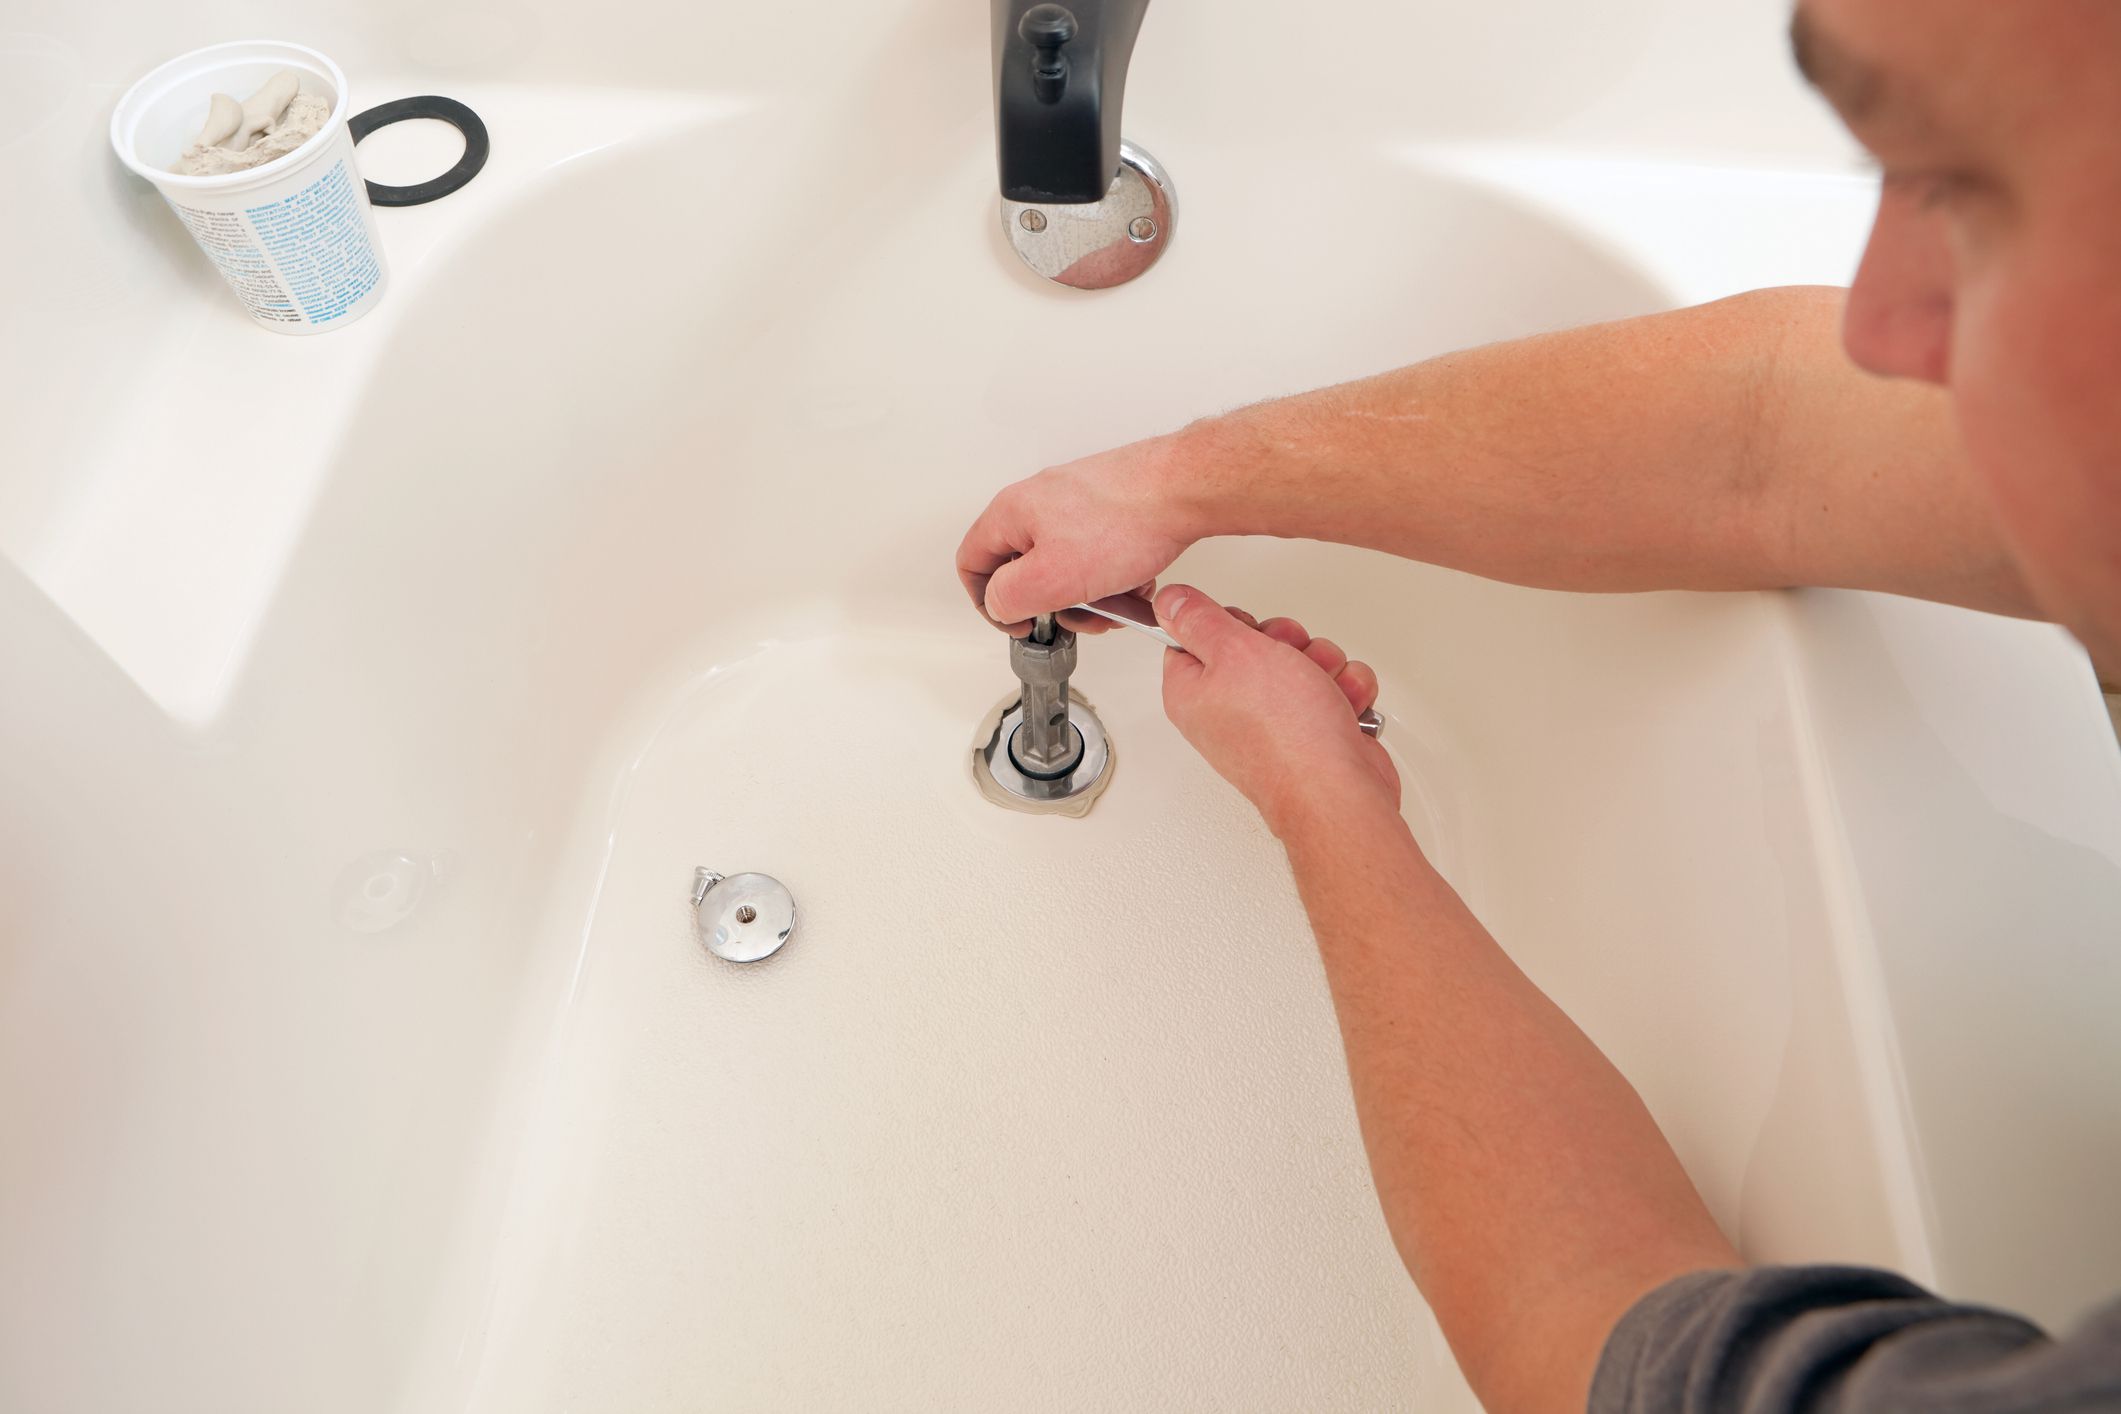
Locate the Set Screw: Begin by identifying the set screw on the back of the overflow cover plate, which is typically located near the top of the bathtub. Use a suitable screwdriver to loosen and remove the set screw, allowing you to detach the overflow cover plate from the bathtub.
-
Remove the Stopper Assembly: With the overflow cover plate removed, you'll gain access to the linkage and plunger assembly connected to the stopper. Carefully extract the linkage and plunger from the overflow opening, ensuring that you keep track of the components for reassembly later.
-
Extract the Stopper: Once the linkage and plunger are removed, you can proceed to extract the stopper from the drain opening. Depending on the specific design of the stopper, it may be necessary to unscrew or lift the stopper to release it from the drain assembly.
-
Clean the Stopper: After removing the stopper, take this opportunity to clean it thoroughly. Use a mild cleaning solution and a brush to remove any accumulated debris, soap scum, or hair that may be hindering the stopper's functionality.
By successfully completing this step, you'll have effectively removed the stopper from the pop-up bathtub drain, allowing for further disassembly and maintenance. With the stopper out of the way, you can proceed to the next crucial step in the process: removing the drain flange to access the underlying components of the drain assembly.
With the stopper removed and the subsequent steps executed with precision, you'll be well on your way to successfully addressing any drainage issues and maintaining the optimal functionality of your bathtub's plumbing system.
Read more: How To Remove Bathtub Drain Flange
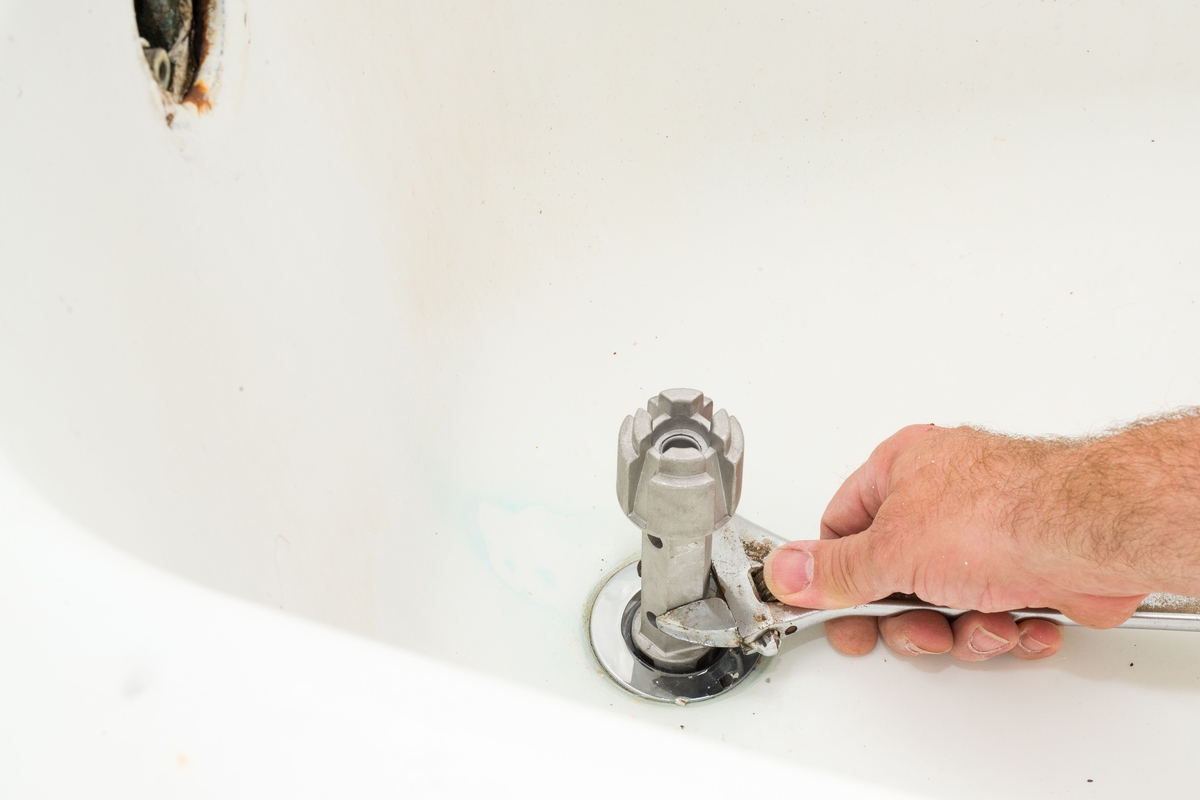
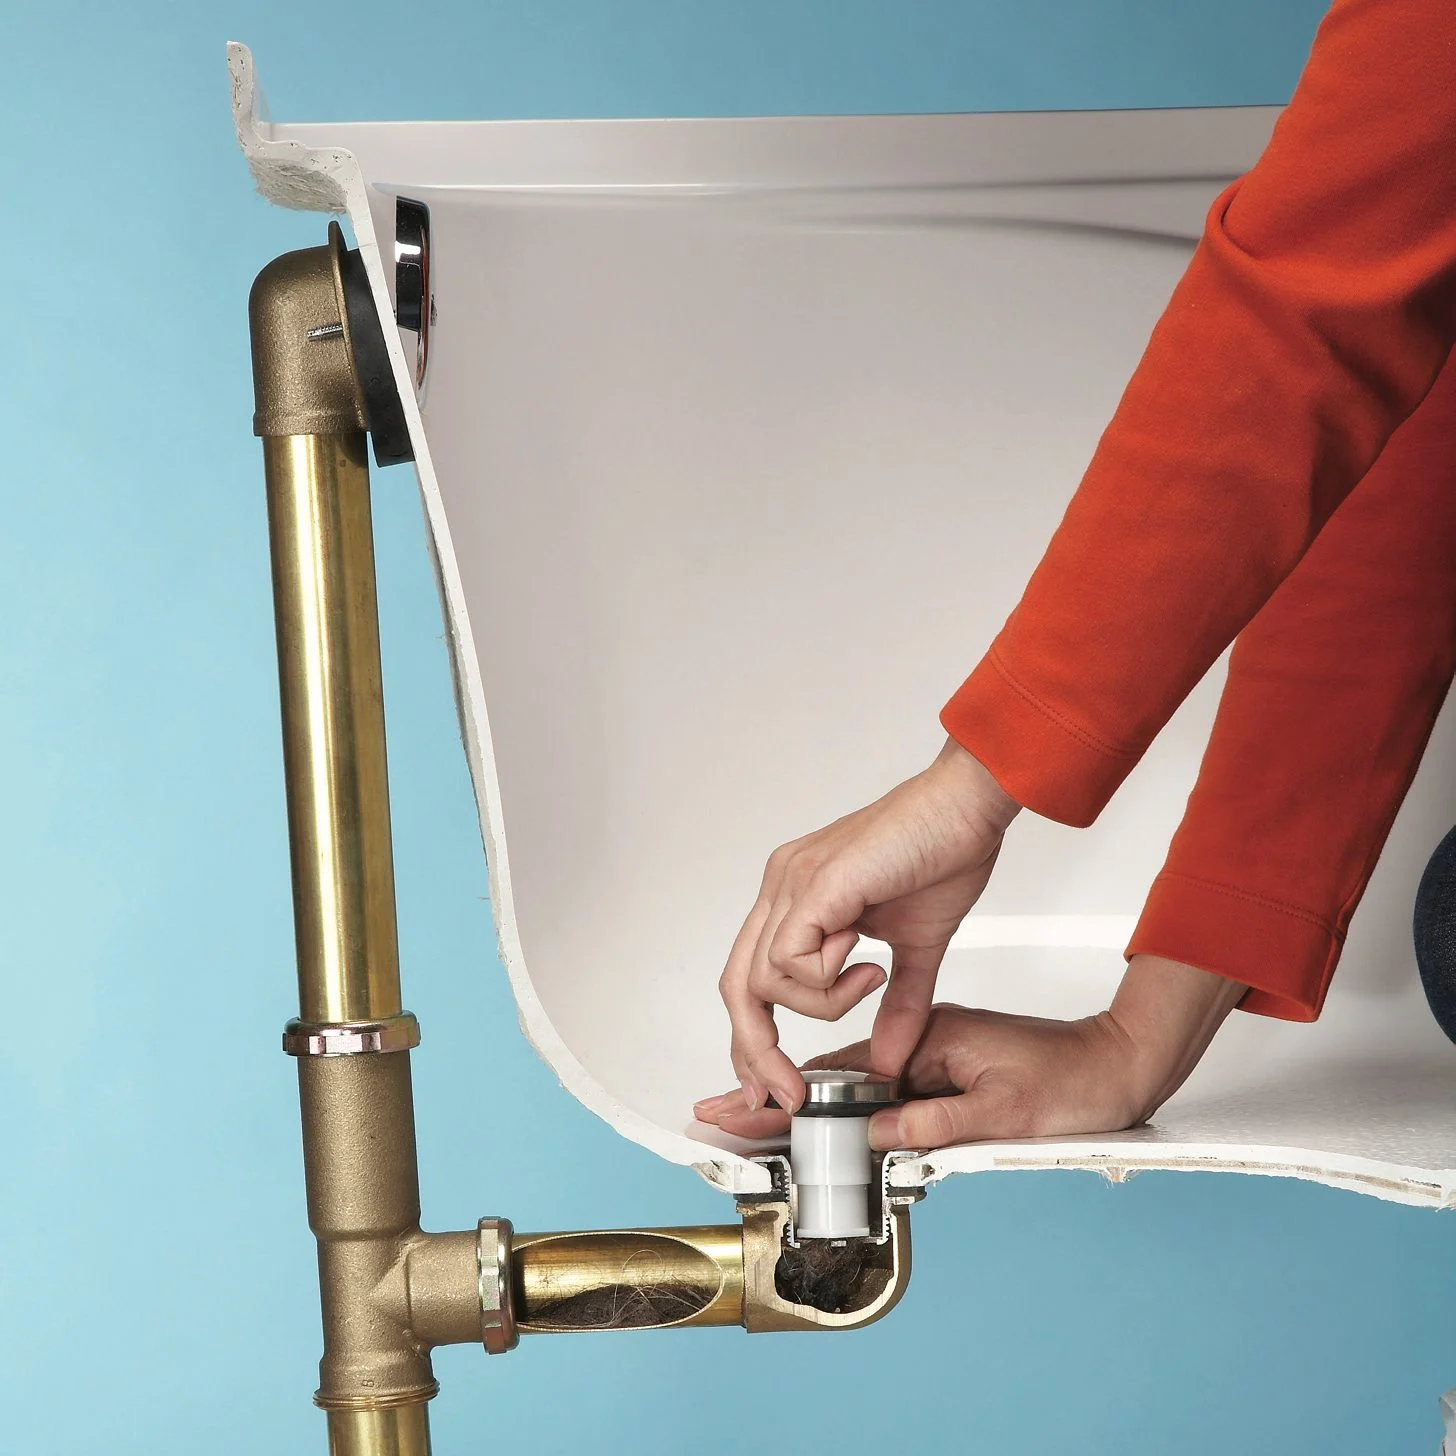
Step 2: Remove the Drain Flange
With the stopper successfully removed, the next critical step in the process of removing a pop-up bathtub drain involves extracting the drain flange. The drain flange is the visible portion of the drain assembly located within the bathtub, and removing it provides access to the underlying components for cleaning and potential replacement. Here's a detailed guide on how to effectively remove the drain flange:
-
Inspect the Drain Flange: Before proceeding with removal, take a moment to inspect the drain flange for any visible damage, corrosion, or signs of wear. This assessment will help determine if the flange requires replacement and inform your next steps.
-
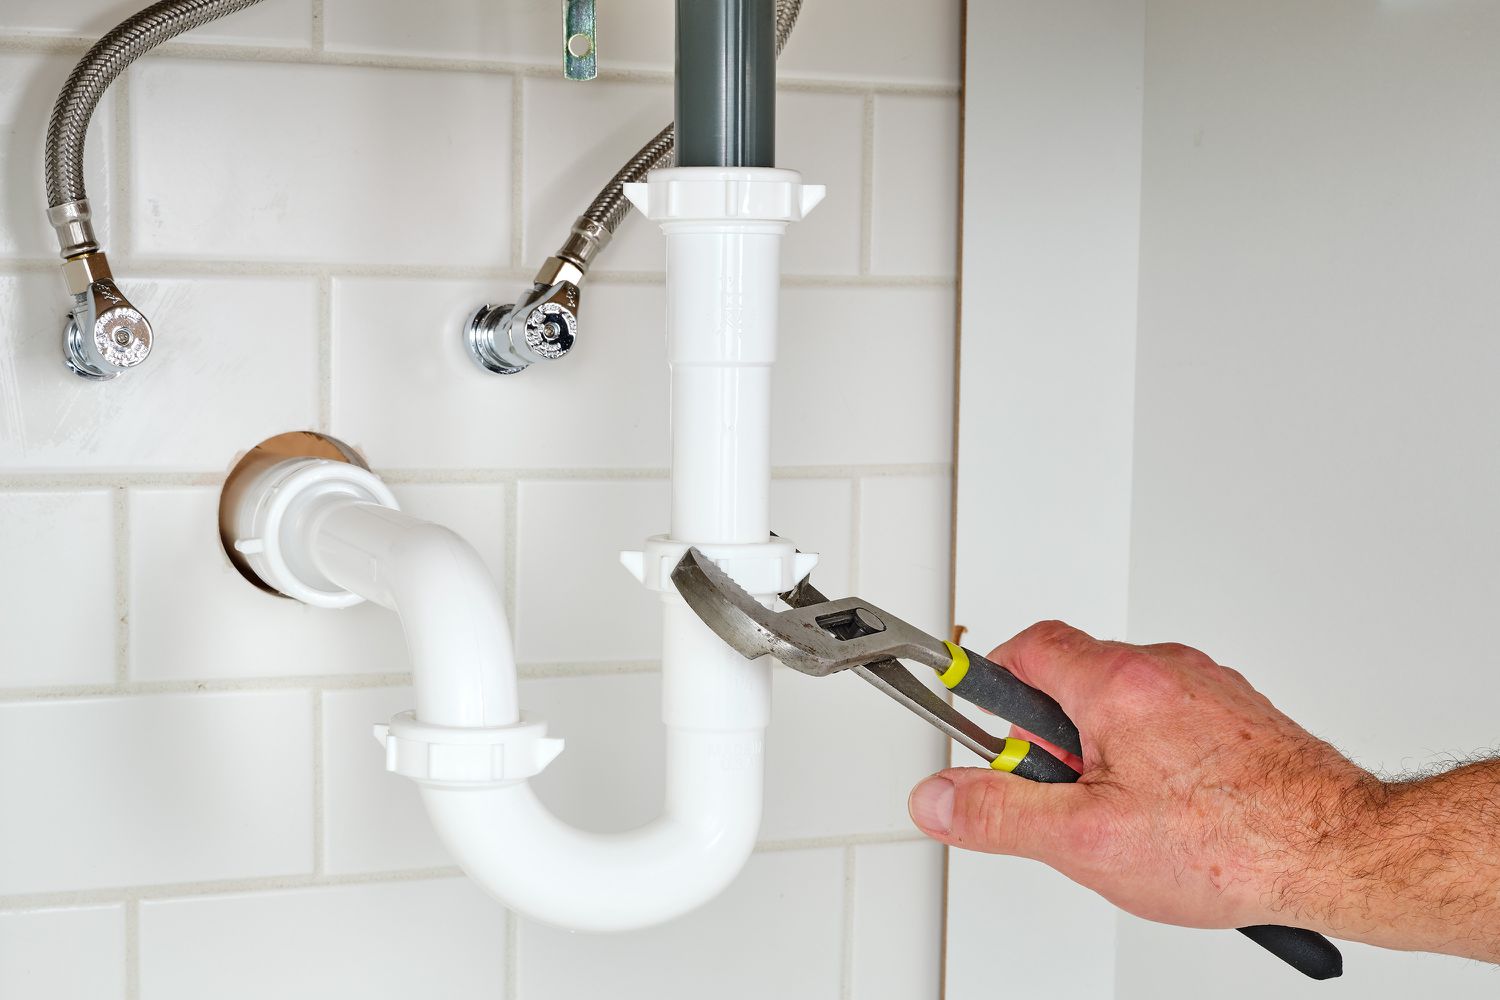
Loosen the Drain Flange Nut: Using an adjustable wrench, carefully loosen the nut securing the drain flange to the bathtub's drain shoe. The drain shoe is the pipe fitting that connects the drain to the bathtub's plumbing system. Apply steady, controlled force to loosen the nut without causing damage to the surrounding components.
-
Remove the Drain Flange: Once the nut is sufficiently loosened, gently lift and remove the drain flange from the bathtub. It's essential to exercise caution during this process to avoid damaging the bathtub's surface or the drain shoe.
-
Clean the Drain Flange and Surrounding Area: With the drain flange removed, take the opportunity to clean the exposed area thoroughly. Use a mild cleaning solution and a brush to remove any accumulated grime, soap scum, or debris from both the drain flange and the surrounding bathtub surface.
-
Inspect the Drain Components: After removing the drain flange, inspect the exposed components, including the drain shoe and associated fittings, for any signs of damage, corrosion, or blockages. This inspection will help determine if any additional maintenance or replacement is necessary.
By successfully completing this step, you'll have effectively removed the drain flange from the pop-up bathtub drain, gaining access to the underlying components for cleaning and inspection. This process sets the stage for potential maintenance or replacement of the drain assembly, ensuring optimal functionality and preventing potential drainage issues in the future.
With the drain flange removed and the subsequent steps executed with precision, you'll be well on your way to effectively addressing any drainage issues and maintaining the optimal functionality of your bathtub's plumbing system.
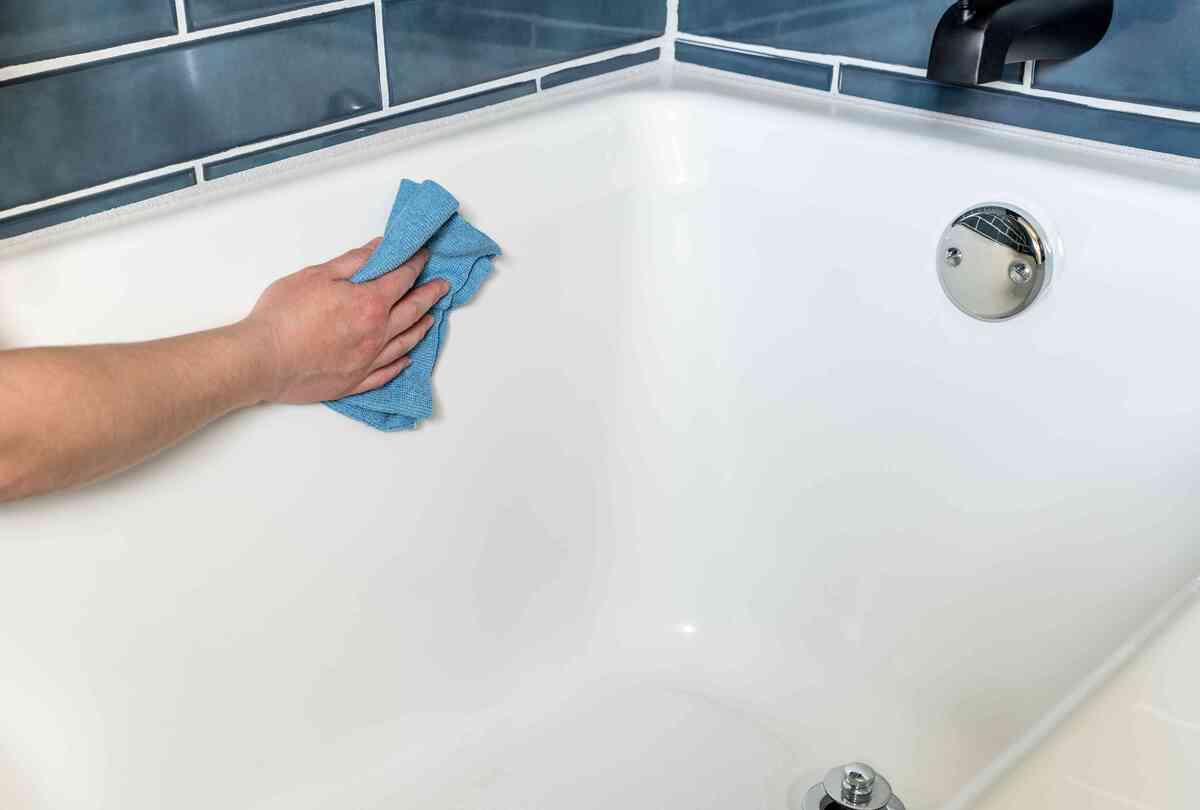
Step 3: Clean the Drain
Once the drain flange has been removed, the next crucial step in the process of removing a pop-up bathtub drain involves thorough cleaning of the drain and its associated components. Over time, the drain assembly can accumulate debris, soap scum, and hair, leading to reduced drainage efficiency and potential blockages. By cleaning the drain and its components, you can ensure optimal functionality and prevent future drainage issues. Here's a detailed guide on how to effectively clean the drain:
-
Clear Debris and Buildup: Begin by visually inspecting the exposed drain components for any visible debris, hair, or buildup. Use a pair of needle-nose pliers or a small tool to carefully remove any accumulated debris from the drain opening and surrounding areas. Clearing this debris is essential for restoring proper drainage and preventing potential blockages.
-
Use a Cleaning Solution: Apply a mild cleaning solution or a specialized bathroom cleaner to the exposed drain components. Use a brush or a cleaning tool to scrub the drain flange, drain opening, and surrounding areas thoroughly. This process will help remove any stubborn grime, soap scum, or residue that may be hindering the drain's functionality.
-
Inspect the Drain Components: While cleaning the drain, take the opportunity to inspect the exposed components for any signs of corrosion, damage, or wear. Pay close attention to the drain flange, drain opening, and surrounding surfaces. Identifying and addressing any issues at this stage can prevent potential problems in the future.
-
Clean the Stopper and Linkage: If applicable, clean the stopper and its associated linkage thoroughly. Use a mild cleaning solution and a brush to remove any accumulated debris, ensuring that the stopper operates smoothly and effectively. This step is crucial for maintaining the overall functionality of the drain assembly.
-
Rinse and Dry: After cleaning the drain and its components, thoroughly rinse the area with clean water to remove any residual cleaning solution. Use a clean rag or towel to dry the exposed components, ensuring that no moisture or cleaning residue remains.
By effectively cleaning the drain and its associated components, you'll not only restore optimal functionality but also prevent potential drainage issues in the future. This meticulous cleaning process sets the stage for the final step: installing the new drain assembly to ensure long-term reliability and efficiency.
With the drain thoroughly cleaned and the subsequent steps executed with precision, you'll be well on your way to maintaining the optimal functionality of your bathtub's plumbing system.
Use a screwdriver to remove the screws on the overflow cover. Pull out the linkage and stopper. Use pliers to unscrew the drain flange and remove the old drain.
Step 4: Install the New Drain
After successfully removing the old pop-up bathtub drain, the final step involves installing a new drain assembly to ensure optimal functionality and prevent potential drainage issues in the future. Installing a new drain not only addresses any existing problems but also provides an opportunity to upgrade to a more efficient and reliable system. Here's a detailed guide on how to effectively install the new drain:
-
Prepare the Replacement Drain Assembly: Before proceeding with installation, ensure that the replacement drain assembly is compatible with your bathtub's design and dimensions. Verify that all necessary components, including the drain flange, stopper, and associated hardware, are readily available.
-
Apply Plumbers' Putty: Begin by applying a suitable amount of plumbers' putty to the underside of the new drain flange. This putty will create a watertight seal between the flange and the bathtub, preventing leaks and ensuring proper functionality. Ensure that the putty is evenly distributed to form a consistent seal.
-
Insert the New Drain Flange: Carefully position the new drain flange in the drain opening, ensuring that it sits flush against the bathtub's surface. Apply gentle pressure to secure the flange in place, allowing the plumbers' putty to create a reliable seal. Wipe away any excess putty that may extrude from the edges of the flange.
-
Secure the Drain Flange Nut: Once the flange is in position, use an adjustable wrench to tighten the nut securing the drain flange to the bathtub's drain shoe. Apply controlled force to ensure that the flange is securely fastened without causing damage to the surrounding components.
-
Assemble the Stopper Mechanism: If the new drain assembly includes a pop-up stopper, carefully assemble the stopper mechanism according to the manufacturer's instructions. This typically involves connecting the linkage and plunger to the stopper and ensuring that the components operate smoothly.
-
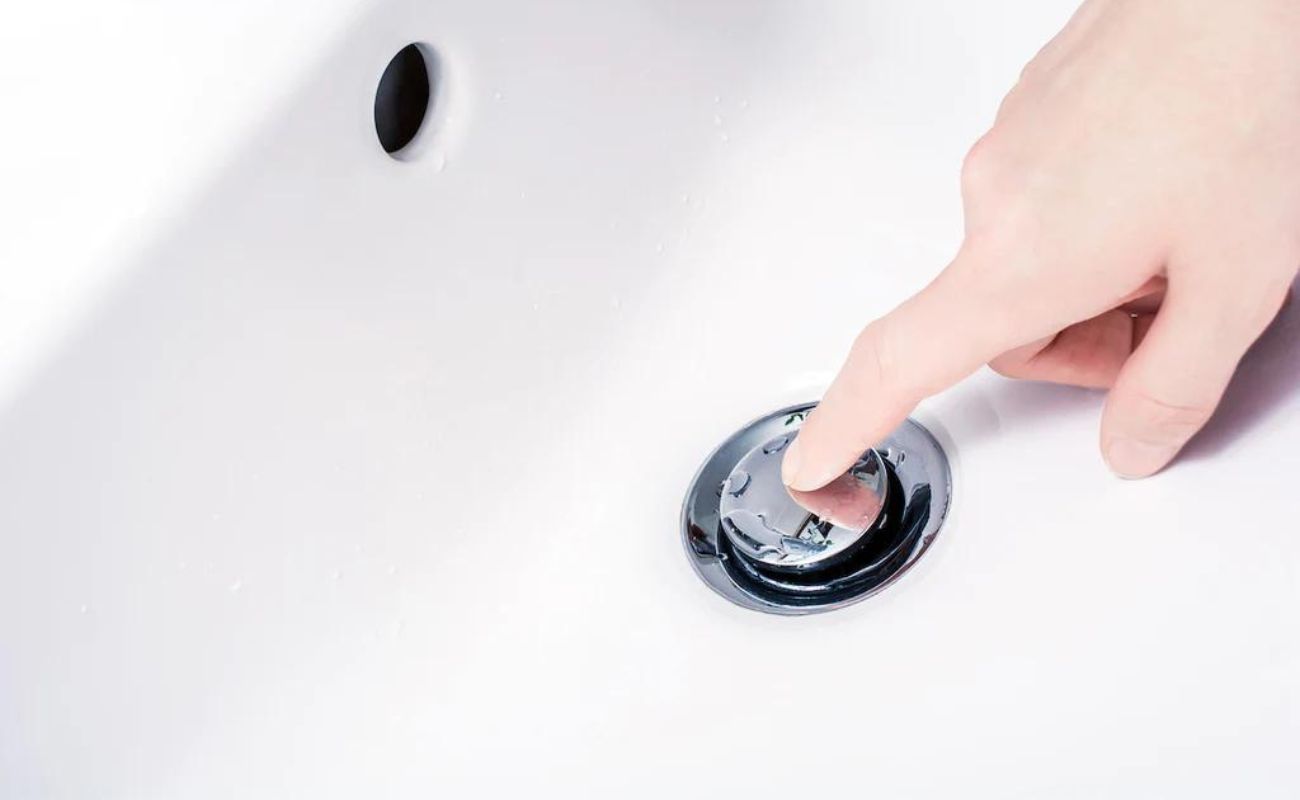
Test the Drain Functionality: With the new drain assembly in place, test the functionality of the stopper and drainage system. Fill the bathtub with water and engage the stopper to verify that it effectively seals the drain opening. Additionally, observe the drainage to ensure that water flows freely and efficiently.
By effectively installing the new drain assembly, you'll not only address any existing drainage issues but also ensure long-term reliability and efficiency. This final step completes the process of removing and replacing the pop-up bathtub drain, empowering you to maintain a functional and hygienic bathroom environment for yourself and your family.
With the new drain assembly successfully installed and the entire process executed with precision, you can take pride in your ability to tackle this DIY project and maintain the optimal functionality of your bathtub's plumbing system.
Conclusion
In conclusion, learning how to remove a pop-up bathtub drain is a valuable skill that empowers homeowners to address drainage issues and maintain the optimal functionality of their plumbing systems. By following the comprehensive steps outlined in this guide, you can confidently undertake this DIY project, saving time and money while ensuring a hygienic and efficient bathroom environment.
The process begins with gathering the necessary tools and materials, including screwdrivers, pliers, an adjustable wrench, plumbers' putty, and a replacement drain assembly. With these resources at your disposal, you can proceed to remove the stopper, providing access to the underlying components of the drain assembly. Carefully extracting the stopper and cleaning it thoroughly sets the stage for the subsequent steps.
Removing the drain flange is a critical phase in the process, as it grants access to the drain components for cleaning and potential replacement. By inspecting, loosening, and removing the drain flange, you can thoroughly clean the drain and surrounding areas, ensuring optimal functionality and preventing potential blockages.
Thoroughly cleaning the drain and its associated components is essential for restoring proper drainage and preventing future issues. By clearing debris, using a cleaning solution, and inspecting the components, you can maintain the efficiency of the drain assembly and prevent potential problems down the line.
The final step involves installing the new drain assembly, ensuring a reliable and efficient system. By preparing the replacement assembly, applying plumbers' putty, inserting the new drain flange, and testing the functionality, you can complete the process with confidence, knowing that your plumbing system is in optimal condition.
By mastering the process of removing a pop-up bathtub drain, homeowners can take proactive steps to maintain their plumbing systems, prevent potential water damage, and create a comfortable and hygienic bathroom environment. This DIY project not only saves on professional maintenance costs but also provides a sense of accomplishment and self-sufficiency.
In conclusion, by following the steps outlined in this guide and approaching the task with patience and attention to detail, you can effectively remove a pop-up bathtub drain, ensuring the long-term reliability and efficiency of your plumbing system.
Frequently Asked Questions about How To Remove Pop Up Bathtub Drain
Was this page helpful?
At Storables.com, we guarantee accurate and reliable information. Our content, validated by Expert Board Contributors, is crafted following stringent Editorial Policies. We're committed to providing you with well-researched, expert-backed insights for all your informational needs.


0 thoughts on “How To Remove Pop Up Bathtub Drain”