Home>Furniture & Design>Interior Design Trends>How To Remove Decals From Glass
Interior Design Trends
How To Remove Decals From Glass
Modified: August 16, 2024
Learn how to effectively remove decals from glass with our expert interior design tips. Keep up with the latest interior design trends!
(Many of the links in this article redirect to a specific reviewed product. Your purchase of these products through affiliate links helps to generate commission for Storables.com, at no extra cost. Learn more)
Introduction
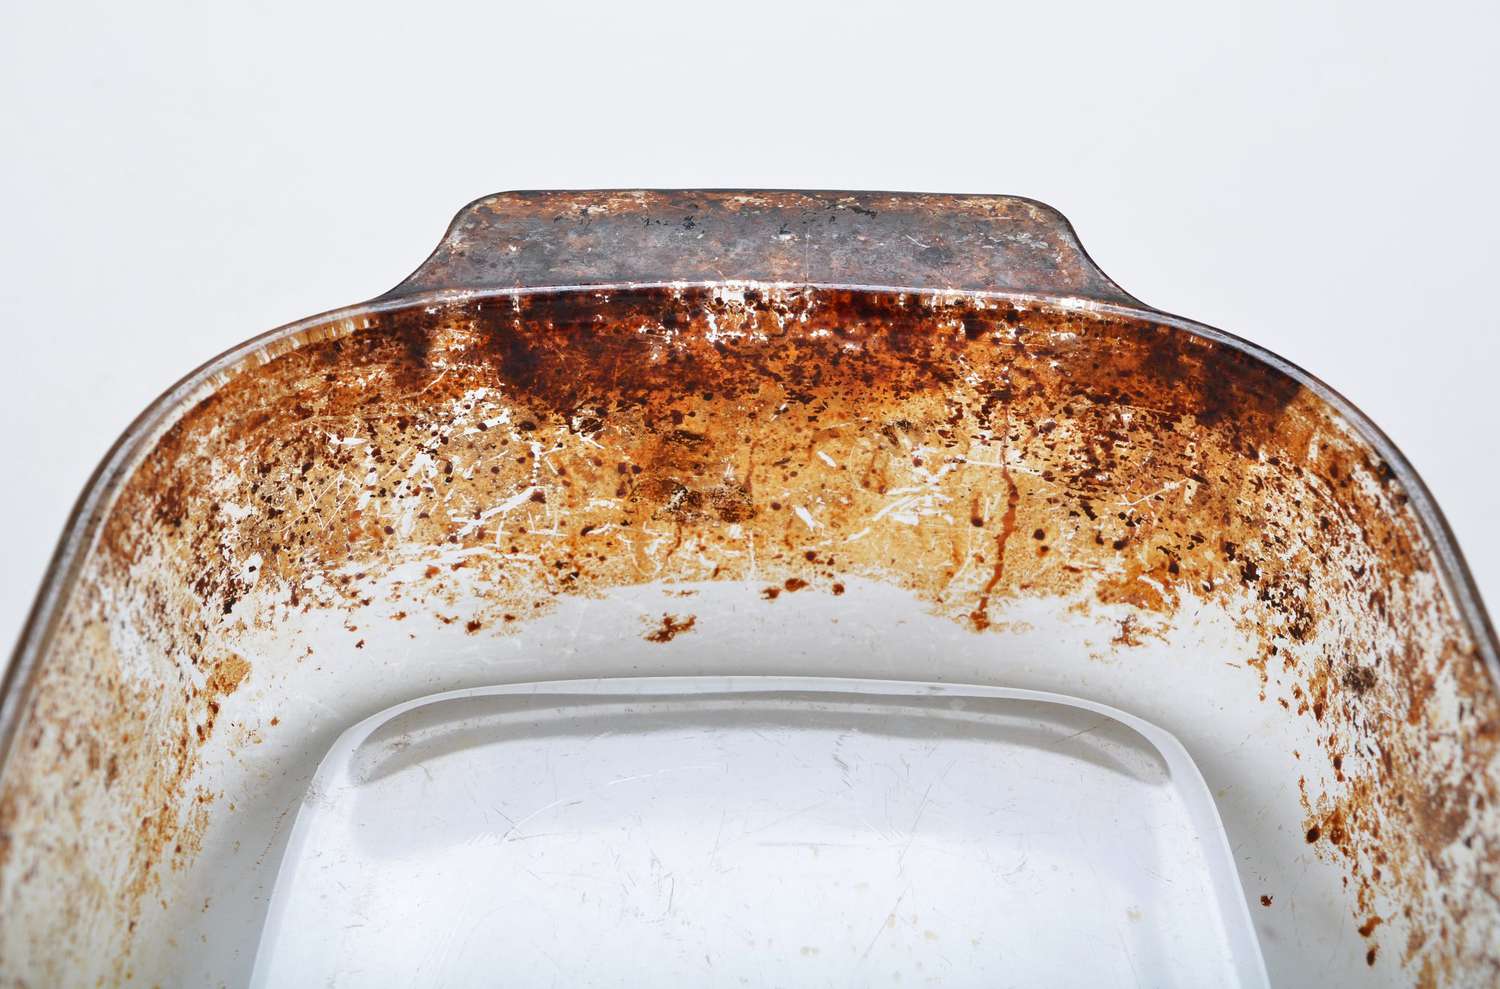
Removing decals from glass can be a challenging task, especially when they have been stuck on for an extended period. Whether you're dealing with stubborn price stickers, decorative decals, or residue from old window decals, it's essential to approach the removal process with care to avoid damaging the glass surface. Fortunately, there are several effective methods and materials that can help you tackle this task with ease.
In this comprehensive guide, we will explore various techniques for removing decals from glass, ranging from using simple household items to specialized commercial products. Each method offers its own set of advantages, and the choice of approach may depend on the type of decal, the duration it has been in place, and the materials at your disposal.
By understanding the step-by-step procedures for each method and the materials needed, you can confidently address decal removal from glass surfaces. Whether you opt for the precision of a razor blade, the gentle heat of a hair dryer, the acidic properties of vinegar, the solvent power of rubbing alcohol, or the convenience of commercial decal removers, you'll be equipped with the knowledge to restore your glass surfaces to their pristine condition.
With the insights provided in this guide, you'll be empowered to tackle decal removal projects effectively, ensuring that your glass surfaces remain free from unsightly residue. Let's delve into the materials needed and the step-by-step procedures for each method to equip you with the expertise needed to achieve successful decal removal.
Key Takeaways:
- Say goodbye to stubborn decals on glass surfaces! From razor blades to vinegar, learn effective and safe methods for removing decals without damaging the glass. You’ll have pristine surfaces in no time!
- Harness the power of everyday household items and commercial products to restore glass surfaces to their original condition. Whether it’s precision scraping or gentle heat, you’ll be equipped to tackle decal removal with confidence.
Read more: How To Remove Decal From Glass
Materials Needed
Before embarking on the task of removing decals from glass, it's essential to gather the necessary materials to ensure a smooth and effective process. The right tools and supplies can make a significant difference in the outcome, allowing you to tackle the task with precision and care. Here's a comprehensive list of materials you'll need for various decal removal methods:
-
Razor Blade Method:
- Single-edge razor blade or scraper: This tool is ideal for precision scraping and can effectively remove stubborn decals without damaging the glass surface.
- Glass cleaner: Having a quality glass cleaner on hand will help you to thoroughly clean the glass surface after removing the decal and any adhesive residue.
-
Hair Dryer Method:
- Hair dryer: A standard household hair dryer will provide the gentle heat needed to soften the adhesive beneath the decal, making it easier to peel off.
- Plastic card or scraper: Using a plastic card or scraper can aid in lifting the softened decal from the glass without causing scratches.
-
Vinegar Method:
- White vinegar: Known for its acidic properties, white vinegar can effectively break down the adhesive of the decal, making it easier to remove.
- Spray bottle: Having a spray bottle filled with vinegar will allow for easy application and targeted coverage.
-
Rubbing Alcohol Method:
- Isopropyl rubbing alcohol: This solvent is effective in dissolving adhesive residue and can be used to wipe away any remaining marks after decal removal.
- Microfiber cloth: A soft microfiber cloth is ideal for applying rubbing alcohol and gently wiping the glass surface without leaving lint or streaks.
-
Commercial Decal Remover Method:
- Commercial decal remover: There are various commercial products specifically designed for decal removal. Choose a reputable brand that aligns with your specific needs and follow the manufacturer's instructions for optimal results.
- Protective gloves: When using commercial decal removers, it's advisable to wear protective gloves to safeguard your skin from any potentially harsh chemicals.
By ensuring that you have the appropriate materials for your chosen decal removal method, you can proceed with confidence, knowing that you are well-equipped to address the task at hand. With these materials in hand, you'll be ready to move on to the step-by-step procedures for each method, allowing you to effectively remove decals from glass surfaces with ease and precision.
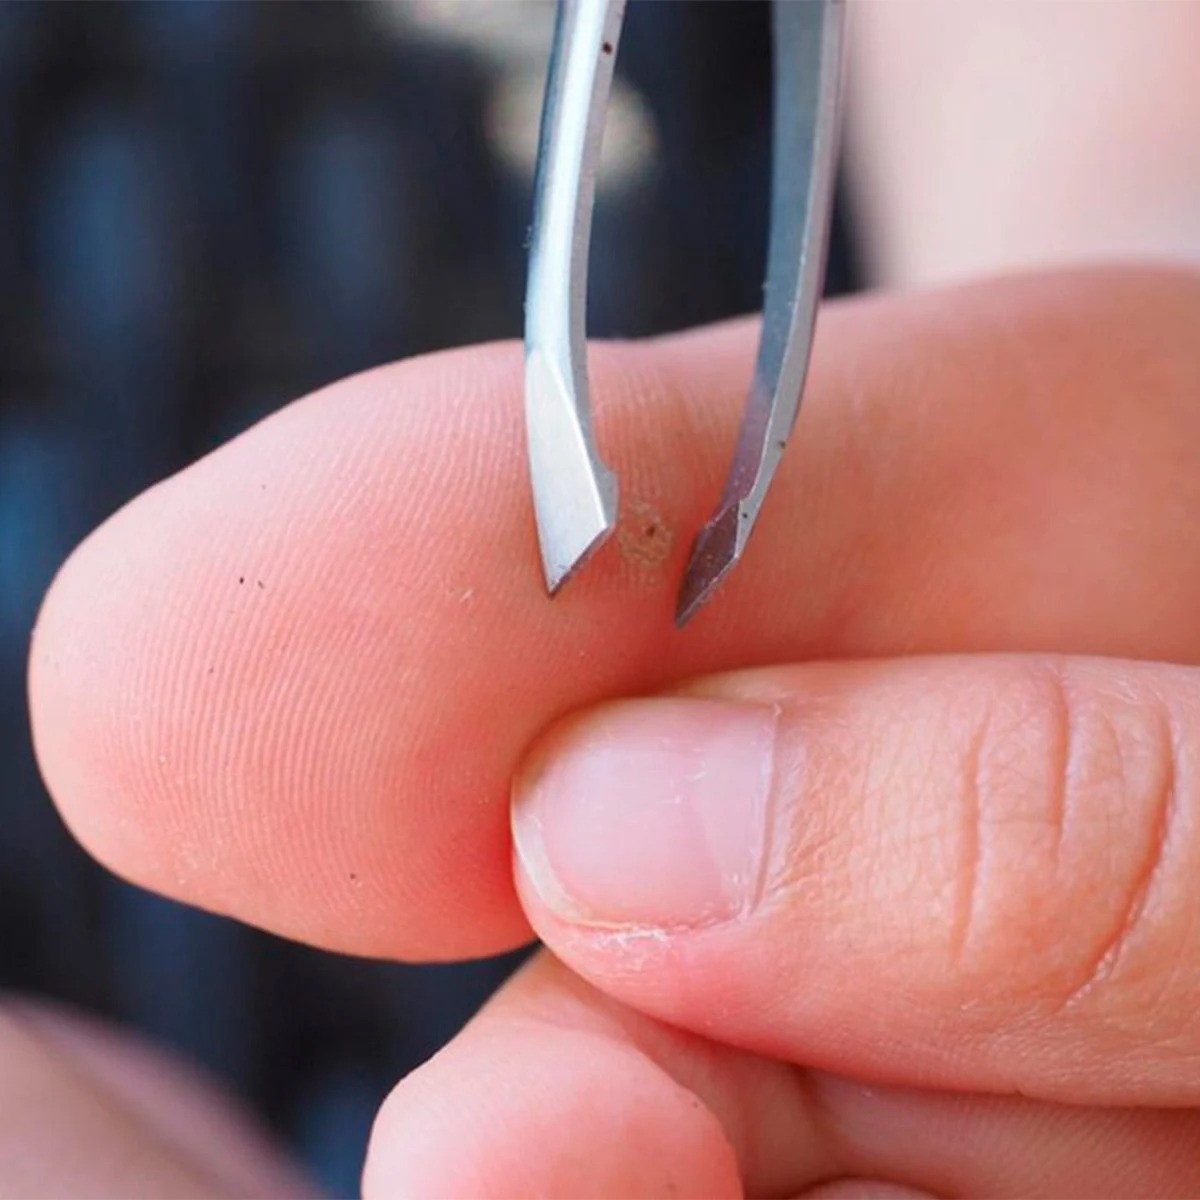
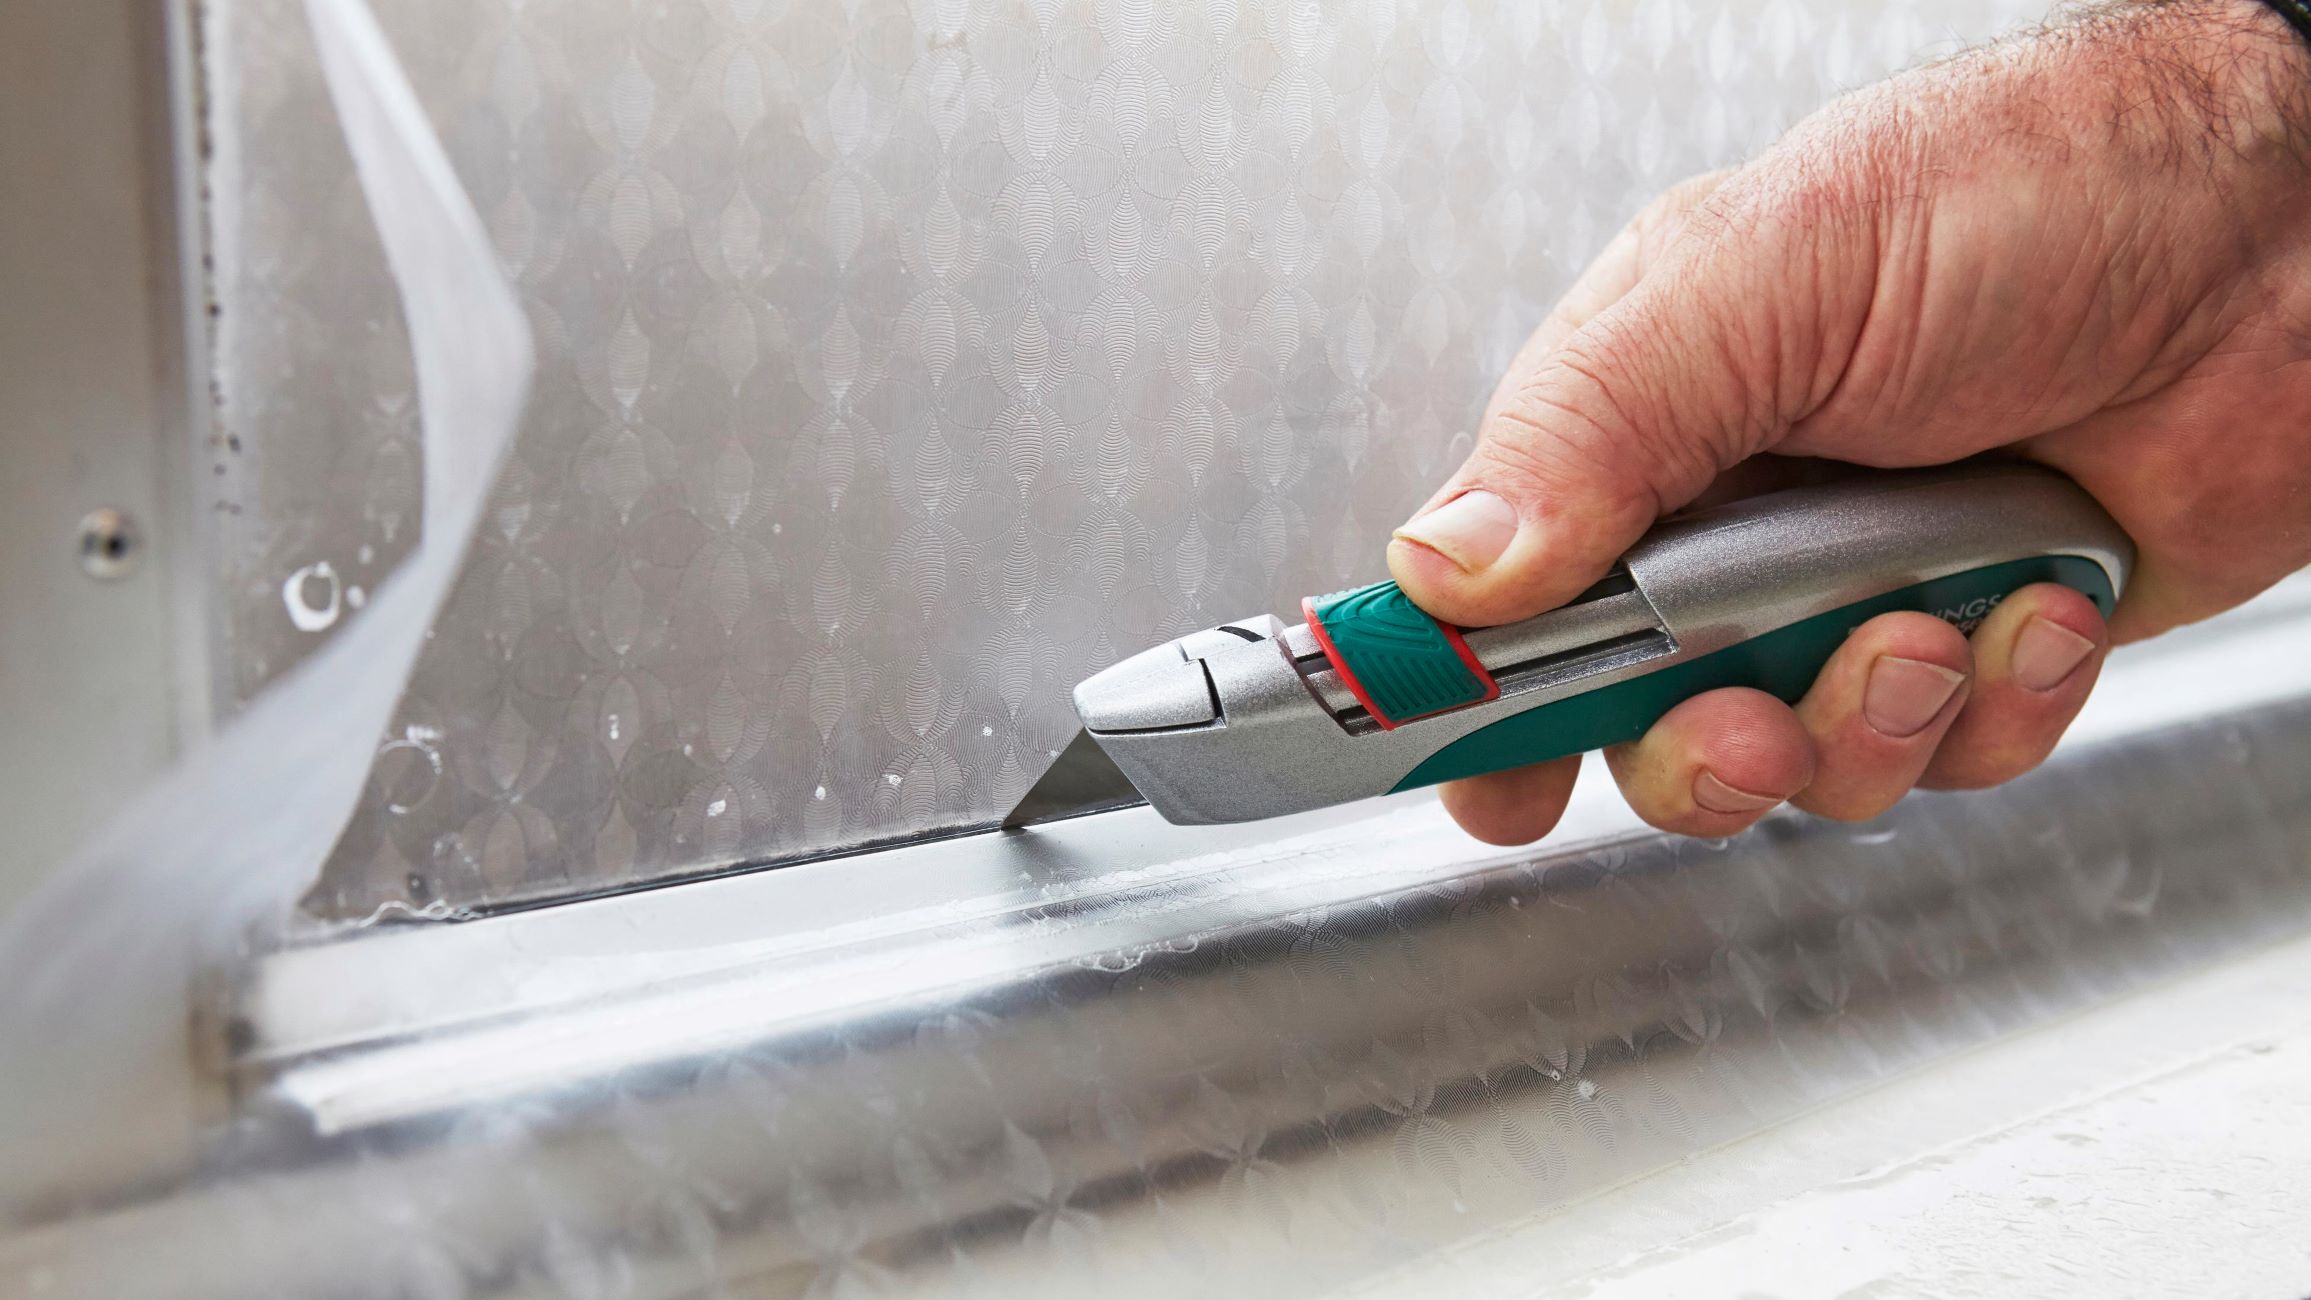
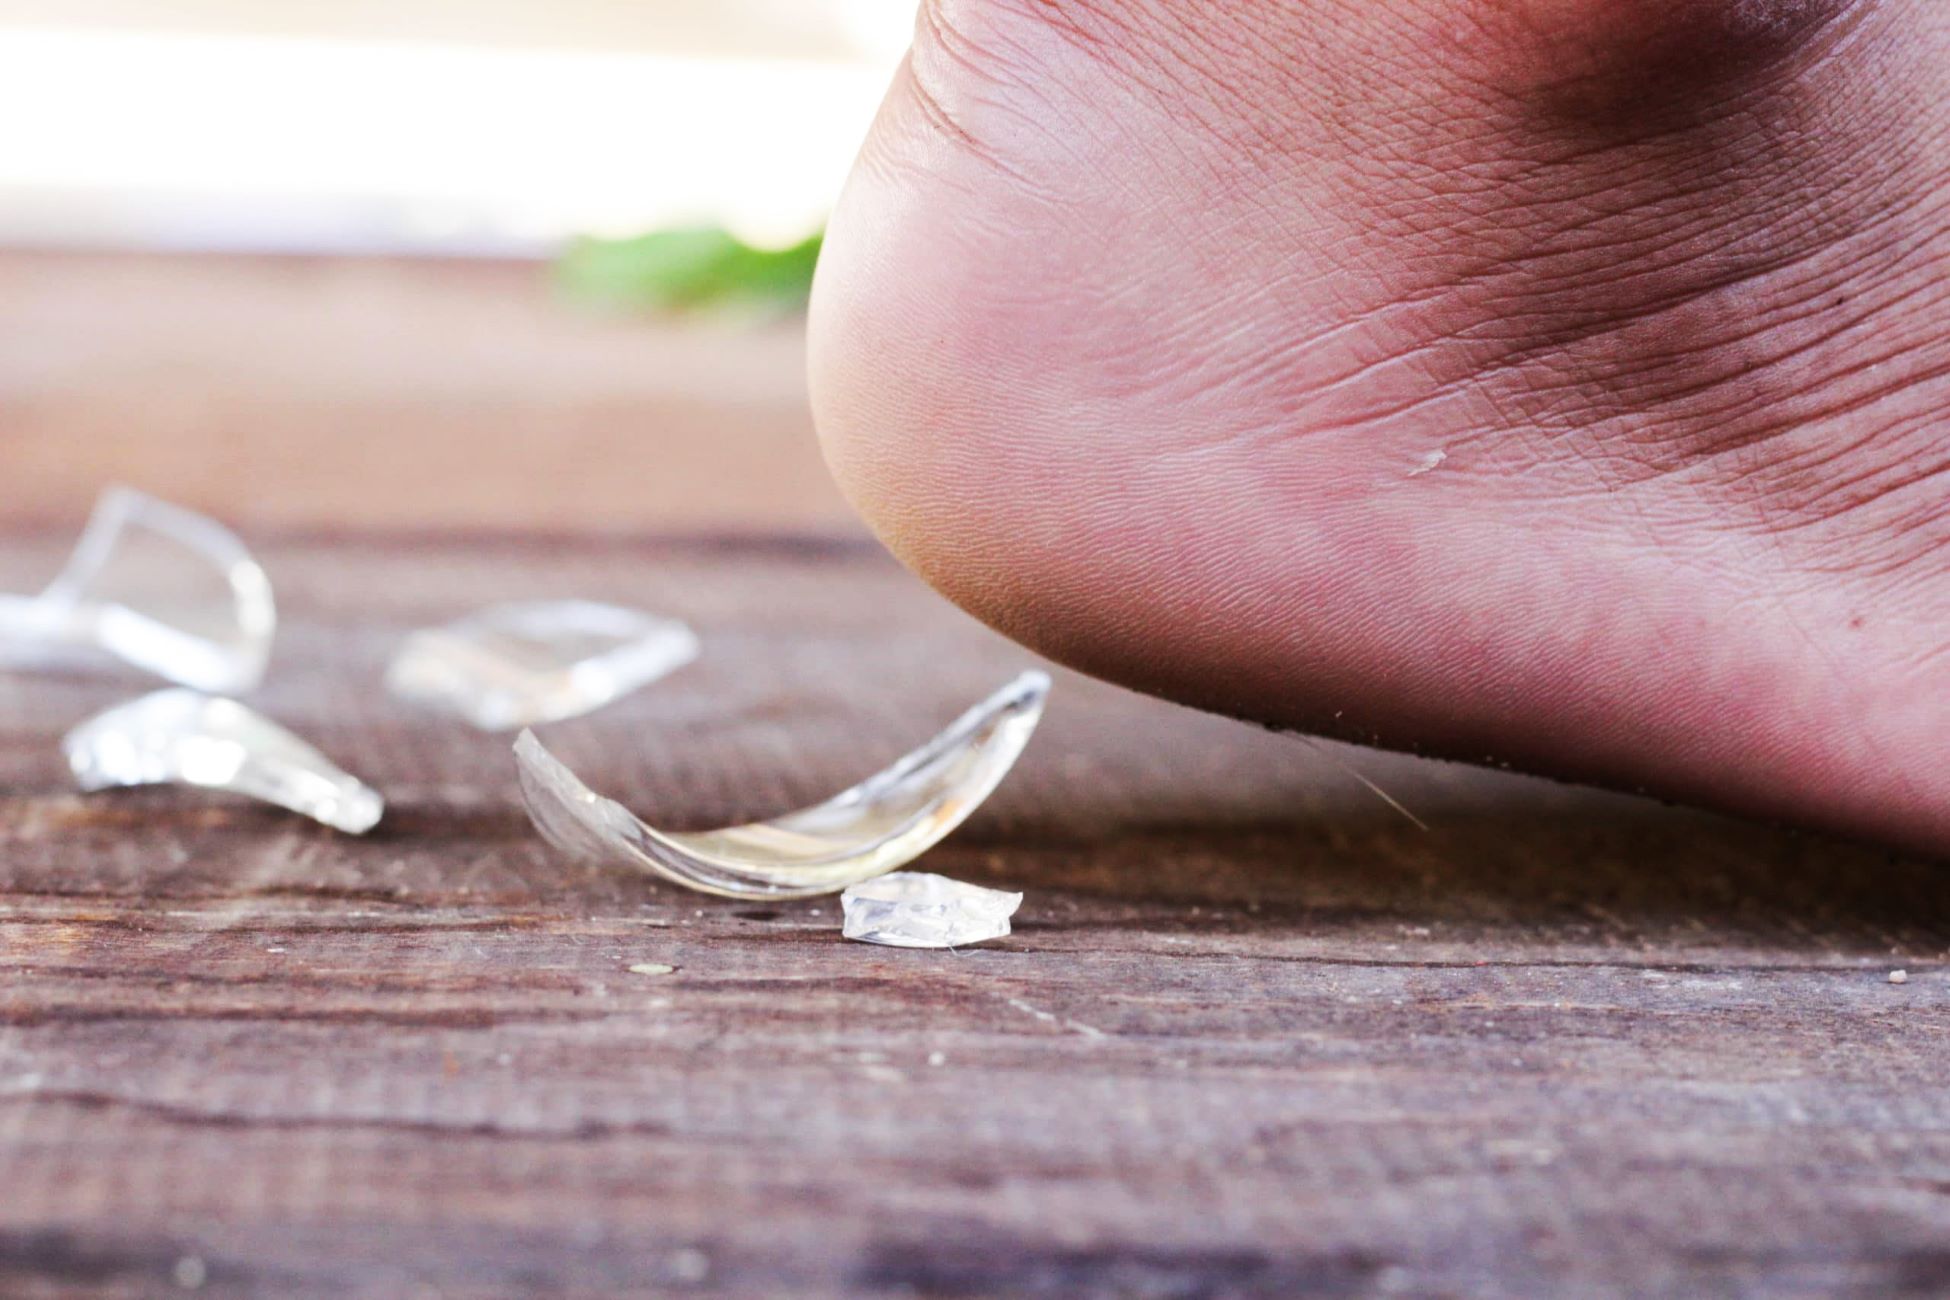
Method 1: Using a Razor Blade
When it comes to precision and control, using a razor blade is a popular method for removing decals from glass surfaces. This technique is particularly effective for tackling stubborn decals that have firmly adhered to the glass. By following the step-by-step procedure outlined below, you can safely and efficiently remove decals using a razor blade.
Step-by-Step Procedure:
-
Prepare the Surface: Before using the razor blade, ensure that the glass surface is clean and free from any loose debris. This will prevent the blade from encountering unnecessary resistance and minimize the risk of scratching the glass.
-
Position the Razor Blade: Hold the razor blade at a shallow angle against the glass, ensuring that it is positioned to make gentle contact with the edge of the decal. It's important to maintain a controlled and steady hand to avoid applying excessive pressure.
-
Begin Scraping: With a gentle and steady motion, carefully scrape the edge of the decal using the razor blade. Apply light pressure and gradually work your way under the decal, lifting it away from the glass surface.
-
Peel Off the Decal: Once the razor blade has loosened the edge of the decal, use your fingers to gently peel it away from the glass. Take care to peel it slowly and steadily, ensuring that the adhesive residue remains intact for easier removal.
-
Clean the Glass Surface: After successfully removing the decal, use a quality glass cleaner to thoroughly clean the glass surface. This will help eliminate any remaining adhesive residue and ensure a pristine finish.
-
Cautionary Note: It's important to exercise caution when using a razor blade to avoid applying excessive pressure or using a dull blade, as this can increase the risk of scratching the glass. Additionally, always work in a well-lit area to clearly observe the decal removal process and minimize the chances of accidental damage.
By following these steps and exercising care and precision, the razor blade method can effectively remove decals from glass surfaces, leaving behind a clean and unblemished finish. This technique is particularly useful for addressing decals that have proven resistant to other removal methods, providing a reliable solution for restoring the glass to its original state.
Method 2: Using a Hair Dryer
When it comes to removing decals from glass surfaces, the hair dryer method offers a gentle yet effective approach that utilizes the power of heat to soften the adhesive beneath the decal. This technique is particularly suitable for delicate glass surfaces and can be a valuable alternative to more abrasive removal methods. By following the step-by-step procedure outlined below, you can confidently employ a hair dryer to remove decals from glass with precision and care.
Step-by-Step Procedure:
-
Prepare the Surface: Begin by ensuring that the glass surface is clean and free from any dust or debris. This will create an optimal environment for the decal removal process and minimize the risk of encountering resistance when applying heat.
-
Heat Application: Hold the hair dryer approximately 6 to 8 inches away from the decal and turn it on to a medium heat setting. Gently move the hair dryer back and forth across the decal, ensuring even heat distribution. The goal is to soften the adhesive beneath the decal without overheating the glass.
-
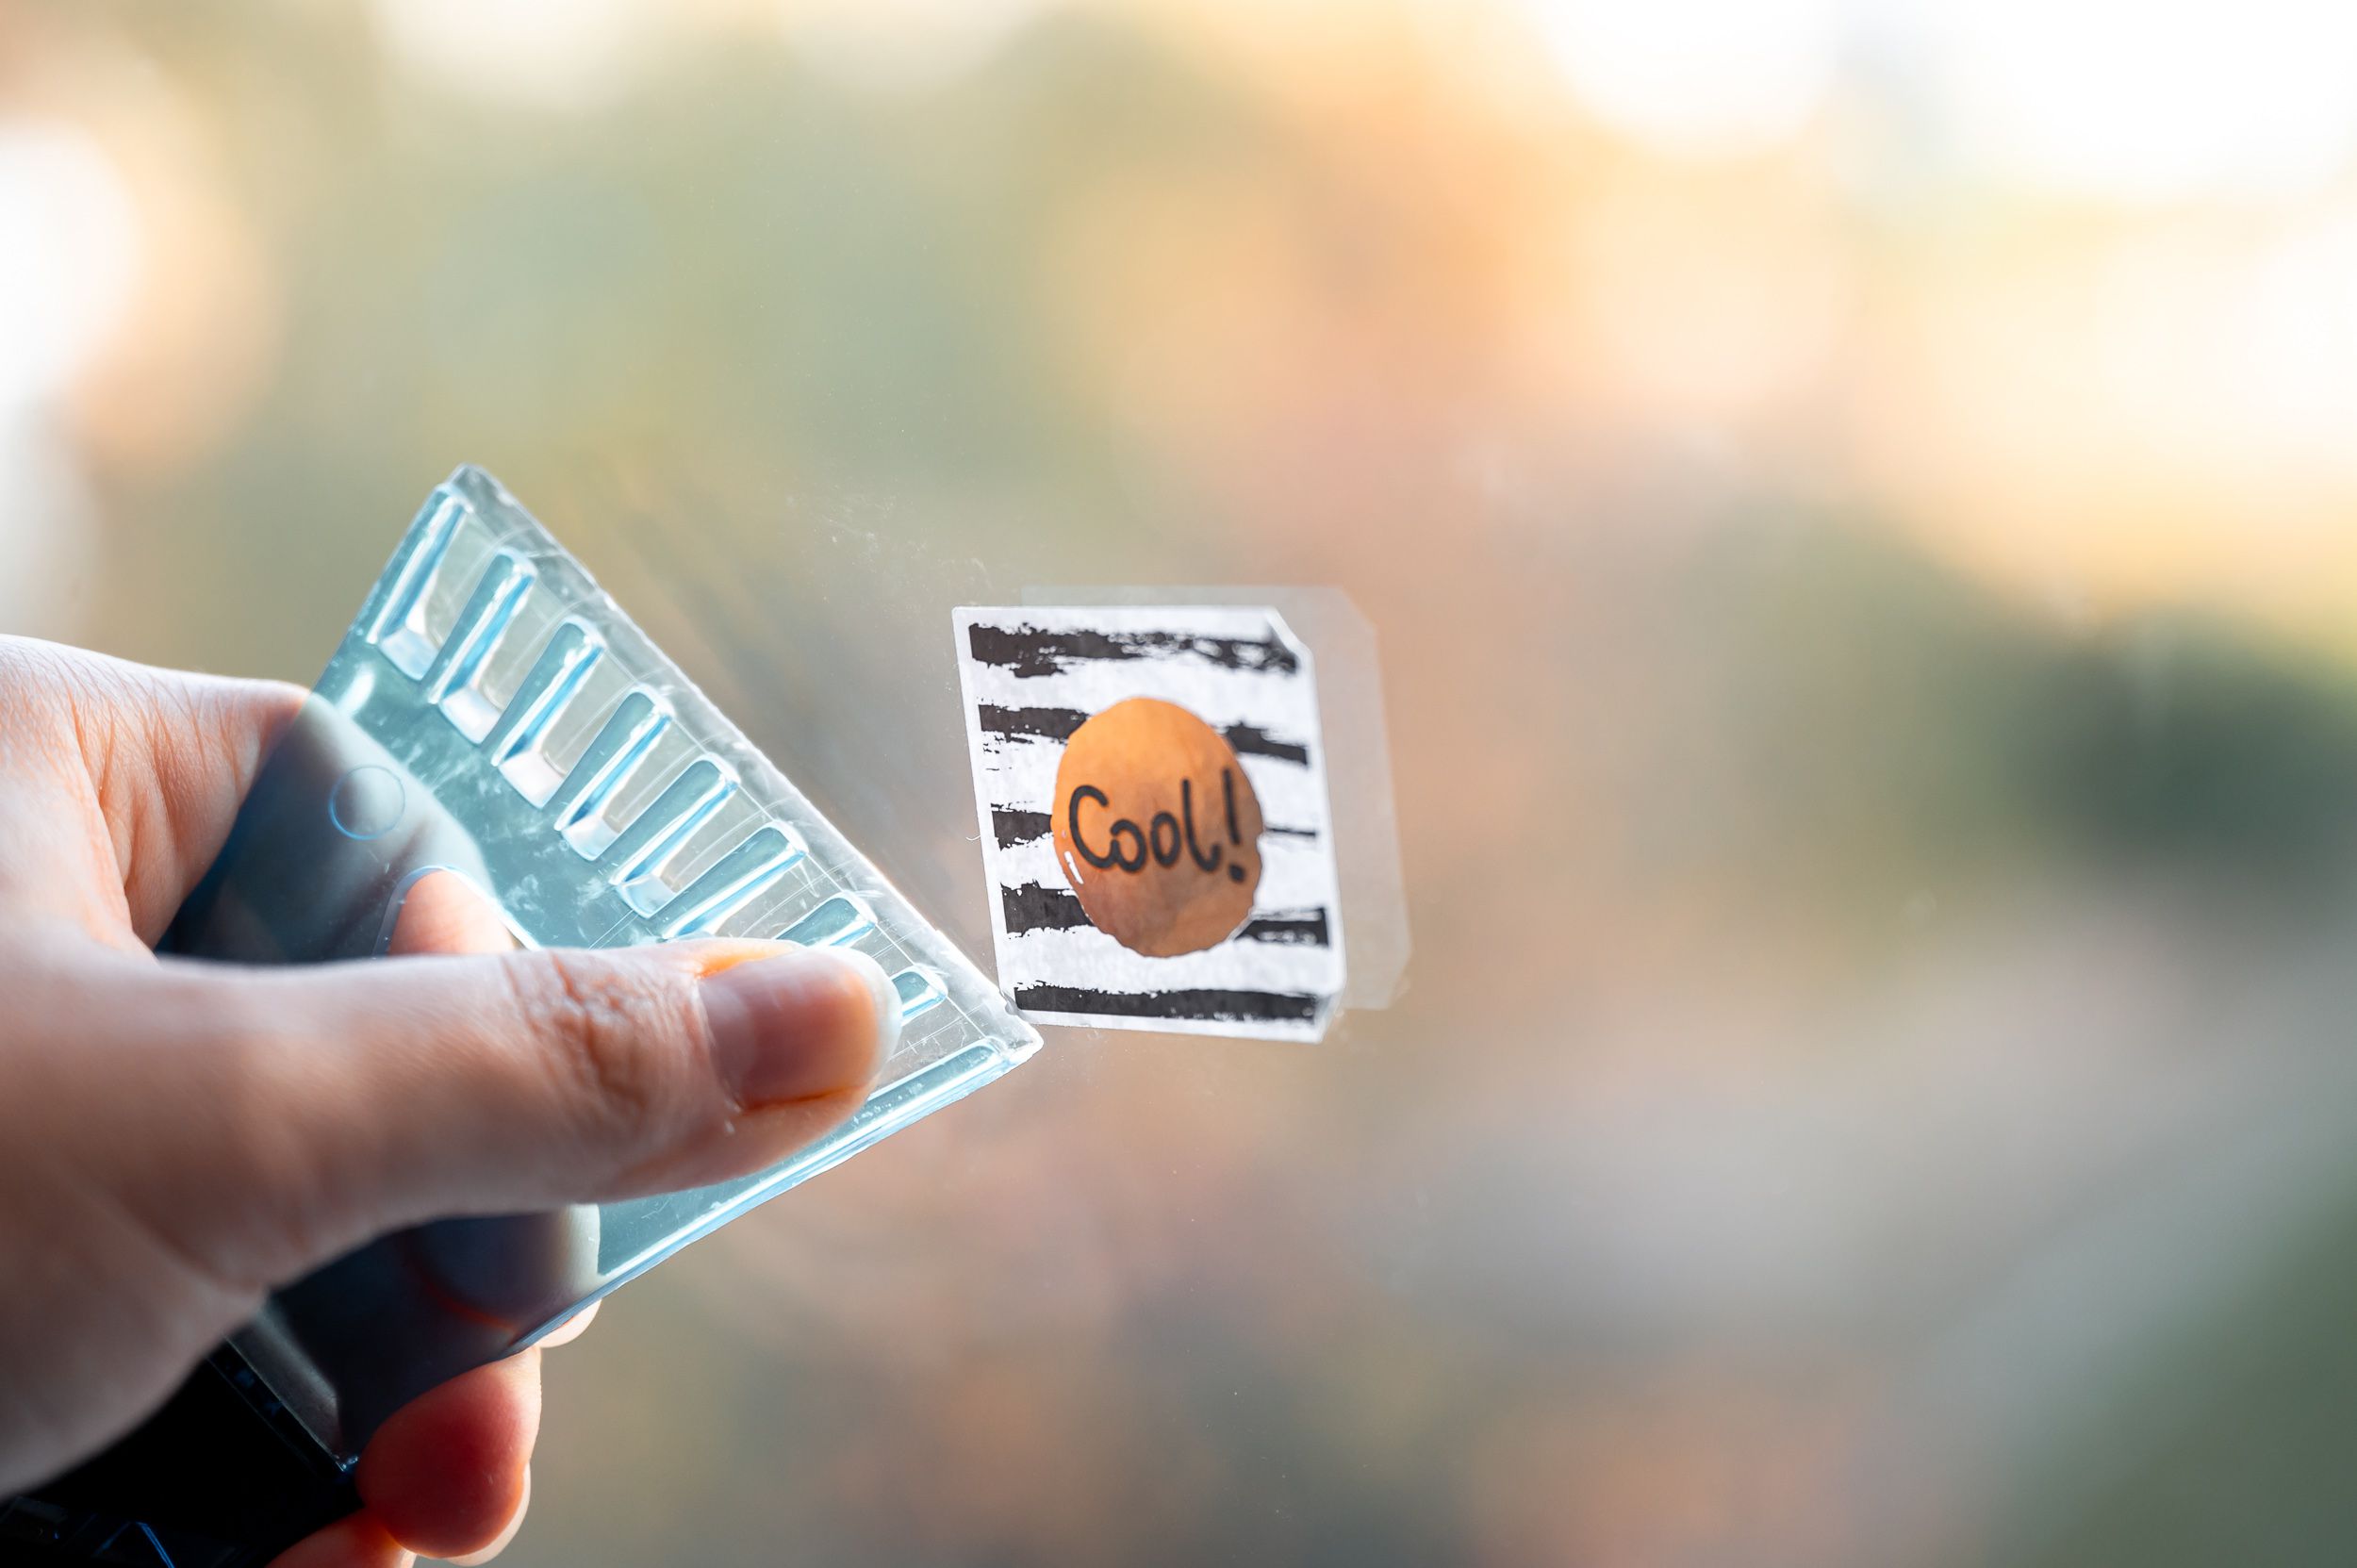
Test for Softening: After a minute or two of heat application, test the decal by attempting to lift a corner using a plastic card or scraper. If the decal begins to lift easily, continue applying heat as needed. Avoid overheating the glass, as excessive heat can cause damage.
-
Peel Off the Decal: Once the adhesive has softened sufficiently, use a plastic card or scraper to gently lift the edge of the decal from the glass surface. Proceed to peel off the decal slowly and steadily, taking care to avoid applying excessive force that could potentially scratch the glass.
-
Residual Adhesive Removal: If any adhesive residue remains on the glass after the decal has been removed, use a mild glass cleaner or a solution of warm, soapy water to gently wipe away the residue. A soft, lint-free cloth can be used to ensure a clean and residue-free finish.
-
Cautionary Note: It's important to exercise caution when using a hair dryer to avoid overheating the glass, as this can lead to thermal stress and potential damage. Additionally, always work in a well-ventilated area and avoid prolonged exposure to the heat source.
By following these steps and employing the gentle heat of a hair dryer, you can effectively remove decals from glass surfaces while safeguarding the integrity of the glass. This method is particularly suitable for delicate glass items such as decorative pieces, windows, and glassware, offering a safe and efficient approach to decal removal.
Method 3: Using Vinegar
When it comes to natural and eco-friendly solutions for removing decals from glass, the use of vinegar stands out as a versatile and effective method. White vinegar, known for its acidic properties, can effectively break down the adhesive bond of decals, making them easier to remove from glass surfaces. This method is particularly appealing for individuals seeking a non-toxic and readily available solution for decal removal. By following the step-by-step procedure outlined below, you can harness the power of vinegar to achieve successful decal removal while minimizing environmental impact.
Step-by-Step Procedure:
-
Prepare the Vinegar Solution: Begin by creating a vinegar solution using equal parts of white vinegar and water. Pour the solution into a spray bottle for convenient application. The diluted vinegar will provide the necessary acidity to break down the adhesive while being gentle on the glass surface.
-
Apply the Vinegar Solution: Liberally spray the vinegar solution onto the decal, ensuring that it is thoroughly saturated. Allow the solution to penetrate the edges of the decal and the underlying adhesive. The acidic nature of the vinegar will work to weaken the bond between the decal and the glass.
-
Soak and Wait: After applying the vinegar solution, allow it to soak for approximately 5 to 10 minutes. This soaking period is crucial, as it gives the vinegar ample time to penetrate and soften the adhesive, making the decal easier to remove.
-
Peel Off the Decal: Once the vinegar solution has had time to work its magic, use a plastic card or scraper to gently lift the edge of the decal from the glass surface. Proceed to peel off the decal slowly and steadily, taking care to avoid leaving behind any residue.
-
Clean the Glass Surface: After successfully removing the decal, use a glass cleaner to thoroughly clean the glass surface. This step will help eliminate any remaining adhesive residue and ensure a pristine finish.
-
Cautionary Note: While vinegar is generally safe for use on glass surfaces, it's advisable to test the solution on a small, inconspicuous area first to ensure compatibility. Additionally, avoid using vinegar on special or treated glass surfaces, as it may cause damage or discoloration.
By following these steps and harnessing the natural power of vinegar, you can effectively remove decals from glass surfaces while embracing an environmentally conscious approach. This method offers a compelling alternative for individuals seeking a non-toxic and budget-friendly solution for decal removal, showcasing the versatility and efficacy of everyday household items.
Method 4: Using Rubbing Alcohol
When it comes to removing decals from glass surfaces, utilizing rubbing alcohol presents a highly effective and versatile method. Isopropyl rubbing alcohol, with its solvent properties, can effectively dissolve adhesive residue, making it easier to wipe away and leaving the glass surface clean and pristine. This method is particularly suitable for addressing stubborn decals and adhesive marks, offering a straightforward and efficient approach to decal removal.
Step-by-Step Procedure:
-
Prepare the Rubbing Alcohol: Begin by ensuring that you have isopropyl rubbing alcohol on hand. This solvent is readily available at most pharmacies and can be purchased in varying strengths. Opt for a concentration of 70% or higher for optimal effectiveness in removing adhesive residue.
-
Apply the Rubbing Alcohol: Pour a small amount of rubbing alcohol onto a soft, lint-free microfiber cloth. Ensure that the cloth is damp but not dripping with the alcohol. Gently press the cloth against the decal, allowing the rubbing alcohol to saturate the adhesive underneath.
-
Soak and Dwell Time: Allow the rubbing alcohol to soak into the adhesive for a few minutes. This dwell time is essential, as it gives the alcohol the opportunity to break down the adhesive bond, making it easier to remove the decal.
-
Gently Wipe and Remove: After the dwell time, use the dampened cloth to gently wipe away the decal and any remaining adhesive residue. Employ a circular motion to ensure thorough coverage and effective dissolution of the adhesive. If necessary, repeat the process to address any stubborn residue.
-
Clean the Glass Surface: Once the decal and adhesive residue have been successfully removed, use a quality glass cleaner to thoroughly clean the glass surface. This final step will ensure that any traces of rubbing alcohol and residual adhesive are completely eliminated, leaving the glass surface spotless.
-
Cautionary Note: While rubbing alcohol is generally safe for use on glass surfaces, it's advisable to test it on a small, inconspicuous area first to ensure compatibility. Additionally, ensure that the area is well-ventilated when using rubbing alcohol to avoid inhaling fumes.
By following these steps and harnessing the solvent power of rubbing alcohol, you can effectively remove decals from glass surfaces with ease and precision. This method offers a practical and accessible solution for addressing adhesive residue, providing a reliable approach to restoring glass surfaces to their original condition.
Method 5: Using Commercial Decal Remover
When it comes to tackling stubborn decals or adhesive residue on glass surfaces, utilizing a commercial decal remover can offer a convenient and highly effective solution. These specialized products are specifically formulated to break down adhesive bonds and facilitate the easy removal of decals without causing damage to the glass. Whether you're dealing with persistent price stickers, old window decals, or stubborn residue, a reputable commercial decal remover can streamline the removal process and deliver impressive results.
Step-by-Step Procedure:
-
Selecting the Right Product: Begin by selecting a commercial decal remover that aligns with your specific needs. There are various formulations available, including gel-based removers, spray-on solutions, and adhesive-dissolving liquids. Consider the type of decal and the extent of the adhesive residue when choosing the most suitable product.
-
Read and Follow Instructions: Before applying the commercial decal remover, carefully read and follow the manufacturer's instructions provided on the product packaging. Pay attention to any safety precautions, application guidelines, and recommended dwell times to ensure optimal results and safe usage.
-
Apply the Decal Remover: Following the instructions, apply the commercial decal remover to the affected area of the glass surface. Ensure that the application is even and thorough, covering the entire decal and any surrounding adhesive residue. Allow the product to dwell for the specified duration as directed.
-
Decal Dissolution: As the commercial decal remover works its magic, it will begin to dissolve the adhesive bond, effectively loosening the decal from the glass surface. Depending on the product, you may notice the decal lifting or becoming easier to peel off as the remover penetrates the adhesive.
-
Gentle Removal: Once the adhesive bond has been sufficiently weakened by the decal remover, use a plastic card or scraper to gently lift the decal from the glass surface. Proceed to peel off the decal with care, ensuring that any remaining residue is also addressed during the removal process.
-
Clean and Polish: After successfully removing the decal and adhesive residue, use a quality glass cleaner to thoroughly clean and polish the glass surface. This final step will eliminate any traces of the decal remover and ensure a pristine finish.
By following these steps and utilizing a reputable commercial decal remover, you can effectively address stubborn decals and adhesive residue on glass surfaces with confidence. These products offer a valuable solution for individuals seeking a specialized and efficient approach to decal removal, providing a reliable means to restore glass surfaces to their original condition.
This method provides a practical and accessible solution for addressing adhesive residue, offering a reliable approach to restoring glass surfaces to their original condition.
Soak a cloth in warm, soapy water and place it over the decal for a few minutes to loosen the adhesive. Then, gently scrape the decal off using a plastic scraper or a credit card. Finally, wipe the glass clean with glass cleaner.
Conclusion
In conclusion, the process of removing decals from glass surfaces encompasses a diverse array of methods, each offering its own set of advantages and considerations. Whether you opt for the precision of a razor blade, the gentle heat of a hair dryer, the natural properties of vinegar, the solvent power of rubbing alcohol, or the convenience of commercial decal removers, the goal remains consistent: to restore glass surfaces to their pristine condition while effectively addressing decal removal.
It's important to recognize that the choice of method may depend on various factors, including the type of decal, the duration it has been in place, and the specific characteristics of the glass surface. By understanding the step-by-step procedures for each method and the materials needed, individuals can confidently approach decal removal projects with the expertise needed to achieve successful outcomes.
The razor blade method offers precision and control, making it ideal for tackling stubborn decals without damaging the glass surface. This technique is particularly effective for addressing decals that have firmly adhered to the glass, providing a reliable solution for restoring the glass to its original state.
The hair dryer method, on the other hand, harnesses the gentle power of heat to soften adhesive bonds, offering a safe and efficient approach to decal removal. This technique is particularly suitable for delicate glass items such as decorative pieces, windows, and glassware, providing a non-abrasive solution for decal removal.
The use of vinegar presents a natural and eco-friendly approach to decal removal, leveraging the acidic properties of white vinegar to break down adhesive bonds. This method offers a compelling alternative for individuals seeking a non-toxic and budget-friendly solution for decal removal, showcasing the versatility and efficacy of everyday household items.
Utilizing rubbing alcohol provides a highly effective and versatile method for removing decals from glass surfaces. The solvent properties of isopropyl rubbing alcohol effectively dissolve adhesive residue, offering a practical and accessible solution for addressing stubborn decals and adhesive marks.
Finally, the use of commercial decal removers offers a convenient and highly effective solution for addressing persistent decals and adhesive residue on glass surfaces. These specialized products are specifically formulated to streamline the removal process and deliver impressive results, providing a valuable solution for individuals seeking a specialized and efficient approach to decal removal.
In essence, the comprehensive guide to removing decals from glass surfaces equips individuals with the knowledge and expertise needed to address decal removal projects effectively. By understanding the materials needed and the step-by-step procedures for each method, individuals can confidently restore glass surfaces to their original condition, ensuring that they remain free from unsightly residue.
Frequently Asked Questions about How To Remove Decals From Glass
Was this page helpful?
At Storables.com, we guarantee accurate and reliable information. Our content, validated by Expert Board Contributors, is crafted following stringent Editorial Policies. We're committed to providing you with well-researched, expert-backed insights for all your informational needs.


0 thoughts on “How To Remove Decals From Glass”