Home>Furniture & Design>Interior Design Trends>How To Tint Glass

Interior Design Trends
How To Tint Glass
Published: February 3, 2024
Learn the latest interior design trends with our guide on how to tint glass. Enhance your space with this popular technique. Discover the possibilities today!
(Many of the links in this article redirect to a specific reviewed product. Your purchase of these products through affiliate links helps to generate commission for Storables.com, at no extra cost. Learn more)
Introduction
Tinting glass is a popular and effective way to enhance privacy, reduce glare, and add a touch of style to windows, doors, and other glass surfaces. Whether you're looking to create a more comfortable living space, increase energy efficiency, or simply update the aesthetics of your home or office, tinting glass can offer a range of benefits. With the right materials and techniques, you can achieve professional-looking results that elevate the ambiance of any space.
Tinting glass is a versatile solution that can be applied to various glass surfaces, including windows, glass doors, and even glass partitions. It provides an added layer of protection against harmful UV rays, which can help preserve furniture, flooring, and other interior elements from fading due to sun exposure. Additionally, tinted glass can contribute to energy efficiency by reducing heat transfer, thus lowering cooling costs during hot seasons.
Moreover, tinting glass can enhance privacy by limiting the visibility from the outside while still allowing natural light to filter through. This is particularly beneficial for spaces where privacy is essential, such as bathrooms, bedrooms, and office meeting rooms. The added privacy can create a more comfortable and secure environment, promoting a sense of tranquility and seclusion.
In terms of aesthetics, tinting glass offers a myriad of design possibilities. From subtle, barely-there tints to bold, statement-making hues, the options are virtually limitless. Tinted glass can complement various interior styles, from modern and minimalist to traditional and eclectic, making it a versatile choice for any design scheme.
Whether you're a seasoned DIY enthusiast or a first-time home improver, learning how to tint glass can be a rewarding and empowering experience. By mastering this skill, you can transform ordinary glass surfaces into functional, stylish, and visually appealing elements that elevate the overall ambiance of your living or working space. In the following sections, we'll delve into the materials needed and the step-by-step process for achieving professional-grade results when tinting glass.
Key Takeaways:
- Tinting glass offers privacy, UV protection, and style. With the right materials and techniques, you can achieve professional-looking results that elevate the ambiance of any space.
- Prepare thoroughly, apply carefully, and address air bubbles for a flawless tinted glass surface. The final steps ensure a polished, enduring, and visually appealing result.
Read more: How To Make Tinted Glass
Materials Needed
When embarking on the journey of tinting glass, it's essential to gather the necessary materials to ensure a smooth and successful process. Here's a comprehensive list of items you'll need to achieve professional-grade results:
-
Tint Film: Select a high-quality tint film that suits your specific needs and preferences. Consider factors such as the level of privacy and UV protection you desire, as well as the aesthetic appeal of the tint color. Tint films are available in various shades and thicknesses, so choose one that aligns with your overall design vision.
-
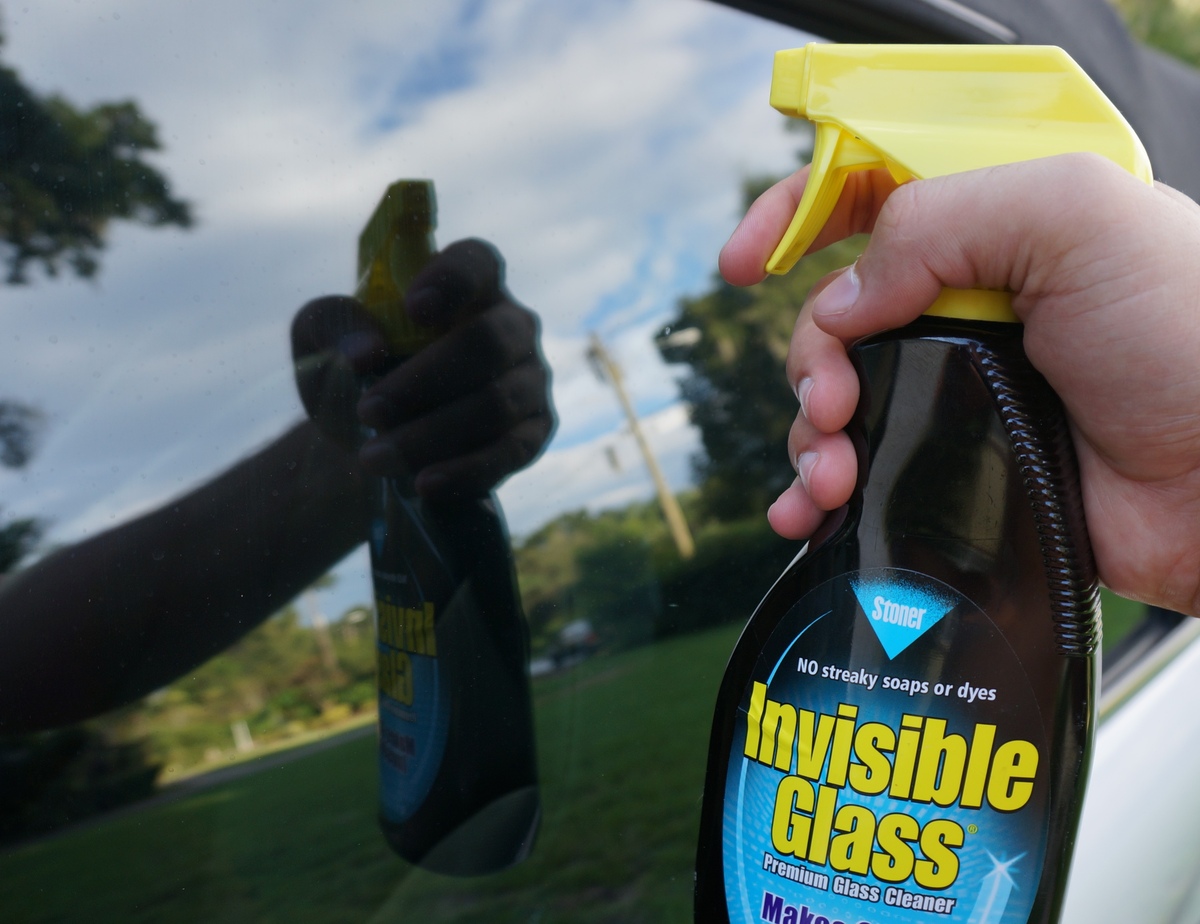
Glass Cleaner: Before applying the tint film, it's crucial to thoroughly clean the glass surface to remove any dirt, dust, or residue. Opt for a reputable glass cleaner that effectively eliminates impurities and ensures a pristine surface for the tint film to adhere to.
-
Measuring Tools: Accurate measurements are key to achieving a precise and seamless tint application. Equip yourself with a measuring tape or ruler to assess the dimensions of the glass surface, allowing you to cut the tint film to the exact size required for a snug fit.
-
Cutting Tools: To trim the tint film to the appropriate dimensions, you'll need cutting tools such as a sharp utility knife or precision scissors. These tools enable you to achieve clean, straight cuts, ensuring that the tint film aligns perfectly with the glass surface.
-
Application Solution: An application solution, typically comprising water and a small amount of mild detergent, is essential for facilitating the smooth application of the tint film. This solution helps the tint film adhere to the glass without air bubbles or creases, resulting in a flawless finish.
-
Squeegee: A squeegee is a vital tool for removing excess application solution and air bubbles during the tinting process. Opt for a squeegee with a smooth, firm edge to effectively press the tint film onto the glass surface without causing damage.
-
Heat Gun or Hair Dryer: While not always necessary, a heat gun or hair dryer can aid in the tint film installation process, particularly for shaping the film around curved or contoured glass surfaces. The application of gentle heat helps the tint film conform to the glass, ensuring a professional and uniform appearance.
-
Lint-Free Cloth: To achieve a pristine finish, have lint-free cloths on hand to wipe the glass surface and remove any remaining particles or moisture before applying the tint film. This step is crucial for ensuring a flawless and long-lasting tint application.
By assembling these essential materials, you'll be well-prepared to embark on the tinting process with confidence, setting the stage for a successful and visually impactful transformation of your glass surfaces.
Preparation
Before diving into the process of applying tint to glass, thorough preparation is essential to ensure a seamless and professional outcome. Proper preparation sets the stage for a successful tinting process, allowing for optimal adhesion and a visually appealing result. Here's a detailed breakdown of the key steps involved in preparing for the glass tinting process:
-
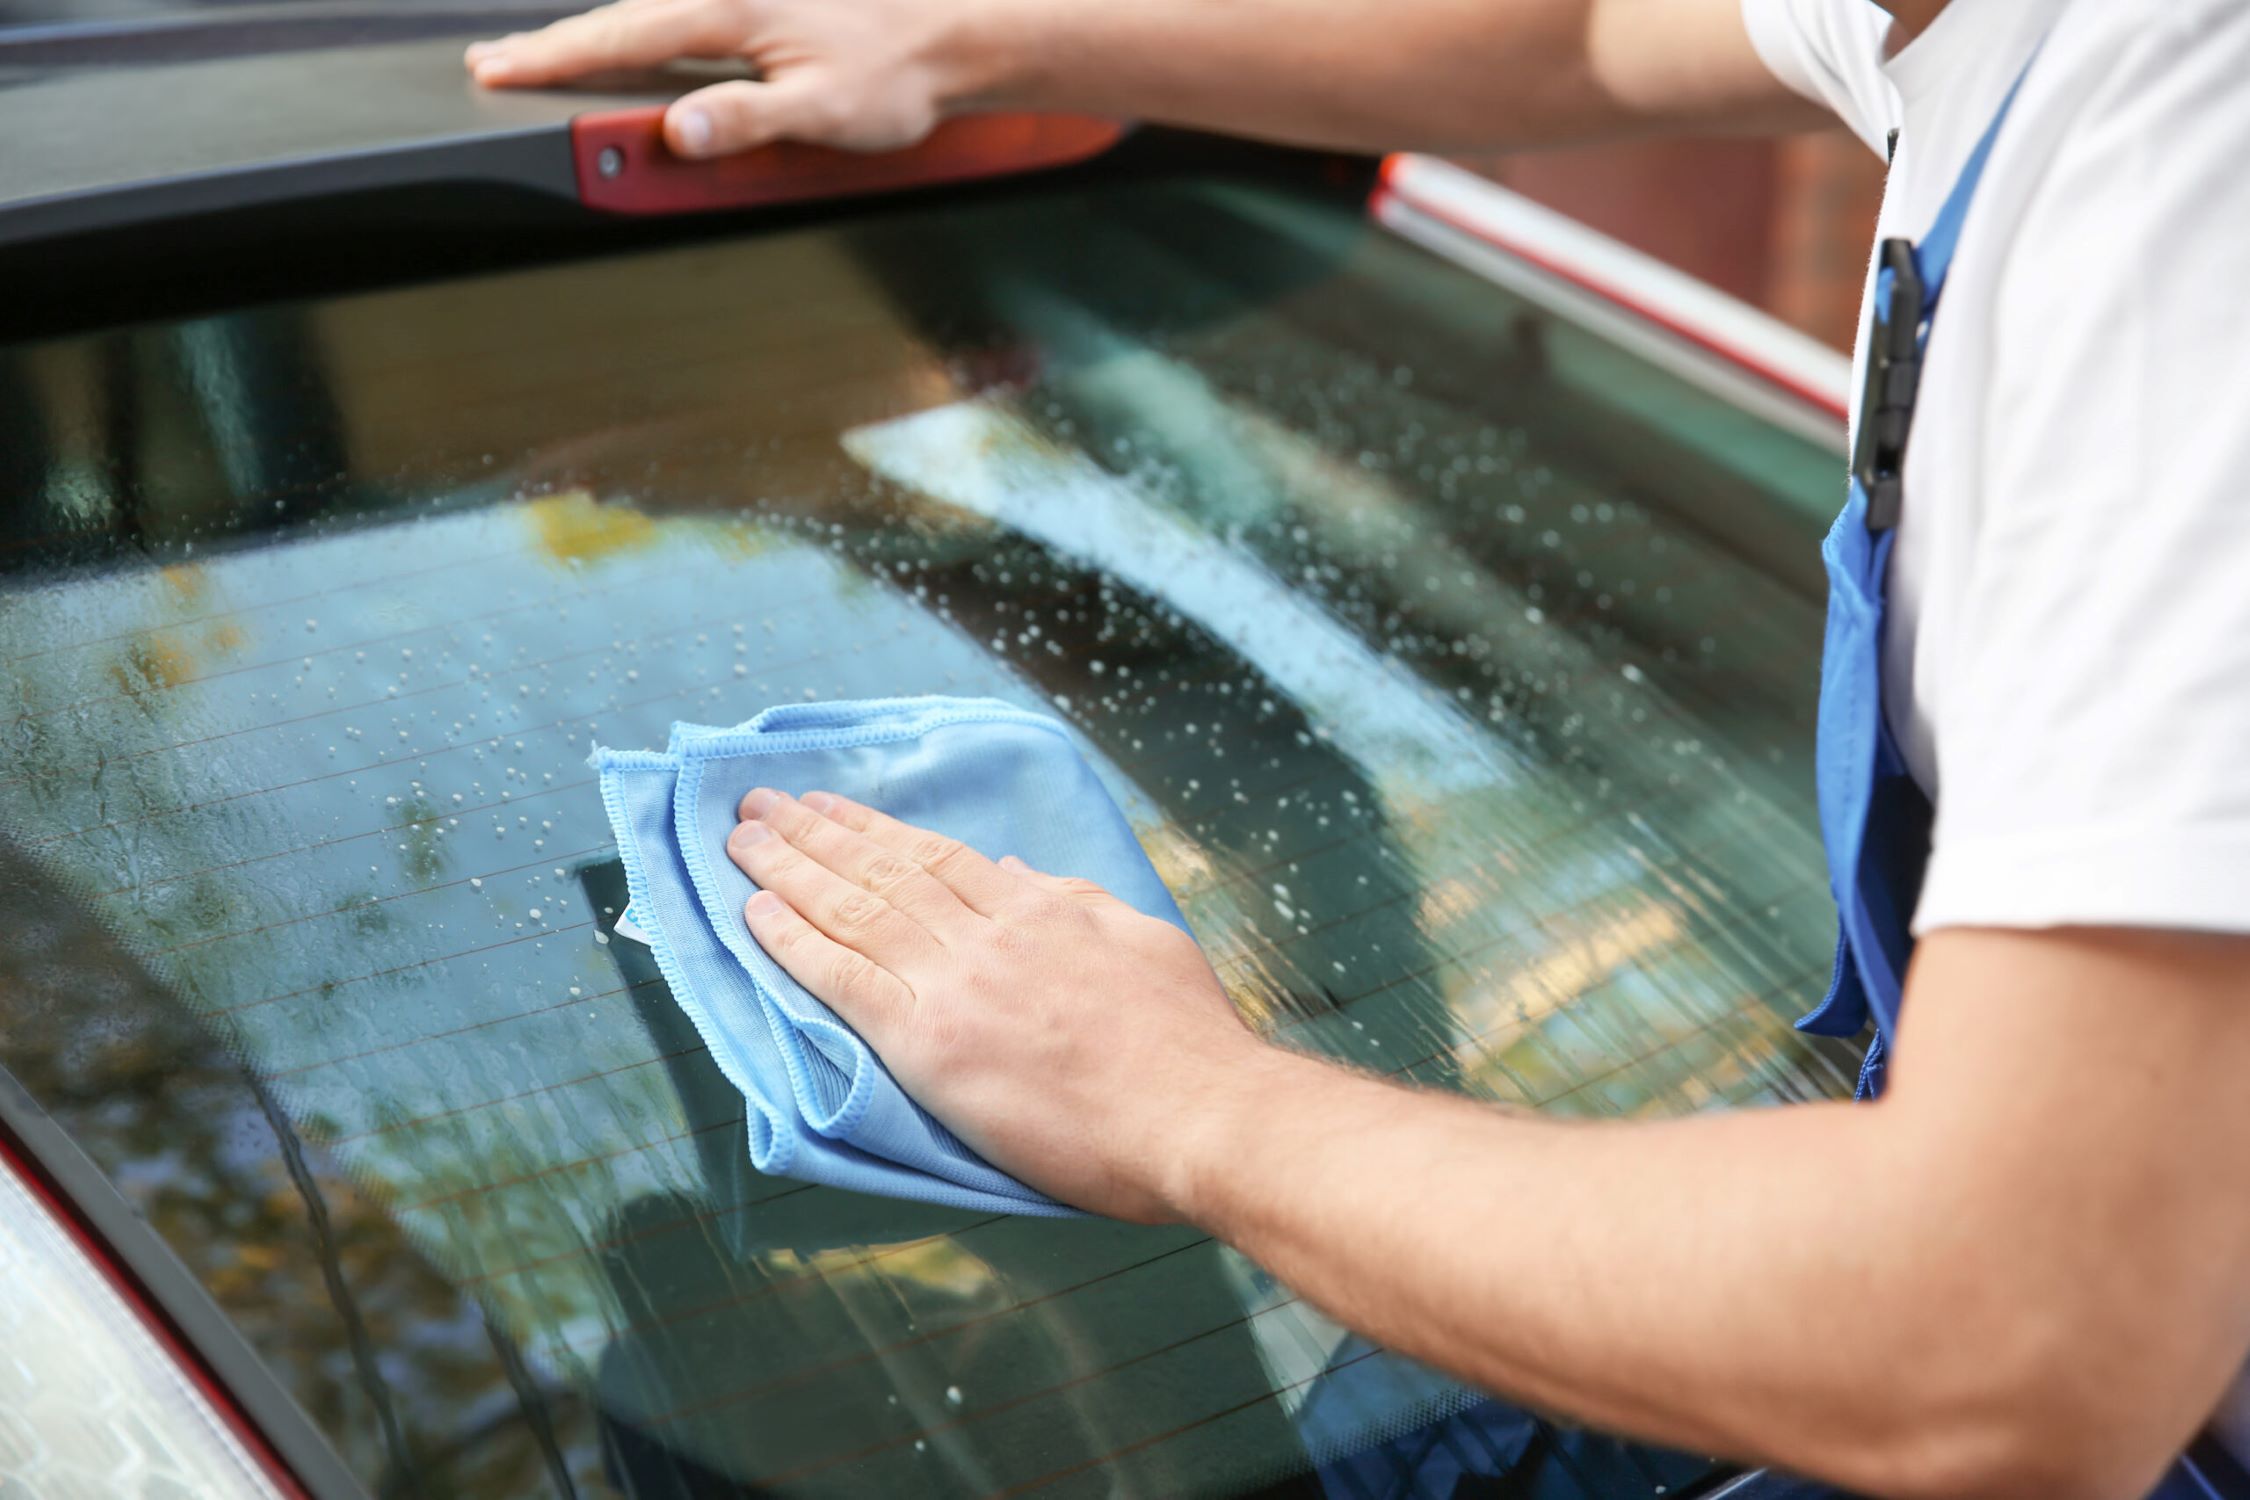
Surface Cleaning: Begin by meticulously cleaning the glass surface that will be tinted. Use a high-quality glass cleaner and a lint-free cloth to remove any dirt, dust, or residue. It's crucial to achieve a pristine surface, free from any impurities that could hinder the adhesion of the tint film.
-
Measuring and Cutting: Accurate measurements are fundamental to achieving a precise and tailored fit for the tint film. Utilize a measuring tape or ruler to determine the exact dimensions of the glass surface. Once the measurements are obtained, carefully cut the tint film to the appropriate size using sharp cutting tools such as a utility knife or precision scissors.
-
Application Solution Preparation: Prepare the application solution by mixing water with a small amount of mild detergent in a spray bottle. This solution will serve as a lubricant during the tint application process, allowing for easy positioning and adjustment of the film on the glass surface.
-
Work Area Setup: Create a clean and well-lit work area to facilitate the tinting process. Ensure that the work surface is free from dust and debris, and consider using a worktable or flat, stable surface to lay out the tint film and perform the application.
-
Film Positioning: Lay the precut tint film on a clean, flat surface, such as a worktable or the glass surface itself. Carefully peel away the protective liner from the tint film, taking care to avoid creasing or folding the film. Position the film on the glass surface to assess the fit and alignment before proceeding with the application.
-
Environmental Considerations: Take into account environmental factors such as temperature and humidity, as they can impact the tinting process. Ideally, perform the tinting process in a well-ventilated area with moderate temperature and low humidity to ensure optimal conditions for the application and adhesion of the tint film.
By meticulously preparing the glass surface and gathering the necessary tools and materials, you'll be well-equipped to embark on the next stages of the tinting process with confidence and precision. Thorough preparation lays the groundwork for a successful and visually impactful transformation of the glass surface, ensuring a professional-grade result that enhances both the aesthetics and functionality of the space.
When tinting glass, make sure to thoroughly clean the surface before applying the tint film to ensure a smooth and even application. Any dirt or debris left on the glass can cause air bubbles and imperfections in the tint.
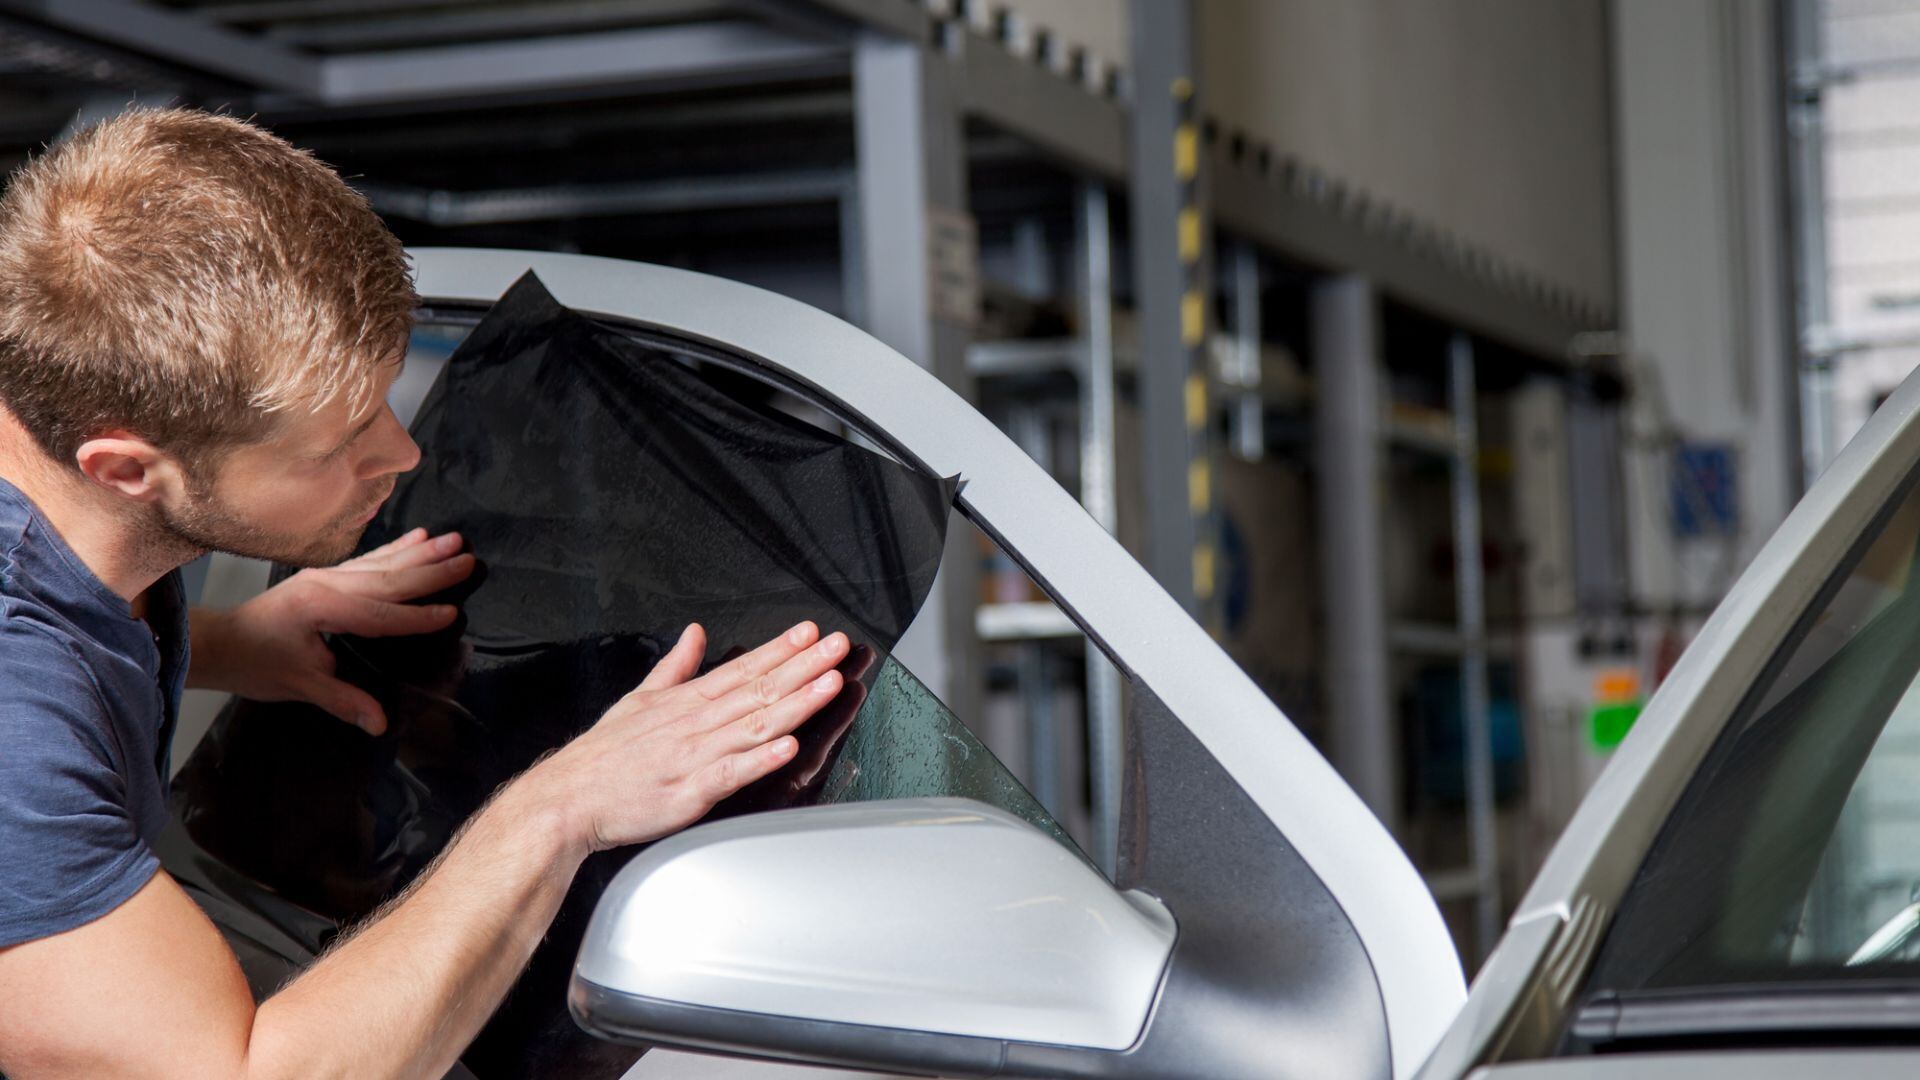
Applying the Tint
With the glass surface meticulously prepared and the necessary materials at hand, the process of applying the tint film can commence. This pivotal stage requires attention to detail and a methodical approach to ensure a seamless and professional outcome. Here's a comprehensive guide to the step-by-step process of applying the tint film to the glass surface:
-
Application Solution Application: Begin by generously spraying the glass surface with the prepared application solution. This step serves to lubricate the surface, allowing for easy repositioning of the tint film and preventing premature adhesion.
-
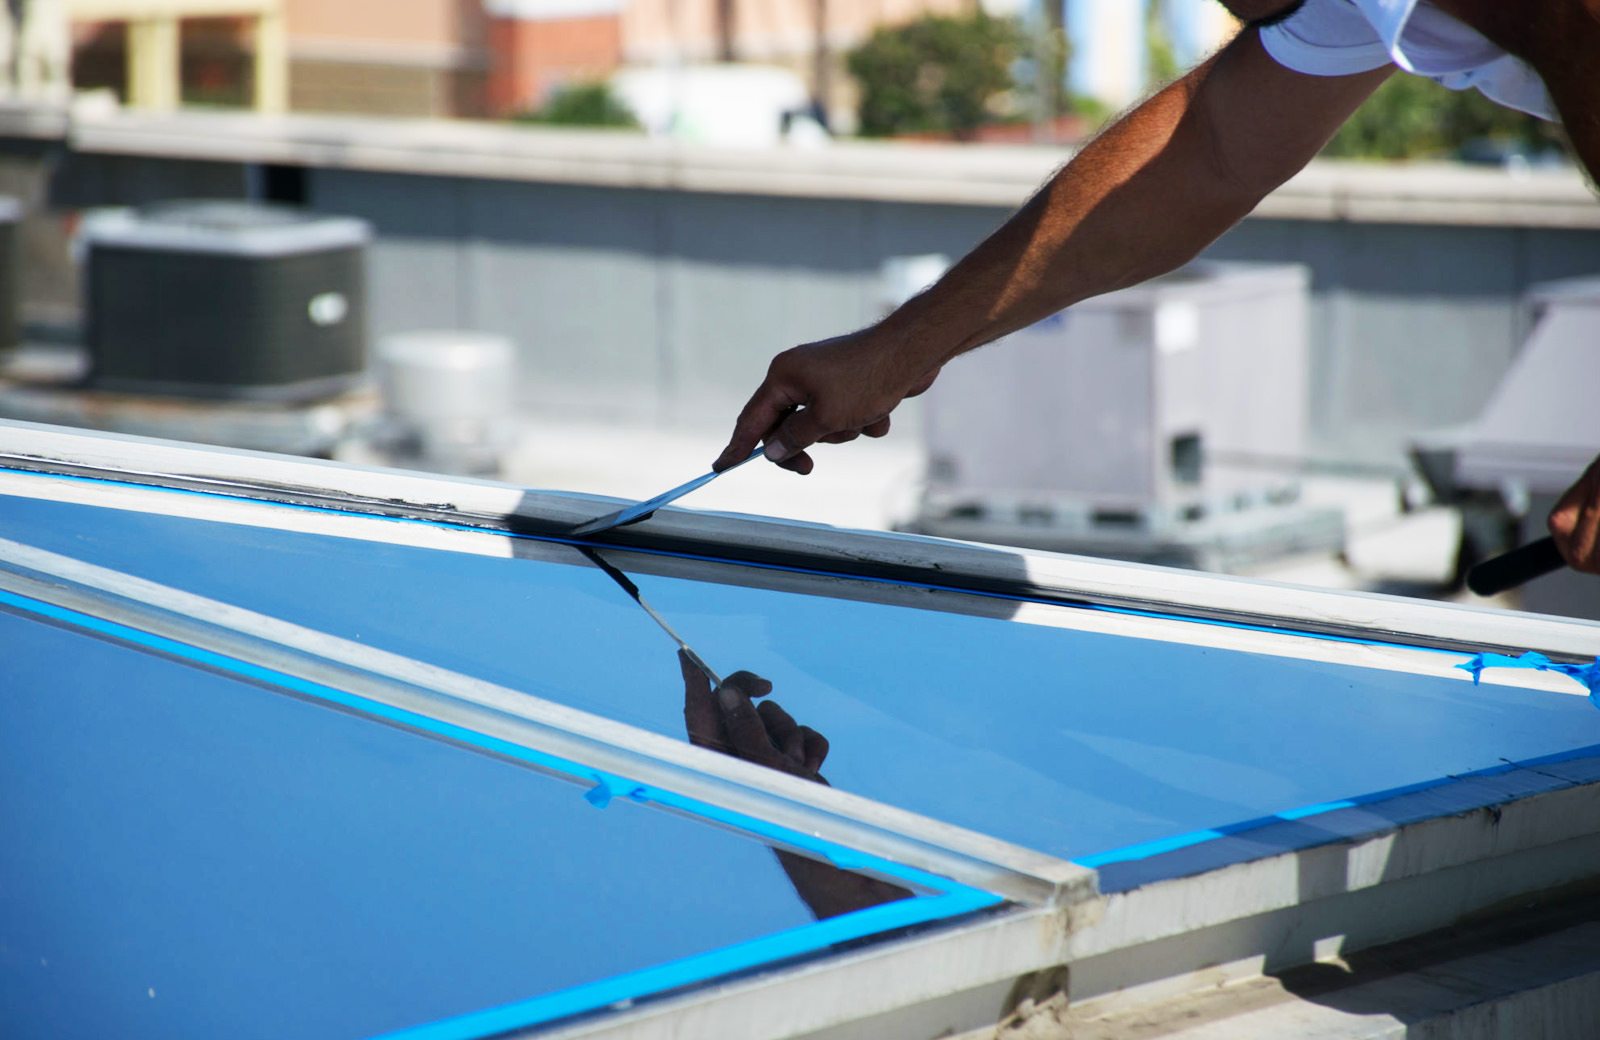
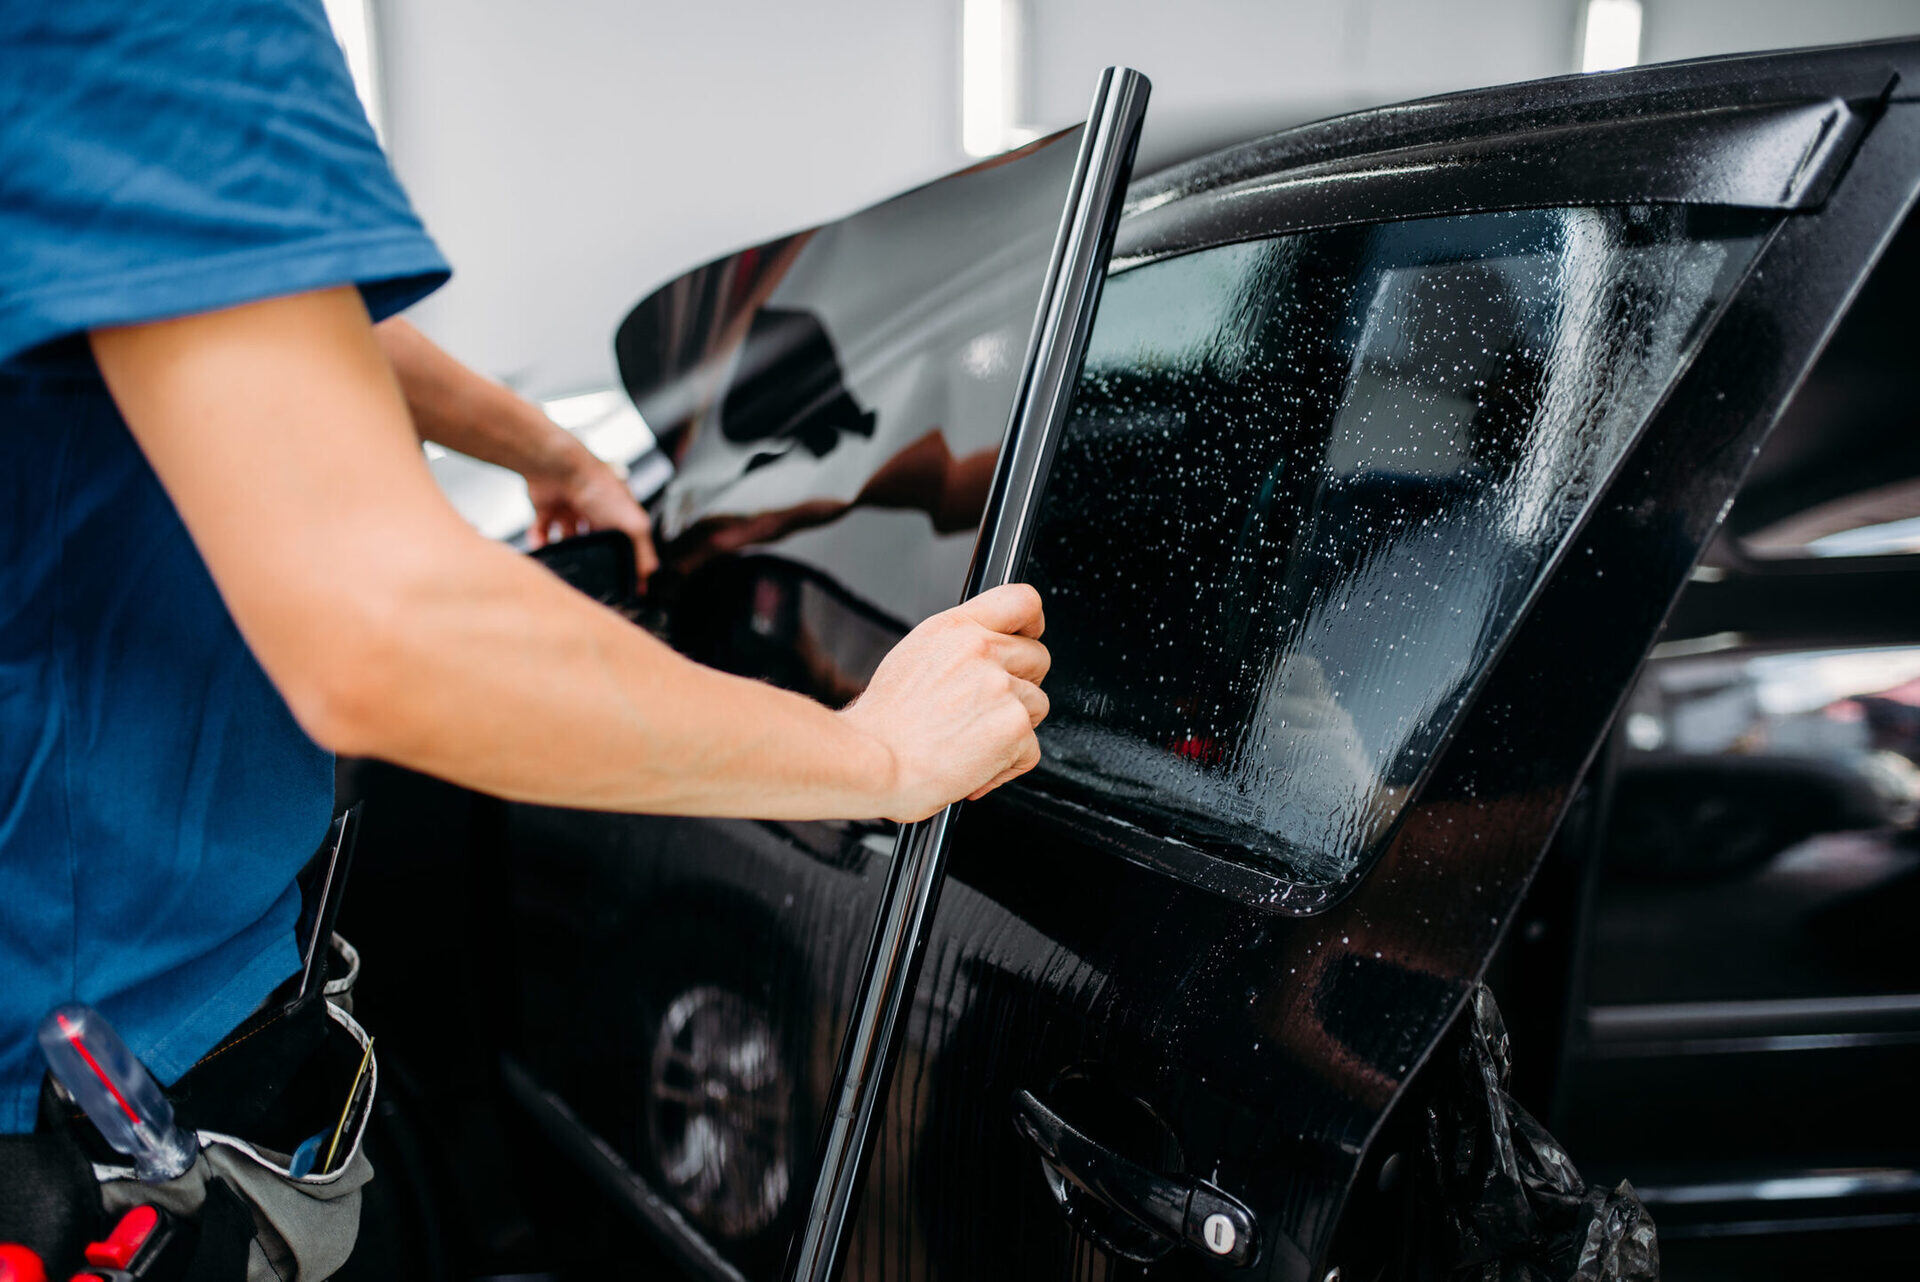
Tint Film Placement: Carefully position the precut tint film onto the moistened glass surface, ensuring that it aligns with the edges and corners. The application solution facilitates effortless maneuvering of the film, enabling precise placement without the risk of creases or air bubbles.
-
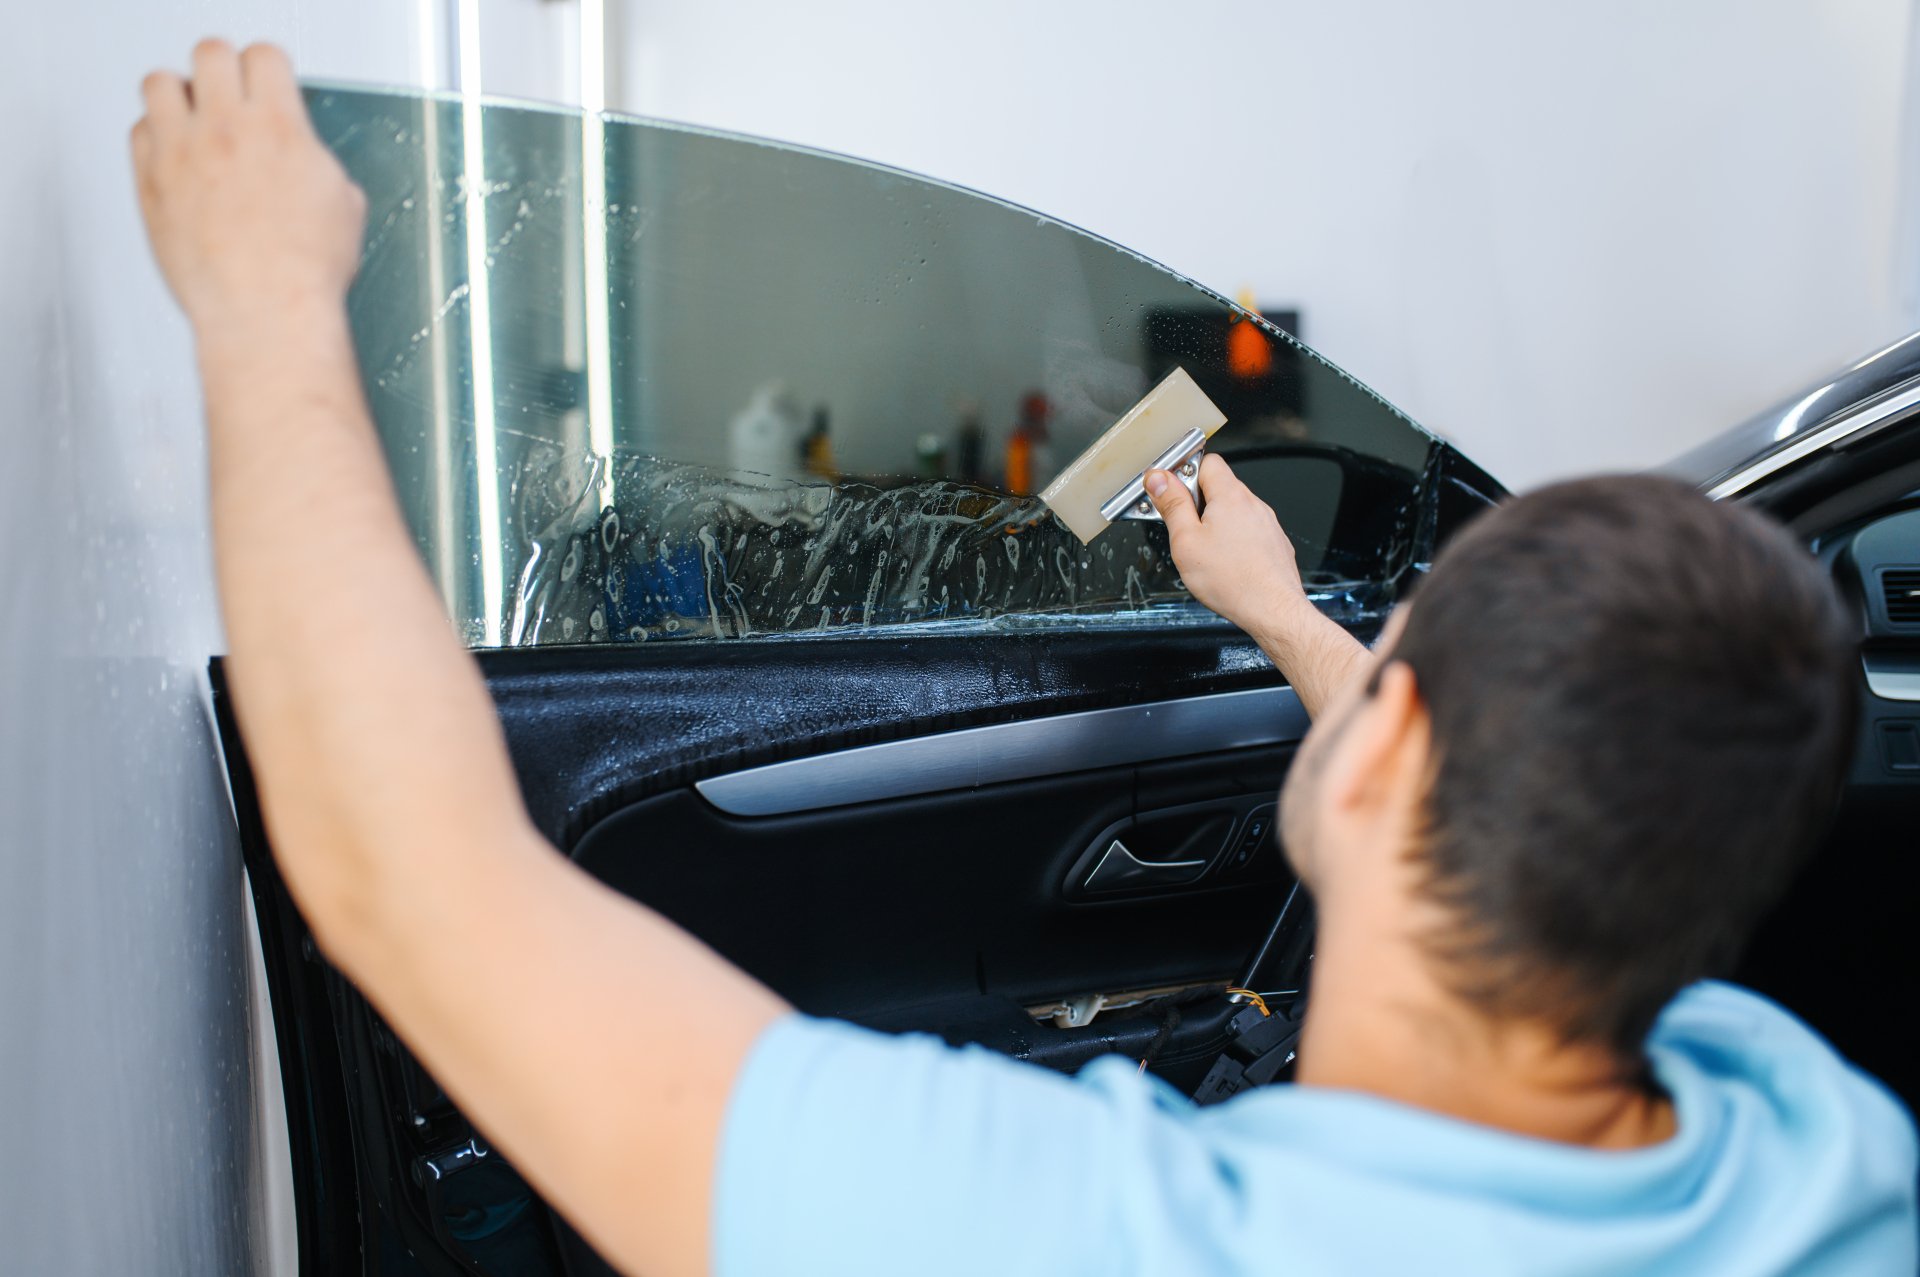
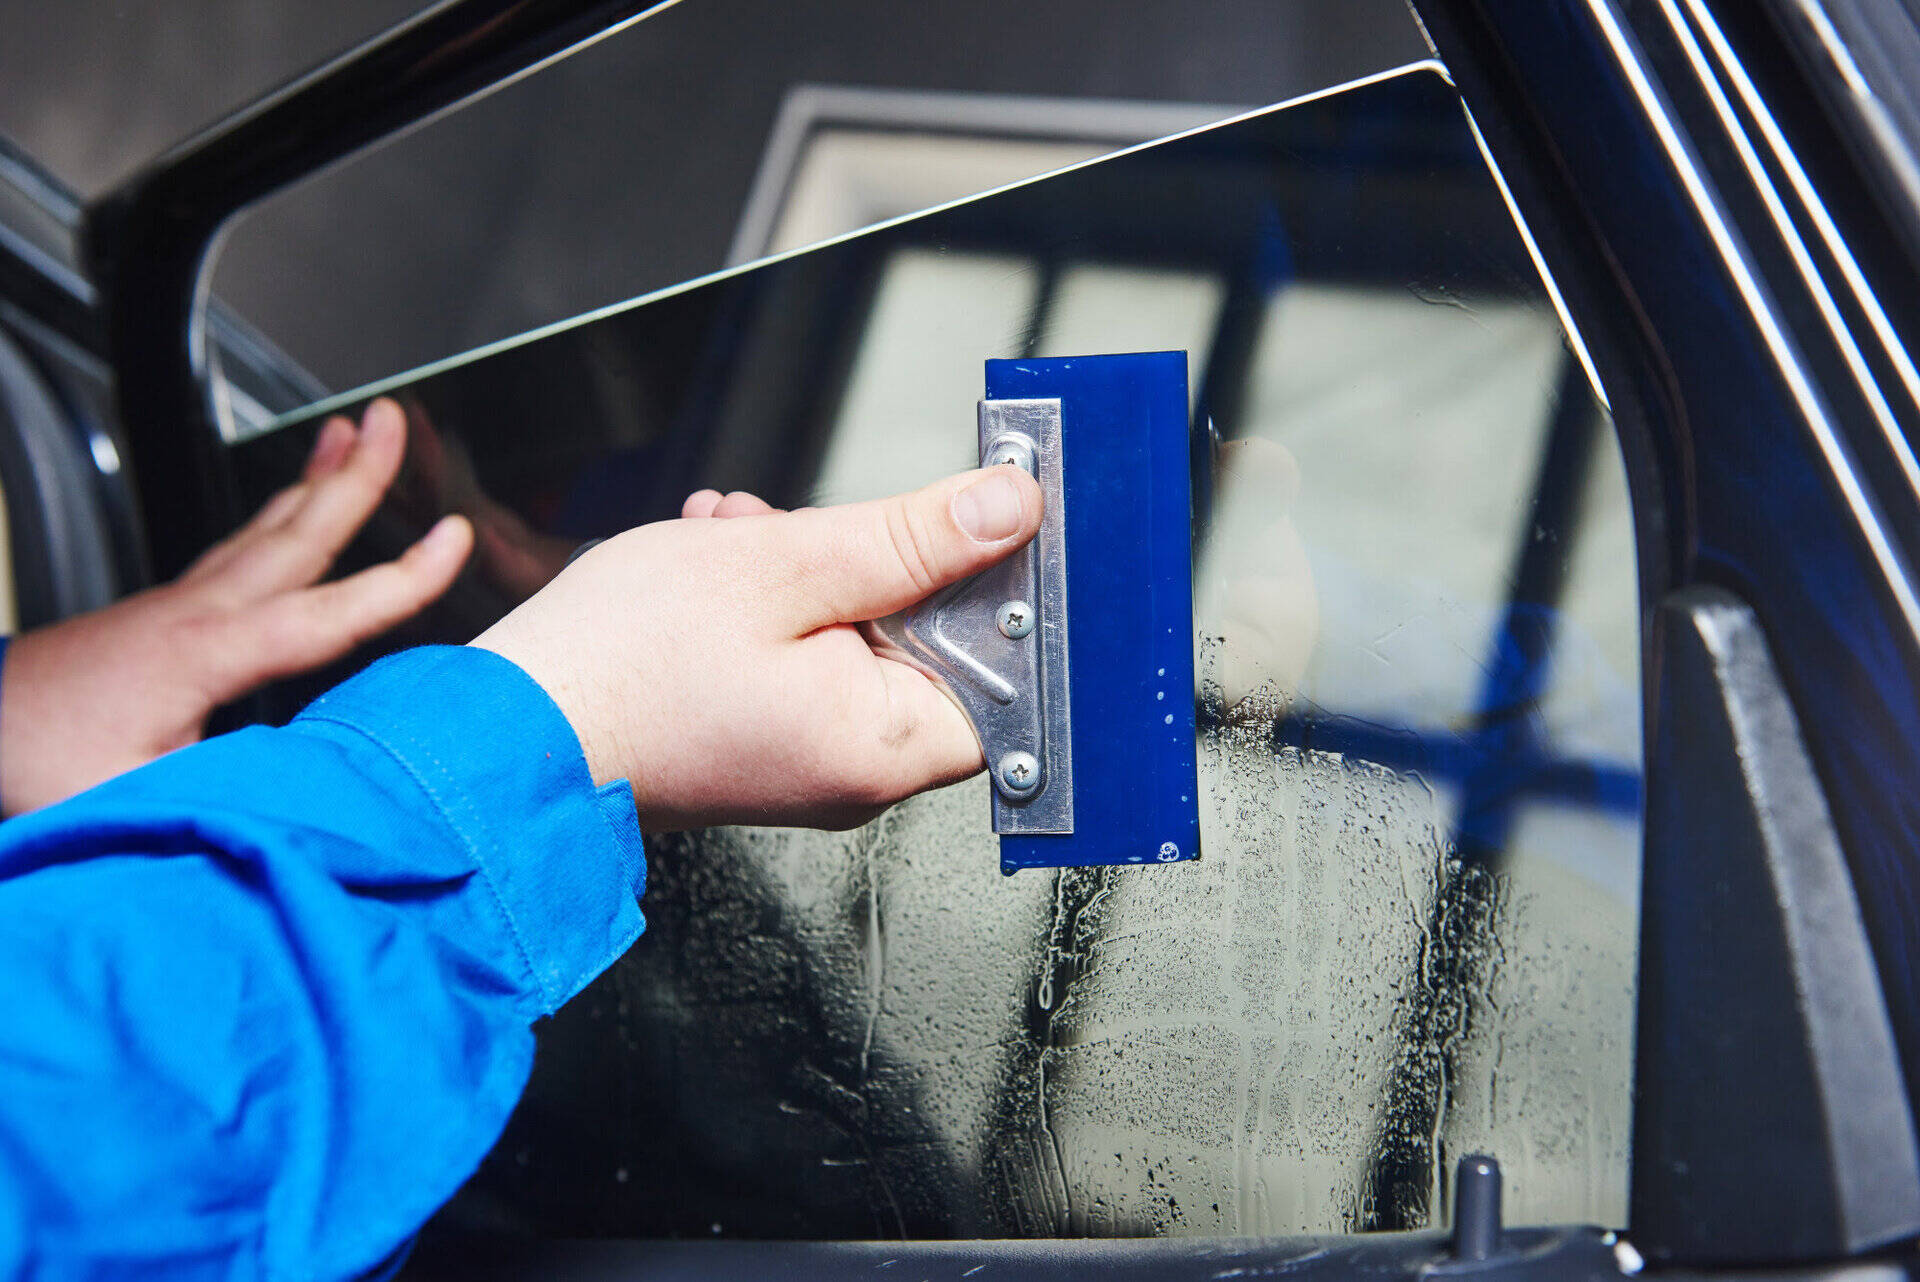
Squeegee Technique: Once the tint film is positioned, use a squeegee to gently press the film against the glass, starting from the center and working outward. This technique effectively removes excess application solution and air bubbles, ensuring a smooth and uniform adhesion of the tint film to the glass surface.
-
Trimming Excess Film: After the tint film is securely adhered to the glass, carefully trim any excess film along the edges using a sharp cutting tool. This step allows for a clean and tailored finish, ensuring that the tint film fits the glass surface precisely.
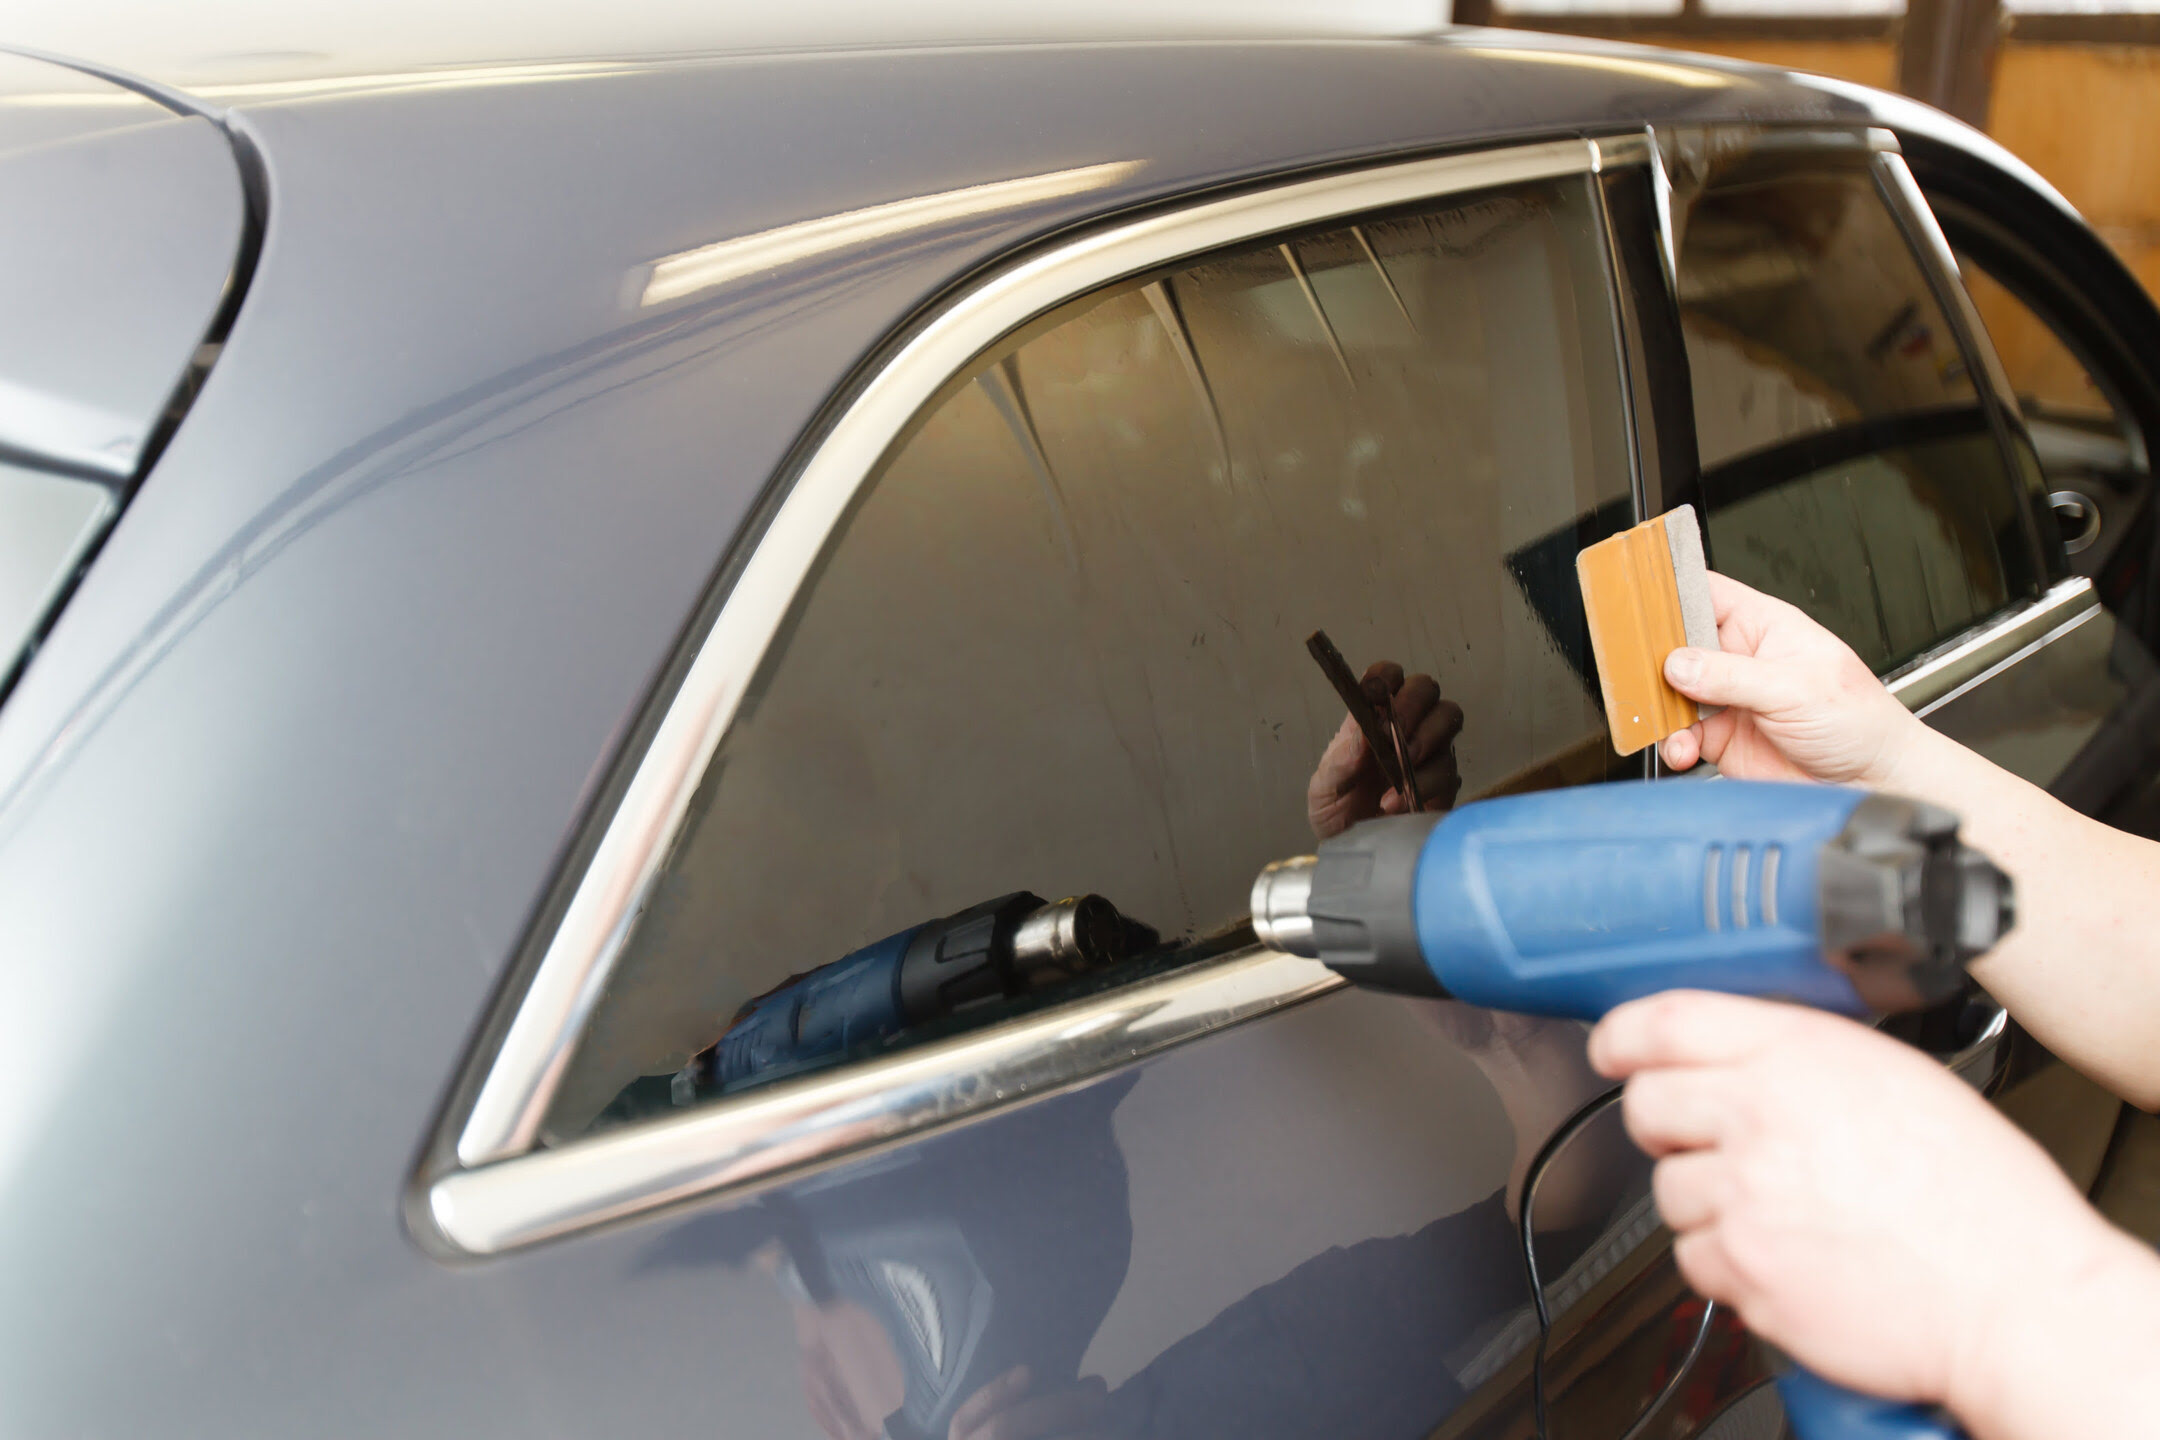
-
Heat Application (Optional): If the glass surface features curves or contours, the application of gentle heat using a heat gun or hair dryer can aid in molding the tint film to the shape of the glass. The controlled application of heat facilitates the film's conformity to the surface, resulting in a professional and seamless appearance.
-
Final Inspection: Once the tint film is applied and any excess film is trimmed, conduct a thorough visual inspection to ensure that the film is free from creases, air bubbles, or imperfections. Any remaining imperfections can be addressed by gently using the squeegee to smooth out the film.
By meticulously following these steps, the application of the tint film can yield a flawless and professional-grade result, transforming the glass surface into a functional, stylish, and visually appealing element within the space. The application process represents a crucial stage in the overall tinting journey, setting the stage for the final steps that will further enhance the aesthetics and functionality of the tinted glass surface.
Removing Air Bubbles
After applying the tint film to the glass surface, it's common to encounter air bubbles trapped beneath the film. While these air bubbles may initially appear concerning, they can be effectively addressed to achieve a smooth and flawless tint application. Removing air bubbles is a crucial step in the tinting process, as it ensures a professional-grade finish and optimal functionality of the tinted glass. Here's a detailed guide on effectively removing air bubbles from the tinted glass surface:
-
Identifying Air Bubbles: Upon completing the initial application of the tint film, carefully inspect the glass surface for any visible air bubbles. These bubbles may vary in size and can be located throughout the tinted area. Identifying the air bubbles is essential for targeted removal and achieving a pristine finish.
-
Squeegee Technique: To address air bubbles, utilize a squeegee to gently press the tint film against the glass surface, starting from the center of the bubble and working towards the edges. Applying even pressure with the squeegee helps redistribute the application solution and encourages the air bubbles to move towards the edges for effective removal.
-
Piercing and Smoothing: For persistent air bubbles that resist the squeegee technique, carefully pierce the bubble with a small pin or needle. Once pierced, use the squeegee to smooth out the film, gradually pushing the air towards the puncture point. This method allows the trapped air to escape, resulting in a smooth and uniform tint application.
-
Heat Application: If certain air bubbles prove challenging to remove, the application of gentle heat using a heat gun or hair dryer can aid in the process. The controlled application of heat softens the tint film, making it more pliable and facilitating the release of trapped air. Use the squeegee to smooth out the film while applying heat, ensuring that the air bubbles dissipate for a flawless finish.
-
Final Inspection: Once the air bubbles are addressed, conduct a final visual inspection to ensure that the tinted glass surface is free from imperfections. Any remaining air bubbles can be gently smoothed out using the squeegee, ensuring a professional and visually appealing result.
By diligently following these steps, the removal of air bubbles from the tinted glass surface can be effectively achieved, resulting in a flawless and professional-grade finish. Addressing air bubbles is a pivotal aspect of the tinting process, contributing to the overall success of the transformation and enhancing the aesthetics and functionality of the glass surface.
Read more: How To Craft Tinted Glass
Final Steps
After successfully applying the tint film and addressing any air bubbles, the final steps of the glass tinting process are essential to ensure a polished and enduring result. These concluding actions contribute to the overall longevity, functionality, and visual appeal of the tinted glass surface. Here's a detailed overview of the crucial final steps:
-
Drying and Curing: Allow the tint film to thoroughly dry and cure on the glass surface. This process typically takes a few days, during which the adhesive fully sets, and any remaining moisture evaporates. Avoid touching or disturbing the tinted area during this period to ensure a seamless and durable finish.
-
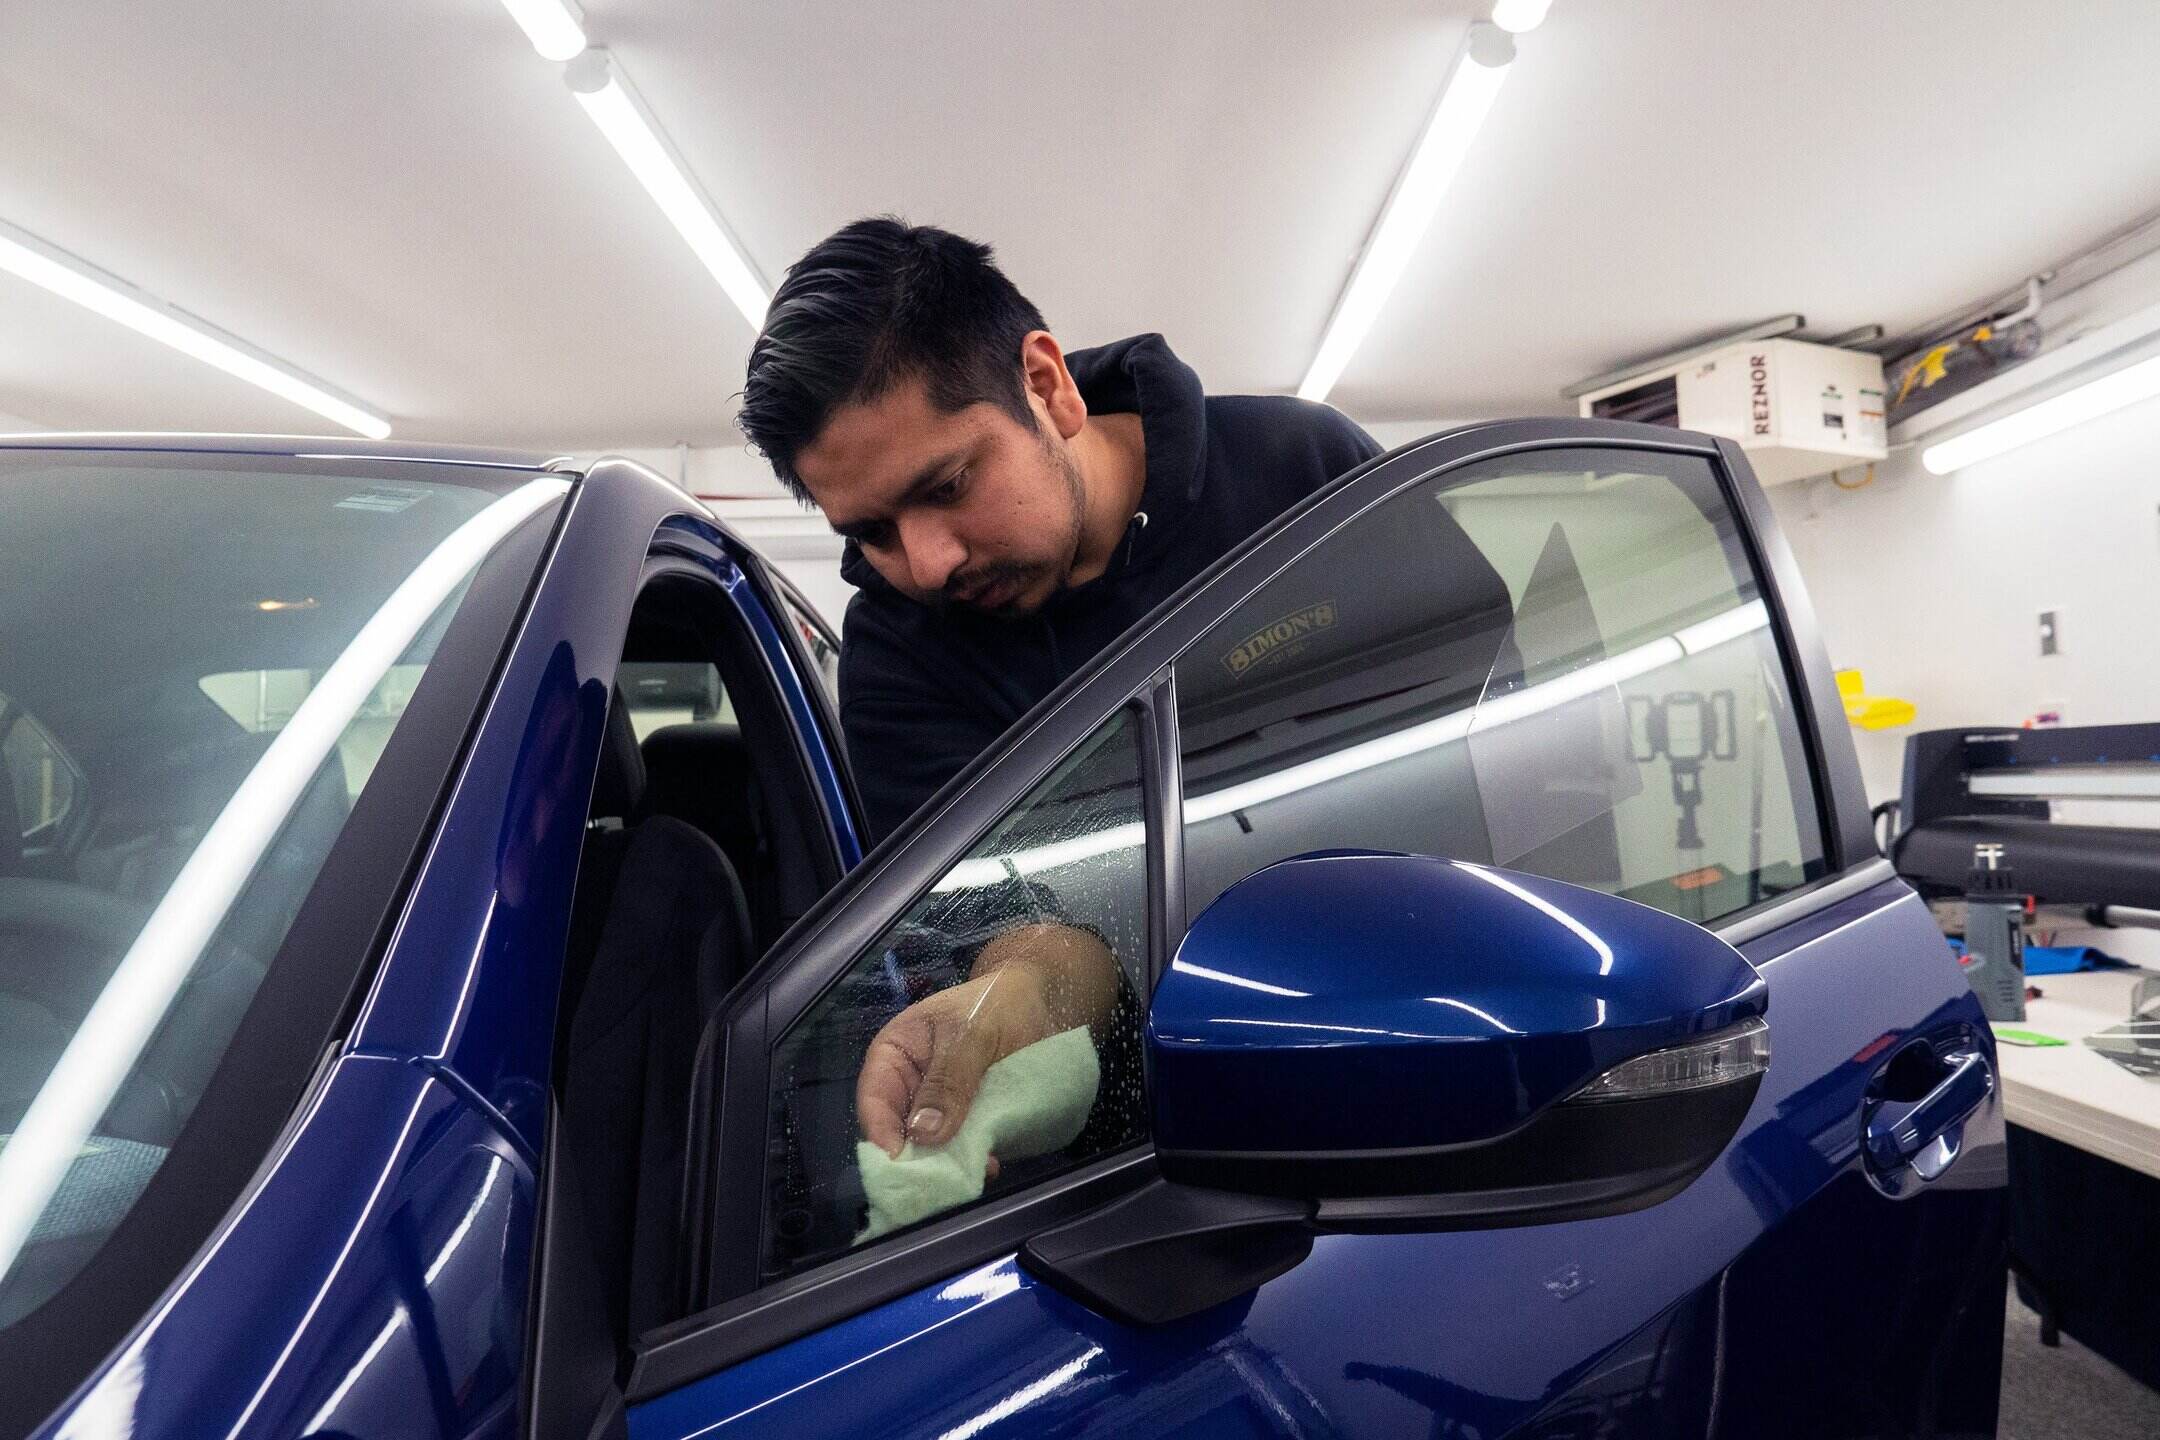
Cleaning and Maintenance: Once the tint film is fully cured, perform a gentle cleaning of the glass surface using a mild glass cleaner and a soft, lint-free cloth. Regular maintenance, such as gentle cleaning and dusting, helps preserve the tint film's appearance and functionality over time.
-
Quality Inspection: Conduct a comprehensive quality inspection of the tinted glass surface to ensure that the film is securely adhered, free from imperfections, and aligned with the edges and corners. Address any minor issues, if present, to maintain the professional-grade finish.
-
Functional Testing: Test the functionality of the tinted glass, particularly in terms of privacy, UV protection, and glare reduction. Assess the impact of the tint film on natural light transmission and the overall ambiance of the space, ensuring that it aligns with the intended design and functional objectives.
-
Aesthetic Evaluation: Step back and evaluate the visual impact of the tinted glass within the surrounding environment. Consider how the tint enhances the overall aesthetics of the space and complements the existing interior design elements. The tinted glass should seamlessly integrate with the surrounding decor, contributing to a cohesive and harmonious ambiance.
-
Documentation and Warranty: Keep a record of the tint film manufacturer's warranty and care instructions for future reference. Understanding the warranty coverage and recommended maintenance practices can help preserve the longevity and performance of the tinted glass surface.
By meticulously completing these final steps, the glass tinting process culminates in a professional, visually appealing, and functional outcome. The attention to detail in the final stages ensures that the tinted glass surface not only meets but exceeds expectations, adding a touch of sophistication and practicality to the interior environment.
Frequently Asked Questions about How To Tint Glass
Was this page helpful?
At Storables.com, we guarantee accurate and reliable information. Our content, validated by Expert Board Contributors, is crafted following stringent Editorial Policies. We're committed to providing you with well-researched, expert-backed insights for all your informational needs.


0 thoughts on “How To Tint Glass”