Home>Furniture & Design>Outdoor Furniture>How To Build Brick Pizza Oven Outdoor
Outdoor Furniture
How To Build Brick Pizza Oven Outdoor
Modified: January 24, 2024
Learn how to build a brick pizza oven for your outdoor space with our expert tips and design ideas. Create a stylish and functional addition to your outdoor furniture collection.
(Many of the links in this article redirect to a specific reviewed product. Your purchase of these products through affiliate links helps to generate commission for Storables.com, at no extra cost. Learn more)
Introduction
So, you're dreaming of creating your very own outdoor brick pizza oven? That's fantastic! There's something truly magical about the process of crafting a homemade pizza from scratch and watching it cook to perfection in your own backyard. Whether you're a culinary enthusiast, a DIY aficionado, or simply someone who loves to entertain, a brick pizza oven can be a wonderful addition to your outdoor space.
Picture this: the tantalizing aroma of freshly baked dough mingling with the savory scent of bubbling cheese and tomato sauce, all while the warmth of the oven radiates through your outdoor gathering area. Sounds delightful, doesn't it? Not only does a brick pizza oven provide a unique focal point for your outdoor space, but it also offers a fun and interactive way to prepare meals for your friends and family.
In this guide, we'll take you through the step-by-step process of building your very own brick pizza oven. From selecting the perfect location for your oven to gathering the necessary materials and tools, constructing the base, building the oven dome, adding those all-important finishing touches, and finally firing up the oven for its inaugural bake, we've got you covered.
So, roll up your sleeves, get ready to get your hands a little dirty, and prepare to embark on a rewarding journey of creativity and culinary delight. By the time you're finished, you'll have a beautiful, functional, and oh-so-impressive brick pizza oven ready to serve up mouthwatering pies for years to come. Let's dive in and start turning those pizza dreams into a brick-and-mortar reality!
Key Takeaways:
- Building a brick pizza oven is a creative and rewarding journey that brings people together, sparks conversations, and creates lasting memories in your outdoor space.
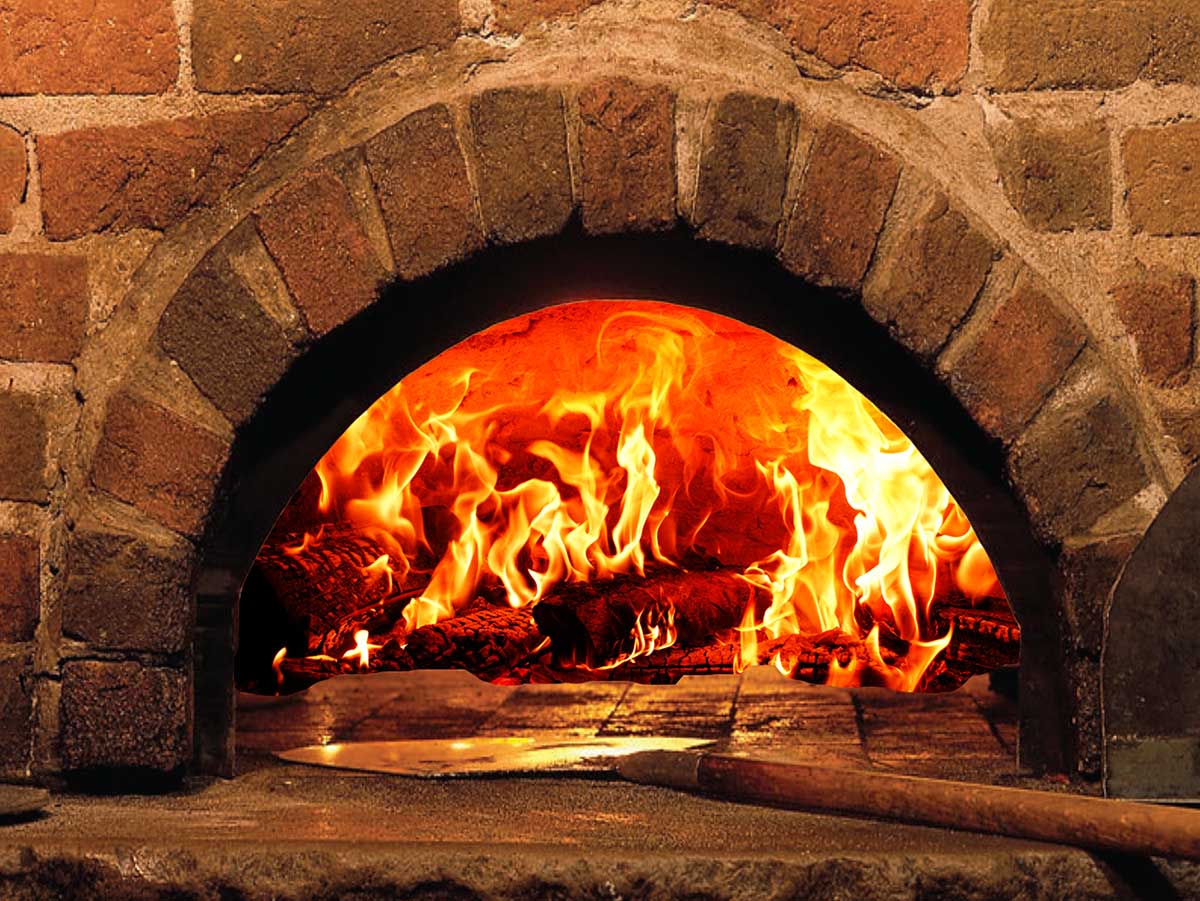
- Embracing the tradition of wood-fired cooking, a homemade brick pizza oven becomes a centerpiece for shared enjoyment, culinary exploration, and the simple pleasures of good food and good company.
Read more: How To Build A Brick Outdoor Pizza Oven
Choosing the Right Location
Before you start building your brick pizza oven, it’s crucial to carefully consider the location where it will be situated. The right spot can significantly impact the functionality, safety, and overall enjoyment of your outdoor oven. Here are some key factors to keep in mind when selecting the perfect location:
- Accessibility: Choose a location that is easily accessible from your kitchen or outdoor dining area. This will make it more convenient to transport ingredients, utensils, and prepared pizzas to and from the oven.
- Wind Patterns: Take note of prevailing wind patterns in your outdoor space. Position the oven so that the smoke will be carried away from seating areas and gathering spots. Additionally, consider using natural windbreaks or installing a wind deflector to minimize the impact of breezy conditions.
- Sun Exposure: Opt for a location that receives a good amount of sunlight, especially during the cooler months. This will help the oven retain heat and ensure optimal cooking conditions for your pizzas.
- Fire Safety: Keep a safe distance from any flammable structures, such as wooden fences, overhanging branches, or outdoor buildings. It’s essential to minimize the risk of accidental fires and ensure that the oven is situated in a fire-safe zone.
- Visual Appeal: Consider the aesthetic impact of the oven’s placement. It should complement your outdoor living space and landscaping while serving as a visually striking focal point.
By carefully evaluating these factors, you can select a location that maximizes the functionality, safety, and visual appeal of your brick pizza oven. Once you’ve identified the perfect spot, you’ll be one step closer to bringing your outdoor culinary vision to life.
Gathering Materials and Tools
Now that you’ve chosen the ideal location for your brick pizza oven, it’s time to gather the necessary materials and tools to bring your project to fruition. Building a brick pizza oven requires a combination of specialized supplies and standard construction tools. Here’s a comprehensive list of what you’ll need:
Materials:
- Firebricks: These specialized bricks are designed to withstand high temperatures and form the interior cooking surface of the oven.
- Refractory Mortar: A heat-resistant mortar that will bond the firebricks together to create the oven’s structure.
- Concrete: Used for constructing the oven’s base and providing a stable foundation.
- Insulating Materials: Insulating blanket or vermiculite concrete to ensure the oven retains heat efficiently.
- Steel Reinforcement Bar (Rebar): Provides structural support for the concrete base and helps prevent cracking.
- Sheet Metal: For creating the oven’s chimney and venting system.
- Wood or Metal Formwork: Used to shape the concrete base and support its structure during pouring and curing.
- Decorative Brick Facade (Optional): If desired, additional bricks can be used for aesthetic purposes to enhance the oven’s appearance.
Tools:
- Masonry Trowel: Essential for applying mortar and positioning bricks with precision.
- Level: Ensures that the oven’s base and dome are constructed evenly and without structural imperfections.
- Concrete Mixer: For efficiently mixing concrete and mortar to the required consistency.
- Measuring Tape: Necessary for accurate dimensions and alignment during construction.
- Wire Brush: Used for cleaning and preparing brick surfaces before mortar application.
- Protective Gear: Safety goggles, gloves, and a dust mask for personal protection during construction.
- Wood or Metal Saw: Depending on the type of formwork and additional construction needs.
By ensuring that you have all the required materials and tools at your disposal, you’ll be well-prepared to tackle each phase of the construction process with confidence. With everything in place, you’re ready to roll up your sleeves and begin building the foundation for your brick pizza oven.
Read more: How To Build A Brick Oven Pizza
Constructing the Base
The foundation of your brick pizza oven is the base, which provides stability and support for the entire structure. Constructing a solid and level base is essential for ensuring the long-term durability and functionality of your oven. Here’s a step-by-step guide to building the base:
1. Site Preparation:
Clear the chosen area of any debris, rocks, or vegetation. Use a shovel to excavate the site, creating a level area that will accommodate the dimensions of your base. Ensure that the ground is compacted and leveled to provide a stable foundation for the concrete slab.
2. Formwork Assembly:
Construct a sturdy formwork using wood or metal to contain the concrete as it is poured. The formwork should outline the shape and dimensions of the base, with careful attention to achieving straight edges and right angles. Use a level to confirm that the formwork is perfectly horizontal and even.
3. Reinforcement Installation:
If necessary, place steel reinforcement bars (rebar) within the formwork to add structural strength to the concrete base. The rebar should be positioned to create a grid pattern, ensuring uniform reinforcement throughout the slab.
Read more: How To Build A Outdoor Pizza Oven
4. Concrete Mixing and Pouring:
Prepare the concrete mixture according to the manufacturer’s instructions, ensuring the correct water-to-concrete ratio. Carefully pour the concrete into the formwork, distributing it evenly and using a trowel to level the surface. Consolidate the concrete by tapping the sides of the formwork to remove air pockets and achieve a smooth finish.
5. Curing and Removal of Formwork:
Allow the concrete to cure for the recommended period, typically several days, to achieve optimal strength. Once the concrete has cured, carefully remove the formwork, taking care not to damage the newly formed base. Protect the cured concrete from rapid drying by covering it with a damp cloth or plastic sheeting as it cures.
By following these steps, you’ll create a robust and level base that serves as the foundation for your brick pizza oven. With the base in place, you’re ready to move on to the exciting phase of constructing the oven dome, bringing your vision of a homemade pizza haven one step closer to reality.
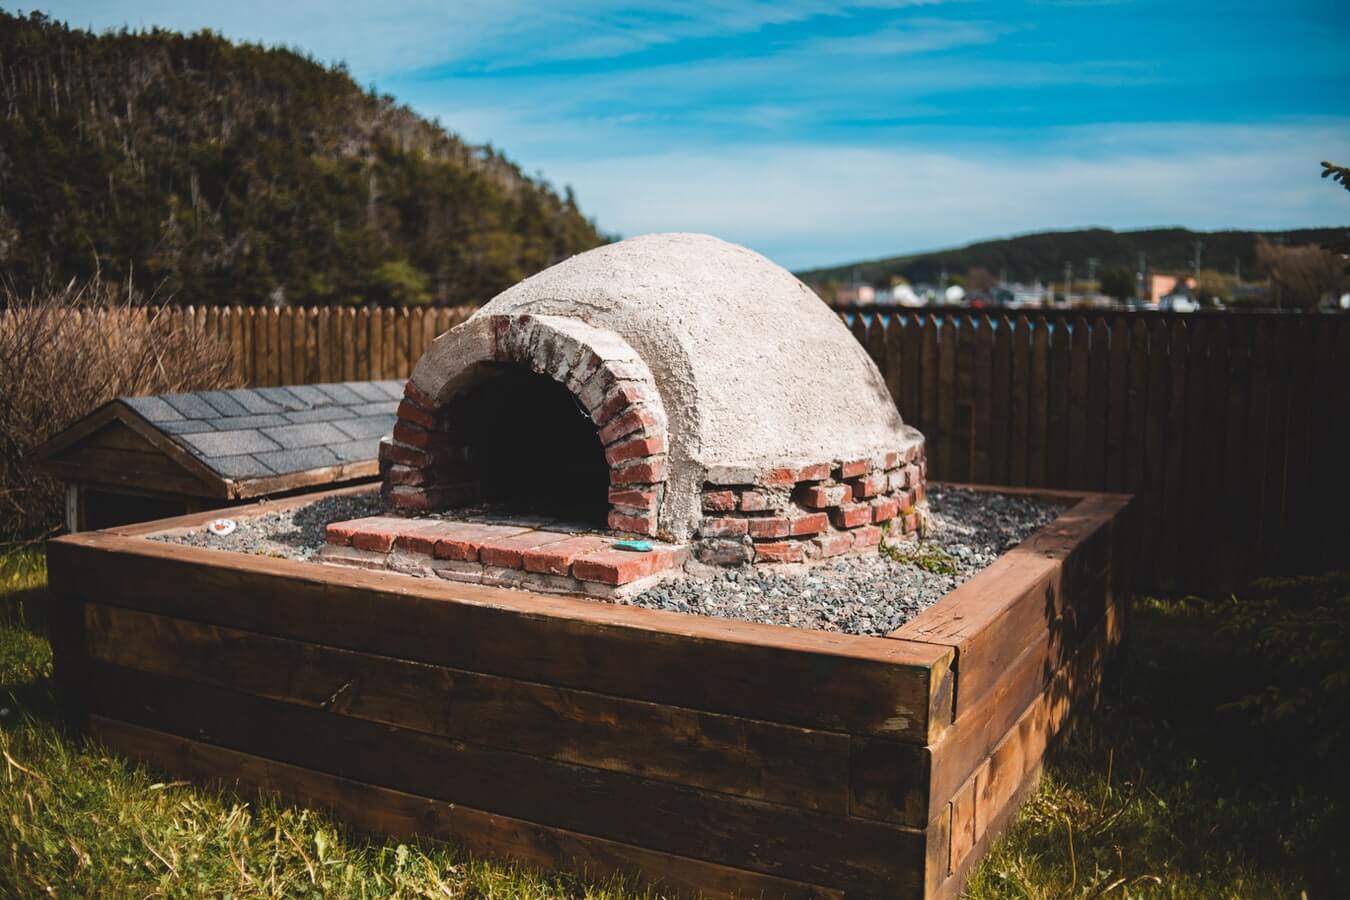
Building the Oven Dome
With the base of your brick pizza oven securely in place, the next phase of the construction process involves building the oven dome. The dome is a defining feature of the oven, responsible for trapping and radiating heat evenly to create the perfect cooking environment for your pizzas. Here’s a detailed guide to constructing the oven dome:
1. Creating the Sand Form:
To shape the oven’s dome, start by creating a sand form that will serve as the internal mold for the dome’s structure. Pile damp sand over the base, gradually shaping it into a smooth, rounded dome that corresponds to the desired interior dimensions of the oven. Take your time to achieve the ideal shape and curvature, as this will directly influence the functionality of the oven.
Read more: How Many Bricks To Build A Pizza Oven
2. Laying the Firebricks:
Once the sand form is in place, begin laying the firebricks over the sand, starting from the oven’s entrance and working your way up and around the dome. Use refractory mortar to secure the firebricks in position, ensuring a snug fit and maintaining the desired dome shape. As you progress, the dome’s structure will gradually take form, with the bricks interlocking to create a sturdy and heat-resistant enclosure.
3. Insulating Layer:
After the firebrick dome is constructed, it’s essential to add an insulating layer to enhance the oven’s heat retention capabilities. This can be achieved by applying insulating blanket or vermiculite concrete over the firebrick structure, creating a thermal barrier that minimizes heat loss and ensures consistent temperatures within the oven.
4. Removing the Sand Form:
Once the insulating layer has been applied and allowed to set, carefully remove the sand from the interior of the dome, leaving behind a hollow, firebrick-lined cooking chamber. Take care to remove all traces of sand to create a clean and spacious interior for your oven.
By meticulously following these steps, you’ll successfully construct the oven dome, a critical component that defines the functionality and performance of your brick pizza oven. With the dome in place, your oven is one step closer to being fully operational, ready to bring the delectable aroma of freshly baked pizzas to your outdoor gatherings.
Finishing Touches
As you near the completion of your brick pizza oven construction, it’s time to add those final touches that will enhance both the functionality and aesthetic appeal of your outdoor culinary masterpiece. From creating a polished exterior finish to installing essential components for efficient operation, here’s a guide to the finishing touches that will bring your oven to life:
1. Exterior Facade:
Add a decorative touch to your oven by applying a carefully chosen exterior facade. This can involve using additional bricks, tiles, or stone cladding to create a visually appealing outer layer that complements your outdoor space’s aesthetic. The facade not only adds charm but also provides protection against the elements, ensuring the longevity of your oven.
2. Chimney and Ventilation:
Install a chimney and ventilation system to facilitate proper airflow and smoke management within the oven. The chimney should be positioned to draw smoke and hot air away from the cooking area, promoting a clean and comfortable cooking environment. It’s essential to ensure that the chimney is securely attached and extends to an appropriate height for effective ventilation.
3. Door Installation:
Consider adding a door to your oven to regulate heat retention and control airflow during the cooking process. The door can be crafted from heat-resistant materials and fitted with a handle for easy operation. A well-designed door contributes to efficient heat management, allowing you to achieve the perfect cooking conditions for your pizzas.
4. Work Surface and Storage:
If space permits, create a dedicated work surface adjacent to the oven, providing a convenient area for food preparation and assembly. Additionally, consider incorporating storage options for wood, cooking utensils, and pizza-making essentials to keep everything organized and within easy reach while you’re cooking outdoors.
5. Personalized Touches:
Add personal touches to your oven area, such as seating, lighting, and landscaping elements that complement the overall ambiance of your outdoor space. Creating a welcoming and comfortable environment around your brick pizza oven encourages friends and family to gather and savor the delightful culinary experiences it offers.
By attending to these finishing touches, you’ll elevate the functionality and visual appeal of your brick pizza oven, transforming it into a stunning focal point that enhances your outdoor living space. With the final details in place, your oven is ready to take center stage as you prepare to fire it up for its inaugural cooking session.
Firing Up the Oven
After investing time, effort, and creativity into building your brick pizza oven, the moment has arrived to bring it to life. Firing up the oven for the first time is an exciting and pivotal step, marking the transition from construction to culinary exploration. Here’s a guide to preparing and igniting your oven for its inaugural use:
1. Clearing the Interior:
Prior to lighting the oven, ensure that the interior is free of any debris, sand, or construction remnants. Use a brush or cloth to clean the cooking surface and remove any foreign particles that may affect the flavor or quality of your pizzas.
2. Gradual Heat Build-Up:
Begin the heating process by building a small, controlled fire using kindling and dry wood. Position the fire toward the rear of the oven, allowing it to gradually spread and heat the interior. It’s essential to avoid sudden temperature changes that could cause thermal shock to the oven’s structure.
3. Monitoring the Temperature:
As the fire burns, monitor the oven’s temperature using an infrared thermometer or by observing the color and behavior of the flames. Aim to gradually increase the temperature, allowing the oven to reach the ideal range for pizza baking, typically between 700°F and 800°F (370°C to 425°C).
4. Heat Soak and Equilibration:
Once the desired temperature is reached, allow the oven to undergo a period of heat soak, during which the cooking surface and interior walls absorb and radiate heat evenly. This process ensures that the oven is thoroughly heated and ready to provide consistent cooking conditions for your pizzas.
5. Testing the Heat:
To verify that the oven is at the optimal temperature for pizza baking, perform a simple heat test by quickly introducing a small piece of dough into the oven. Observe how it reacts and bakes, adjusting the heat as needed to achieve the ideal cooking results.
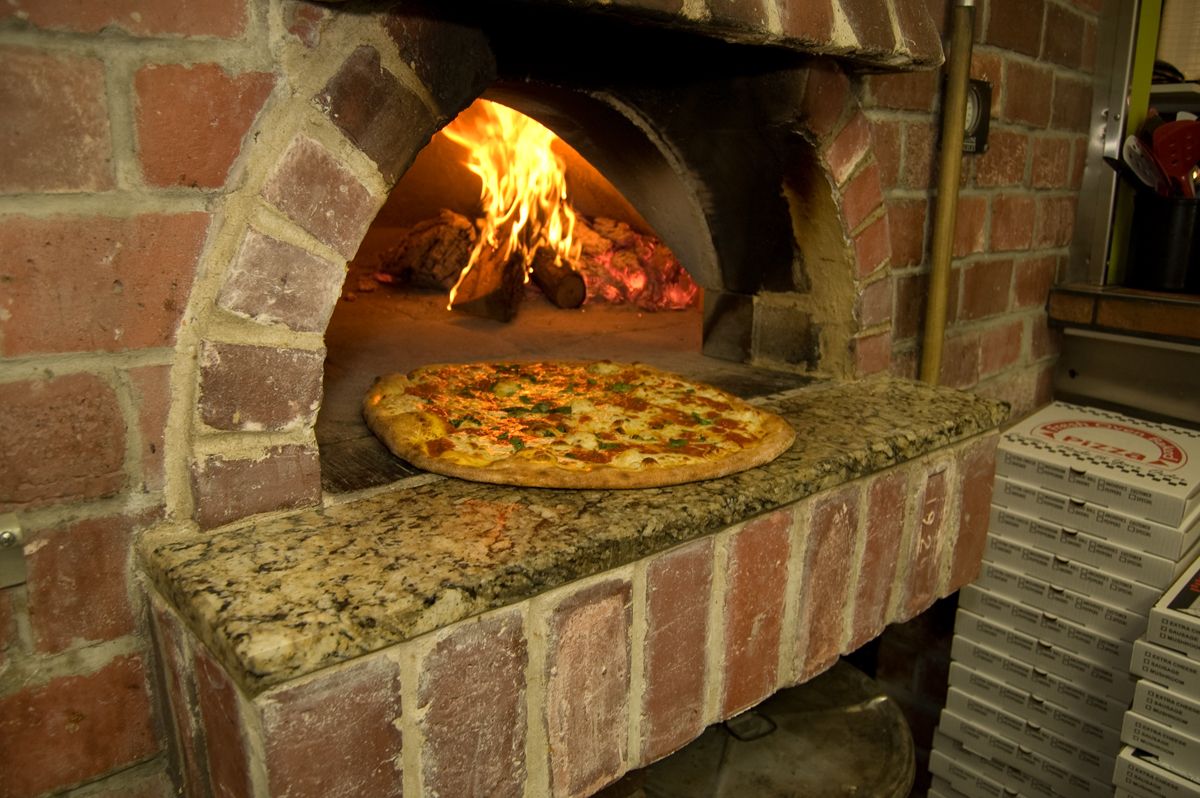
6. Ready to Bake:
With the oven fully heated and the temperature stabilized, you’re ready to start baking your first pizzas. Slide your prepared pizzas onto the cooking surface, and revel in the experience of watching them transform into mouthwatering culinary delights within the radiant heat of your homemade brick pizza oven.
By following these steps, you’ll successfully fire up your brick pizza oven for its inaugural use, unlocking the potential for countless memorable gatherings and delicious homemade pizzas in your outdoor space. As the oven comes to life, it signals the beginning of a new chapter filled with culinary exploration and shared enjoyment with family and friends.
Read more: How To Cook Pizza In An Outdoor Pizza Oven
Conclusion
Congratulations! You’ve embarked on an incredible journey of creativity, craftsmanship, and culinary delight as you’ve built your very own brick pizza oven. From the initial vision of a backyard pizza haven to the hands-on construction process, you’ve poured your passion into creating a captivating focal point for your outdoor space. As you reflect on this rewarding endeavor, consider the following key takeaways:
A Culinary Centerpiece:
Your brick pizza oven is more than just a cooking appliance—it’s a centerpiece that brings people together, sparks conversations, and creates lasting memories. The allure of gathering around the oven to prepare and savor delicious pizzas is an experience that enriches the fabric of your outdoor lifestyle.
Craftsmanship and Personalization:
Building a brick pizza oven is a testament to your craftsmanship and creativity. The personalized touches you’ve added, from the carefully chosen materials to the finishing details, have transformed the oven into a reflection of your unique style and passion for outdoor living.
Culinary Exploration:
With your brick pizza oven ready to use, you’re now poised to embark on a journey of culinary exploration. Experiment with different pizza recipes, explore the nuances of wood-fired cooking, and delight in the process of creating homemade pizzas that are infused with the unmistakable flavor of your outdoor oven.
Shared Enjoyment:
As you invite friends and family to gather around the oven, you’ll witness the joy and camaraderie that it fosters. Whether it’s a casual weekend get-together or a festive celebration, the oven becomes a focal point for shared enjoyment, laughter, and the simple pleasures of good food and good company.
A Legacy of Tradition:
By building a brick pizza oven, you’ve embraced a tradition that spans generations and cultures. The art of wood-fired cooking has a timeless appeal, and your oven represents a link to this rich culinary heritage, offering a tangible connection to the past while creating new traditions for the future.
As you stand back and admire the fruits of your labor—a beautifully crafted brick pizza oven that radiates warmth, flavor, and endless possibilities—take pride in the fact that you’ve created more than just an outdoor cooking appliance. You’ve built a gathering place, a source of inspiration, and a symbol of the joys of outdoor living. So, fire up the oven, savor the aroma of bubbling cheese and wood-fired crust, and revel in the satisfaction of bringing your pizza dreams to life.
Frequently Asked Questions about How To Build Brick Pizza Oven Outdoor
Was this page helpful?
At Storables.com, we guarantee accurate and reliable information. Our content, validated by Expert Board Contributors, is crafted following stringent Editorial Policies. We're committed to providing you with well-researched, expert-backed insights for all your informational needs.


0 thoughts on “How To Build Brick Pizza Oven Outdoor”