Home>Furniture & Design>Outdoor Furniture>How To Build An Outdoor Pizza Oven Wood Fired
Outdoor Furniture
How To Build An Outdoor Pizza Oven Wood Fired
Modified: August 27, 2024
Learn how to build an outdoor wood-fired pizza oven and elevate your outdoor-furniture-furniture-and-design with this comprehensive guide. Impress your guests with delicious homemade pizzas!
(Many of the links in this article redirect to a specific reviewed product. Your purchase of these products through affiliate links helps to generate commission for Storables.com, at no extra cost. Learn more)
Introduction
So, you've decided to take your outdoor cooking game to the next level by building your very own wood-fired pizza oven. Congratulations! Not only will this project add a charming and functional element to your outdoor space, but it will also elevate your culinary adventures to new heights. Picture yourself effortlessly crafting mouthwatering, crispy-crust pizzas with the irresistible aroma of wood smoke wafting through the air. Sounds enticing, doesn't it?
Building an outdoor pizza oven may seem like a daunting task, but fear not. With the right guidance, a dash of creativity, and a sprinkle of elbow grease, you can turn this dream into a sizzling reality. In this comprehensive guide, we'll walk you through each step of the process, from selecting the perfect location for your oven to savoring the first delectable slice of homemade pizza.
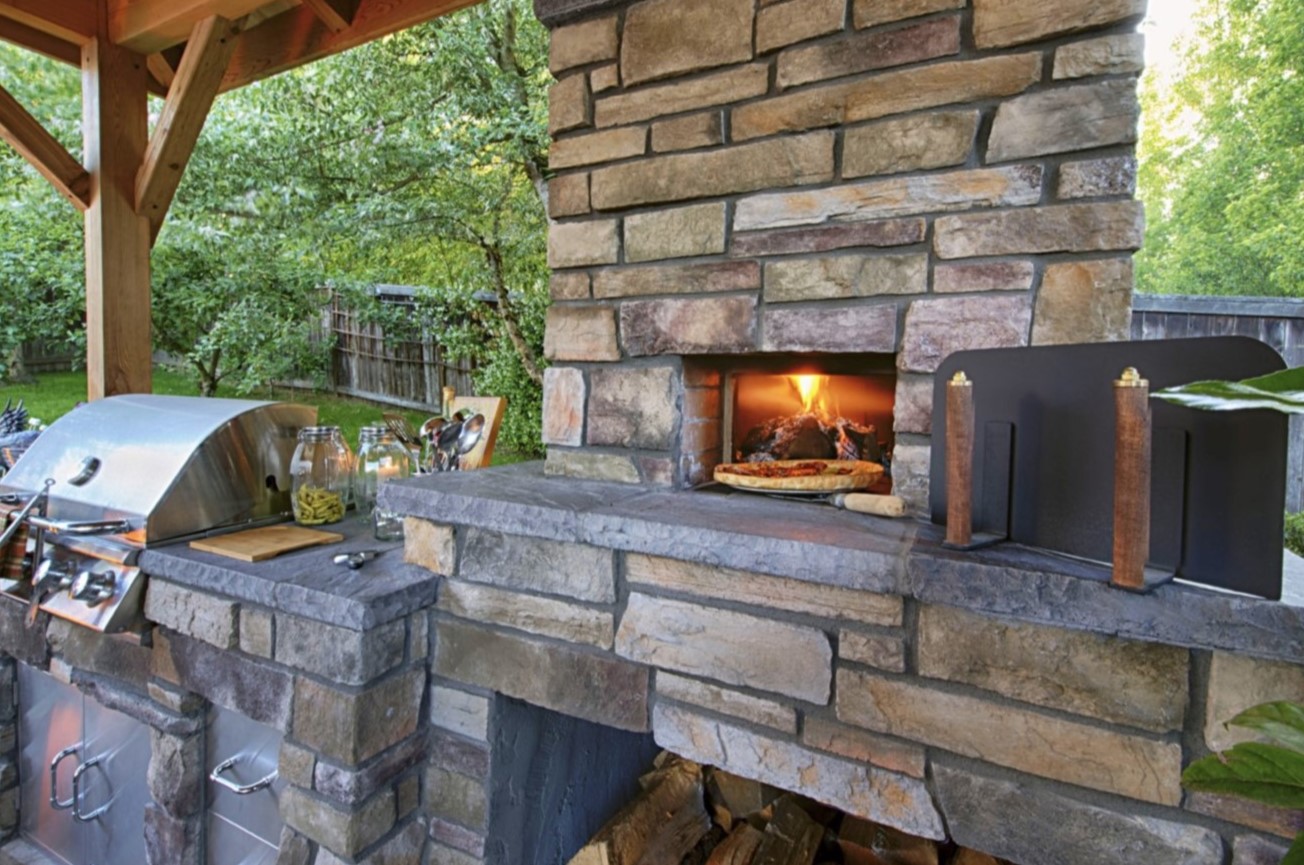
Before we roll up our sleeves and dive into the nitty-gritty of construction, let's take a moment to appreciate the allure of wood-fired cooking. There's something inherently magical about the way a wood-fired oven transforms simple ingredients into culinary masterpieces. The intense, radiant heat produced by a wood fire creates an ideal cooking environment, resulting in pizzas with perfectly blistered crusts and tantalizingly charred edges. Moreover, the aromatic essence of wood smoke imbues the food with a rustic, smoky flavor that simply can't be replicated by conventional ovens.
Beyond its culinary prowess, an outdoor pizza oven adds a touch of rustic charm and conviviality to your outdoor living space. It becomes a focal point for gatherings, inspiring conviviality and camaraderie as friends and family gather around to craft and savor delectable pizzas. The process of building the oven itself can also be a rewarding and enriching experience, allowing you to unleash your creativity and craftsmanship.
As we embark on this journey, keep in mind that building a wood-fired pizza oven is not just about constructing a cooking appliance; it's about creating a space where memories are made, flavors are savored, and the simple joy of outdoor living is celebrated. So, grab your apron, fire up your imagination, and let's begin the adventure of a lifetime.
Key Takeaways:
- Building an outdoor pizza oven is a fun and rewarding project that adds charm to your outdoor space and elevates your culinary adventures with the irresistible aroma of wood smoke and mouthwatering, crispy-crust pizzas.
- Carefully choosing the right location for your oven, gathering the necessary materials and tools, and constructing the base and dome are crucial steps in creating a functional and visually appealing wood-fired pizza oven.
Read more: How Hot Should A Wood-Fired Pizza Oven Be
Choosing the Right Location
Before you start gathering materials and diving into the construction process, it’s crucial to carefully select the perfect spot for your outdoor pizza oven. The location you choose will not only affect the functionality and efficiency of the oven but also contribute to the overall ambiance of your outdoor space.
First and foremost, consider the proximity to your kitchen and dining area. While the allure of a secluded nook in the garden might seem appealing, having the oven relatively close to your indoor kitchen will make the logistics of food preparation and transportation much more convenient. It also encourages seamless integration of indoor and outdoor culinary activities, allowing you to effortlessly transition from prepping ingredients in the kitchen to crafting and baking pizzas in the outdoor oven.
Next, assess the ground surface where you plan to build the oven. Ideally, the area should be level and stable, providing a solid foundation for the oven base. Uneven ground can not only complicate the construction process but also compromise the stability and safety of the oven once it’s operational. Additionally, take into account the prevailing wind direction in your outdoor space. Positioning the oven to minimize exposure to strong winds will help maintain a consistent and controllable cooking environment.
Another crucial factor to consider is the proximity to combustible materials. While the allure of a cozy, sheltered alcove might seem appealing, it’s essential to ensure that the oven is positioned at a safe distance from any flammable structures, such as wooden fences, overhanging branches, or outdoor buildings. This precaution is vital for both the safety of the oven and the surrounding environment.
Furthermore, think about the visual impact of the oven’s placement. Consider how it will complement the overall aesthetic of your outdoor space and how it can serve as a focal point or gathering area. A well-positioned pizza oven has the potential to become a captivating centerpiece, enhancing the charm and functionality of your outdoor living area.
By carefully evaluating these factors and envisioning how the oven will integrate into your outdoor lifestyle, you can select a location that optimizes convenience, safety, and aesthetic appeal. With the perfect spot chosen, you’re ready to embark on the next steps of this exciting endeavor.
Gathering Materials and Tools
With the location selected, it’s time to gather the materials and tools necessary to bring your outdoor pizza oven to life. Building a wood-fired oven requires a combination of traditional building materials and specialized components designed to withstand the intense heat generated during the cooking process.
First and foremost, you’ll need high-quality fire bricks to construct the oven chamber and base. These bricks are specially designed to withstand extreme temperatures, making them ideal for creating the interior cooking surface and insulating the oven to ensure efficient heat retention. Additionally, refractory mortar is essential for bonding the fire bricks together, creating a durable and heat-resistant structure.
To form the distinctive dome shape of the oven, you’ll require a supportive formwork, typically made from materials such as sand, vermiculite, or specialized refractory materials. This formwork provides the foundation for constructing the oven dome, allowing you to shape and insulate the structure before removing it once the dome is complete.
In addition to the specialized oven components, you’ll need standard building materials such as concrete, aggregates, and reinforcing mesh to create a sturdy and stable base for the oven. These materials form the foundation on which the oven chamber and dome will be constructed, providing essential support and structural integrity.
When it comes to tools, a sturdy wheelbarrow, shovel, and mixing tools are essential for preparing and handling the concrete, mortar, and insulation materials. A spirit level and measuring tools will ensure that the base and oven structure are level and accurately aligned, contributing to the functionality and visual appeal of the finished oven.
It’s also important to have personal protective equipment, including gloves, safety goggles, and dust masks, to ensure your safety during the construction process. Given the nature of the materials and the construction tasks involved, taking appropriate safety precautions is paramount.
Finally, consider investing in a reliable infrared thermometer to monitor the temperature inside the oven accurately. This tool will enable you to gauge the heat levels and ensure that the oven reaches the optimal temperature for baking perfect pizzas.
By gathering these materials and tools, you’ll be well-equipped to tackle the construction of your outdoor pizza oven with confidence and efficiency. With everything in place, you’re ready to lay the foundation for your culinary masterpiece.
Building the Base
With the materials and tools at the ready, it’s time to lay the foundation for your outdoor pizza oven by constructing a sturdy and level base. The base serves as the platform on which the oven chamber and dome will be built, providing essential support and stability for the entire structure.
Begin by marking the outline of the base using string lines and stakes, ensuring that the dimensions align with the design specifications for your oven. Excavate the marked area to a suitable depth, removing any vegetation and debris to create a clean and level surface for the base. Once the excavation is complete, compact the soil to create a stable foundation for the base.
Next, it’s time to prepare the concrete mix for the base. Combine the concrete, aggregates, and water in a wheelbarrow or mixing container, following the manufacturer’s guidelines for the correct proportions. Thoroughly mix the materials to achieve a consistent and workable concrete mix, ensuring that it is free from lumps and air pockets.
Carefully pour the concrete mix into the excavated area, spreading it evenly to the desired thickness using a screed board or leveling tool. Use a spirit level to ensure that the surface of the concrete base is perfectly level, making any necessary adjustments to achieve an even and uniform finish. Additionally, incorporate reinforcing mesh within the concrete to enhance its strength and durability.
As the concrete sets, it’s important to keep it moist to facilitate proper curing and prevent cracking. Cover the base with a plastic sheet or damp hessian cloth and periodically mist it with water to maintain moisture levels during the curing process. This step is crucial for ensuring that the concrete achieves optimal strength and resilience.
Once the concrete has cured to the appropriate strength, the base is ready to support the construction of the oven chamber and dome. With a solid and level foundation in place, you’re one step closer to realizing your wood-fired pizza oven dreams. The next phase of the construction process will see the oven taking shape as you craft the distinctive dome that defines the oven’s character and functionality.
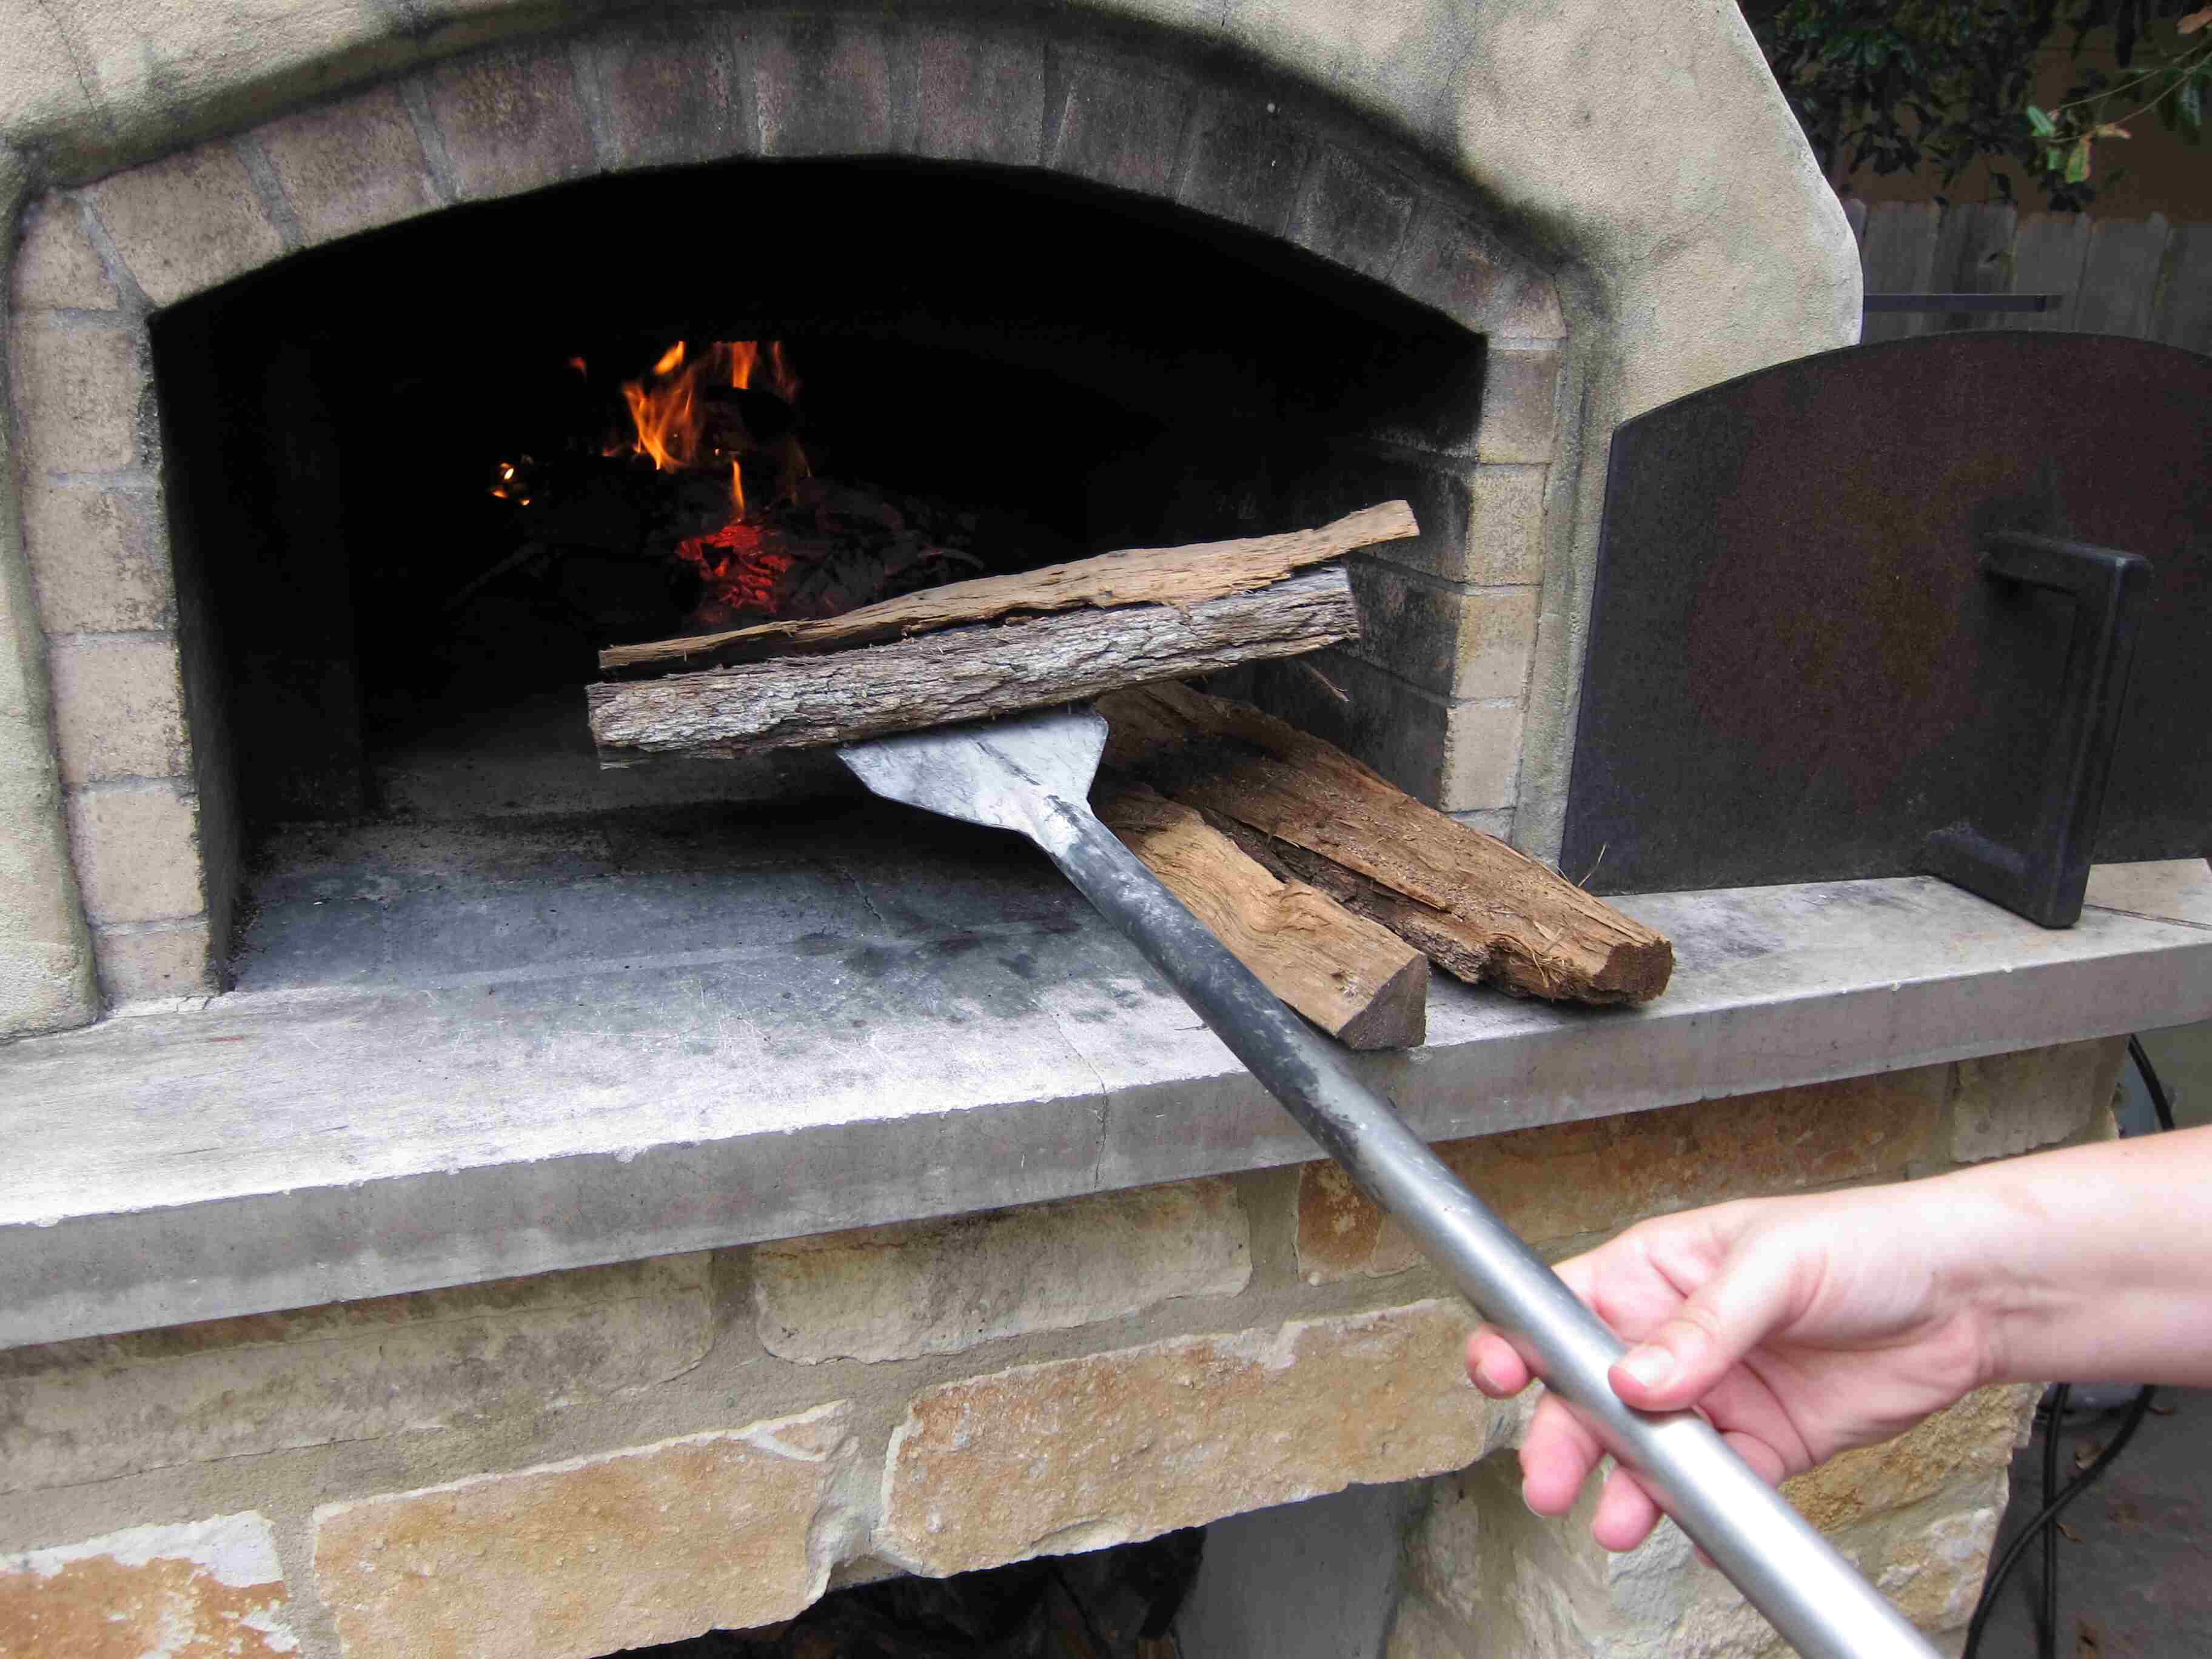
When building an outdoor wood-fired pizza oven, make sure to use firebricks to line the inside for heat retention and durability. Regular bricks can crack from the high temperatures.
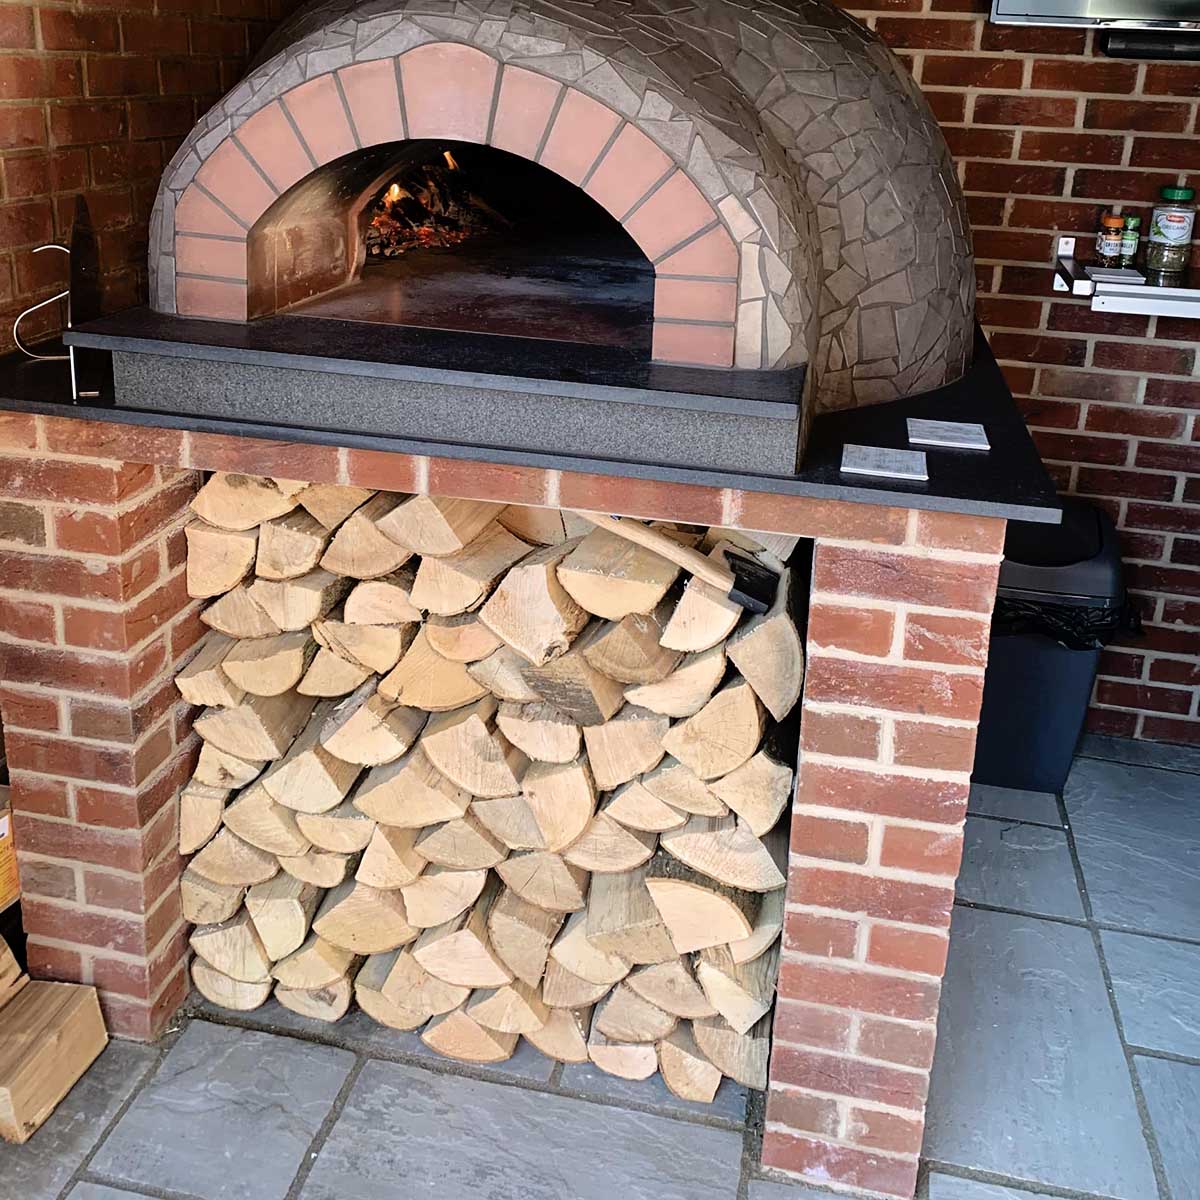
Constructing the Oven Dome
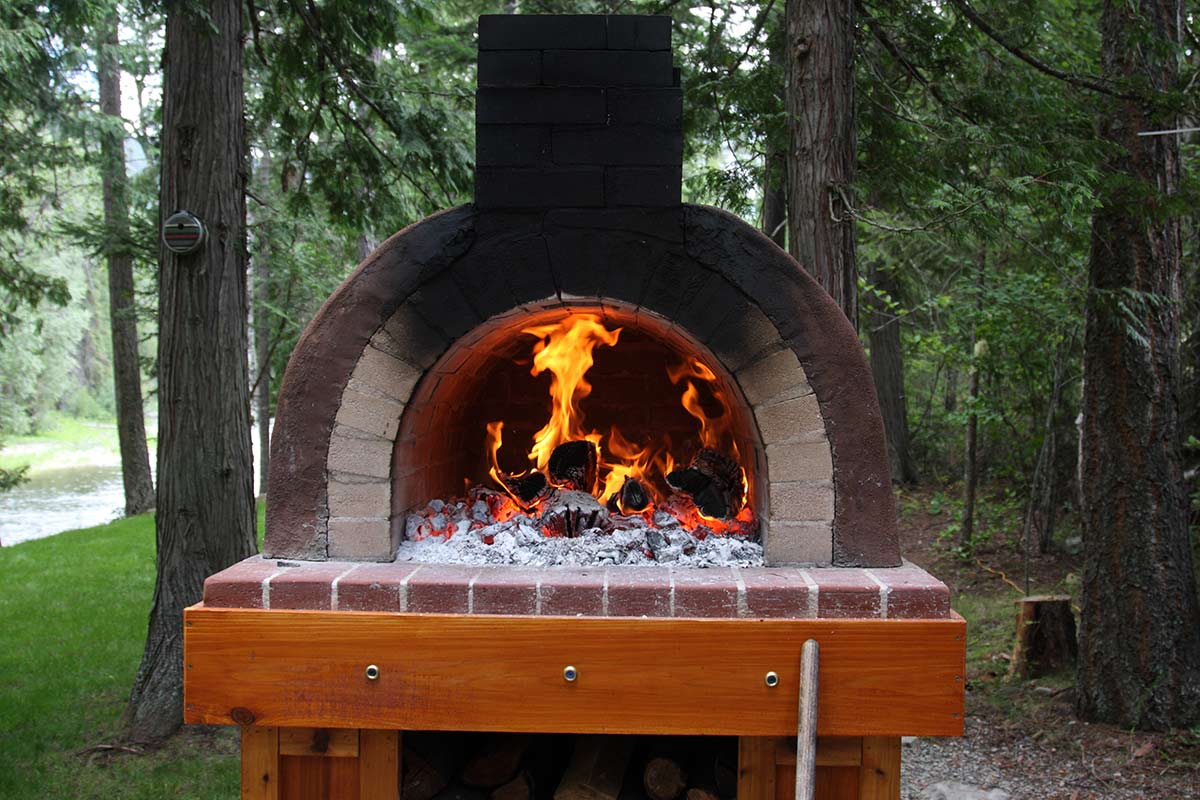
With the sturdy base in place, it’s time to embark on the captivating phase of constructing the oven dome, the defining feature that sets wood-fired pizza ovens apart. The dome not only imparts the oven with its characteristic appearance but also plays a crucial role in creating the optimal cooking environment for crafting mouthwatering pizzas.
To form the dome, you’ll need a supportive formwork that will serve as the mold for shaping the oven’s distinctive structure. This formwork can be crafted using a mixture of sand and clay, which is sculpted into the desired dome shape and carefully compacted to provide structural support. Alternatively, specialized refractory materials designed for dome construction can be utilized to create the formwork, offering enhanced durability and insulation.
Once the formwork is in place, it’s time to start laying the fire bricks to construct the dome. Using high-temperature resistant refractory mortar, carefully position and bond the fire bricks together, gradually shaping the dome structure as you progress. Pay meticulous attention to the orientation and placement of the bricks, ensuring that they form a snug and cohesive dome that will withstand the intense heat of the wood fire.
As the dome takes shape, it’s essential to create a smooth and uniform interior surface to facilitate efficient heat distribution and retention. This can be achieved by carefully positioning and leveling the fire bricks, ensuring that they form a seamless and cohesive structure. Additionally, incorporating insulating materials such as vermiculite or specialized refractory insulation within the dome structure will enhance its thermal efficiency, contributing to consistent and optimal cooking conditions.
Once the dome construction is complete, the formwork can be carefully removed, revealing the captivating curvature of the oven’s interior. This marks a significant milestone in the construction process, as the oven begins to take on its distinctive character and functionality. With the dome in place, the next steps will involve installing the chimney and adding the finishing touches that will bring the oven to life.
As you craft the oven dome, envision the countless delectable pizzas that will be lovingly baked within its confines, each one infused with the unmistakable flavor and charm of wood-fired cooking. With the dome constructed, you’re on the cusp of realizing the full potential of your outdoor pizza oven, bringing the tantalizing aroma of wood smoke and the sizzle of bubbling cheese to your outdoor culinary escapades.
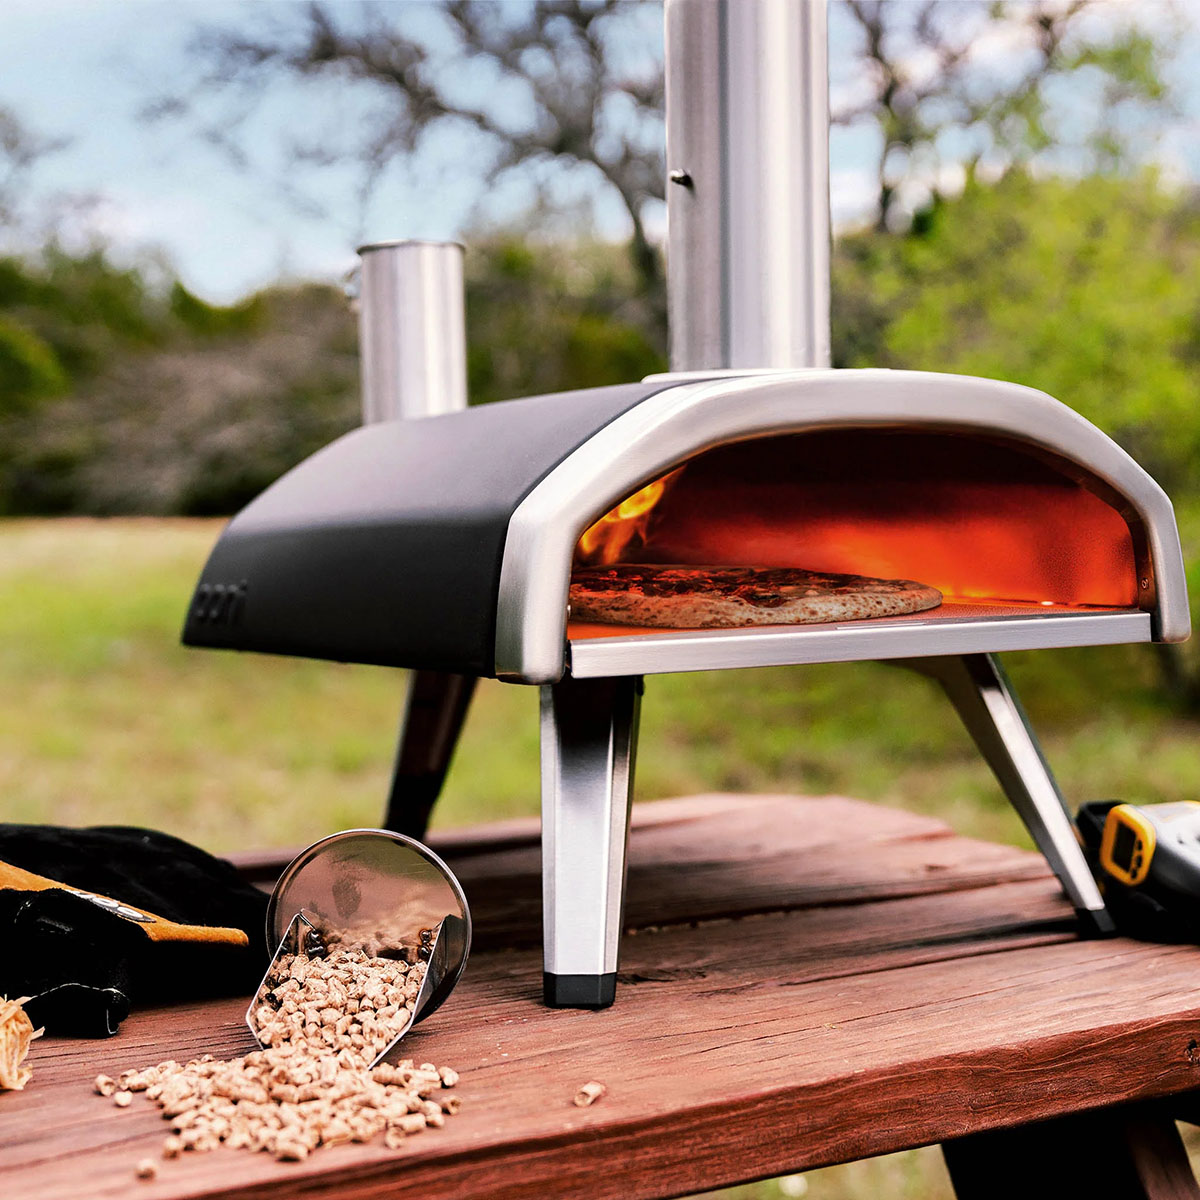
Installing the Chimney
As the construction of your outdoor pizza oven nears completion, it’s time to focus on a crucial element that will ensure optimal airflow and efficient smoke evacuation: the chimney. The chimney plays a pivotal role in maintaining the ideal cooking environment within the oven, allowing for proper ventilation and the expulsion of smoke and combustion byproducts.
When installing the chimney, it’s essential to carefully consider its height and positioning to maximize its effectiveness. The chimney should extend above the highest point of the oven dome to create adequate draft and facilitate the smooth release of smoke and gases. This ensures that the oven operates efficiently, with minimal smoke escaping into the cooking area.
Begin by selecting a suitable flue pipe or chimney system designed for wood-fired ovens, ensuring that it is constructed from durable and heat-resistant materials capable of withstanding the intense temperatures generated during cooking. Position the chimney opening on the oven dome, taking care to create a secure and airtight connection to prevent smoke leakage.
Once the chimney opening is established, carefully insert the flue pipe or chimney system, securing it in place to create a seamless and robust connection with the oven dome. Pay close attention to the stability and alignment of the chimney, ensuring that it is securely anchored to the oven structure to withstand the rigors of operation.
As you finalize the installation of the chimney, consider the addition of a chimney cap to prevent debris, rainwater, and animals from entering the flue. This simple yet essential component helps maintain the integrity and functionality of the chimney, ensuring that it operates efficiently and remains free from obstructions.
With the chimney installed, your outdoor pizza oven is now equipped with the essential ventilation system necessary for creating the perfect wood-fired cooking environment. The chimney not only enhances the functionality of the oven but also adds a touch of rustic charm to its overall aesthetic, evoking the timeless allure of traditional wood-fired cooking.
As you stand back and admire the completed chimney, envision the wisps of fragrant wood smoke gracefully ascending into the open sky, carrying with them the promise of delectable pizzas and culinary adventures. With the chimney in place, the final steps of adding finishing touches and curing the oven will set the stage for the much-anticipated inaugural pizza bake. The journey from construction to culinary delight is nearly complete, and the tantalizing aroma of wood-fired pizza is within reach.
Finishing Touches and Curing the Oven
With the construction of the outdoor pizza oven nearly complete, it’s time to add the finishing touches that will elevate its functionality, durability, and visual appeal. These final steps, coupled with the crucial process of curing the oven, will set the stage for the inaugural pizza bake and ensure that your wood-fired masterpiece is primed and ready for culinary adventures.
One of the essential finishing touches involves applying an insulating layer to the exterior of the oven dome. This layer, often composed of materials such as vermiculite or specialized refractory insulation, enhances the oven’s thermal efficiency, helping to maintain consistent and optimal cooking temperatures. Additionally, it contributes to the oven’s durability and longevity by providing a protective barrier against the elements.
As you apply the insulating layer, take care to create a smooth and uniform finish, ensuring that the entire oven dome is adequately covered. This step not only enhances the oven’s performance but also presents an opportunity to personalize its appearance, whether by adding decorative elements or integrating it seamlessly into your outdoor living space.
Following the application of the insulating layer, it’s crucial to allow the oven to cure gradually, a process that involves gradually increasing the temperature to drive off residual moisture and solidify the refractory materials. This gradual curing process is essential for ensuring the strength and resilience of the oven, allowing it to withstand the intense heat of wood-fired cooking without compromising its structural integrity.
Begin the curing process by building small, controlled fires within the oven, gradually increasing the intensity and duration of the fires over several days. This gradual approach allows the refractory materials to acclimate to the heat, minimizing the risk of thermal shock and ensuring that the oven reaches its optimal strength and thermal performance.
As the oven cures, take the time to savor the anticipation of the culinary delights that await, envisioning the delectable pizzas and other wood-fired creations that will soon emerge from its inviting interior. The process of curing the oven marks the transition from construction to culinary adventure, signaling that the time has come to unleash the full potential of your wood-fired masterpiece.
With the finishing touches complete and the oven undergoing the crucial curing process, you’re poised to embark on a journey of culinary discovery, where the tantalizing aroma of wood smoke and the sizzle of bubbling cheese will herald the beginning of a new chapter in outdoor cooking. The stage is set, and the wood-fired oven stands ready to transform simple ingredients into unforgettable culinary experiences.
Enjoying Your Homemade Pizza
Congratulations! After meticulous planning, dedicated construction, and the careful curing of your outdoor pizza oven, the moment has arrived to savor the fruits of your labor and indulge in the art of wood-fired pizza making. As the oven reaches its optimal temperature and the tantalizing aroma of wood smoke fills the air, it’s time to craft and bake your first homemade pizza, a culmination of creativity, craftsmanship, and culinary passion.
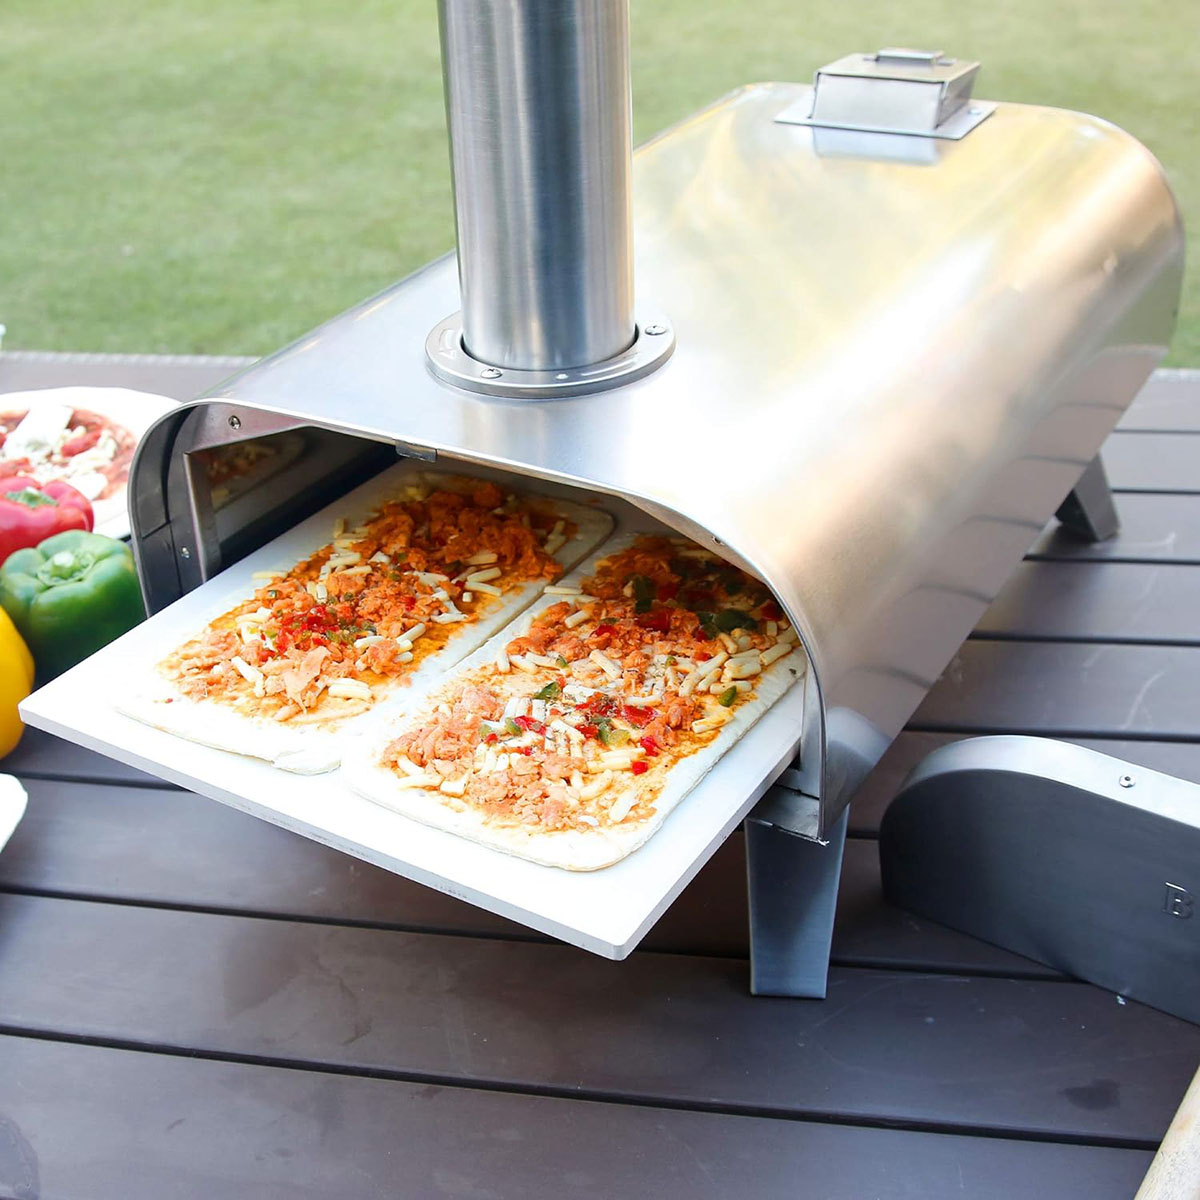
Begin by preparing the pizza dough, allowing it to rise to airy perfection as you gather an array of fresh, high-quality ingredients to adorn your creation. Whether it’s the vibrant hues of sun-ripened tomatoes, the creamy richness of fresh mozzarella, or the aromatic notes of basil and oregano, each element contributes to the symphony of flavors that will unfold within the confines of the wood-fired oven.
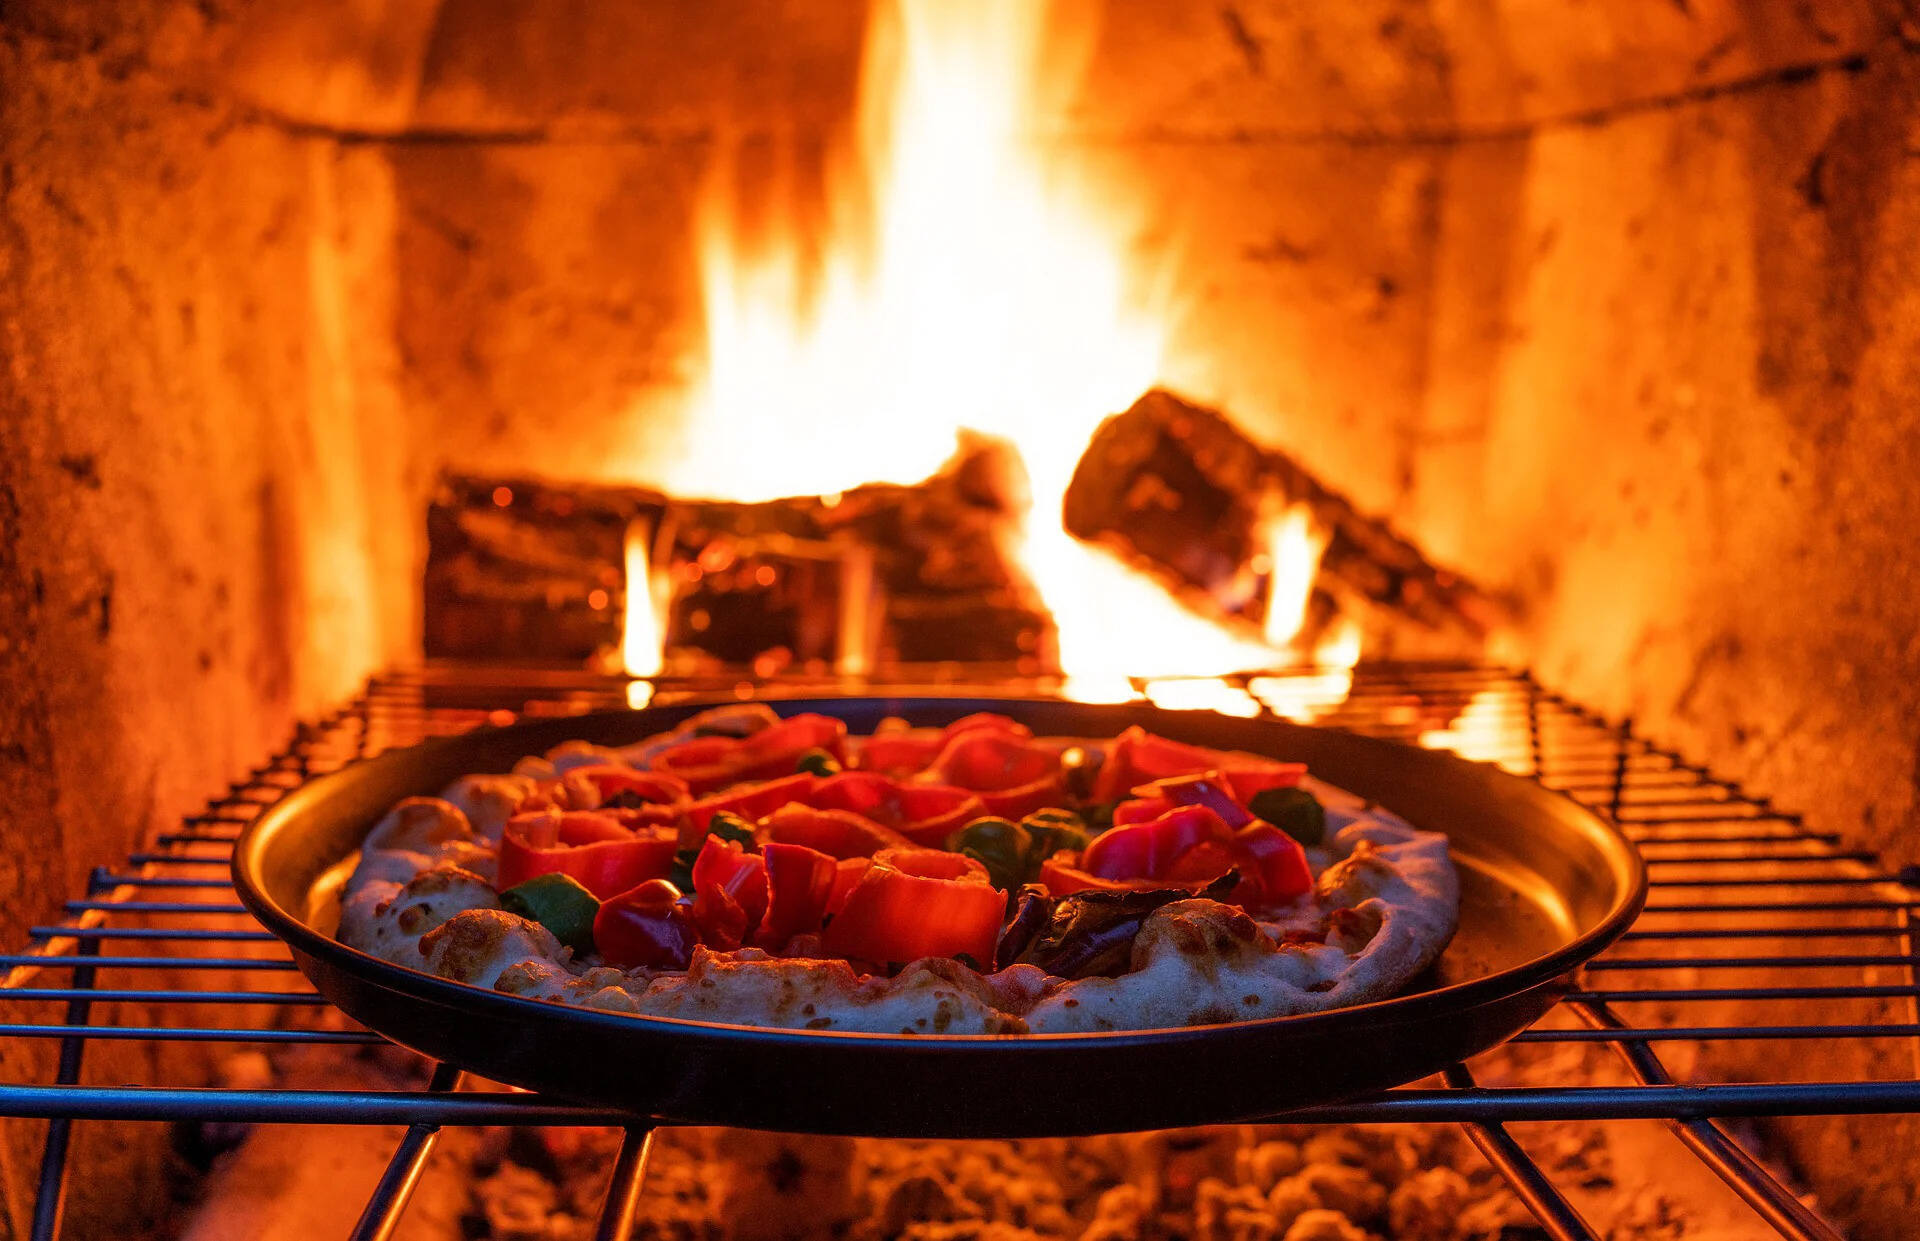
With the dough stretched and adorned with a mosaic of vibrant toppings, carefully slide the uncooked pizza onto a wooden peel, ready to be embraced by the radiant heat of the oven’s interior. As it enters the fiery chamber, the dough begins to bubble and blister, the toppings gently caramelizing as the unmistakable scent of wood smoke infuses the air.
As the pizza bakes, take a moment to revel in the crackling of the wood fire and the dance of flames within the oven, a sensory symphony that heralds the transformation of raw ingredients into a culinary masterpiece. The intense heat of the oven’s interior works its magic, creating a crisp, blistered crust and infusing the toppings with a smoky essence that elevates their flavors to new heights.
As the pizza emerges from the oven, adorned with the unmistakable char and caramelization that only wood-fired cooking can impart, it’s time to savor the culmination of your efforts. Slice into the bubbling, aromatic creation, and savor the first bite, reveling in the harmonious blend of textures and flavors that only a wood-fired pizza can offer.
As you share this delectable creation with friends and family, basking in the conviviality and camaraderie that the wood-fired oven inspires, take pride in the fact that this culinary delight was crafted with your own hands, from the construction of the oven to the careful selection of ingredients. Each bite carries the essence of tradition, craftsmanship, and the simple joy of outdoor living.
With each pizza that emerges from the wood-fired oven, you’ll continue to refine your techniques, explore new flavor combinations, and create cherished memories around the warmth and allure of outdoor cooking. The journey from construction to culinary delight has come full circle, and the wood-fired oven stands as a testament to the art of crafting unforgettable culinary experiences in the heart of your outdoor space.
So, as you savor the last delectable bite of your homemade wood-fired pizza, take a moment to reflect on the journey that brought you here, and anticipate the countless culinary adventures that await. With the wood-fired oven as your trusted ally, the possibilities are endless, and the joy of outdoor cooking is yours to savor, one unforgettable pizza at a time.
Frequently Asked Questions about How To Build An Outdoor Pizza Oven Wood Fired
Was this page helpful?
At Storables.com, we guarantee accurate and reliable information. Our content, validated by Expert Board Contributors, is crafted following stringent Editorial Policies. We're committed to providing you with well-researched, expert-backed insights for all your informational needs.


0 thoughts on “How To Build An Outdoor Pizza Oven Wood Fired”