Home>Construction & Tools>Building Materials>How To Build A Brick Oven Pizza
Building Materials
How To Build A Brick Oven Pizza
Modified: March 21, 2024
Learn how to build a brick oven pizza using high-quality building materials for a delicious homemade pizza experience. Discover the best materials and techniques for constructing your own brick oven.
(Many of the links in this article redirect to a specific reviewed product. Your purchase of these products through affiliate links helps to generate commission for Storables.com, at no extra cost. Learn more)
Introduction
There’s something magical about the process of building a brick oven pizza. It’s not just about creating a cooking appliance; it’s about crafting an experience that brings people together to enjoy delicious food and good company. Building a brick oven pizza is a labor of love that combines the timeless art of masonry with the joy of cooking.
In this comprehensive guide, we’ll take you through the step-by-step process of building your own brick oven pizza. Whether you’re a seasoned DIY enthusiast or a novice looking for a rewarding project, this guide will provide you with the knowledge and confidence to create a stunning brick oven pizza in your own backyard.
From gathering materials and tools to curing the oven, each step is crucial in ensuring the success of your project. By the end of this journey, you’ll not only have a beautiful and functional brick oven pizza but also a deeper appreciation for the craftsmanship and tradition behind this culinary marvel.
So, roll up your sleeves, gather your enthusiasm, and let’s embark on this fulfilling endeavor of building a brick oven pizza that will undoubtedly become a centerpiece of warmth, laughter, and delectable flavors in your life.
Key Takeaways:
- Building a brick oven pizza is a labor of love that combines masonry and cooking, creating a centerpiece for warmth, laughter, and delicious flavors in your life.
- The process fosters a deeper connection to tradition, brings people together, and opens a world of culinary exploration, resulting in enduring satisfaction and joy.
Read more: How To Build Brick Pizza Oven Outdoor
Step 1: Gathering Materials and Tools
Before diving into the construction process, it’s essential to gather all the necessary materials and tools. The following items will lay the foundation for your brick oven pizza project:
Materials:
- Bricks: Select high-quality, fire-resistant bricks designed for building ovens. These bricks will withstand the intense heat generated during the cooking process.
- Refractory Cement: This specialized heat-resistant cement is crucial for bonding the bricks together and forming a durable oven structure.
- Fire Clay: Used in combination with the refractory cement to enhance the heat-resistance and strength of the oven.
- Insulation: Insulating materials such as ceramic fiber blanket or vermiculite/perlite mix are essential for retaining heat within the oven and ensuring efficient cooking.
- Wood or Gas Burner: Depending on your preference, you'll need a suitable source of heat for the oven. Traditionalists may opt for wood, while others may choose a gas burner for convenience.
- Metal Door and Chimney Cap: These components are vital for regulating airflow and maintaining the ideal cooking environment inside the oven.
Tools:
- Masonry Trowel: An indispensable tool for spreading and shaping the refractory cement during the construction process.
- Level: Ensures the evenness and stability of the oven base and dome as you build them.
- Measuring Tape: Precision is key in creating a well-proportioned and functional oven, making a measuring tape a valuable asset.
- Wire Brush: Used for cleaning and preparing the bricks and mortar, ensuring a strong bond between the materials.
- Protective Gear: Safety should always be a priority. Invest in gloves, safety glasses, and a dust mask to shield yourself from potential hazards during construction.
By acquiring these materials and tools, you’ll be equipped to embark on the exciting journey of building your very own brick oven pizza. With everything in place, you’re ready to move on to the next crucial step: choosing the right location for your oven.
Step 2: Choosing the Right Location
When it comes to building a brick oven pizza, the location is more than just a practical consideration—it’s an integral part of the overall experience. Here are key factors to consider when selecting the perfect spot for your oven:
Accessibility: Ensure that the chosen location provides easy access to your kitchen or cooking area. This convenience will streamline the process of transferring prepared pizzas and ingredients to and from the oven.
Wind Direction: Take note of the prevailing wind direction in your area. Position the oven so that the entrance faces away from the prevailing winds to prevent smoke from blowing into the cooking area.
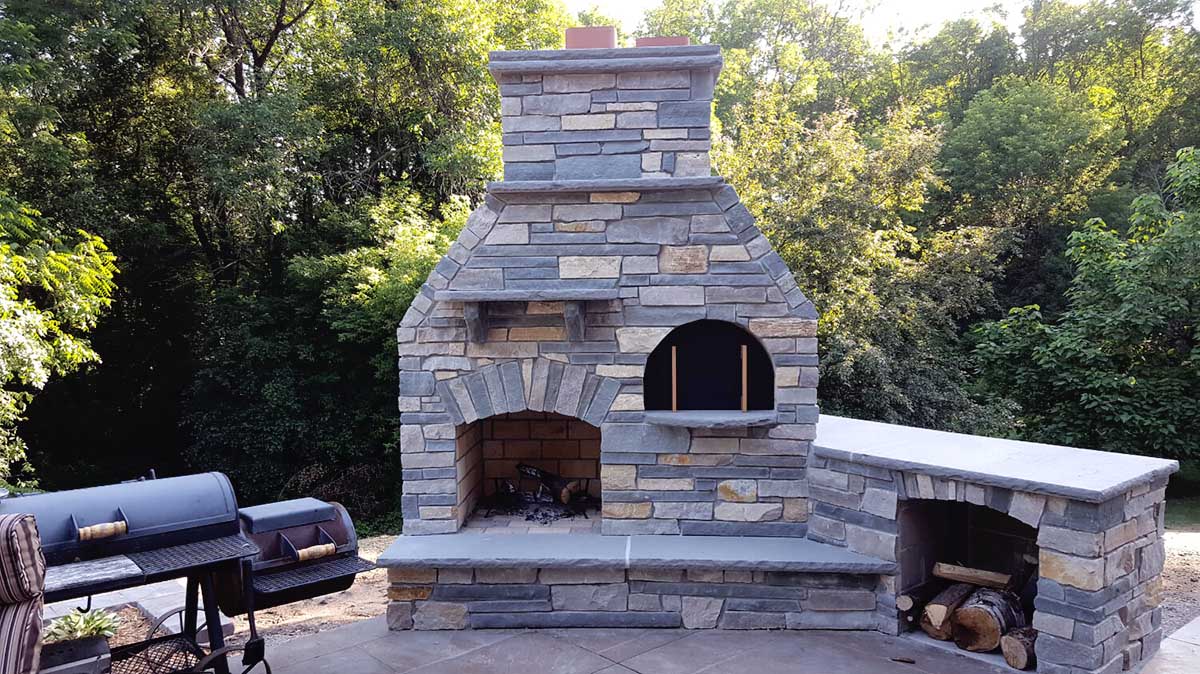
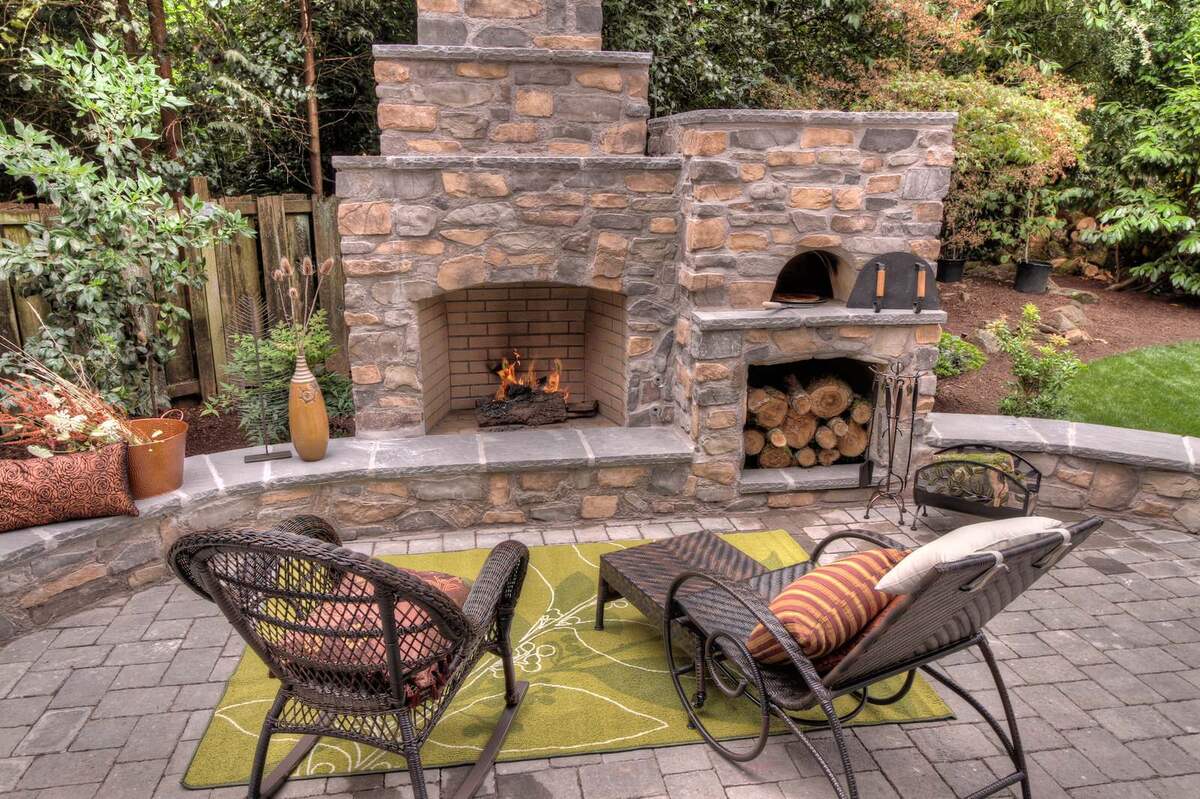
Visibility and Aesthetics: Consider the visual impact of the oven’s placement. It should be visible and easily accessible, creating a focal point for outdoor gatherings and adding a touch of rustic charm to your outdoor space.
Safety and Clearance: Ensure that the oven is positioned a safe distance from any flammable materials such as trees, bushes, or wooden structures. Adequate clearance will prevent potential fire hazards and ensure safe operation of the oven.
Ground Stability: The chosen location should offer a stable and level ground for the construction of the oven base. A solid foundation is crucial for the structural integrity and longevity of the oven.
By carefully considering these factors, you can select an ideal location that not only enhances the functionality of the oven but also adds to the overall ambiance of your outdoor space. With the location chosen, you’re ready to move forward with the exciting process of building the base for your brick oven pizza.
Read more: How Many Bricks To Build A Pizza Oven
Step 3: Building the Base
The foundation of your brick oven pizza plays a critical role in ensuring stability and durability. Here’s a step-by-step guide to constructing a solid base for your oven:
1. Site Preparation: Begin by clearing and leveling the chosen area for the base. Remove any debris, rocks, or vegetation, and use a shovel and level to ensure a flat and even surface.
2. Creating the Form: Construct a form using wooden boards to outline the dimensions of the base. Ensure that the form is square and level, as this will determine the shape and stability of the base.
3. Mixing and Pouring Concrete: Prepare a concrete mix according to the manufacturer’s instructions. Pour the concrete into the form, spreading it evenly and ensuring that it reaches all corners and edges. Use a trowel to smooth the surface of the concrete.
4. Curing the Base: Allow the concrete to cure for the recommended time, typically several days. This process is essential for the concrete to achieve its full strength and stability.
5. Installing the Oven Stand: Once the concrete base has fully cured, place the oven stand or metal frame on top of it. Ensure that the stand is positioned securely and level on the base.
6. Adding Insulation: To improve the heat retention and efficiency of the base, consider adding a layer of insulation material such as ceramic fiber blanket or vermiculite/perlite mix between the stand and the oven floor.
By meticulously following these steps, you’ll establish a sturdy and reliable foundation for your brick oven pizza. With the base completed, you’re now prepared to move on to the next exciting phase: constructing the oven dome.
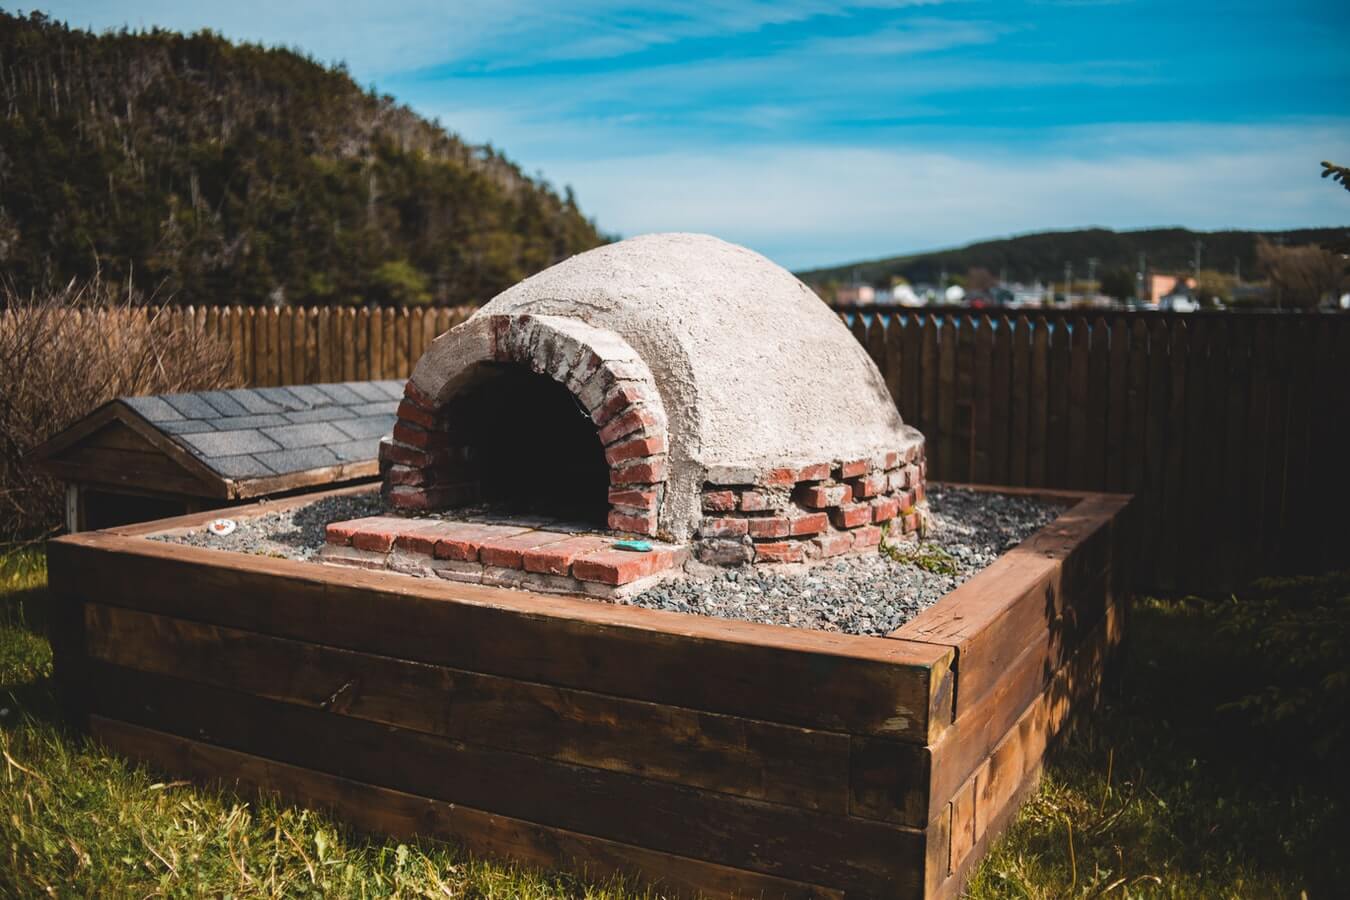
Step 4: Constructing the Oven Dome
Constructing the oven dome is a pivotal phase in the creation of your brick oven pizza, as it directly influences the oven’s heat retention and cooking performance. Here’s a comprehensive guide to building the oven dome:
1. Creating the Sand Form: Begin by shaping a mound of damp sand into the desired dome shape on top of the oven base. This sand form will serve as a temporary mold for the oven dome construction.
2. Laying the Fire Bricks: Start placing fire-resistant bricks over the sand form, beginning at the oven entrance and working your way around in a circular pattern. Use a generous amount of refractory cement to bond the bricks together, ensuring a secure and stable structure.
3. Gradual Dome Construction: As you lay the bricks, gradually taper the dome inward to form a spherical shape. This gradual curvature is essential for evenly distributing heat within the oven during the cooking process.
4. Creating the Oven Entrance: Leave a gap in the brickwork to form the entrance of the oven. This opening will later accommodate a door to regulate airflow and retain heat during cooking.
5. Removing the Sand Form: Once the dome structure is complete and the refractory cement has set, carefully remove the sand from inside the dome. This will leave behind a hollow, curved interior ready for insulation and finishing touches.
6. Applying Insulation: Line the interior of the dome with insulation material such as ceramic fiber blanket or a vermiculite/perlite mix. This insulation is crucial for retaining heat within the oven and ensuring consistent cooking temperatures.
By meticulously following these steps, you’ll create a robust and efficient oven dome that forms the heart of your brick oven pizza. With the dome in place, you’re ready to proceed to the next essential phase: adding insulation and finishing touches to your oven.
When building a brick oven pizza, make sure to use firebricks for the oven floor and dome, as they can withstand high heat. Also, use refractory mortar to hold the bricks together, ensuring a strong and durable oven.
Step 5: Adding Insulation and Finishing Touches
As you near the completion of your brick oven pizza, the addition of insulation and finishing touches is crucial for optimizing its performance and enhancing its visual appeal. Here’s a detailed guide to this essential step:
1. Applying Insulating Layer: Begin by adding a layer of insulation material, such as ceramic fiber blanket or a vermiculite/perlite mix, over the interior of the oven dome. This insulation will help retain heat and ensure consistent cooking temperatures.
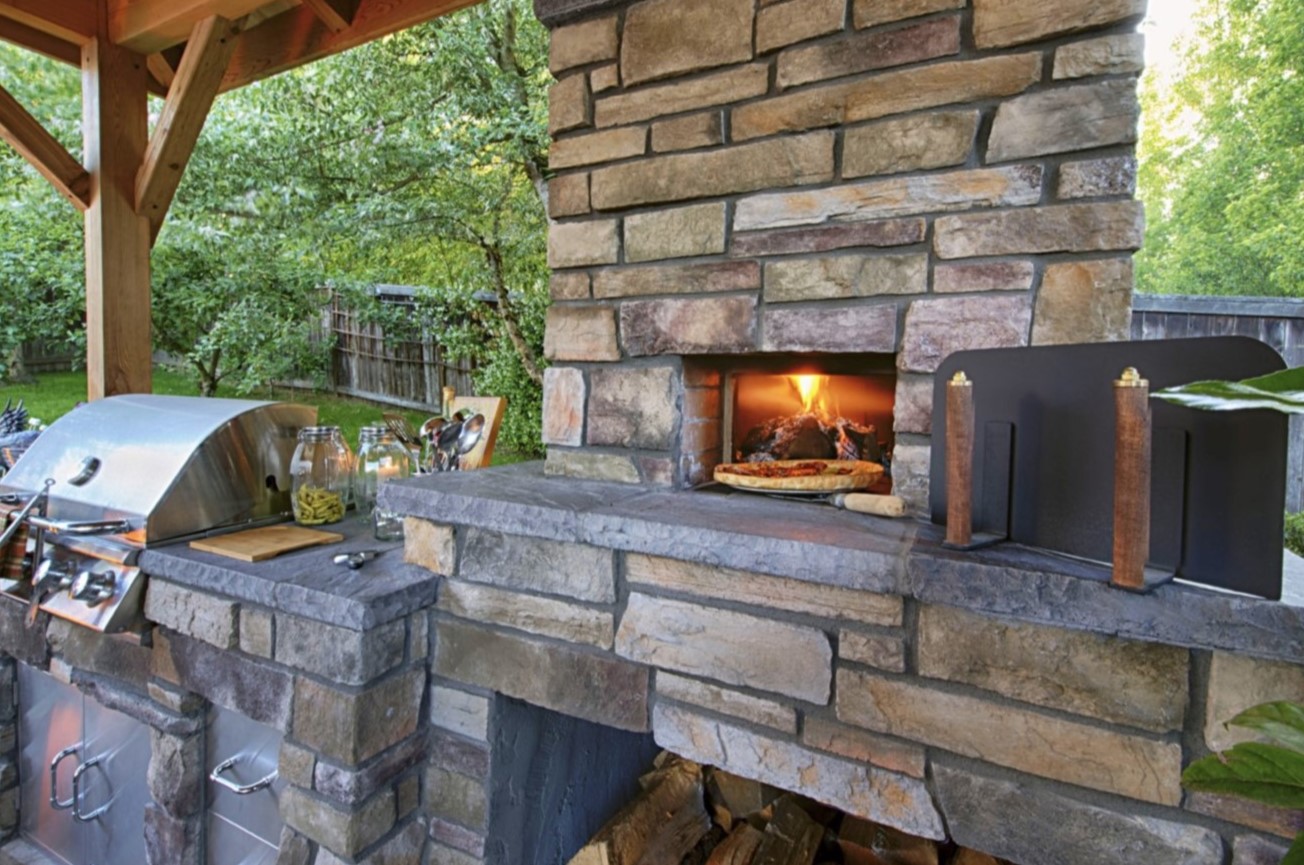
2. Installing the Oven Door: Mount a metal or wooden door at the entrance of the oven to regulate airflow and maintain the desired cooking environment. The door also adds a decorative touch to the oven.
3. Adding a Chimney Cap: Install a chimney cap at the top of the oven dome to prevent debris, rain, and animals from entering the chimney. The cap also helps to maintain proper airflow and ventilation.
4. Exterior Finishing: Consider applying a decorative finish to the exterior of the oven, such as a weather-resistant stucco or a layer of heat-resistant paint. This not only enhances the aesthetics of the oven but also provides protection against the elements.
5. Final Inspection and Clean-Up: Conduct a thorough inspection of the oven to ensure that all components are securely in place and that the construction meets safety standards. Clean up any debris or excess materials from the construction site.
6. Preparing for Curing: Before initiating the curing process, allow the oven to dry thoroughly to ensure that all materials have set and bonded effectively. This preparation is essential for the successful curing of the oven.
By meticulously following these steps, you’ll add the essential insulation and finishing touches that elevate your brick oven pizza to a functional and visually appealing centerpiece. With these elements in place, you’re now ready to proceed to the final step: curing the oven to prepare it for the culinary delights that await.
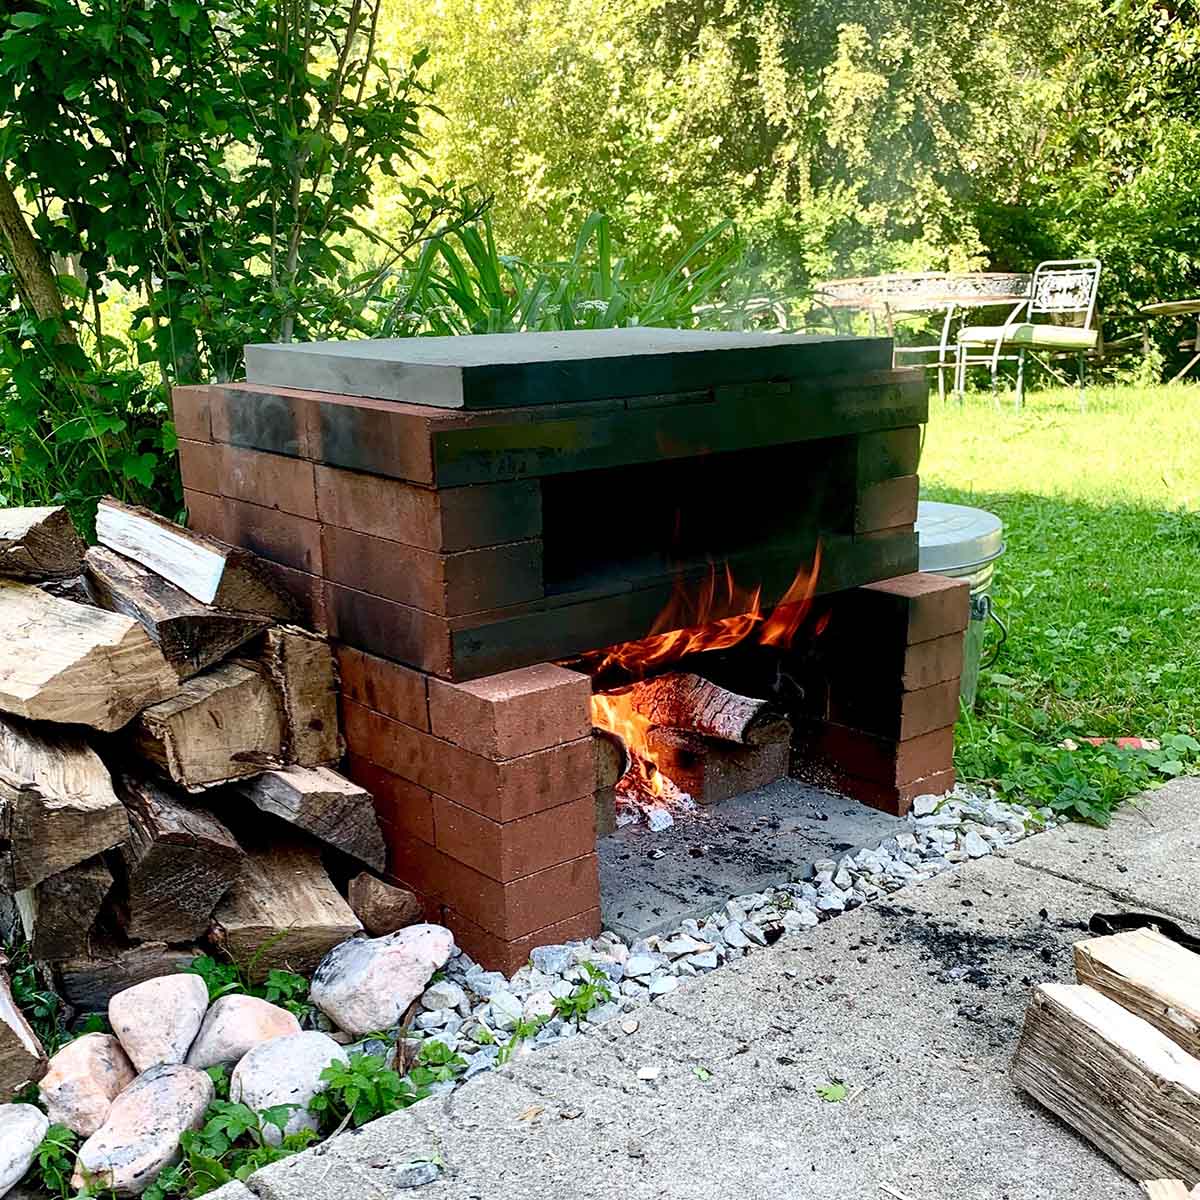
Step 6: Curing the Oven
The process of curing the oven is a crucial final step that prepares it for the intense heat required for cooking delectable brick oven pizzas and other culinary delights. Curing not only strengthens the oven but also ensures the longevity of the materials. Here’s a comprehensive guide to this essential process:
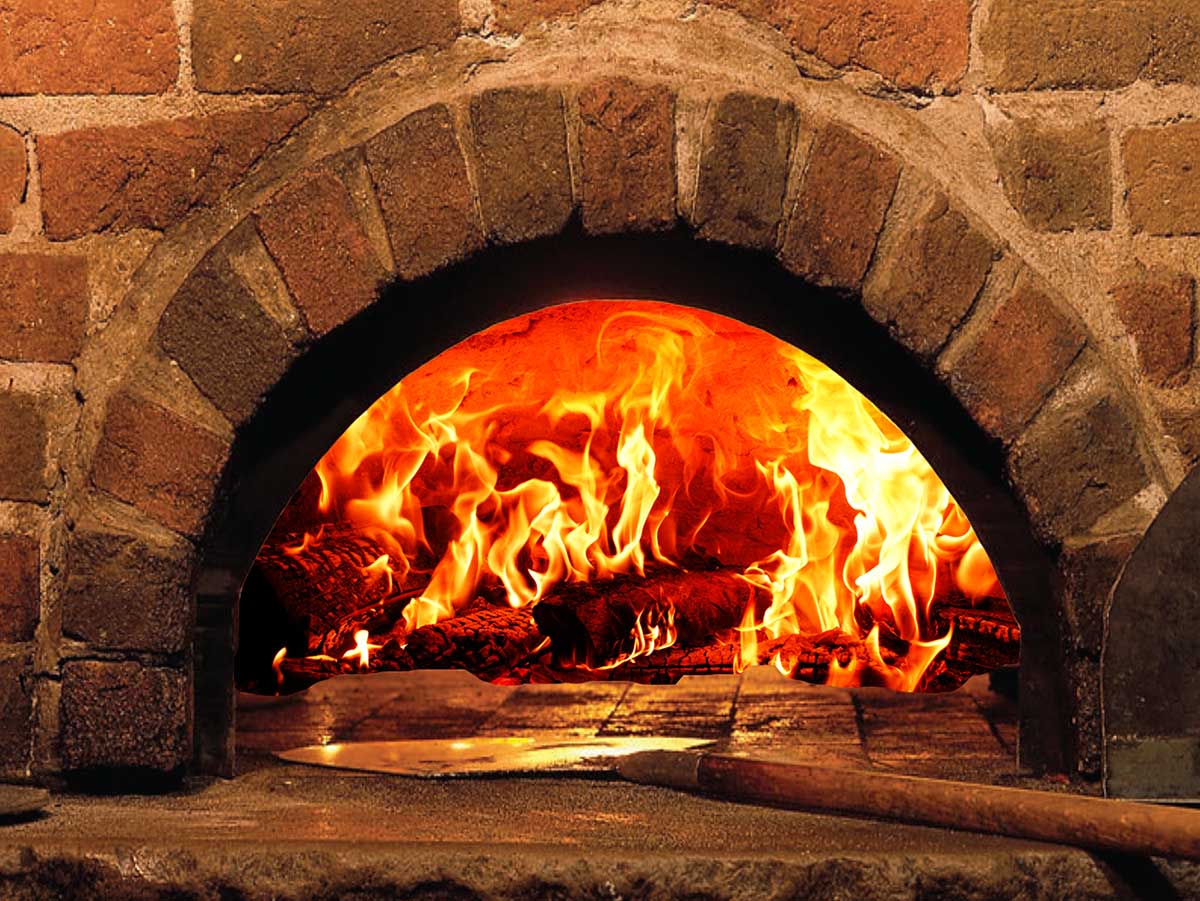
1. Gradual Heating: Begin by initiating the curing process with a series of gradual heatings. Start with small, controlled fires, allowing the oven to slowly acclimate to the increasing temperatures. This gradual approach is essential for preventing thermal shock to the materials.
2. Increasing the Heat: Over the course of several days, gradually increase the intensity and duration of the fires. This progressive escalation will thoroughly dry and cure the refractory cement and insulation materials, fortifying the oven for high-temperature use.
3. Monitoring the Temperature: Use a temperature gauge to monitor the internal heat of the oven during the curing process. Ensure that the temperature rises steadily and uniformly throughout the oven, indicating the effective distribution of heat.
4. Allowing for Cool-Down Periods: After reaching peak temperatures during each firing, allow the oven to cool down gradually. This controlled cooling period is essential for preventing thermal stress and ensuring the durability of the materials.
5. Final Inspection: Once the curing process is complete, conduct a thorough inspection of the oven to ensure that all components are structurally sound and that the insulation and refractory materials have cured effectively.
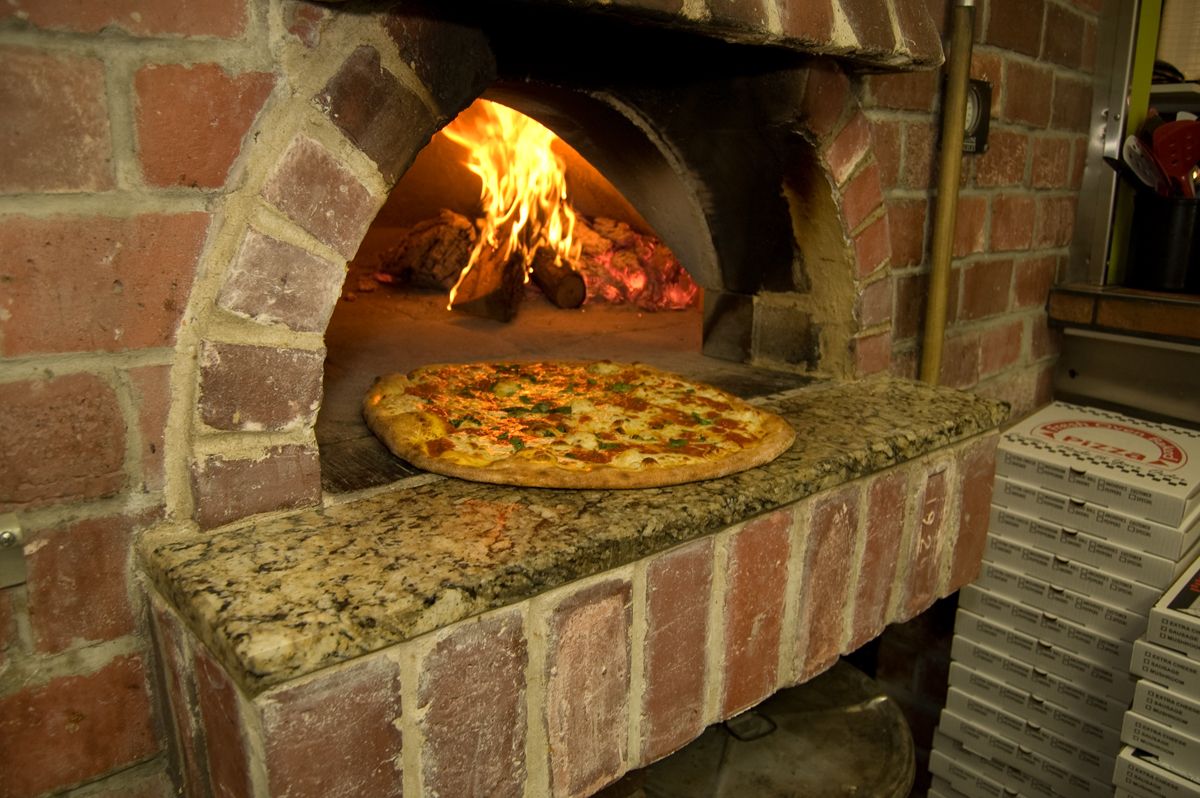
6. Test Firing for Cooking: After the curing process, initiate a test firing to prepare the oven for cooking. This final step ensures that the oven is fully cured and ready to deliver exceptional cooking performance.
By meticulously following these steps, you’ll successfully complete the crucial process of curing the oven, setting the stage for a wealth of culinary adventures and the creation of mouthwatering brick oven pizzas. With the oven fully cured and prepared, you’re now poised to embark on a journey of culinary creativity and enjoyment, savoring the fruits of your labor in the form of delectable homemade pizzas and other culinary delights.
Read more: How To Build A Brick Outdoor Pizza Oven
Conclusion
Congratulations on completing the exhilarating journey of building your own brick oven pizza! This endeavor has not only resulted in the creation of a culinary masterpiece but has also fostered a deeper connection to the timeless art of masonry and the joy of crafting delicious food. As you reflect on this fulfilling experience, it’s essential to recognize the enduring rewards that come with building a brick oven pizza.
Craftsmanship and Tradition: The process of constructing a brick oven pizza has allowed you to engage with the rich tradition of masonry and culinary craftsmanship. This timeless art form has empowered you to create a functional and visually stunning oven that embodies the spirit of tradition and artisanal skill.
Community and Celebration: Your brick oven pizza is more than just a cooking appliance; it’s a catalyst for bringing people together. Whether it’s a gathering of family and friends or a celebration of culinary creativity, your oven will serve as a focal point for warmth, laughter, and the shared enjoyment of delectable flavors.
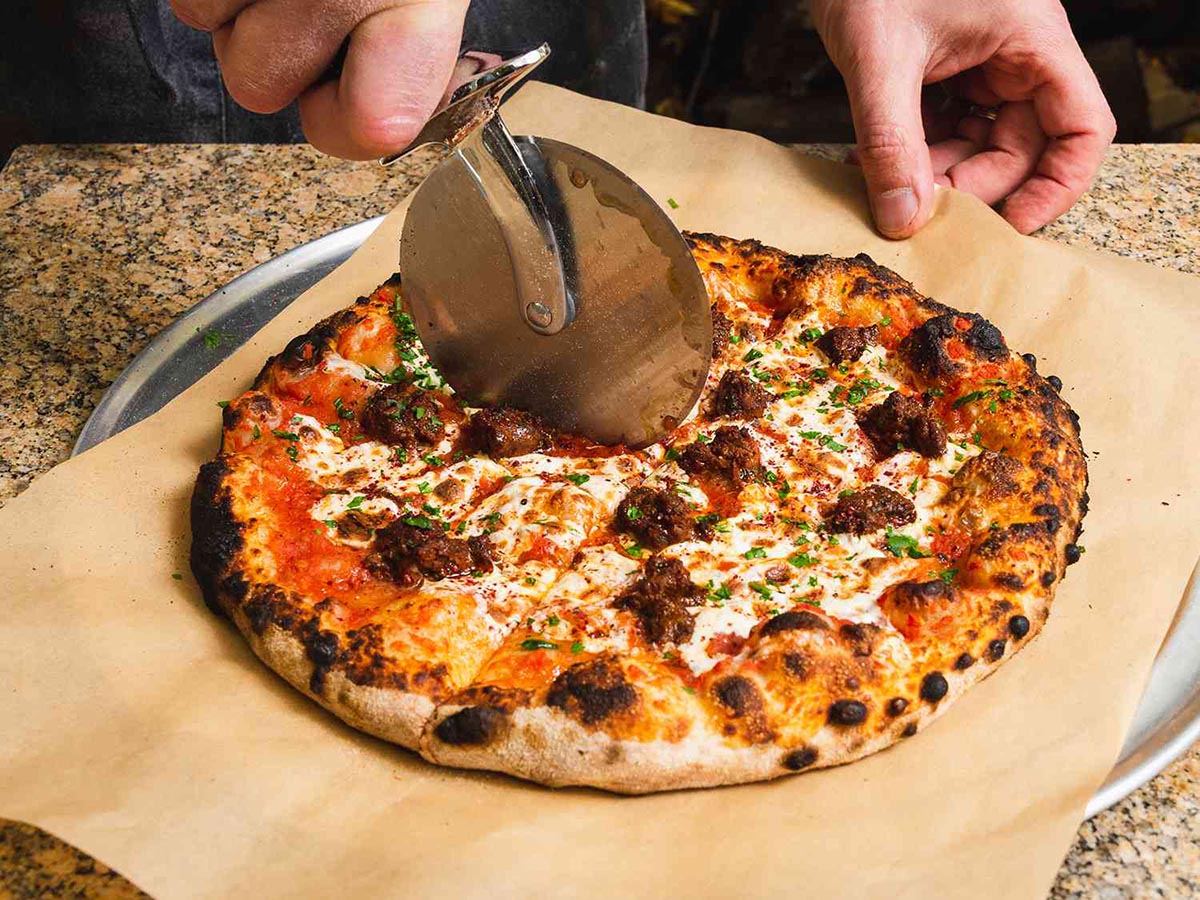
Culinary Exploration: With your brick oven pizza ready for action, you’re now poised to embark on a journey of culinary exploration. From crafting artisanal pizzas with an array of gourmet toppings to experimenting with bread, roasted vegetables, and other delights, your oven opens a world of culinary possibilities.
Enduring Satisfaction: The completion of your brick oven pizza represents a significant achievement, one that will continue to bring satisfaction and joy for years to come. The memories created around the oven, the aromas of freshly baked pizzas, and the shared moments of culinary creativity will form an enduring tapestry of satisfaction and fulfillment.
As you savor the fruits of your labor and share the delights of your brick oven pizza with those around you, remember the journey that has led to this moment. Your dedication, craftsmanship, and passion have resulted in a culinary centerpiece that will enrich your life and the lives of those you hold dear. So, fire up the oven, unleash your creativity, and savor the boundless pleasures of homemade brick oven pizza!
Frequently Asked Questions about How To Build A Brick Oven Pizza
Was this page helpful?
At Storables.com, we guarantee accurate and reliable information. Our content, validated by Expert Board Contributors, is crafted following stringent Editorial Policies. We're committed to providing you with well-researched, expert-backed insights for all your informational needs.


0 thoughts on “How To Build A Brick Oven Pizza”