Home>Furniture & Design>Outdoor Furniture>How To Seal Chipboard For Outdoor Use
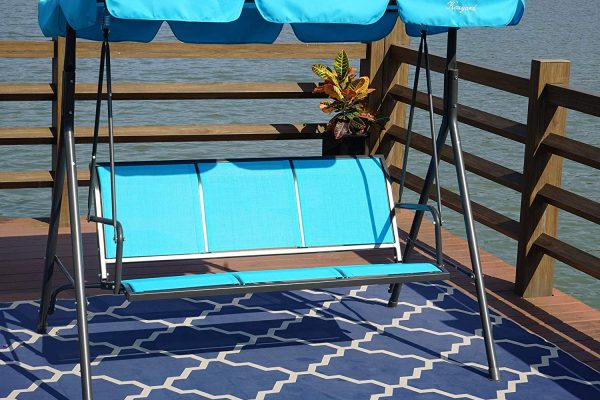
Outdoor Furniture
How To Seal Chipboard For Outdoor Use
Published: January 15, 2024
Learn the best methods for sealing chipboard to protect your outdoor furniture designs. Keep your outdoor furniture looking great with these expert tips.
(Many of the links in this article redirect to a specific reviewed product. Your purchase of these products through affiliate links helps to generate commission for Storables.com, at no extra cost. Learn more)
Introduction
When it comes to outdoor furniture and design, one of the key considerations is ensuring the longevity and durability of the materials used. Chipboard, a cost-effective and versatile option, is a popular choice for outdoor furniture due to its affordability and adaptability. However, to safeguard chipboard against the elements and preserve its structural integrity, it's crucial to seal it effectively for outdoor use.
In this comprehensive guide, we will delve into the process of sealing chipboard for outdoor applications. Whether you're a seasoned DIY enthusiast or a homeowner looking to protect your outdoor chipboard furniture, this article will provide valuable insights and practical tips to help you achieve a professional-grade seal.
Let's embark on a journey to understand chipboard, explore the essential steps for preparation and application of sealant, and uncover the best practices for curing and maintaining sealed chipboard in outdoor settings. By the end of this guide, you'll be well-equipped to elevate the longevity and weather resistance of your outdoor chipboard furniture and design elements. So, let's dive in and unlock the secrets of sealing chipboard for outdoor use.
Key Takeaways:
- Protecting chipboard for outdoor use involves thorough preparation, including surface inspection, moisture protection, and primer application, to ensure a durable and weather-resistant seal against the elements.
- After sealing chipboard for outdoor use, regular maintenance, periodic reapplication of sealant, and protective measures are essential to uphold its resilience and aesthetic appeal in outdoor environments.
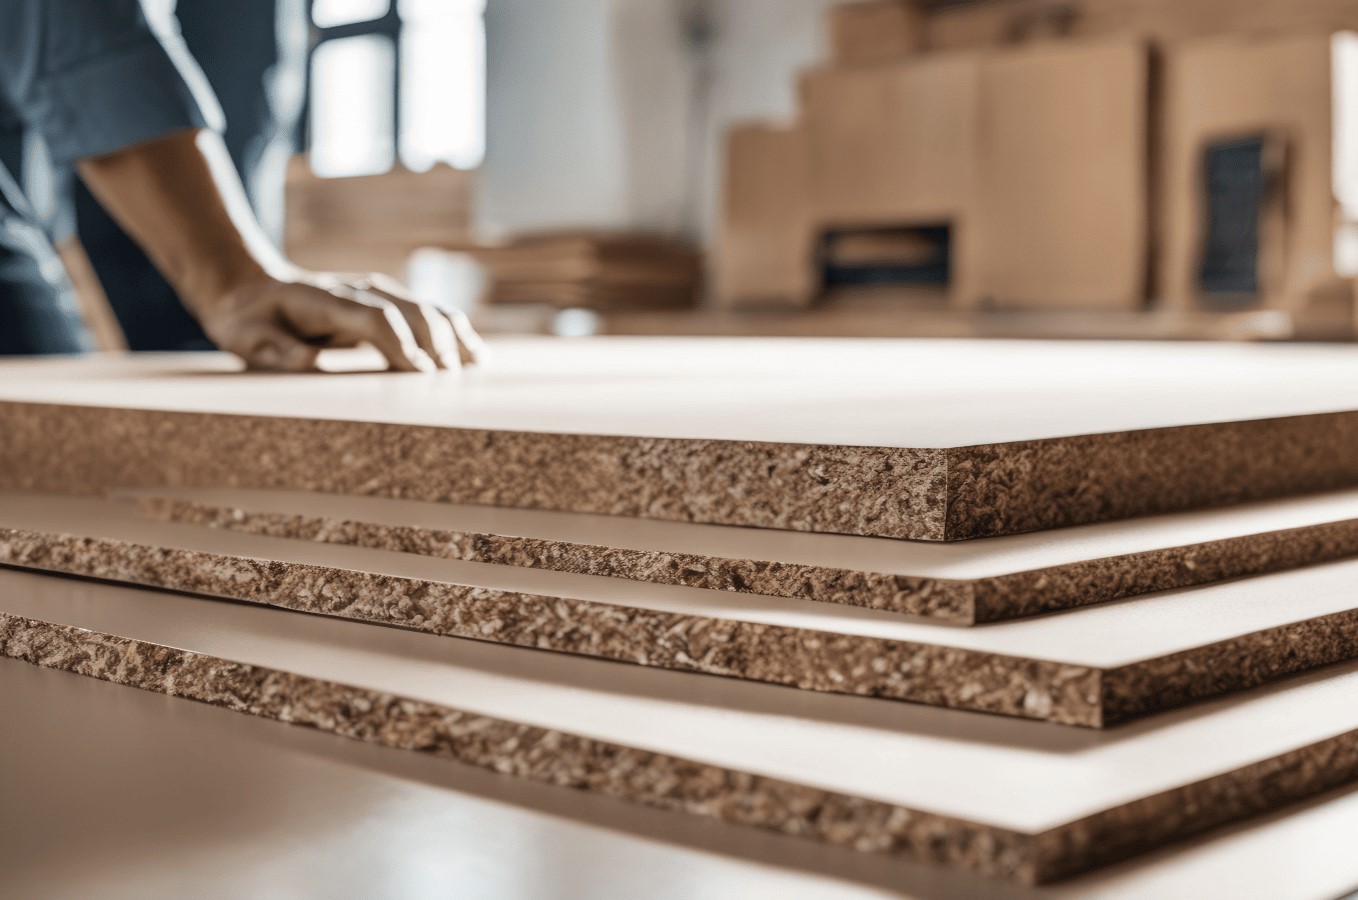
Understanding Chipboard
Before delving into the process of sealing chipboard for outdoor use, it’s essential to grasp the nature of this versatile material. Chipboard, also known as particleboard, is composed of wood chips, sawdust, and resin bonded together under high pressure and heat. This engineered wood product offers a cost-effective alternative to solid wood, making it a popular choice in furniture construction, including outdoor pieces.
Chipboard’s composition gives it a smooth and uniform surface, making it ideal for various finishes, including paint, veneer, and laminate. While chipboard is prized for its affordability and ease of use, it is inherently susceptible to moisture and environmental factors, which can compromise its structural integrity over time.
When used outdoors, chipboard is exposed to fluctuating weather conditions, including rain, humidity, and sunlight, all of which can accelerate wear and tear if the material is left unprotected. This underscores the importance of effectively sealing chipboard to shield it from the elements and prolong its lifespan in outdoor settings.
By understanding the composition and vulnerabilities of chipboard, you can make informed decisions regarding its treatment and maintenance. The next step involves preparing the chipboard for sealing, a critical process that sets the stage for a durable and weather-resistant finish.
Preparation for Sealing
Before applying any sealant to chipboard for outdoor use, thorough preparation is paramount to ensure the effectiveness and longevity of the seal. The following steps outline the essential measures for preparing chipboard for sealing:
- Surface Inspection: Begin by inspecting the chipboard surface for any imperfections, such as rough areas, protruding particles, or uneven edges. Sand down any rough spots and use a damp cloth to remove any dust or debris, ensuring a smooth and clean surface for the sealant to adhere to.
- Moisture Protection: Chipboard is highly susceptible to moisture, which can lead to swelling and warping. To safeguard against moisture infiltration, it’s crucial to apply a moisture-resistant primer or sealer specifically designed for chipboard. This initial layer acts as a barrier, preventing water from compromising the integrity of the material.
- Edge Sealing: Pay special attention to the edges of the chipboard, as these areas are particularly vulnerable to moisture absorption. Apply an edge-sealing compound or primer to seal the exposed edges, effectively fortifying them against moisture ingress.
- Primer Application: Once the chipboard surface is prepped and protected, apply a high-quality primer designed for outdoor use. The primer enhances adhesion and provides a stable base for the sealant, ensuring uniform coverage and long-lasting protection against the elements.
- Environmental Considerations: Take into account the specific outdoor environment where the chipboard will be situated. If the furniture or design elements will be exposed to direct sunlight, extreme temperatures, or high humidity, opt for a sealant that offers UV resistance and robust weatherproofing properties to combat these environmental stressors.
By meticulously preparing the chipboard surface and selecting the appropriate protective products, you set the stage for a robust and enduring seal. The next phase involves the application of the sealant, a crucial step in fortifying chipboard for outdoor use.
To seal chipboard for outdoor use, apply a waterproof sealant or outdoor varnish to all surfaces, including edges and corners. Make sure to follow the manufacturer’s instructions for proper application and drying time.
Applying Sealant
Once the chipboard surface is meticulously prepared, the next step in the sealing process involves the precise application of a high-quality sealant. This critical phase determines the level of protection and durability that the chipboard will exhibit in outdoor conditions. Here’s a comprehensive guide to effectively applying sealant to chipboard for outdoor use:
- Selection of Sealant: Choose a sealant specifically formulated for outdoor applications and compatible with chipboard. Opt for a product that offers robust weather resistance, UV protection, and moisture repellency to ensure comprehensive safeguarding against the elements.
- Application Method: Utilize a paintbrush, roller, or sprayer to apply the sealant evenly across the chipboard surface. Ensure thorough coverage, paying particular attention to any joints, edges, and intricate details to create a seamless and impenetrable barrier against moisture and environmental factors.
- Multiple Coats: Depending on the manufacturer’s recommendations and the porosity of the chipboard, consider applying multiple coats of sealant to enhance its protective capabilities. Allow each coat to dry completely before applying the next, ensuring optimal adhesion and coverage.
- Uniform Distribution: Maintain a consistent application rate and technique to achieve uniform distribution of the sealant. Avoid excessive buildup or pooling, as this can lead to uneven drying and compromise the integrity of the seal. A smooth and uniform application is essential for maximizing the effectiveness of the sealant.
- Drying and Curing: After the final coat is applied, allow the sealant to dry and cure according to the manufacturer’s instructions. Ensure proper ventilation and adequate drying time to facilitate the formation of a robust protective layer that withstands outdoor exposure.
By adhering to these guidelines and exercising precision during the sealant application, you can fortify chipboard against the rigors of outdoor environments, ensuring long-term resilience and weather resistance. Once the sealant has been applied and cured, the chipboard is ready for outdoor use, but ongoing maintenance is essential to preserve its protective seal.
Curing and Maintenance
Following the application of the sealant, allowing for proper curing is essential to maximize its protective capabilities and longevity. The curing process involves the gradual hardening and strengthening of the sealant, resulting in a durable and weather-resistant finish. Here’s a comprehensive overview of the curing phase and essential maintenance practices for sealed chipboard in outdoor settings:
- Curing Time: Refer to the manufacturer’s guidelines to determine the recommended curing time for the specific sealant used. Typically, the curing process may take several days to complete, during which the chipboard should be shielded from moisture and excessive exposure to the elements to facilitate optimal hardening.
- Regular Inspection: After the initial curing period, conduct regular inspections of the sealed chipboard to assess its condition and identify any signs of wear, damage, or moisture penetration. Promptly address any issues to prevent potential deterioration of the sealant and underlying chipboard.
- Periodic Maintenance: Implement a routine maintenance schedule to preserve the integrity of the sealed chipboard. This may include gentle cleaning with a mild detergent and water, followed by a thorough drying process to remove any accumulated dirt, debris, or environmental residues that could compromise the sealant.
- Reapplication of Sealant: Over time, the protective sealant may experience gradual wear due to exposure to the elements. Depending on the specific sealant used and the outdoor conditions, periodic reapplication of the sealant may be necessary to reinforce the chipboard’s resistance to moisture, UV radiation, and other environmental stressors.
- Protective Measures: To prolong the lifespan of the sealed chipboard, consider implementing protective measures such as using furniture covers, positioning outdoor pieces in shaded areas, and avoiding prolonged exposure to harsh weather conditions whenever possible.
By adhering to a proactive maintenance regimen and promptly addressing any issues that arise, you can uphold the integrity of the sealed chipboard, ensuring its continued resilience and aesthetic appeal in outdoor environments. With proper care and maintenance, sealed chipboard furniture and design elements can withstand the challenges of outdoor use, providing enduring functionality and visual allure.
Conclusion
Sealing chipboard for outdoor use is a transformative process that elevates the durability and weather resistance of furniture and design elements, ensuring their longevity and aesthetic appeal in outdoor settings. By understanding the nature of chipboard, meticulously preparing the surface, applying a high-quality sealant, and implementing proactive maintenance practices, you can fortify chipboard against the rigors of outdoor environments, safeguarding it from moisture, UV radiation, and other environmental stressors.
Effective sealing not only enhances the structural integrity of chipboard but also opens up a myriad of design possibilities, allowing for the creation of stunning outdoor furniture, decking, and decorative features that seamlessly blend functionality with style. Whether you’re reviving existing chipboard pieces or embarking on new outdoor projects, the sealing process empowers you to unleash the full potential of this versatile material in outdoor applications.
As you embark on your journey to seal chipboard for outdoor use, remember that attention to detail, the selection of high-quality products, and consistent maintenance are the cornerstones of a resilient and enduring seal. With the right approach, sealed chipboard can withstand the test of time, enriching outdoor spaces with its charm and practicality.
So, embrace the art of sealing chipboard for outdoor use, and witness the transformation of ordinary chipboard into a resilient and captivating feature of your outdoor oasis. With each meticulously sealed piece, you infuse outdoor spaces with durability, style, and the enduring allure of chipboard, creating a harmonious union of nature and design.
By embracing these principles and practices, you can embark on a journey to unlock the full potential of chipboard in outdoor applications, enriching your outdoor living experience and design endeavors with enduring beauty and functionality.
Frequently Asked Questions about How To Seal Chipboard For Outdoor Use
Was this page helpful?
At Storables.com, we guarantee accurate and reliable information. Our content, validated by Expert Board Contributors, is crafted following stringent Editorial Policies. We're committed to providing you with well-researched, expert-backed insights for all your informational needs.


0 thoughts on “How To Seal Chipboard For Outdoor Use”