Home>Renovation & DIY>Home Renovation Guides>How To Seal A Sunroom

Home Renovation Guides
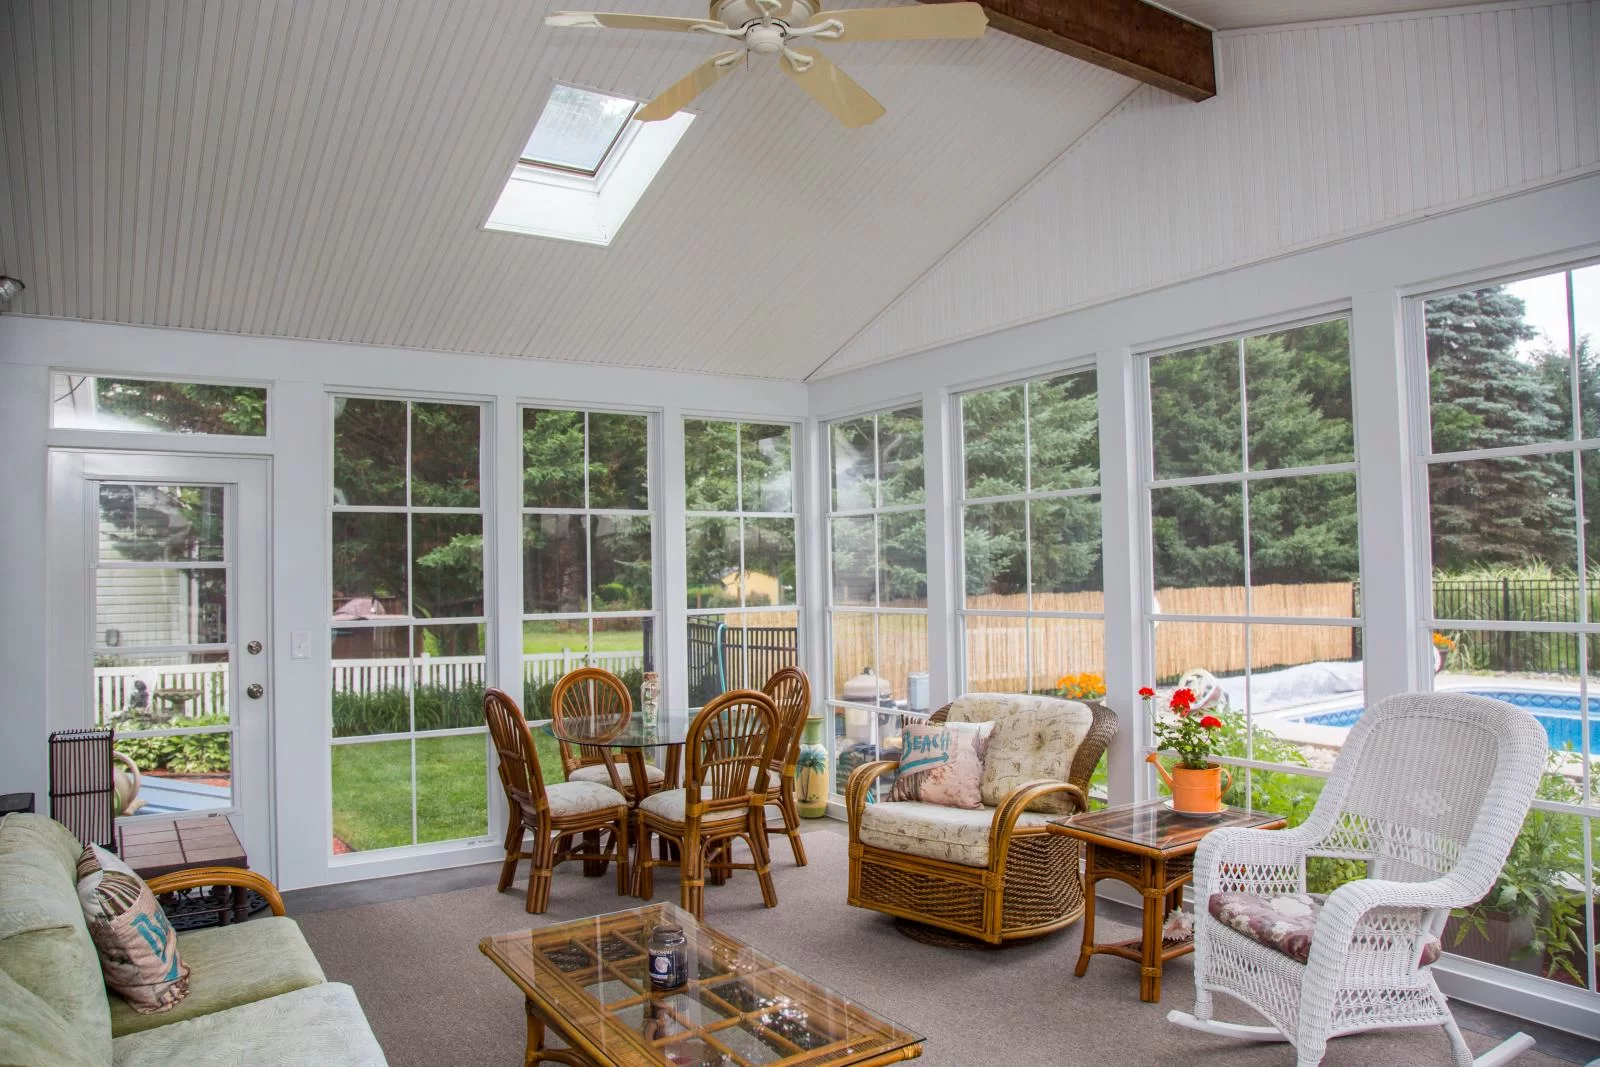
How To Seal A Sunroom
Published: January 17, 2024
Learn how to effectively seal a sunroom with our comprehensive home renovation guide. Discover expert tips and techniques for a successful sunroom sealing project. Start renovating your home today!
(Many of the links in this article redirect to a specific reviewed product. Your purchase of these products through affiliate links helps to generate commission for Storables.com, at no extra cost. Learn more)
Introduction
So, you've finally decided to seal your sunroom. You're on the right track! Sealing your sunroom not only enhances its aesthetic appeal but also provides protection against the elements, ensuring a comfortable and durable space for relaxation and entertainment.
A well-sealed sunroom offers numerous benefits, including improved energy efficiency, reduced maintenance costs, and enhanced overall comfort. Whether you're planning to convert your sunroom into a cozy reading nook, a vibrant indoor garden, or a serene meditation space, proper sealing is essential to create a welcoming and functional environment.
In this comprehensive guide, we'll walk you through the process of sealing your sunroom, from assessing the current condition to choosing the right sealant, and from preparing the sunroom for the sealing process to applying and maintaining the sealant. By the end of this journey, you'll be equipped with the knowledge and confidence to transform your sunroom into a well-sealed, inviting retreat that seamlessly blends with the beauty of the outdoors while providing the comfort of indoor living. Let's embark on this exciting venture to elevate your sunroom to its full potential!
Key Takeaways:
- Sealing your sunroom is like giving it a protective hug, keeping it cozy and safe from the outside world. It’s a journey of love and care for your home.
- Choosing the right sealant and maintaining it is like giving your sunroom a superhero cape. It protects and preserves, ensuring your sunroom remains a happy and inviting space.
Read more: How To Build A Sunroom On A Patio
Assessing the Sunroom
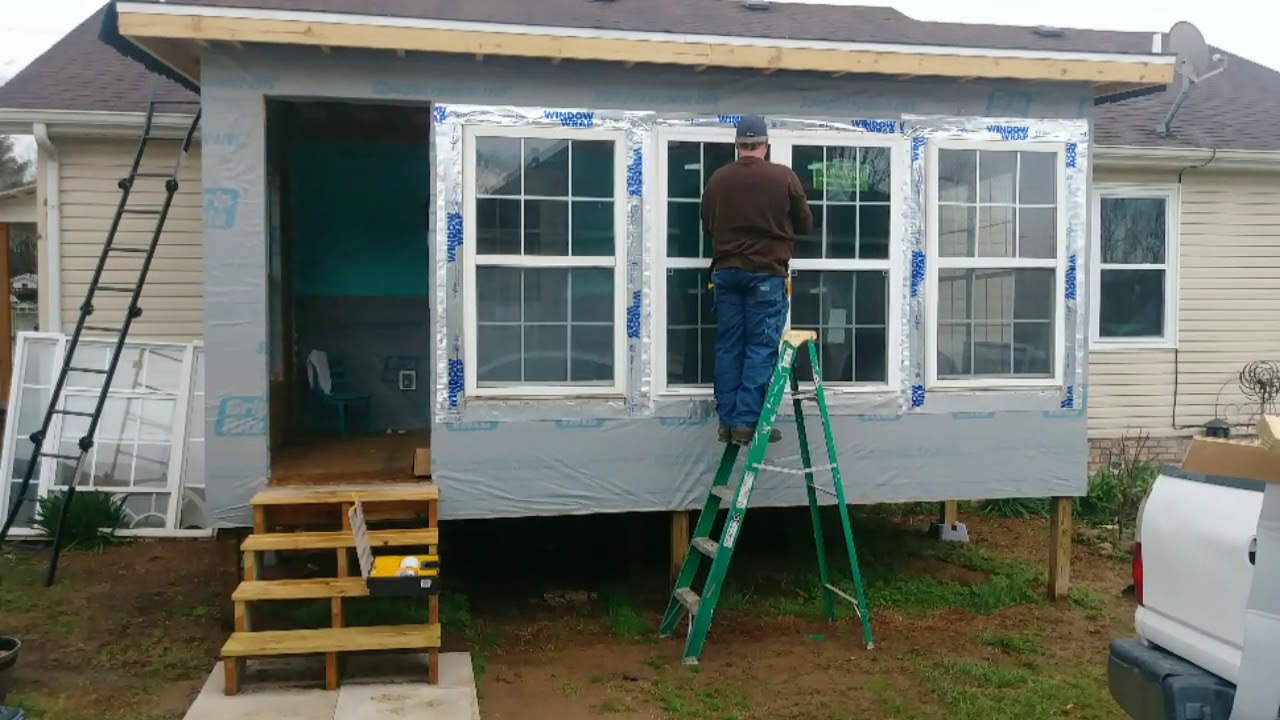
Before diving into the sealing process, it’s crucial to assess the current condition of your sunroom to identify any existing issues that may impact the sealing procedure. Start by thoroughly examining the windows, doors, walls, and flooring for signs of wear and tear, water damage, or air leaks.
Windows and Doors: Check the seals and weather-stripping around the windows and doors for any gaps, cracks, or deterioration. Inspect the glass for cracks or gaps that may compromise the insulation and structural integrity of the sunroom.
Walls: Look for water stains, mold, or mildew on the walls, especially near the baseboards and corners. These indicate potential water intrusion or excessive moisture, which must be addressed before sealing the sunroom.
Flooring: Examine the flooring for any signs of warping, discoloration, or moisture damage. Ensure that the floor is level and free of any structural issues that may affect the sealing process.
Structural Integrity: Assess the overall structural integrity of the sunroom, including the roof, support beams, and foundation. Look for any signs of sagging, shifting, or damage that may require repairs before proceeding with the sealing process.
Additionally, consider the climate and environmental factors that your sunroom is exposed to. If you live in an area prone to extreme temperatures, heavy rainfall, or high humidity, the sealing requirements may differ compared to a sunroom in a milder climate.
By conducting a thorough assessment, you’ll gain valuable insights into the specific areas that require attention and potential repairs before initiating the sealing process. Addressing any underlying issues proactively will ensure that the sealant application is effective and long-lasting, providing optimal protection and comfort in your sunroom.
Choosing the Right Sealant
When it comes to sealing your sunroom, selecting the appropriate sealant is paramount to achieving a durable and effective seal. With a wide range of sealant options available, it’s essential to consider the specific needs of your sunroom, including the materials used, the prevailing climate, and the desired level of protection.
Type of Sealant: Consider the type of sealant best suited for the surfaces in your sunroom. For windows and doors, silicone-based sealants offer excellent flexibility and weather resistance, while acrylic-based sealants are ideal for sealing gaps and cracks in walls and flooring. Polyurethane sealants provide exceptional adhesion and durability, making them suitable for high-traffic areas.
Climate Considerations: Take into account the climate conditions your sunroom is exposed to. If you experience temperature extremes, choose a sealant with thermal stability to withstand expansion and contraction. For sunrooms in humid environments, opt for a mold and mildew-resistant sealant to prevent moisture-related issues.
UV Resistance: If your sunroom receives prolonged sunlight exposure, select a sealant with UV-resistant properties to prevent discoloration, degradation, and loss of adhesion over time. UV-stable sealants maintain their integrity and appearance, ensuring long-term performance in sunlit areas.
Application Method: Evaluate the ease of application and compatibility with the sunroom’s materials. Some sealants come in convenient cartridge or squeeze tube packaging for precise application, while others may require specialized tools for proper installation. Ensure that the selected sealant aligns with the surface materials and allows for seamless application.
Longevity and Maintenance: Look for sealants with a proven track record of longevity and minimal maintenance requirements. A high-quality sealant should withstand the test of time without frequent reapplication, reducing the need for ongoing maintenance and ensuring prolonged protection for your sunroom.
By carefully considering these factors and consulting with professionals if needed, you can choose a sealant that meets the unique needs of your sunroom, providing reliable protection, energy efficiency, and aesthetic enhancement. The right sealant will be the cornerstone of a well-sealed sunroom, creating a comfortable and inviting space for years to come.
Preparing the Sunroom
Before applying the sealant, thorough preparation of the sunroom is essential to ensure optimal adhesion and long-lasting results. Proper preparation involves cleaning the surfaces, addressing any existing issues, and creating a suitable environment for the sealant application.
Cleaning the Surfaces: Start by cleaning the windows, doors, walls, and flooring to remove dirt, dust, grease, and any existing sealant residue. Use a gentle, non-abrasive cleaner suitable for the specific materials in your sunroom. Ensure that the surfaces are completely dry before proceeding to the next steps.
Repairing Damaged Areas: Address any visible damage, such as cracks, gaps, or deteriorated seals, before applying the new sealant. Repair any structural issues, replace damaged weather-stripping, and fix any water damage or mold growth to create a solid foundation for the sealant application.
Protecting Adjacent Surfaces: Cover adjacent surfaces, such as the floor and adjacent walls, with protective materials to prevent accidental spills or smudges during the sealing process. Use painter’s tape and drop cloths to shield areas that are not intended for sealing, ensuring a neat and controlled application.
Ensuring Proper Ventilation: Adequate ventilation is crucial during the sealant application and curing process. Open windows and doors to promote air circulation and minimize the buildup of fumes. If necessary, use fans to improve airflow and expedite the drying time of the sealant.
Applying Primer (If Needed): Depending on the type of sealant and the condition of the surfaces, applying a primer may be recommended to enhance adhesion and ensure uniform coverage. Follow the manufacturer’s guidelines regarding the selection and application of primers for the specific sealant being used.
By meticulously preparing the sunroom, you create an optimal foundation for the sealant application, maximizing its effectiveness and longevity. A well-prepared surface allows the sealant to adhere securely, forming a robust barrier against the elements and contributing to the overall comfort and durability of your sunroom.
Make sure to inspect the sunroom for any cracks or gaps in the windows, doors, and walls. Use weatherstripping, caulk, or sealant to fill in any gaps to prevent air and water leaks. Regular maintenance is key to keeping your sunroom sealed and protected.
Applying the Sealant
Now that the sunroom is meticulously prepared, it’s time to embark on the application of the sealant. The process of applying the sealant demands precision, patience, and attention to detail to ensure a seamless and effective seal that enhances the functionality and aesthetics of the sunroom.
Choosing the Right Tools: Select the appropriate tools for the sealant application, such as caulking guns, putty knives, or specialized applicators based on the type of sealant and the specific areas to be sealed. Ensure that the tools are clean and in good condition to facilitate a smooth application process.
Applying the Sealant: Begin by loading the sealant into the caulking gun or dispensing it as per the manufacturer’s instructions. Apply a uniform bead of sealant along the edges of windows, doors, and any gaps or joints in the walls and flooring. Use steady pressure and maintain a consistent pace to achieve a neat and continuous seal line.
Smoothing and Shaping: After applying the sealant, use a putty knife or a specialized smoothing tool to shape and smooth the sealant, ensuring proper adhesion and a visually appealing finish. Work methodically to remove excess sealant and create clean, well-defined edges along the sealed areas.
Allowing for Proper Curing: Once the sealant is applied and shaped, allow it to cure as per the manufacturer’s recommended timeframe. During this period, avoid touching or disturbing the sealed areas to prevent smudges or disruptions to the curing process. Proper curing is essential for the sealant to attain its full strength and effectiveness.
Cleaning Up: After the sealant has fully cured, carefully remove any protective coverings and clean up any residual sealant or smudges using a suitable solvent or cleaner recommended by the manufacturer. Ensure that the sealed areas are free of debris and maintain a clean, polished appearance.
By following these steps and exercising care and precision throughout the application process, you can achieve a professionally sealed sunroom that not only provides enhanced protection and energy efficiency but also elevates the visual appeal and functionality of the space. A well-applied sealant is the cornerstone of a resilient and inviting sunroom that seamlessly integrates with your lifestyle and home environment.
Read more: How To Turn A Patio Into A Sunroom
Maintaining the Sealant
After successfully sealing your sunroom, ongoing maintenance is crucial to preserve the integrity and effectiveness of the sealant, ensuring long-term protection and performance. By implementing regular maintenance practices, you can safeguard the sealant against wear and tear, environmental factors, and potential damage, prolonging the lifespan of your sunroom’s sealant and preserving its functionality and aesthetic appeal.
Regular Inspections: Schedule periodic inspections of the sealed areas in your sunroom to detect any signs of deterioration, cracking, or gaps in the sealant. Inspecting the windows, doors, walls, and flooring allows you to identify and address any issues promptly, preventing potential water intrusion, air leaks, or energy loss.
Cleaning and Care: Keep the sealed surfaces clean and free of debris, dirt, and moisture. Regularly clean the windows, doors, and walls using gentle, non-abrasive cleaners suitable for the specific materials. Avoid harsh chemicals or abrasive cleaning tools that may compromise the integrity of the sealant.
Addressing Damage Promptly: If you notice any damage or deterioration in the sealant, address it promptly by removing the affected sealant and reapplying a fresh bead to restore the seal. Timely intervention prevents the escalation of minor issues into more significant problems, preserving the effectiveness of the sealant.
Monitoring Environmental Impact: Be mindful of environmental factors that may impact the sealant, such as extreme temperatures, humidity, and prolonged sunlight exposure. Take proactive measures to mitigate the effects of these factors, such as using blinds or shades to reduce direct sunlight and maintaining consistent indoor humidity levels.
Reapplication as Needed: Over time, the sealant may require periodic reapplication in areas that experience high wear or exposure. Monitor the condition of the sealant and plan for regular touch-ups or resealing as part of your sunroom maintenance routine, ensuring continuous protection and performance.
By incorporating these maintenance practices into your sunroom care regimen, you can uphold the effectiveness and longevity of the sealant, preserving the comfort, energy efficiency, and visual appeal of your sunroom for years to come. A well-maintained sealant ensures that your sunroom remains a welcoming and functional space that enriches your daily living experience.
Conclusion
Sealing your sunroom is a transformative endeavor that enhances the comfort, energy efficiency, and visual appeal of this unique space in your home. By embarking on the journey to seal your sunroom, you’ve taken a significant step toward creating a welcoming retreat that seamlessly integrates with the beauty of the outdoors while providing the comfort of indoor living.
Throughout this comprehensive guide, we’ve explored the essential steps involved in sealing a sunroom, from assessing the current condition and choosing the right sealant to preparing the sunroom, applying the sealant, and maintaining its integrity. Each phase of the sealing process plays a vital role in ensuring the durability, functionality, and aesthetic enhancement of your sunroom.
As you embark on this endeavor, remember that proper assessment, meticulous preparation, and the selection of the right sealant tailored to your sunroom’s specific needs are fundamental to achieving a successful and enduring seal. The application of the sealant demands precision, care, and attention to detail, culminating in a professionally sealed sunroom that offers enhanced protection and visual appeal.
Furthermore, the commitment to ongoing maintenance and care is essential to preserve the integrity and effectiveness of the sealant, safeguarding your sunroom against wear and environmental factors while prolonging its lifespan and performance.
By embracing the process of sealing your sunroom and integrating these best practices into your home maintenance routine, you’re investing in a space that not only enriches your daily living experience but also adds value and functionality to your home. A well-sealed sunroom is a testament to your dedication to creating a harmonious blend of indoor comfort and outdoor allure, providing a sanctuary for relaxation, entertainment, and rejuvenation.
As you embark on this exciting venture, may your sealed sunroom become a cherished haven that reflects your unique style and enhances the quality of your home life. With proper sealing and maintenance, your sunroom will continue to be a source of joy and comfort, offering a seamless connection to the beauty of nature while providing a cozy retreat within your home.
Frequently Asked Questions about How To Seal A Sunroom
Was this page helpful?
At Storables.com, we guarantee accurate and reliable information. Our content, validated by Expert Board Contributors, is crafted following stringent Editorial Policies. We're committed to providing you with well-researched, expert-backed insights for all your informational needs.


0 thoughts on “How To Seal A Sunroom”