Home>Furniture>Bedroom Furniture>How To Stop A Bed From Squeaking

Bedroom Furniture
How To Stop A Bed From Squeaking
Modified: August 22, 2024
Learn how to stop a bed from squeaking with these simple tips and tricks. Discover effective solutions and enjoy a peaceful night's sleep in your bedroom furniture.
(Many of the links in this article redirect to a specific reviewed product. Your purchase of these products through affiliate links helps to generate commission for Storables.com, at no extra cost. Learn more)
Introduction
Nothing is more annoying than trying to get a good night’s sleep only to be constantly interrupted by the irritating sound of a squeaky bed. The creaking noise can not only disrupt your sleep, but it can also be a source of frustration and embarrassment. Thankfully, there are simple and effective ways to stop a bed from squeaking and restore peace and tranquility to your bedroom.
Understanding the underlying causes of bed squeaks is crucial in finding the right solution. Squeaking beds are often caused by loose screws, worn-out joints, or friction between moving parts. By identifying these potential issues, you can address them directly and put an end to the noise once and for all.
Before diving into the process, it’s essential to gather the necessary tools and materials. You’ll need a screwdriver or wrench to tighten screws and bolts, lubricant to reduce friction, furniture pads or rubber washers to absorb vibrations, and replacement parts if necessary. Having these items prepared will make the process smoother and more efficient.
Now, let’s take a closer look at the step-by-step process of stopping a bed from squeaking:
Key Takeaways:
- Say goodbye to sleepless nights! Follow these 7 steps to silence your squeaky bed, from tightening screws to using lubricant, and enjoy peaceful, uninterrupted sleep.
- Don’t let bed squeaking disrupt your tranquility. With the right tools and know-how, you can easily identify and address the causes of squeaks, ensuring a quiet and serene bedroom environment.
Understanding the causes of bed squeaking
Bed squeaking can be attributed to various factors, including the type of bed frame, the age and condition of the bed, and even the weight distribution on the mattress. By identifying the main causes of the squeaking, you can effectively troubleshoot the problem and find the appropriate solution.
One common cause of bed squeaking is loose screws and bolts. Over time, the constant movement and pressure exerted on the bed can loosen the hardware, resulting in a squeaky sound with every movement. Inspecting the bed frame and tightening any loose screws or bolts should be one of the first steps in addressing the issue.
Another factor that contributes to bed squeaks is worn-out joints. As beds age, the joints and connections between different parts of the frame can become loose or worn, leading to unwanted noise. Properly inspecting the frame and identifying any areas of weakness will help determine if any repairs or replacements are necessary.
Friction between metal joints and hinges is another common cause of bed squeaking. Over time, these metal components can become dry and start rubbing against each other, resulting in irritating noises. Applying lubricant to these areas can reduce friction and effectively eliminate the squeaking sound.
Furthermore, the type of bed frame can also play a role in bed squeaking. Metal frames, with their inherent rigidity, are more prone to squeaking compared to wooden frames. The materials used, the construction, and the overall design of the frame can all impact the occurrence of squeaks.
It’s also important to consider the weight distribution on the bed. If the weight is unevenly distributed, it can create strain on certain parts of the frame and lead to squeaking noises. Adjusting the placement of the mattress and ensuring an even distribution of weight can help alleviate this issue.
By understanding these causes, you can more effectively troubleshoot and address the specific source of the squeaking in your bed. With a comprehensive understanding of the underlying factors, it’s now time to gather the necessary tools and materials to put an end to the squeaks once and for all.
Tools and materials needed
Before you start fixing the squeaks in your bed, it’s important to be equipped with the right tools and materials. Having everything prepared in advance will make the process smoother and more efficient. Here are the items you’ll need:
- 1. Screwdriver or wrench: A screwdriver or wrench will be necessary for tightening any loose screws or bolts that may be causing the squeaking.
- 2. Lubricant: To address squeaks caused by friction, you’ll need a lubricant, such as a silicone-based spray or a specialized furniture lubricant.
- 3. Furniture pads or rubber washers: These items are useful for reducing vibrations and absorbing shocks, which can help eliminate noise caused by loose joints or connections.
- 4. Replacement parts: Depending on the severity of the issue, you may need to replace certain parts of the bed frame, such as worn-out joints or damaged hardware.
- 5. Flashlight: A flashlight will come in handy for inspecting hard-to-reach areas of the bed frame and identifying any potential problem areas.
Gathering these tools and materials beforehand will save you time and ensure you have everything you need to successfully fix the squeaks in your bed.
Now that you’re fully prepared, let’s move on to the step-by-step process of stopping your bed from squeaking and restoring peaceful nights of sleep.
Step 1: Remove the mattress and box spring
The first step in stopping a bed from squeaking is to remove the mattress and box spring. This will allow you to have better access to the bed frame and easily identify the source of the squeaks.
Start by carefully lifting the mattress off the bed frame and placing it aside. Depending on the size and weight of the mattress, you may need some assistance. Once the mattress is removed, you’ll have a clear view and ample space to work on the bed frame.
Next, remove the box spring from the bed frame if you have one. Some beds may not have a box spring, so skip this step if it doesn’t apply to your bed. Place the box spring aside, ensuring it is in a safe and stable position.
By removing the mattress and box spring, you eliminate any obstacles and create a workspace to address the squeaking issues more effectively. With a clear view of the bed frame, you can now move on to the next step: inspecting the frame for any signs of damage or loose parts.
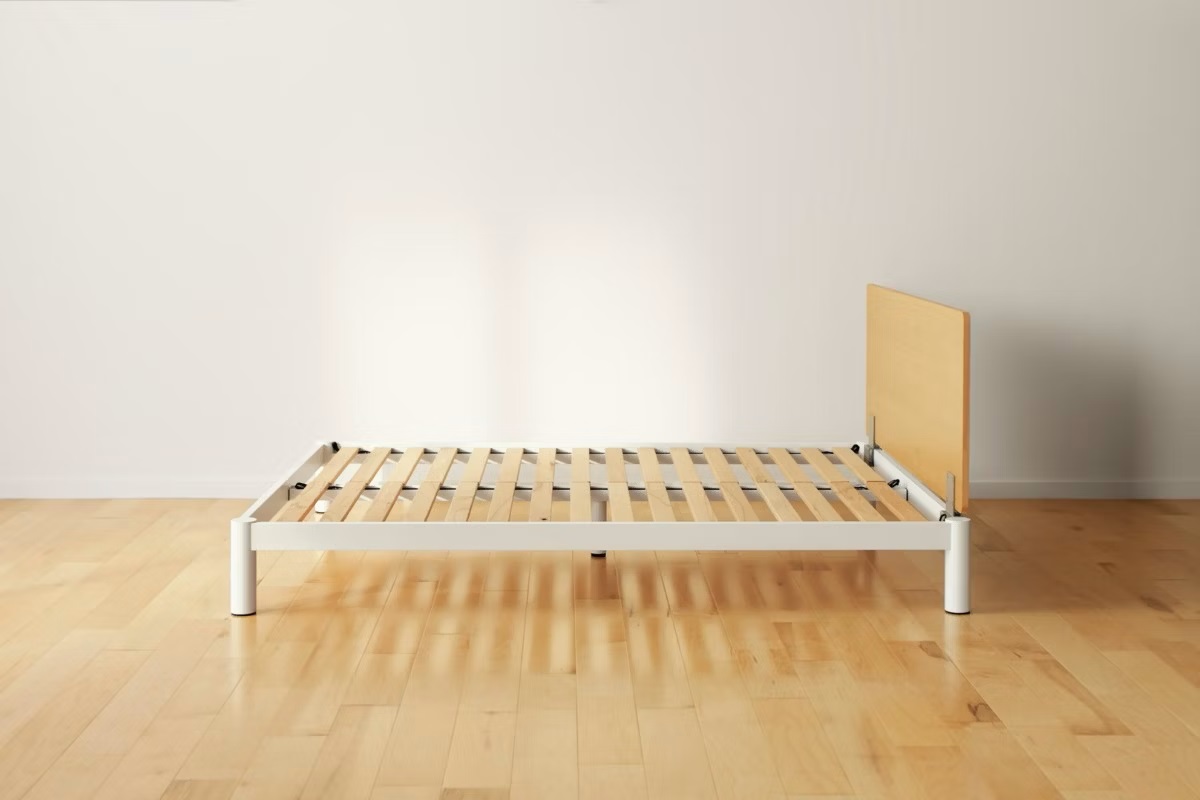
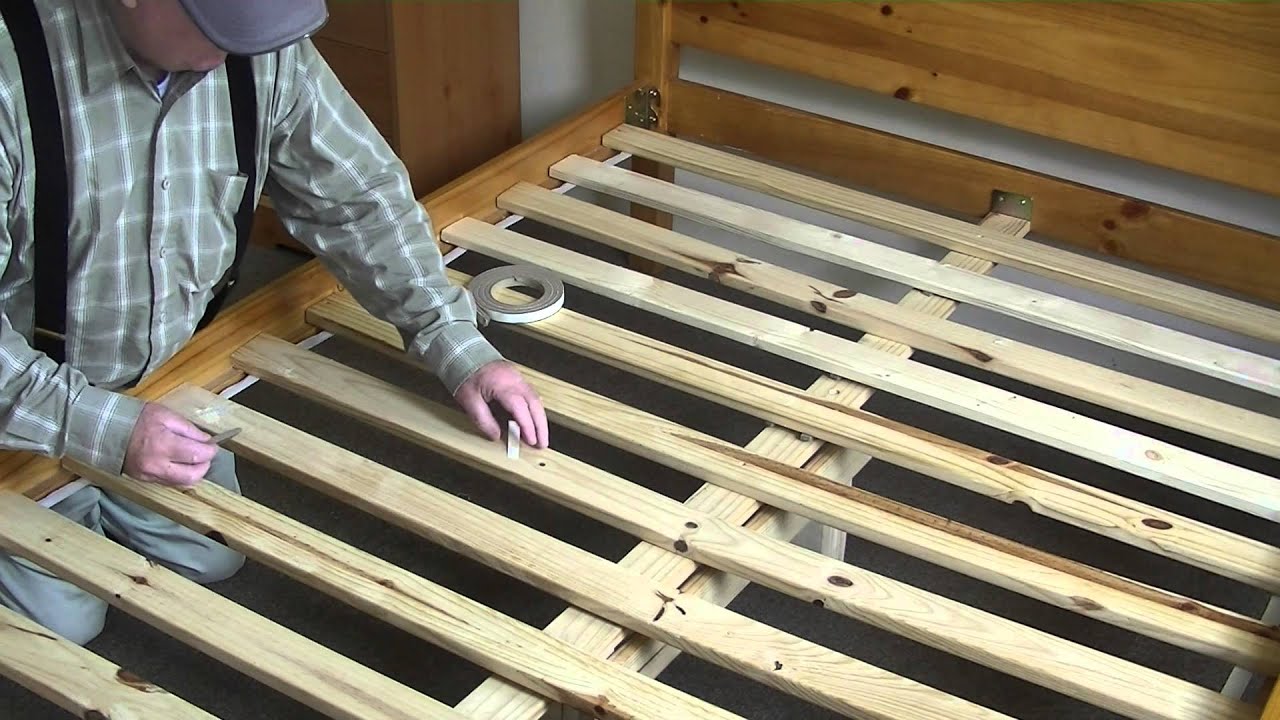
Step 2: Inspect the bed frame
With the mattress and box spring removed, it’s time to inspect the bed frame closely. This step is crucial in identifying any areas of weakness, loose joints, or damaged parts that may be causing the squeaking.
Begin by visually examining the entire frame, looking for any visible signs of wear, rust, or loose connections. Pay close attention to the corners, joints, and where different components of the frame meet. Look for cracks, gaps, or any indications of movement or instability.
While conducting your inspection, use a flashlight to help illuminate hard-to-see areas. Shine the light along the joints to look for any gaps or spaces where the frame may be rubbing against itself.
If you notice any loose screws or bolts during the inspection, make note of them. These will need to be tightened to prevent movement and reduce the squeaking noise.
In some cases, you may find that certain parts of the bed frame are worn, damaged, or even broken. These areas may require replacement, depending on the severity of the issue. Take note of any specific parts that need to be replaced so that you can order the appropriate replacements later on.
By thoroughly inspecting the bed frame, you gain a clear understanding of the condition of the frame and the specific areas that need attention. With this information in hand, you’re ready to move on to the next step: tightening loose screws and bolts.
Read more: How To Stop Recliner From Squeaking
Step 3: Tighten loose screws and bolts
After inspecting the bed frame and identifying any loose screws or bolts, it’s time to tighten them. Loose hardware is a common culprit behind bed squeaks, as it allows for movement and friction between the frame components. By tightening these fasteners, you can effectively eliminate unnecessary noise and stabilize the bed frame.
Using a screwdriver or wrench, systematically go through each section of the bed frame and tighten any loose screws or bolts you identified during the inspection. Make sure to apply enough force to ensure they are securely tightened, but be careful not to overtighten, as it could potentially damage the frame.
Start with the corners of the bed frame, as these are often the areas most prone to loosening. Gently test the stability of the frame as you tighten each screw or bolt to ensure a snug fit. If you are unsure about the tightness of a particular screw or bolt, it’s better to slightly tighten it and then check for any remaining squeaks.
Pay close attention to the joints and connections between different parts of the frame. These areas are prone to movement and can generate squeaking noises. By tightening the screws or bolts in these regions, you can reduce the potential for friction and eliminate the squeaking.
Once you’ve gone through the entire bed frame and tightened all the loose screws and bolts, test the stability and give the bed a gentle shake to check for any remaining squeaks. If you still hear any noise, it’s time to move on to the next step: applying lubricant to metal joints and hinges.
To stop a bed from squeaking, try tightening all the screws and bolts on the frame. If that doesn’t work, consider adding a layer of felt or rubber between the frame and the mattress to dampen any noise.
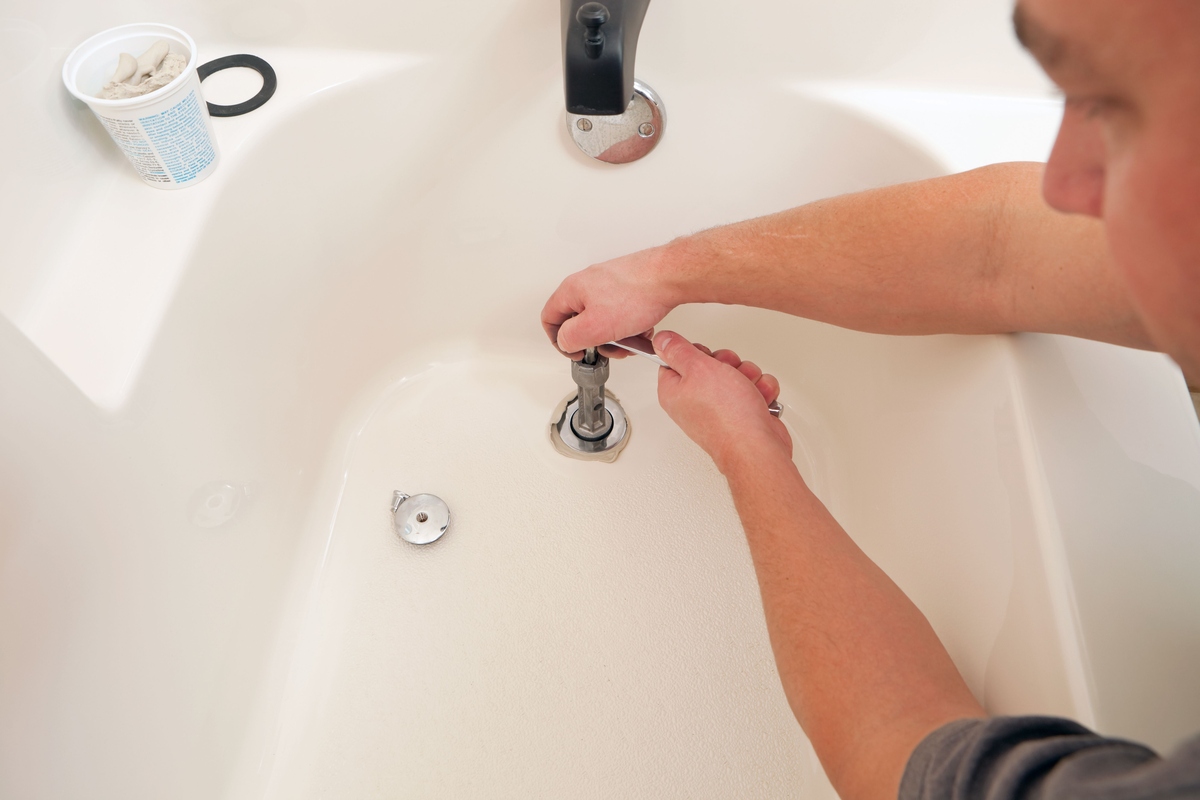
Step 4: Apply lubricant to metal joints and hinges
Applying lubricant to the metal joints and hinges of your bed frame is an effective way to reduce friction and eliminate squeaks. Over time, the metal components can become dry, leading to increased friction and irritating noise. By lubricating these areas, you can restore smooth movement and silence those annoying squeaks.
Start by identifying the metal joints and hinges that are causing the squeaking. This may include areas where the bed frame connects, such as corners, pivot points, or any other points of contact between metal parts.
Once you’ve identified the problem areas, choose an appropriate lubricant. Silicone-based spray lubricants or specialized furniture lubricants work well for this purpose. Avoid using oil-based products, as they can attract dust and dirt, potentially causing more harm than good.
Apply a small amount of lubricant to the metal joints and hinges, ensuring you cover all the areas that are causing the squeaks. Use a rag or cloth to wipe away any excess lubricant to prevent it from spreading or dripping onto the mattress or other parts of the bed.
After applying the lubricant, move the bed frame back and forth, giving the joints and hinges a good workout. This will help distribute the lubricant evenly and allow it to penetrate the metal surfaces.
Re-test the bed for any remaining squeaks. If you still hear noise, try applying a bit more lubricant to the problem areas and repeat the testing process. Sometimes, it may take a few applications to fully eliminate all the squeaks.
By applying lubricant to the metal joints and hinges, you can greatly reduce friction and silence the squeaks in your bed. With that task completed, let’s move on to the next step: using furniture pads or rubber washers to absorb vibrations.
Step 5: Use furniture pads or rubber washers
Using furniture pads or rubber washers is an effective way to minimize vibrations and absorb shocks, which can contribute to bed squeaking. These materials act as a buffer between different parts of the bed frame, reducing friction and eliminating noise caused by loose connections or movement.
Start by identifying the areas of the bed frame where vibrations or movement are occurring. This may include spots where the frame contacts the floor, as well as areas where different parts of the frame come into contact with each other.
Place furniture pads or rubber washers strategically in these problem areas. For example, if the legs of the bed frame touch the floor, place furniture pads underneath each leg to cushion the impact and minimize vibrations when the bed is in use.
If there are specific joints or connections that are causing squeaking due to movement or rubbing, insert rubber washers between those parts. This will create a buffer and help reduce friction, resulting in a quieter bed.
Make sure to choose furniture pads or rubber washers that are of appropriate size and thickness for your bed frame. They should provide sufficient cushioning and stability without causing any imbalance or instability in the frame.
Test the bed by applying pressure or giving it a gentle shake to check if the furniture pads or rubber washers have effectively reduced the squeaking. If you still notice noise, you may need to adjust the placement or add additional pads or washers to further minimize vibrations.
By using furniture pads or rubber washers, you can absorb shocks, minimize vibrations, and ultimately eliminate or significantly reduce bed squeaking. With that step completed, let’s move on to the next: checking for any worn-out or damaged parts that may need replacement.
Step 6: Replace worn-out or damaged parts
If you’ve followed the previous steps and are still experiencing bed squeaking, it’s possible that some parts of your bed frame may be worn out or damaged beyond repair. In this case, it’s necessary to replace those components to completely resolve the issue.
Start by identifying the specific parts of the bed frame that are causing the squeaking and examine them closely. Look for any signs of wear, cracks, or other damage that may be contributing to the noise.
Common parts that may need replacement include worn-out joints, damaged hardware, or even the entire bed frame if it’s old and beyond repair. It’s important to accurately identify the problematic parts to ensure you purchase the correct replacements.
Measure the dimensions of the parts that need replacing and consult your bed’s manufacturer or a reputable furniture store to find compatible replacements. They can provide you with the right specifications and guide you in selecting the appropriate parts for your bed frame.
If you’re unsure about the exact parts you need or how to proceed with the replacement, consider reaching out to a professional for assistance. They can offer expert advice and ensure that the replacement process is done correctly.
Once you have the necessary replacement parts, carefully remove the old components from your bed frame and replace them with the new ones. Make sure to follow any specific instructions provided by the manufacturer or seek guidance if needed.
After the replacement, reassemble the bed frame and give it a thorough test. Check for any remaining squeaks or signs of instability. With the worn-out or damaged parts replaced, you should notice a significant reduction or complete elimination of the squeaking noise.
By replacing worn-out or damaged parts, you address the root cause of the squeaking, ensuring a long-lasting and quiet bed. With this step completed, we’re now ready for the final step: reassembling the bed frame and enjoying a peaceful sleep.
Read more: How To Stop A Ceiling Fan From Squeaking
Step 7: Reassemble the bed
After addressing all the causes of bed squeaking and completing the necessary repairs and replacements, it’s time to reassemble the bed. This final step ensures that all the components are securely in place and the bed is ready for use without any squeaks or noise.
Start by positioning the box spring or foundation back onto the bed frame, if applicable. Ensure that it fits properly and sits evenly on the frame.
Next, carefully lower the mattress onto the box spring, aligning it with the edges of the bed frame. Take your time to adjust it, ensuring it is centered and sitting flat on the surface.
Double-check that all the screws, bolts, and fasteners are tightened securely. Give the bed frame a gentle shake or apply pressure to different areas to test for any remaining squeaks.
If you don’t hear any noise and the bed feels stable, you can consider the reassembly process complete. Take a moment to appreciate your efforts and the quiet, peaceful bed you’ve achieved.
If you still notice any squeaking or instability, retrace your steps and carefully investigate the problem areas. Check for any loose screws, bolts, or connections that may have been overlooked during the repair process.
If the squeaking persists despite your best efforts, it might be worth seeking the advice of a professional. They can provide their expertise and help troubleshoot the issue further.
Remember, regular maintenance and periodic inspections can help prevent bed squeaking in the future. Stay proactive by tightening screws and bolts periodically, applying lubricant to metal joints as needed, and addressing any signs of wear or damage promptly.
By properly reassembling the bed frame and ensuring all components are secure, you can enjoy a squeak-free sleep experience and a peaceful bedroom environment.
Congratulations on successfully stopping your bed from squeaking! Get ready to experience uninterrupted nights of rest and relaxation.
Conclusion
Bed squeaking can disrupt your sleep and be a source of frustration. However, with the right knowledge and tools, you can easily stop your bed from squeaking and restore tranquility to your bedroom.
By understanding the causes of bed squeaking, such as loose screws, worn-out joints, and friction between metal parts, you can tackle the problem head-on. In the process, you may need to tighten loose hardware, apply lubricant to metal joints, use furniture pads or rubber washers to absorb vibrations, and even replace worn-out or damaged parts.
Thoroughly inspecting the bed frame and identifying the specific areas causing the squeaks is crucial. Taking the time to address each issue meticulously ensures a long-lasting solution.
Remember, prevention is key. Keep up with regular maintenance by periodically tightening screws and bolts, applying lubricant, and promptly addressing signs of wear or damage.
Now that you have successfully followed the step-by-step guide to stop your bed from squeaking, it’s time to reassemble the bed and enjoy a peaceful night’s sleep.
Imagine laying down on your bed, free from the annoying and disruptive sound of squeaks. With a quiet and comfortable sleeping environment, you can wake up rejuvenated and ready to embrace the day ahead.
Don’t let bed squeaking steal your sleep or sanity. Take action today and reclaim the serenity of your bedroom.
Frequently Asked Questions about How To Stop A Bed From Squeaking
Was this page helpful?
At Storables.com, we guarantee accurate and reliable information. Our content, validated by Expert Board Contributors, is crafted following stringent Editorial Policies. We're committed to providing you with well-researched, expert-backed insights for all your informational needs.