Articles
How To Stop Basement From Leaking
Modified: October 28, 2024
Learn effective strategies and techniques to prevent basement leaking with our informative articles. Protect your home from water damage.
(Many of the links in this article redirect to a specific reviewed product. Your purchase of these products through affiliate links helps to generate commission for Storables.com, at no extra cost. Learn more)
Introduction
Basement leaks can be a homeowner’s worst nightmare. Not only can they cause significant damage to the structural integrity of your home, but they can also lead to the growth of mold and mildew, creating a health hazard for you and your family. In addition, a leaking basement can ruin any plans you have for utilizing the space as a living area, office, or storage space.
Understanding the causes of basement leaks is crucial in order to effectively address and prevent them. This comprehensive guide will provide you with the knowledge and practical steps you need to take to stop basement leaks once and for all.
Key Takeaways:
- Understanding the common causes of basement leaks, evaluating their severity, and finding the source of the leak are crucial steps in effectively addressing and preventing water infiltration in your basement.
- Implementing proactive measures such as repairing cracks, applying waterproof coatings, installing drainage systems, and redirecting water away from the foundation can significantly reduce the risk of basement leaks and protect your home from water damage.
Read more: How To Stop An Outside Faucet From Leaking
Understanding the Causes of Basement Leaks
Before diving into solutions, it’s important to understand what causes basement leaks in the first place. By knowing the underlying causes, you can effectively address the problem and prevent future leaks.
One of the most common causes of basement leaks is poor drainage. When rainwater or melted snow does not have a clear path to flow away from your home’s foundation, it can accumulate around the basement walls and seep through any cracks or openings.
Another cause is hydrostatic pressure. This occurs when the water table around your home rises due to heavy rainfall or a high water table in the area. The increased pressure from the water can force its way through small cracks or weak points in the basement walls.
Foundation cracks are another common culprit. Over time, the foundation of your home can develop cracks due to settlement, soil movement, or other structural issues. These cracks provide an easy access point for water to enter your basement.
In some cases, basement leaks can be attributed to faulty or improperly installed waterproofing systems. If the waterproofing materials or systems used during the construction of your home were not installed correctly or have deteriorated over time, they may not effectively keep water out.
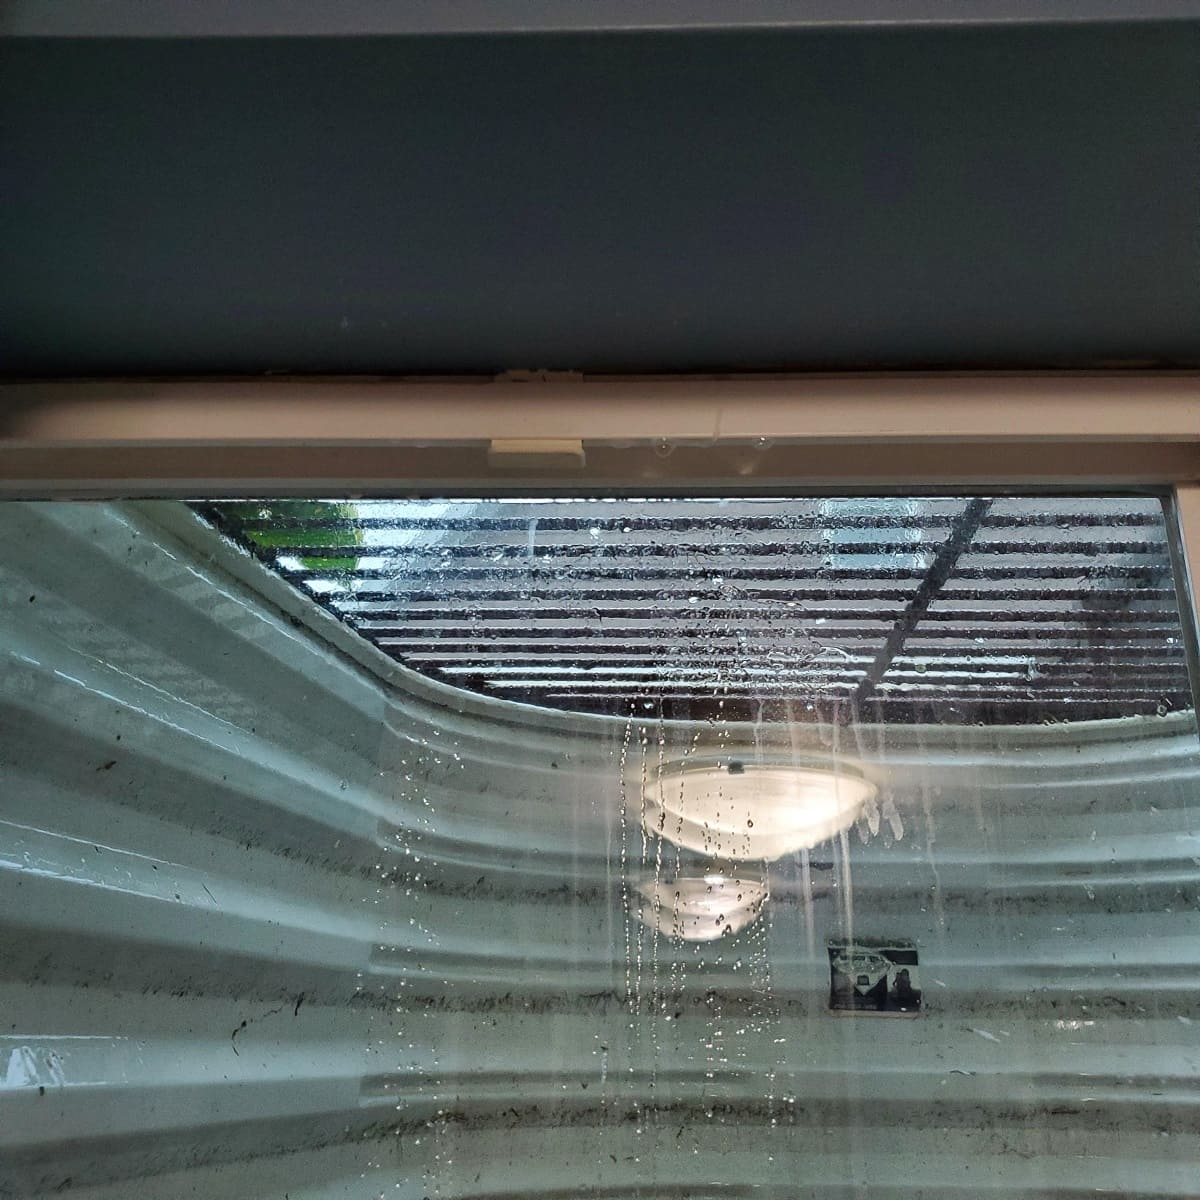
Lastly, leaks can also occur through windows, doors, or other openings in the basement walls. Poorly sealed windows or gaps around doors can allow water to seep in during heavy rains or flooding.
By understanding these common causes, you can begin to assess the severity of your basement leaks and determine the best course of action to fix and prevent them.
Evaluating the Severity of Basement Leaks
Once you’ve identified that you have a basement leak, the next step is evaluating its severity. Understanding the extent of the problem will help you determine the appropriate measures needed to fix the issue.
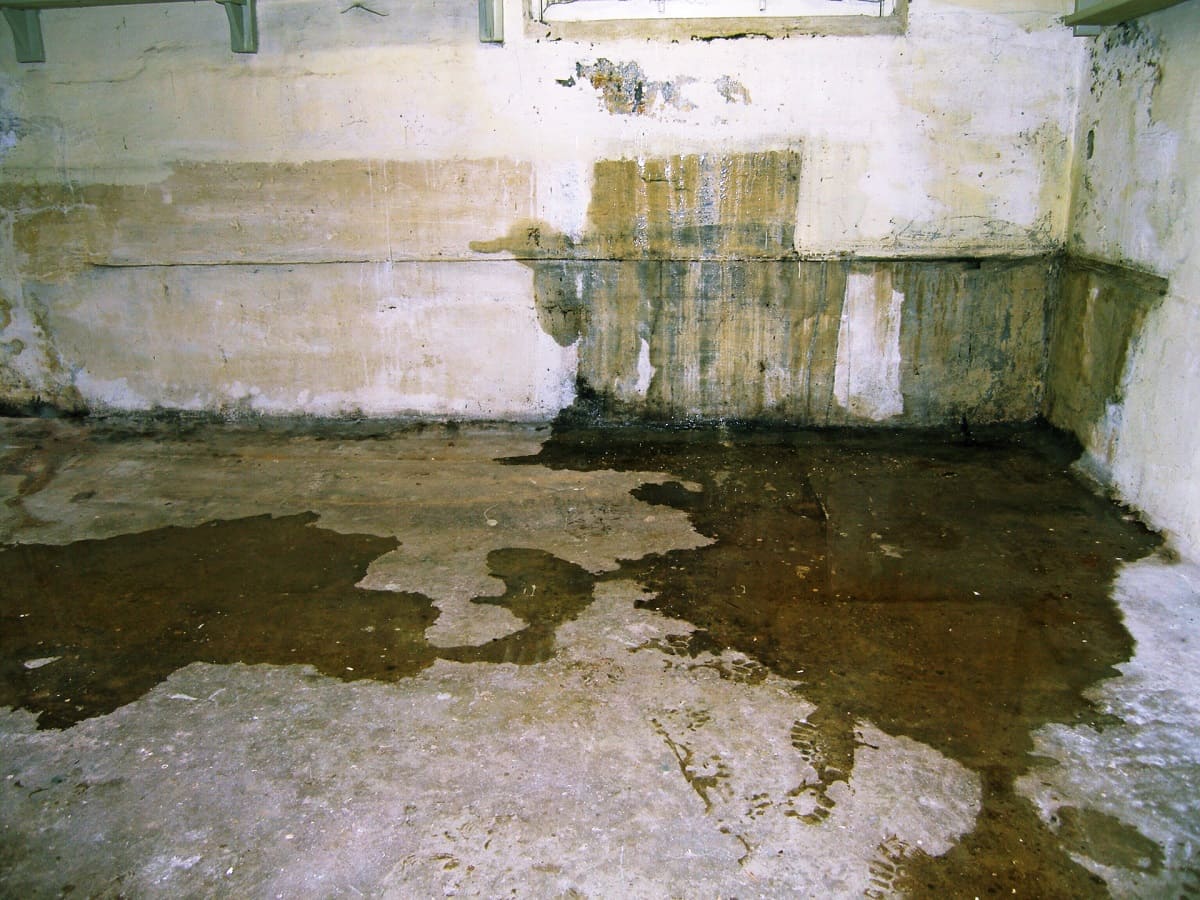
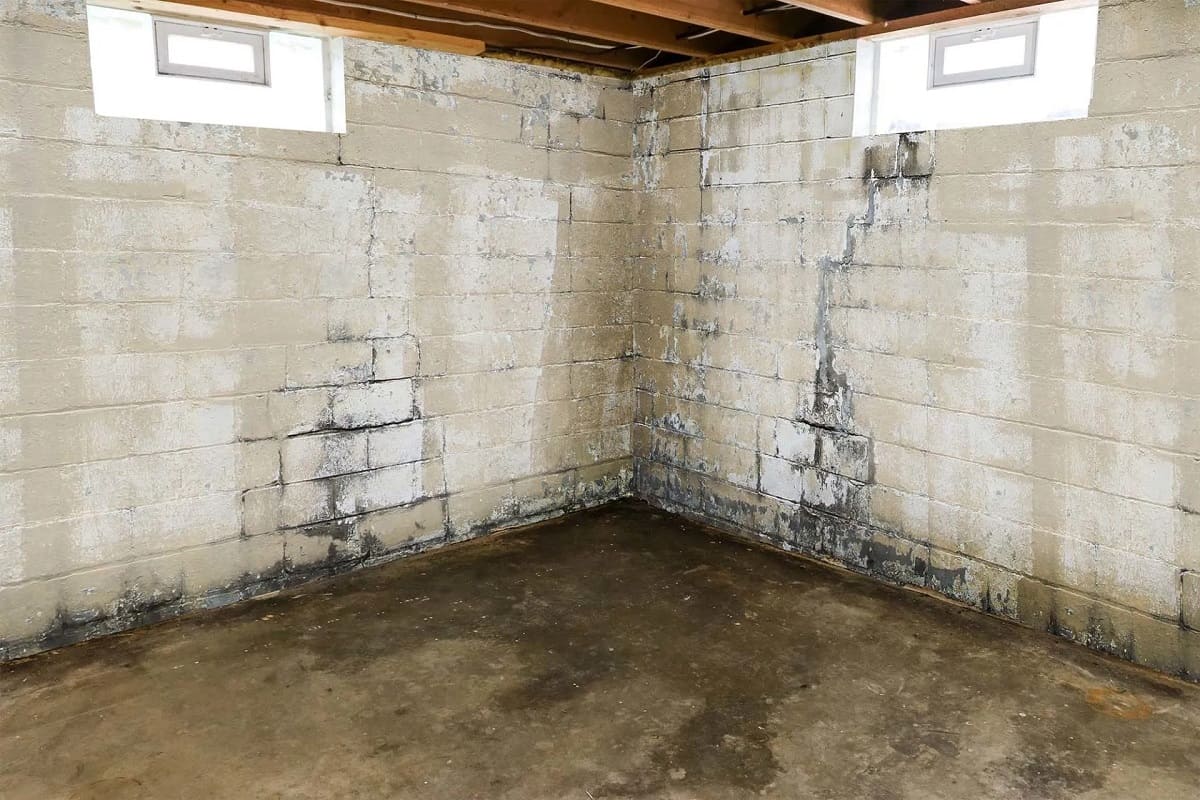
Start by examining the affected area of the basement. Look for any visible signs of water, such as puddles, damp walls, or water stains. Take note of the size and frequency of the leaks. Is it a minor trickle or a significant flow of water? Is it a constant issue or does it only occur during heavy rainstorms?
Check for any mold or mildew growth, as this is an indicator that the leak has been ongoing for some time. Mold or musty odors may also be present. These signs suggest that the leak has caused water to accumulate and linger in the basement, increasing the risk of structural damage and health concerns.
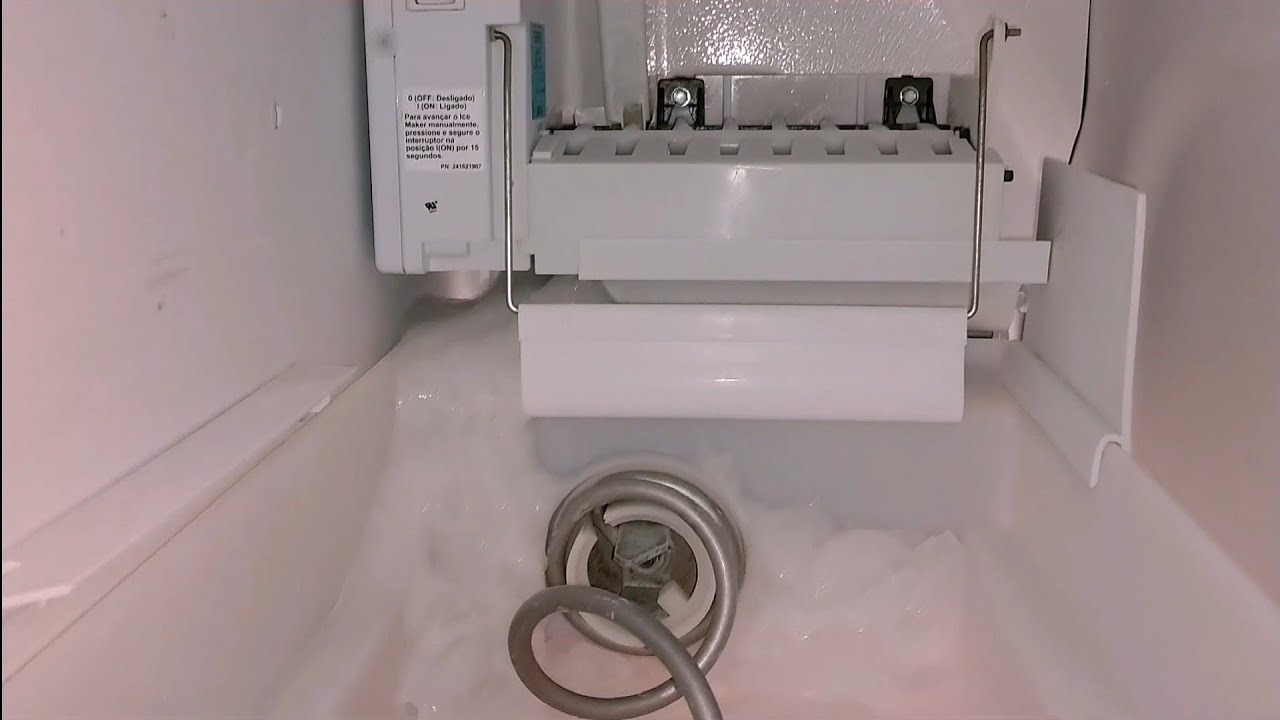
Assess the impact of the leak on your property. Is the water damaging any belongings stored in the basement? Are there any electrical components or appliances at risk of getting damaged? Determine whether the leak is a minor inconvenience or a significant threat to your property and safety.
Consider any additional symptoms that may be associated with the leak. Are there cracks or bulges in the basement walls? Is the floor uneven or sinking? These signs may indicate more serious structural issues that need to be addressed alongside the leak repair.
It’s important to keep in mind that even small, seemingly insignificant leaks can worsen over time and cause more extensive damage if left untreated. Therefore, it is generally recommended to take immediate action to address any basement leak, regardless of its perceived severity.
By evaluating the severity of the basement leak, you can determine the appropriate steps to take to repair and prevent further damage. For minor leaks, simple DIY solutions may suffice. However, for more severe or persistent leaks, professional assistance may be required to ensure a proper and long-lasting fix.
Finding the Source of the Leak
Before you can effectively repair a basement leak, it is crucial to find the source of the problem. Identifying the exact point where water is entering your basement will allow you to target your repair efforts and prevent future leaks.
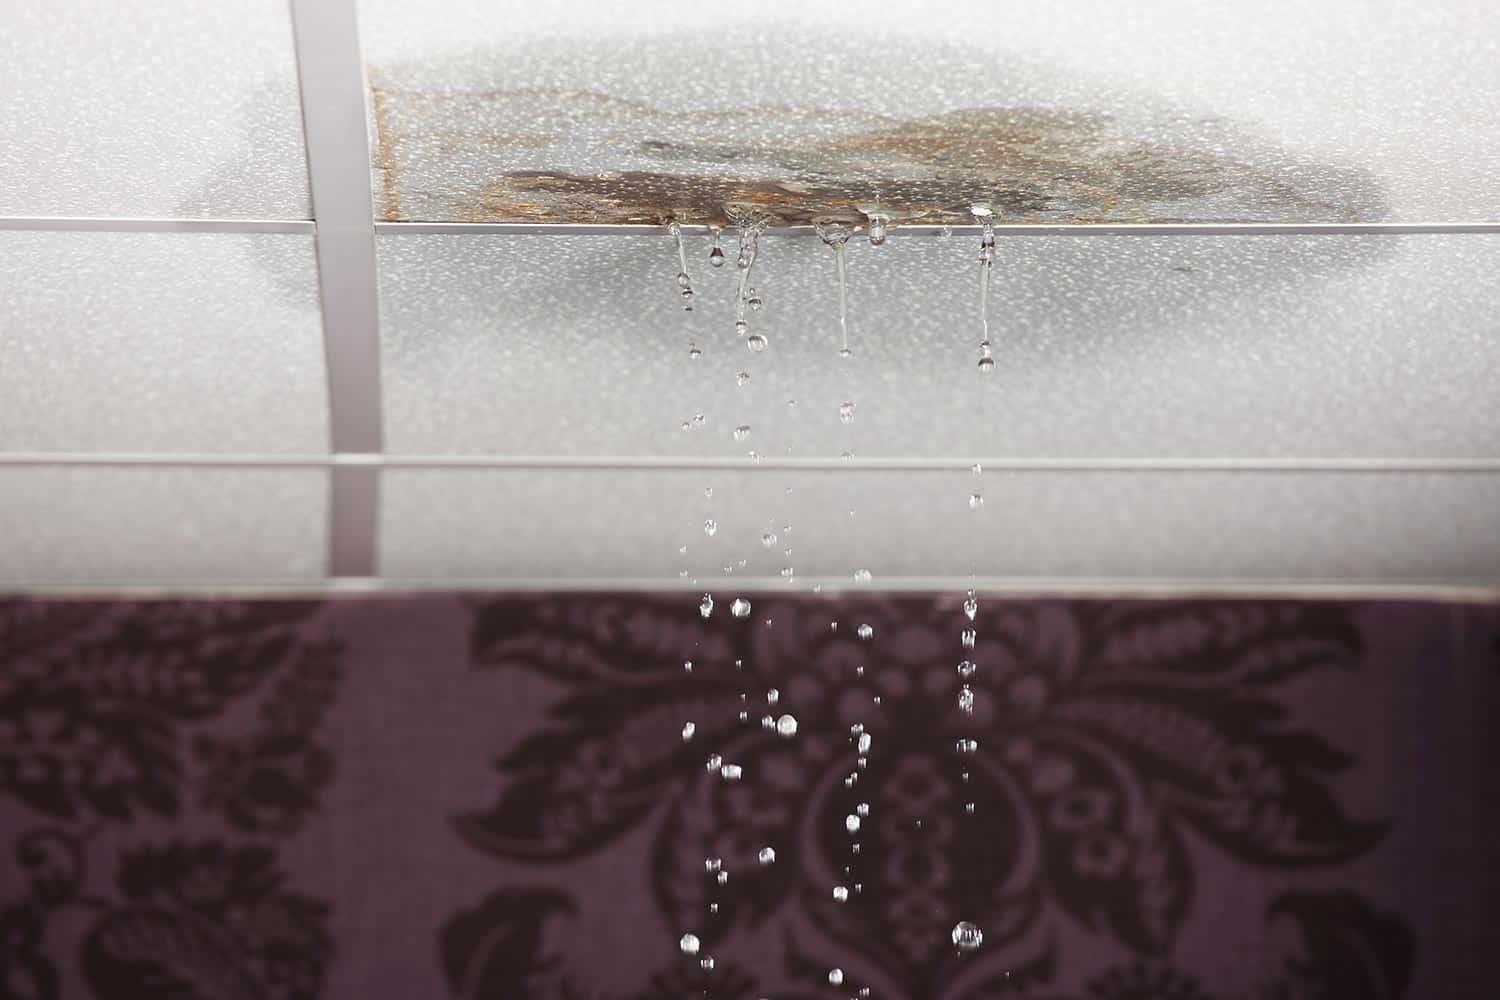
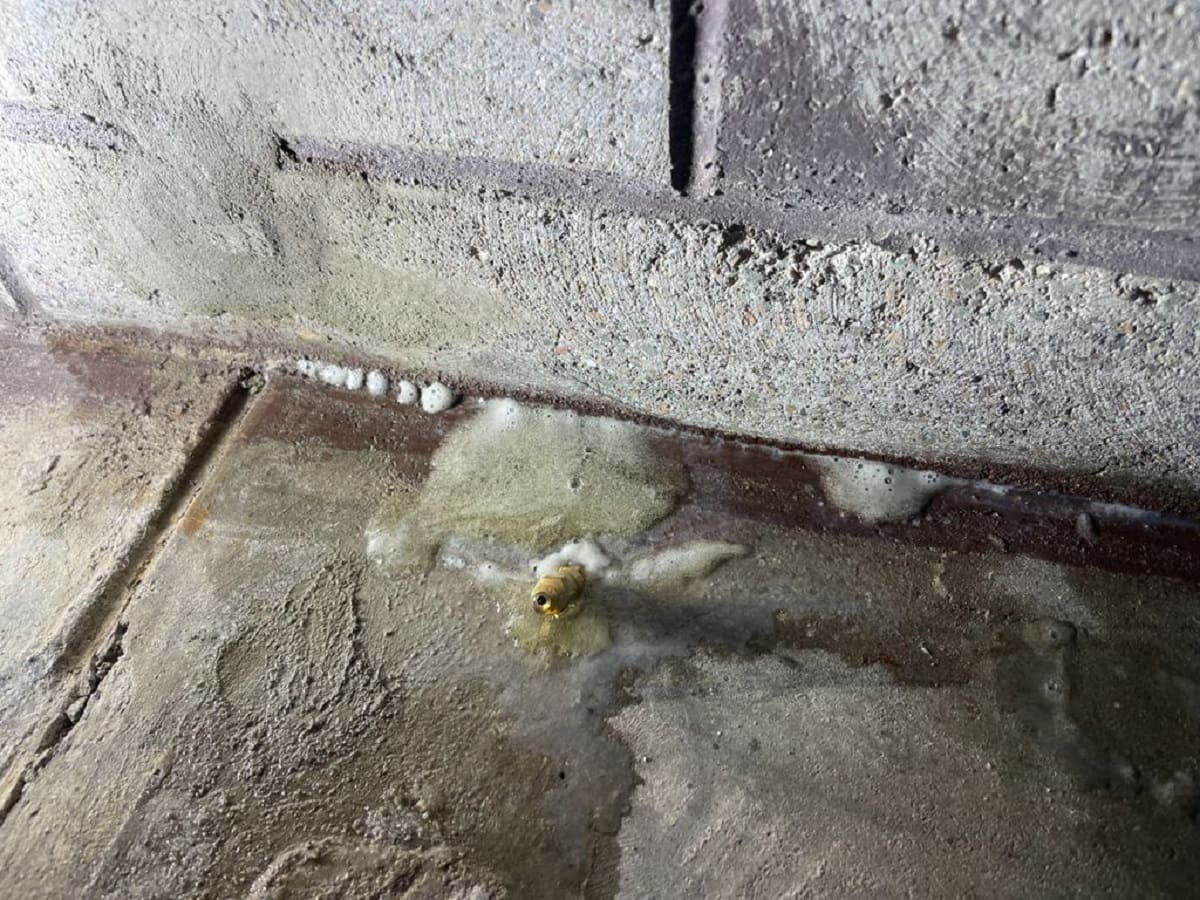
Begin by visually inspecting the interior of your basement for any signs of water or moisture. Look for damp spots, water stains, or puddles on the floor. Pay attention to any areas where water seems to be pooling or dripping from the walls or ceiling.
Follow the water trail to its origin, looking for any visible cracks or gaps in the basement walls or floor. Use a flashlight to carefully examine the corners, joints, and any areas where pipes or utility lines enter the basement. These areas are common entry points for water.
If the source of the leak is not visible from the interior, it may be necessary to investigate the exterior of your home. Walk around the foundation, paying close attention to areas that are in close proximity to where the leak occurs inside the basement.
Look for signs of cracks, deteriorating mortar, or gaps in the foundation walls. Pay attention to the condition of the exterior waterproofing materials, such as the tar or sealant. These areas may give you clues as to where water is seeping into your basement.
In some cases, you may need to wait for a rainfall or snowmelt event to observe the leak in action. This can provide valuable information about the exact point of entry and the severity of the leak.
If you are unable to pinpoint the source of the leak on your own, it may be necessary to seek professional assistance. Waterproofing experts have the knowledge and tools to conduct a thorough inspection and locate the exact source of the leak.
By finding the source of the leak, you can effectively target your repair efforts and ensure a long-lasting solution. Keep in mind that addressing the source of the problem is just as important as repairing the visible damage in order to prevent future basement leaks.
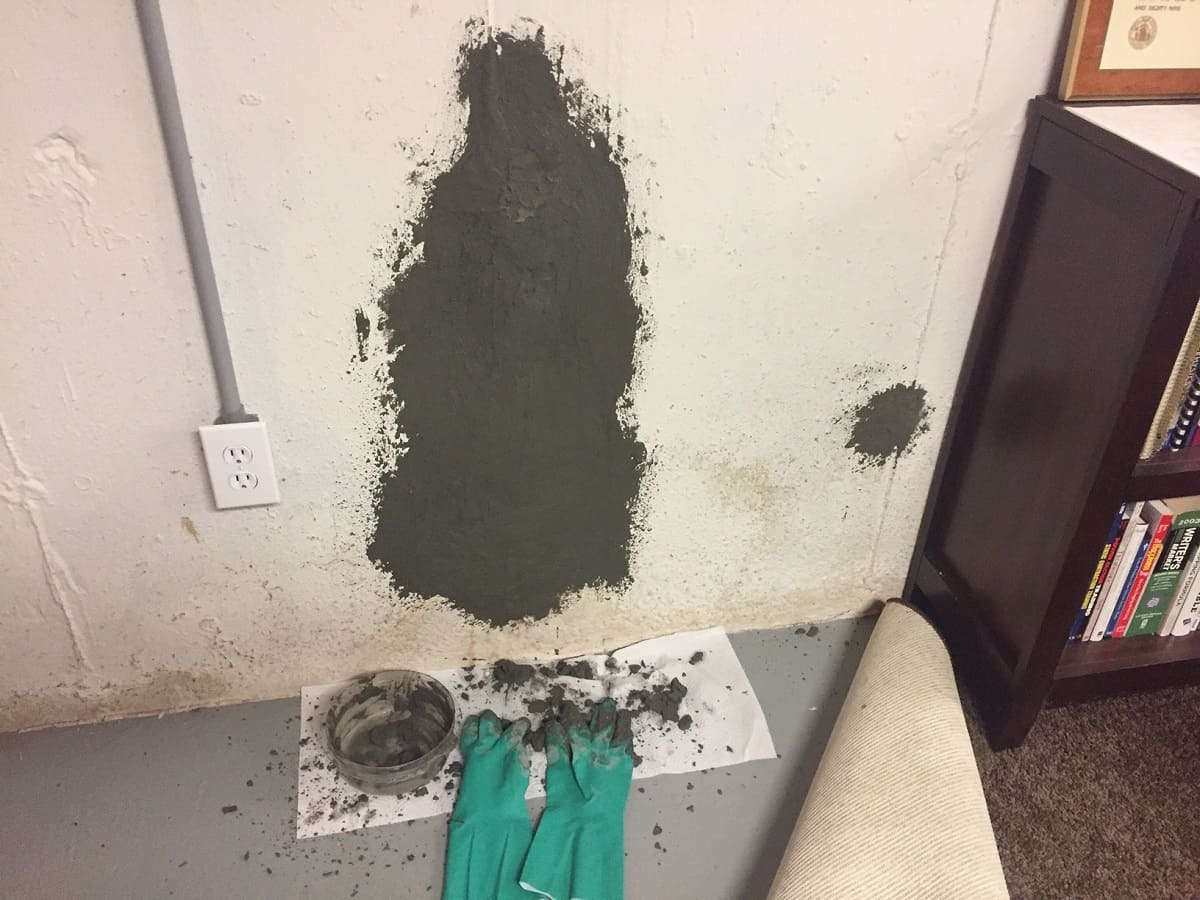
Repairing Cracks in the Basement Walls
One common cause of basement leaks is cracks in the walls. These cracks can allow water to seep into your basement, leading to dampness, mold growth, and structural damage. Repairing these cracks is an important step in preventing further water infiltration.
The first step in repairing cracks in basement walls is to clean the area around the crack. Use a wire brush or a scraper to remove any loose debris, dirt, or old sealant. This will ensure that the repair material adheres properly to the surface.
Next, inspect the crack to determine its size and depth. Small hairline cracks can often be repaired using a waterproof caulking or sealant. For larger cracks or those that continue to leak after caulking, a more extensive repair may be required.
For small cracks, apply a waterproof caulking or sealant directly into the crack. Smooth it out with a putty knife or your finger, ensuring that the sealant fills the crack completely. Allow the sealant to dry and cure according to the manufacturer’s instructions.
For larger cracks, you may need to use a hydraulic cement or epoxy injection. These materials provide a more durable and long-lasting solution for repairing larger cracks. Follow the manufacturer’s instructions for mixing and applying the material, ensuring that it completely fills the crack.
After applying the repair material, it’s important to monitor the crack for any signs of leaking. If the crack continues to leak, it may require additional repairs or professional assistance. It’s also a good idea to periodically inspect and reseal the repaired crack to ensure its effectiveness over time.
Keep in mind that repairing cracks in the basement walls is not a permanent solution to basement leaks. While it may address the immediate issue, it’s important to also address the underlying causes such as poor drainage or hydrostatic pressure to prevent future cracks from forming.
By taking the time to repair cracks in your basement walls, you can minimize water infiltration and ensure a dry and functional basement space.
Read more: How To Stop Water Heater From Leaking
Applying Waterproof Coatings to Basement Walls
A crucial step in preventing basement leaks is applying waterproof coatings to the basement walls. These coatings create a protective barrier that helps to prevent water from seeping into the walls and causing damage.
The first step in applying waterproof coatings is to prepare the basement walls. Clean the walls thoroughly to remove any dirt, dust, or loose materials. Use a stiff brush, scraper, or a power washer to ensure a clean surface for the coating.
Next, inspect the walls for any cracks or holes and repair them using an appropriate sealant or patching compound. It’s important to address any existing damage before applying the waterproof coating to ensure its effectiveness.
Choose a waterproof coating that is suitable for your basement walls and follow the manufacturer’s instructions for application. There are various types of waterproof coatings available, such as waterproof paint, sealants, or cementitious coatings.
If using waterproof paint, start by applying a primer to the walls. This will help the paint adhere better and provide a stronger bond. Once the primer has dried, apply the waterproof paint using a brush or roller, ensuring even coverage across the walls. Apply multiple coats if necessary, allowing each coat to dry fully before applying the next.
For sealants or cementitious coatings, mix the product according to the manufacturer’s instructions. Use a brush or a trowel to spread the coating evenly on the walls, working from the bottom up. Make sure to cover all areas, including corners and any potential weak spots.
Allow the coating to dry and cure fully before considering the job complete. This may take several days, so be patient and avoid any contact with the coated walls during this time.
Keep in mind that applying a waterproof coating does not eliminate the need for proper drainage and addressing other potential causes of basement leaks. It is a complementary measure that enhances the waterproofing of the walls.
By applying waterproof coatings to your basement walls, you can significantly reduce the risk of water intrusion and keep your basement dry and protected against leaks.
Ensure that your gutters and downspouts are clear and directing water away from the foundation. Consider installing a sump pump and waterproofing the walls and floors. Regularly inspect for cracks and seal them with hydraulic cement.
Installing a Drainage System
A key component in preventing basement leaks is installing a proper drainage system around your home’s foundation. This system helps to divert water away from the foundation, reducing the risk of water accumulating and seeping into the basement.
The first step in installing a drainage system is to assess the grading around your home. Ensure that the ground slopes away from the foundation rather than towards it. If necessary, regrade the area by adding soil to create a gentle slope that directs water away from the foundation.
Next, consider installing a perimeter drain system, also known as a French drain. This system consists of a trench dug around the perimeter of the foundation, filled with gravel and a perforated pipe. This pipe collects water and redirects it away from the foundation.
To install a perimeter drain system, start by excavating a trench approximately one foot wide and one foot deep around the perimeter of the foundation. The trench should slope slightly downward away from the foundation to facilitate water flow.
Line the bottom of the trench with a layer of gravel to create a stable base for the perforated pipe. Place the pipe in the center of the trench, ensuring that the perforations are facing downward to collect water from the surrounding soil.
Cover the pipe with additional gravel, filling the trench until it’s approximately three to four inches below the ground level. This allows space for a layer of topsoil and prevents the gravel from being exposed.
Finally, backfill the trench with topsoil, ensuring that the area is properly compacted to promote proper drainage. Restore the surrounding landscaping to its original condition, making sure that water from gutters or downspouts is directed towards the perimeter drain system.
If you already have a perimeter drain system in place but it is not effectively diverting water away from the foundation, it may be necessary to maintain or upgrade the system. Inspect the system for clogs, damage, or insufficient slope and make necessary repairs or adjustments.
Installing a drainage system is an effective way to prevent basement leaks by effectively managing the flow of water away from your home’s foundation. It is a proactive measure that can save you from costly and damaging basement repairs in the long run.
Redirecting Water Away from the Foundation
In addition to installing a drainage system, redirecting water away from the foundation is crucial in preventing basement leaks. By controlling the flow of water around your home, you can reduce the risk of water pooling and seeping into the basement.
One effective way to redirect water away from the foundation is by extending the downspouts. Ensure that your downspouts are properly connected to the gutters and that they are positioned to direct water at least six feet away from the foundation. This helps to prevent water from accumulating near the foundation walls.
You can use downspout extensions or splash blocks to assist with redirecting the water. These simple additions can make a significant difference in preventing water from pooling around the foundation.
Another method is to create a swale or a shallow, sloping depression in your yard. This swale should be positioned between your home and any potential sources of water, such as slopes or neighboring properties. The swale will help to channel water away from the foundation and towards a suitable drainage area.
It’s important to regularly inspect and maintain the swale to ensure that it remains clear of debris or obstructions that could impede the flow of water. Additionally, consult with a professional to ensure that the swale is properly designed and sloped for optimal water redirection.
If necessary, consider installing gutter guards to prevent debris from clogging the gutters. Clogged gutters can cause water to overflow and spill near the foundation, increasing the risk of basement leaks. Gutter guards help to keep the gutters clean and free-flowing, ensuring that water is efficiently directed away from the foundation.
Landscaping choices can also play a role in redirecting water away from the foundation. Consider planting trees, shrubs, or ground covers that have deep root systems and can absorb excess water from the soil. This helps to reduce the amount of water that reaches the foundation.
By redirecting water away from the foundation, you can significantly reduce the risk of basement leaks. These simple measures can make a big difference in keeping your basement dry and protected from water infiltration.
Properly Sealing Windows and Doors
Windows and doors are common entry points for water during heavy rainfall or flooding. Properly sealing these openings is crucial in preventing water from seeping into your basement and causing leaks.
Start by inspecting the windows and doors for any gaps, cracks, or deteriorating weatherstripping. These are areas where water can easily penetrate and lead to basement leaks.
If you notice any gaps or cracks around the windows or doors, use a caulking gun to apply a waterproof sealant. Make sure to thoroughly fill in the gaps, ensuring that the sealant forms a tight and continuous seal. Smooth out the sealant with a putty knife or your finger for a neat and effective seal.
In addition to caulking, check the condition of the weatherstripping around windows and doors. Replace any worn or damaged weatherstripping, as it may no longer provide a proper seal against water infiltration. Ensure that the weatherstripping creates a tight seal when the window or door is closed.
If your windows are particularly susceptible to leaks, consider installing storm windows or adding a window film for extra protection. These additional layers can provide an added barrier against moisture and water infiltration.
For basement windows, which are closer to the ground, consider installing window well covers. These covers serve as a protective barrier, preventing water, debris, and animals from entering the window well and potentially causing leaks.
Regularly inspect the seals around windows and doors for any signs of wear or damage. Over time, sealants and weatherstripping may deteriorate, requiring periodic maintenance or replacement. By staying proactive, you can ensure that your windows and doors remain effectively sealed and protected against basement leaks.
Properly sealing windows and doors is an essential step in preventing basement leaks. Taking the time to address any gaps or cracks and maintaining the integrity of the seals will help keep water out and maintain a dry and leak-free basement.
Read more: How To Stop An Air Conditioner From Leaking
Maintaining Gutters and Downspouts
Gutters and downspouts play a crucial role in directing water away from your home’s foundation, preventing basement leaks. However, if not properly maintained, they can become clogged and ineffective, leading to water overflow and potential water damage.
Regular maintenance of gutters and downspouts is essential in ensuring optimal water flow and preventing water from pooling around your foundation.
Start by inspecting your gutters for any signs of damage, such as cracks, leaks, or loose sections. Repair or replace any damaged components to ensure proper functionality.
Clear out any debris, leaves, or twigs that may have accumulated in the gutters. This can be done by hand or with the help of a garden trowel or a small shovel. Dispose of the debris in a proper waste container to prevent it from clogging the downspouts.
After removing the larger debris, use a hose to flush out the gutters and downspouts. This will help ensure that all smaller particles and residues are cleared away. Pay close attention to the downspouts, as they are common areas for clogs to occur.
If you notice any persistent clogs in the downspouts, use a plumber’s snake or a hose with a pressure nozzle attachment to dislodge and remove the blockage. It’s important to maintain clear pathways for water to flow freely and effectively away from your foundation.
Inspect the alignment of the gutter system to ensure that it is properly sloped towards the downspouts. This allows water to flow naturally and prevents any pooling or overflowing. Adjust any sections that are not properly aligned for optimal water flow.
Consider installing gutter guards or screens to prevent debris from entering the gutters in the first place. These protectors act as a barrier, allowing water to flow through while keeping leaves and other debris out, reducing the frequency of gutter cleaning.
Regularly check and clean your gutters and downspouts at least twice a year, ideally in the spring and fall. However, if your area experiences heavy rainfall or if you have many trees around your property, you may need to clean them more frequently to maintain effective drainage.
Maintaining gutters and downspouts is an important part of preventing basement leaks. By keeping them clean and clear, you can ensure proper water flow and protect your home’s foundation from water damage.
Preventative Measures to Stop Basement Leaks
While there are various solutions available to repair and address existing basement leaks, taking preventative measures is equally important in stopping future leaks from occurring. By implementing these proactive steps, you can minimize the risk of water infiltration and keep your basement dry and protected.
1. Maintain proper grading: Ensure that the ground around your home is sloped away from the foundation. This helps to divert water away from your basement walls and reduces the risk of water accumulation.
2. Install and maintain downspout extensions: Extend your downspouts at least six feet away from the foundation to direct water away. Regularly check and clean the extensions to prevent clogs and obstructions.
3. Monitor and redirect surface water: Be mindful of any surface water that collects near your foundation after heavy rainfall or snowmelt. Consider installing French drains or swales to redirect the water flow away from the foundation.
4. Regularly inspect and repair foundation cracks: Conduct routine inspections of your basement walls for any cracks, gaps, or deteriorating sealant. Promptly repair any identified issues to prevent water from seeping in.
5. Apply waterproof coatings to basement walls: Coat your basement walls with waterproof sealants or paint to create a protective barrier against water infiltration. Follow the manufacturer’s instructions for proper application and maintenance.
6. Maintain proper drainage systems: Regularly inspect and maintain perimeter drains, sump pumps, and other drainage systems to ensure they are functioning effectively. Clear any debris or blockages to prevent backups and overflow.
7. Properly seal windows and doors: Check for gaps or cracks around windows and doors and seal them with weatherstripping or caulking. Ensure that the seals remain intact and replace them when necessary.
8. Keep gutters clean and well-maintained: Regularly clean your gutters and downspouts to prevent clogs and allow water to flow freely. Consider installing gutter guards to minimize debris buildup.
9. Monitor and address moisture and humidity levels: Keep an eye on the humidity levels in your basement and use dehumidifiers if necessary to prevent excessive moisture buildup that can contribute to mold and mildew growth.
10. Conduct regular inspections and maintenance: Regularly inspect your basement for any signs of water leaks, mold, or structural issues. Address any problems immediately to prevent further damage and minimize the risk of basement leaks.
By taking these preventative measures, you can significantly reduce the likelihood of basement leaks and keep your basement dry and protected. Remember, a proactive approach is key to maintaining a healthy and leak-free home.
Conclusion
Dealing with basement leaks can be a frustrating and costly problem for homeowners. However, by understanding the causes of basement leaks and implementing preventative measures, you can effectively stop leaks from occurring and protect your home from further water damage.
Start by understanding the common causes of basement leaks, such as poor drainage, hydrostatic pressure, foundation cracks, and faulty waterproofing. By addressing these underlying issues, you can prevent water from seeping into your basement.
Evaluating the severity of basement leaks helps you determine the appropriate measures needed for repair. Whether it’s repairing cracks in the basement walls or applying waterproof coatings, addressing the root cause is crucial in fixing the problem.
Finding the source of the leak allows you to target your repair efforts and prevent future leaks. Pay close attention to areas where water is entering, whether it’s through cracks in walls, windows, or doors, and seal them effectively.
Installing a drainage system and redirecting water away from the foundation are important steps in preventing basement leaks. Proper grading, downspout extensions, and swales can help channel water away from your home and reduce the risk of water accumulation.
Properly sealing windows and doors, maintaining gutters and downspouts, and implementing other preventative measures are also essential in mitigating the risk of basement leaks. Regular inspections, repairs, and maintenance ensure that your home remains protected.
In conclusion, preventing basement leaks requires a combination of understanding the causes, taking proactive measures, and regular maintenance. By implementing these strategies, you can enjoy a dry and leak-free basement, preserving the integrity of your home and providing a safe living space for you and your family.
Frequently Asked Questions about How To Stop Basement From Leaking
Was this page helpful?
At Storables.com, we guarantee accurate and reliable information. Our content, validated by Expert Board Contributors, is crafted following stringent Editorial Policies. We're committed to providing you with well-researched, expert-backed insights for all your informational needs.


0 thoughts on “How To Stop Basement From Leaking”