Articles
How To Stop A Ceiling Fan From Squeaking
Modified: October 18, 2024
Learn how to stop a ceiling fan from squeaking with these helpful articles. Find easy tips and tricks to keep your fan quiet and running smoothly.
(Many of the links in this article redirect to a specific reviewed product. Your purchase of these products through affiliate links helps to generate commission for Storables.com, at no extra cost. Learn more)
Introduction
Ceiling fans are a staple in many homes, providing a cost-effective and efficient way to cool down a room. However, nothing can disrupt a peaceful and comfortable environment quite like the squeaking sound of a ceiling fan. Not only can it be annoying, but it can also indicate underlying issues that need to be addressed.
If you’re tired of that squeaking noise every time you turn on your ceiling fan, fear not! In this article, we’ll explore the common causes of ceiling fan squeaking and provide you with effective solutions to silence the noise once and for all.
Understanding why your ceiling fan is squeaking is crucial to diagnosing and resolving the issue. Some of the common reasons include blade accumulation of dust and debris, loose screws or bolts, worn-out motor housing, imbalanced fan blades, or even old and worn out parts. By identifying the root cause, you’ll be better equipped to tackle the problem head-on.
Before diving into the steps to stop a ceiling fan from squeaking, it’s essential to gather the necessary tools and materials. You’ll need a ladder, screwdriver (typically a Phillips or flathead), cleaning cloth, mild detergent, lubricating oil (such as WD-40 or silicone-based lubricant), and replacement parts if needed.
Now that you’re armed with the right tools and understanding of the potential causes, let’s get started with the step-by-step process to stop a ceiling fan from squeaking.
Key Takeaways:
- Say goodbye to annoying ceiling fan squeaks by cleaning, tightening, and balancing components. Enjoy a peaceful, cool breeze with these simple DIY steps.
- Regular maintenance and troubleshooting can eliminate squeaking and restore tranquility to your living space. Keep your ceiling fan running smoothly with these expert tips.
Read more: How To Stop A Bed From Squeaking
Understanding the Cause of Ceiling Fan Squeaking
When your ceiling fan starts squeaking, it can be a sign that something is amiss. Before you attempt to fix the problem, it’s crucial to understand the causes behind the squeaking noise. Here are a few common culprits:
- Dust and debris: Over time, dust and debris can accumulate on the fan blades, causing them to become imbalanced and produce a squeaking noise. Regular cleaning is essential to prevent this buildup.
- Loose screws or bolts: The constant movement of a ceiling fan can cause screws and bolts to become loose. When this happens, the fan may start to wobble and emit a squeaking noise.
- Worn-out motor housing: The motor housing is a critical component of the ceiling fan, and if it becomes worn or damaged, it can produce squeaking sounds. This is often due to prolonged usage without maintenance.
- Imbalanced fan blades: If the fan blades are not properly balanced, they can cause friction against each other and generate annoying squeaks. This can happen if the blades become misaligned or if a blade is damaged.
- Worn-out parts: Over time, various parts of the ceiling fan, such as bearings, bushings, or the flywheel, can wear out. This can result in squeaking noises as the fan operates.
By understanding these potential causes, you can take targeted actions to stop the squeaking noise and restore your ceiling fan to optimal functionality.
In the next sections, we will guide you through the step-by-step process of fixing a squeaking ceiling fan, addressing each potential cause to ensure a comprehensive solution to the problem.
Tools and Materials Needed
Before you begin troubleshooting and fixing your squeaking ceiling fan, gather the necessary tools and materials. Having everything at hand will make the process smoother and more efficient. Here’s what you’ll need:
- A ladder or step stool: Depending on the height of your ceiling, you may need a ladder or step stool to safely reach the fan.
- A screwdriver: Most ceiling fans use either Phillips or flathead screws, so have both types of screwdrivers available to ensure you have the right tool for the job.
- A cleaning cloth: You’ll need a soft cloth or microfiber cloth to clean the fan blades and remove any dust or debris.
- A mild detergent: Mix a small amount of mild detergent with water to clean the fan blades if they are dirty or covered in grime.
- Lubricating oil: Using lubricating oil, such as WD-40 or a silicone-based lubricant, can help eliminate squeaks caused by friction between moving parts.
- Replacement parts: Depending on the specific issue with your ceiling fan, you may need to have replacement parts on hand, such as new screws or blade brackets.
Gathering these tools and materials before you start will save you time and frustration during the repair process. With everything ready, you can now move on to the step-by-step instructions to effectively stop your ceiling fan from squeaking.
Step 1: Turn Off the Fan
Before you begin working on your squeaking ceiling fan, it’s crucial to ensure your safety by turning off the fan’s power. This step will prevent any accidental injuries while you’re handling the fan. Follow these steps to turn off the fan:
- Locate the wall switch or remote control that controls the ceiling fan.
- Flip the switch or press the appropriate button on the remote control to turn off the fan’s power.
- For added safety, consider turning off the circuit breaker that supplies power to the fan. Locate the breaker in your electrical panel and switch it off.
Once you’ve confirmed that the fan is completely powered off, wait a few minutes to ensure that the blades have come to a complete stop. This will prevent any accidental movement while you’re working on the fan.
Taking the extra time to turn off the fan and ensure it’s completely stopped will minimize the risk of injury and ensure a safer and more effective repair process.
Now that you’ve turned off the fan and taken the necessary safety precautions, you’re ready to move on to the next step: cleaning and lubricating the fan blades.
Step 2: Clean and Lubricate the Fan Blades
One of the most common causes of a squeaking ceiling fan is the accumulation of dust and debris on the fan blades. This buildup can unbalance the blades and create friction, resulting in annoying squeaks. Cleaning and lubricating the fan blades can help eliminate this issue. Follow these steps:
- Get a ladder or step stool to reach the fan blades safely.
- Use a soft cleaning cloth or a microfiber cloth to gently wipe down each fan blade. This will remove any dust, dirt, or grime that may be causing the squeaking noise.
- If the fan blades are particularly dirty, mix a small amount of mild detergent with water and apply it to the cloth. Wipe down the blades with the soapy cloth, being careful not to saturate them with water.
- After cleaning the blades, dry them thoroughly with a clean, dry cloth.
- Once the blades are clean and dry, apply a few drops of lubricating oil to the fan blade brackets or any moving parts of the fan. Be careful not to over-lubricate, as excess oil can attract more dust and debris.
- Turn the fan on low speed for a few minutes to allow the lubricant to distribute evenly across the blades and moving parts.
Cleaning and lubricating the fan blades should eliminate any squeaking caused by dust or debris buildup. It’s a good practice to clean the blades regularly to prevent future squeaking. However, if the squeaking persists after cleaning and lubrication, move on to the next step to check for loose screws and bolts.
With clean and lubricated fan blades, you’re now ready to address any loose screws or bolts in step 3.
Read more: How To Stop Recliner From Squeaking
Step 3: Tighten the Screws and Bolts
Loose screws and bolts can contribute to a squeaking ceiling fan by causing imbalance and vibration. It’s essential to check and tighten all the screws and bolts of your fan to eliminate any squeaking noises. Follow these steps:
- Use a screwdriver (either Phillips or flathead, depending on your fan’s screws) to carefully tighten all the visible screws on the fan blades and motor housing.
- Check the screws and bolts on the fan’s mounting bracket and downrod. These components connect the fan to the ceiling, so make sure they are secure.
- Inspect the screws or bolts that attach the fan blades to the blade brackets. Tighten any loose screws or bolts, ensuring that the blades are properly secured.
- Gently shake the fan to check for any remaining loose screws or bolts. If you notice any movement or rattling, tighten the corresponding screws until the fan feels stable.
Remember to use caution and not over-tighten the screws, as this can potentially damage the fan or strip the screw heads. It’s essential to find a balance between tightening the screws sufficiently and avoiding excessive force.
Once you’ve tightened all the screws and bolts, turn on the fan to see if the squeaking noise has been resolved. If the squeaking persists, proceed to the next step to check the motor housing for any issues.
By ensuring that all screws and bolts are tightened properly, you can eliminate any potential sources of squeaking due to loose connections. Now, let’s move on to step 4 to inspect the motor housing.
Apply a small amount of lubricating oil to the fan’s bearings and motor to reduce friction and eliminate squeaking. Be sure to turn off the power and let the fan come to a complete stop before applying the oil.
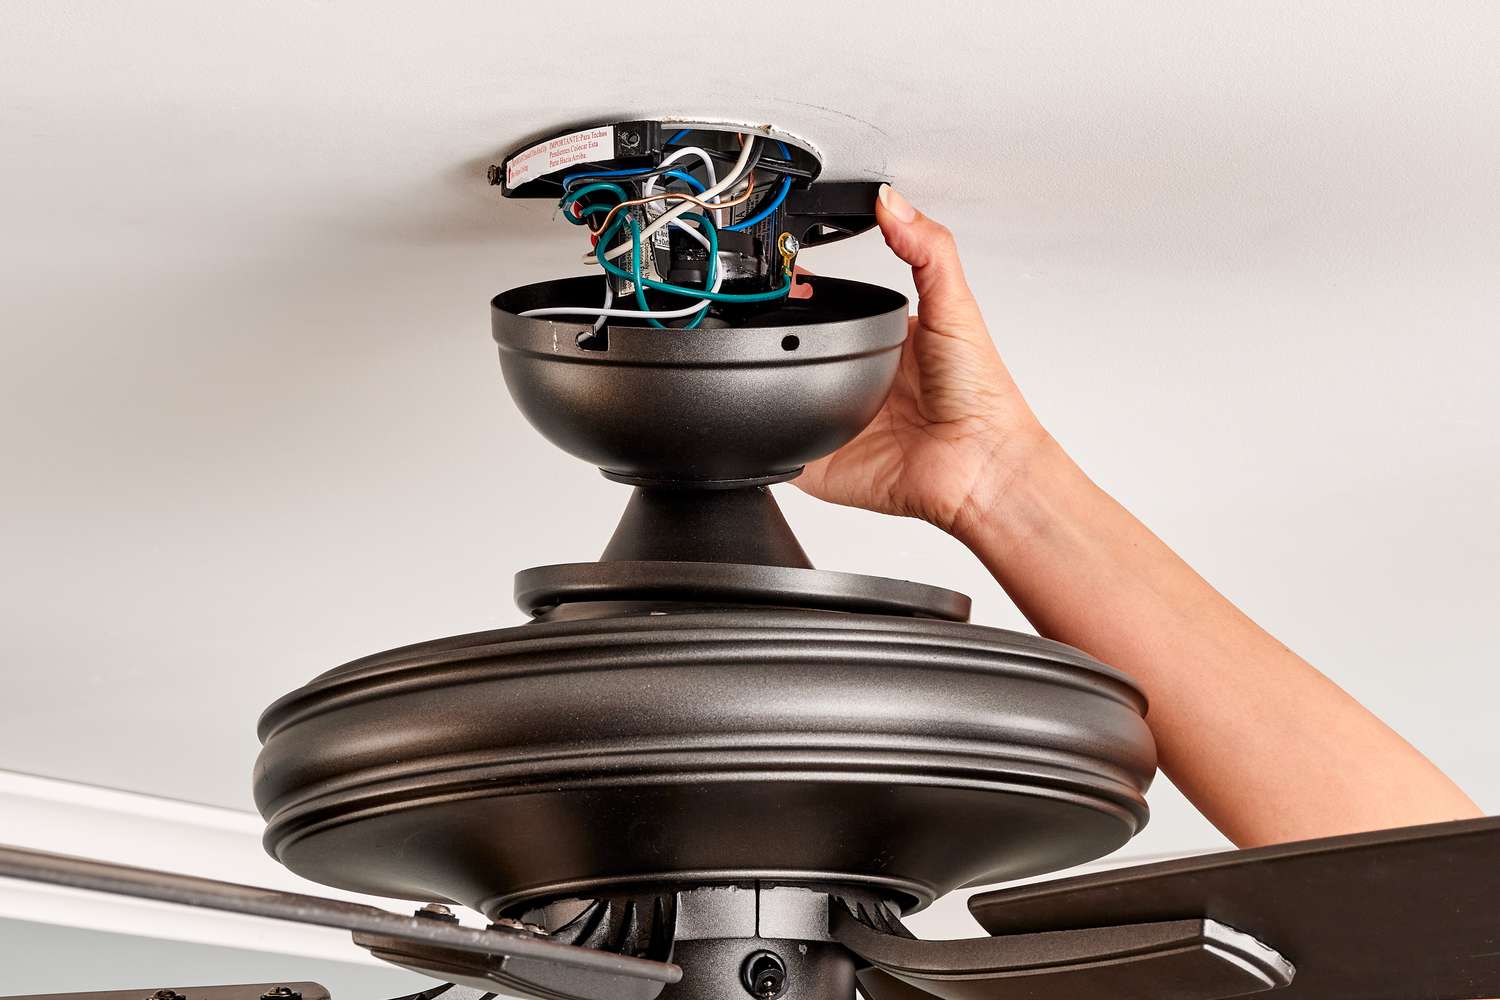
Step 4: Check the Motor Housing
The motor housing of a ceiling fan houses the motor and various components that ensure smooth and quiet operation. If the motor housing becomes worn or damaged, it can result in squeaking noises. Here’s how to check the motor housing:
- Carefully inspect the motor housing for any visible signs of damage, such as cracks or loose parts. If you notice any such issues, it may be necessary to contact a professional or replace the fan.
- Use a screwdriver to remove the screws that secure the motor housing cover, exposing the internal components of the fan.
- Check for any loose or worn-out parts within the motor housing, such as rubber grommets or bushings. These components can cause friction and generate squeaking sounds.
- If you discover any loose or damaged parts, refer to your fan’s user manual or contact the manufacturer for replacement parts. It’s crucial to use genuine replacement parts to ensure proper functioning and safety.
- Once you have replaced any worn or damaged parts, carefully reattach the motor housing cover and tighten the screws securely.
By checking the motor housing, you can identify and address any internal issues that could be causing the squeaking noise. If the squeaking persists after checking the motor housing, proceed to step 5 to inspect the mounting bracket.
Remember to exercise caution when working with the motor housing and internal components of the fan. If you are unsure or uncomfortable with this step, it’s advisable to seek professional assistance to avoid any damage or injury.
Now, let’s move on to step 5 to ensure the mounting bracket is secure.
Step 5: Inspect the Mounting Bracket
The mounting bracket of a ceiling fan is responsible for securely attaching the fan to the ceiling, providing stability and preventing wobbling and squeaking. Checking the mounting bracket is crucial in addressing any potential issues. Follow these steps:
- Climb up the ladder or step stool to reach the ceiling fan.
- Inspect the mounting bracket to ensure it is securely attached to the ceiling. Look for any signs of looseness or misalignment.
- If you notice any loose screws or bolts, use a screwdriver to tighten them, ensuring a tight and stable connection between the bracket and the ceiling.
- Examine the mounting bracket’s position and make sure it is straight and aligned. If it appears crooked, adjust it as needed to achieve a level and balanced position.
- Once you have tightened the screws and ensured proper alignment, give the fan a gentle shake to check for any remaining wobbling or instability.
A secure and properly aligned mounting bracket is essential for maintaining the stability and smooth operation of your ceiling fan. By addressing any issues with the mounting bracket, you can reduce the risk of squeaking noises caused by movement or misalignment.
If the squeaking noise persists after inspecting and adjusting the mounting bracket, it’s time to move on to step 6, which focuses on balancing the fan blades.
Remember to exercise caution when working with the mounting bracket and make sure the ladder or step stool is stable and secure before climbing.
Now, let’s proceed to step 6 to balance the fan blades and eliminate any remaining squeaking noises.
Step 6: Balance the Fan Blades
Imbalanced fan blades can cause friction and result in squeaking noises. Balancing the fan blades is an essential step in eliminating any remaining squeaking. Follow these steps to balance your fan blades:
- Turn off the fan and allow the blades to come to a complete stop.
- Climb up a ladder or step stool to reach the fan blades.
- Visually inspect each fan blade for any visible signs of damage, such as warping or curling. Damaged blades may need to be replaced.
- Use a measuring tape to measure the distance from the ceiling to each blade tip. Compare the measurements to ensure they are equal. Uneven measurements indicate an imbalance.
- To correct an imbalance, use a balancing kit or fan blade balancing clips. These accessories attach to the blades to redistribute weight and restore balance.
- Follow the manufacturer’s instructions to attach the balancing clips to the appropriate blades. Typically, the clips are positioned at the midpoint of the blade.
- Turn the fan on at a low speed and observe if the squeaking noise has been eliminated. If not, adjust the position of the clips as needed or try repositioning them on different blades.
- Continue to adjust the clips until the fan operates smoothly and quietly without any squeaking noises.
Properly balanced fan blades will minimize vibrations and noise, ensuring a peaceful and pleasant experience when using your ceiling fan. If the squeaking persists even after balancing the blades, proceed to step 7 to check for any worn-out parts that may need replacing.
Remember to exercise caution when climbing a ladder or step stool, and ensure your safety at all times while working on the fan blades.
Now, let’s move on to step 7 to address any worn-out parts and complete the troubleshooting process.
Step 7: Replace Worn Out Parts
If you have followed the previous steps and the squeaking noise still persists, it may be due to worn-out parts within your ceiling fan. Components such as bearings, bushings, or the flywheel can wear out over time and cause unwanted noises. Here’s how to address this issue:
- Identify the specific part or parts that may be causing the squeaking noise. This may require disassembling certain portions of the fan to access the internal components.
- Refer to your fan’s user manual or contact the manufacturer to determine the exact replacement parts needed.
- Order the necessary replacement parts from a trusted supplier or directly from the manufacturer to ensure high-quality and compatibility.
- Once you have obtained the replacement parts, carefully follow the manufacturer’s instructions to replace the worn-out components. This may involve unscrewing and removing certain covers, guards, or other parts of the fan.
- Install the new parts, ensuring they are securely attached and aligned properly.
- Reassemble the fan, making sure all the screws, bolts, and other fasteners are tightened to the appropriate specifications.
- Turn on the fan and test for any remaining squeaking noises. If the noise persists, double-check that all parts have been installed correctly and consider contacting a professional for further assistance.
Replacing worn-out parts within your ceiling fan may require some technical expertise. If you are unsure about completing this step or if the noise persists after replacing the components, it is advisable to seek professional help to ensure the proper functioning and safety of your fan.
Congratulations! By following these steps, you have successfully troubleshooted and addressed the squeaking noise in your ceiling fan. Enjoy the quiet and cool breeze provided by your fan without any annoying interruptions.
Before we conclude, let’s summarize what we’ve covered in this article.
Conclusion
Ceiling fan squeaking can be a frustrating issue, but with the right knowledge and tools, you can silence the noise and restore tranquility to your living space. Throughout this article, we have explored the common causes of ceiling fan squeaking and provided step-by-step instructions to troubleshoot and resolve the issue. Let’s recap the main points:
We began by understanding the potential causes of ceiling fan squeaking, including dust and debris buildup, loose screws or bolts, worn-out motor housing, imbalanced fan blades, and worn-out parts. By identifying the root cause, we can more effectively address the issue.
Next, we gathered the necessary tools and materials to embark on the repair process. A ladder, screwdriver, cleaning cloth, mild detergent, lubricating oil, and replacement parts (if needed) are essential items to have on hand.
We then went through a series of steps to tackle the problem. We turned off the fan to ensure safety, cleaned and lubricated the fan blades to remove dust and debris, tightened the screws and bolts to eliminate any wobbling, checked the motor housing for damage, inspected the mounting bracket for stability, balanced the fan blades to minimize vibrations, and finally, replaced any worn-out parts that may continue to cause squeaking noise.
It’s important to note that if at any point you feel unsure or uncomfortable with the repair process, it’s best to seek professional assistance to ensure the safety of yourself and your fan.
By following these steps, you can resolve the issue of a squeaking ceiling fan and restore a peaceful and comfortable atmosphere in your home. Remember to regularly clean and maintain your fan to prevent future squeaking and ensure optimal performance.
Thank you for reading, and we hope these steps have been helpful in assisting you with your squeaking ceiling fan dilemma. Enjoy the cool breeze and quiet operation of your newly fixed fan!
Frequently Asked Questions about How To Stop A Ceiling Fan From Squeaking
Was this page helpful?
At Storables.com, we guarantee accurate and reliable information. Our content, validated by Expert Board Contributors, is crafted following stringent Editorial Policies. We're committed to providing you with well-researched, expert-backed insights for all your informational needs.


0 thoughts on “How To Stop A Ceiling Fan From Squeaking”