Home>Furniture>Living Room Furniture>How To Build An Armchair
Living Room Furniture
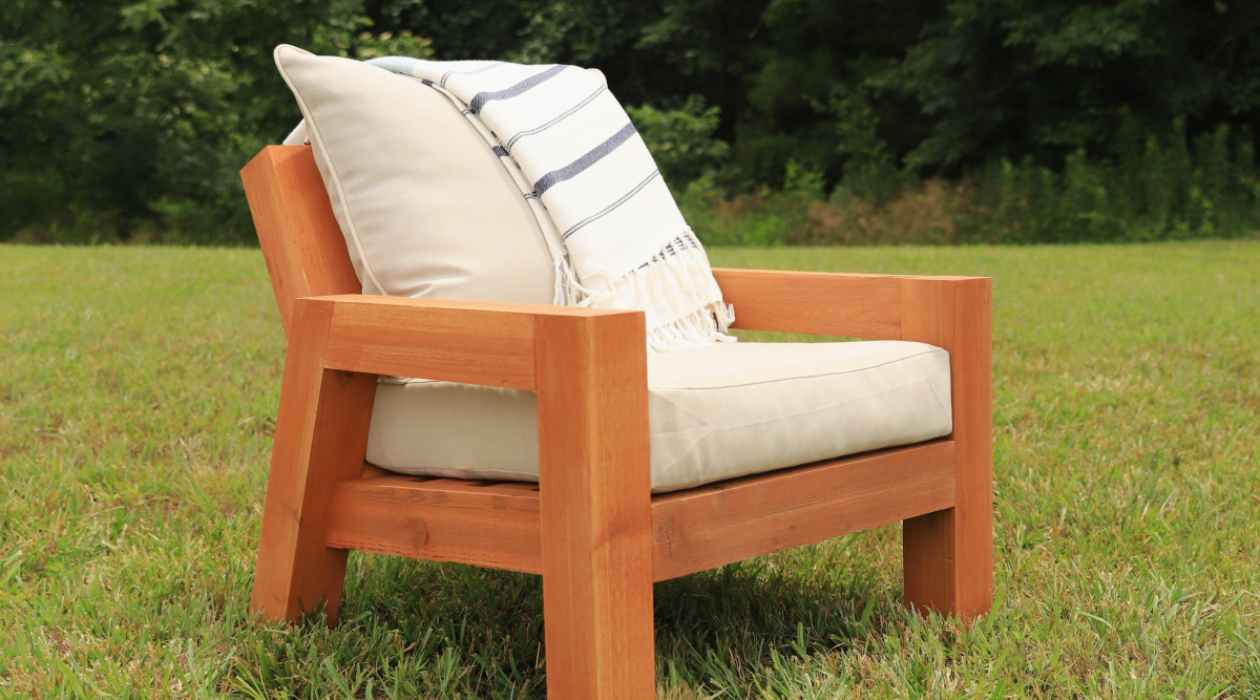
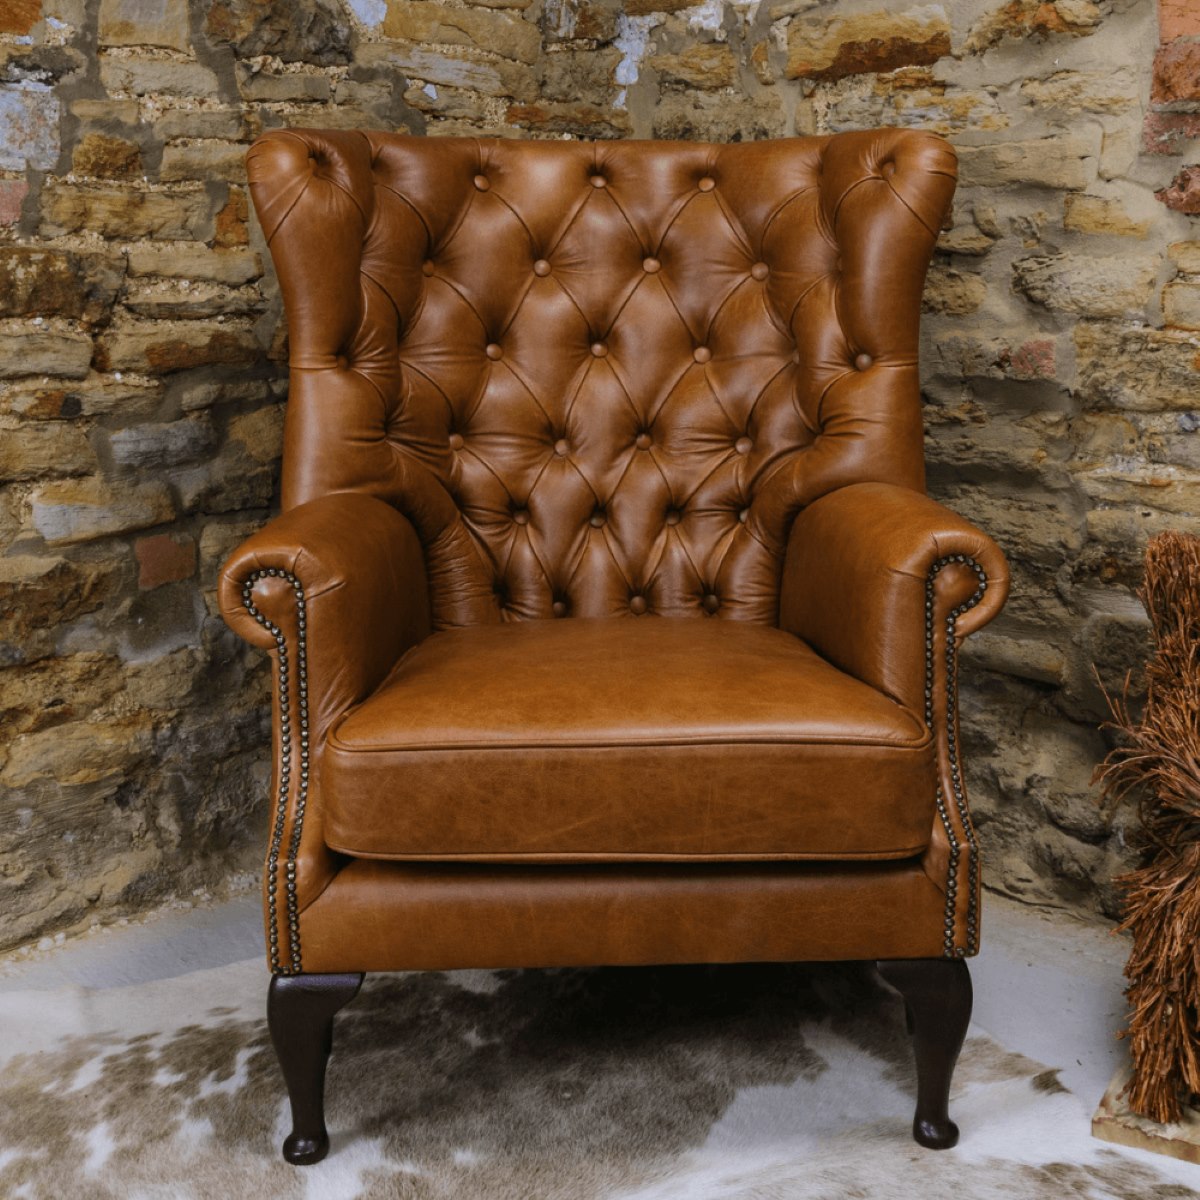
How To Build An Armchair
Modified: August 16, 2024
Learn how to build your own armchair for your living room with our step-by-step guide. Create the perfect piece of living room furniture with our easy-to-follow instructions.
(Many of the links in this article redirect to a specific reviewed product. Your purchase of these products through affiliate links helps to generate commission for Storables.com, at no extra cost. Learn more)
Introduction
Welcome to the ultimate guide on how to build your very own armchair! If you’ve always dreamed of having a stylish and comfortable armchair in your living room but haven’t found the perfect one in stores, why not take matters into your own hands and build it yourself? Not only will it give you a sense of accomplishment, but you’ll also have complete control over the design, material, and overall look of the armchair.
Building an armchair may seem like a daunting task, but with some careful planning, the right materials, and a little bit of patience, you can create a one-of-a-kind piece that perfectly complements your living room decor. Whether you’re a seasoned DIY enthusiast or a beginner with a passion for woodworking, this step-by-step guide will walk you through the entire process, from planning and design to the finishing touches.
Before we dive into the nitty-gritty of building an armchair, it’s important to have a clear vision of what you want to achieve. Consider the style, size, and functionality of the armchair. Are you looking for a sleek and modern design or a rustic and cozy feel? Will it be used as a reading chair or a statement piece? Take some time to brainstorm and gather inspiration from magazines, online galleries, and furniture stores.
Once you have a clear idea of your armchair’s design, it’s time to gather the necessary materials and tools. The type of wood you choose will greatly impact the overall look and durability of the armchair. Popular options include oak, maple, and birch. You’ll also need screws, nails, and wood glue for assembly, as well as sandpaper, stain or paint, and upholstery fabric for the finishing touches.
Now that you have everything you need, let’s jump right into the step-by-step process of building an armchair. Remember to take your time and follow the instructions carefully. Building furniture requires precision and attention to detail, but with the right approach, you’ll soon have a stunning armchair that you can proudly display in your living room. So, roll up your sleeves and let’s get started on this exciting DIY project!
Key Takeaways:
- Building your own armchair allows you to unleash your creativity, personalize your living space, and experience the satisfaction of crafting a unique piece of furniture that reflects your style and personality.
- From planning and design to the final touches, building an armchair is a fulfilling journey that hones your skills, exercises your creativity, and results in a comfortable and stylish haven for relaxation and enjoyment.
Read more: How To Clean Armchair Fabric
Step 1: Planning and Design
The first step in building an armchair is to thoroughly plan and design your project. This stage is crucial as it allows you to envision what your final armchair will look like and ensures that you have a clear roadmap for the construction process.
Start by measuring the available space in your living room. Consider the dimensions of the armchair, including its width, depth, and height. You want to make sure that the armchair will fit comfortably in the designated area without overwhelming the room or obstructing walkways.
Next, decide on the style and aesthetic you want to achieve with your armchair. Are you aiming for a modern, minimalist look or a more traditional, vintage feel? Browse through furniture catalogs, online galleries, and interior design websites to gather inspiration. Take note of specific design elements that appeal to you, such as the shape of the arms, the curvature of the backrest, or the type of upholstery.
Once you have a clear vision of your armchair’s design, it’s time to create a detailed plan. Sketch out the armchair from different angles, including the front, side, and top view. This will help you visualize how different components will fit together and identify any potential design flaws or adjustments that need to be made.
Consider the ergonomics of the armchair as well. Pay attention to the seat height, backrest angle, and armrest height to ensure optimal comfort. You may also want to include additional features such as a reclining mechanism or a swivel base, depending on your preferences.
Don’t forget to take into account the weight-bearing capacity of the armchair. This is particularly important if you plan on using it as a reading chair or for long periods of sitting. Reinforce critical areas such as the frame and joints to ensure stability and durability.
Lastly, create a materials list for your armchair. This will include the type of wood, screws, nails, and any additional hardware you’ll need for assembly. Consider the type of finish you want for your armchair as well, whether it’s staining the wood or painting it in a specific color. Keep in mind that the materials you choose will impact the overall cost and lifespan of your armchair.
By taking the time to plan and design your armchair thoroughly, you’ll save yourself a lot of headaches and potential mistakes during the construction process. It will also ensure that you end up with an armchair that meets your expectations in terms of both aesthetics and functionality.
Step 2: Gather Materials and Tools
Now that you have a well-defined plan and design for your armchair, it’s time to gather all the necessary materials and tools. Having everything on hand before you start will make the construction process much smoother and more efficient.
The materials you’ll need will depend on the specific design and style of your armchair. However, there are some essential items that you’ll generally require:
- Wood: Select the type of wood that best suits your design and budget. Common choices include oak, maple, and birch. Make sure the wood is of good quality, free from defects, and appropriately sized for your project.
- Screws and Nails: Choose appropriate screws and nails for assembling the various components of your armchair. Make sure they are the right length and gauge to ensure a secure and stable structure.
- Wood Glue: Invest in a high-quality wood glue to reinforce the joints and add stability to your armchair. Ensure the glue is suitable for the type of wood you are using.
- Sandpaper: You’ll need sandpaper of varying grits to smooth down rough edges, remove any imperfections, and prep the wood for finishing.
- Finishing Materials: Depending on your preference, you may choose to stain or paint your armchair. Select the appropriate finish and color that aligns with your design vision.
- Upholstery Fabric: If you plan on upholstering your armchair, choose a fabric that is durable, comfortable, and visually appealing. Consider the color, pattern, and texture that will complement your overall design.
In addition to materials, you’ll also require a set of tools to complete the construction process. Here are some essential tools you’ll need:
- Measuring Tape
- Table Saw or Circular Saw
- Screwdriver and/or Cordless Drill
- Hammer
- Chisels
- Clamps
- Sanding Block or Orbital Sander
- Paintbrushes or Stain Applicators
- Upholstery Tools (if applicable)
Before starting the construction process, double-check that you have all the necessary materials and tools. Make a list and visit your local hardware store or order online to ensure you have everything you need.
Gathering the materials and tools upfront will save you time and frustration during the construction process. It ensures that you have everything at your fingertips and allows for smoother progress as you bring your armchair to life.
Step 3: Cutting and Preparing Wood
Now that you have all the necessary materials and tools, it’s time to start cutting and preparing the wood for your armchair. This step is crucial, as it sets the foundation for the construction and ensures that all components are properly sized and shaped.
Begin by referring to your detailed plan and design. Take accurate measurements for each component of the armchair, such as the seat, backrest, arms, and legs. Mark these measurements on the appropriate pieces of wood, using a measuring tape and pencil.
Next, take your table saw or circular saw and carefully cut along the marked lines. Make sure to follow all safety precautions and wear appropriate protective gear, such as safety goggles and gloves. Take your time to ensure accurate and clean cuts.
After the pieces are cut, use a chisel to smooth any rough edges or imperfections. This will help prevent splinters and create a more polished finish. Take care when using the chisel to avoid any accidental damage to the wood.
Once you have all the components cut and prepared, perform a dry fit to ensure that everything aligns properly. Lay out the pieces according to your plan and assess if any adjustments need to be made. This step is crucial for identifying any potential issues before moving forward with assembly.
If everything fits well, proceed to sanding the wood. Start with a coarse-grit sandpaper to remove any remaining roughness or blemishes on the surface. Gradually move to finer-grit sandpaper, making sure to sand in the direction of the wood grain for a smooth finish.
Take your time during the sanding process, paying attention to all the details. Be sure to sand all sides of the wood, including the edges and corners, to ensure a consistent and flawless result.
Once the wood is sanded, it’s time to apply the finish of your choice. If you decide to stain the wood, carefully follow the manufacturer’s instructions and allow sufficient drying time between coats. If you opt for painting, apply a primer before adding your chosen color. Apply the finish evenly and make sure to cover all surfaces.
After the finish has dried, take a final look at the wood pieces to ensure they are ready for assembly. They should be smooth, free of imperfections, and display the desired color or stain. Now, you’re ready to move on to the exciting stage of assembling your armchair!
Remember, precision and attention to detail are crucial during the cutting and preparation stage. Taking the time to accurately measure, cut, sand, and finish the wood will ensure a solid foundation for a beautifully crafted armchair.
Step 4: Assembling the Frame
With the wood pieces cut, prepared, and finished, it’s time to move on to the exciting stage of assembling the frame of your armchair. The frame is the backbone of the chair, providing stability and support for the other components.
Before you commence assembly, carefully review your plan and design. Lay out the wood pieces in the correct order to ensure that you have all the necessary components for the frame, including the legs, seat supports, armrests, and backrest supports.
To begin, attach the seat supports to the legs. Select the appropriate method of attachment, such as screws, nails, or wood glue, based on your chosen design and the strength required. Make sure the supports are flush with the legs and secure them firmly in place.
Next, add the armrests to the frame. Attach them to the legs using the same method you used for the seat supports. Ensure that the armrests are level and parallel to each other and that they provide a comfortable resting place for your arms.
Once the armrests are securely attached, move on to connecting the backrest supports. These will provide structure and stability to the back of the armchair. Align the supports with the appropriate markings on the legs and fasten them securely.
During the assembly process, periodically check the levelness and stability of the frame. Use a level to ensure that the seat, arms, and backrest are all properly aligned. This will help guarantee a comfortable and visually pleasing result.
Depending on your armchair design, you may also need to insert crossbars or additional supports for added strength. These can be positioned between the legs or underneath the seat. Make sure they are firmly attached and reinforce any joints as necessary.
Throughout the assembly stage, take your time and double-check each joint and attachment point. A sturdy and well-constructed frame is essential for the longevity and durability of your armchair.
Once the frame is fully assembled, test its sturdiness by gently rocking or wiggling it. Any excessive movement or instability should be addressed before proceeding further.
Now that the frame is complete, you can step back and admire the structure you’ve built. The armchair is beginning to take shape, and it’s time to move on to the next step – attaching the seat and backrest.
Remember, precision and attention to detail during the assembly stage is crucial. Ensure that all joints are tight and secure, and that the frame is level and stable. This will lay the foundation for a strong and reliable armchair, ready to provide comfort and style for years to come.
When building an armchair, make sure to use sturdy and durable materials such as hardwood for the frame and high-quality upholstery fabric. This will ensure that your armchair is strong and long-lasting.
Read more: How To Make Armchair Slipcovers
Step 5: Attaching the Seat and Backrest
With the frame of your armchair assembled, it’s time to move on to attaching the seat and backrest. These components are essential for providing comfort and support while showcasing the visual appeal of your armchair.
First, position the seat onto the frame, ensuring it is aligned with the seat supports. Depending on your design, you may need to attach the seat using screws, nails, or brackets. Make sure the attachment method you choose provides a secure and stable connection.
If you plan on upholstering the seat, it’s a good idea to add a layer of foam padding before attaching the fabric. This will enhance comfort and give your armchair a plush look. Secure the upholstery fabric over the foam, pulling it tightly and fastening it to the underside of the seat.
Next, turn your attention to the backrest. Align it with the backrest supports on the frame and secure them together using screws, nails, or brackets. Ensure that the backrest is level and securely attached, providing proper support while maintaining a comfortable angle.
Upholstering the backrest can be done in a similar manner to the seat. Measure and cut the upholstery fabric to fit the backrest, making sure to leave some excess for folding and fastening. Pull the fabric tightly and staple or tack it to the back of the armchair, concealing the raw edges.
If your armchair design includes cushions or pillows for added comfort, now is the time to attach them as well. Secure them to the seat and backrest using either fabric ties, Velcro, or hidden fasteners, depending on your preference and the chosen design.
Once the seat, backrest, and any additional cushions or upholstery are securely attached, step back and assess the overall appearance and comfort of your armchair. Test the seat and backrest for firmness and stability, making sure they can support the weight and provide a comfortable sitting experience.
Remember to consider any decorative elements or finishing touches you’d like to add at this stage. This could include adding buttons, decorative nails, or piping to the upholstery, or applying wood stain or paint to enhance the visual appeal of the frame.
With the seat and backrest firmly attached, your armchair is starting to come together beautifully. It’s time to move on to the next step – sanding and finishing – to bring out the true beauty of your DIY creation.
Throughout this step, pay attention to detail and ensure that all attachments are secure and aligned properly. This will guarantee a sturdy and visually pleasing armchair that you can enjoy for years to come.
Step 6: Sanding and Finishing
After successfully attaching the seat and backrest to your armchair, it’s time to shift your focus to sanding and finishing. This step plays a crucial role in enhancing the visual appeal and overall quality of your DIY armchair.
Start by inspecting the entire surface of the armchair, including the frame, seat, and backrest. Use sandpaper of progressively finer grits to smooth out any rough areas, uneven edges, or imperfections. Sand in the direction of the wood grain for the best results.
Pay particular attention to the areas where joints and connections were made. Ensure that they are seamless and flush with the surrounding wood. Sanding these areas carefully will create a unified and professional-looking finish.
Once you’ve achieved a smooth surface, remove all dust and debris using a clean cloth or vacuum. This will ensure that the finishing products adhere properly and produce a polished result.
Now it’s time to apply a finish to your armchair. The choice of finish will depend on personal preference and the desired look for your armchair. Options range from stains, varnishes, and paints to oils and waxes.
If you’re aiming for a natural wood look, consider applying a stain to enhance the grain and color. Alternatively, you can paint the armchair in a color that matches your interior design or adds a pop of personality to your space. Whichever finish you choose, read and follow the manufacturer’s instructions carefully.
Apply the finish using a paintbrush, stain applicator, or cloth, depending on the product and your desired outcome. Work in small sections, ensuring an even and smooth application. Allow the finish to dry according to the recommended time frame before proceeding to the next step.
If desired, you can apply multiple coats of finish for added durability and a more pronounced color or sheen. Gently sand between coats to achieve a smooth surface. Again, remove any dust before applying subsequent coats.
Once the finish has dried and hardened, give your armchair a final inspection. Look for any areas that may require touch-ups or additional finishing. Check for any rough spots or unevenness that may need a light sanding.
By properly sanding and finishing your armchair, you’ll achieve a polished and professional end result. The finish will protect the wood and give your armchair a beautiful and inviting appearance.
Now that you’ve completed the sanding and finishing stage, your armchair is almost ready to take its place in your living room. The final steps involve upholstering the armchair and adding those special touches that will truly make it your own.
Stay tuned for the next step – upholstering the armchair – to complete this exciting DIY project!
Step 7: Upholstering the Armchair
Upholstering the armchair is the next step in bringing your DIY project to life. This stage allows you to add comfort, style, and a personal touch to your armchair, making it truly unique and inviting.
Before you begin upholstering, gather all the necessary materials. These may include upholstery fabric, foam padding, batting, scissors, a staple gun, a rubber mallet, and fabric glue.
Start by preparing the armchair for upholstering. If there is existing fabric or padding on the seat and backrest, remove it carefully using a staple remover or scissors. Inspect the frame and make any necessary repairs or adjustments to ensure a solid foundation.
If you haven’t already done so, now is the time to add foam padding to the seat and backrest for added comfort. Measure and cut the foam to fit the dimensions, and secure it to the wood using fabric glue or adhesive spray. Make sure the foam is smooth and even.
Next, lay the upholstery fabric over the foam, making sure it covers the entire seat and backrest with some excess for wrapping and stapling. Smooth out any wrinkles or creases in the fabric, ensuring a neat and even appearance.
Starting at the center of one side, use a staple gun to attach the fabric to the frame. Pull the fabric taut as you staple, working your way out towards the corners. Repeat this process for each side, pulling the fabric tightly to create a smooth and seamless finish.
At the corners, fold the fabric neatly and securely using a combination of folds, pleats, or gathers. This will ensure a tidy and professional-looking result. Use a rubber mallet to hammer down any stubborn staples, ensuring they are fully embedded in the wood.
Continue stapling and smoothing the fabric until the entire seat and backrest are upholstered. Trim any excess fabric, leaving a small margin for a clean and polished edge.
For added durability and a finished look, you can add a layer of batting over the upholstery fabric. This will soften any sharp edges and give the armchair a plump and cozy appearance. Apply it over the fabric, smoothing out any lumps or unevenness as you go.
Take a step back and inspect your upholstered armchair. Ensure the fabric is smooth, the patterns are aligned (if applicable), and the upholstery is secure. Test the seat and backrest for comfort and stability, making any adjustments as needed.
Finally, add any finishing touches you desire, such as decorative trims, buttons, or piping. These details can elevate the overall aesthetic of your armchair and add a personal touch. Use fabric glue or small upholstery tacks to secure them in place.
Upholstering your armchair allows you to customize and personalize it to your taste. By selecting the right fabric, padding, and finishing details, you can create a comfortable and stylish piece of furniture that suits your living room perfectly.
With the final upholstery touches complete, your DIY armchair is almost finished. Stay tuned for the last step – adding the final touches and decorations – to complete this exciting and rewarding project.
Step 8: Final Touches and Decoration
Congratulations! You’ve made it to the final step of building your own armchair – adding the final touches and decorations. This is the stage where you can let your creativity shine and truly make your armchair a standout piece in your living room.
Start by evaluating your armchair’s overall appearance and identifying any areas that could benefit from additional embellishments. Consider decorative elements such as cushions, pillows, or throws that can enhance both the comfort and aesthetics of your armchair.
Select decorative fabrics or patterns that complement your armchair’s design and the style of your living room. Play with different textures, colors, and prints to create a visually appealing and inviting look. Mix and match patterns and solids for added interest.
Place decorative cushions or pillows strategically on the armchair, adding layers of comfort and style. Consider using different sizes and shapes to create a visually dynamic arrangement. You can also mix and match fabrics to add depth and personality.
Experiment with throws or blankets draped over the armchair to add warmth and a cozy touch. Opt for materials that are soft and inviting, such as plush knits or faux fur. Fold or drape them in a way that complements the lines and shape of your armchair.
Don’t forget about the arms of the armchair – they can serve as a canvas for additional decorative elements. Consider adding arm covers made from coordinating or contrasting fabric. These can protect your armchair from wear and tear while adding a stylish accent.
Other decorative elements you can incorporate are buttons, decorative nails, or piping. These small details can add a touch of elegance and sophistication to your armchair. While they may require some additional time and effort, they can make a significant difference in the overall appearance of your creation.
Consider the surroundings of your armchair as well. Add a side table or a floor lamp to create a cozy reading nook or a space for placing a cup of tea or a book. Place a rug under the armchair to anchor it and add visual warmth to the room.
Lastly, step back and take a moment to admire your handiwork. Your DIY armchair is now complete and ready to be enjoyed. Sit back, relax, and revel in the satisfaction of creating a unique piece of furniture that reflects your personal style and craftsmanship.
Remember, the final touches and decorations allow you to infuse your armchair with your personality and make it truly your own. Have fun with the process, experiment with different materials and textures, and don’t be afraid to let your creativity soar.
Thank you for joining us on this journey of building your very own armchair. We hope you have found this guide helpful and that your armchair brings you comfort and joy for years to come.
Read more: What Is An Armchair
Conclusion
Congratulations on completing your DIY armchair! You have embarked on a fulfilling journey, starting from planning and design, gathering materials and tools, cutting and preparing wood, and assembling the frame. You then moved on to attaching the seat and backrest, sanding and finishing, upholstering, and adding the final touches and decorations.
Building your own armchair not only allows you to create a piece of furniture that perfectly fits your living room and personal style, but it also gives you a sense of accomplishment and pride. Throughout the process, you have honed your woodworking skills, exercised your creativity, and showcased your craftmanship.
Your armchair is now a focal point in your living room, a comfortable and stylish haven where you can relax and unwind. Its unique design and personalized touches make it a reflection of your personality and taste.
Remember, building furniture is a continuous learning experience. As you hone your skills and gain more confidence, you may want to take on even more ambitious projects in the future. Embrace the journey, experiment with different techniques and designs, and continue to develop your expertise.
We hope this comprehensive guide has provided you with the essential knowledge and inspiration to successfully create your own armchair. Building furniture is a rewarding and empowering experience, and we are thrilled to have been a part of your journey.
Thank you for joining us on this DIY adventure. We wish you many comfortable and enjoyable moments in your custom-made armchair!
Frequently Asked Questions about How To Build An Armchair
Was this page helpful?
At Storables.com, we guarantee accurate and reliable information. Our content, validated by Expert Board Contributors, is crafted following stringent Editorial Policies. We're committed to providing you with well-researched, expert-backed insights for all your informational needs.


0 thoughts on “How To Build An Armchair”