Home>Furniture>Living Room Furniture>How To Reupholster An Armchair
Living Room Furniture
How To Reupholster An Armchair
Modified: August 16, 2024
Learn how to reupholster your armchair and give it a fresh look with our step-by-step guide. Upgrade your living room furniture today!
(Many of the links in this article redirect to a specific reviewed product. Your purchase of these products through affiliate links helps to generate commission for Storables.com, at no extra cost. Learn more)
Introduction
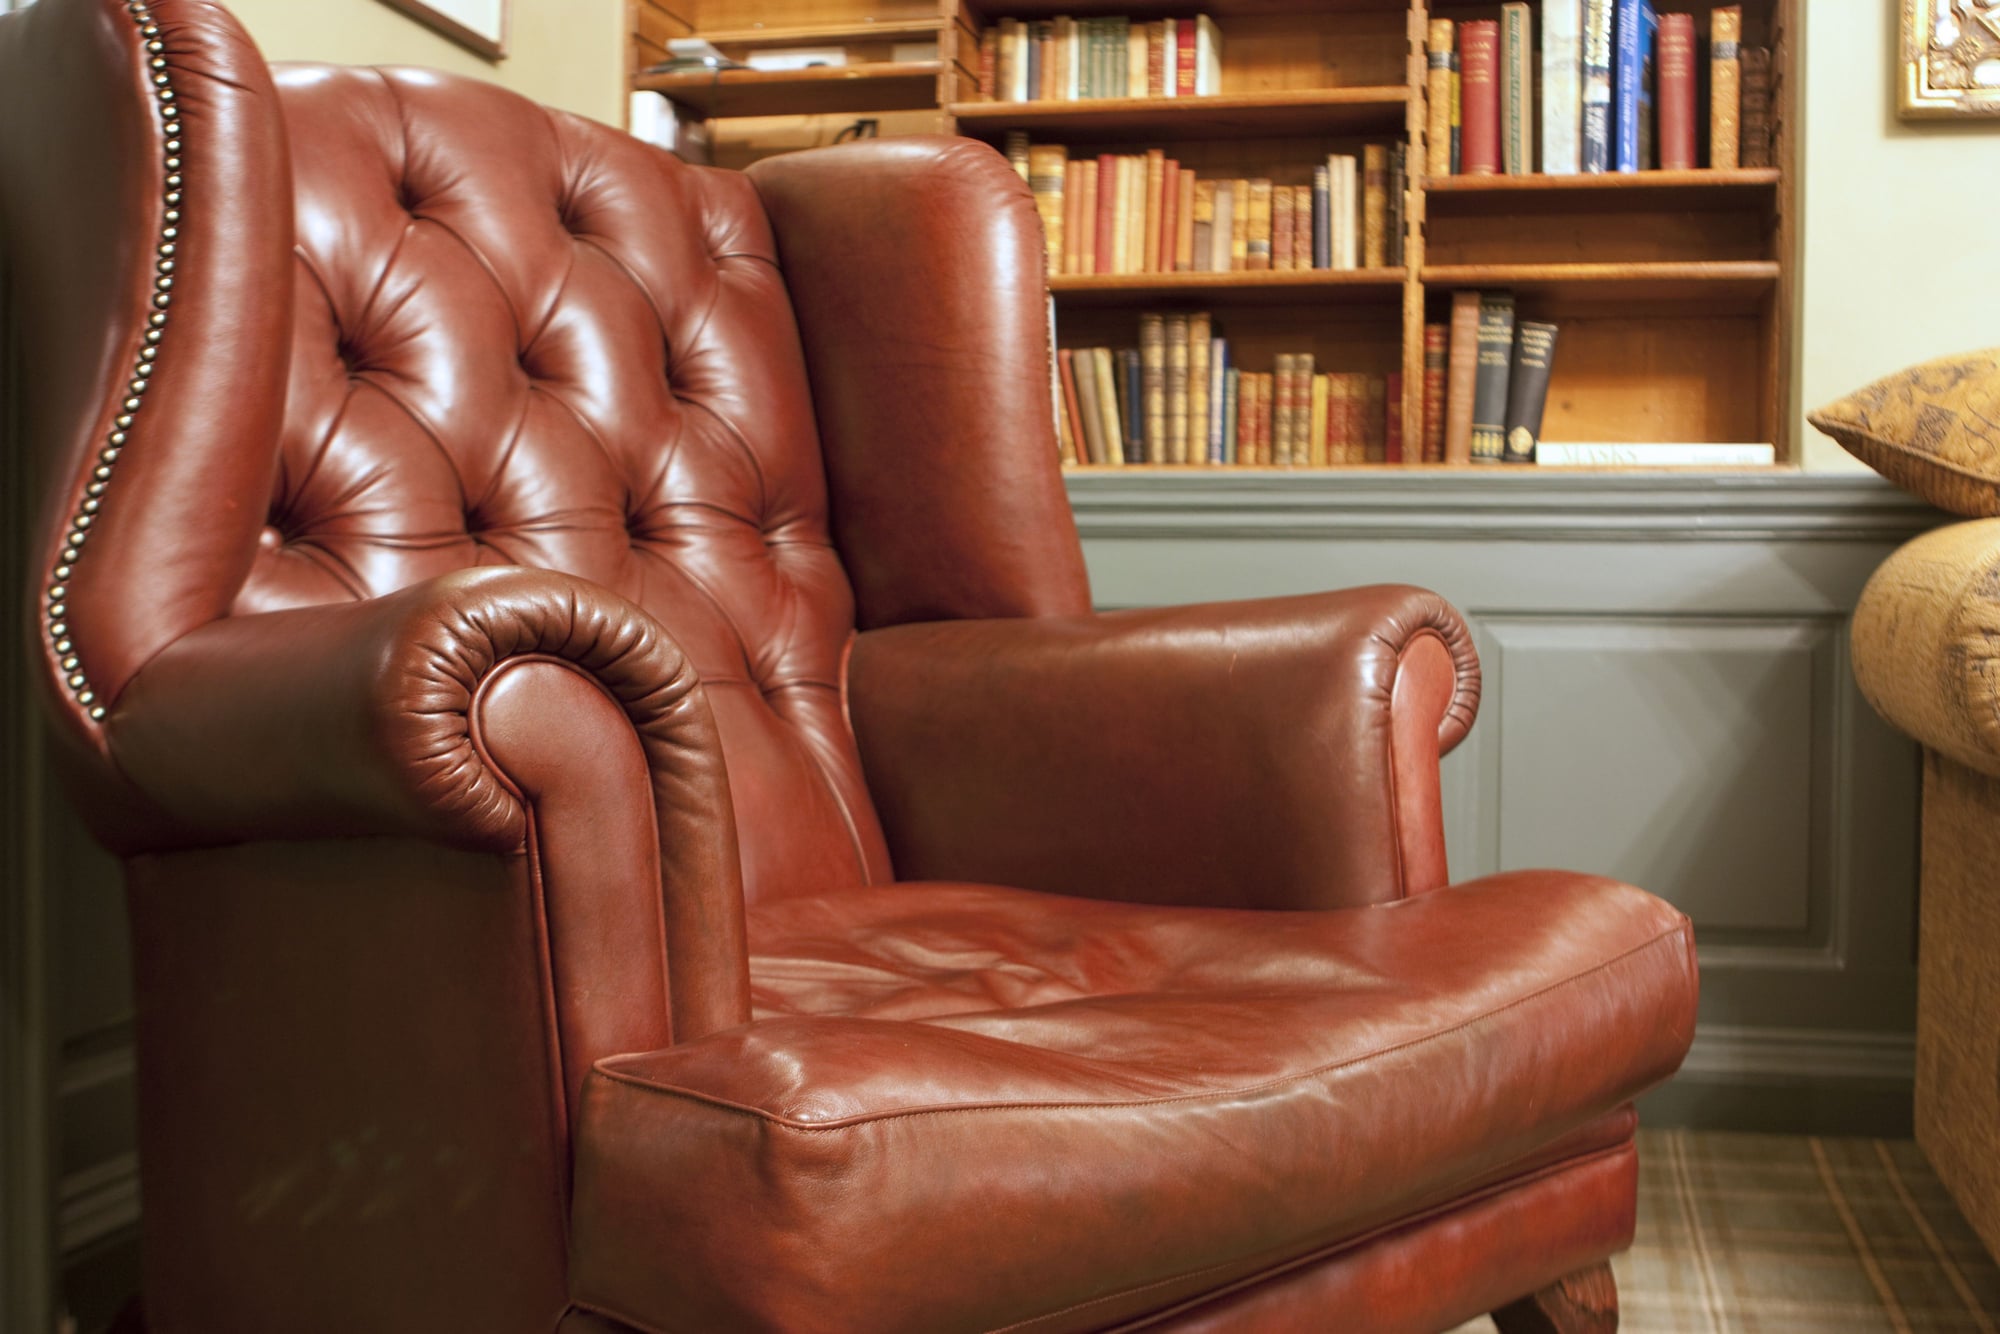
Welcome to the ultimate guide on how to reupholster an armchair! If you have an old armchair that has seen better days, don’t rush to throw it away. Instead, consider giving it a new lease on life by reupholstering it. Reupholstering allows you to transform a worn-out and outdated piece of furniture into a stunning centerpiece for your living room.
Reupholstering an armchair may seem like a daunting task, but with the right tools and materials, it can be a rewarding DIY project. Not only will you be able to customize the chair to your liking, but you’ll also save money compared to buying a brand new one. Plus, you’ll have the satisfaction of knowing that you’ve put your personal touch into rejuvenating the piece.
In this comprehensive guide, we will walk you through the step-by-step process of reupholstering an armchair. From removing the old upholstery to adding decorative details, you’ll learn all the techniques and tips to achieve professional-looking results. So, grab your tools and let’s get started on this exciting journey!
Key Takeaways:
- Don’t toss out that old armchair! Reupholstering it is a fun and eco-friendly DIY project. With patience and creativity, you can transform it into a stunning centerpiece for your living room.
- Gather the right tools and materials, follow the step-by-step process, and add your personal touch with trim and decorative details. Save money, reduce waste, and enjoy your unique, reupholstered armchair!
Read more: How To Reupholster Patio Chairs
Tools and Materials Required
Before you begin reupholstering your armchair, it’s important to gather all the necessary tools and materials. Having everything prepared in advance will make the process much smoother and ensure that you have everything you need at your fingertips. Here’s a list of the essential tools and materials you’ll need:
1. Staple remover: This tool will be your best friend when it comes to removing the old staples from the chair.
2. Needle-nose pliers: These pliers are helpful for gripping and removing stubborn staples.
3. Upholstery hammer: This tool is used to secure fabric onto the frame of the armchair.
4. Scissors: A good pair of scissors is necessary for cutting the new upholstery fabric to size.
5. Sewing machine (optional): If you plan to sew your own cushion covers or make any adjustments to the fabric, a sewing machine will come in handy.
6. Foam padding: Depending on the condition of your armchair’s existing padding, you may need to replace it with new foam padding.
7. Upholstery fabric: This is the star of the show! Choose a beautiful, durable fabric that suits your style and complements your living room.
8. Batting or cotton batting: This material helps to soften the edges and provide a smooth foundation for the upholstery fabric.
9. Upholstery webbing: This strong, durable webbing is used to support the seat springs and provide a stable foundation.
10. Upholstery tacks or staples: These are used to secure the fabric to the frame of the armchair.
11. Trim or decorative details: If you want to add a finishing touch to your armchair, consider adding trim, such as piping or nailhead trim.
12. Safety equipment: Remember to wear safety goggles and gloves when working with sharp tools or chemicals.
With these tools and materials on hand, you’re ready to embark on your reupholstering journey. Each step will require specific tools and materials, so make sure you have everything ready before you begin. Now that you’re well-prepared, it’s time to dive into the step-by-step process of reupholstering your armchair!
Step 1: Removing the Old Upholstery
The first step in reupholstering an armchair is to remove the old upholstery. This process requires patience and attention to detail to ensure that you can start with a clean slate. Here’s how to go about it:
- Begin by carefully inspecting the armchair to identify all the areas where the upholstery is attached. Look for visible staples, tacks, or screws that are holding the fabric in place.
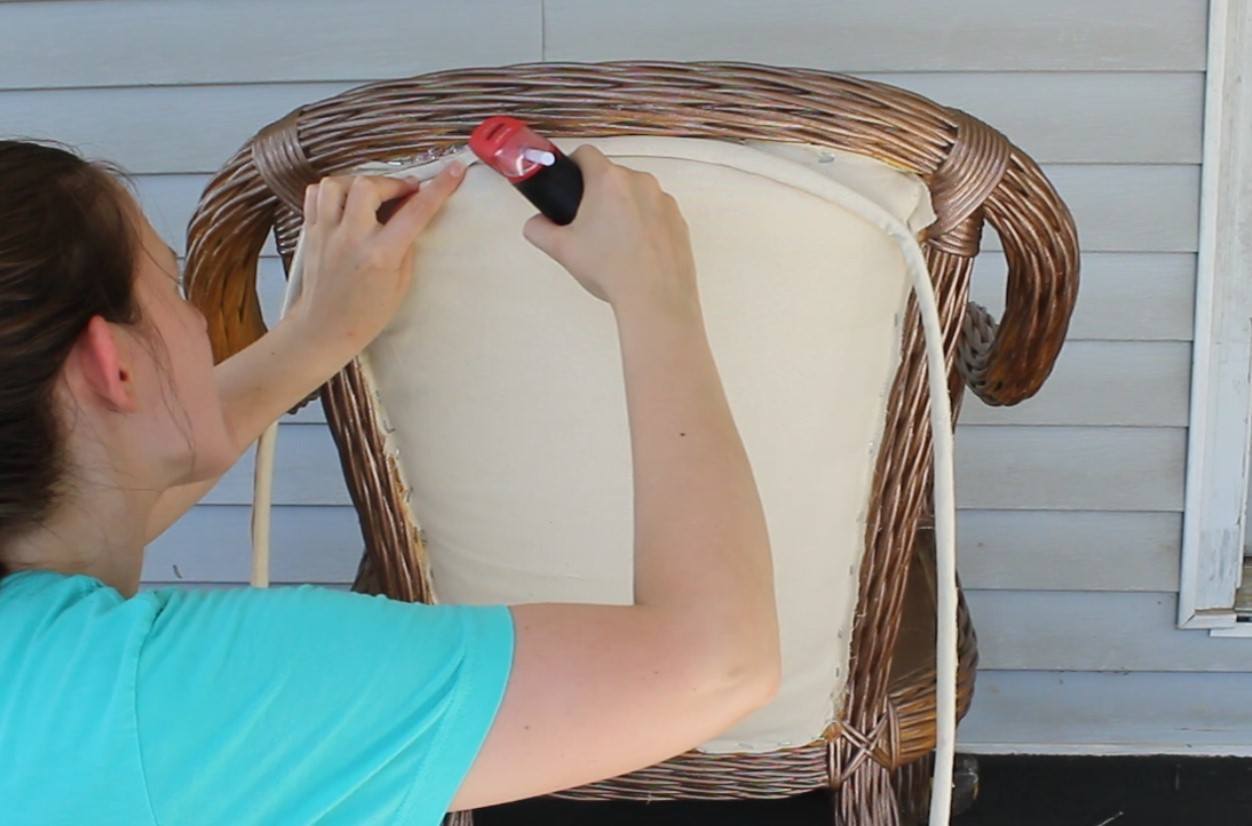
- Using a staple remover or needle-nose pliers, start removing the staples or tacks along the edges of the armchair. Take your time to avoid damaging the fabric or the frame beneath.
- As you remove each staple or tack, make note of its placement and keep track of the order in which they were removed. This will help you during the reupholstering process.
- Once the edges are free, gently pull the fabric away from the chair. Be cautious of any additional staples or tacks that may be holding the fabric in place underneath.
- If necessary, use the staple remover or pliers to remove any remaining staples or tacks on the seat and back of the chair. Take care not to tear or damage the underlying padding or frame.
- Continue this process until all the old upholstery has been completely removed from the armchair.
Removing the old upholstery can be time-consuming, especially if there are a lot of staples or tacks. However, it’s essential to take your time and work carefully to avoid any damage. Once you have successfully removed the old upholstery, you’re ready to move on to the next step: assessing and repairing the frame of the armchair.
Step 2: Assessing and Repairing the Frame
With the old upholstery removed, it’s time to assess the condition of the frame and make any necessary repairs before moving forward with the reupholstering process. Follow these steps to assess and repair the frame of your armchair:
- Thoroughly inspect the armchair frame for any signs of damage, such as cracks, loose joints, or weak areas. Take note of any areas that need repair.
- If you notice any loose joints, apply wood glue to the affected area and clamp it together until the glue dries. This will reinforce the joint and ensure stability.
- If there are cracks or splits in the frame, use wood filler to fill in the gaps. Apply the wood filler according to the manufacturer’s instructions and allow it to dry completely before proceeding.
- If the armchair has any missing or damaged wooden parts, consider replacing them. Measure the dimensions of the damaged piece and purchase a suitable replacement. Ensure that the replacement matches the style and design of the original piece.
- Sand down any rough or uneven surfaces on the frame to create a smooth base for the new upholstery. Use sandpaper or a sanding block, starting with a coarse grit and gradually moving to a finer grit for a polished finish.
- Once the repairs are complete and the frame is in good condition, wipe away any dust or debris from the sanding process. This will prepare the frame for the next step: measuring and cutting the new upholstery fabric.
Assessing and repairing the frame is crucial for ensuring the longevity and stability of your reupholstered armchair. Taking the time to address any issues before proceeding will result in a chair that not only looks great but also functions well. Now that the frame is ready, let’s move on to the next step: measuring and cutting the new upholstery fabric.
Step 3: Measuring and Cutting the New Upholstery Fabric
Now that you have assessed and repaired the frame of your armchair, it’s time to measure and cut the new upholstery fabric. This step requires precision and careful planning to ensure a proper fit. Follow these steps to measure and cut the fabric:
- Start by measuring each section of the armchair that needs to be upholstered. This includes the seat, backrest, and any other removable cushions.
- Use a measuring tape to measure the length and width of each section. It’s important to measure from the outer edges to account for any padding or foam that will be added later.
- Add an additional 2-3 inches to each measurement to provide enough fabric for wrapping around the edges and securing it to the frame.
- Once you have the measurements, transfer them onto the new upholstery fabric. Use a fabric marker or chalk to mark the dimensions accurately.
- Before cutting the fabric, double-check your measurements and markings to ensure they are correct. It’s better to be cautious and re-measure if necessary.
- Using a sharp pair of fabric scissors, carefully cut along the marked lines. Take your time to ensure clean and straight cuts.
- If your armchair has curved or intricate sections, you may need to create a pattern by tracing the shape onto paper and then transferring it to the fabric. This will ensure a precise fit.
Remember to cut each section of fabric separately, keeping them organized and labeled for easy identification during the reupholstering process. Taking accurate measurements and cutting the fabric correctly is essential for achieving a professional and seamless finish. Now that the fabric is ready, it’s time to move on to the next step: attaching the new upholstery.
When reupholstering an armchair, make sure to carefully remove the old fabric and take note of how it was attached. This will make it easier to reupholster and ensure a professional finish.
Read more: How To Clean Armchair Fabric
Step 4: Attaching the New Upholstery
Now that you have measured and cut the new upholstery fabric, it’s time to attach it to the armchair’s frame. This step requires careful precision to ensure a smooth and tight fit. Follow these steps to attach the new upholstery:
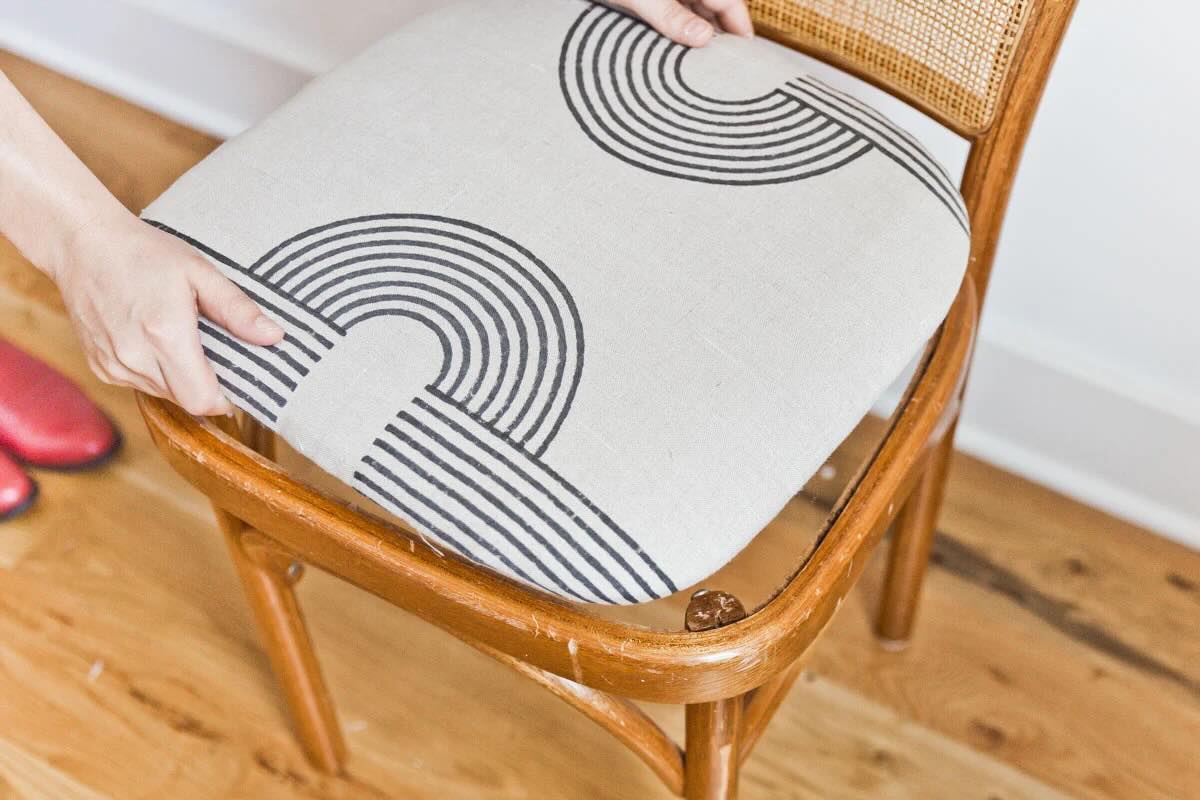
- Start with the seat of the armchair. Place the cut fabric over the seat, making sure it is centered and aligned properly.
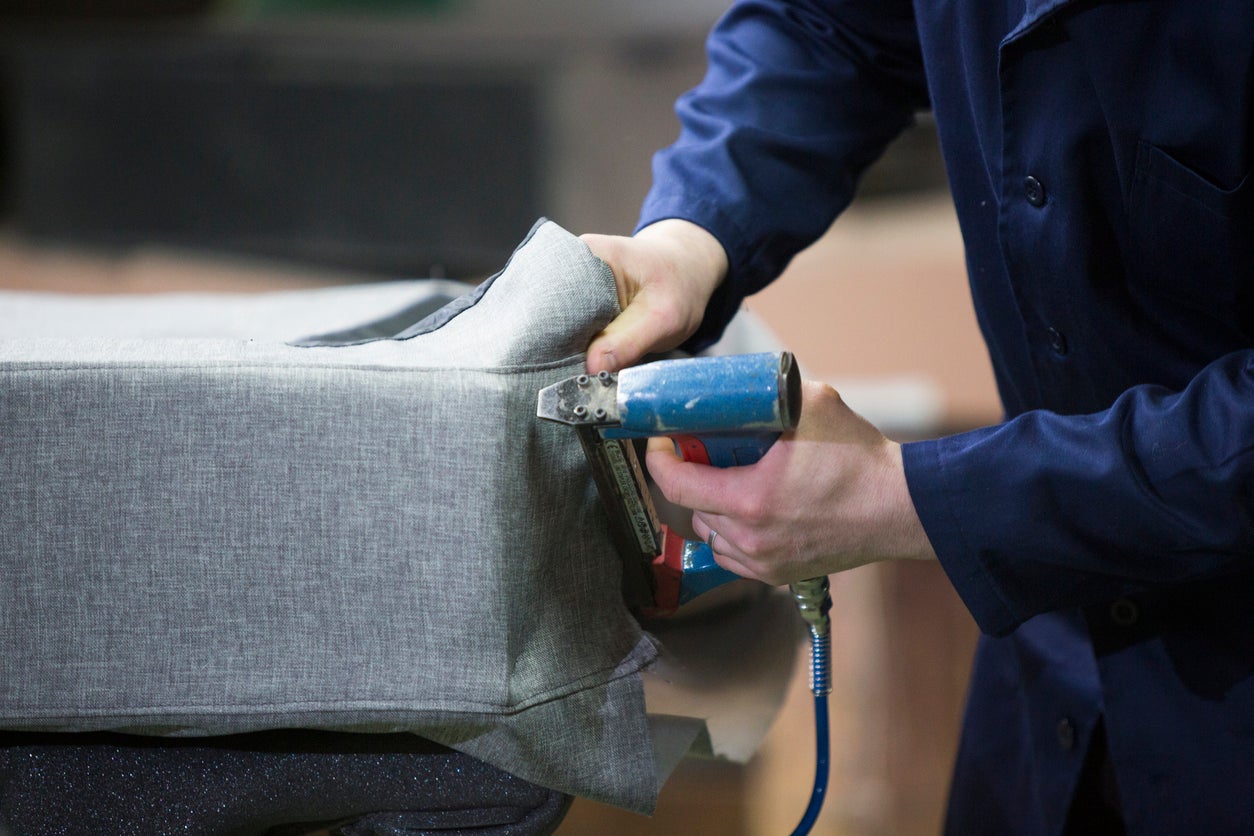
- Using an upholstery staple gun, begin stapling the fabric onto the underside of the seat. Start with the front edge and work your way towards the back, spacing the staples evenly along each side.
- Pull the fabric taut as you staple, but be careful not to pull it too tightly as it may distort the shape of the seat. Leave some slack to allow for a comfortable seating surface.
- Continue stapling the fabric around the entire perimeter of the seat, maintaining an even tension. Trim any excess fabric if necessary, leaving a small allowance for folding and securing.
- Move on to the backrest and armrests, following the same stapling technique. Again, ensure the fabric is centered and aligned properly before stapling.
- If your armchair has removable cushions, upholster them separately while following the same instructions. This will allow for easy removal and cleaning in the future.
- As you work on each section, periodically smooth out any wrinkles or folds in the fabric to maintain a neat and professional appearance.
It’s important to note that if there are any intricate or curved areas on the armchair, you may need to make small pleats or cuts in the fabric to allow for a snug fit. Take your time and be patient to achieve the desired result.
Once you have attached the new upholstery to all the relevant sections, step back and inspect your work. Ensure that the fabric is smooth, the pattern is aligned correctly, and there are no loose or sagging areas.
Great job! You have successfully attached the new upholstery to your armchair. Now, let’s move on to the next step: securing the fabric.
Step 5: Securing the Fabric
Now that you have attached the new upholstery fabric to your armchair, it’s time to secure it in place. This step involves ensuring that the fabric remains tight and wrinkle-free for a polished and professional look. Follow these steps to secure the fabric:
- Start with the seat of the armchair. Using an upholstery hammer, carefully tuck the excess fabric underneath the seat and secure it in place with staples or upholstery tacks. Work your way around the seat, spacing the staples or tacks evenly.
- As you secure the fabric, make sure to pull it taut to eliminate any wrinkles or sagging. The fabric should be smooth and snug against the padding and frame.
- Move on to the backrest and armrests, following the same technique of tucking and securing the excess fabric underneath. Check for any loose areas and adjust as necessary.
- If there are any corners or curved sections on your armchair, you may need to make small pleats or folds in the fabric to create a tight fit. Secure these pleats with staples or tacks for a seamless appearance.
- Once you have secured the fabric in all the relevant areas, give it a final inspection. Smooth out any remaining wrinkles or folds to ensure a clean and professional finish.
Securing the fabric is essential for maintaining the integrity of your reupholstered armchair. Take your time and pay attention to detail to achieve a snug and wrinkle-free result. By securing the fabric properly, you ensure that your armchair looks visually appealing and provides long-lasting comfort.
Now that the fabric is secured, it’s time to add those finishing touches. In the next step, we’ll explore how to add trim or decorative details to enhance the overall look of your armchair.
Step 6: Adding Trim or Decorative Details
Adding trim or decorative details can elevate the look of your reupholstered armchair and give it a unique and personalized touch. This step allows you to showcase your creativity and style. Follow these steps to add trim or decorative details:
- Select the type of trim or decorative detail you want to incorporate into your armchair. This can include options such as piping, nailhead trim, or decorative upholstery tacks.
- Measure and cut the trim or decorative element to fit the desired sections of your armchair. Use a fabric marker or chalk to mark the placement if necessary.
- If you’re adding piping or corded trim, attach it to the fabric by sewing it into the seams or gluing it using fabric adhesive. Ensure that the piping is properly aligned and neatly secured.
- If you’re using nailhead trim or decorative upholstery tacks, carefully hammer them into place along the edges or selected areas of the armchair. Space them evenly and ensure a clean and symmetrical appearance.
- Step back and assess your work as you add each trim or decorative detail. Make any adjustments needed to ensure a cohesive and visually pleasing look.
Adding trim or decorative details is an opportunity to add personality and style to your reupholstered armchair. Whether you prefer a classic and elegant look or a bold and eclectic design, the choice of trim or decorative element can greatly enhance the overall aesthetic. Take your time to ensure a precise and well-executed finish.
With the trim or decorative details added, your reupholstered armchair is nearly complete. In the final step, we will guide you through reassembling the chair and putting the finishing touches on your project.
Step 7: Reassembling the Chair
Congratulations, you’re in the final step of reupholstering your armchair! Now that you have completed all the previous steps, it’s time to reassemble the chair and put the finishing touches on your project. Here’s how to do it:
- Begin by gathering all the reassembled pieces of your armchair, including the seat, backrest, cushions, and any other removable parts.
- Align the seat with the frame of the armchair and secure it in place using screws or bolts, following the manufacturer’s instructions. Make sure the seat is properly aligned and centered.
- If there are any cushions or pillows, place them back into their designated spots on the armchair. Fluff and adjust them for optimal comfort and appearance.
- Double-check that all the trim, decorative details, and upholstery fabric are secure and properly in place. Make any final adjustments if needed.
- Inspect the entire armchair for any loose screws or fittings. Tighten them as necessary to ensure stability and safety.
- Give the armchair a thorough cleaning, removing any dust or debris that may have accumulated during the reupholstering process.
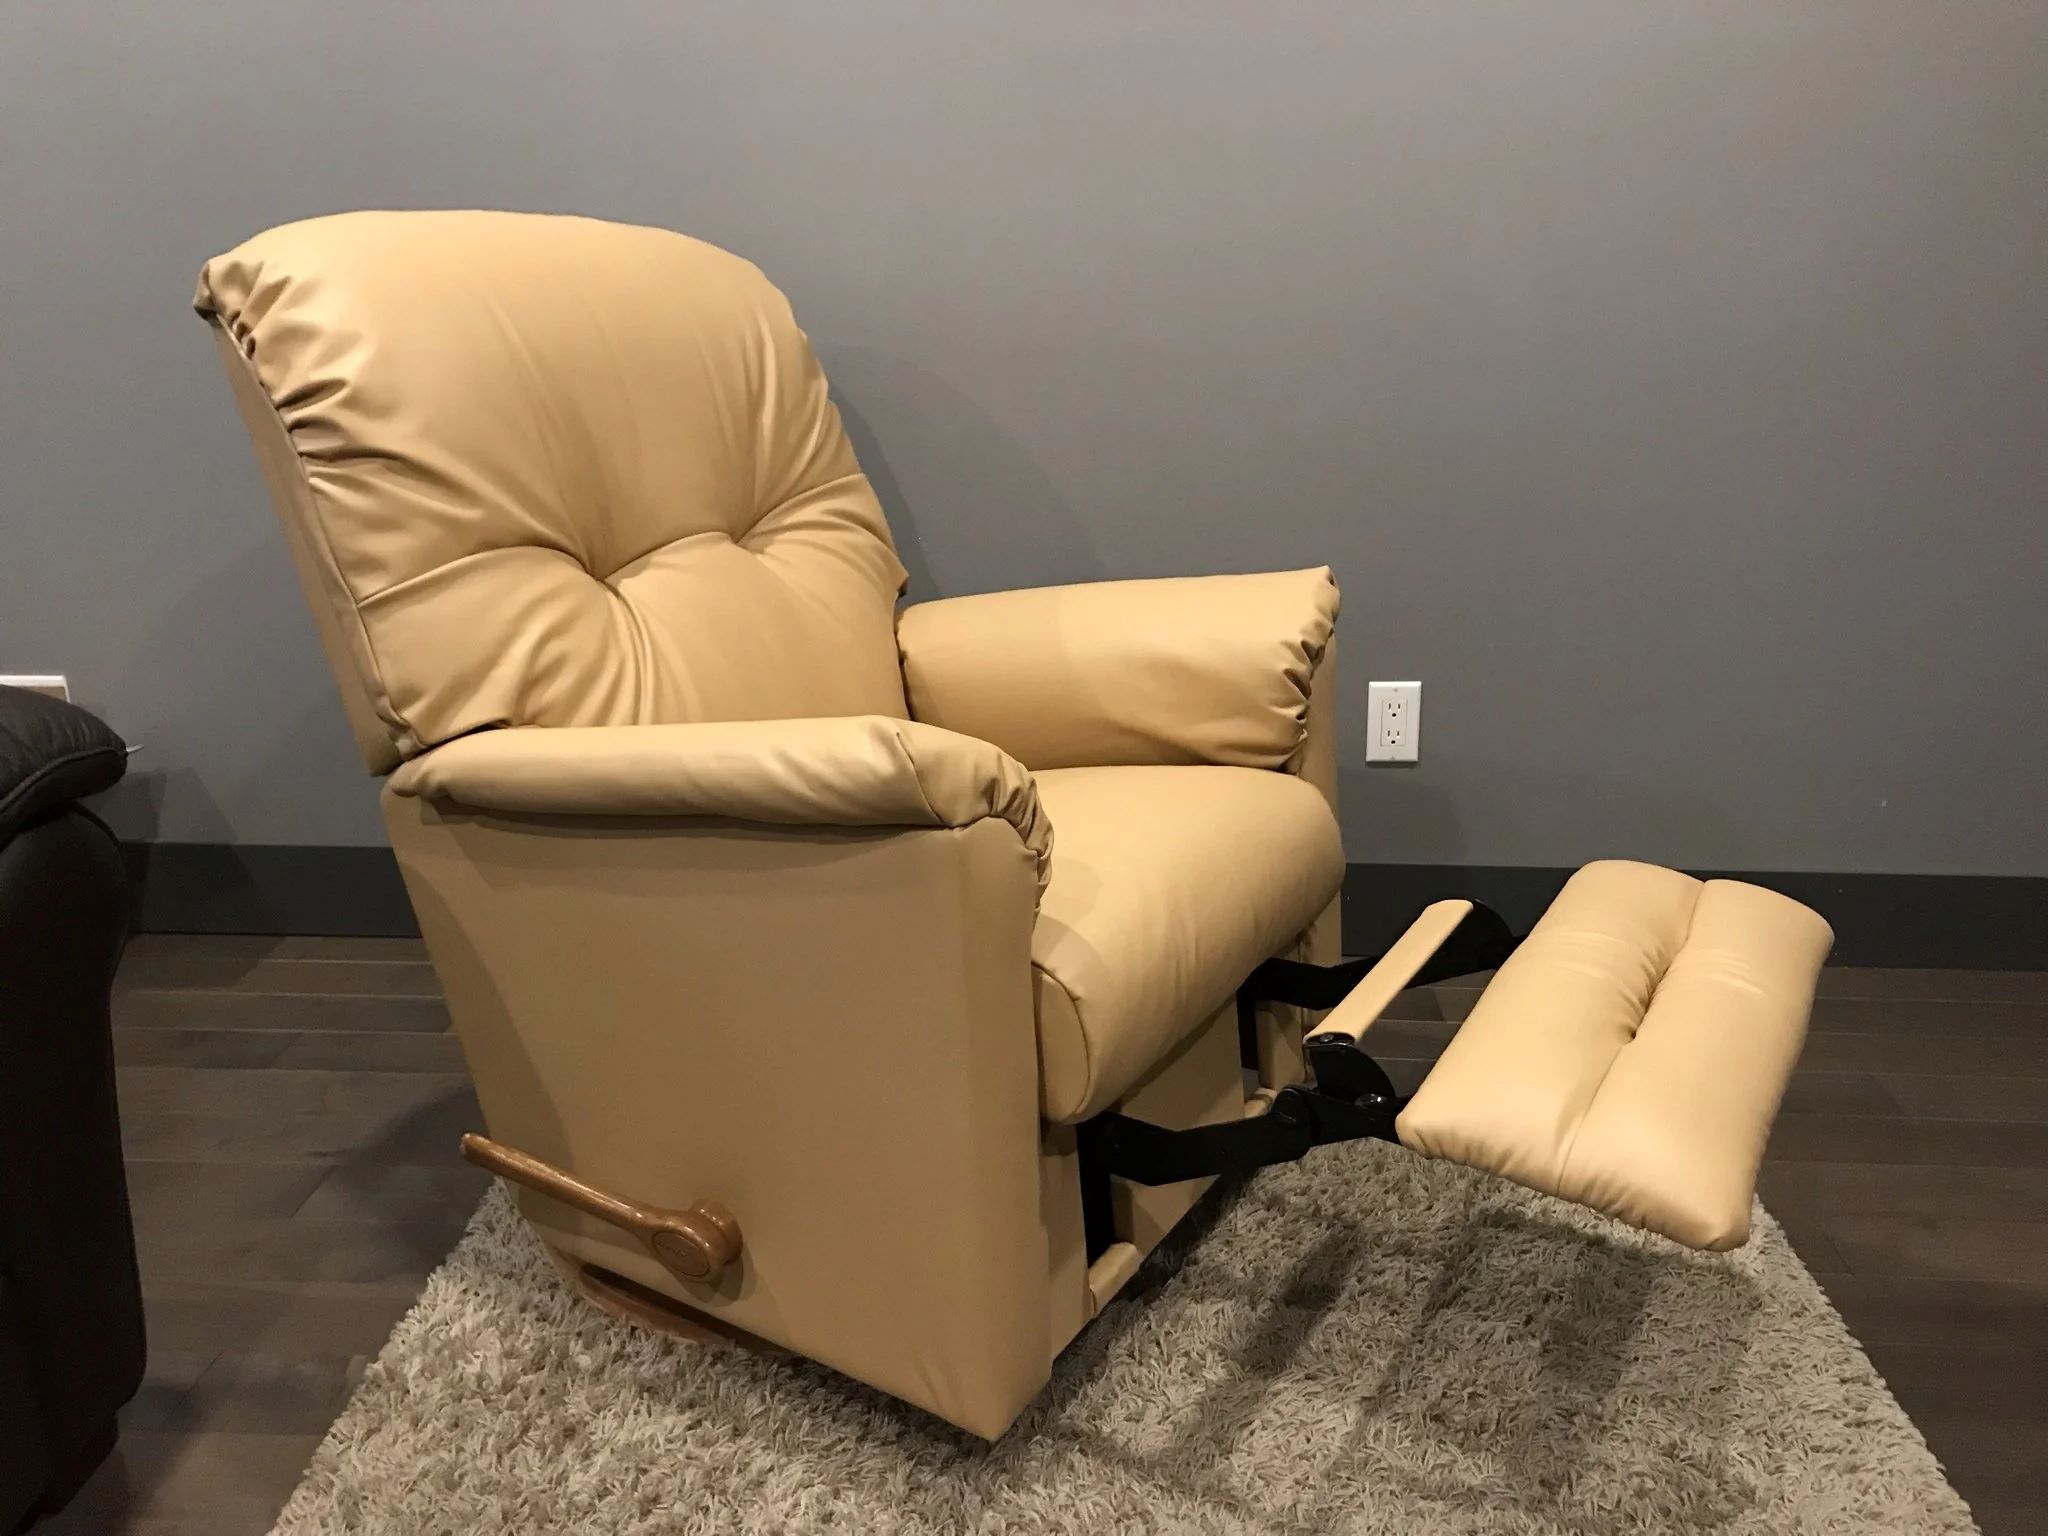
- Step back and admire your reupholstered armchair! You have successfully transformed an old and worn-out piece into a stunning and refreshed furniture item for your living room.
Reassembling the chair is the final step in your reupholstering journey. With your armchair now complete, take a moment to appreciate the hard work and effort you’ve put into bringing new life to this piece of furniture.
Now that you have accomplished the reupholstering process, your armchair is ready to be showcased in your living room. Sit back, relax, and enjoy your newly reupholstered armchair, knowing that it’s a unique and personalized creation!
Congratulations once again on completing your reupholstering project. We hope this guide has been informative and helpful throughout the process. Happy decorating!
Read more: How To Make Armchair Slipcovers
Conclusion
Reupholstering an armchair may seem like a daunting task, but with the right tools, materials, and guidance, it can be a highly rewarding DIY project. By following the step-by-step process outlined in this guide, you have learned how to breathe new life into your old armchair.
From removing the old upholstery to assessing and repairing the frame, measuring and cutting the new fabric, attaching and securing it, adding trim or decorative details, and finally reassembling the chair, you have embarked on a journey of creativity and transformation.
Throughout this process, you’ve experienced the joy of envisioning a new design, working with your hands, and seeing the results of your hard work come to life. Reupholstering an armchair not only allows you to customize and personalize your furniture, but it also helps to reduce waste and gives new purpose to an otherwise discarded piece.
Remember, reupholstering requires patience, attention to detail, and a willingness to learn and adapt. Don’t be afraid to experiment with different fabrics, colors, and decorative elements to create a truly unique and stunning armchair that reflects your personal style.
By reupholstering your armchair, you have not only saved money but also contributed to the sustainability of your home. It’s a small step towards a more eco-friendly approach to interior design, where existing furniture can be revived and cherished for years to come.
So, the next time you come across an old armchair that is begging for a makeover, remember the skills and knowledge you have acquired from this guide. Get your tools ready, unleash your creativity, and let the transformation begin!
Frequently Asked Questions about How To Reupholster An Armchair
Was this page helpful?
At Storables.com, we guarantee accurate and reliable information. Our content, validated by Expert Board Contributors, is crafted following stringent Editorial Policies. We're committed to providing you with well-researched, expert-backed insights for all your informational needs.
0 thoughts on “How To Reupholster An Armchair”