Home>Garden Essentials>How To Collect Cosmos Seeds
Garden Essentials
How To Collect Cosmos Seeds
Modified: October 20, 2024
Learn how to collect cosmos seeds from your garden and save them for future planting. Follow our step-by-step guide to ensure a successful harvest.
(Many of the links in this article redirect to a specific reviewed product. Your purchase of these products through affiliate links helps to generate commission for Storables.com, at no extra cost. Learn more)
Introduction
Gardening enthusiasts understand the incredible joy of collecting and saving seeds from their favorite plants. Not only does it allow them to continue the legacy of their cherished blooms, but it also offers a cost-effective and sustainable way to grow new plants year after year. One such plant that captivates many gardeners is the cosmos.
Cosmos, with its vibrant and delicate flowers, is a popular choice for adding beauty and color to any garden. These annual plants are known for their resilience, low maintenance, and ability to attract pollinators. But did you know that you can collect cosmos seeds to grow a new batch of these stunning flowers in the future?
In this guide, we will explore the art of collecting cosmos seeds and provide you with step-by-step instructions to help you successfully harvest, clean, and store these seeds for future use. Whether you want to expand your cosmos garden or share these seeds with fellow gardeners, we have got you covered.
So, let’s dig in and discover how you can collect cosmos seeds to preserve the beauty of these captivating blooms for seasons to come.
Key Takeaways:
- Collecting cosmos seeds ensures a continuous supply of beautiful flowers for your garden, saves money, and allows you to share seeds with other gardeners, fostering a sense of community and sustainability.
- By following the right timing, tools, and techniques, you can successfully collect, clean, and store cosmos seeds, ensuring their viability for future planting and enjoying the magic of gardening.
Read more: When To Plant Cosmos Seeds
Step 1: Understanding Cosmos Seeds
Before you embark on collecting cosmos seeds, it is important to have a good understanding of what they are and why they are worth collecting. Cosmos seeds are the reproductive structures produced by cosmos plants, allowing them to reproduce and propagate.
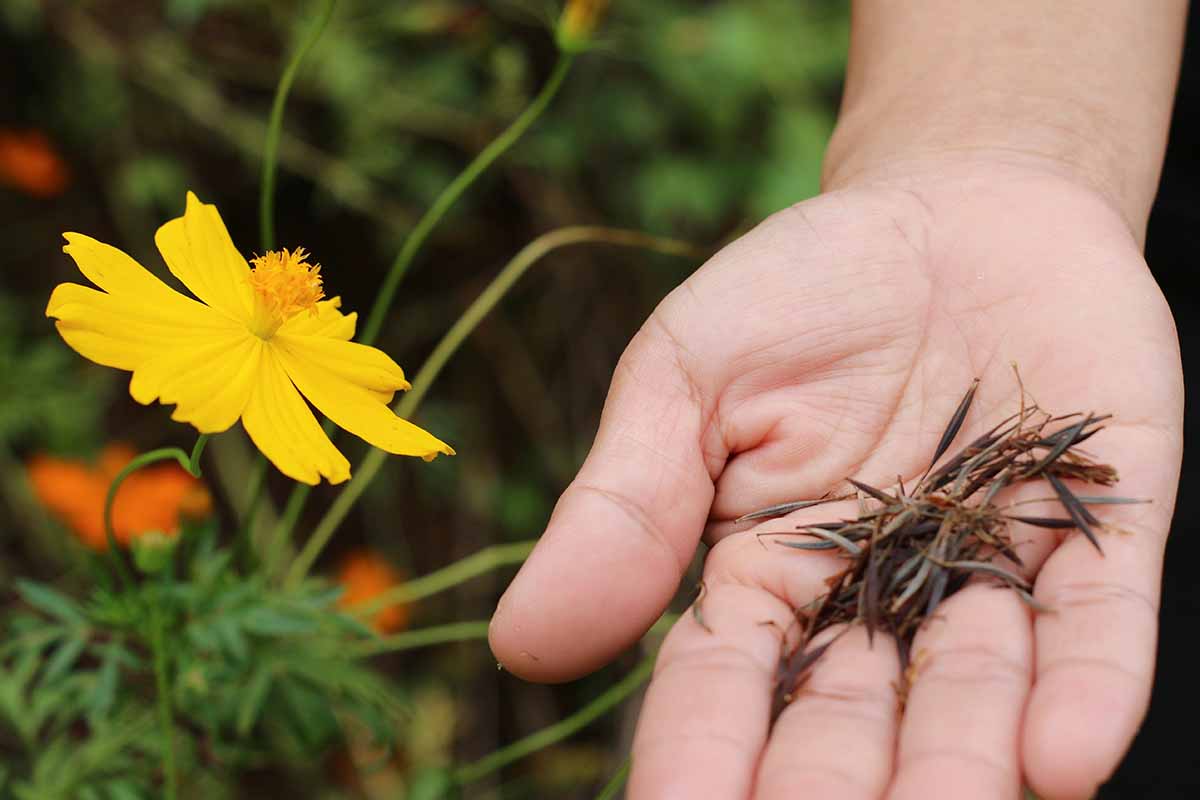
Cosmos plants belong to the Asteraceae family and are native to the Americas. They are popular among gardeners for their beautiful daisy-like flowers that come in a variety of colors, including pink, white, orange, and yellow. The seeds themselves are small, lightweight, and typically dark brown or black in color.
There are several types of cosmos seeds available, each offering unique characteristics and visual appeal. Some of the popular cosmos varieties include:
- Cosmos bipinnatus: This is the most common type of cosmos, featuring finely divided foliage and large, colorful flowers.
- Cosmos sulphureus: Also known as the sulfur cosmos, this variety has vibrant orange and yellow flowers.
- Cosmos atrosanguineus: Commonly known as chocolate cosmos, this variety stands out with its rich burgundy-colored petals and chocolate-like fragrance.
Now that you know about the different types of cosmos seeds, let’s explore why collecting these seeds is beneficial. One of the primary reasons for collecting cosmos seeds is to ensure the sustainability and continuity of your garden. By preserving the seeds, you can regrow your favorite cosmos varieties year after year, saving money and time on purchasing new plants.
Furthermore, collecting cosmos seeds allows you to have a constant supply of seeds that you can share with fellow gardeners, exchange with seed banks, or use for other landscaping projects. It also enables you to experiment with hybridization and produce new variants of cosmos plants with unique characteristics.
Understanding the value and potential of cosmos seeds will motivate you to embark on this rewarding journey of collecting and preserving these seeds. So, let’s move on to the next step and learn about the right time for seed collection.
Step 2: Identifying the Right Time for Seed Collection
Timing is crucial when it comes to collecting cosmos seeds. Harvesting the seeds at the right stage ensures their optimal viability, increasing the chances of successful germination and future growth. So, how do you determine when the seeds are ready for collection?
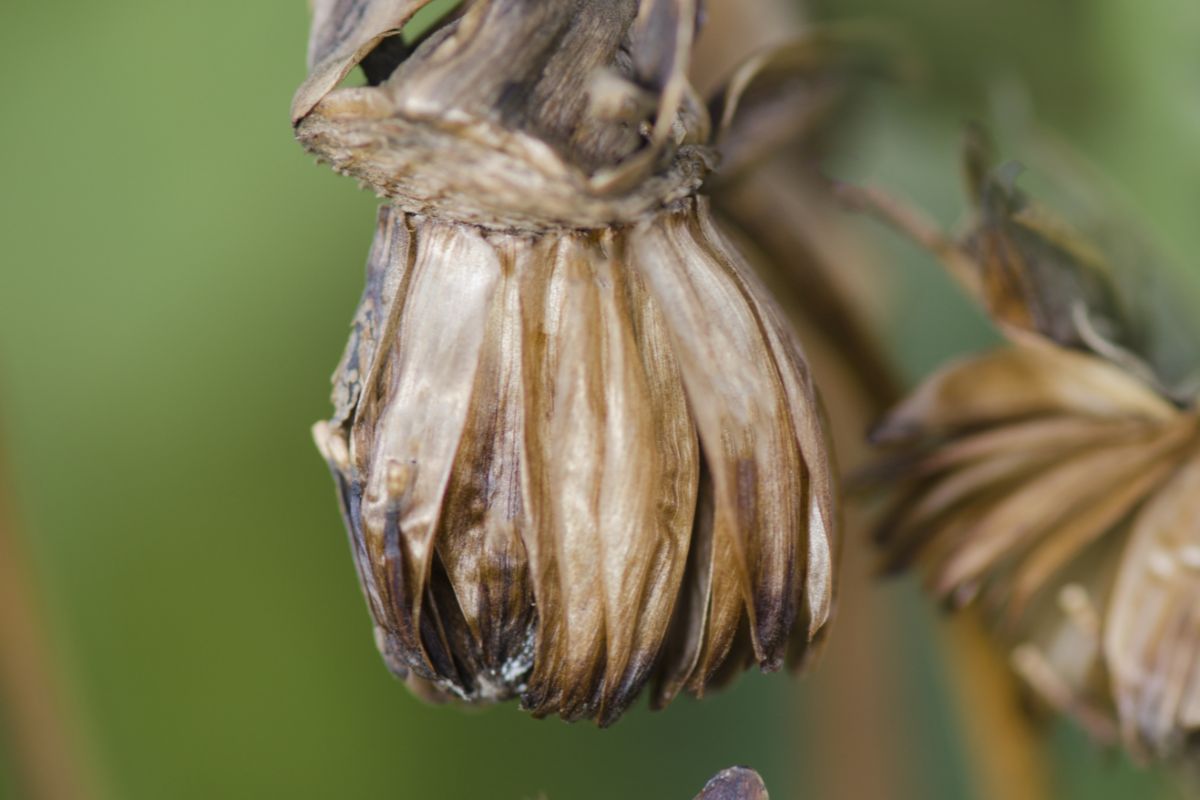
One of the signs of seed readiness is the drying and browning of the flower petals. As the cosmos flowers mature, their petals start to wither and turn brown. This is an indication that the seeds are nearing maturity. You can gently touch the flower head, and if it feels dry and papery, it’s a good indication that the seeds are nearly ripe.
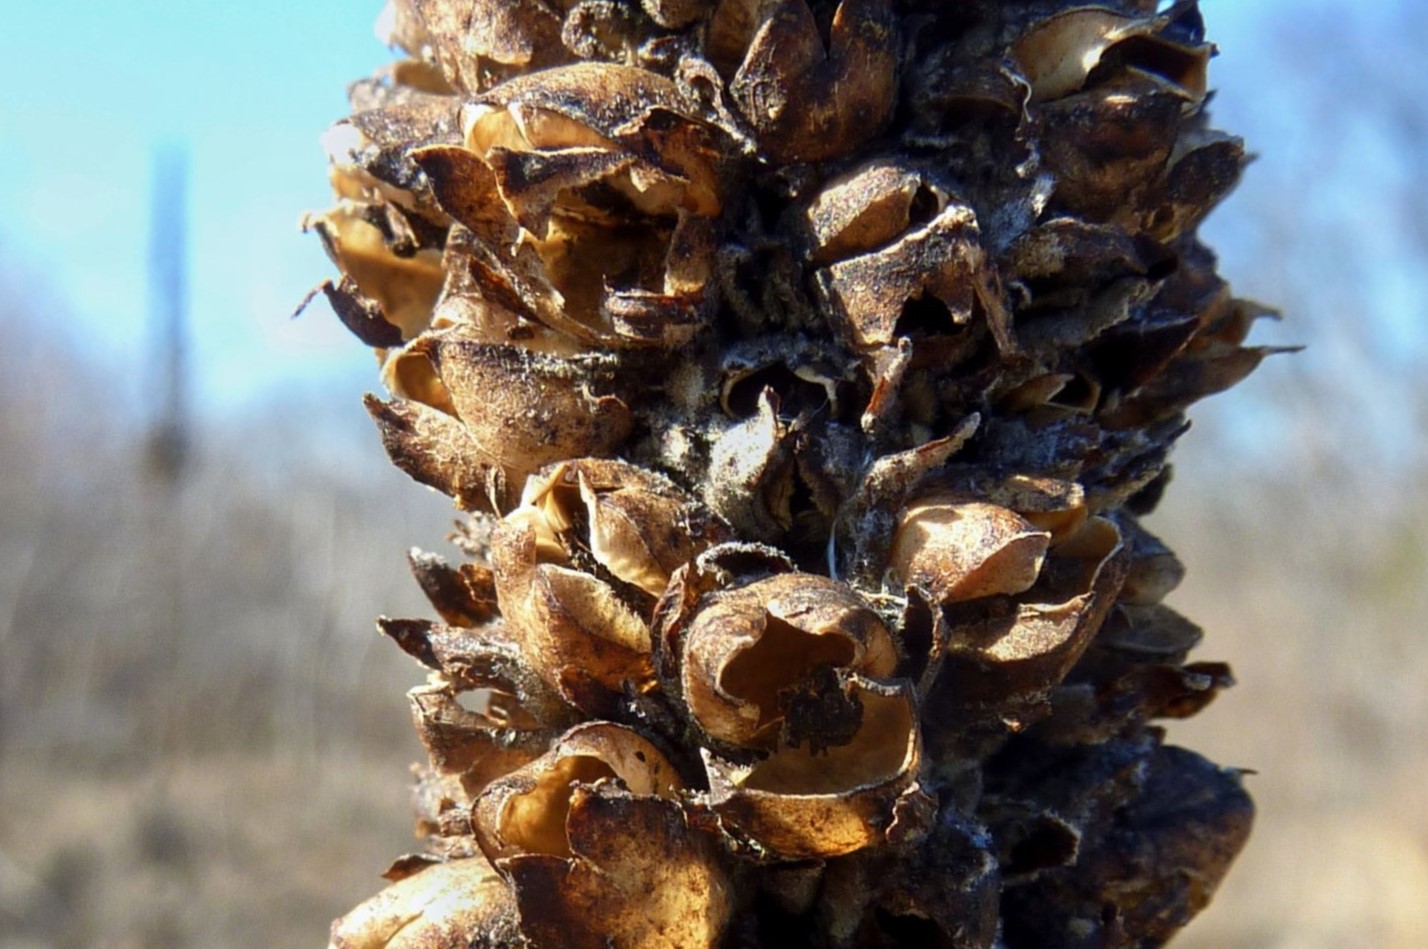
Another way to identify seed maturity is by looking at the seed head. The center of the flower, where the seeds are located, will turn brown and dry. The seeds themselves should be dark brown or black and hard to the touch.
The best time to collect cosmos seeds is when the seed heads are fully dry but have not yet cracked open or dispersed the seeds. It is important to collect the seeds before they are exposed to the elements and risk being lost or damaged.
In terms of the season, cosmos flowers typically bloom throughout the summer and into the early fall months. As the plants continue to flower, new seed heads will form, allowing you to collect seeds at different stages. Keep an eye on the flowers and seed heads as the season progresses, and collect the seeds when they are ready.
By paying attention to these signs of seed readiness and selecting the right time for collection, you can ensure the highest quality seeds for future planting. Now that you know when to collect the seeds, let’s move on to the next step, where we will explore the tools and equipment you need for an effective seed collection process.
Step 3: Tools and Equipment Required
When it comes to collecting cosmos seeds, having the right tools and equipment on hand ensures a smooth and efficient process. Here are the essential tools you’ll need for successful seed collection:
- Garden Shears or Pruners: To harvest the seed heads, a good pair of sharp garden shears or pruners is essential. They allow you to cut the stems cleanly without damaging the seeds.
- Paper Bags or Envelopes: These will be used to hold the seed heads and collect the seeds. Opt for breathable paper bags or envelopes to prevent moisture buildup and mold formation.
- Gloves: To protect your hands from any potential prickly stems or debris, wear a pair of sturdy gardening gloves.
- Marker or Label: It is important to label your seed collection, indicating the date and the cosmos variety. This will help you keep track of the seeds and ensure proper identification in the future.
- Storage Containers: Once the seeds are collected and cleaned, you’ll need suitable containers for long-term storage. Choose small airtight containers such as glass jars or plastic seed storage containers.
As you embark on the seed collection process, it’s important to take some safety precautions to ensure your well-being:
- Wear protective clothing to shield yourself from skin irritations or allergens.
- Avoid collecting seeds during wet weather conditions, as moisture can affect the quality of the seeds.
- Be cautious of sharp edges when handling pruners or shears, and keep them away from children or pets.
Equipped with the necessary tools and safety precautions, you are now ready to dive into harvesting cosmos seeds. In the next step, we will walk you through the process of harvesting the seeds from the cosmos plants.
Step 4: Harvesting Cosmos Seeds
Harvesting cosmos seeds is an exciting and rewarding process. By following these steps, you’ll be able to collect mature seeds and ensure a successful harvest:
1. Determine Seed Maturity: Before you start harvesting, make sure the seeds are mature and ready for collection. As mentioned earlier, look for dried flower petals and a brown, dry center in the flower head. The seeds should be dark brown or black and hard to the touch.
2. Harvesting Techniques: To harvest the cosmos seeds, use your garden shears or pruners to cut the seed heads from the plant. Aim to cut just below the spent flower head, leaving a small stem attached to the seed head. This stem will make it easier to handle and process the seeds later on.
3. Removing Seeds: Once you have harvested the seed heads, it’s time to remove the seeds. You can do this by gently rubbing the dry seed heads between your fingers or by using your hands to crush the seed heads and release the seeds. Alternatively, you can place the seed heads in a paper bag or envelope and gently shake them to dislodge the seeds. Ensure that you work over a clean, dry surface to collect any seeds that fall out during the process.
Take your time when removing the seeds to ensure that you retrieve as many as possible. It is normal for a small amount of debris, such as dried petals or flower parts, to be mixed in with the seeds. These can be removed during the cleaning process in the next step.
Remember to handle the seed heads and seeds with care to avoid damaging them, as the seeds are delicate and the key to future growth. With the seeds removed and collected, it’s time to move on to the next step: cleaning and preparing the seeds for storage.
To collect cosmos seeds, wait for the flower to dry out and the seeds to turn brown. Then, gently shake the seed heads into a paper bag to collect the seeds. Store in a cool, dry place until ready to plant.
Read more: How Deep To Plant Cosmos Seeds
Step 5: Cleaning and Preparing the Seeds
After harvesting the cosmos seeds, it’s important to clean and prepare them for storage. This step ensures that the seeds are free from debris, moisture, and any potential contaminants. Here’s how you can clean and prepare your seeds:
1. Removing Debris and Unwanted Material: Start by separating the seeds from any debris that may have been collected during the harvesting process. Gently blow on the seeds or use a fine-mesh sieve to remove dried petals, stems, or other unwanted materials. Be careful not to blow too hard and risk losing precious seeds.
2. Drying Methods: Next, you’ll need to dry the cleaned seeds thoroughly. Spread the seeds out in a single layer on a clean, dry surface. Avoid using paper towels or other materials that might stick to the seeds. Place the seeds in a well-ventilated area away from direct sunlight and excessive humidity. Allow them to air dry for about a week, or until the seeds are completely dry and brittle.
3. Storage Options: Once the seeds are dry, it’s time to prepare them for storage. You have several options for storing cosmos seeds:
- Seed Envelopes: You can store the seeds in small paper envelopes that are labeled with the date and variety of cosmos. Place the envelopes in a sealed glass jar or airtight container to protect them from moisture and pests.
- Seed Storage Containers: Alternatively, you can use plastic or glass seed storage containers with airtight lids. These containers provide added protection against moisture and pests, ensuring the longevity of the seeds.
- Seed Packets: If you plan to share or exchange seeds, consider creating homemade seed packets. Label each packet with the appropriate information and store them in a cool, dry place.
Remember to store the seeds in a cool, dry location away from direct sunlight and fluctuating temperatures. This will help maintain their viability for years to come.
By cleaning and properly preparing your cosmos seeds, you ensure their quality and increase the chances of successful germination when you’re ready to plant them. With the seeds prepared for storage, let’s move on to the next step, where we’ll explore the best practices for storing your cosmos seeds.
Step 6: Storing Cosmos Seeds for Future Use
Proper storage is key to preserving the viability and longevity of your cosmos seeds. Follow these steps to ensure your seeds remain viable and ready for future planting:
1. Choosing the Right Storage Containers: Selecting the right storage containers is crucial for maintaining the quality of your cosmos seeds. Opt for small airtight containers such as glass jars or plastic seed storage containers. These containers provide a protective barrier against moisture and pests, keeping the seeds in optimal conditions.
2. Seed Viability and Longevity: Cosmos seeds can remain viable for several years if stored properly. However, their germination rates may decrease over time. It is generally recommended to use cosmos seeds within 2-3 years for best results. To ensure maximum viability, store your seeds in cool, dry, and dark conditions.
3. Creating a Labeling System: Properly labeling your cosmos seeds is essential for easy identification and organization. Create a labeling system that includes the variety and date of collection. This helps you keep track of the seeds’ age and allows you to select the freshest seeds for planting in the future. You can use adhesive labels, small tags, or even permanent markers directly on the seed containers.
By storing your cosmos seeds in suitable containers, maintaining their viability, and establishing a clear labeling system, you can efficiently preserve and utilize your seed collection for years to come.
Now that you have successfully collected and stored your cosmos seeds, let’s move on to the final step, where we will provide you with some additional tips and tricks for successful seed collection.
Step 7: Tips and Tricks for Successful Seed Collection
To ensure a successful seed collection process and maximize your seed yield, follow these helpful tips and tricks:
1. Maximizing Seed Yield:
- Allow some flower heads to remain on the plant until they naturally dry and the seeds are fully mature. This will give you a higher chance of collecting fully developed and viable seeds.
- Collect seeds from multiple plants to increase genetic diversity and improve the overall health and resilience of your cosmos population.
- Consider staggering your planting and harvesting times for cosmos plants to ensure a continuous supply of seeds throughout the season.
2. Preventing Cross-pollination:
- If you are growing multiple varieties of cosmos and want to preserve their purity, consider isolating the plants through spacing or physical barriers to prevent cross-pollination.
- Hand pollination can be used to control cross-pollination and ensure specific traits are preserved. Use a small paintbrush or cotton swab to transfer pollen between flowers.
3. Common Mistakes to Avoid:
- Avoid harvesting seeds too early. Premature seeds may not be fully developed and may have lower germination rates.
- Ensure your tools and hands are clean before collecting seeds to prevent the spread of diseases or pests.
- Do not expose the collected seeds to direct sunlight or excessive heat during the drying process, as this may cause damage or loss of viability.
By following these tips and avoiding common mistakes, you can increase your seed yield, preserve the purity of specific varieties, and ensure the best possible germination rates for your cosmos seeds.
Congratulations! You have now completed the steps for successful cosmos seed collection. With your stored seeds, you can continue to enjoy the beauty and vibrancy of cosmos flowers in your garden for years to come.
If you want to further explore the world of cosmos or delve into other gardening topics, check out the additional resources listed below for more information and inspiration.
Happy gardening!
Conclusion
Congratulations on successfully collecting and storing your cosmos seeds! By mastering the art of seed collection, you have opened up a world of possibilities for your garden. Not only have you ensured the sustainability and continuity of your favorite cosmos varieties, but you have also gained the ability to share, exchange, and experiment with different seed varieties.
Throughout this guide, we have explored the steps involved in collecting cosmos seeds, from understanding their nature and identifying the right time for collection, to harvesting, cleaning, and storing the seeds. Each step plays a crucial role in preserving seed viability and ensuring successful germination in the future.
Remember to choose the appropriate tools, follow safety precautions, and pay attention to signs of seed readiness. Cleaning and drying the seeds properly, using suitable storage containers, and creating a labeling system will greatly contribute to the longevity and organization of your seed collection.
Additionally, we provided you with tips on maximizing seed yield, preventing cross-pollination, and avoiding common mistakes. These insights will help you master the art of seed collection and improve your overall gardening experience.
Now that you have a collection of carefully harvested and stored cosmos seeds, you can look forward to the joy of planting and nurturing these beautiful flowers in your garden season after season. Be sure to share the rewards of your hard work with fellow gardeners, seed banks, or gardening enthusiasts who will appreciate the abundance of cosmos seeds you have saved.
Remember, the journey of collecting and preserving seeds is an ongoing one. With each passing season, you will continue to learn and refine your techniques, expanding your seed collection and deepening your love for gardening.
Thank you for joining us on this cosmos seed collection adventure. We hope this guide has inspired and empowered you to dive further into the world of seeds and discover the magic and beauty that lies within.
Happy planting!
Read more: When Do Cosmos Germinate
Additional Resources
If you’re eager to dive deeper into the world of gardening and seed collection, we recommend exploring the following resources:
- Books: Look for gardening books and seed saving guides that provide comprehensive information on collecting and storing seeds. Some popular titles include “The Seed Garden: The Art and Practice of Seed Saving” by Lee Buttala and Shanyn Siegel, and “Seed to Seed: Seed Saving and Growing Techniques for Vegetable Gardeners” by Suzanne Ashworth.
- Online Gardening Communities: Join online gardening communities where you can engage with fellow gardeners, share experiences, and exchange seeds. Websites like Gardening Know How, GardenWeb, and The Seed Exchange Forum provide platforms for connecting with like-minded individuals.
- Seed Organizations and Libraries: Explore seed organizations and libraries that specialize in preserving and sharing heirloom and rare seed varieties. These organizations often offer educational resources, seed exchanges, and opportunities to connect with other passionate seed savers. The Seed Savers Exchange and the International Seed Library Alliance are great starting points.
- Botanical Gardens and Arboretums: Visit local botanical gardens and arboretums that showcase a wide variety of plants and often have seed-saving programs or workshops. These gardens can provide valuable insights and opportunities for hands-on learning.
- University Extension Services: Check with your local university’s extension services for resources and workshops on seed saving and gardening. They often offer expert advice, research-based information, and workshops tailored to your specific region.
Remember, the journey of seed collection is a continuous learning process. Embrace the knowledge and experiences that come with it, and don’t be afraid to experiment and try new techniques. Each seed you collect and each garden you nurture contribute to the beauty and biodiversity of our natural world.
Happy seed collecting and happy gardening!
Now that you're well-versed in collecting cosmos seeds, why not enhance your gardening prowess further? If you're looking to spruce up your garden's boundaries, our guide on creative garden fence ideas offers plenty of inspiration. For those curious about starting a new project, understanding the cost of various flower seeds can help in planning and budgeting your garden's next colorful additions. Both articles are packed with useful tips to help you make informed decisions and keep your garden looking its best.
Frequently Asked Questions about How To Collect Cosmos Seeds
Was this page helpful?
At Storables.com, we guarantee accurate and reliable information. Our content, validated by Expert Board Contributors, is crafted following stringent Editorial Policies. We're committed to providing you with well-researched, expert-backed insights for all your informational needs.


0 thoughts on “How To Collect Cosmos Seeds”