Home>Garden Essentials>How To Fix A Water Fountain

Garden Essentials
How To Fix A Water Fountain
Modified: March 16, 2024
Learn how to fix your garden water fountain with our step-by-step guide. Discover simple solutions to common problems and enjoy a fully functioning water feature in your outdoor space.
(Many of the links in this article redirect to a specific reviewed product. Your purchase of these products through affiliate links helps to generate commission for Storables.com, at no extra cost. Learn more)
Introduction
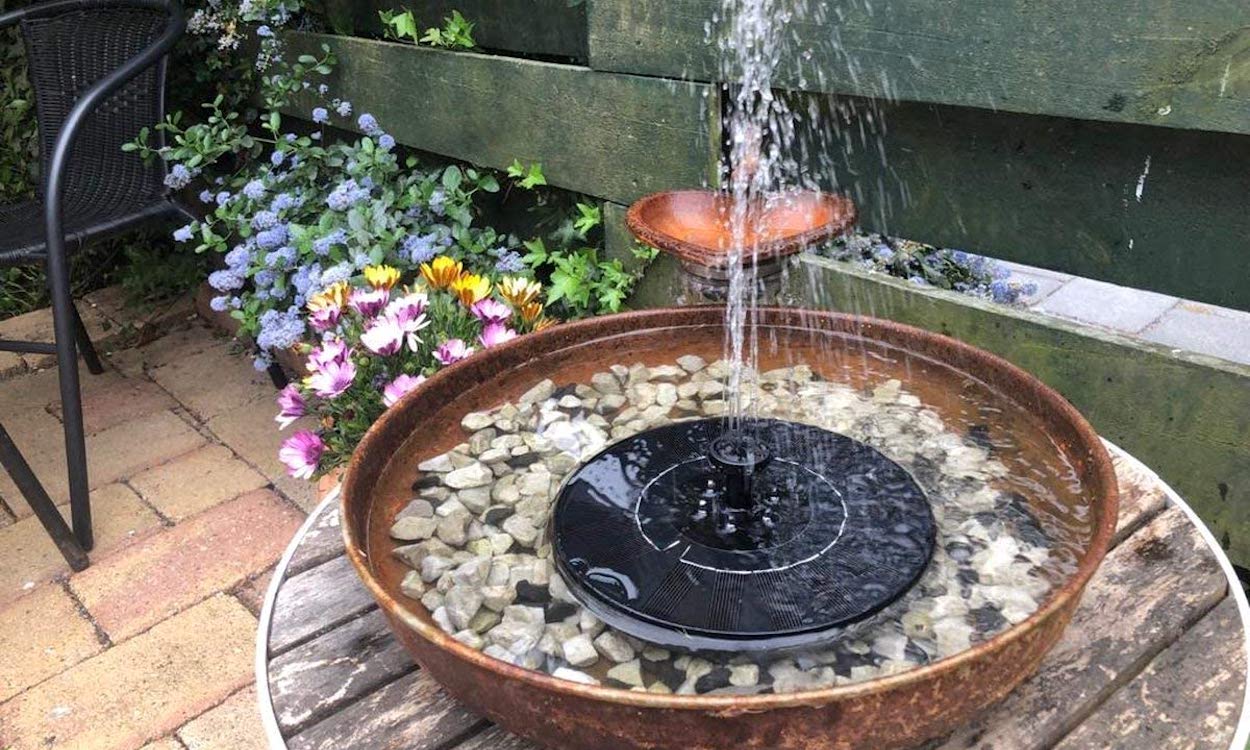
Welcome to our comprehensive guide on how to fix a water fountain. A water fountain can be a beautiful addition to any garden or outdoor space, providing a soothing and relaxing ambiance. However, like any mechanical device, fountains can encounter issues over time. Whether it’s a malfunctioning pump, clogged water flow, or electrical problems, it’s essential to know how to troubleshoot and fix these issues to keep your fountain running smoothly.
In this article, we will walk you through the step-by-step process of diagnosing and resolving common problems with water fountains. We will provide safety precautions, a list of tools and materials you’ll need, and detailed instructions on how to tackle each issue. So, let’s not waste any more time and dive right into the world of water fountain troubleshooting!
Key Takeaways:
- Keep your water fountain running smoothly by following safety precautions, gathering essential tools, and diagnosing common issues like water flow, pump malfunctions, and electrical problems. Regular cleaning and maintenance are key to a beautiful and functional fountain.
- Troubleshoot and fix your water fountain step-by-step by turning off the water supply, cleaning the fountain, checking and replacing the pump, inspecting and repairing the wiring, and reassembling and testing the fountain. Enjoy the soothing ambiance of a fully functional fountain in your garden!
Read more: What Is A Water Fountain
Safety Precautions
Before you begin working on your water fountain, it’s crucial to prioritize your safety. Here are some essential safety precautions and guidelines to follow:
- Turn off the power: Before you start any maintenance or repair work, ensure that the fountain’s power supply is turned off. This will prevent any electrical hazards and reduce the risk of electrical shock.
- Wear protective gear: It’s advisable to wear protective gloves and safety glasses to protect your hands and eyes during the process. Additionally, if you’re working with any chemical cleaners, make sure to wear appropriate respiratory and skin protection.
- Use stable footing: When working on your fountain, make sure to have a stable surface to stand on. Avoid working on unstable or uneven ground to prevent accidents or falls.
- Be mindful of water: Remember that you’ll be dealing with water during the repair process. Take necessary precautions to avoid slipping on wet surfaces and keep electrical connections away from water sources.
- Refer to the manufacturer’s guidelines: Every water fountain is unique, so it’s essential to refer to the manufacturer’s guidelines and specific instructions for your particular model. These guidelines will provide you with important safety information and maintenance tips.
By following these safety precautions, you can ensure a secure working environment and minimize the risk of accidents or injuries while fixing your water fountain.
Tools and Materials Needed
Before you begin fixing your water fountain, it’s important to gather the necessary tools and materials. Having everything prepared beforehand will save you time and avoid interruptions during the repair process. Here’s a list of essential tools and materials you may need:
Tools:
- Screwdriver set (Phillips and flathead)
- Adjustable wrench
- Pliers
- Wire cutters/strippers
- Multimeter
- Bucket or basin
- Soft-bristle brush
- Tweezers
Materials:
- Cleaning solution or vinegar
- Distilled water
- Pump replacement (if necessary)
- Replacement wiring (if necessary)
- Electrical tape
- Thread seal tape
Note that the specific tools and materials required may vary depending on the type and complexity of your water fountain. It’s always a good idea to refer to the manufacturer’s guidelines or consult a professional if you’re unsure about any specific requirements.
By having these tools and materials on hand, you’ll be well-prepared to tackle any common issues that may arise during the repair process. Let’s move on to the step-by-step guide on fixing your water fountain!
Read more: How To Seal A Water Fountain
Step 1: Diagnose the Problem
Before you can fix your water fountain, it’s important to identify the underlying issue. By diagnosing the problem accurately, you can determine the appropriate solution and avoid unnecessary repairs. Here are some common problems you may encounter with your water fountain:
No Water Flow
If your water fountain isn’t producing any water flow, there could be a few possible reasons:
- Check if the water supply is turned on and that the water level in the fountain is adequate.
- Inspect the pump to ensure it’s functioning correctly. Listen for any unusual noises or vibrations.
- Examine the fountain’s plumbing connections for signs of blockages or leaks.
Weak Water Flow
If the water flow from your fountain is weak, consider the following troubleshooting steps:
- Inspect the pump and clean it if it’s clogged with debris or mineral deposits.
- Check the tubing and nozzles for any blockages. Clear them using a soft brush or tweezers.
- Ensure the water supply valve is fully open and not restricted.
Electrical Issues
If your water fountain is not turning on or experiencing electrical problems:
- Check the power source and ensure that the fountain is correctly plugged in.
- Inspect the electrical connections for loose wires or damaged components.
- Utilize a multimeter to test the power supply and determine if it’s functioning properly.
By carefully diagnosing the problem, you’ll have a clearer understanding of what needs to be fixed or replaced in your water fountain. Once you’ve identified the issue, you can proceed to the next step in the repair process.
Read more: How To Install A Water Fountain
Step 2: Turn off the Water Supply
Before you start working on your water fountain, it’s crucial to turn off the water supply to prevent any water leakage or damage. Here’s how you can safely turn off the water:
- Locate the water supply valve or shut-off valve connected to your fountain. This is usually located near the base of the fountain, underground, or in a nearby utility area.
- Turn the valve clockwise to shut off the water flow. This will stop the water from flowing into your fountain.
- After turning off the water supply, run the fountain for a few seconds to discharge any remaining water in the system.
Turning off the water supply during the repair process will help prevent potential water damage and ensure a dry working environment. It will also make it easier to clean and fix any issues without water interference.
Once you’ve successfully shut off the water supply, you can move on to the next steps in repairing your water fountain.
Step 3: Clean the Fountain
Cleaning your water fountain is an essential step in maintaining its functionality and aesthetic appeal. Over time, debris, algae, and mineral deposits can accumulate, affecting the water flow and overall performance. Here’s how you can effectively clean your fountain:
- Empty the fountain: Start by draining the water from the fountain. Use a bucket or basin to collect the water and dispose of it properly.
- Remove loose debris: Take out any loose leaves, sticks, or other debris that may have accumulated in the fountain. Use a soft-bristle brush or tweezers to remove small debris that can’t be easily picked up.
- Clean the fountain surface: Mix a cleaning solution of mild soap or vinegar with water. Gently scrub the surface of the fountain, removing any dirt or algae buildup. Rinse thoroughly with clean water.
- Unclog water passages: Inspect the fountain’s water passages, such as tubes, nozzles, and jets. If you notice any blockages, use a soft brush or tweezers to clear them. Ensure that the pathways are completely clear for proper water flow.
- Address mineral deposits: If you have hard water, mineral deposits may accumulate on the surfaces and components of the fountain. Soak these parts in a mixture of white vinegar and water, then scrub away the deposits using a brush. Rinse with clean water afterward.
- Allow the fountain to dry: After cleaning, let the fountain dry completely before moving on to the next steps. This will help prevent any issues related to water damage or electrical safety.
Regularly cleaning your water fountain will not only enhance its appearance but also ensure optimal performance. By removing debris and addressing mineral deposits, you can help prolong the lifespan of your fountain and maintain a clean and inviting water feature.
Once you’ve finished cleaning the fountain, you can proceed to the next step in fixing any specific issues that may require further attention.
Step 4: Check and Replace the Pump
The pump is a crucial component of your water fountain, responsible for the circulation and movement of water. If your fountain is experiencing issues with water flow or not working at all, the pump may be the culprit. Here’s how you can check and potentially replace the pump:
- Disconnect the power: Before inspecting or replacing the pump, make sure to disconnect the power supply to the fountain for safety.
- Access the pump: Depending on your fountain’s design, you may need to remove the decorative elements or housing to access the pump. Refer to the manufacturer’s instructions for guidance.
- Inspect the pump: Once you have access to the pump, inspect it for any visible signs of damage or wear. Look for loose connections, cracks, or excessive debris that may be affecting its performance.
- Clean the pump: If the pump is clogged with debris or mineral deposits, clean it using a soft brush, vinegar, or a designated pump cleaning solution. Ensure that all the pathways and impellers are clear and free from obstruction.
- Test the pump: Reconnect the power supply to the fountain and turn it on to observe the pump’s performance. Listen for any strange noises, vibrations, or irregular water flow patterns. If the pump is still not functioning properly, it may need to be replaced.
- Replace the pump: If the pump is beyond repair or unable to provide sufficient water flow, you’ll need to replace it with a new one. Refer to the manufacturer’s guidelines or consult with a professional to ensure you select the right pump for your fountain.
- Install the new pump: Follow the manufacturer’s instructions for installing the new pump. Make sure to secure all connections and ensure proper alignment.
By checking and potentially replacing the pump, you can restore proper water circulation and address issues related to water flow. Remember to always follow safety precautions and refer to the manufacturer’s guidelines to achieve the best results.
Once you’ve checked or replaced the pump, it’s time to move on to the next step in troubleshooting your water fountain.
Step 5: Inspect and Repair the Wiring
Electrical issues can often be the cause of a malfunctioning water fountain. If your fountain is not turning on or experiencing intermittent power, it’s important to inspect and potentially repair the wiring. Here’s how you can go about it:
- Disconnect the power: Before working with any electrical components, ensure that the power supply to the fountain is turned off and disconnected.
- Access the wiring: Depending on the design of your fountain, you may need to remove decorative elements or panels to access the wiring. Refer to the manufacturer’s instructions for guidance.
- Inspect the wiring: Carefully examine the wiring for any visible damage, such as frayed or exposed wires, loose connections, or burned-out components. Take note of any areas that require repair or replacement.
- Repair or replace wiring: If you notice any damaged wiring or connections, you’ll need to repair or replace them. Use wire cutters/strippers to remove any damaged sections of wire, and splice in new wire where necessary. Ensure that the connections are properly insulated using electrical tape or heat shrink tubing.
- Test the connections: Once you’ve repaired or replaced the wiring, reconnect the power supply and test the connections. Be cautious and observant, checking for any signs of overheating, sparks, or improper functionality.
- Secure the wiring: After confirming that the wiring is working properly, secure it in place using zip ties or clips to prevent any accidental disconnections or entanglements.
It’s important to note that if you’re not comfortable working with electrical components or if the wiring damage is extensive, it’s best to seek the assistance of a professional electrician.
By inspecting and repairing the wiring, you can eliminate electrical issues and ensure that your water fountain receives the necessary power for proper functioning. Remember to always prioritize safety and follow electrical guidelines while working with wiring.
Once you’ve completed the wiring inspection and any necessary repairs, you can proceed to the final step in fixing your water fountain.
Regularly clean and remove debris from the fountain pump and filter to prevent clogging and ensure proper water flow.
Read more: When Was The Water Fountain Invented
Step 6: Reassemble and Test the Fountain
After troubleshooting and fixing specific issues with your water fountain, it’s time to reassemble the components and test its functionality. Here are the final steps to reassembling and testing your fountain:
- Reattach any removed parts: If you had to remove any decorative elements or housing during the repair process, carefully reattach them to the fountain. Ensure that all connections are secure and aligned correctly.
- Turn on the water supply: Once you’ve reassembled the fountain, turn on the water supply. Check for any leaks or unusual water flow patterns. Make any necessary adjustments to ensure proper water circulation.
- Reconnect the power: After confirming that the fountain is functioning properly with the water supply, reconnect the power supply. Double-check that all electrical connections are secure and insulated.
- Test the fountain: Switch on the power and observe the fountain in operation. Verify that the water flow is consistent and at the desired intensity. Listen for any unusual noises or vibrations, which may indicate further issues.
- Monitor the fountain: Allow the fountain to run for a sufficient amount of time to ensure that it remains in proper working order. Keep an eye out for any recurring problems or signs of malfunction.
- Perform regular maintenance: To prevent future issues, establish a routine maintenance schedule for your water fountain. This may include cleaning the fountain regularly, checking the pump and wiring, and addressing any necessary repairs promptly.
By following these steps, you can ensure that your water fountain is reassembled correctly and functioning as intended. Regular maintenance and monitoring will help prolong the lifespan of your fountain and ensure that it continues to enhance the beauty of your garden.
Remember to consult the manufacturer’s guidelines and seek professional assistance if you encounter any difficulties during the reassembly or testing process.
Congratulations, you have successfully fixed and reassembled your water fountain! Enjoy the soothing sounds and visual appeal of your fully functional fountain in your garden or outdoor space.
Conclusion
Fixing a water fountain may seem like a daunting task, but with the right knowledge and steps, it is a manageable and rewarding endeavor. By following the troubleshooting process outlined in this guide, you can diagnose and resolve common issues that may arise, such as water flow problems, pump malfunctions, and electrical issues.
Throughout the repair process, it’s crucial to prioritize safety by turning off the power, wearing protective gear, and following manufacturer’s guidelines. Additionally, gathering the necessary tools and materials beforehand will ensure a smooth repair experience.
Remember that regular cleaning and maintenance are essential for the longevity and optimal performance of your water fountain. By keeping it free from debris, regularly checking the pump, and inspecting the wiring, you can prevent issues from arising and address them promptly if they do occur.
Upon reassembling and testing your fountain, make sure to monitor its operation and perform routine maintenance to keep it in top shape. By doing so, you can continue enjoying the soothing sights and sounds of your water fountain in your garden or outdoor space.
By following this comprehensive guide and utilizing your newfound knowledge, you have the confidence and ability to fix and maintain your water fountain, enhancing the beauty and tranquility of your garden.
Happy troubleshooting and enjoy the serenity of your fully functional water fountain!
Frequently Asked Questions about How To Fix A Water Fountain
Was this page helpful?
At Storables.com, we guarantee accurate and reliable information. Our content, validated by Expert Board Contributors, is crafted following stringent Editorial Policies. We're committed to providing you with well-researched, expert-backed insights for all your informational needs.


0 thoughts on “How To Fix A Water Fountain”