Home>Garden Essentials>How To Install A Water Fountain
Garden Essentials
How To Install A Water Fountain
Modified: September 2, 2024
Learn how to install a beautiful water fountain in your garden and enhance the tranquility and beauty of your outdoor space.
(Many of the links in this article redirect to a specific reviewed product. Your purchase of these products through affiliate links helps to generate commission for Storables.com, at no extra cost. Learn more)
Introduction
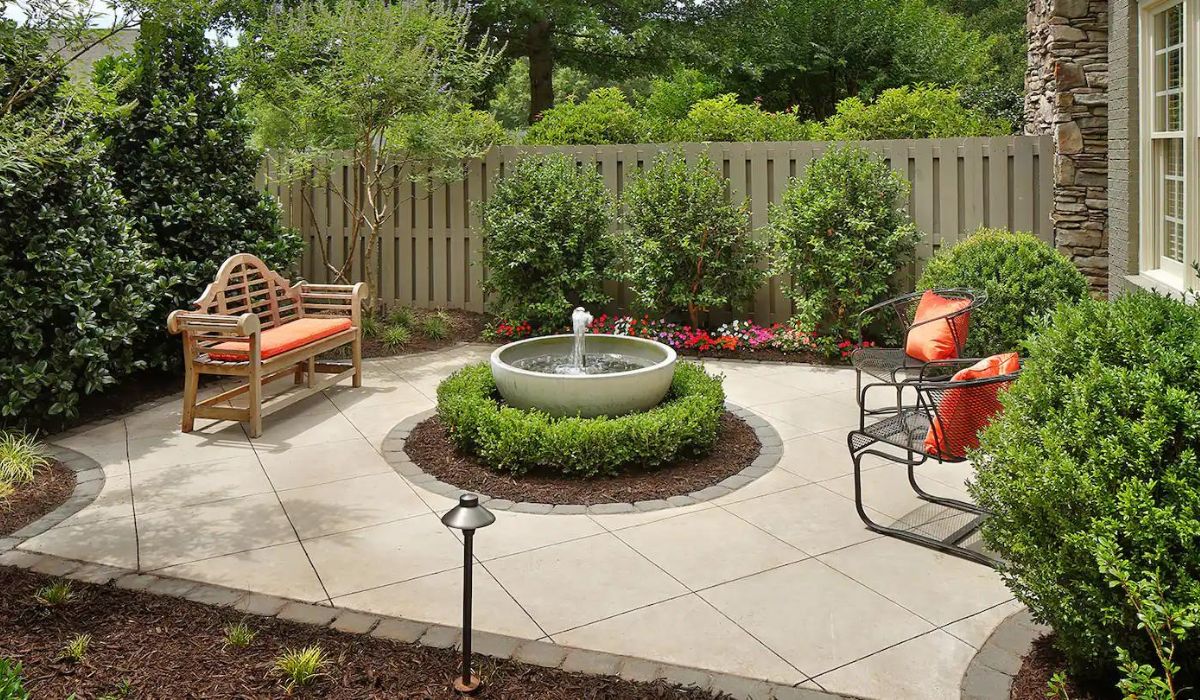
Welcome to the world of water fountains! Adding a water fountain to your garden can transform it into a tranquil oasis, creating a soothing and captivating atmosphere. Whether you have a spacious backyard or a small balcony, installing a water fountain is a simple and rewarding project that can enhance the beauty of your outdoor space.
In this article, we will guide you through the process of installing a water fountain in your garden. From selecting the location to testing and adjusting the fountain, we will cover every step to ensure a successful installation.
Before we dive into the details, let’s talk about why a water fountain is a great addition to any garden. Not only do fountains provide a visually stunning feature, but they also have numerous benefits.
First and foremost, the sound of flowing water creates a serene and relaxing ambiance, allowing you to unwind and escape the stresses of everyday life. It’s like having a mini waterfall in your backyar a tranquil background soundtrack as you enjoy your garden or entertain guests.
Water fountains also attract birds and other wildlife, making your garden a haven for nature. The sound and sight of birds frolicking in the water will bring you closer to the wonders of the animal kingdom, while also contributing to the ecological balance of your garden.
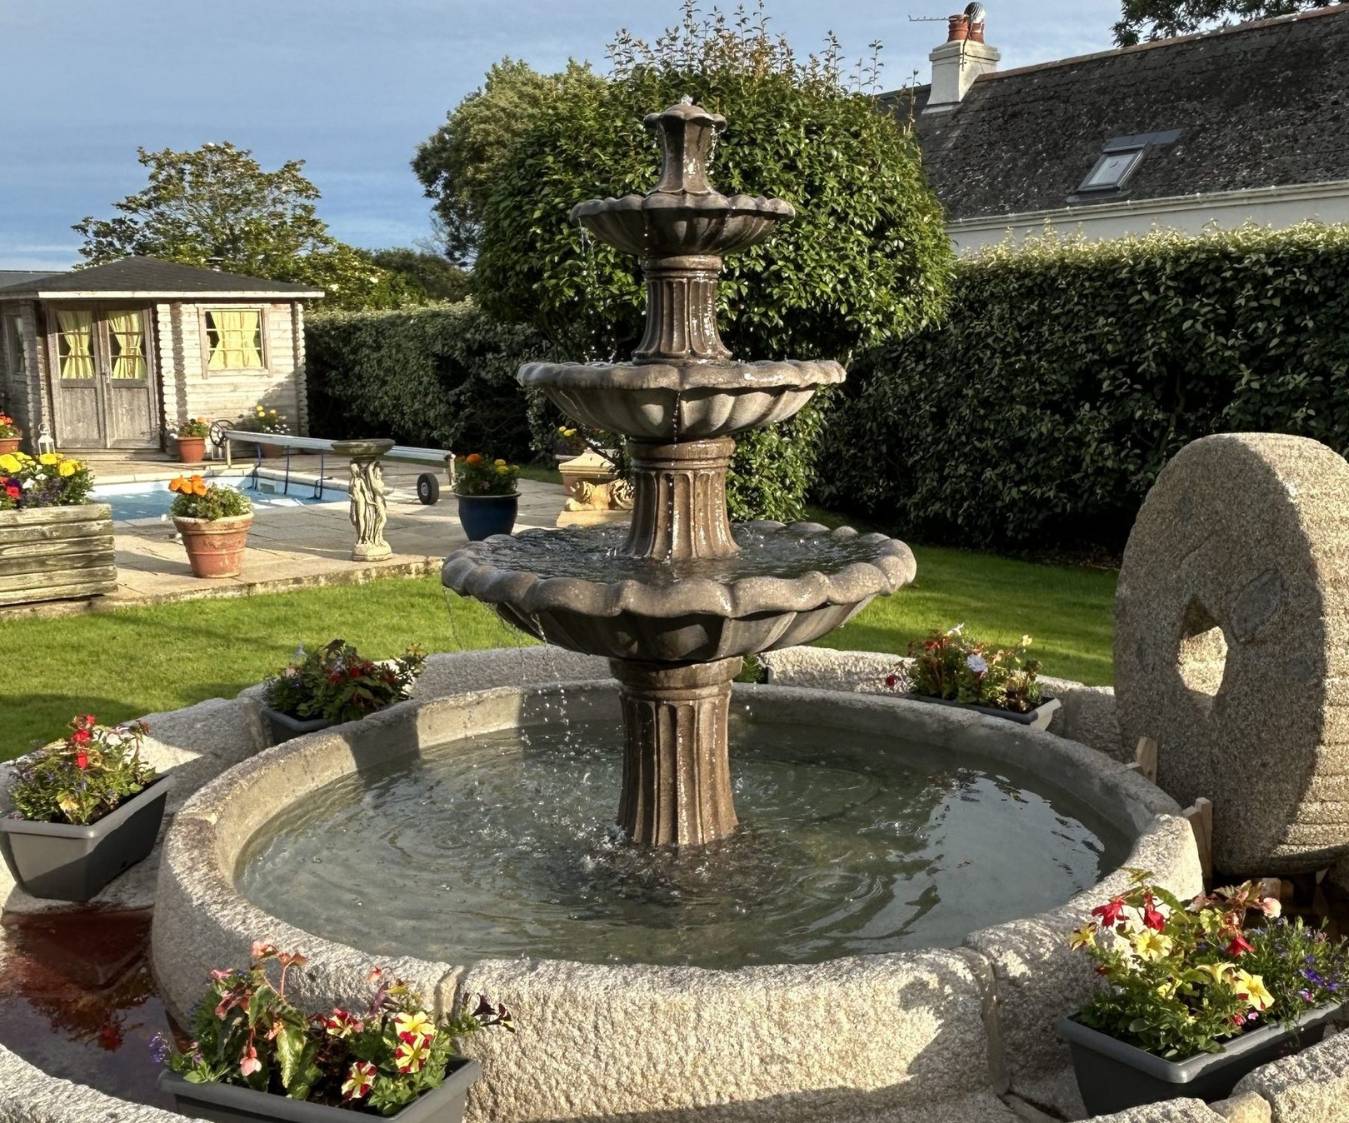
Add to that the visual appeal of a water fountain. Whether it’s a classic tiered fountain or a modern and sleek design, water features add a touch of elegance and sophistication to any outdoor space. The shimmering water, along with the play of light and shadows, creates a breathtaking focal point that will impress your guests.
Now that you understand why a water fountain is a fantastic addition to your garden, let’s move on to the tools and materials you’ll need for the installation. Don’t worry – it’s a short list, and you probably already have most of these items in your toolbox!
Key Takeaways:
- Installing a water fountain in your garden can create a peaceful oasis, attracting wildlife and adding elegance to your outdoor space. It’s a simple and rewarding project that enhances the beauty of your garden.
- From selecting the location to testing and adjusting the fountain, each step is crucial for a successful installation. Regular maintenance ensures your fountain continues to bring joy and tranquility to your garden for years to come.
Read more: How To Install A Water Fountain Pump
Tools and Materials Required
Before you start the installation process, it’s important to gather all the necessary tools and materials. Having everything on hand will make the process smoother and more efficient. Here is a list of what you will need:
1. Water Fountain Kit – Purchase a water fountain kit that suits your garden’s style and size. These kits typically include the fountain components, such as the pump, basin, tubing, and decorative elements. You can find a wide variety of fountain kits at garden centers or online.
2. Shovel – A sturdy shovel will be needed to dig the hole for the fountain basin. Make sure it’s in good condition to handle the task.
3. Level – Having a level is essential to ensure that your fountain is straight and properly balanced once it’s installed. A simple bubble level will do the trick.
4. Water Source – Determine the water source for your fountain. This could be a nearby outdoor faucet or a dedicated water line specifically installed for the fountain.
5. Garden Hose – A garden hose will be necessary to connect the water supply to the fountain. Make sure it’s long enough to reach from the water source to the fountain’s location.
6. Electrical Outlet – If your fountain requires electricity, ensure that there is an accessible outdoor electrical outlet nearby. If not, you may need to hire an electrician to install one.
7. Decorative Pebbles or Stones – These will add a finishing touch to your fountain and help conceal the basin. Choose pebbles or stones that complement the overall aesthetic of your garden.
8. Safety Gear – It’s always important to prioritize safety. Equip yourself with gloves, safety goggles, and any other protective gear necessary for the installation process.
With all the tools and materials ready, you’re now prepared to move on to the actual installation process. In the next steps, we’ll guide you through selecting the location, preparing the area, assembling the fountain components, connecting the water supply, and finalizing the installation.
Step 1: Selecting the Location
The first step in installing a water fountain is choosing the perfect location for it in your garden. The right placement can significantly enhance the visual impact and overall enjoyment of your fountain. Consider the following factors when selecting the location:
1. Accessibility: Ensure that the location is easily accessible for maintenance and cleaning. You’ll need to periodically clean the fountain and check the water levels, so choose a spot that allows for easy maneuverability.
2. Power and Water Source: If your fountain requires electricity, make sure the chosen location is near an outdoor electrical outlet. Additionally, consider the proximity to a water source. It should be within reach for connecting the fountain to a hose or water line.
3. Sunlight Exposure: Assess the amount of sunlight the location receives throughout the day. Some fountains require direct sunlight, while others can thrive in partial shade. Choose a spot that matches the lighting requirements of your specific fountain type.
4. Aesthetics: Consider the overall aesthetics of your garden and how the fountain will fit in. Think about the style of your landscape and the visual impact you want the fountain to have. It should complement the existing plants, structures, and design elements in your garden.
5. Noise Level: Take into account the noise level of the chosen location. The sound of flowing water can be soothing, but excessive noise can be distracting. Keep in mind factors like nearby roads, neighbors, and other sources of noise pollution.
6. Safety: Ensure that the location you choose is safe for both the fountain and its users. Avoid placing the fountain near overhanging trees or branches, as falling debris can damage the fountain or clog its components. Also, consider the stability of the ground to prevent any potential sinking or shifting of the fountain over time.
Once you’ve evaluated these factors, mark the selected location using stakes or flags. This will give you a visual reference point as you move on to the next steps of the installation process. With the location chosen, it’s time to prepare the area for your water fountain.
Step 2: Preparing the Area
Now that you have selected the perfect location for your water fountain, it’s time to prepare the area to ensure a stable and level foundation. Follow these steps to properly prepare the area:
1. Clear the Area: Remove any obstacles, plants, or debris from the chosen location. This includes rocks, weeds, and other vegetation that could interfere with the placement of the fountain components.
2. Mark the Outline: Use a rope or a garden hose to outline the shape and size of the fountain base on the ground. This will give you a clear visual guide for digging the hole.
3. Dig the Hole: Using a shovel, dig a hole that matches the dimensions of the fountain basin. The hole should be deep enough for the basin to sit level with the ground. Check the levelness of the hole as you dig, making adjustments as needed.
4. Create a Stable Base: Once the hole is dug, make sure the bottom is level and free from any debris or sharp objects. You can use a hand tamper or the back of your shovel to compact the soil and create a stable base for the fountain.
5. Add a Layer of Sand: To further ensure stability, spread a layer of sand at the bottom of the hole. This will help with leveling and provide a cushioning effect for the basin.
6. Install a Weed Barrier: To prevent weeds and other plants from growing up through the fountain components, consider placing a weed barrier fabric at the bottom of the hole before adding the sand. This will help maintain the cleanliness and functionality of the fountain over time.
7. Revisit Levelness: Before proceeding to the next step, recheck the levelness of the hole to ensure a balanced installation. Adjust the soil or sand as needed to achieve a level base.
With the area prepared and the foundation in place, you are now ready to assemble the fountain components and bring your water feature to life.
Step 3: Assembling the Fountain Components
With the location selected and the area prepared, it’s time to move on to assembling the fountain components. Follow these steps to properly assemble your water fountain:
1. Unpack the Fountain Kit: Carefully unpack the fountain kit and lay out all the components. Make sure you have all the necessary parts, including the pump, tubing, basin, and any decorative elements.
2. Follow the Instructions: Read the manufacturer’s instructions carefully to understand the specific assembly process for your fountain kit. Each kit may have slightly different components and instructions, so it’s essential to follow the provided guidelines.
3. Install the Pump: Begin by installing the pump in the designated area of the fountain basin. Follow the instructions provided to securely attach the pump to the appropriate location. Ensure that the pump is placed correctly, as this will affect the water flow and overall performance of the fountain.
4. Connect the Tubing: Attach the tubing to the pump according to the manufacturer’s instructions. This tubing will be responsible for circulating the water from the pump to the fountain’s decorative elements.
5. Add the Decorative Elements: Install any decorative elements that came with your fountain kit, such as water spouts, tiered trays, or sculptures. These elements will add visual interest and create the desired aesthetic for your water fountain.
6. Test the Fountain: Fill the basin with water and plug in the pump to test the functioning of the fountain. Monitor the water flow and listen for any unusual sounds. Make any necessary adjustments to the pump or tubing to achieve the desired water flow and visual effect.
7. Fine-Tune the Fountain: Once you are satisfied with the water flow and the overall appearance of the fountain, make any final adjustments. Ensure that all the components are securely in place and that there are no leaks or issues with the fountain’s operation.
With the fountain components properly assembled and tested, it’s time to move on to connecting the water supply and adding the finishing touches to your installation.
When installing a water fountain, make sure to place it on a level surface to prevent tipping. Also, ensure that the electrical outlet is nearby for easy access.
Read more: How To Install Lights In A Water Fountain
Step 4: Connecting the Water Supply
Now that you have assembled the fountain components, it’s time to connect the water supply and bring your water fountain to life. Follow these steps to properly connect the water supply:
1. Locate the Water Source: Identify the nearest outdoor faucet or water supply that you will be using to provide water to the fountain. Ensure that the chosen water source has a sufficient water pressure to operate the fountain effectively.
2. Determine the Hose Length: Measure the distance between the water source and the fountain location to determine the length of hose you will need. Choose a hose that is long enough to reach from the water source to the fountain without any stretching or pulling.
3. Attach the Hose to the Water Source: Attach one end of the hose to the outdoor faucet or water supply. Secure it tightly to prevent any leaks or disconnections. If needed, use a hose clamp or a rubber washer to ensure a tight fit.
4. Connect the Hose to the Fountain: Take the other end of the hose and connect it to the designated inlet on the fountain. This is where the water will enter the fountain and flow through the components. Make sure the connection is secure and watertight.
5. Turn on the Water Supply: Once the hose is securely connected, turn on the water supply from the outdoor faucet or water source. Gradually increase the water flow to avoid overwhelming the fountain components.
6. Check for Leaks: Inspect all the connection points for any leaks. If you notice any leaks, tighten the connections or add sealant to prevent water from escaping. It’s important to address leaks promptly to ensure the efficiency and longevity of your fountain.
7. Adjust the Water Flow: Observe the water flow in the fountain and adjust it to your desired speed and intensity. Some fountains have adjustable flow settings that can be controlled directly on the pump or through a separate control valve.
8. Test the Fountain Operation: Allow the fountain to operate for a few minutes to ensure that everything is functioning properly. Listen for any unusual sounds or vibrations and check that the water is flowing as expected through the decorative elements. Make any necessary adjustments to achieve the desired water flow and visual effect.
By following these steps, you have successfully connected the water supply to your fountain, allowing water to flow and create a captivating display. Now it’s time to move on to the next step: testing and adjusting the fountain.
Step 5: Testing and Adjusting the Fountain
Now that your water fountain is connected to the water supply, it’s important to test and adjust its operation to ensure optimal performance. Follow these steps to properly test and adjust your fountain:
1. Power on the Fountain: If your fountain requires electricity, plug it into the outdoor electrical outlet. Ensure that the connection is secure and that the fountain is receiving power.
2. Observe the Water Flow: Watch the water as it circulates through the fountain components. Note the height and speed of the water flow. Is it consistent and aesthetically pleasing? Take a moment to assess the visual impact and determine if any adjustments are needed.
3. Adjust the Pump: Most fountains have an adjustable flow setting on the pump itself or a separate control valve. Experiment with different flow settings to achieve the desired water flow and visual effect. Play around with higher or lower speeds to find the perfect balance.
4. Check for Proper Water Distribution: Ensure that the water is evenly distributed across all the decorative elements of the fountain. If you notice that the water is pooling in one area or not flowing as desired, adjust the placement of the elements or the positioning of the pump to achieve an even water distribution.
5. Listen for Noise or Vibrations: Pay attention to any unusual sounds or vibrations coming from the fountain. Excessive noise or vibrations could indicate a problem with the pump or the connections. If you notice any issues, inspect the fountain for loose parts or leaks. Tighten any loose connections or consult the manufacturer’s instructions for troubleshooting guidance.
6. Monitor Water Levels: Regularly check the water levels in the fountain to ensure that it is adequately filled. Depending on the size of the fountain and the climate, water may evaporate over time. Refill the basin as needed to maintain the proper water level for optimal performance.
7. Take Note of Weather Conditions: Be aware of the impact of weather conditions on your fountain. Wind can disperse the water flow, rain can affect the water levels, and extreme temperatures can impact the functionality of the pump. Adjust the fountain or take protective measures, if necessary, to maintain its operation in varying weather conditions.
By thoroughly testing and adjusting your fountain, you can achieve the desired water flow, visual effect, and functionality. Continue to monitor and make any necessary adjustments as you observe the fountain in operation. With the fountain operating smoothly, it’s time to move on to the final step: securing and finalizing the installation.
Step 6: Securing and Finalizing the Installation
Once you have tested and adjusted your water fountain to your satisfaction, it’s time to secure and finalize the installation. Follow these steps to ensure that your fountain is secure and ready to be enjoyed:
1. Secure the Fountain: Depending on the size and weight of your fountain, it may need to be secured to prevent movement or tipping. Use stakes or anchors to secure the fountain in the ground or attach it to a sturdy surface. This will help keep the fountain stable, especially during inclement weather or if you have pets or children in the area.
2. Conceal the Fountain Basin: To give your fountain a polished look, consider using decorative rocks, pebbles, or stones to cover the basin. This will help to conceal the inner workings of the fountain while adding to its overall visual appeal. Arrange the rocks or stones strategically to create a natural and pleasing aesthetic.
3. Regular Cleaning and Maintenance: Establish a regular cleaning and maintenance routine for your fountain to keep it in optimal condition. Remove any debris, leaves, or algae that may accumulate in the basin. Clean the pump and tubing periodically to ensure proper water flow. Refer to the manufacturer’s instructions for specific cleaning and maintenance guidelines.
4. Inspect and Address Any Issues: Regularly inspect your fountain for any signs of wear, damage, or malfunctions. Address any issues promptly to prevent further damage. Check for any leaks, loose connections, or signs of deterioration. Replace any worn-out parts or seek professional assistance, if needed.
5. Enjoy and Relax: With your water fountain securely installed and properly maintained, it’s time to sit back, relax, and enjoy the beauty and tranquility it brings to your garden. Take moments to appreciate the soothing sound of flowing water and the visual appeal of your fountain. Spend time in the serene ambiance created by your water feature.
Remember to continue monitoring and maintaining your fountain regularly to ensure its longevity and uninterrupted operation. With proper care, your water fountain will continue to bring joy and peace to your garden for years to come.
Congratulations on successfully installing and finalizing your water fountain installation! You can now enjoy the serene beauty and captivating ambiance it adds to your outdoor space.
Conclusion
Installing a water fountain in your garden can bring a sense of tranquility, beauty, and relaxation to your outdoor space. With the right location, proper preparation, and careful assembly, creating your own water oasis is within reach.
Throughout this guide, we have covered the essential steps to successfully install a water fountain in your garden. From selecting the ideal location to securing and finalizing the installation, each step is crucial to creating a visually stunning and functional water feature.
By following these steps, you have learned how to choose a location that enhances the aesthetics and functionality of your fountain. You have also been guided through the process of preparing the area, assembling the fountain components, and connecting the water supply. Additionally, we discussed the importance of testing and adjusting the fountain to achieve the desired water flow and visual effect.
Remember to regularly maintain and clean your fountain to ensure its longevity and optimal performance. Pay attention to any signs of wear or damage, and address them promptly to prevent further issues. By taking the time to properly care for your fountain, you can enjoy its beauty and soothing sounds for years to come.
Whether you have a spacious garden, a cozy patio, or a small balcony, a water fountain can transform your outdoor space into a serene sanctuary. The sound of flowing water, the shimmering reflections, and the dynamic visual display create an ambiance that promotes relaxation and rejuvenation.
So, now it’s time to take the first step and start planning your water fountain installation. Consider your garden’s layout, your personal preferences, and the overall style you want to achieve. With the confidence and knowledge gained from this guide, you can create a stunning water feature that complements your garden and brings a sense of peace and serenity to your outdoor living space.
Immerse yourself in the beauty of nature, the soothing sound of water, and the calming presence of a water fountain. Your garden will become a haven where you can escape, rejuvenate, and connect with the wonders of the natural world.
Frequently Asked Questions about How To Install A Water Fountain
Was this page helpful?
At Storables.com, we guarantee accurate and reliable information. Our content, validated by Expert Board Contributors, is crafted following stringent Editorial Policies. We're committed to providing you with well-researched, expert-backed insights for all your informational needs.


0 thoughts on “How To Install A Water Fountain”