Home>Garden Essentials>How To Get Seeds Out Of Sunflowers
Garden Essentials
How To Get Seeds Out Of Sunflowers
Modified: August 16, 2024
Learn the best techniques for getting seeds out of sunflowers in your garden. Explore simple and effective methods to harvest and store sunflower seeds.
(Many of the links in this article redirect to a specific reviewed product. Your purchase of these products through affiliate links helps to generate commission for Storables.com, at no extra cost. Learn more)
Introduction
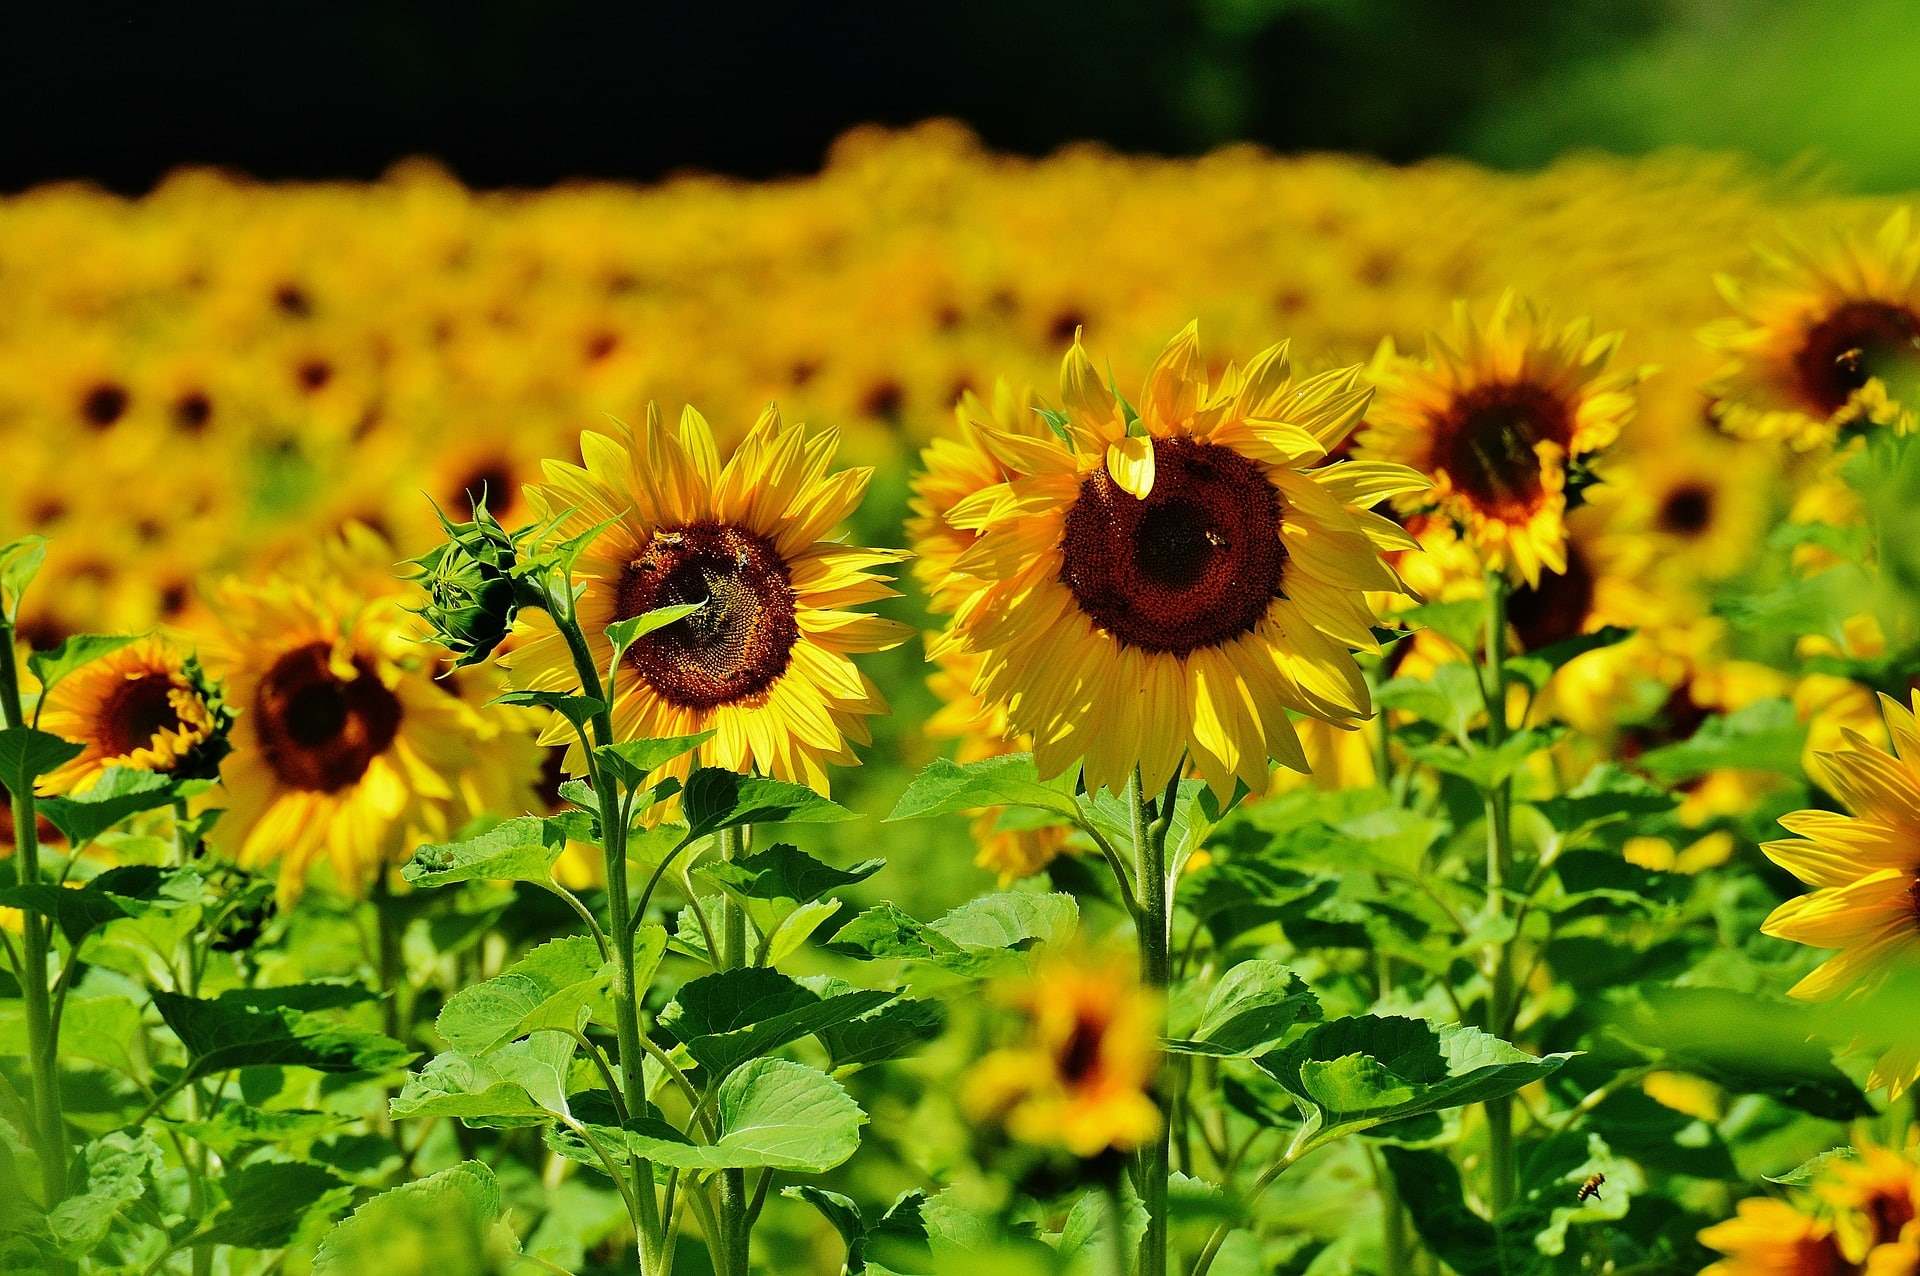
Sunflowers, with their bright and cheerful faces, have long been admired for their beauty and symbolism. But these stunning flowers are more than just a pretty face – they also produce delicious and nutritious seeds that can be enjoyed in a variety of ways. If you’re a sunflower enthusiast looking to get your hands on those coveted seeds, you’ve come to the right place! In this article, we’ll explore the different methods for harvesting and extracting sunflower seeds, so you can enjoy the fruits of your labor.
Before we dive into the nitty-gritty of seed extraction, let’s take a moment to appreciate the anatomy of a sunflower. Each sunflower head is composed of hundreds, if not thousands, of individual florets. The disk florets, located in the center of the head, are the ones that eventually turn into seeds. These small, elongated seeds are packed tightly together, surrounded by a protective outer shell.
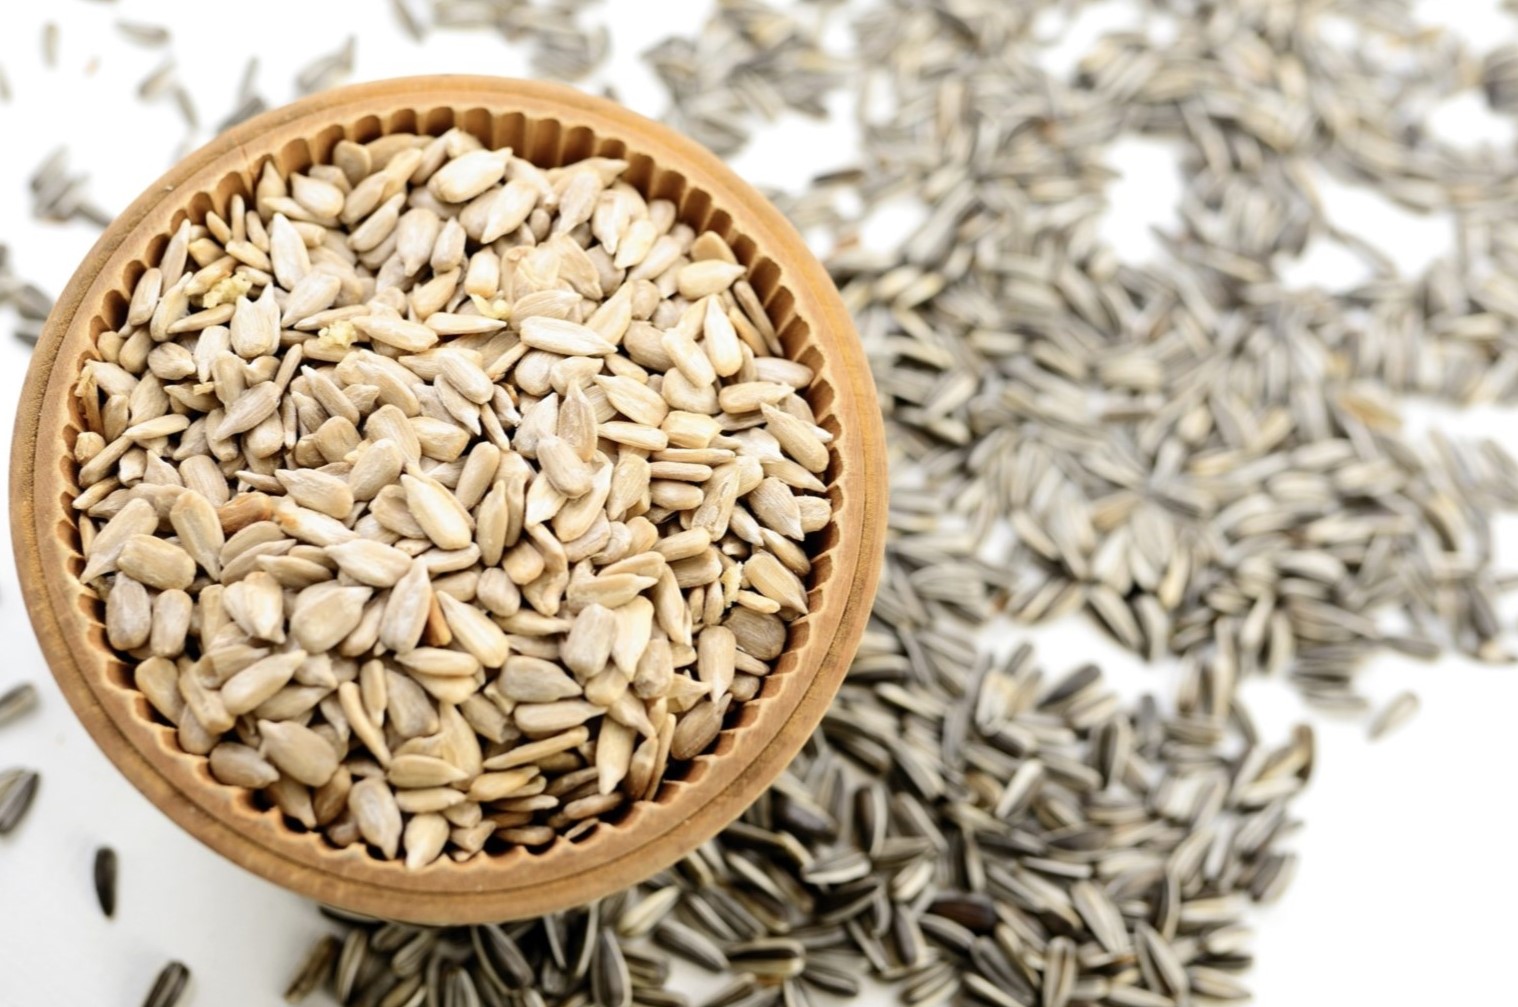
Harvesting sunflower seeds can be a labor-intensive process, but the rewards are well worth it. Not only are sunflower seeds a delicious and versatile snack, but they are also packed with nutrients. They are a rich source of healthy fats, protein, fiber, and a wide range of vitamins and minerals. Whether you plan to munch on them as a snack or use them in your favorite recipes, having a stash of fresh sunflower seeds is a real treat.
Now that you’re aware of the benefits of sunflower seeds and the effort required to get them, let’s dive into the different methods for harvesting and extracting these tasty little morsels.
Key Takeaways:
- Harvesting sunflower seeds can be a fun and rewarding process, whether using traditional hand-harvesting or innovative techniques like bagging and drying or water separation. Enjoy the adventure and savor the delicious rewards of your hard work!
- Properly storing sunflower seeds in a cool, dry place ensures their freshness and flavor for an extended period. Enjoy the delightful crunch and boost of nutrition in your favorite snacks and recipes!
Read more: How To Get Sunflower Seeds From A Sunflower
Sunflower Anatomy
Before we delve into the various methods of harvesting sunflower seeds, it’s important to have a basic understanding of the anatomy of a sunflower. Knowing the different parts of the sunflower head will help you navigate the seed extraction process more effectively.
A sunflower head is composed of two main parts: the ray florets and the disk florets. The ray florets are the petals that give the sunflower its iconic appearance. While they may look like individual petals, they are actually sterile flowers. Their primary function is to attract pollinators with their vibrant colors.
In the center of the sunflower head, you’ll find the disk florets. These are the fertile flowers that develop into the sunflower seeds we all crave. Each disk floret contains both male and female reproductive parts. The male reproductive part, called the stamen, consists of the filament and the anther, which produces the pollen. The female reproductive part, known as the pistil, consists of the stigma, style, and ovary.
As the sunflower blooms, the ray florets gradually wither and fall off, leaving behind the disk florets that will develop into seeds. These small and elongated seeds are tightly packed together in a spiral pattern. The seeds are enclosed in a tough outer shell, often referred to as the seed coat or hull. Removing the husk to access the edible seed inside is a crucial step in the seed extraction process.
Understanding the structure of the sunflower head and the location of the seeds within it will help guide you as you embark on your sunflower seed harvesting journey. Now that we have a clear picture of the sunflower’s anatomy, let’s explore the different methods of extracting those prized sunflower seeds.
Harvesting Sunflower Seeds
Harvesting sunflower seeds can be an enjoyable and rewarding process, and there are several methods you can choose from. Whether you prefer a traditional hand-harvesting approach or a more innovative technique, each method has its own merits. Let’s explore some of the most common methods for harvesting sunflower seeds.
Method 1: Traditional Hand-Harvesting
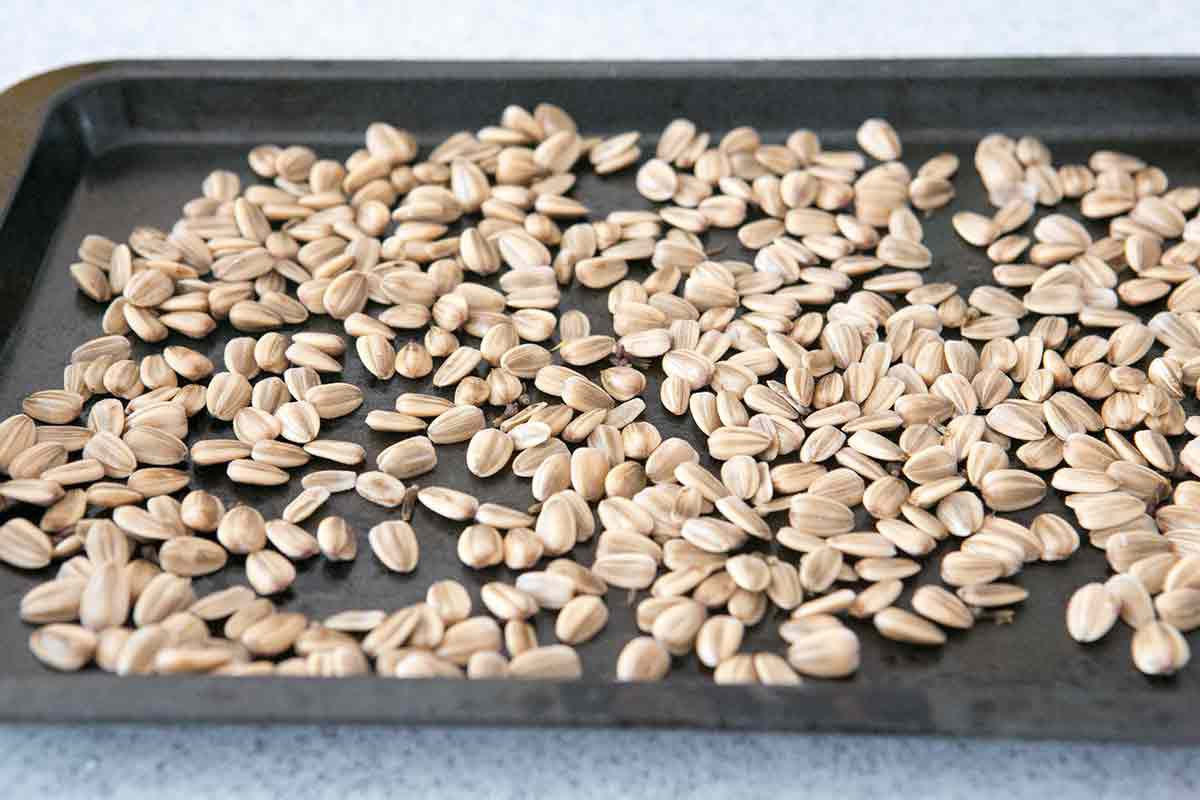
This method requires some patience and manual work, but it is a simple and straightforward way to harvest sunflower seeds. Wait until the back of the sunflower head turns yellow, indicating that the seeds are ripe. Cut the head from the stem, leaving a few inches of the stem attached. Hang the sunflower head upside down in a well-ventilated area like a garage or shed. This allows the seeds to dry naturally and helps prevent mold or rot. Once the seeds are fully dry, which can take up to two weeks, gently rub or shake the head to loosen the seeds. Collect the seeds by hand and remove any debris or remaining flower parts.
Method 2: Bagging and Drying
This method is particularly useful if you have a larger sunflower plantation and want to harvest multiple sunflower heads at once. As the sunflower heads begin to mature, cover them with breathable bags or cloth to protect them from birds and squirrels. This method allows the sunflower heads to continue ripening while protecting them from potential seed loss. Once the heads are fully mature and the back has turned yellow, cut them from the stem and follow the same drying process as method 1. The bags can be opened, and the seeds can be collected after the drying period.
Read more: How To Make Sunflower Seeds From A Sunflower
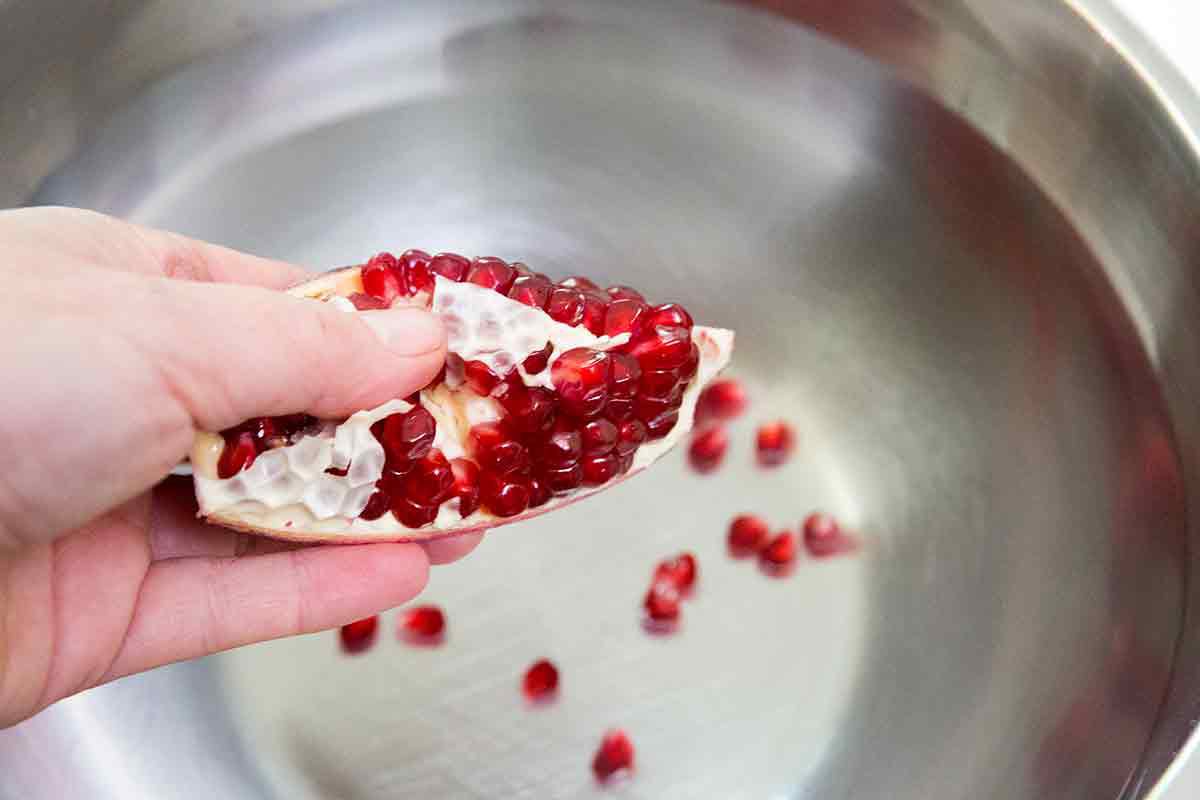
Method 3: Water Separation Technique
This method is ideal if you have a large quantity of sunflower heads and want to expedite the seed extraction process. Start by cutting the sunflower heads from the stems and placing them in a large bucket or container. Fill the container with water, making sure the heads are fully submerged. Allow the heads to soak for several hours or overnight. After soaking, the seeds will sink to the bottom, while debris and flower parts will float to the surface. Skim off the debris and discard it. Drain the water and collect the seeds from the bottom of the container. Rinse the seeds thoroughly and allow them to dry before storing.
Method 4: Hammering Method
This method is a bit more labor-intensive but can be satisfying if you enjoy a hands-on approach. Begin by cutting the sunflower heads from the stems. Place the head on a hard surface, such as a concrete floor or sturdy table. Using a clean hammer or mallet, gently tap the backside of the sunflower head, starting from the edges and working your way inward. The impact will help crack the shell and loosen the seeds. Be careful not to apply too much force, as this may damage the seeds inside. Once the seeds are loosened, carefully separate them from the debris and store them in a dry container.
No matter which method you choose, it’s important to ensure that the sunflower seeds are fully dry before storing them. Store the seeds in an airtight container in a cool, dry place. Properly stored sunflower seeds can maintain their quality and flavor for up to a year.
Now that you’re armed with various methods for harvesting sunflower seeds, you can embark on your own sunflower seed gathering adventure. Enjoy the process, and savor the delicious rewards of your hard work!
Method 1: Traditional Hand-Harvesting
Traditional hand-harvesting is a tried-and-true method for harvesting sunflower seeds. While it requires some manual work and patience, it allows you to be intimately involved in the process. Here’s a step-by-step guide to hand-harvesting sunflower seeds.
Step 1: Monitor the Sunflowers
Keeping a close eye on your sunflowers is crucial to ensure you harvest them at the right time. Watch for signs that the seeds are mature and ready for harvesting. One key indicator is the change in color of the back of the sunflower head. Once it turns yellow or brown, it’s a sign that the seeds are ripe.
Step 2: Cut the Sunflower Heads
Using a sharp knife or pruning shears, carefully cut the sunflower head from the stem. Leave a few inches of the stem attached to make handling easier during the drying process.
Step 3: Dry the Sunflower Heads
To prepare the sunflower heads for seed extraction, you need to dry them thoroughly. Find a well-ventilated area, such as a garage or shed, where you can hang the sunflower heads upside down. Tie a string or twine around the stem and hang them up. This allows air to circulate around the heads, aiding in the drying process.
Step 4: Allow the Seeds to Dry
Leave the sunflower heads to dry for approximately one to two weeks. This period varies depending on factors such as humidity and temperature. The goal is to ensure that the seeds are fully dried and hardened.
Step 5: Loosen the Seeds
Gently rub or shake the dry sunflower head to loosen the seeds. You’ll notice that the seeds have separated from the flower disk and are now inside the head. Be careful during this step to avoid breaking the seeds or damaging the head.
Read more: How To Get Seeds Out Of Raspberries
Step 6: Collect the Seeds
With the seeds loosened, it’s time to collect them. Place a clean container, such as a bowl or a bucket, underneath the sunflower head. With your fingers or a small tool, carefully separate the seeds from the head and let them fall into the container. Removing any flower debris or remaining plant matter during this process is essential.
Step 7: Store the Seeds
After collecting the seeds, it’s important to store them properly to maintain their freshness. Transfer the seeds into an airtight container to protect them from moisture and pests. Store the container in a cool, dry place, such as a pantry or cellar. Properly stored sunflower seeds can stay fresh for up to a year.
Traditional hand-harvesting is a rewarding method for obtaining sunflower seeds. Not only does it provide a sense of connection to the plants, but it also allows you to control the harvesting process. So, roll up your sleeves, get your hands dirty, and enjoy the satisfaction of collecting your own sunflower seeds!
Method 2: Bagging and Drying
If you have a larger sunflower plantation or want to harvest multiple sunflower heads at once, the bagging and drying method can be a convenient and efficient way to collect the seeds. This method not only protects the heads from birds and squirrels, but it also allows the sunflower heads to continue ripening. Here’s how you can use the bagging and drying method to harvest sunflower seeds.
Step 1: Protect the Sunflower Heads
As the sunflower heads begin to mature and the petals start to wither, cover them with breathable bags or cloth. You can use paper bags, mesh bags, or even old pantyhose. The purpose of bagging the heads is twofold: it prevents birds and squirrels from accessing the seeds, and it allows the heads to fully mature and ripen while still on the plant.
Read more: How To Get Seeds Out Of Smoothie
Step 2: Monitor the Ripening Process
Check on the bagged sunflower heads regularly to monitor their progress. Look for signs that the seeds are fully matured, such as the yellowing or browning of the back of the head. Depending on the variety of sunflowers and the environmental conditions, it can take anywhere from a few weeks to a couple of months for the seeds to mature.
Step 3: Cut the Sunflower Heads
Once the sunflower heads have reached full maturity, it’s time to harvest them. Use sharp scissors or pruning shears to cut the heads from the stems, making sure to leave a few inches of the stem attached to aid in handling.
Step 4: Dry the Sunflower Heads
Unlike the traditional hand-harvesting method, you can keep the sunflower heads protected within the bags while they dry. Hang the bagged heads upside down in a well-ventilated area. This allows air to circulate around the heads, drying them while still inside the bags. It’s important to choose a location where the heads won’t be exposed to excessive moisture or direct sunlight, as these factors can affect the quality of the seeds.
Step 5: Monitor the Drying Progress
Check on the sunflower heads regularly to ensure they are drying properly. You may notice that the heads become lighter in weight as the moisture evaporates. Depending on the conditions, it can take approximately two weeks for the heads to fully dry. Patience is key during this step.
Read more: How To Get Seeds Out Of Raspberries
Step 6: Collect the Seeds
Once the sunflower heads are completely dry, carefully remove the bags from the heads. Holding the bag over a clean container, gently shake or tap the heads to release the seeds. The seeds should fall into the container, while any remaining debris or flower parts will remain in the bag.
Step 7: Store the Seeds
Transfer the collected sunflower seeds into an airtight container, such as a mason jar or a resealable bag. Store the container in a cool, dry place away from direct sunlight. Properly stored sunflower seeds can stay fresh for an extended period, allowing you to enjoy their delightful flavor and nutrition throughout the year.
The bagging and drying method offers a convenient way to harvest multiple sunflower heads while ensuring their full ripening and protection from pests. Give this method a try and enjoy the process of gathering your own bountiful harvest of sunflower seeds.
Method 3: Water Separation Technique
The water separation technique is a unique method for harvesting sunflower seeds that involves using water to separate the seeds from debris and flower parts. This method is particularly useful when dealing with a large quantity of sunflower heads. Here’s how you can employ the water separation technique to harvest sunflower seeds.
Step 1: Cut the Sunflower Heads
Begin by cutting the sunflower heads from the stem using sharp scissors or pruning shears. Trim the stems to a manageable length, leaving a few inches attached to the heads.
Read more: How To Flavor Sunflower Seeds
Step 2: Place the Heads in a Container
Find a large bucket or container that can hold all of the sunflower heads you are planning to process. Place the heads inside the container, making sure they are fully submerged in water. It’s best to use room temperature or slightly warm water for this process.
Step 3: Soak the Heads
Allow the sunflower heads to soak in the water for several hours or overnight. This soaking period helps loosen the seeds from the flower disk and prepares them for separation.
Step 4: Skim off the Debris
After the soaking period, you’ll notice that debris and flower parts float to the surface of the water. Use a skimming tool or your hands to gently remove and discard this floating debris. This step ensures that only the sunflower seeds and clean water remain in the container.
Step 5: Drain the Water
Carefully drain the water from the container, being cautious not to let the seeds escape. You can use a fine mesh sieve or colander to catch any stray seeds while pouring out the water.
Read more: How Sunflower Seeds Are Made
Step 6: Collect the Sunflower Seeds
Once the water has been drained, you’ll be left with sunflower seeds at the bottom of the container. Rinse the seeds with clean water to remove any remaining dirt or impurities. Gently agitate the seeds with your hands or a spoon to ensure a thorough rinsing.
Step 7: Dry the Seeds
After rinsing, transfer the sunflower seeds onto a clean towel or paper towel. Spread them out in a single layer and allow them to air dry completely. This can take several hours or even a day, depending on the humidity in your environment.
Step 8: Store the Seeds
Once the seeds are completely dry, transfer them to an airtight container for storage. Remember to label the container with the date of harvest to keep track of their freshness. Store the container in a cool, dry place away from sunlight and moisture.
The water separation technique is an efficient way to harvest sunflower seeds, especially when dealing with a large quantity. It allows for easy removal of debris and ensures clean, ready-to-use seeds. Give this method a try and enjoy the convenience of having freshly harvested sunflower seeds at your disposal.
Method 4: Hammering Method
If you’re looking for a more hands-on and adventurous approach to harvesting sunflower seeds, the hammering method may be just what you’re looking for. As the name suggests, this method involves using a hammer or mallet to extract the seeds from the sunflower heads. Here’s how you can employ the hammering method to harvest sunflower seeds.
Step 1: Cut the Sunflower Heads
Start by cutting the sunflower heads from the stem using sharp scissors or pruning shears. Trim the stems to a manageable length, leaving a few inches attached to the heads to aid in handling.
Step 2: Prepare a Work Area
Choose a sturdy surface for the hammering process. A concrete floor, a sturdy table, or a wooden board placed on a solid surface are all suitable options. Make sure the surface is clean and free of any debris or obstacles.
Step 3: Position the Sunflower Head
Place the sunflower head on the chosen work surface, ensuring it is secure and won’t move during the hammering process. Hold the head firmly with one hand or use a clamp to secure it in place.
Step 4: Start Hammering
With the sunflower head properly positioned, take a clean hammer or mallet in your other hand and start gently tapping the backside of the sunflower head. Begin at the edges and work your way toward the center, applying light and controlled strikes on the entire backside of the head.
Read more: How Much Are Sunflower Seeds
Step 5: Crack the Husk
The goal is to crack the tough outer shell of the sunflower head without damaging the seeds inside. Continue tapping and striking the backside of the head until you notice the shell starting to crack. Be cautious not to use excessive force, as this could crush the seeds within.
Step 6: Loosen and Collect the Seeds
Once the shell is cracked, carefully separate the seeds from the head. You can use your fingers or a small tool, such as tweezers or a toothpick, to pluck the seeds from the crevices created by the hammering. Be patient and take your time to ensure you extract all the seeds without damaging them.
Step 7: Remove Debris and Store the Seeds
Inspect the extracted seeds for any remaining debris or flower parts. Remove them carefully to ensure you have clean sunflower seeds. Transfer the seeds into a clean, dry container for storage. Keep the container in a cool, dry place away from sunlight and moisture to maintain the seeds’ freshness and quality.
The hammering method provides a hands-on and interactive way to harvest sunflower seeds. It allows you to immerse yourself in the process and experience the thrill of extracting the seeds with your own hands. Enjoy the adventure and the rewarding feeling of collecting your own sunflower seeds!
Storing Sunflower Seeds
Once you’ve harvested and dried your sunflower seeds, it’s crucial to store them properly to maintain their freshness and flavor. Proper storage not only helps preserve the seeds’ quality but also ensures they can be enjoyed over an extended period. Here are some essential tips for storing sunflower seeds:
Read more: How To Sow Sunflower Seeds
1. Dry Thoroughly:
Before storing sunflower seeds, ensure they are completely dry. Any residual moisture can lead to mold, spoilage, or loss of flavor. After drying, let the seeds cool down to room temperature before packaging them for storage.
2. Choose the Right Container:
Use an airtight container to store sunflower seeds. Mason jars, resealable bags, or food-grade plastic containers with secure lids are all suitable options. Ensure the container is clean, dry, and free from any lingering odors that could affect the taste of the seeds.
3. Label and Date:
Properly label the container with the date of harvest. This helps you keep track of the seeds’ freshness and ensures you use the oldest seeds first. It’s also helpful to note any specific variety or additional information that you may find useful later on.
4. Store in a Cool, Dry Place:
Choose a cool and dry location for storing sunflower seeds. Direct sunlight, heat, and moisture can all affect the seeds’ quality and lead to rancidity or spoilage. A pantry, cupboard, or cellar away from the kitchen’s heat and humidity is an ideal storage spot.
Read more: How To Harvest Mexican Sunflower Seeds
5. Minimize Exposure to Air and Light:
Air and light can accelerate the degradation of sunflower seeds. Store the container in a dark corner or use opaque containers to minimize exposure to light. Additionally, minimizing air exposure by keeping the container tightly sealed helps preserve the seeds’ freshness.
6. Avoid Temperature Fluctuations:
Fluctuating temperatures can lead to moisture buildup in the container and affect the seeds’ longevity. Avoid storing sunflower seeds in areas prone to temperature fluctuations, such as near appliances or doors. Stable, cooler temperatures will help maintain the seeds’ quality over time.
7. Check and Rotate:
Periodically check stored sunflower seeds for any signs of spoilage, such as mold, off odors, or a rancid taste. If you encounter any issues, discard the affected seeds immediately to prevent contamination of the remaining batch. Additionally, make sure to rotate your seed supply, using older seeds before newer ones, to prevent them from going stale.
By following these storage guidelines, you can enjoy the freshness and flavor of your sunflower seeds for an extended period. Whether you consume them as a snack, add them to baked goods and salads, or use them in your favorite recipes, properly stored sunflower seeds will provide a delightful crunch and a boost of nutrition whenever you need it.
Conclusion
Harvesting sunflower seeds is a rewarding and enjoyable process that allows you to reap the delicious benefits of these vibrant flowers. Whether you choose the traditional hand-harvesting method, opt for the bagging and drying technique, employ the water separation approach, or go for the adventurous hammering method, each method offers its own unique experience and rewards.
Taking the time to understand the anatomy of a sunflower and monitoring the ripening process ensures that you harvest the seeds at their peak flavor and nutritional value. Properly drying the sunflower heads and storing the seeds in a cool, dry place is essential for maintaining their freshness and preventing spoilage.
Once you’ve harvested and stored your sunflower seeds, the possibilities are endless. You can enjoy them as a wholesome and nutritious snack, add them to granola bars, trail mixes, or salads, or use them as a flavorful ingredient in baked goods. Their versatility and delightful crunch make them a fantastic addition to many recipes.
Remember, harvesting sunflower seeds is more than just a means of obtaining a tasty treat—it’s an opportunity to connect with nature and appreciate the marvels of these beautiful flowers. The hard work, from monitoring the growth of the sunflowers to the meticulous process of extracting and storing the seeds, pays off in the end when you enjoy the fruits of your labor.
So go ahead, embark on your sunflower seed harvesting journey with confidence. Choose the method that suits your preferences and circumstances, and relish in the satisfaction of gathering your own bountiful harvest of sunflower seeds. May your journey be filled with joy, deliciousness, and a deeper appreciation for the wonders of nature.
Frequently Asked Questions about How To Get Seeds Out Of Sunflowers
Was this page helpful?
At Storables.com, we guarantee accurate and reliable information. Our content, validated by Expert Board Contributors, is crafted following stringent Editorial Policies. We're committed to providing you with well-researched, expert-backed insights for all your informational needs.
0 thoughts on “How To Get Seeds Out Of Sunflowers”