Home>Garden Essentials>How To Plant Carrot Seeds In Garden
Garden Essentials
How To Plant Carrot Seeds In Garden
Modified: April 22, 2024
Learn how to plant carrot seeds in your garden with our easy step-by-step guide. Discover the best techniques for a successful harvest and enjoy homegrown carrots straight from your own backyard.
(Many of the links in this article redirect to a specific reviewed product. Your purchase of these products through affiliate links helps to generate commission for Storables.com, at no extra cost. Learn more)
Introduction
Welcome to the world of gardening! If you’re a beginner, you might feel a bit overwhelmed by the thought of planting your own vegetables. But fear not, because in this article, we’re going to guide you through the process of planting carrot seeds in your garden.
Carrots are a versatile and nutritious vegetable that can be enjoyed in various dishes. By planting your own carrots, you have the opportunity to savor the fresh flavor and experience the rewarding feeling of growing your own food.
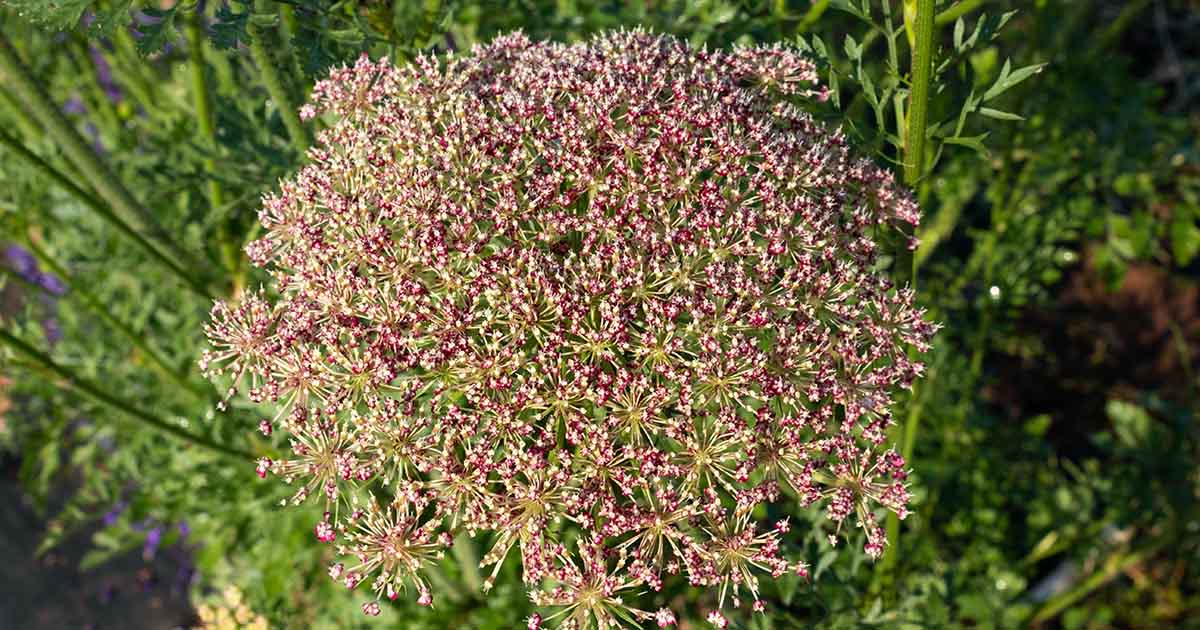
Before we dive into the step-by-step process, let’s briefly talk about carrots. Carrots are biennial plants that belong to the Apiaceae family. They are known for their vibrant orange color, but can also come in purple, red, yellow, and white varieties. Carrots are rich in beta-carotene, a pigment that gives them their distinctive color and is converted by our bodies into vitamin A, an essential nutrient for healthy eyes and skin.
Now that we understand the charm and nutritional value of carrots, let’s get our hands dirty and learn how to plant carrot seeds in your garden!
Key Takeaways:
- Prepare loose, fertile soil for carrot seeds by removing debris, adding organic matter, and leveling the surface. This creates an optimal environment for healthy carrot growth and easier harvesting.
- Harvest mature carrots by gently loosening the soil, grasping the foliage, and avoiding breakage. Store them in a cool, dark place for long-lasting freshness and enjoy the sweet rewards of homegrown carrots!
Read more: How To Plant Carrot Seeds
Step 1: Prepare the Soil
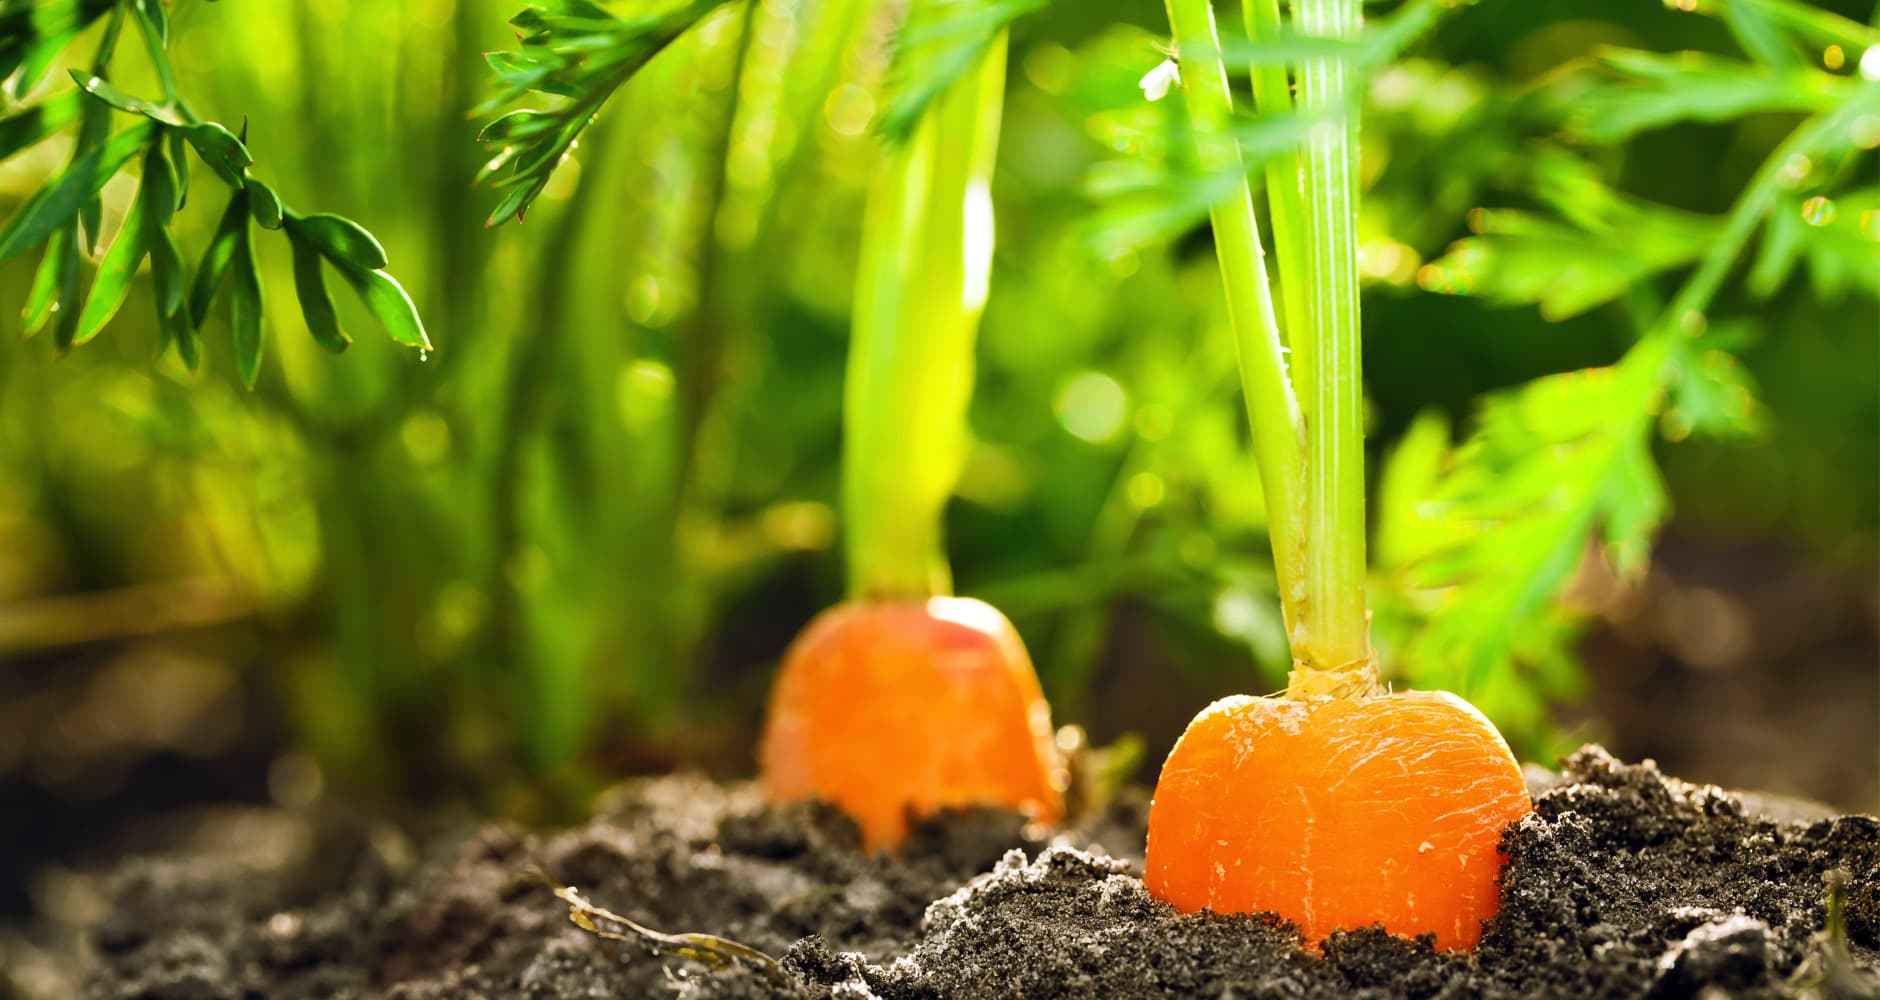
The key to successful carrot growth starts with preparing the soil in your garden bed. Carrots prefer loose, well-draining soil that is free from stones, clumps, and debris. Follow these steps to ensure your soil is ready for planting:
- Clear the area: Begin by clearing the designated area of any weeds, rocks, or other debris. This will create a clean and open space for your carrot seeds to thrive.
- Loosen the soil: Carrot seeds require loose soil to penetrate and grow. Use a garden fork or a tiller to loosen the soil to a depth of at least 8 inches. Avoid excessive tilling, as it can lead to compacted soil.
- Remove large clumps: Break up any large clumps of soil and remove them, as they can hinder the growth of young carrot roots. Aim for a fine, crumbly texture.
- Add organic matter: Enrich your soil by adding organic matter such as compost or well-rotted manure. This will improve soil structure, fertility, and moisture-retaining capabilities.
- Level the surface: Smooth out the soil’s surface with a rake, ensuring it is even and level. This will make planting and subsequent maintenance tasks much easier.
By following these steps, you will create an optimal growing environment for your carrot seeds. The loose and fertile soil will allow the young roots to develop properly and make it easier for you to harvest the carrots when the time comes. Now that the soil is prepared, it’s time to move on to the next step: choosing the right carrot seeds!
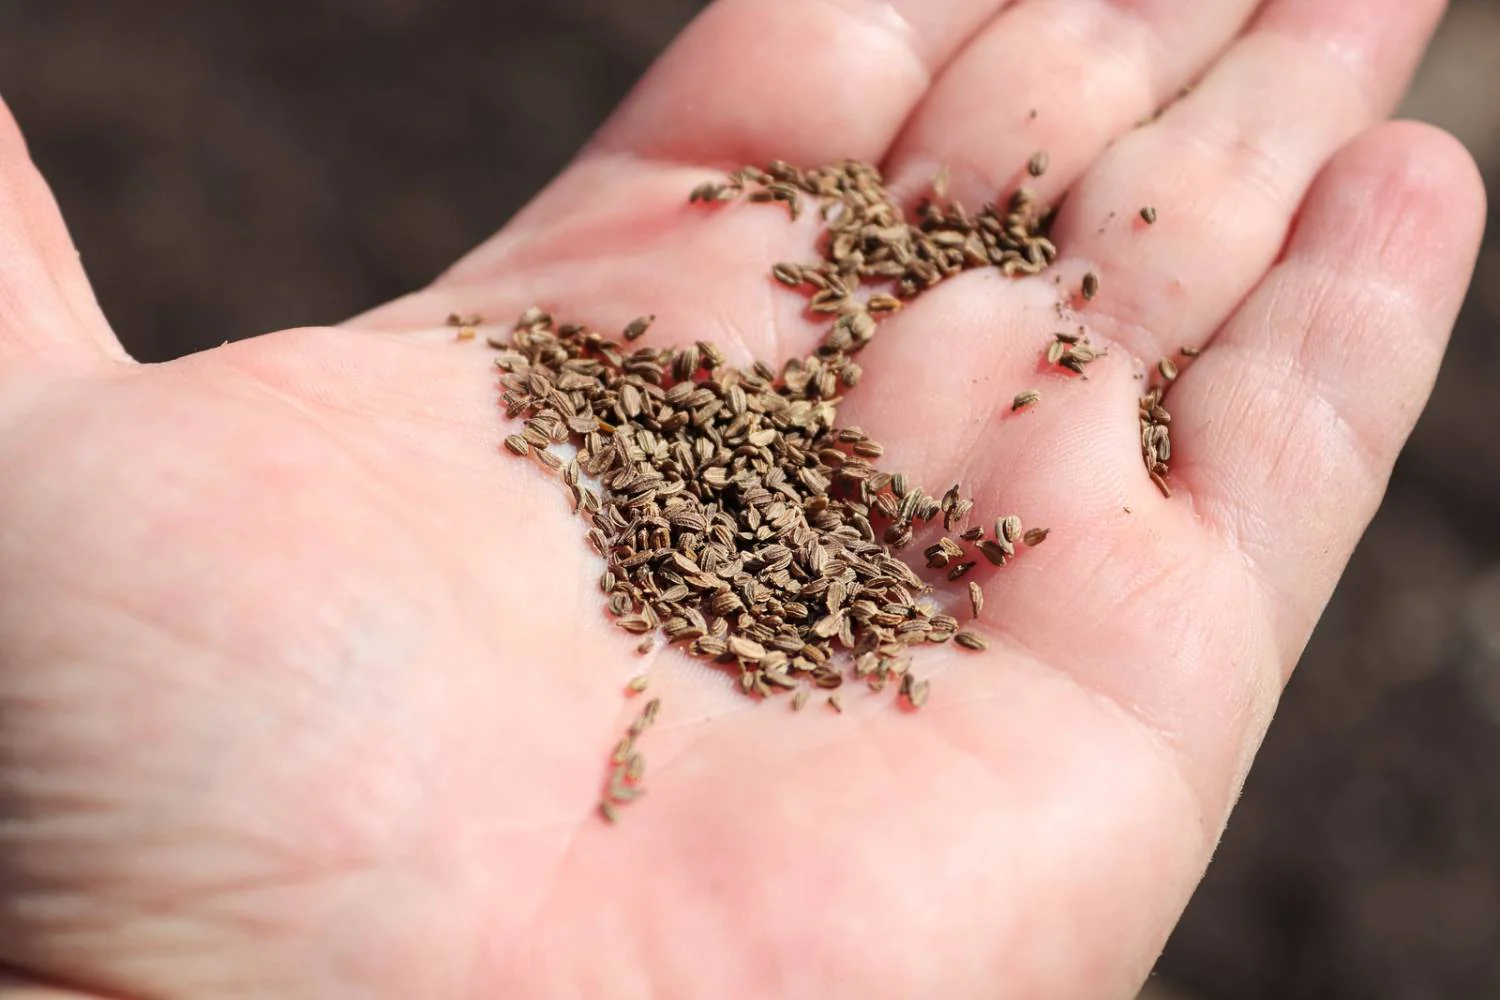
Step 2: Choose the Right Carrot Seeds
Choosing the right carrot seeds is essential to ensure a successful and fruitful harvest. Here are some factors to consider when selecting your carrot seeds:
- Variety: Carrots come in various shapes, sizes, and colors. You can choose from classic orange varieties or explore unique options like purple, red, or rainbow carrots. Consider the flavor, texture, and visual appeal you desire when selecting a variety.
- Growing season: Carrots have different maturity dates, ranging from early to mid-season and late-season varieties. Consider your local climate and the length of your growing season to choose a variety that will have enough time to mature before the colder months arrive.
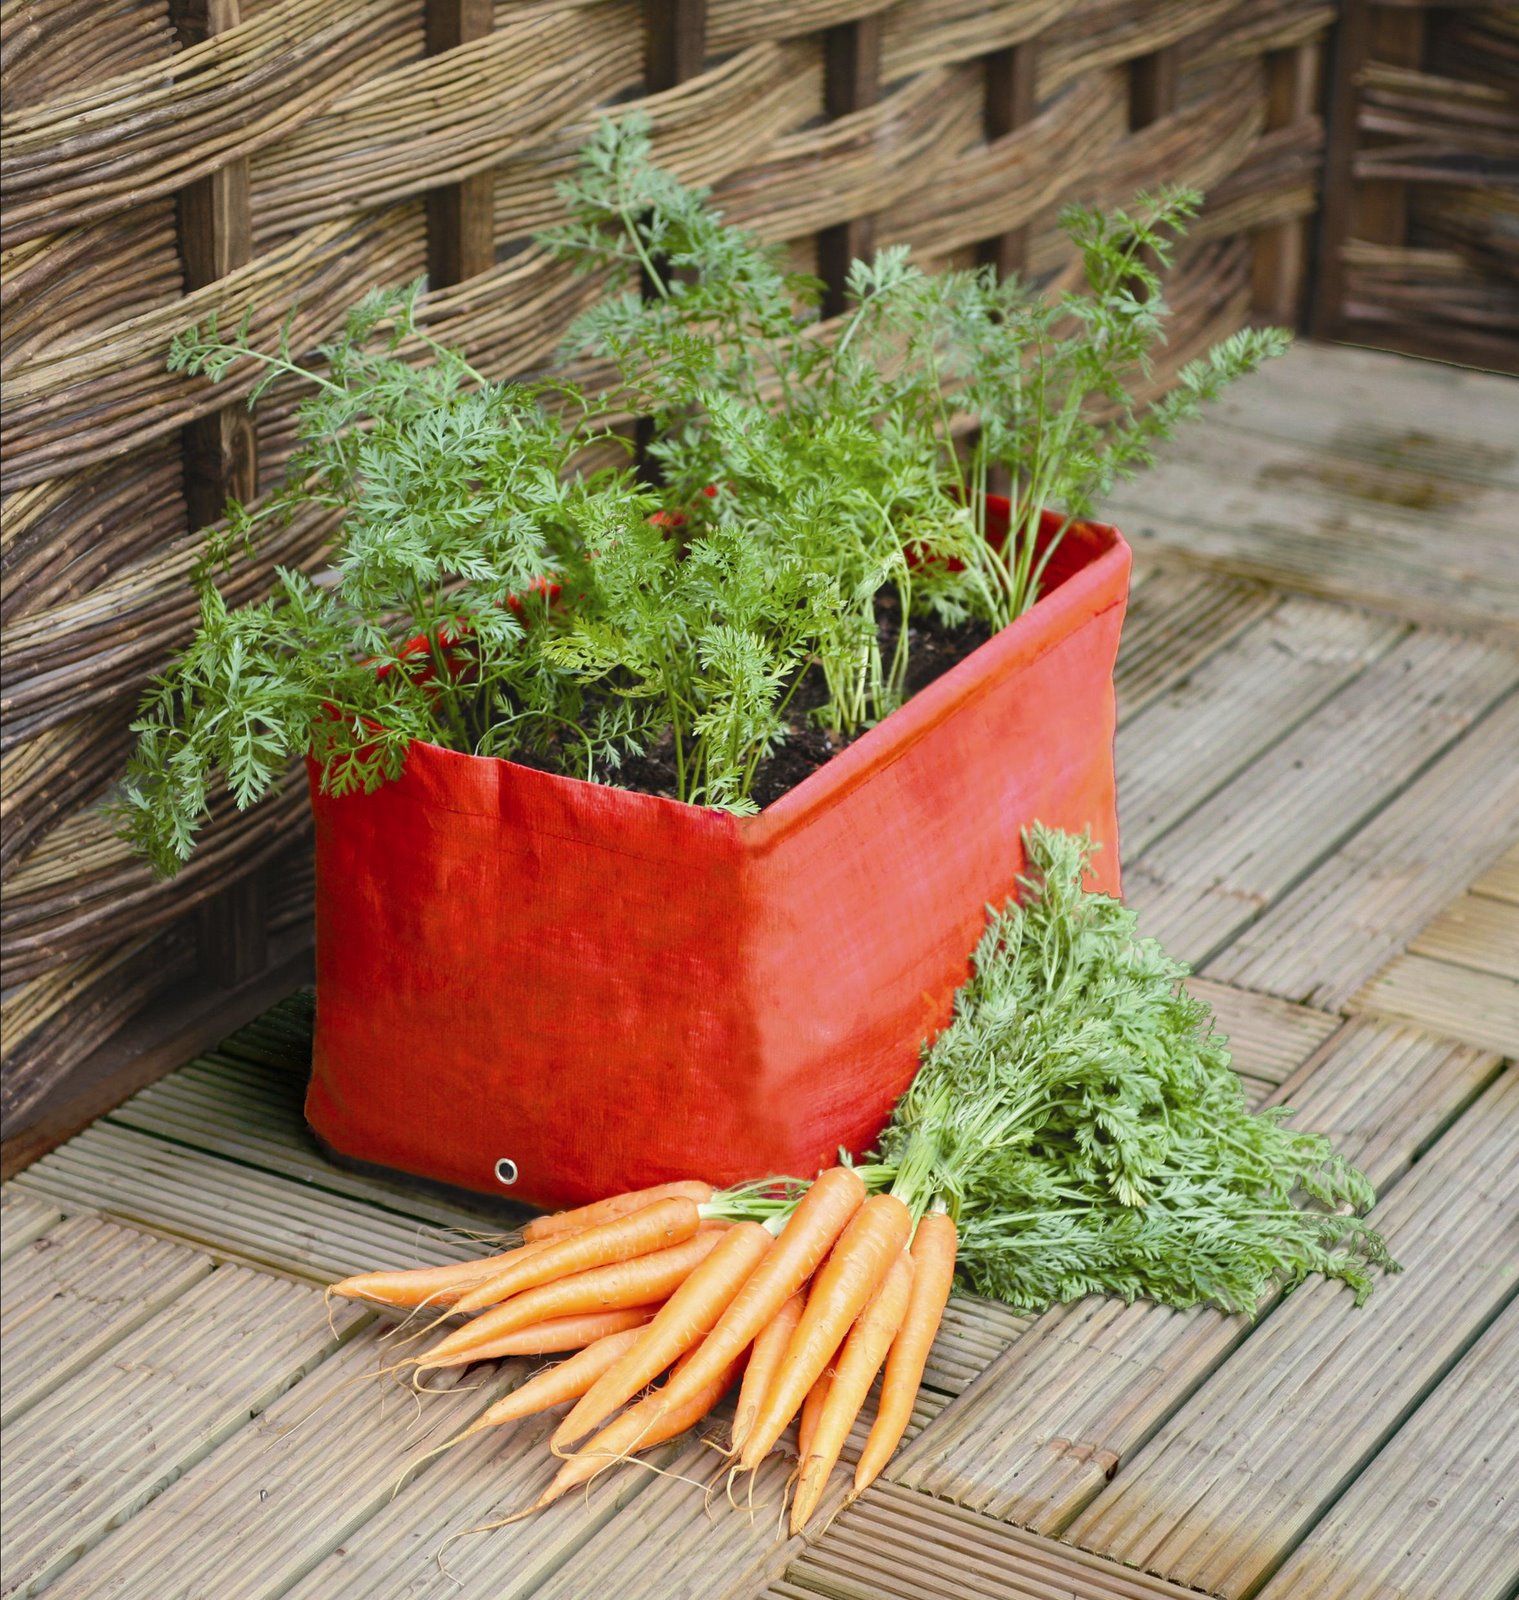
- Container or ground: If you’re limited on space, you can opt for smaller carrot varieties suitable for container gardening. Look for varieties labeled as “short” or “baby” carrots, which are specifically bred to grow well in containers.
- Resistance to pests and disease: Some carrot varieties have built-in resistance to common pests and diseases, such as carrot rust fly or root knot nematodes. Choosing resistant varieties can help prevent or minimize potential problems in your garden.
- Seed quality: It’s crucial to select high-quality carrot seeds from reputable seed suppliers. Check the seed packets for the expiration date and make sure the seeds are fresh and viable. Consider purchasing organic and non-GMO seeds if that aligns with your gardening preferences.
By taking these factors into account, you can find carrot seeds that are well-suited to your specific gardening needs and preferences. Once you have selected the perfect carrot seeds, it’s time to move on to determining the planting time.
Step 3: Determine the Planting Time
Timing is crucial when it comes to planting carrot seeds. Carrots are a cool-season crop and prefer to grow in cooler temperatures. Here are some tips to help you determine the right planting time:
- Last frost date: Find out the average date of the last frost in your region. Carrots can tolerate light frost, but it’s best to plant them after the danger of heavy frost has passed.
- Soil temperature: Carrots prefer to germinate in soil temperatures between 50°F (10°C) and 80°F (27°C). Planting when the soil temperature is too high can result in poor germination. Use a soil thermometer to measure the soil temperature before planting.
- Days to maturity: Check the seed packet or catalog description for the number of days to maturity. Count backward from the expected first frost date to determine when to plant. Allow enough time for the carrots to grow and mature before the colder temperatures arrive.
As a general guideline, you can start planting carrot seeds in the early spring, as soon as the soil is workable and temperatures are within the optimal range. Depending on your location and the specific variety, you can also make successive plantings every few weeks for a continuous harvest throughout the growing season.
Keep in mind that these are general recommendations, and the best planting time may vary depending on your specific climate and local conditions. Observing the weather patterns and consulting with experienced local gardeners can provide valuable insights into the ideal planting time for carrots in your area.
Now that you have determined the planting time, it’s time to move on to the exciting part: planting the carrot seeds in your garden!
Step 4: Plant the Carrot Seeds
Now that you have prepared the soil and determined the planting time, it’s time to plant your carrot seeds. Follow these steps for successful planting:
- Make furrows: Use a garden hoe or your finger to create shallow furrows in the prepared soil. The furrows should be about ½ inch deep and spaced at least 2 inches apart.
- Seed spacing: Carrot seeds are tiny, so it’s essential to space them properly to avoid overcrowding. Sow the seeds about 1 inch apart within the furrows.
- Seed depth: Carrot seeds should be planted about ¼ to ½ inch deep. Sprinkle a thin layer of soil or vermiculite over the seeds to cover them.
- Water gently: Use a watering can with a fine spray or a misting nozzle on a hose to water the newly planted seeds gently. Avoid heavy watering, as it can displace the seeds or cause them to rot.
- Label your rows: It’s a good practice to label your rows or use markers to identify the planted area. This will help you keep track of your carrots as they grow and make it easier to maintain and harvest them.
Remember that carrot seeds can take some time to germinate, generally between 7 to 21 days. Be patient and keep the soil moist during the germination period. Once the carrot seedlings emerge, it’s crucial to provide them with the proper care and attention to ensure healthy growth.
Keep in mind that while precise spacing is essential, thinning out the carrot seedlings later is necessary. This will allow the remaining carrots to have sufficient space to grow and develop into full-sized carrots. We will cover thinning out the seedlings in the next step.
Now that you have planted your carrot seeds, it’s time to move on to the next step: providing adequate watering to support their growth.
Read more: Where Are Carrot Seeds On The Plant
Step 5: Provide Adequate Watering
Watering is a critical aspect of growing healthy carrots. Proper moisture levels in the soil ensure that the carrot roots develop well and prevent the carrots from becoming dry or woody. Here are some tips for providing adequate watering to your carrot plants:
- Consistent moisture: Carrots benefit from consistent moisture in the soil. Regular but moderate watering is recommended, especially during dry spells or when the weather is hot. Aim to keep the soil evenly moist, but be cautious of overwatering, which can lead to rot or disease.
- Deep watering: Carrots have long taproots, so it’s important to water deeply. Apply water directly to the soil surface, allowing it to penetrate and reach the roots. Avoid wetting the foliage to prevent fungal diseases.
- Watering frequency: The frequency of watering will depend on your soil type, climate, and rainfall. In general, watering every 1 to 2 days is suitable for most carrot varieties. Monitor the moisture level of the soil and adjust your watering schedule accordingly.
- Mulch to retain moisture: Applying a layer of organic mulch, such as straw or shredded leaves, around the carrot plants can help retain soil moisture. Mulch also helps suppress weeds and regulate soil temperature.
It’s important to note that consistent moisture is crucial during the early stages of carrot growth, especially during germination and root development. Once the carrots mature, it’s important to reduce watering to prevent splitting or overly large carrots.
Regularly monitor the soil moisture level by inserting your finger into the soil to a depth of about 2 inches. If it feels dry, it’s time to water. Remember, consistent and appropriate watering will contribute to the overall health and quality of your carrot harvest.
Now that you have learned about providing adequate moisture to your carrot plants, let’s move on to the next step: mulching the garden bed to further support the growth of your carrots.
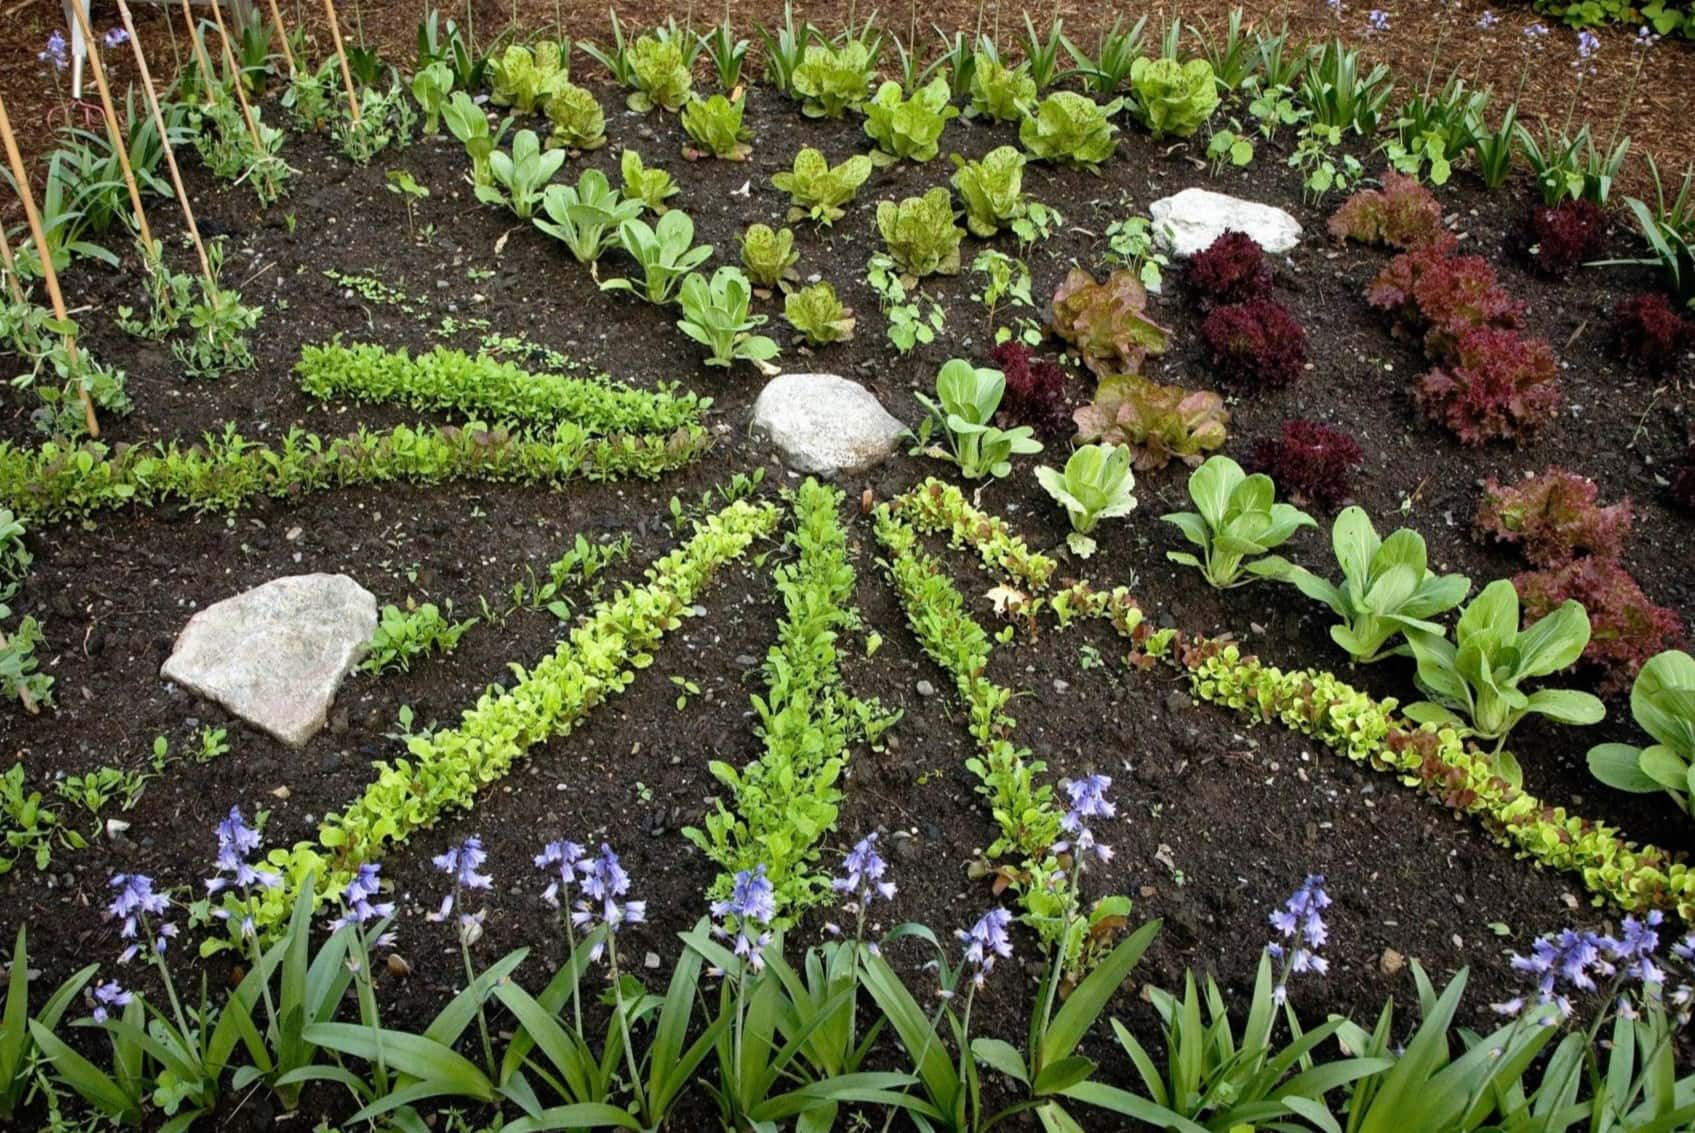
When planting carrot seeds in your garden, make sure to choose a sunny spot with well-drained soil. Sow the seeds thinly and water gently to keep the soil moist. Thin out the seedlings as they grow to give each carrot enough space to develop.
Step 6: Mulch the Garden Bed
Mulching is an effective practice that helps conserve moisture, suppress weeds, and maintain a more stable soil temperature. Mulching your carrot garden bed will provide numerous benefits and create a conducive environment for healthy carrot growth. Here’s how to mulch your garden bed:
- Mulch material selection: Choose organic mulch materials, such as straw, shredded leaves, or grass clippings. Avoid using mulch that may contain weed seeds or chemicals.
- Prepare the soil surface: Before mulching, ensure that the soil surface is clear of any weeds or debris. Rake the soil gently to create a smooth and even surface.
- Apply the mulch: Spread a layer of mulch around the carrot plants, taking care not to pile it against the stems of the plants. Aim for a thickness of 1 to 2 inches to provide adequate coverage.
- Keep a distance from the plant stems: Leave a small gap between the mulch layer and the base of the carrot plants. This helps prevent excessive moisture retention around the stems, which can lead to rot or disease.
- Mulch maintenance: Periodically check and replenish the mulch layer as needed. As the mulch decomposes, it will mix with the soil and provide additional organic matter, enriching the soil’s fertility.
Mulching offers several advantages for growing carrots. It helps retain moisture in the soil, reducing the frequency of watering needed. This is especially beneficial during hot and dry periods. Mulch also suppresses weed growth by preventing sunlight from reaching weed seeds, reducing competition for nutrients and space. It acts as an insulating layer, regulating soil temperature and protecting the roots of the carrots during extreme weather conditions.
However, keep in mind that mulching is not mandatory for growing carrots. If you prefer not to mulch, ensure that you maintain regular watering and weed control practices to support the growth of your carrots.
Now that your garden bed is mulched, let’s move on to the next step: thinning out the carrot seedlings for optimal growth.
Step 7: Thin Out the Seedlings
Thinning out the carrot seedlings is a crucial step in ensuring that your carrots have enough space to grow and develop into healthy, full-sized roots. When the carrot seedlings are about 2 inches tall, it’s time to thin them out. Follow these steps to thin out the seedlings effectively:
- Choose the right time: Wait until the seedlings have grown their first true leaves. This usually occurs when they reach a height of about 2 inches.
- Identify crowded areas: Take a close look at your carrot seedlings and identify areas where they are growing too close together. Look for clusters of seedlings or areas where they appear densely packed.
- Remove excess seedlings: Gently grasp the tallest seedlings with your fingers or use scissors to cut the unwanted seedlings at ground level. Aim to leave about 2 to 3 inches of space between each remaining carrot plant.
- Thinning spacing: The exact spacing will depend on the variety you are growing, but a general guideline is to thin the seedlings to about 1 to 2 inches apart. Thinning allows the remaining carrots to have enough room to fully develop without competition for nutrients and water.
- Discard or transplant the thinned seedlings: If the thinned seedlings are healthy, you can transplant them to another area of your garden or give them to fellow gardening enthusiasts. Otherwise, you can compost them to enrich your soil.
Thinning out the seedlings may seem difficult, as it often involves removing young plants that you have nurtured. However, thinning is crucial for the overall health and success of your carrot crop. Overcrowding can lead to stunted growth, misshapen carrots, and increased risk of disease and pest problems.
Regularly inspect your carrot bed and continue to thin out any new growth as needed throughout the growing season. This practice will ensure that your remaining carrots have ample space to grow and develop into delicious and robust roots.
Now that you have learned how to thin out the seedlings, let’s move on to step 8: weed control to maintain a healthy carrot bed.
Step 8: Weed Control
Weed control is essential for the successful growth of your carrot plants. Weeds compete with carrots for nutrients, water, and sunlight, potentially stunting their growth or causing nutrient deficiencies. Here are some strategies for effective weed control in your carrot bed:
- Hand pulling: Regularly inspect your carrot bed and hand-pull any visible weeds. It’s best to remove weeds when they are small and before they have a chance to spread and establish deep roots.
- Mulching: As mentioned earlier, applying a layer of mulch around your carrot plants can help suppress weed growth by blocking sunlight and preventing weed seeds from germinating. Mulch also helps conserve moisture and maintain a more stable soil temperature.
- Use a hoe or cultivator: When the soil is dry, you can use a hoe or cultivator to gently loosen the top layer of soil, cutting the weeds off at the root level. Be careful not to damage the carrot plants while using these tools.
- Pre-emergent herbicides: If you prefer using herbicides, select pre-emergent herbicides specifically labeled for use in vegetable gardens. Follow the instructions carefully and apply them before weed seeds germinate. Remember to avoid direct contact with your carrot plants.
- Keep the garden clean: Regularly remove any plant debris or fallen leaves from the carrot bed. These can create an ideal environment for weeds to establish and grow.
Consistent weed monitoring and control throughout the growing season are crucial. Weeds can quickly overrun your carrot bed if left unattended, making it challenging for the carrots to thrive. By implementing these weed control strategies, you’ll help provide your carrots with the necessary growing space and resources they need to flourish.
Now that you’ve learned about weed control, let’s move on to step 9: applying fertilizer to enhance the growth of your carrots.
Read more: When Do You Plant Carrot Seeds
Step 9: Apply Fertilizer
Applying fertilizer to your carrot plants can help ensure they have an adequate supply of nutrients for healthy growth and development. Here are some guidelines for fertilizing your carrots:
- Soil analysis: Before applying fertilizer, it’s beneficial to conduct a soil test to determine the nutrient levels in your garden bed. This will help you identify any deficiencies and adjust your fertilizer application accordingly.
- Choose the right fertilizer: Carrots generally benefit from a balanced fertilizer that provides equal amounts of nitrogen (N), phosphorus (P), and potassium (K), such as a 10-10-10 or 14-14-14 formula. Additionally, organic fertilizers like compost or well-rotted manure can be beneficial for improving soil fertility.
- Timing of application: It’s best to apply fertilizer before planting your carrot seeds or just as the seedlings emerge. Avoid applying fertilizer when the plants are close to maturity, as it can lead to excessive foliage growth rather than root development.
- Application method: Sprinkle the fertilizer evenly around the base of the carrot plants, taking care not to get it directly on the foliage. Water the plants after applying the fertilizer to help it absorb into the soil.
- Follow package instructions: Read and follow the instructions on the fertilizer packaging carefully, as application rates and methods may vary depending on the specific product. Over-fertilizing can cause damage to the carrots and negatively impact their flavor.
It’s important to note that carrots, being root crops, prefer a light and fertile soil. Overly rich soil or excessive fertilization can result in forking or hairy roots. Remember to strike a balance and provide the necessary nutrients without overdoing it.
In addition to fertilizer applications, incorporating organic matter into the soil, such as compost or well-rotted manure, can also help improve soil fertility and provide micronutrients to support the growth of your carrots.
Now that you have learned the importance of fertilizer, let’s move on to the final step: harvesting your carrots!
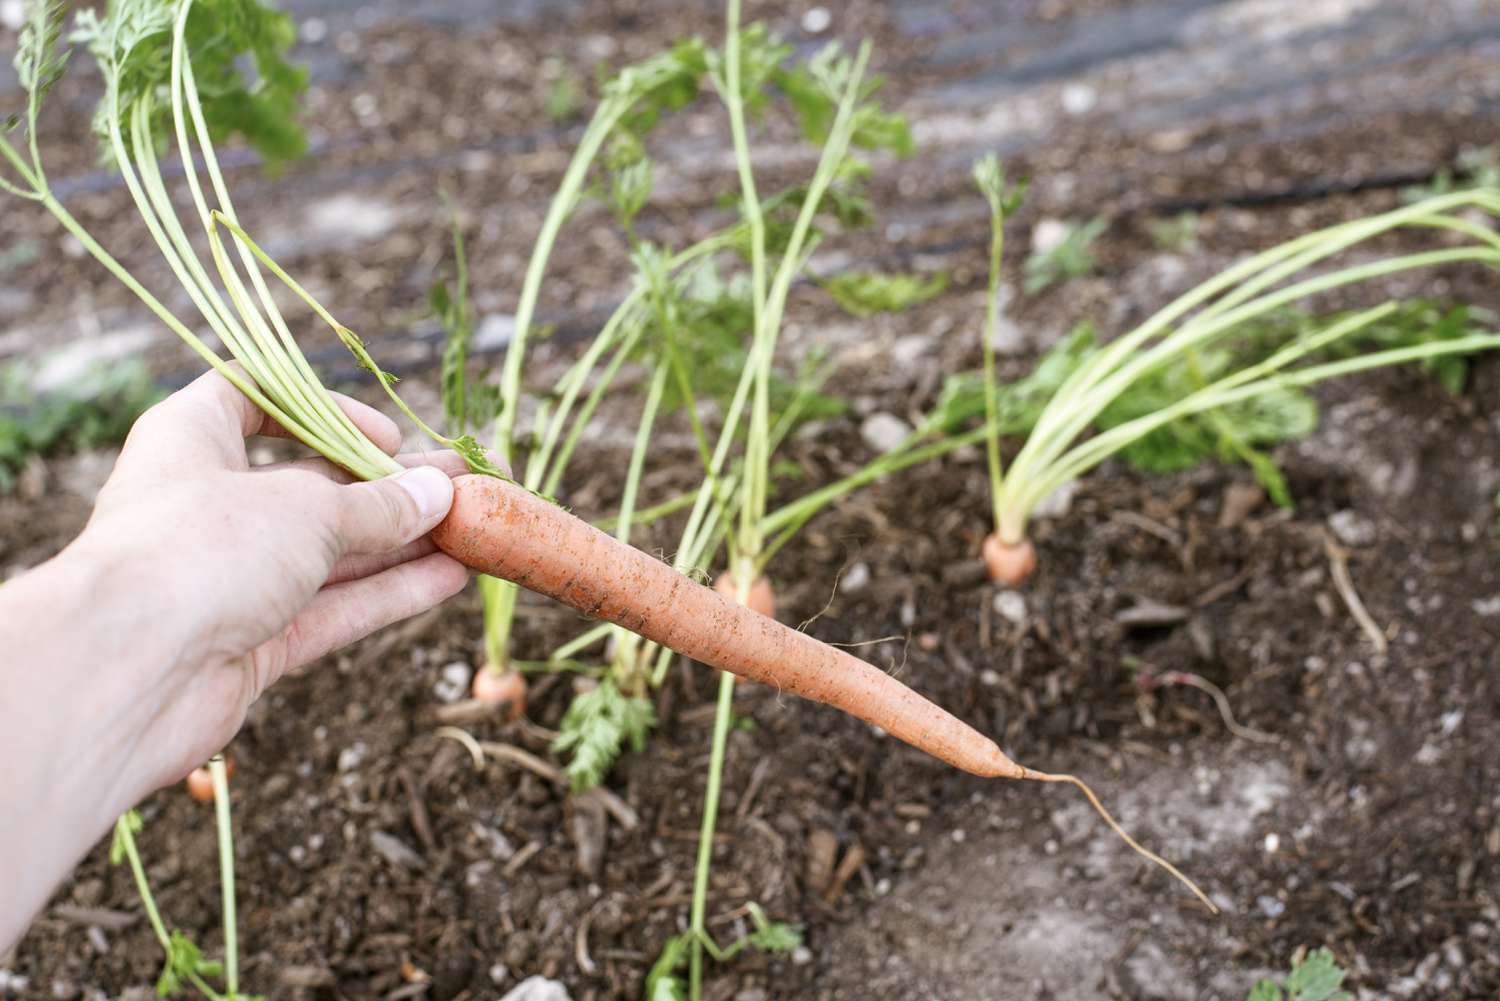
Step 10: Harvesting Carrots
The moment has finally arrived to harvest your homegrown carrots! Harvesting at the right time ensures that you will enjoy the sweetest and most flavorful carrots. Here are some steps to follow when harvesting your carrots:
- Maturity check: Carrots are ready for harvest when they have reached their mature size and color. This typically occurs around 60 to 80 days after planting, depending on the variety.
- Loosen the soil: Before harvesting, gently loosen the soil around the base of the carrot plants with a garden fork or trowel. This will make it easier to lift the carrots without damaging the roots.
- Grasp the foliage: Firmly hold the green foliage near the root crown and gently pull the carrot out of the soil. If the soil is compacted, you may need to use a fork or trowel to lift the carrots carefully.
- Avoid breaking or bruising: Handle the harvested carrots with care to prevent any breakage or bruising. Damaged carrots do not store well and should be consumed promptly.
- Remove foliage: After harvesting, trim off the green foliage, leaving about an inch of stem attached to the carrot. This helps maintain freshness and prevents the carrots from wilting.
- Storage: Carrots can be stored in a variety of ways. You can keep them unwashed in a cool and dark place, such as a root cellar or refrigerator. Alternatively, you can store them in damp sand or sawdust to maintain moisture levels.
Remember, harvesting your carrots is an exciting and rewarding process. Enjoy the satisfaction of seeing the fruits of your labor and savor the incredible flavors of your homegrown carrots.
Now that you’ve completed all the steps, from preparing the soil to harvesting your beautiful carrots, pat yourself on the back for a job well done! With practice and experience, you’ll continue to refine your gardening skills and enjoy the bountiful rewards of growing your own food.
Happy gardening and happy carrot harvesting!
Conclusion
Congratulations on successfully learning how to plant carrot seeds in your garden! With each step, from preparing the soil to harvesting the carrots, you have gained valuable knowledge and skills to cultivate a thriving carrot crop. Gardening provides a rewarding and fulfilling experience, and growing your own carrots allows you to enjoy the flavors and nutritional benefits of fresh, homegrown produce.
Throughout this guide, we covered essential steps such as preparing the soil, choosing the right carrot seeds, determining the planting time, and providing adequate watering and fertilizer. We also discussed other important aspects including mulching, thinning out seedlings, weed control, and ultimately, harvesting your carrots.
By following these steps and incorporating your own creativity and care, you are setting yourself up for a successful carrot-growing journey. Embrace the joys and challenges of gardening, and don’t hesitate to adapt your techniques based on your specific location, climate, and gardening preferences.
Remember to take pleasure in the process and be patient with your plants. Gardening is a continuous learning experience, and with time and practice, your skills will grow alongside your carrot plants. Celebrate each milestone, whether it’s planting your first seeds or savoring the first bite of a freshly harvested carrot.
Now, armed with the knowledge and confidence to plant carrot seeds, it’s time to turn that knowledge into action. Grab your gardening tools, get your hands in the soil, and embark on your carrot-growing adventure. Enjoy the journey, the delicious rewards, and the sense of accomplishment that comes with growing your own carrots. Happy gardening!
Frequently Asked Questions about How To Plant Carrot Seeds In Garden
Was this page helpful?
At Storables.com, we guarantee accurate and reliable information. Our content, validated by Expert Board Contributors, is crafted following stringent Editorial Policies. We're committed to providing you with well-researched, expert-backed insights for all your informational needs.


0 thoughts on “How To Plant Carrot Seeds In Garden”